SEARCH FINESCALE.COM

Enter keywords or a search phrase below:

Hunting After Dark, 2011-2012 Night Fighter Group Build

251643 views
1422 replies
1 rating 2 rating 3 rating 4 rating 5 rating
  • Member since
    November 2009
  • From: SW Virginia
Posted by Gamera on Friday, November 11, 2011 9:51 AM

Casper: Great looking bird and love all the extra work you put into the cockpit.

Sharp! Yes

"I dream in fire but work in clay." -Arthur Machen


  • Member since
    January 2003
  • From: Hancock, Me USA
Posted by p38jl on Sunday, November 13, 2011 7:08 PM

Sweet Build !! Smile

[Photobucket]

  • Member since
    October 2010
  • From: Hobart, Australia
Posted by Casper the Chihuahua on Monday, November 14, 2011 1:59 AM

Thanks guys!

Cheers

On the bench: A-4F 1/32 Hasegawa

Just deployed: F6F-5N Hellcat Nightfighter 1/48 Eduard

Up next: A6-E Intruder 1/48 Revell

  • Member since
    October 2010
  • From: Hobart, Australia
Posted by Casper the Chihuahua on Wednesday, November 16, 2011 7:46 PM

So here is my final build for this GB. The re-issued Tamiya, Italeri Ju88 C-6. Raised panel lines galore but meh...it should still look pretty good when assembled.

I also picked up really cheap the Eduard interior and exterior sets for the Hasegawa kit. I've had a good look and there aren't too many variances and I should be able to use most of the PE.

Now it's time to bathe the sprues...

Cheers

On the bench: A-4F 1/32 Hasegawa

Just deployed: F6F-5N Hellcat Nightfighter 1/48 Eduard

Up next: A6-E Intruder 1/48 Revell

  • Member since
    October 2010
  • From: Hobart, Australia
Posted by Casper the Chihuahua on Friday, November 18, 2011 6:58 PM

I haven't worked with 1/72 PE in a while. But I got there in the end! Cockpit done and fitted.

Cheers

On the bench: A-4F 1/32 Hasegawa

Just deployed: F6F-5N Hellcat Nightfighter 1/48 Eduard

Up next: A6-E Intruder 1/48 Revell

  • Member since
    February 2011
  • From: Launceston, Australia
Posted by the real red baron on Friday, November 18, 2011 8:21 PM

Looking good, raised panel lines galore? Meh, I'm used to them, bring mainly a airfix man!


  • Member since
    September 2011
  • From: Watertown, NY
Posted by JailCop on Friday, November 18, 2011 8:46 PM

Is it too late to get in on this build?  I'n just finishing up a Mig 21 and I have a 1/48 Hasegawa F6F-5N that I'd love to do for this build

  • Member since
    March 2010
  • From: Democratic Peoples Republic of Illinois
Posted by Hercmech on Saturday, November 19, 2011 1:41 PM

Nice work on the pit Casper!


13151015

  • Member since
    August 2009
  • From: Borlando Fla home of the rat
Posted by TREYZX10R on Saturday, November 19, 2011 5:35 PM

Looking great Casper!!!

  • Member since
    October 2010
  • From: Hobart, Australia
Posted by Casper the Chihuahua on Saturday, November 19, 2011 9:17 PM

Not a huge amount of parts to this kit but there will be a bit of sanding and filling. An old Italeri pressing and it's not a great fit. Anyway it's a nice bird and I am enjoying another Luftwaffe build!

Cheers

On the bench: A-4F 1/32 Hasegawa

Just deployed: F6F-5N Hellcat Nightfighter 1/48 Eduard

Up next: A6-E Intruder 1/48 Revell

  • Member since
    June 2008
  • From: Iowa
Posted by Hans von Hammer on Sunday, November 20, 2011 7:35 PM

If you need me to make any change here, please let me know. 

-Hans von Hammer- 1/48 Beaufighter, or He 219 or P-38M-

Just to let ya know.. I finally got things in order, and it'll be the P-38M, 1/48th..  It's also a " What if Oberst Hans von Hammer was also a WW2 Nachtjäger, and he flew a captured P-38 (in his personal colors and markings) with his Radarmaschinenbediener Radarmaschinenbediener (Radar Operator), 'Otto'?" build...

  • Member since
    October 2009
  • From: Texas
Posted by Gregbbear on Monday, November 21, 2011 10:24 AM

Jailcop, welcome aboard!  A night hellcat sounds good.

Caspar, the Ju-88 is already looking good!  The cockpit rivals many larger scale kits.

Very intriguing Mr. von Hammer!

Cheers,

Greg

- yat yas!


  • Member since
    February 2003
  • From: Rothesay, NB Canada
Posted by VanceCrozier on Monday, November 21, 2011 10:57 AM

Hans von Hammer


If you need me to make any change here, please let me know. 


-Hans von Hammer- 1/48 Beaufighter, or He 219 or P-38M-


Just to let ya know.. I finally got things in order, and it'll be the P-38M, 1/48th..  It's also a " What if Oberst Hans von Hammer was also a WW2 Nachtjäger, and he flew a captured P-38 (in his personal colors and markings) with his Radarmaschinenbediener Radarmaschinenbediener (Radar Operator), 'Otto'?" build...

There goes Hammer, breaking all the rules again! Whistling Ahh well, if anyone can pull it off, you can.

On the bench: Airfix 1/72 Wildcat; Airfix 1/72 Vampire T11; Airfix 1/72 Fouga Magister

  • Member since
    October 2010
  • From: Hobart, Australia
Posted by Casper the Chihuahua on Thursday, November 24, 2011 5:09 AM

All the PE greeblies now attached, canopy and gondola masked and ready to go;

Then the interior colour for the canopy and gondola;

Prime for the whole plane;

White for the underside wingtips and band near the rear of the fuselage;

RLM Light blue for underneath;

RLM dark green for the upper;

and finally the camo pattern. The white band turned out great and looks really effective against the green pattern;

Ok, I'm off OS for a week so back to this in a while.

Cheers

On the bench: A-4F 1/32 Hasegawa

Just deployed: F6F-5N Hellcat Nightfighter 1/48 Eduard

Up next: A6-E Intruder 1/48 Revell

  • Member since
    February 2003
  • From: Rothesay, NB Canada
Posted by VanceCrozier on Thursday, November 24, 2011 7:06 AM

Looking good Casper!

On the bench: Airfix 1/72 Wildcat; Airfix 1/72 Vampire T11; Airfix 1/72 Fouga Magister

  • Member since
    August 2009
  • From: Borlando Fla home of the rat
Posted by TREYZX10R on Thursday, November 24, 2011 10:15 PM

Nice crisp paint lines Casper!

  • Member since
    January 2003
  • From: Hancock, Me USA
Posted by p38jl on Saturday, November 26, 2011 1:09 PM

Casper... nice job ! Toast

[Photobucket]

  • Member since
    September 2011
  • From: Watertown, NY
Posted by JailCop on Saturday, December 3, 2011 10:00 PM

Decals done on my F6F-5N, needs a few more applications of micro-set, then it'll be clear coat time, then antenna, then weathering, then done


  • Member since
    June 2010
Posted by Night Fighter Nut on Sunday, December 4, 2011 7:40 AM

Nicely done.  :)

  • Member since
    June 2010
Posted by Night Fighter Nut on Sunday, December 4, 2011 7:44 AM

That Junkers looks very well done.  :)

  • Member since
    September 2011
  • From: Watertown, NY
Posted by JailCop on Sunday, December 4, 2011 5:06 PM

Well, calling it done!  


  • Member since
    August 2009
  • From: Borlando Fla home of the rat
Posted by TREYZX10R on Sunday, December 4, 2011 7:01 PM

Awesome job Jailcop ,really like what you did with this build,very clean and sharp!

  • Member since
    October 2010
  • From: Hobart, Australia
Posted by Casper the Chihuahua on Monday, December 5, 2011 12:08 AM

So painting finished. Decals on and wheels, props etc. and assorted greeblies attached.

Next is an oil wash for the landing gear and a bit of weathering for the exhausts and the flaps.

Cheers

On the bench: A-4F 1/32 Hasegawa

Just deployed: F6F-5N Hellcat Nightfighter 1/48 Eduard

Up next: A6-E Intruder 1/48 Revell

  • Member since
    January 2003
  • From: Hancock, Me USA
Posted by p38jl on Monday, December 5, 2011 9:17 AM

Looking nice guys ! Toast

[Photobucket]

  • Member since
    November 2009
  • From: SW Virginia
Posted by Gamera on Monday, December 5, 2011 10:08 AM

Jailcop: Wow, fantastic job on 'Butch'. Then again I am partial to Navy blue planes in any case.

Casper: Nice! Almost done, shame to dirty up such an attractive paint scheme though.

"I dream in fire but work in clay." -Arthur Machen


  • Member since
    February 2003
  • From: Rothesay, NB Canada
Posted by VanceCrozier on Monday, December 5, 2011 10:33 AM

Casper the Chihuahua

So painting finished. Decals on and wheels, props etc. and assorted greeblies attached.

http://i1093.photobucket.com/albums/i438/smcintyre11/Ju88%20C-6/efd9b1e0.jpg

Next is an oil wash for the landing gear and a bit of weathering for the exhausts and the flaps.

Cheers

Nice!! Yes

On the bench: Airfix 1/72 Wildcat; Airfix 1/72 Vampire T11; Airfix 1/72 Fouga Magister

  • Member since
    October 2010
  • From: Hobart, Australia
Posted by Casper the Chihuahua on Monday, December 5, 2011 9:31 PM

Ok, my final entry for this GB completed. 4 different but fun builds. I really like this little JU88 kit, not bad despite it's age as an Italeri re-issue.

Cheers

On the bench: A-4F 1/32 Hasegawa

Just deployed: F6F-5N Hellcat Nightfighter 1/48 Eduard

Up next: A6-E Intruder 1/48 Revell

  • Member since
    August 2009
  • From: Borlando Fla home of the rat
Posted by TREYZX10R on Thursday, December 8, 2011 10:05 PM

Casper your build came out great, really like this bird! nicely done Sir!

I'm back in my Nocturnal mode and starting the Fw190A-8/R11 1/48 Dragon

The kit looks nice with very little flash and a sheet of PE that appears to be stainless instead of the usual brass. The decals have yellowed so I have some Owl decals for relacement. This will be Ofw. Gunther Migge 1/NJGr.10

quick dry fit looks promising no major gaps

  • Member since
    December 2010
  • From: Memphis TN
Posted by Heavens Eagle on Friday, December 9, 2011 12:43 AM

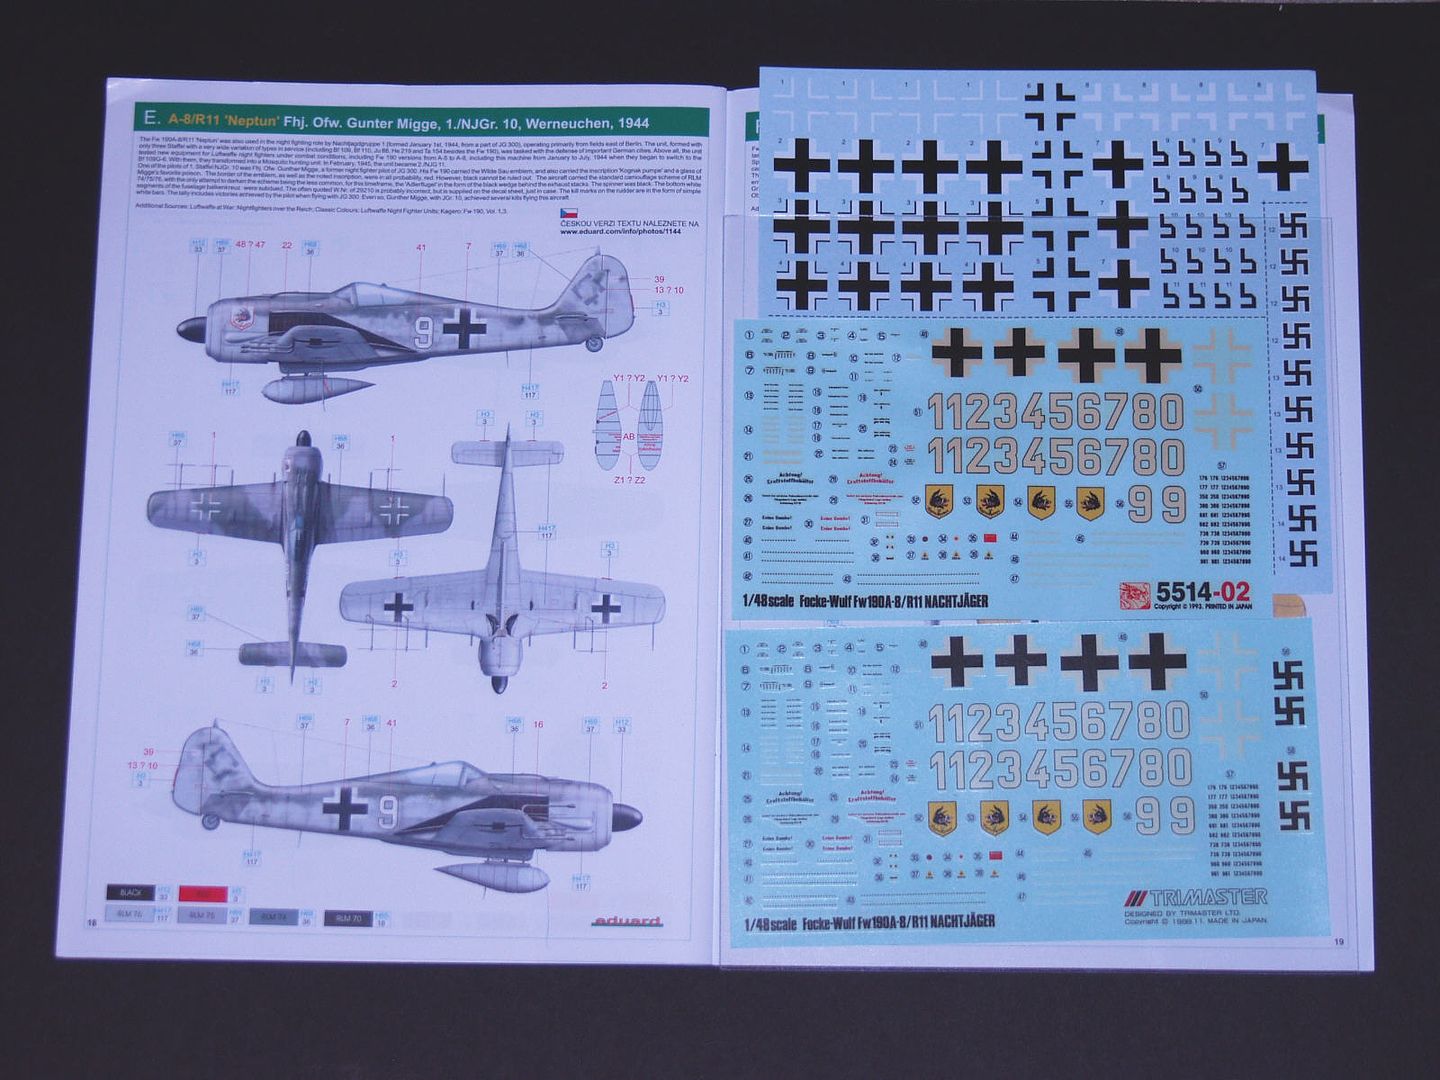
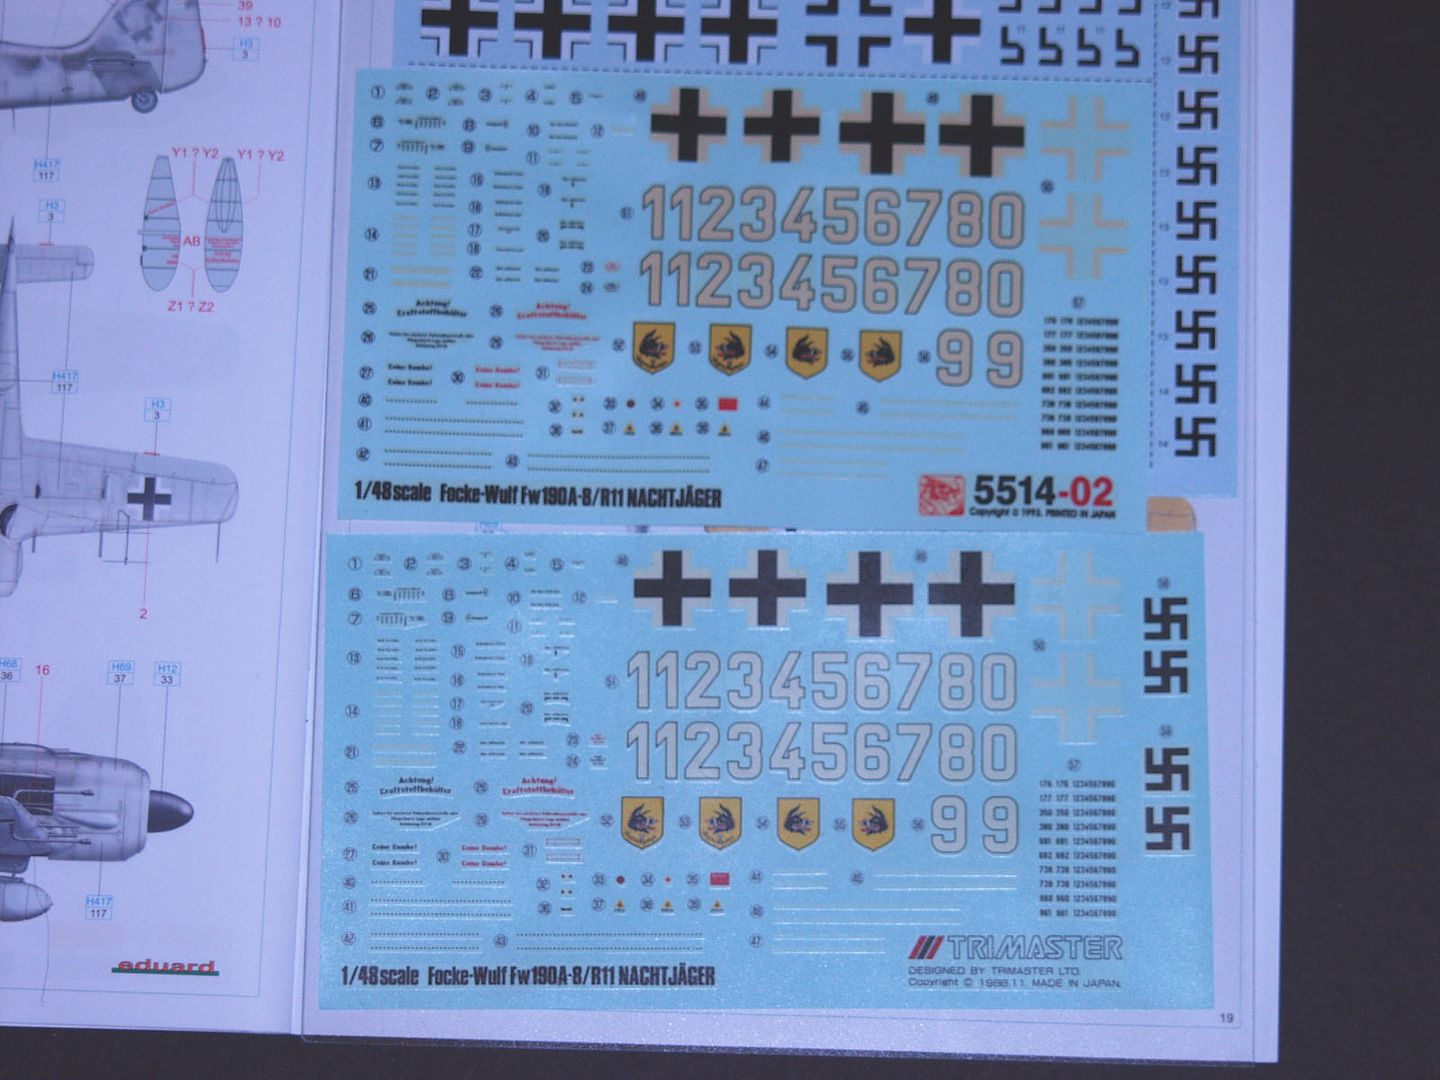
Hey TREYZX10R I see you have picked the Dragon kit to build.  I have been working up to doing this kit myself.  I have both the old original Trimaster kit of it, and a more recent Dragon release.  As to the decals, if the clear backing has yellowed, yes you need to replace them, BUT if you are taking the off white in the numbers and crosses as a sign, this is how they are supposed to be.  The white markings were an off white so as to not stand out quite as much in the dark.

Here are some photos of the decals from my Trimaster kit and the DML kit.  Also are the decal sheet and Paint page from the Eduard Fw 190A Nachtjager Limited Edition kit.  It is kit 1144 and you can still download the Instructions PDF file from Eduard if you would like.  The White on the lower part of the fuselage crosses is covered by the grey of the lower side.  Thus you have only the black cross showing.


Would have started myself before now except I needed a paint booth and just finished building it.  Here are some photos of it.

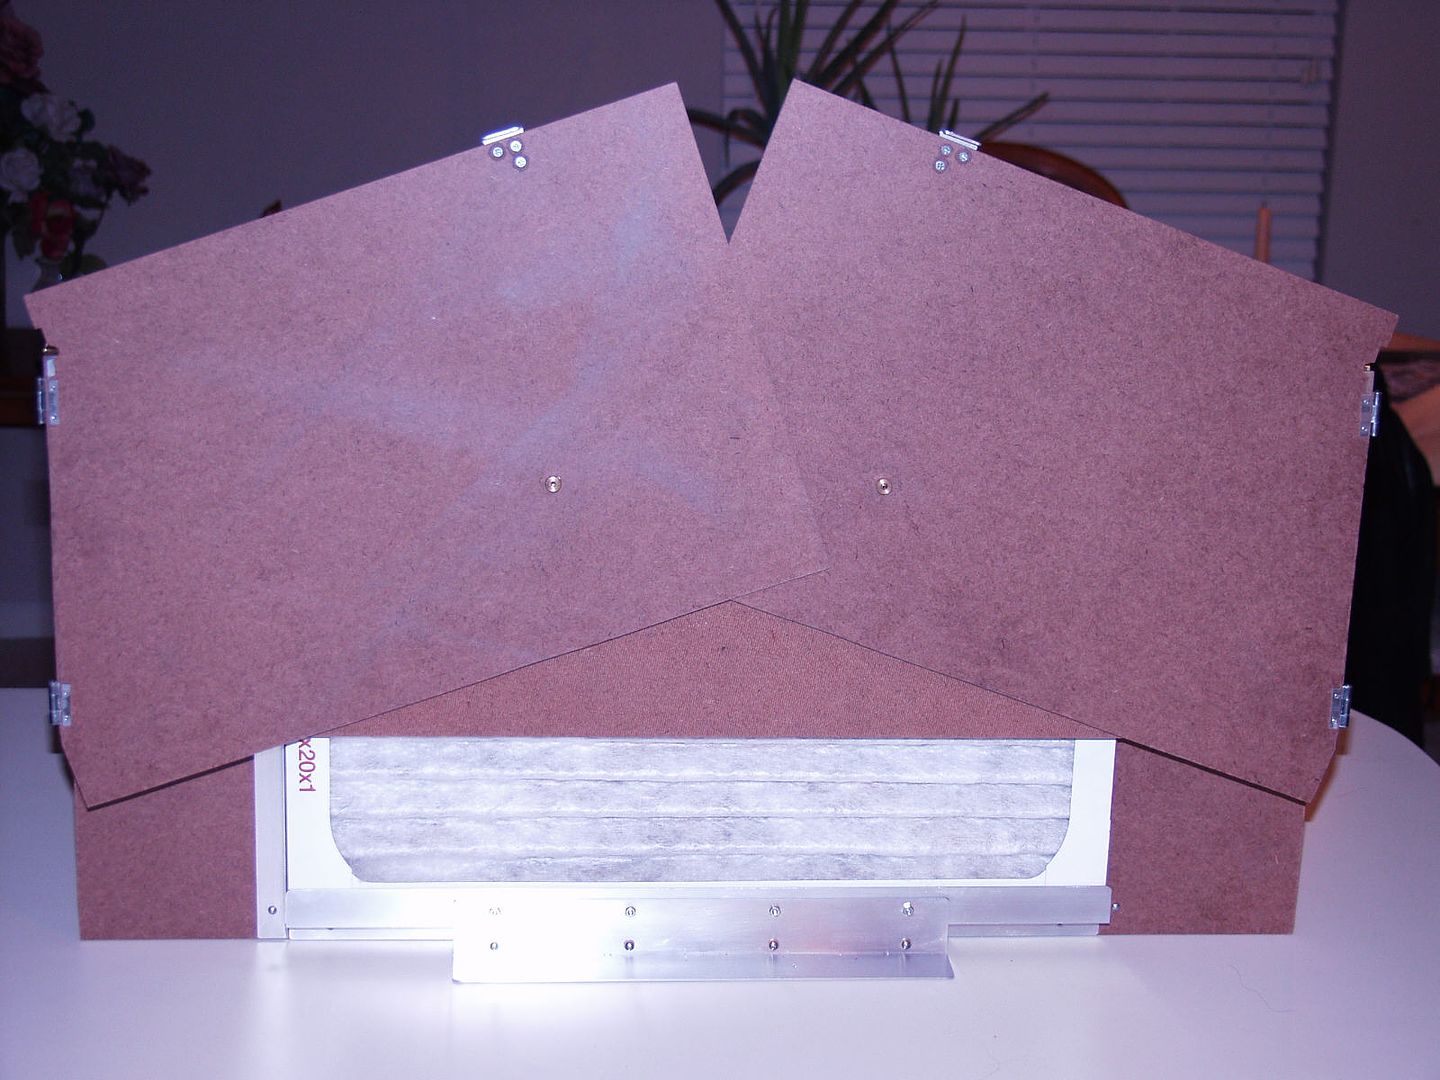
30 inches wide with a 22inch indirect flourecent light.  10 x 20 inch air filter to catch paint pigment and 1 or 2 fans pushing about 60 and 120 cubic feet of air respectively.  The large parts are an old Monogram B-29 in 1:48th.

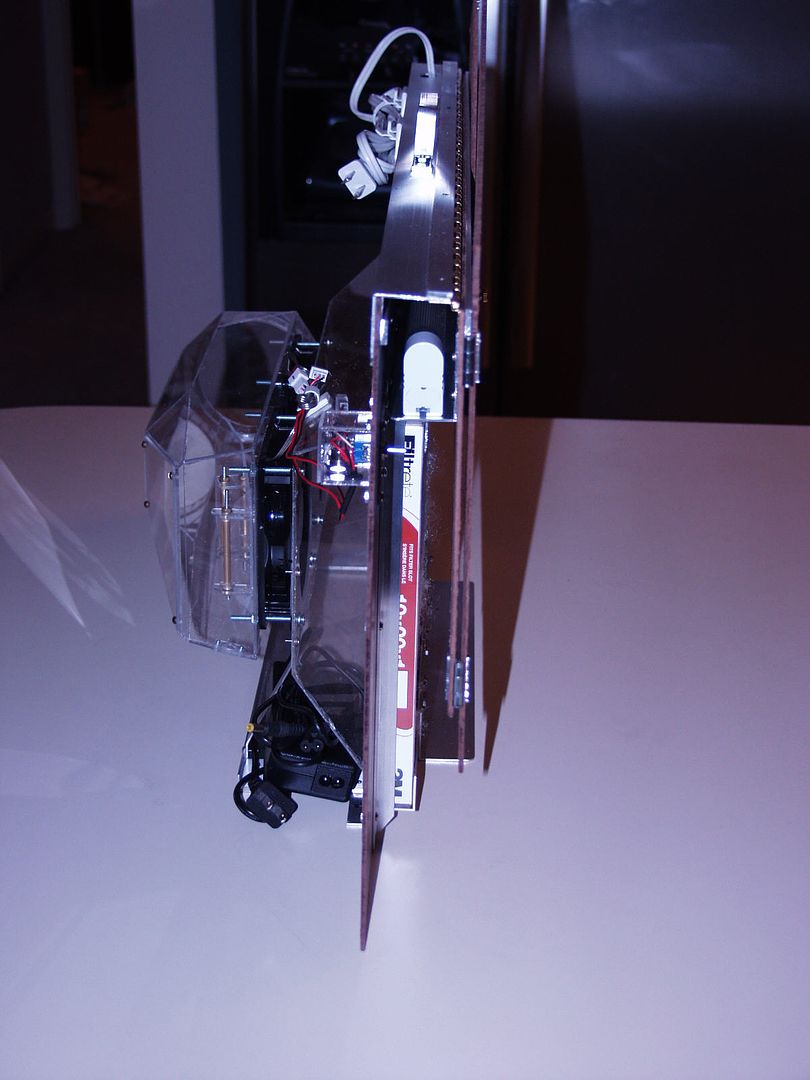
Front part folds in a somewhat unorthodox way to make it a bit less bulky.  The whole thing only weighs 11.5 pounds.

Like I said it folds up in a somewhat unorthodox way.  This was the simplest and flattest way as the light fixture on the underside of the top made things a little tricky.

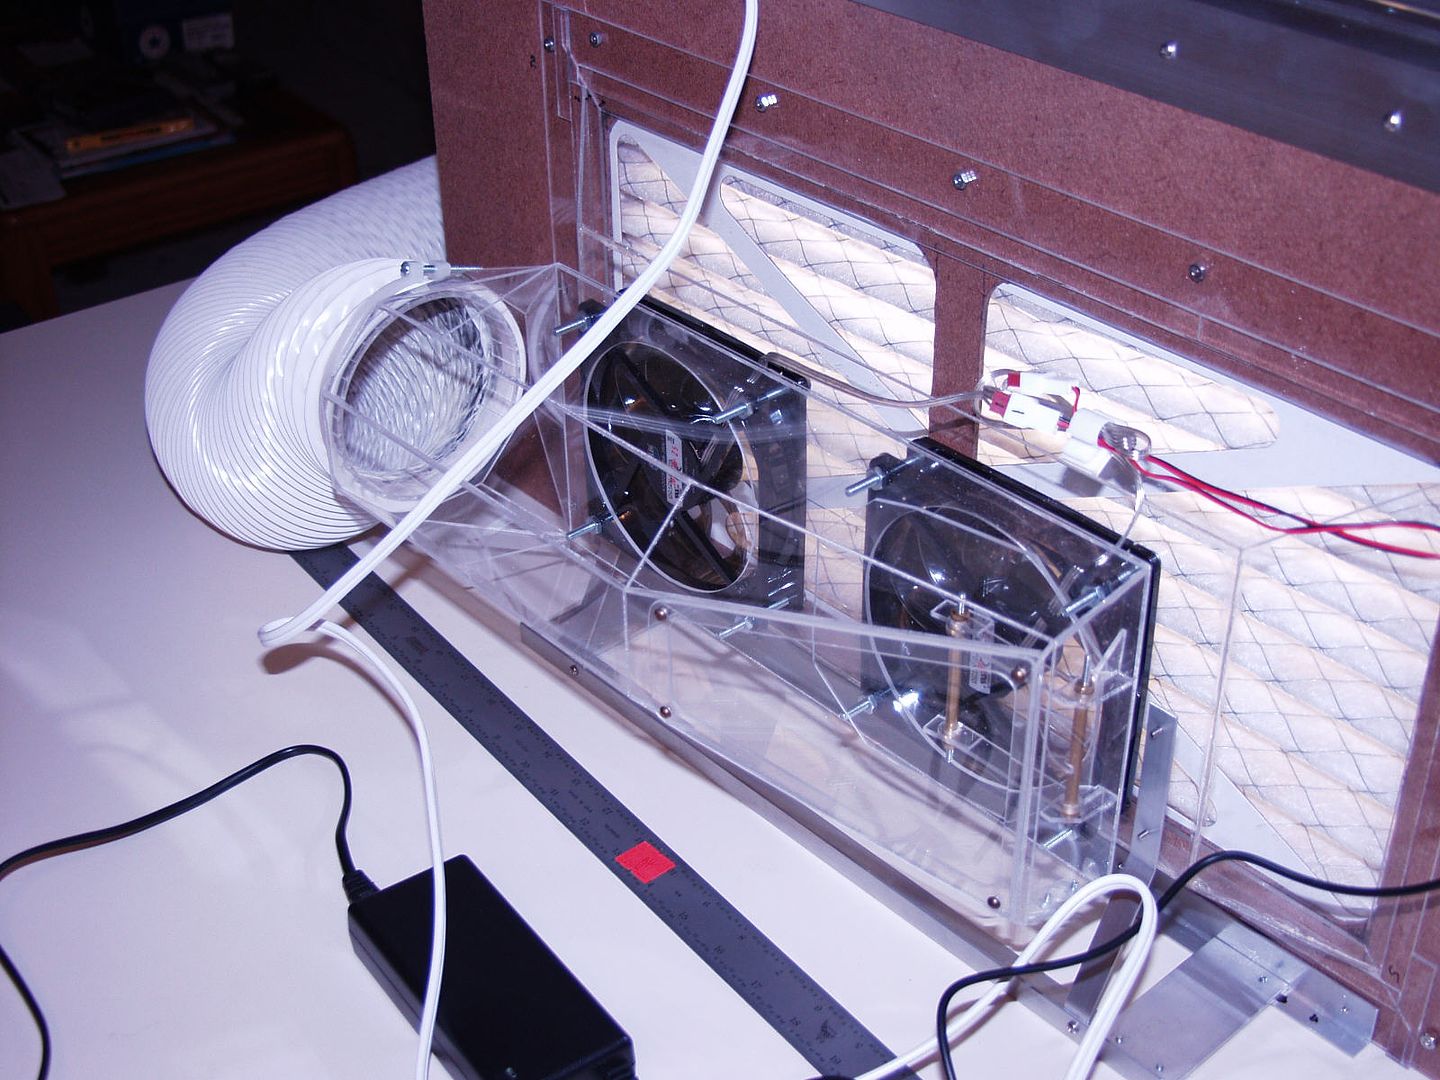
The backside ducting was built up from acrylic sheet .080 thick.  Cut it to size on my band saw and a little file work and sanding on the edges made it easy to glue together with Weldon 3. The vinyl ducting was dryer duct from 1985 (no longer available) but perfect for this application.

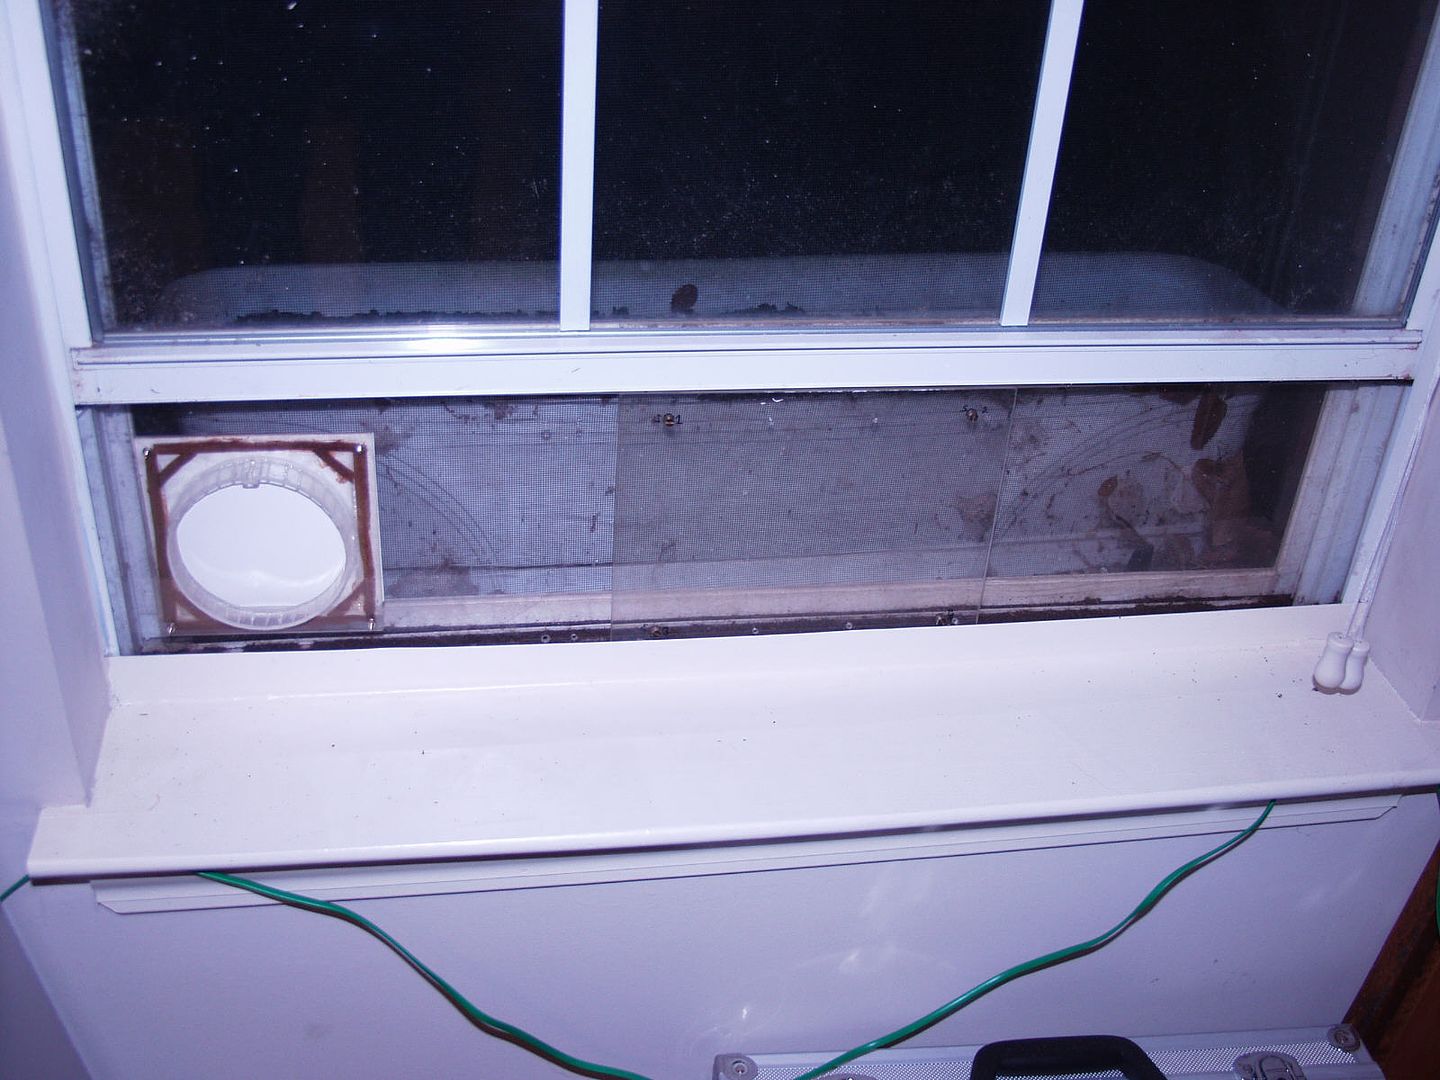
The window insert is also from back when.  I had a simple 120v brushless instrument fan just sucking the tainted air out in the old days.  Couldn't find the fan though I did find all the dryer duct.  The duct that was on the back side of that original fan is "COATED" with dried paint, thus the new booth with the air filter.

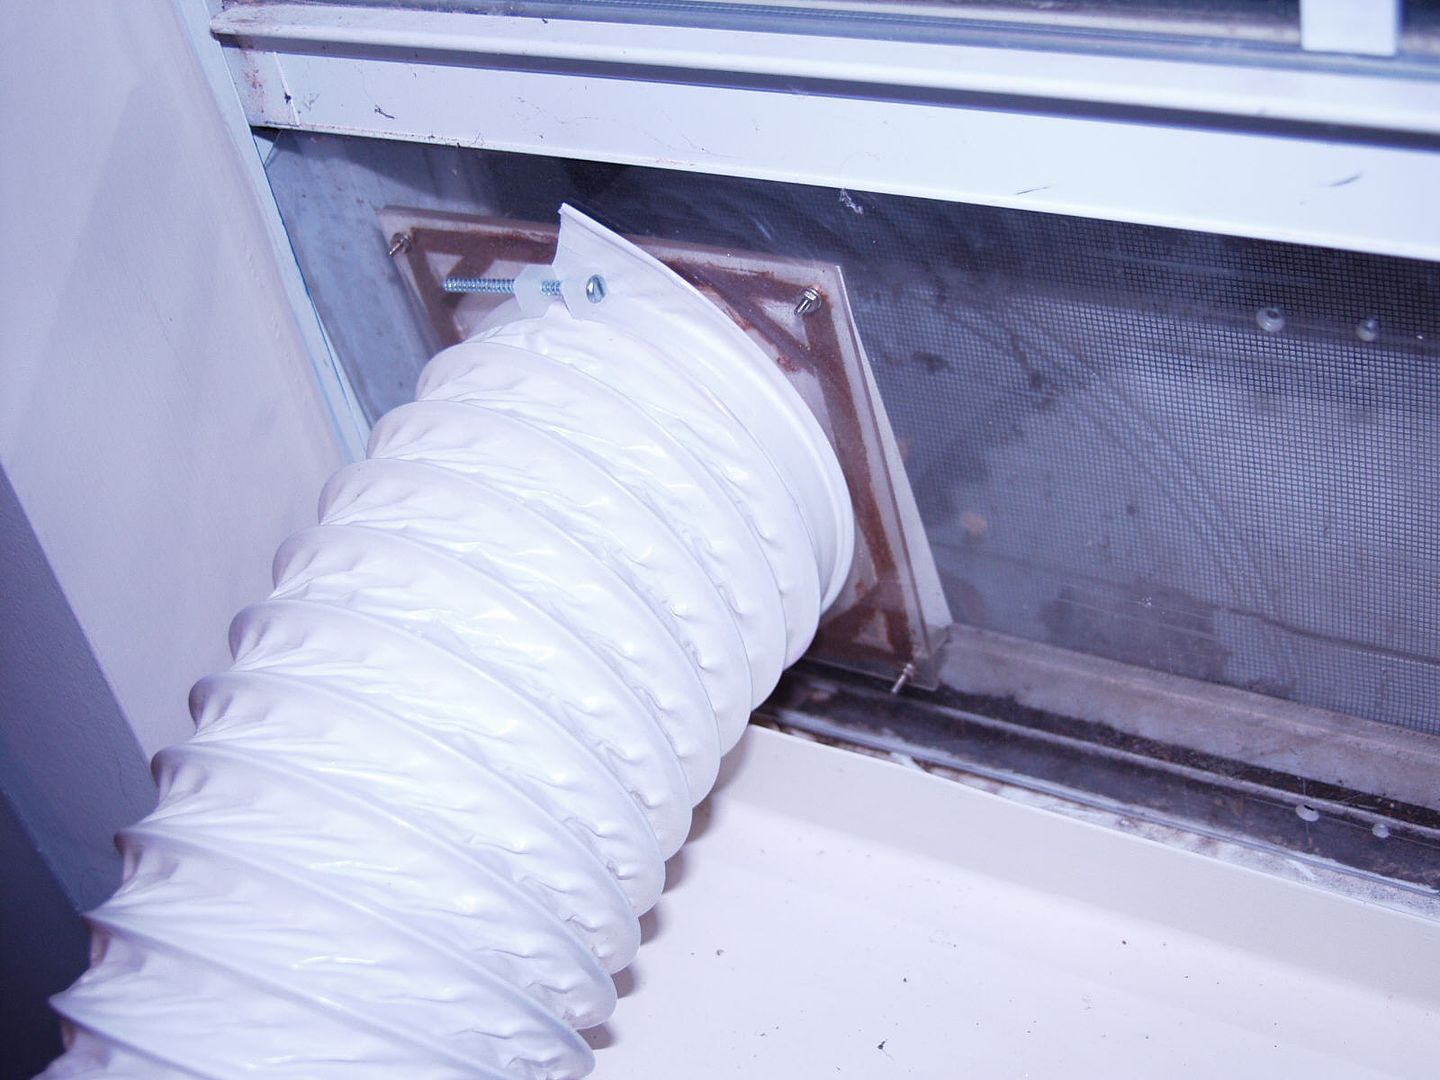
The other end of the duct hooked up.  The white flap over the opening was to keep cold air from flowing back through the tube when the fans are off, and too keep rain from coming into the duct if it happens to be raining out.  This setup works extreamely well at keeping the paint fumes around the Zero point everywhere except right at the front of the booth while spraying.  I usually can't even smell the fumes while painting.

The booth cost me about $120.  Will have to go and do a pricing of the separate items to know for sure.  The fans are 12V computer fans and then a 6 amp 12V power supply to run them (overkill I know but it was a LOT cheaper than Radio Shack) The light fixture was about $10, the fans and supply were right at $40.  The 1:8th inch thick Masonite was cut from a 2ft x 4ft sheet I picked up at Home Depot.  The acrylic and aluminum extrusions were bought at Lowe's.  If you are having to do your painting out in the Garage or worse OUTSIDE  Surprise  This might be a good way to get the spouse (if you have one) to let you paint inside.  After all her main complaint is the smell so, if there is no smell there should be no complaint.  Big SmileYeah   


  • Member since
    August 2009
  • From: Borlando Fla home of the rat
Posted by TREYZX10R on Friday, December 9, 2011 8:22 PM

Heavens Eagle thanks for the info and the link for the PDF very much appreciated. That is a great looking paintbooth !

The office is ready to instal


JOIN OUR COMMUNITY!

Our community is FREE to join. To participate you must either login or register for an account.

SEARCH FORUMS
FREE NEWSLETTER
By signing up you may also receive reader surveys and occasional special offers. We do not sell, rent or trade our email lists. View our Privacy Policy.