SEARCH FINESCALE.COM

Enter keywords or a search phrase below:

Hunting After Dark, 2011-2012 Night Fighter Group Build

251643 views
1422 replies
1 rating 2 rating 3 rating 4 rating 5 rating
  • Member since
    December 2010
  • From: Memphis TN
Posted by Heavens Eagle on Friday, December 9, 2011 11:36 PM

Cockpit is looking good there TREYZX10R!  As to the yellow decals, the "newer" DML decals are a bit more yellow looking than the original Trimaster decal release.  The colors are a little more heavy handed.  The Trimaster issue had the swasti's with it though.  I found a number of photos of Migge and his Weis 9.  One photo had another plane from the squadron in the backround that I will model the second kit to.  Only problem is the photos I have found show something white written in an arc on the side of the background plane under the canopy on the left side.  Just not enough resolution & clarity to tell what it is. Bang Head 

  • Member since
    August 2009
  • From: Borlando Fla home of the rat
Posted by TREYZX10R on Saturday, December 10, 2011 4:46 PM

Thanks Heavens Eagle,I'll look and see if I can turn up a pic that shows whats written on that 2nd aircraft.

I made some progress on the wings and fuse. Some fit issues up front are going to be a pain,especially at the wing roots. I had to leave out the forward part #c22 it made the fit even worse. To obtain a better fit I glued the upper fuse and gun cowling only at the trailing edges and let it dry over night. This allowed me to spread the forward areas out for a better fit around the trailing edge of the engine cowl. The fit is still not great but a lot better.

the wing assembly is another bit of 'why did they mold it this way' fiasco. I glued the wheel bays at the trailing edge and let dry overnight. This allowed me to fit the top halves to the bottom and get those leading edge areas around the wheel tubs to fit better. Again not great but better

I 'm hoping after this drys it wo'nt be so bad,shoild've gotten the Eduard limited instead me thinks;)

and the drop tank fiddly bits are done a quick pass with a #11 will get the tiny bit of flash I missed after it drys good

  • Member since
    December 2010
  • From: Memphis TN
Posted by Heavens Eagle on Saturday, December 10, 2011 6:32 PM

Hey TREYZX10R, watching your build of this kit is prepping me for my build.  Spent the last 4 months working on a devil of a build and it is only about 1/2 done.  Finally had to have a break.  Had too much scratch building going on.

Unfortunately the Eduard LE of the night fighters is only available from the ' Bay.  It went out of production quite a while ago.  I have heard from many sources though that the Eduard Fw 190's are all quite nice kits.  If you get into a real bind, one answer would be to just pick up an Eduard weekender of the 190 A8 and use the extra detail parts from the DML kit to do it.  I have that option but just want to do a kit build of something that I can build up and NOT have to do major surgery on it.  Challenge is good.  Scratch build half the kit, BAD.  (not that I am unable Sheesh! )

Tomorrow is start day for my night fighter.  Just relaxing right now.  Keep up the goodness!

  • Member since
    August 2009
  • From: Borlando Fla home of the rat
Posted by TREYZX10R on Sunday, December 11, 2011 12:09 PM

Thanks Heavens Eagle,yes shame about the eduard only being available on evil bay,good idea combining an a8 kit but I'll soldier on with the beast at hand. The wing root -engine cowl fit is aweful and in a very bad place to fix without damaging the surrounding detail. I'll do what I can to minumize the damage during the repair.

.

  • Member since
    November 2009
  • From: SW Virginia
Posted by Gamera on Sunday, December 11, 2011 1:57 PM

Eagle: Really nice paint spray booth, I'd never have thought of using computer fans like that, great idea!

Trey: Sharp work as usual!

"I dream in fire but work in clay." -Arthur Machen


  • Member since
    June 2010
Posted by Night Fighter Nut on Sunday, December 11, 2011 2:13 PM

Good going there Trey!  :)

  • Member since
    December 2010
  • From: Memphis TN
Posted by Heavens Eagle on Sunday, December 11, 2011 5:30 PM


Gamera wrote the following post on Sunday, December 11, 2011

Eagle: Really nice paint spray booth, I'd never have thought of using computer fans like that, great idea!

Gamera:  20 years ago I used a brushless instrument fan (120AC version) that pumped out a little air.  Just the fan and enough ducting to run the paint and fumes out the window.  With the newer fans look at the CFM ratings and do a little visualization.  The fans I am using are rated at just a hair under 70CFM.  I have 2 that I can run on this.

To see if this is enough air, think of it like this: a box 3ft x 3ft x 3ft is 27 cubic feet.  A box 3 x 3 x 6 is 54 cubic feet. A box 4 x 4 x 6 is 96 cubic feet.  If we consider that I am only using a small airbrush and with both fans going.  There is plenty of airflow going out without having to do noise and hurricane.  I could probably use large spray cans and never smell it back past about 3 feet away.  Of course there might not be quite enough power to push them as much as needed and I might need to get some stronger fans.  The main key here is BRUSHLESS .  I used an AC (wall outlet) version 20 years ago and it worked great at venting.  I know it worked as here is a photo of the air duct.  (nasty)

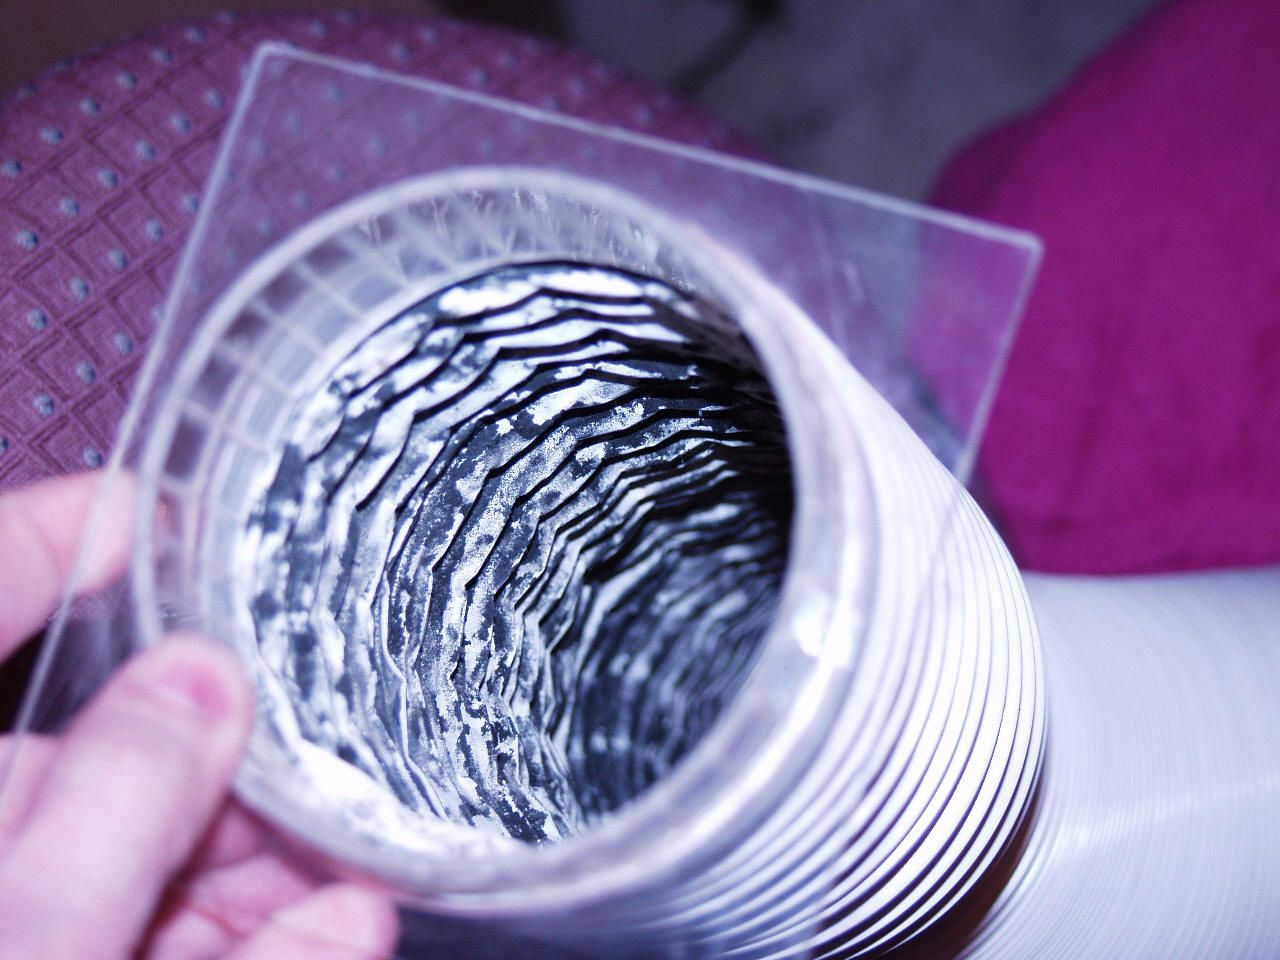
I had no filter over the fan to catch the paint particles at that time.  It worked quite well and didn't seem to hurt the fan even though it was somewhat coated with hobby paint too.

I should find out how well the 2 'puter fans work here soon.  It has been quite a while since I was doing any airbrushing.  So will see.


  • Member since
    August 2009
  • From: Borlando Fla home of the rat
Posted by TREYZX10R on Sunday, December 11, 2011 8:01 PM

Cliff ,NFN thanks! I was able to sand everything without loosing much detail at all. I will need to rescribe a few small spots but thats it, real relief to be through that hurdle.

  • Member since
    October 2009
  • From: Texas
Posted by Gregbbear on Monday, December 12, 2011 1:04 PM

Jailcop, and Caspar, awesome builds!  I updated the front page.  Great additions.

Trey, you never cease to amaze me.  Number 6!

Paul, that is a great looking paint booth.

If no objections, I might extend this GB awhile.  When I started this, I didn't know I would be going to Paramedic school, so I haven't even come close to building what I wanted to for this GB.

Cheers,

Greg

- yat yas!


  • Member since
    September 2003
  • From: Australia
Posted by Helo H-34 on Monday, December 12, 2011 1:24 PM

Hi Greg ,

I was hoping you would extend the Hunting After Dark GB .

I haven't even finished one of my builds , so I'm most gratefull for the extension .

I hope all is going well at Paramedic School , you certainly have my upmost admiration and respect for taking on such an important job and along with all the studying that must be involved , well done Sir...Toast

                John .

  • Member since
    October 2010
  • From: Hobart, Australia
Posted by Casper the Chihuahua on Monday, December 12, 2011 2:36 PM

Gregbbear

Jailcop, and Caspar, awesome builds!  I updated the front page.  Great additions.

Cheers,

Greg

Hey Gregbear, I also finished my Nightfighter (see page 70)

Cheers

On the bench: A-4F 1/32 Hasegawa

Just deployed: F6F-5N Hellcat Nightfighter 1/48 Eduard

Up next: A6-E Intruder 1/48 Revell

  • Member since
    February 2010
  • From: Maine
Posted by Stage_Left on Monday, December 12, 2011 7:10 PM

Hi Greg- I'd support your decision to extend. I got overanxious when I signed up and jumped into another GB, so I never started my He-219 due to that and other things that life sends our way (as you noted).

That 219 has been in my stash since the mid-'90s, and it's probably the ONE kit I've most wanted to get underway. Maybe I should be joining macattack80's No More Excuses GB...... Whistling 

  • Member since
    June 2010
Posted by Night Fighter Nut on Monday, December 12, 2011 10:11 PM

I hope this GB extends somewhat.  I would love a chance to finish the Italian build I started earlier and perhaps do some other builds like the Russian and French night fighters I have.Geeked

  • Member since
    August 2009
  • From: Borlando Fla home of the rat
Posted by TREYZX10R on Monday, December 12, 2011 10:55 PM

Greg thanks lol, that would be great to extend this I was hoping to get in a few more! Not too much to report in . I did tackle the fiddly bits on the canopy. I wound up ditching the pe upper support . The tabs would'nt fold down without crushing the assembly together at the gap. The supplied part looks fine so no great loss

  • Member since
    November 2009
  • From: SW Virginia
Posted by Gamera on Tuesday, December 13, 2011 8:06 AM

Eagle: Thanks for the additional photos! I'm airbrushing in my basement at the time, there is no window really to put a hose from a spray booth. Thankfully so far I've had no real problems with fumes- still I'll keep your booth in mine if I should try building one.

Trey: Nice job and love the canopy supports.

Greg: Yes, extending the GB is a great idea! I pulled up the Widow this weekend, dusted her off and restarted her again, she's not going to look great but I am going to finish her. Figured I'd go over the line but with an extended build I should be ok.

"I dream in fire but work in clay." -Arthur Machen


  • Member since
    August 2009
  • From: Borlando Fla home of the rat
Posted by TREYZX10R on Tuesday, December 13, 2011 10:05 PM

Cliff thank you sir much appreciated, I'm looking forward to seeing your Widow despite your misgivings I'm sure you'll pull off a nice build!

I sprayed the RLM74 & 75 using silly putty as a mask for a soft edge between the 2 colors. Hopefully tomorrow will see some RLM 76 go on

  • Member since
    August 2009
  • From: Borlando Fla home of the rat
Posted by TREYZX10R on Wednesday, December 14, 2011 1:26 PM

RLM76 is on and finished up the gear

  • Member since
    November 2009
  • From: SW Virginia
Posted by Gamera on Wednesday, December 14, 2011 1:40 PM

Ohhhhhhh, nice work there Trey, love the landing gear.

"I dream in fire but work in clay." -Arthur Machen


  • Member since
    October 2009
  • From: Texas
Posted by Gregbbear on Wednesday, December 14, 2011 6:41 PM

Dang!  That is looking good Trey!  Your landing gear looks exceptional too.  You have a really good touch with the detailing.  Very realistic.

Caspar, sorry I didn't get your Nighthawk on the front page sooner.  I must have got distracted before???.  I certainly remember admiring all of the photos of it.  Another good looking bird!

Thanks for all the continuing interest in this GB.  Keep on plugging away when you can.

John, thanks buddy!

Cheers,

Greg

- yat yas!


  • Member since
    August 2009
  • From: Borlando Fla home of the rat
Posted by TREYZX10R on Friday, December 16, 2011 1:39 AM

Cliff,Greg thanks really appreciate the kind words from both of you!.

I'm going crosseyed but did finish the decals,and there was a ton of em'

  • Member since
    March 2010
  • From: Democratic Peoples Republic of Illinois
Posted by Hercmech on Friday, December 16, 2011 5:10 PM

TREY: Coming along nice...as usual!Yes


13151015

  • Member since
    August 2009
  • From: Borlando Fla home of the rat
Posted by TREYZX10R on Sunday, December 18, 2011 5:32 PM

Thanks Hercmech!

I finished it ,hows it look?

  • Member since
    November 2009
  • From: SW Virginia
Posted by Gamera on Sunday, December 18, 2011 5:36 PM

Trey: Super job as usual! Love the light weathering you did around the engine.

Seems weird to see one from you that's not green and light grey with big red meatballs on her now though Stick out tongue

"I dream in fire but work in clay." -Arthur Machen


  • Member since
    March 2010
  • From: Democratic Peoples Republic of Illinois
Posted by Hercmech on Monday, December 19, 2011 12:11 PM

Came out fantastic...love those antenas.


13151015

  • Member since
    December 2010
  • From: Memphis TN
Posted by Heavens Eagle on Tuesday, December 20, 2011 7:41 PM

Looking quite nice there TREYZX10R !  Am about 1/4 of the way done with my old original TRIMASTER release of this kit.  Your build highlighted the problem areas for me and am getting quite a nice build out of it.  (of course though I am doing some modifications, just can't leave anything quite alone ) WinkYeah

Main change is I made the wheel wells deeper.  They were way too shallow.  Will be working up my intro post here in the next few days.  Been quite busy lately.  Smile

  • Member since
    August 2009
  • From: Borlando Fla home of the rat
Posted by TREYZX10R on Wednesday, December 21, 2011 1:20 AM

Heavens  Eable ,thank you Sir! I'm really looking forward to seein' what you've done with yours!!! Tackling a wheel well is no small feat!

  • Member since
    October 2009
  • From: Texas
Posted by Gregbbear on Friday, December 23, 2011 4:01 PM

Another fine addition Trey!  That is one great looking nocturnal butcher bird.  Front page is updated, sorry it took a few days to get to it.

Paul, looking forward to some wip photos.

Merry Christmas and Happy Holidays,

Greg

- yat yas!


  • Member since
    December 2010
  • From: Memphis TN
Posted by Heavens Eagle on Friday, December 23, 2011 11:31 PM

Never fear Greg!

Currently have a bunch of parts in small assemblies.  Parts modified, others with plans for modding, and LOTS of photos.

If you would like to see how I post my brand of insanity  Hmm  Go here and have a look see at my other project. ( It is about halfway down the page)  It should give some idea of how my posts will be looking.  It's just that I am enjoying the build so much that it is hard to stop for a couple of evenings to get the docs all set up.

Have a Merry Christmas ALL.  

  • Member since
    October 2009
  • From: Texas
Posted by Gregbbear on Sunday, January 1, 2012 4:23 PM

Happy New Year Night Fighters!

Paul, I looked at your Hannover, and all I can say is "wow"!  You could take that and make a book out of your format.  Very, very cool.

I've been sanding and filling on the Meteor some more.  It seems non-stop.  I couldn't resist starting another build.  I started a RoG 1/72 F4U-5N Corsair.  Other than extending the fuselage to correct length, it shouldn't pose any major challenges, and looks like a nice kit.  I should have some photos up soon.

Cheers,

Greg

- yat yas!


  • Member since
    December 2010
  • From: Memphis TN
Posted by Heavens Eagle on Sunday, January 1, 2012 8:52 PM

Hey Greg

Yes it turns into a bit of a book.  The format is better now, but it does take some thought and work to do the "sheets".  Am working on sheet 6 now and am getting into the nitty build gritty part of it.  As I go it turns out that it's a help to have the DML re-pop of the kit as I am going back and taking some before photos off the DML parts.  Other things just missed the mid steps, but it is pretty clear what I did.  Will have something up tomorrow as I am on a 4 day weekend (WOOHOO ! )  Would probably have done a post today, but had a FUBAR last night and lost a lot of yesterday's work.  Bang Head  Was my own fault (forgot to save periodically)  Super Angry  Ended up being a postitive though as I cleaned up the format and base parts and streamlined doing the pages.

Happy New Year all!

JOIN OUR COMMUNITY!

Our community is FREE to join. To participate you must either login or register for an account.

SEARCH FORUMS
FREE NEWSLETTER
By signing up you may also receive reader surveys and occasional special offers. We do not sell, rent or trade our email lists. View our Privacy Policy.