SEARCH FINESCALE.COM

Enter keywords or a search phrase below:

Weathering GB - 2/1/2011 - 1/31/2012

24487437 views
861 replies
1 rating 2 rating 3 rating 4 rating 5 rating
  • Member since
    August 2006
  • From: Amherst, MA
Posted by M1 A1 A2 Tanker on Tuesday, May 24, 2011 10:01 AM

Finally started the weathering on my Tamiya SdKfz 222. These pictures are after the first overall dust wash using

oil paints thinned with mineral spirits. The fiddly bits (i.e. screens and tools) are left off and weathered separately 

so I don't break them.


Hope you like them....

Scott


“Computers are like Old Testament gods; lots of rules and no mercy.”  ~ Joseph Campbell


  • Member since
    January 2010
  • From: Nebraska, USA
Posted by CallSignOWL on Tuesday, May 24, 2011 9:56 AM

the Wings on this spitfire ore one piece affairs that slide into slots in the fuselage, but don't really align all that well. The dihedral is hard to get right as a result, and there are considerable gaps at the wing roots. To top it all off, the model is festooned with hundreds of rivets that I don't want to sand off!

and here is a closeup of the pilot figure:


OWL

------------------------

Now that I'm here, where am I??

  • Member since
    June 2010
  • From: Austin, TX
Posted by DoogsATX on Monday, May 23, 2011 7:16 AM

NiceFit

DoogsATX: Please withdraw me from the group build. I am in the process of moving and am not sure when I will get back to building my Revell 1:125 U-99 submarine. However, I will keep monitoring this forum. The tips are wonderful. Now to pack up my paint booth...

No worries! I know how moving can turn one's life upside down for awhile. Best of luck with the move!

On the Bench: 1/32 Trumpeter P-47 | 1/32 Hasegawa Bf 109G | 1/144 Eduard MiG-21MF x2

On Deck:  1/350 HMS Dreadnought

Blog/Completed Builds: doogsmodels.com


  • Member since
    January 2009
  • From: Dallas, Texas
Posted by NiceFit on Sunday, May 22, 2011 8:23 PM

DoogsATX: Please withdraw me from the group build. I am in the process of moving and am not sure when I will get back to building my Revell 1:125 U-99 submarine. However, I will keep monitoring this forum. The tips are wonderful. Now to pack up my paint booth...

Respectfully, Dobby

  • Member since
    January 2010
  • From: Nebraska, USA
Posted by CallSignOWL on Sunday, May 22, 2011 8:54 AM

I have finally started on my second entry into the GB, the Spitfire Mk. IX. This will be in an American scheme of olive drab over light gray. It will also have full invasion stripes. The Airfix kit had no interior, so I added basic sidewall details with plastic strip, an IP from the scrap bin and cut out the entry door too. That door is tiny and took a while to detail! I also painted up the pilot figure and drilled out the exhaust. I didn't go crazy with the interior details because I will be focusing more on the outside weathering effects.


OWL

------------------------

Now that I'm here, where am I??

  • Member since
    November 2008
  • From: Zephyrhills,FL
Posted by daddy1 on Sunday, May 22, 2011 6:37 AM

Looking very good ,CasperBow Down.

http://whlswngsthngs.shutterfly.com/


  • Member since
    December 2002
  • From: Bury St Edmunds, Suffolk, England
Posted by Bish on Sunday, May 22, 2011 4:56 AM

Casper, amazing work there. And you are giving me a great idea for a dio. I have struggeled to come up with new things to do for aircrfat Dioramas. I have ideas for aircraft being maintained out in the open. It had never occured to me to build the inside of a hanger/workshop. Going to have to study your build closely and pince some ideas.

Again, great work Yes

I am a Norfolk man and i glory in being so


On the bench: Airfix 1/72nd Harrier GR.3/Fujimi 1/72nd Ju 87D-3

  • Member since
    October 2010
  • From: Hobart, Australia
Posted by Casper the Chihuahua on Sunday, May 22, 2011 12:52 AM

Got the building finished, starting to populate the interior with stuff.

There must be dozens and dozens of tiny elements in this diorama and they all have to be painted and detailed. I'm now waiting for the furniture to dry so I can start setting up work benches and the communications bench with radio and telex.

The bird is going to be facing forward on an angle with the port side of the engine lined up along side the two drums with the plank across.

Cheers

On the bench: A-4F 1/32 Hasegawa

Just deployed: F6F-5N Hellcat Nightfighter 1/48 Eduard

Up next: A6-E Intruder 1/48 Revell

  • Member since
    October 2010
  • From: Hobart, Australia
Posted by Casper the Chihuahua on Friday, May 20, 2011 2:26 AM

I've fitted the timber frames, doors and windows. Tomorrow I'm going to apply so more weathering on the blue windows, doors etc. to tie it in with the brickwork. Stress the metal on the piping and tap (by the back door in the far right corner)

Then I can start populating the space with props and finally the Bf109. I'm trying to represent one corner of the building, the hangar doors are somewhere unseen from this corner.

Cheers

On the bench: A-4F 1/32 Hasegawa

Just deployed: F6F-5N Hellcat Nightfighter 1/48 Eduard

Up next: A6-E Intruder 1/48 Revell

  • Member since
    October 2008
  • From: New Jersey
Posted by oddmanrush on Thursday, May 19, 2011 9:38 AM

Hey, so some progress now on the Hellcat...just a quick pic.

I added the lighter blue shade along the fuselage and the exhaust streaks coming off the engine. I'll have to touch up some white on the under carriage because I wasn't paying attention, but its not too bad.

Thanks,

Jon

My Blog: The Combat Workshop 

  • Member since
    October 2008
  • From: New Jersey
Posted by oddmanrush on Wednesday, May 18, 2011 9:57 AM

Terry, awesome work, really admire your ability to apply realistic chips and rust and grime. I'm anxious to see the final product.

Casper, nice work on the brick wall!

As for me, the Hellcat is still in limbo. I'm planning on building a new paint booth for myself in the laundry room. Yup, laundry room. I had been airbrushing in a box on the kitchen table but that may not continue to be the best idea. Hopefully I'll have the my final project for this GB completed soon.

Jon

My Blog: The Combat Workshop 

  • Member since
    December 2002
  • From: Bury St Edmunds, Suffolk, England
Posted by Bish on Tuesday, May 17, 2011 5:07 PM

terry, great work there. The chipping looks great. Don't leave us waiting so long for the next update.

casper, ye have to agree, that brick work looks spot on

I am a Norfolk man and i glory in being so


On the bench: Airfix 1/72nd Harrier GR.3/Fujimi 1/72nd Ju 87D-3

  • Member since
    November 2008
  • From: Zephyrhills,FL
Posted by daddy1 on Monday, May 16, 2011 10:41 PM

 Terry- That rust/ slime/etc.. look great .Bow Down

Casper- I think you nailed the look of old brickYesToast. Have you thought of giving them a light dusting of pastels for an even dustier look?2 cents

Howard

http://whlswngsthngs.shutterfly.com/


  • Member since
    October 2010
  • From: Hobart, Australia
Posted by Casper the Chihuahua on Sunday, May 15, 2011 2:01 AM

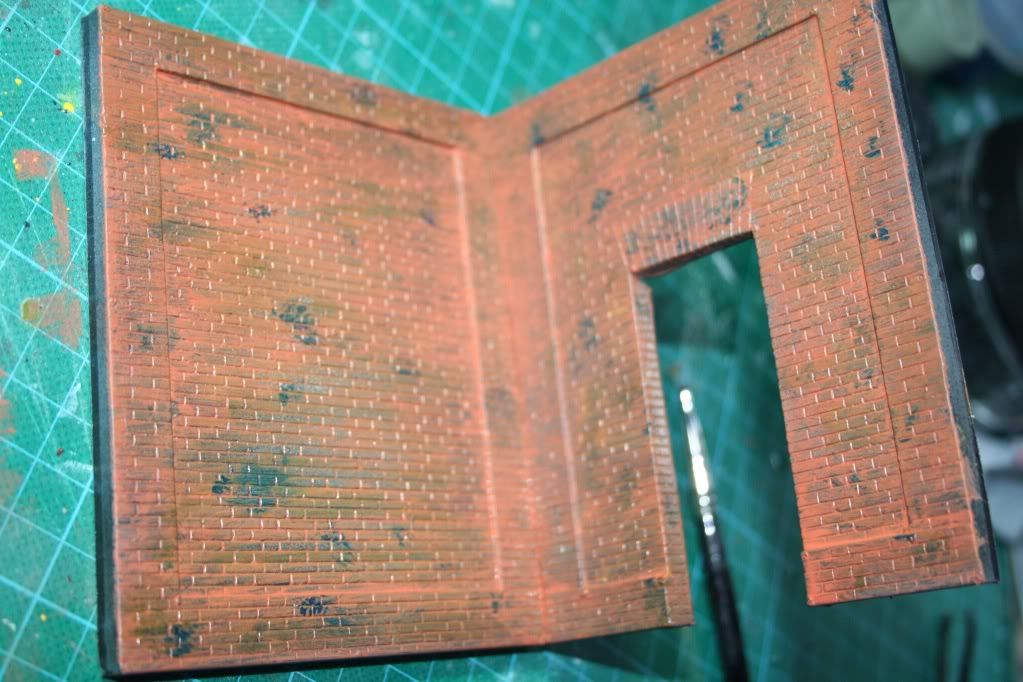
Ok, the final almost black, runny wash settles into all the cracks and pretty much sells the look;

I painted the window and door fittings. I'll be pretty much using the dot filter technique in oils to weather the windows.

I'm trying to work out how to achieve a chipping effect but since this diorama perspective is from inside then it may not be too necessary to go to town on this.

Cheers

On the bench: A-4F 1/32 Hasegawa

Just deployed: F6F-5N Hellcat Nightfighter 1/48 Eduard

Up next: A6-E Intruder 1/48 Revell

  • Member since
    October 2010
  • From: Hobart, Australia
Posted by Casper the Chihuahua on Sunday, May 15, 2011 1:15 AM

So I took a crash course in brick painting, decided to experiment with a couple of techniques.

First a not too carefully applied spray of gloss black;
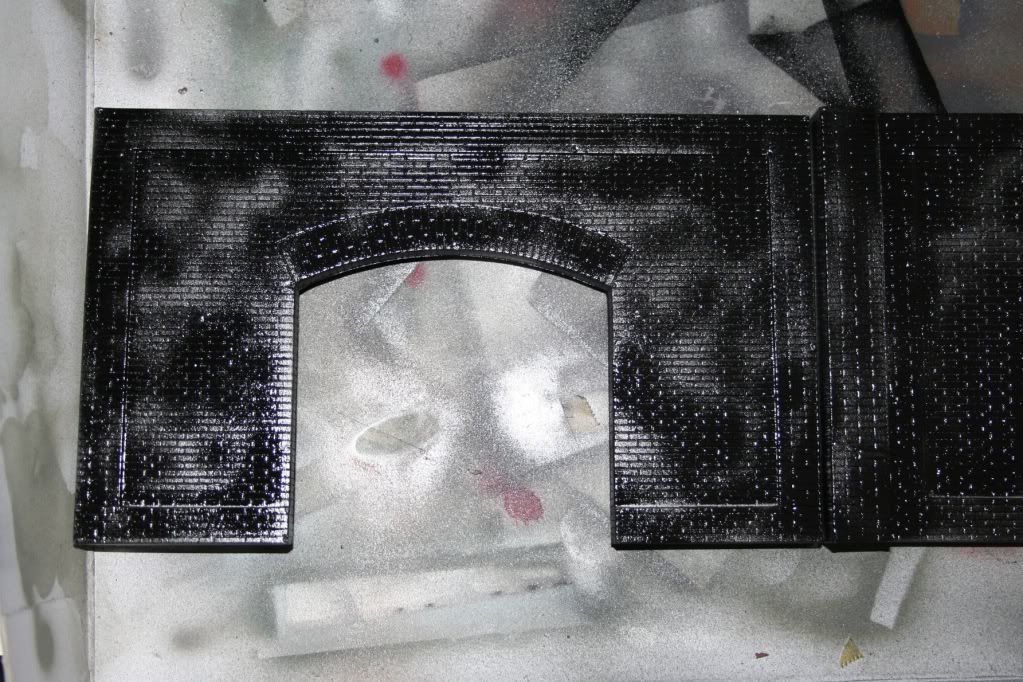
Then some patches of white;
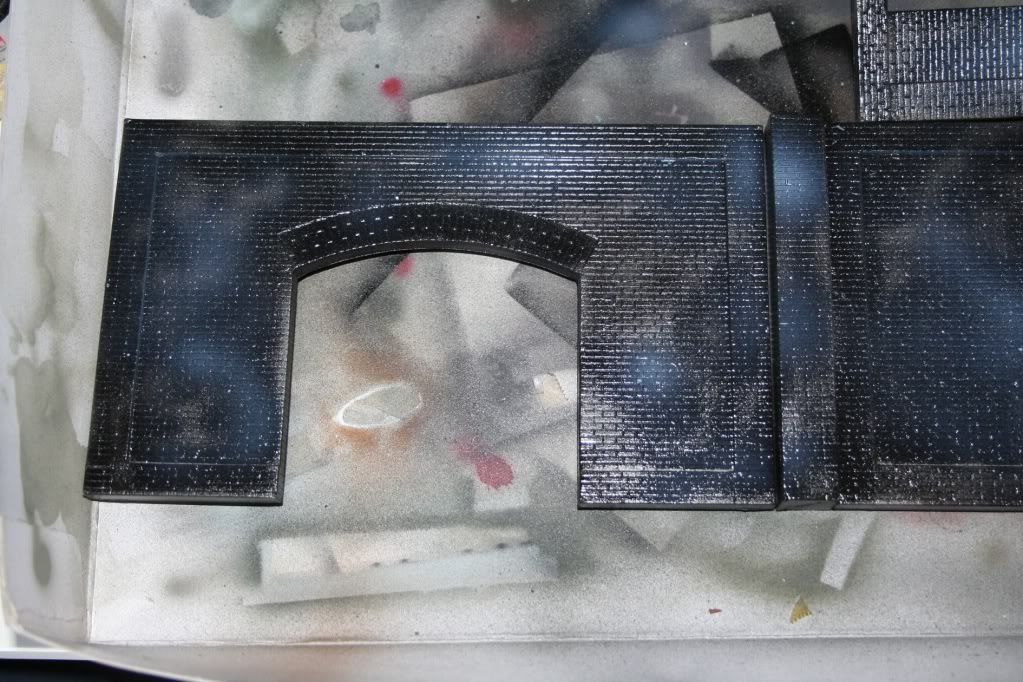
...then some random splotches of various greys. I used about 8 in all.
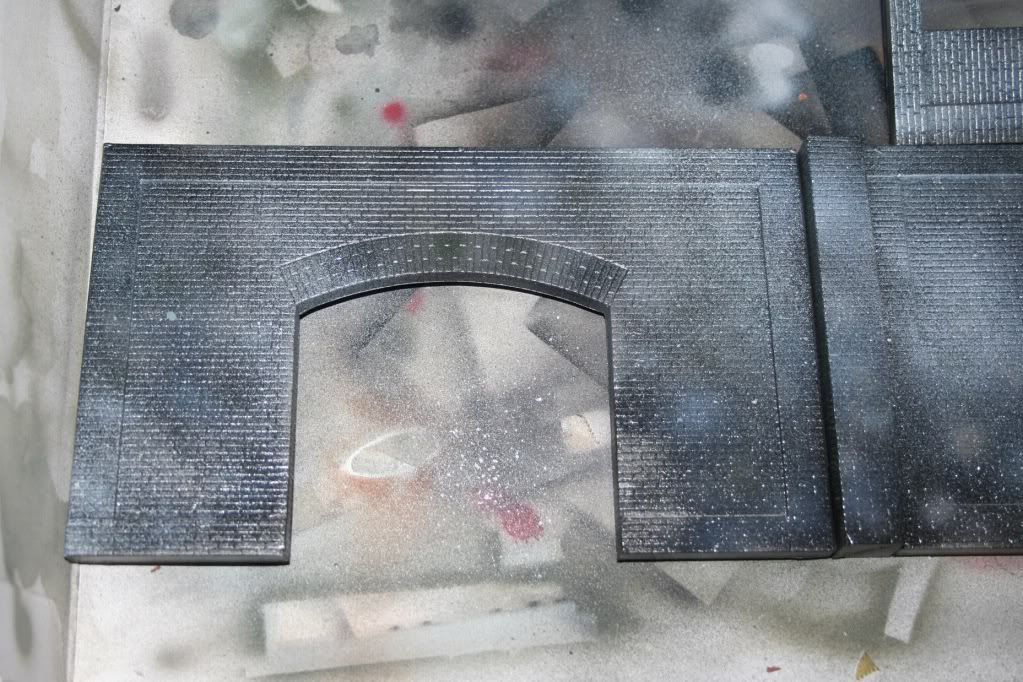
Then with a partially dried brush I very messily applied some Life Colour Rust 2, making sure to slop it everywhere and into the cracks between bricks. I then wiped off the excess with a slightly damp piece of paper towel.
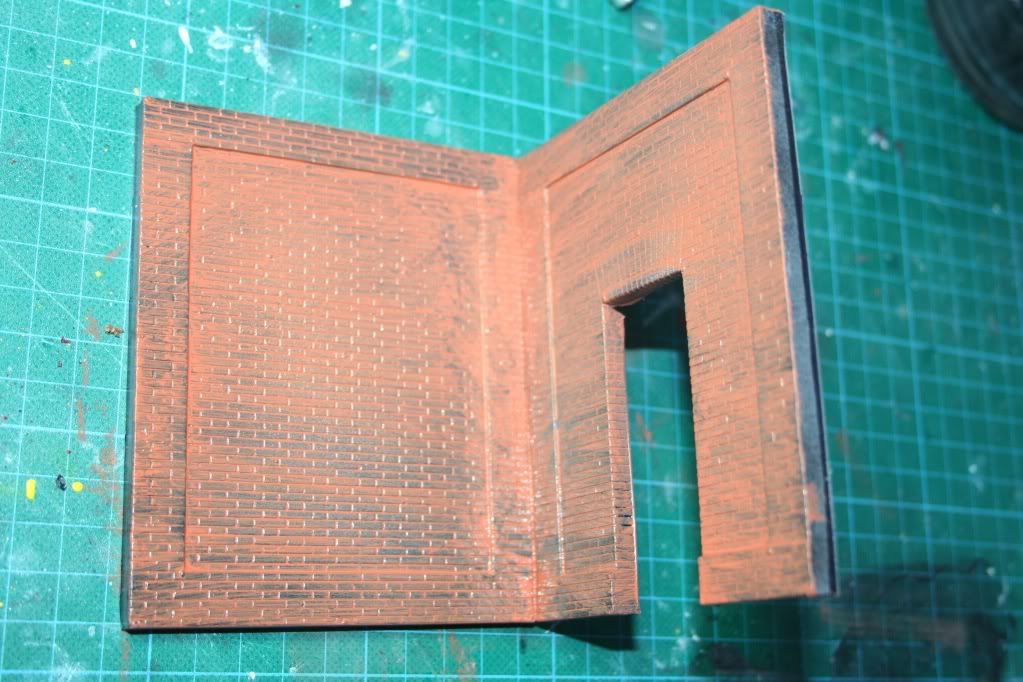
Then using the dot filter techniques I applied some various acrylics, yellow, browns, olive drab and some metallic blue to try and capture that glazed enamel look some bricks get;
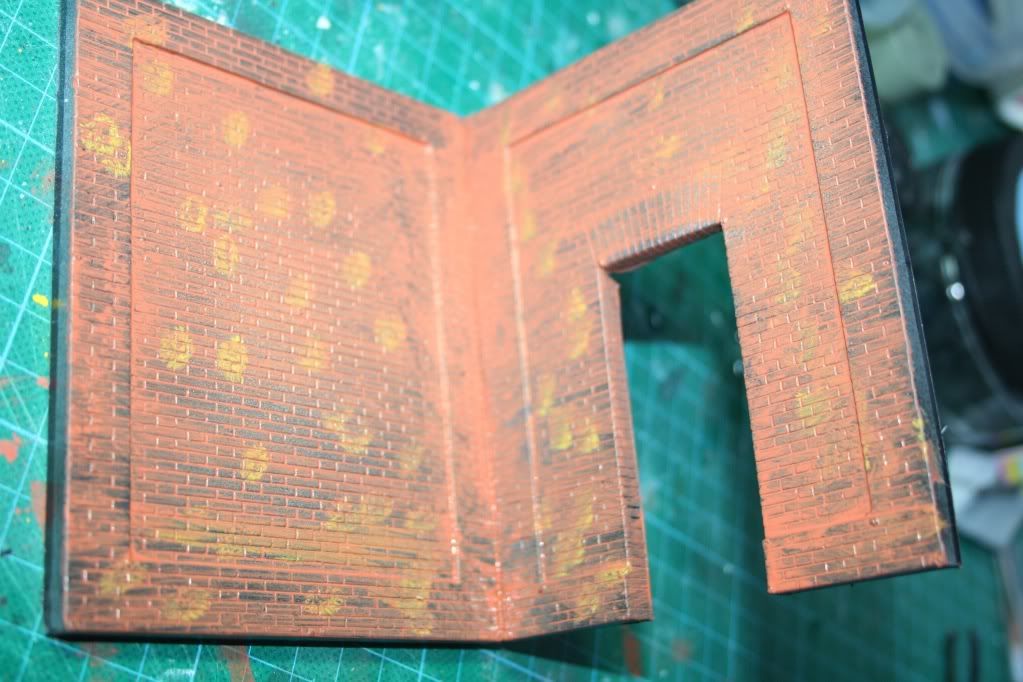
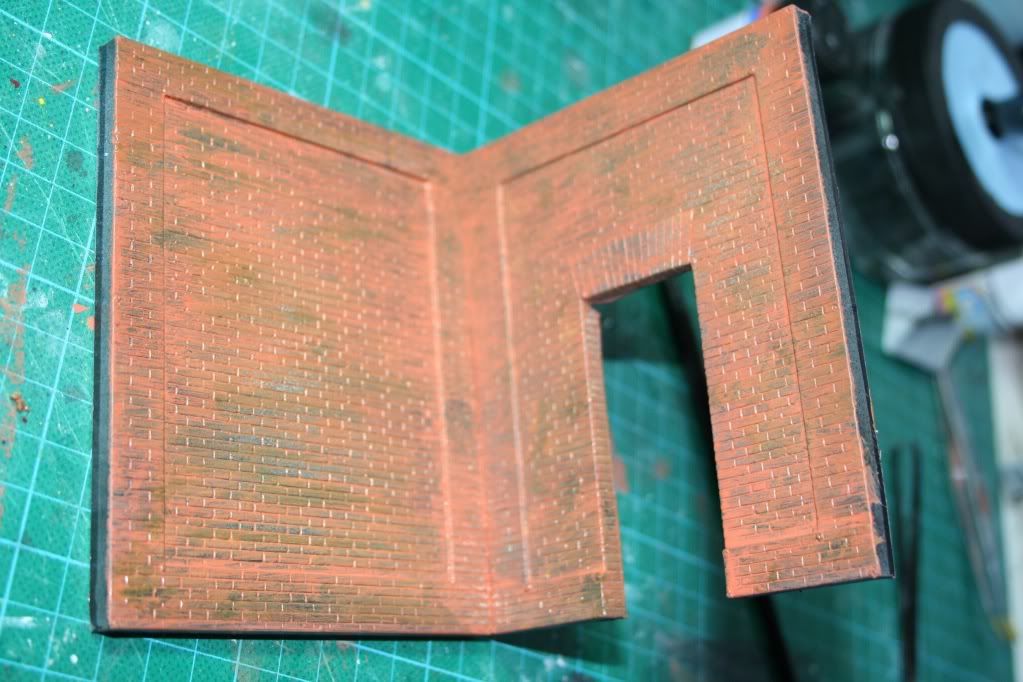
Each phase was worked into the texture with a dry brush, last of all was some more Rust to tone down some areas where there might be a bit too much variation.
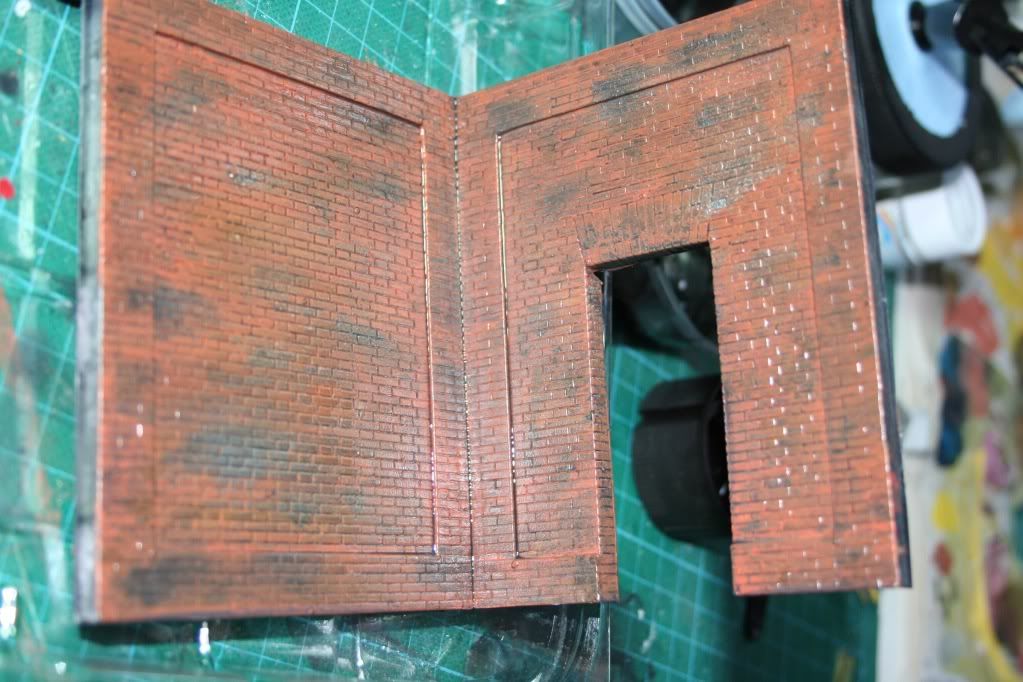
Finally I used a very heavily thinned oil wash in grays then black. I got this to run into every gap between bricks. The dark colours then applied in random splotches to help simulate areas on the brick work where cracks may be more prominent.
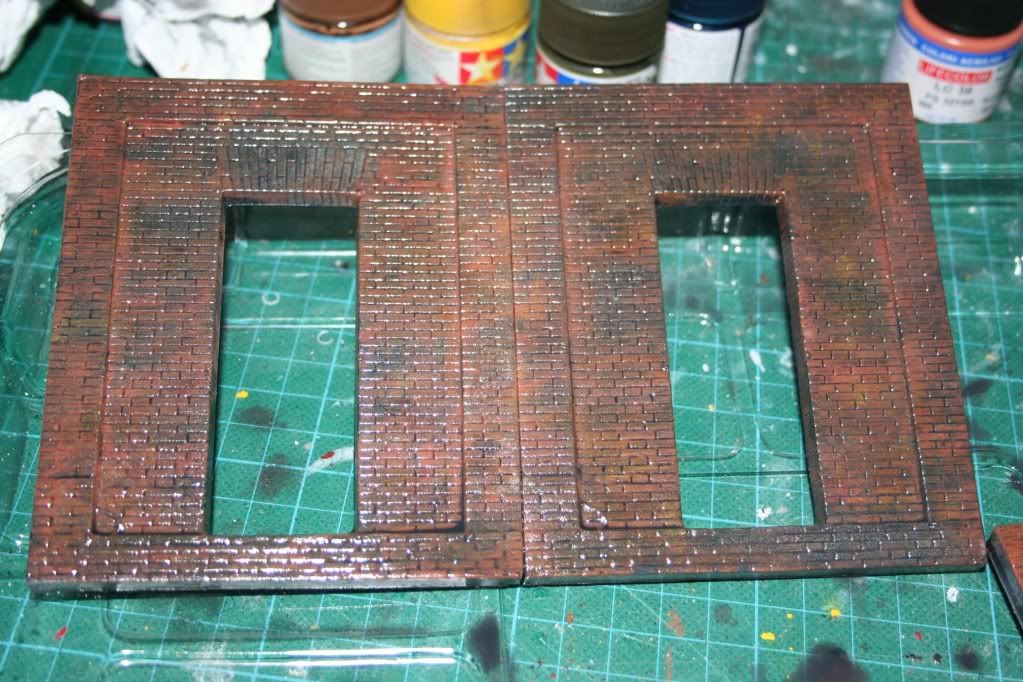
Once the oils dry I'll probably have to apply some more to work up the textures.

Cheers
On the bench: A-4F 1/32 Hasegawa

Just deployed: F6F-5N Hellcat Nightfighter 1/48 Eduard

Up next: A6-E Intruder 1/48 Revell

  • Member since
    May 2005
  • From: Dublin Rep Of Ireland
Posted by terry35 on Saturday, May 14, 2011 6:16 PM

Wow I can't believe that its so long since I updated this one. I was in th panzerjager GB so that took up bench time, but I have been working  away on this.I do pop in about once a week yo see how other members are progressing.

 I have scratched the rope bumpers as I was not willing to spend more money on an accessory than I spent on the kit. I used the kit tracks which are awful but I got the sag in place by forward planning and placing pins in the hull early on during the build.

I placed tamiya masking tape all round the hull, reason?  well I wanted to give the impression of a waterline with two different weathering types above and below the line. It will be a while before this is fully realised.

The rope bumper in place, its made from model ship rigging.

The front bumper is made from bandage wrapped around a piece of sponge.

This is just an update, I have a lot of work to do and two weeks to placing it on the competition table.

Terry.

  • Member since
    October 2010
  • From: Hobart, Australia
Posted by Casper the Chihuahua on Saturday, May 14, 2011 12:06 AM

Got some more work on the diorama. Cut the vacform walls and cleaned them up a bit. Started assembling the inside of the building. I have to remember to fix all the doors and window fittings inside out so they are the inside view.

Also cut the base board...with a modelling saw!! Crying it warped a bit and took a longtime but I think I've salvaged it for future use.

Got these goodies as well. A Verlinden Luftwaffe service kit in resin. The engine is the exact match of the Bf 109s Eduard offering. I also like how the shipping crate is also included. Also the Radio set on a bnch in the corner with some maps will add to the story of the dio.

Cheers

On the bench: A-4F 1/32 Hasegawa

Just deployed: F6F-5N Hellcat Nightfighter 1/48 Eduard

Up next: A6-E Intruder 1/48 Revell

  • Member since
    May 2010
Posted by personman906 on Friday, May 13, 2011 10:35 PM

Ok, I'm finally posting an update.  Just the right-side track left on the PzH-2000, Chieftain is ready for painting, and I have a nice diorama with my Su-122 and some Panzergrenadiers.  That took a very long time to paint, what with all the base cots, build-up layers, rust gradients, ice, snow, and the "other stuff".  I'll post pictures soon so I can finally have my first build for this GB done.

In Soviet Russia, MODEL BUILD YOU!

Still Building: Dragon 1/144 HH-60H

Ready for First Coat: Academy 1/35 MH-60G, Tamiya 1/35 Chieftain Mk5, Trumpeter 1/35 KSK Commandos

Finishing Touches: Revell 1/35 PzH-2000, Dragon 1/144 SH-60F, Revell 1/48 F-15E


  • Member since
    December 2002
  • From: Bury St Edmunds, Suffolk, England
Posted by Bish on Wednesday, May 11, 2011 10:24 AM

I knew it was something like that. Well you certainly done a good job on it.

I am a Norfolk man and i glory in being so


On the bench: Airfix 1/72nd Harrier GR.3/Fujimi 1/72nd Ju 87D-3

  • Member since
    June 2010
  • From: Austin, TX
Posted by DoogsATX on Wednesday, May 11, 2011 9:46 AM

Bish

Doogs, wasn't that Sherman your first armour build.

Not exactly. I built probably a half-dozen or so when I was a kid, but none were very good. The Sherman was my first armor build of this new modeling career, though...

On the Bench: 1/32 Trumpeter P-47 | 1/32 Hasegawa Bf 109G | 1/144 Eduard MiG-21MF x2

On Deck:  1/350 HMS Dreadnought

Blog/Completed Builds: doogsmodels.com


  • Member since
    December 2002
  • From: Bury St Edmunds, Suffolk, England
Posted by Bish on Wednesday, May 11, 2011 9:38 AM

Thought it was time i caught up on the GB's i have my name down for. Some great builds been completed in this one so far. Its really hard to pick any out. Of course i am drawn to the German builds, but i couldn't pick a favorite. Doogs, wasn't that Sherman your first armour build.

I am a Norfolk man and i glory in being so


On the bench: Airfix 1/72nd Harrier GR.3/Fujimi 1/72nd Ju 87D-3

  • Member since
    November 2008
  • From: Zephyrhills,FL
Posted by daddy1 on Wednesday, May 11, 2011 7:59 AM

[quote user="DoogsATX"]

Howard - Fantastic work on the P-38! Apologies for the delay, but I've got it up on the front page now!

No apology needed. It seems many of us lately have had many distractions resulting in less build and/or forum time. Plus it's easy to get wrapped up in the GroupBuild thing. They're loads of fun and a valuable skill building tool.

 Now to get to my   other GBs ,get them done and start on some more GBs.

Howard

http://whlswngsthngs.shutterfly.com/


  • Member since
    June 2010
  • From: Austin, TX
Posted by DoogsATX on Tuesday, May 10, 2011 10:32 AM

Howard - Fantastic work on the P-38! Apologies for the delay, but I've got it up on the front page now!

Scorpiomikey - Was that scheme ever actually employed? I know the Have Blue prototype had a pretty slick blue camo pattern, but that's the only non-black F-117-type-thing I'm aware of.

Casper - Can't wait to see the dio come together! 

On the Bench: 1/32 Trumpeter P-47 | 1/32 Hasegawa Bf 109G | 1/144 Eduard MiG-21MF x2

On Deck:  1/350 HMS Dreadnought

Blog/Completed Builds: doogsmodels.com


  • Member since
    June 2010
  • From: Austin, TX
Posted by DoogsATX on Tuesday, May 10, 2011 10:28 AM

Fly-n-hi

Hey Doogs, sign me up.  I started building a 1/48 Hasegawa F/A-18C in the middle of April for the Hornet's Nest GB but I'm planning on weathering the heck out of it.  

Added! Looking forward to it - Hornets always seem to weather up better than most modern aircraft!


On the Bench: 1/32 Trumpeter P-47 | 1/32 Hasegawa Bf 109G | 1/144 Eduard MiG-21MF x2

On Deck:  1/350 HMS Dreadnought

Blog/Completed Builds: doogsmodels.com


  • Member since
    November 2008
  • From: Zephyrhills,FL
Posted by daddy1 on Tuesday, May 10, 2011 8:44 AM

vetteman42

Casper Eats oh but I think this is gonna be cool Yeah

 Is your 109 1/48 scale ?

DittoYes

http://whlswngsthngs.shutterfly.com/


  • Member since
    October 2010
  • From: Hobart, Australia
Posted by Casper the Chihuahua on Tuesday, May 10, 2011 1:07 AM

vetteman42

Casper Eats oh but I think this is gonna be cool Yeah

 Is your 109 1/48 scale ?

Nope, she's 1/32! Big Smile

Cheers

On the bench: A-4F 1/32 Hasegawa

Just deployed: F6F-5N Hellcat Nightfighter 1/48 Eduard

Up next: A6-E Intruder 1/48 Revell

  • Member since
    July 2008
  • From: USA California
Posted by vetteman42 on Tuesday, May 10, 2011 12:51 AM

Casper Eats oh but I think this is gonna be cool Yeah

 Is your 109 1/48 scale ?

Randy So many to build.......So little time

  • Member since
    October 2010
  • From: Hobart, Australia
Posted by Casper the Chihuahua on Monday, May 9, 2011 10:27 PM

I finally got the Mini Art Industrial wall set in the post. Didn't realise they were vacform until I gottem but oh well!

This shows a general rough layout of the Bf 109 diorama.

It will be busied up with all sorts of doodads but for the moment this gives me a good idea of where everything may sit.

Cheers

On the bench: A-4F 1/32 Hasegawa

Just deployed: F6F-5N Hellcat Nightfighter 1/48 Eduard

Up next: A6-E Intruder 1/48 Revell

  • Member since
    November 2008
  • From: Zephyrhills,FL
Posted by daddy1 on Wednesday, May 4, 2011 9:17 PM

Scorpiomikey

Awesome, cheers for the help guys. I did see one peice of video of an F-15 refueling and the boom operater drew a few pictures on his wing before he got it to connect. Looked quite nasty.

 Imagine what it would be like , in rough air , on an aircraft where the IFR is in front of the windscreen , such as the A-10 or B-58. To see that big , round chunk of aluminum hovering around in front of your face. At least the Navy and Marines have stuck with the probe and drogue method of air refueling. Maybe why. 

 Like I said those boomers do a very difficult task. In all kinds of weather, day or night. They also have one of the most panoramic views out of an airplane window.  Got to see Yosemite National Park from the boomer station, on a KC-135 orientation flight out of Castle AFB after I came back from my tour with the 18th . Simply beautiful. 

 Howard 

http://whlswngsthngs.shutterfly.com/


  • Member since
    March 2010
  • From: New Zealand
Posted by Scorpiomikey on Wednesday, May 4, 2011 6:22 PM

Awesome, cheers for the help guys. I did see one peice of video of an F-15 refueling and the boom operater drew a few pictures on his wing before he got it to connect. Looked quite nasty.

"I am a leaf on the wind, watch how i soar"

Recite the litanies, fire up the Gellar field, a poo storm is coming Hmm 

My signature

Check out my blog here.

JOIN OUR COMMUNITY!

Our community is FREE to join. To participate you must either login or register for an account.

SEARCH FORUMS
FREE NEWSLETTER
By signing up you may also receive reader surveys and occasional special offers. We do not sell, rent or trade our email lists. View our Privacy Policy.