Sorry guys for that double post of mine 
Tigerman - Get your wife a Panzerjager for her birthday and yall can build togther Back to reality, this kit is packed full of stuff most being the interior and the gun. The interior must have two sprues of parts and the gun has three. Very intricate looking gun. should be fun.
Bob - Thanks. Nice work so far. It can be a pain but your smart to get all of those wheels out of the way. Thats my least favorite part of a build but it has to be done.
Nate - Thanks. And you, great work so far. The track looks great! I would leave it as is, dont think you should remove any links. Have seen a lot of pictures that the vehicle has a lot of sag. I think it is perfect.
Terry - That thing is going to be tiny. Finished a 1/35 one for the marder madness and thought it was on the small side. Will be fun to watch this one ome togther.
Ben - These panzer I and variants are small thats for sure. Have built a couple of the older PZ I dragon kits but not with an interior. Care is the word with these!
Nice work on your Marder. Did you ever decide for sure if you were going to leave the hatchs open too see the interior?
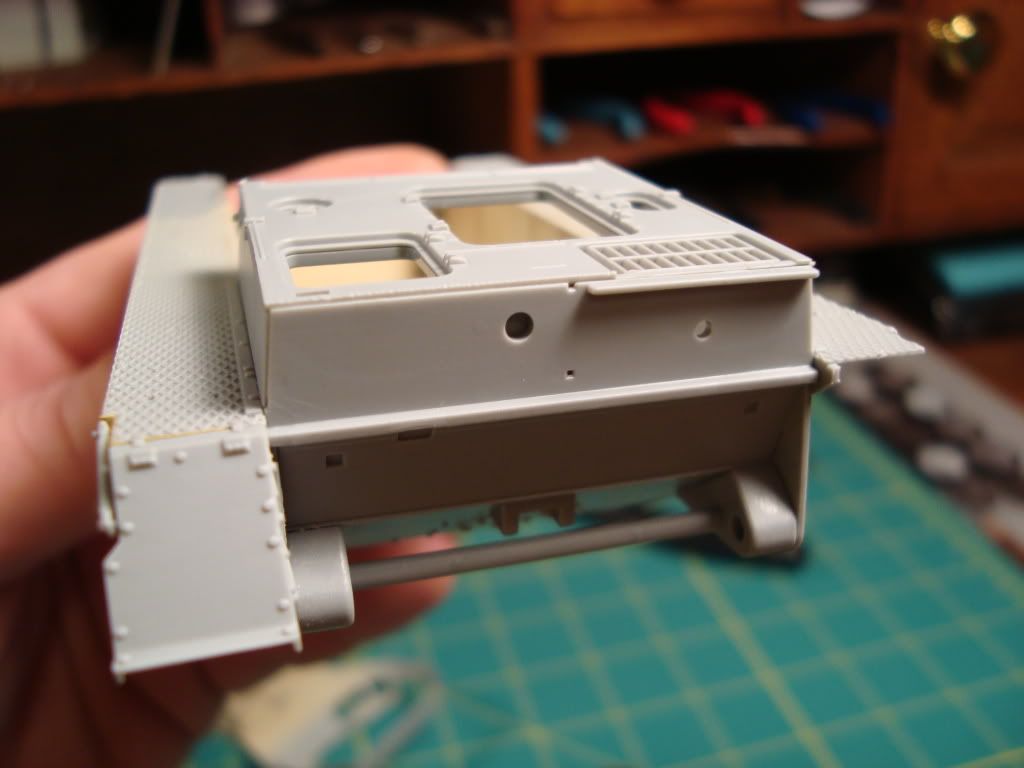
Had problems with this build last night no fault of the kit, it was all me. All parts fit great and I would dry fit and get comfortable with the parts but when I went to glue everything just went to  The worst part and this I do find some fault in the kit, there is a bar at the rear of the tank and the parts that hold it into place did not have the holes drilled all the way threw. It would be an easy fix if one would drill the holes BEFORE gluing the pieces that hold it in place on. Well I glued them on then descovered what I had done about 30 minutes after glueing so spent a lot of time prying the parts off and cleaning them up then redoing . Luckly everything went well. This is the bar I'm talking about.

Today things went much better, just a bad day yesterday I guess, in order to get the rear plate on had to build the engine cover so that I could ensure evrything was lined up correctly.
Few other small parts were put on and then went to painting the interior. Think it still needs to be a little more worn.
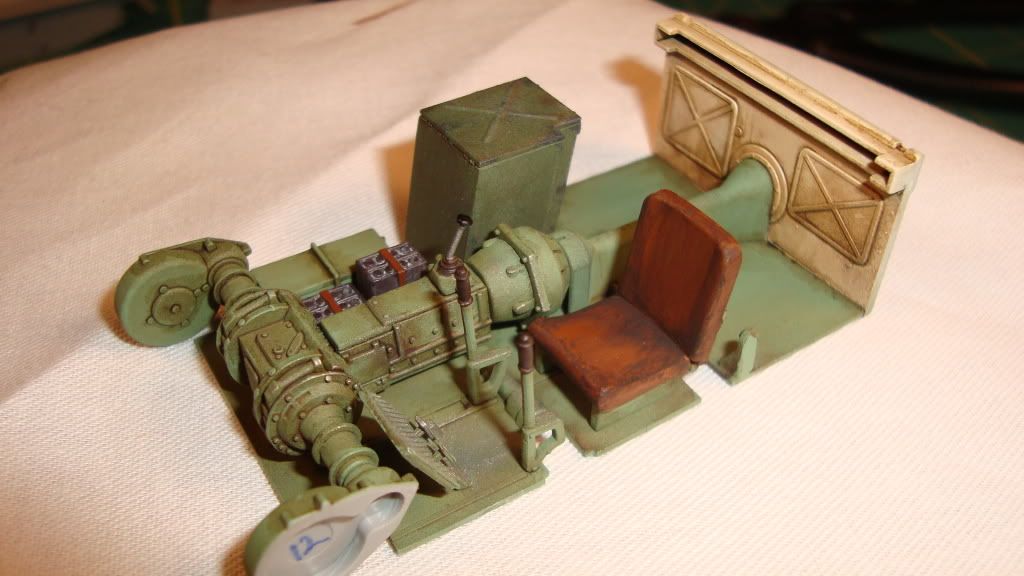
Also have the hull interior painted and weathered it's just waiting for the interior to drop into it. Thats it for now.....More to come.