SEARCH FINESCALE.COM

Enter keywords or a search phrase below:

Made In USSR GB

61749 views
430 replies
1 rating 2 rating 3 rating 4 rating 5 rating
Dre
  • Member since
    June 2007
  • From: here, not over there
Posted by Dre on Saturday, June 4, 2011 8:31 PM

bsyamato, that's some great scratchbuilding going on.  I'm definately watching this with interest.

Will post pics of my progress soon.

  • Member since
    October 2008
  • From: italy
Posted by bsyamato on Saturday, June 4, 2011 8:27 PM

cockpit updates

at the end turn on the analogic instruments version to complicate things Cool

then the early version of foxhound.

lots of test fitting are needed, heres the progress

i can assure that not maniacal 100 % ip reproduction but is fairly accurate.. as possible for me Hmm

that's all, here is about 3:30 of night .. goodnight

  • Member since
    February 2011
  • From: San Antonio
Posted by MAJ Mike on Saturday, June 4, 2011 9:26 AM

Dre

Way over the horizon = sneaking up on you from the rear.    Just wait and let it catch up with you instead of chasing it.Wink

Hmmmm, "Zen and the Art of Model Building".  I like it.  I shall now go and become one with myT-62A. Big Smile


 "I'd "I'd rather be historically accurate than politically correct."

"Sic gorgiamus allos subjectatos nunc!"

  • Member since
    October 2008
  • From: italy
Posted by bsyamato on Saturday, June 4, 2011 6:13 AM

castelnuovo

All right, my stash has arrived and in it was this bad boy.

http://i405.photobucket.com/albums/pp140/softrun/003.jpg

So far it looks like this

http://i405.photobucket.com/albums/pp140/softrun/002.jpg

Cheers...Toast

wishing to improve my veichle skill i'll steal some tips from yuo and mike Pirate

  • Member since
    July 2008
  • From: Vancouver, the "wet coast"
Posted by castelnuovo on Saturday, June 4, 2011 2:14 AM

All right, my stash has arrived and in it was this bad boy.

So far it looks like this

Cheers...Toast

  • Member since
    October 2008
  • From: italy
Posted by bsyamato on Friday, June 3, 2011 7:01 PM

foxhound (and not only)  updates:

start to add consolles

on the picture a fantasy figure that will explain after

carefully cutting excess plastic, the cockpit fit good

tha's all for the mig.

I decided to put the foxhound in a basic diorama, just as showed in some russian parade to public.

I'll just put it in a concrete base, probably some civilia that look where putin put people moneys Big Smile

and to survey the mig put a police woman , here some good reference

So.. i don't have a set of russian police then some scratch needed.

To scratch a body in 1/72 is not so impossible, but faces are another question , then i'll use pieces frome the above elven fantasy figure from caesar miniatures

after some cut (included elves ears) take measures to scratch the legs from evergreen rod, really good to carve


and now thats really all, i do this waiting the glue dry on the cockpit

Dre
  • Member since
    June 2007
  • From: here, not over there
Posted by Dre on Wednesday, June 1, 2011 12:54 PM

Way over the horizon = sneaking up on you from the rear.    Just wait and let it catch up with you instead of chasing it.Wink

  • Member since
    February 2011
  • From: San Antonio
Posted by MAJ Mike on Wednesday, June 1, 2011 11:57 AM

Dre

Ah, grasshopper...  you're half-way there! 

Heh!  No, I think half-way-there is 'way over the horizon for me. Wink


 "I'd "I'd rather be historically accurate than politically correct."

"Sic gorgiamus allos subjectatos nunc!"

Dre
  • Member since
    June 2007
  • From: here, not over there
Posted by Dre on Wednesday, June 1, 2011 11:47 AM

Ah, grasshopper...  you're half-way there!


  • Member since
    February 2011
  • From: San Antonio
Posted by MAJ Mike on Wednesday, June 1, 2011 10:59 AM

Dre

MAJMike- thanks, but all it requires is a really tiny paintbrush and patience.

Well, I've got the paint brush.


 "I'd "I'd rather be historically accurate than politically correct."

"Sic gorgiamus allos subjectatos nunc!"

Dre
  • Member since
    June 2007
  • From: here, not over there
Posted by Dre on Wednesday, June 1, 2011 10:09 AM

bsyamato, I really can't say whether Trumpeter got the shape right or not.   Honestly, I know nothing about the MiG 3, other than this kit was on-sale and I wanted a Soviet interceptor...  something to go with all of my Bf 109's.

MAJMike- thanks, but all it requires is a really tiny paintbrush and patience.

I got a little more cockpit work done last niight- I finished the over-all detail painting, made a Milliput "seat cushion" to cover up the sink hole in the bottom of the seat and...  that's all.  I still need to source some seatbelts, paint the "seat cushion", and give it all a wash and final weathering before closing the fuselage.   Roughly 12 hours in the cockpit so far...

The "seat cushion"...  I tried to shape it like someone had put some butt-hours on it.

  • Member since
    October 2008
  • From: italy
Posted by bsyamato on Wednesday, June 1, 2011 4:50 AM

Dre giood looking mig! 

I know that trumpeteer sometimes have not correct shapes of shapes, this mig is correct?

  • Member since
    February 2011
  • From: San Antonio
Posted by MAJ Mike on Sunday, May 29, 2011 7:20 PM

Dre: Amazing detail work!!


 "I'd "I'd rather be historically accurate than politically correct."

"Sic gorgiamus allos subjectatos nunc!"

Dre
  • Member since
    June 2007
  • From: here, not over there
Posted by Dre on Sunday, May 29, 2011 7:12 PM

I finally got some time to post a pic of what i'm woirking on for this GB....

Big box, odd shaped aircraft inside it.   Apparently, the MiG 3 was all motor...  doesn't look like it has much longitudinal stability!

The Office was worked up earlier in the week...  pretty spartan for now.

I was able to get to painting today.   The instruction book calls for "light grey" paint where it's not painted in something else...  I used MM acrylic US Haze Gray because it is the lightest non-RLM color I've got at hand.

I've begun to detail paint the various things inside the pilot's office, but still a but more work to do.  I'm going to add a few random Eduard pre-printed placards here and there and some wiring back to the radio set to liven things up.  Accuracy, schmaccuracy.Wink

So that's where this stands for now.

  • Member since
    February 2011
  • From: San Antonio
Posted by MAJ Mike on Saturday, May 28, 2011 7:43 PM

Looking good!!


 "I'd "I'd rather be historically accurate than politically correct."

"Sic gorgiamus allos subjectatos nunc!"

  • Member since
    October 2008
  • From: italy
Posted by bsyamato on Saturday, May 28, 2011 7:35 PM

MAJ Mike

bsyamato: actually, for the grab rails I just used a pair of needle-nosed pliers.  I used the plastic kit rails as a pattern.  Worked much better than I had expected.  I'll try it again on future builds.  I'm starting to see each build as an experiment.

i have no rails Tongue Tied need to find something other ,

Started the cockpit scratchin:

fixing main bulkheads

test fittings with seats for right height for the floor

3 mm was needed to reach the right result

and fixed the middle bulkheads,

actually this system allow me to easy work on the cockpit, better was if i let the rear bulkhead not glued Bang Head

naturally some references needed, in particular files found on airwar.ru

that's all for the mig... and this

the little harke Big Smile can i add it ozzman?

  • Member since
    February 2011
  • From: San Antonio
Posted by MAJ Mike on Saturday, May 28, 2011 9:51 AM

bsyamato: actually, for the grab rails I just used a pair of needle-nosed pliers.  I used the plastic kit rails as a pattern.  Worked much better than I had expected.  I'll try it again on future builds.  I'm starting to see each build as an experiment.


 "I'd "I'd rather be historically accurate than politically correct."

"Sic gorgiamus allos subjectatos nunc!"

  • Member since
    October 2008
  • From: italy
Posted by bsyamato on Saturday, May 28, 2011 9:42 AM

thanx for comments Big Smile 

Mike i'm good with plastic or other but my metal skill is lowest (good on heavy metal playng but this is another story) than your, actually missing a sort of tool like your, the metal bender you have on the workbench.

Last night started to plant cockpit bulkhead, and planning as i can scratch the tub to easily paint.

My surprise the front well is too deep!! Firts time i see a similar thing Tongue Tied

Waiting to do more progress for posting pictures.

Ozzman i started when i was teenager a scratchbuilt of a mi-10 harke , don't remember the scale but probably 1/400 or something like that, can i add on my builds here?

  • Member since
    February 2011
  • From: San Antonio
Posted by MAJ Mike on Friday, May 27, 2011 5:13 PM

Good idea.  Thanks.


 "I'd "I'd rather be historically accurate than politically correct."

"Sic gorgiamus allos subjectatos nunc!"

Dre
  • Member since
    June 2007
  • From: here, not over there
Posted by Dre on Friday, May 27, 2011 5:07 PM

I like your outlook regarding flaws and experiments- that's how all my builds seem to go.

"let's try this" = strip the paint and pull out Plan B.

If I may suggest it, I'd use a smidgen of putty around the grab rails to simulate welding beads..  it's Russian, so it doesn't have to be pretty!Smile

  • Member since
    February 2011
  • From: San Antonio
Posted by MAJ Mike on Friday, May 27, 2011 4:28 PM

Dre

Some of the other guys have mad skillz, I'm an assembler!

Does that T-62 have a bunch of parts to build different versions?  The T-55 has different cupolas, hatches and lights to make different versions...

Assembler, I like that!

No, this is a kit that has been in my stash for about 25 years.  I decided I needed to build some from the stash and back off buying new kits.  This T-62A is pretty elementary.  I wanted to try making my own brass grab rails and I'm using some PE on it.  Every kit is an experiment, every build has its flaws.


 "I'd "I'd rather be historically accurate than politically correct."

"Sic gorgiamus allos subjectatos nunc!"

Dre
  • Member since
    June 2007
  • From: here, not over there
Posted by Dre on Friday, May 27, 2011 4:21 PM

Some of the other guys have mad skillz, I'm an assembler!

Does that T-62 have a bunch of parts to build different versions?  The T-55 has different cupolas, hatches and lights to make different versions...

  • Member since
    February 2011
  • From: San Antonio
Posted by MAJ Mike on Friday, May 27, 2011 4:11 PM

Dre

MAJMike-that T-62 is looking good.  Those Tamiya T-series kits practically build themselves once you open the box.

Its a good thing.  My skills aren't at the level of you guys.


 "I'd "I'd rather be historically accurate than politically correct."

"Sic gorgiamus allos subjectatos nunc!"

Dre
  • Member since
    June 2007
  • From: here, not over there
Posted by Dre on Friday, May 27, 2011 3:33 PM

bsyamato, that looks like a fun build. 

Cracked open the Trumpeter MiG-3 last night, built up the sparse cockpit...  if I can get some free time this weekend, I'll try and get the interior painted and closed up.  This kit is pretty good so far, relatively few parts for a 1/32 A/C and the deep surface detail ought to hold a wash quite well.  I haven't decided to go with the white/grey scheme or the forest green/grey scheme... those big red arrow decals (white/grey scheme) look a little daunting.

MAJMike-that T-62 is looking good.  Those Tamiya T-series kits practically build themselves once you open the box.

  • Member since
    October 2007
  • From: Scotland
Posted by Milairjunkie on Friday, May 27, 2011 6:01 AM

MAJ Mike

You airplane guys continue to amaze me with the amount of detail you can pack into a cockpit.  Very nice!!

Likewise you land ship guys with your dirt & rust!

Tags: Tu-160
  • Member since
    February 2011
  • From: San Antonio
Posted by MAJ Mike on Thursday, May 26, 2011 6:29 PM

bsyamato:  My goodness!!!  The decal sheet alone would cause me to go crazier than I am now.  I'm much too old and lack the fine motor skills for that kit.  Its going to be sweet. I'm looking forward to more of your WIP photos. Big SmileWow


 "I'd "I'd rather be historically accurate than politically correct."

"Sic gorgiamus allos subjectatos nunc!"

  • Member since
    October 2008
  • From: italy
Posted by bsyamato on Thursday, May 26, 2011 6:23 PM

Mike this 62 seems have lots of metal in Yes great

Milairjunkie some piece to glue again on the little bomber Big Smile 

then little bomber there and a little fighter here:

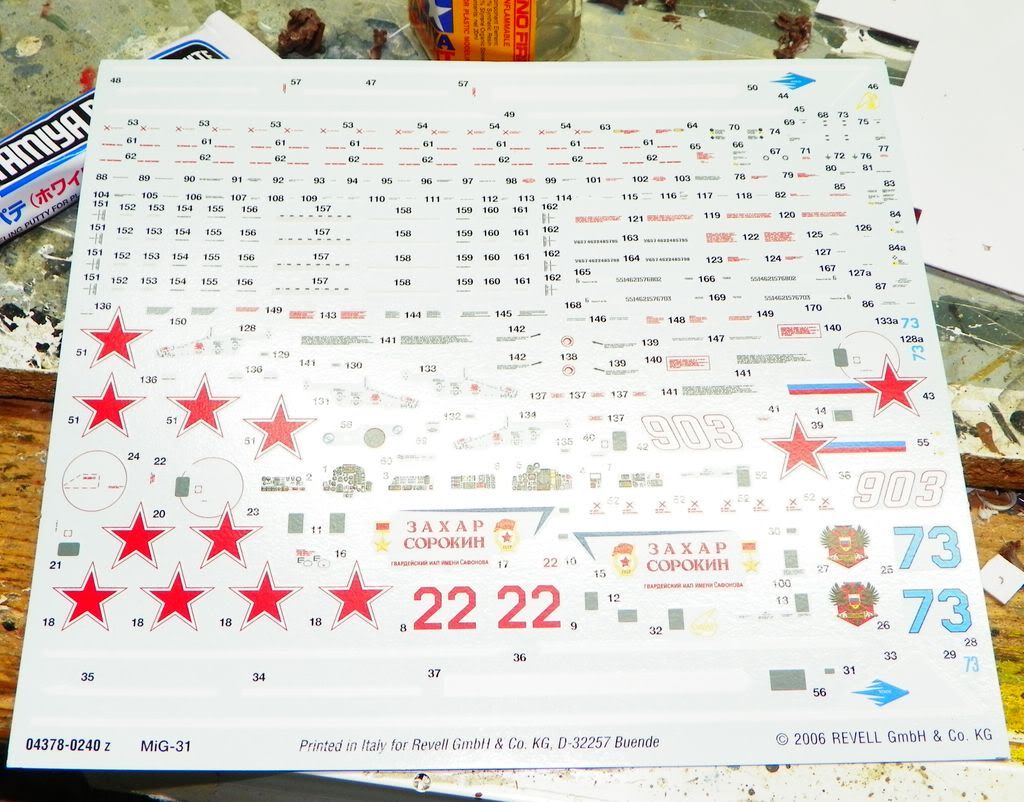
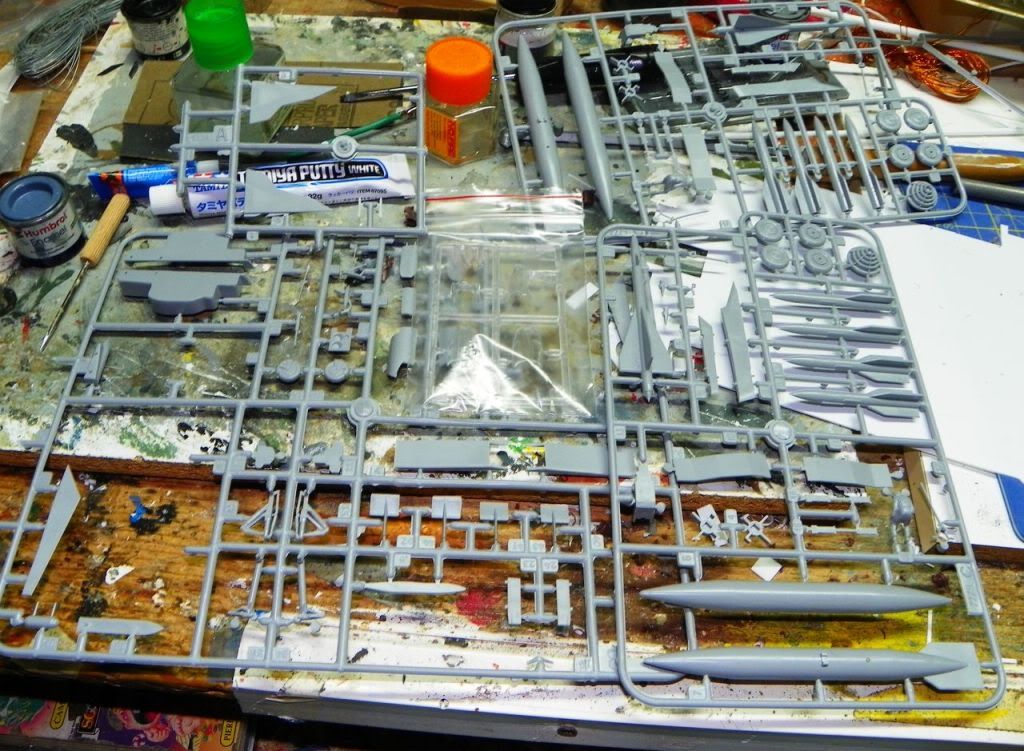
This is my lots of raw pieces maded by zvezda and reboxed from revell with an impressive decal sheet, printed in italy. At the end revell put only the box Propeller

at least the kit seems correct, surely better than the old revell ,that was completely wrong in all aspects, but was maded before the berlin wall break!
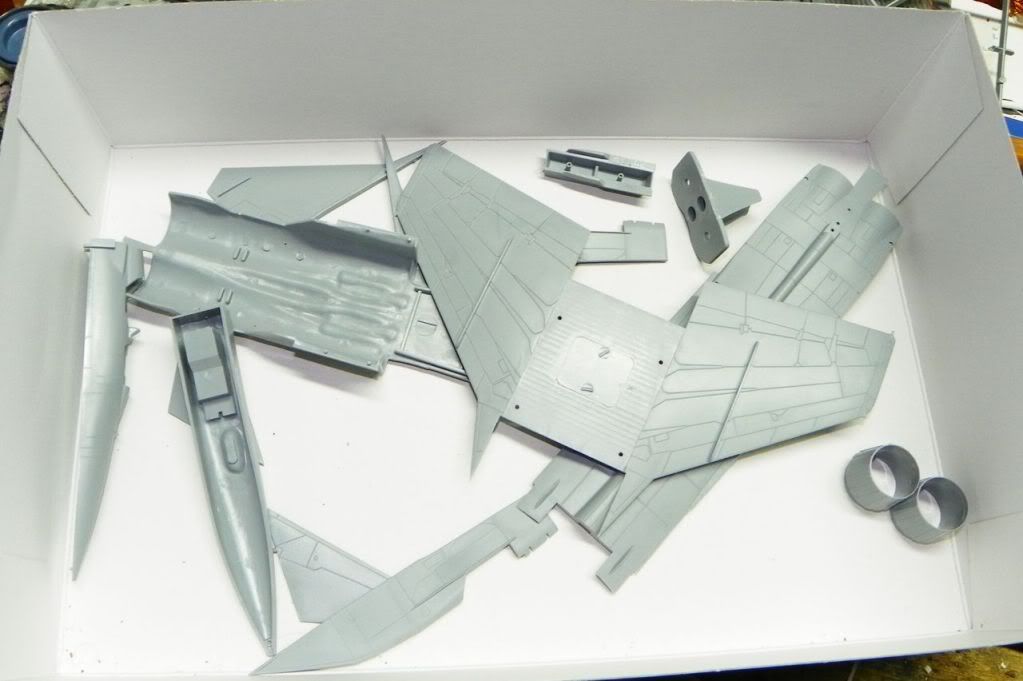
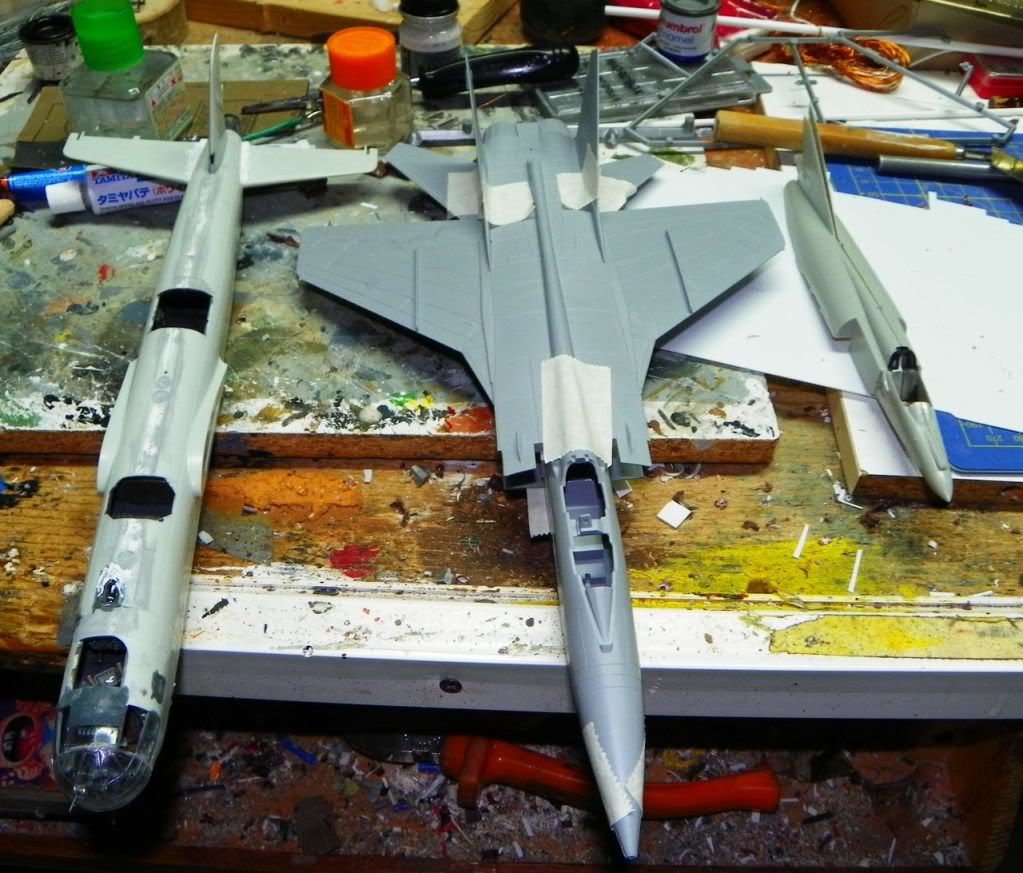
a confrontation with other 72 kits , grief and the super etendard
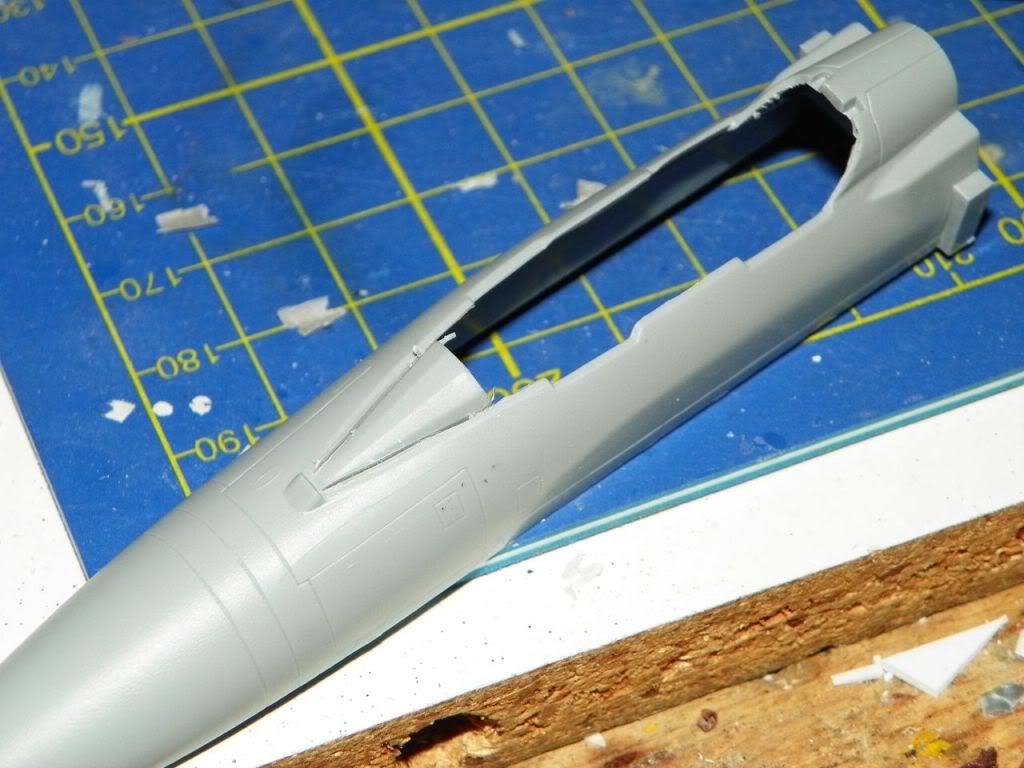
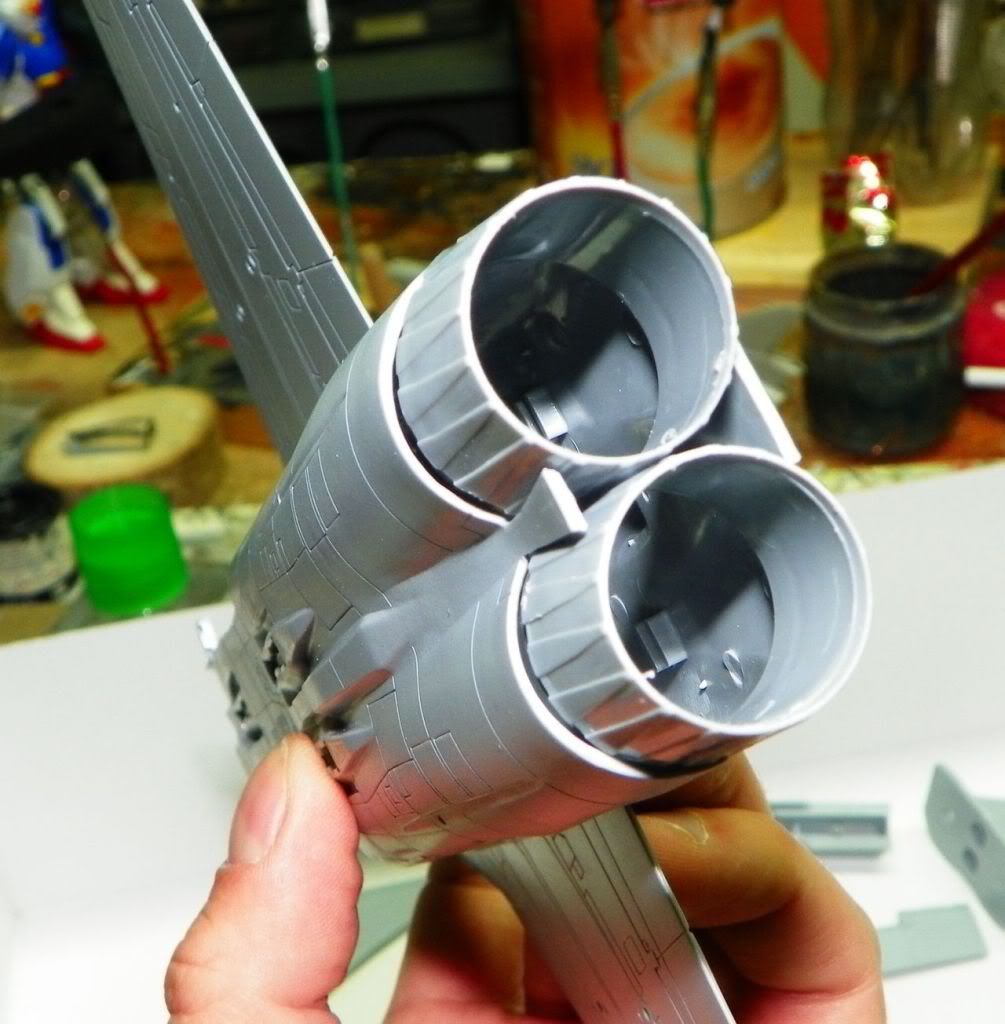
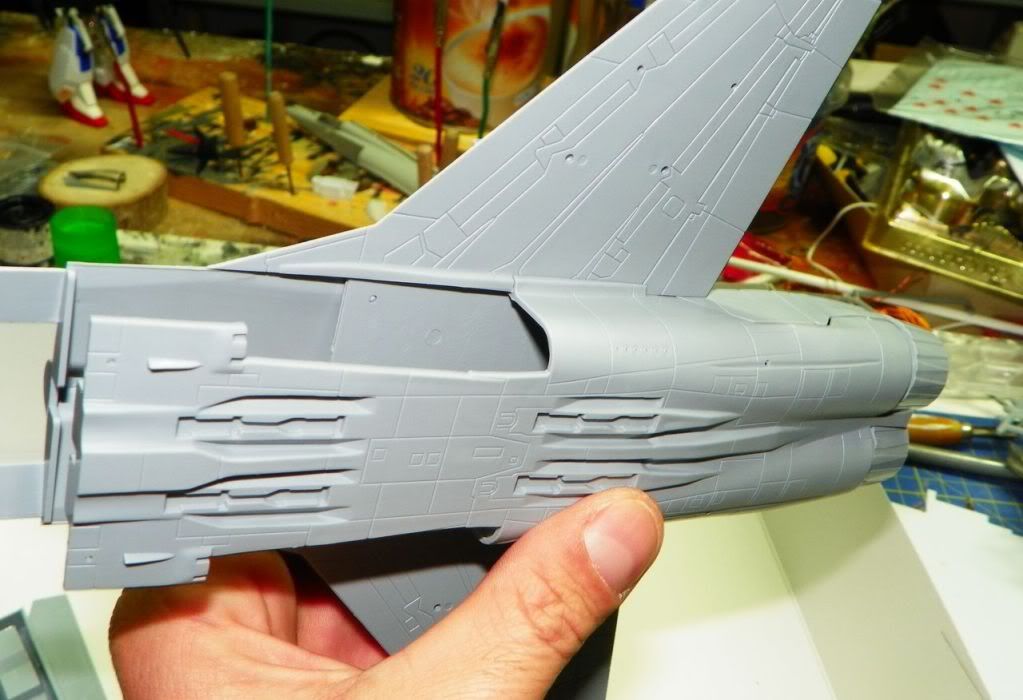
details are very deep, not as matchbox kits but almost
and the only aftermarket pieces tha i use, ejection seats, these k-36 from pavla
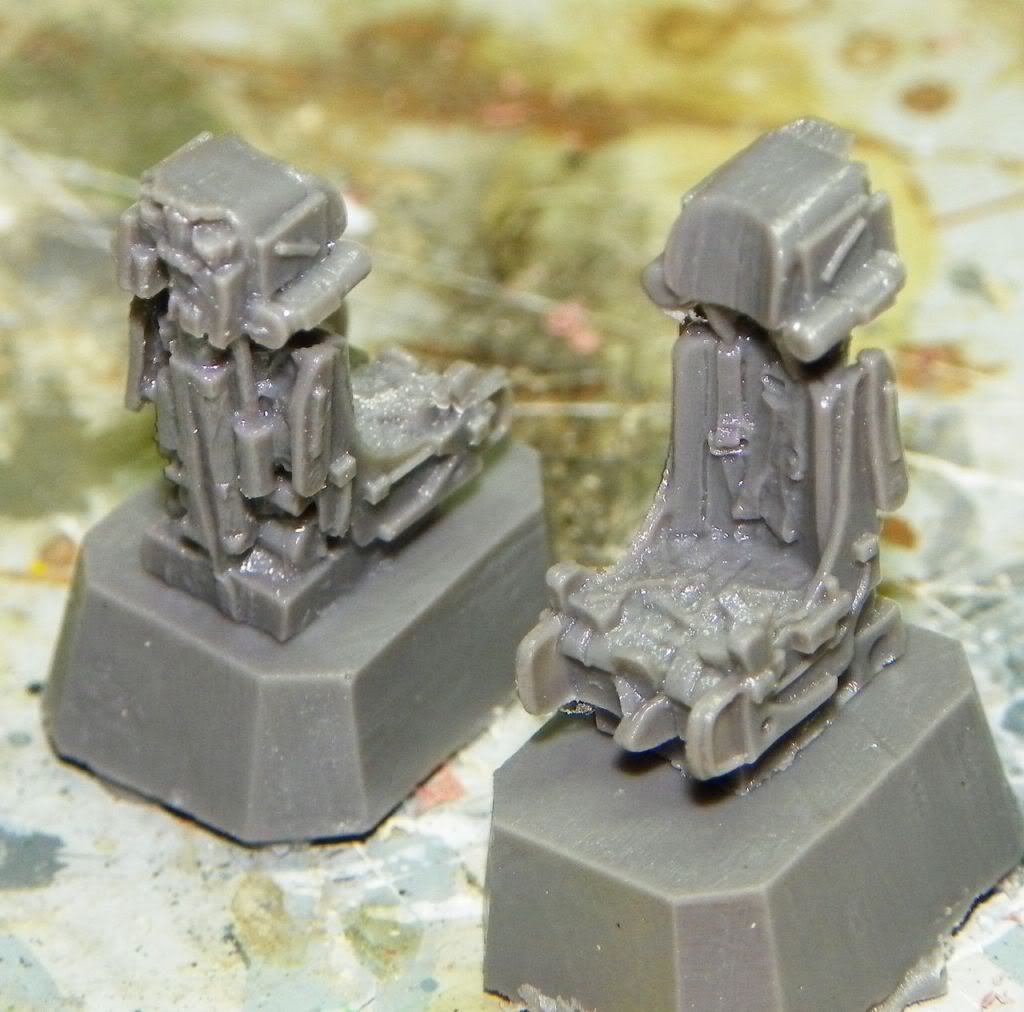
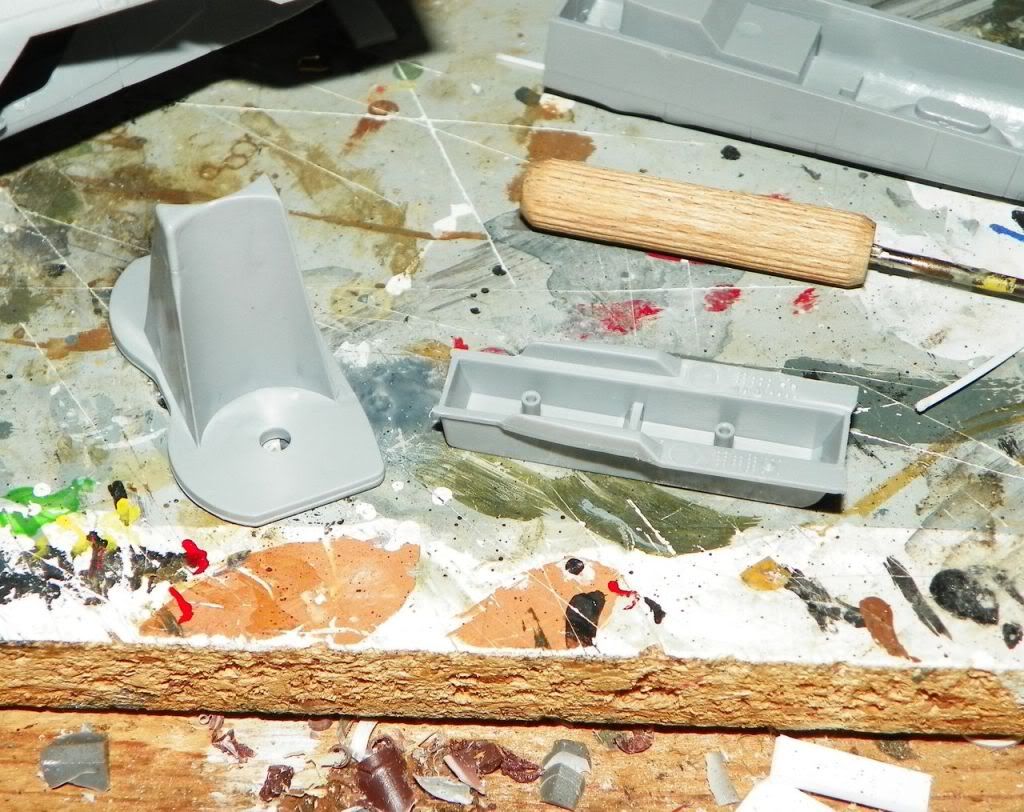
Started something about the cockpit, need to scratch all , the original are very bad Dead the ip are from decals... 

trowed away all the original pieces (ok i put it in the unused piece storage... Whistling never put pieces in the recycle , all pieces can be usefull in future)
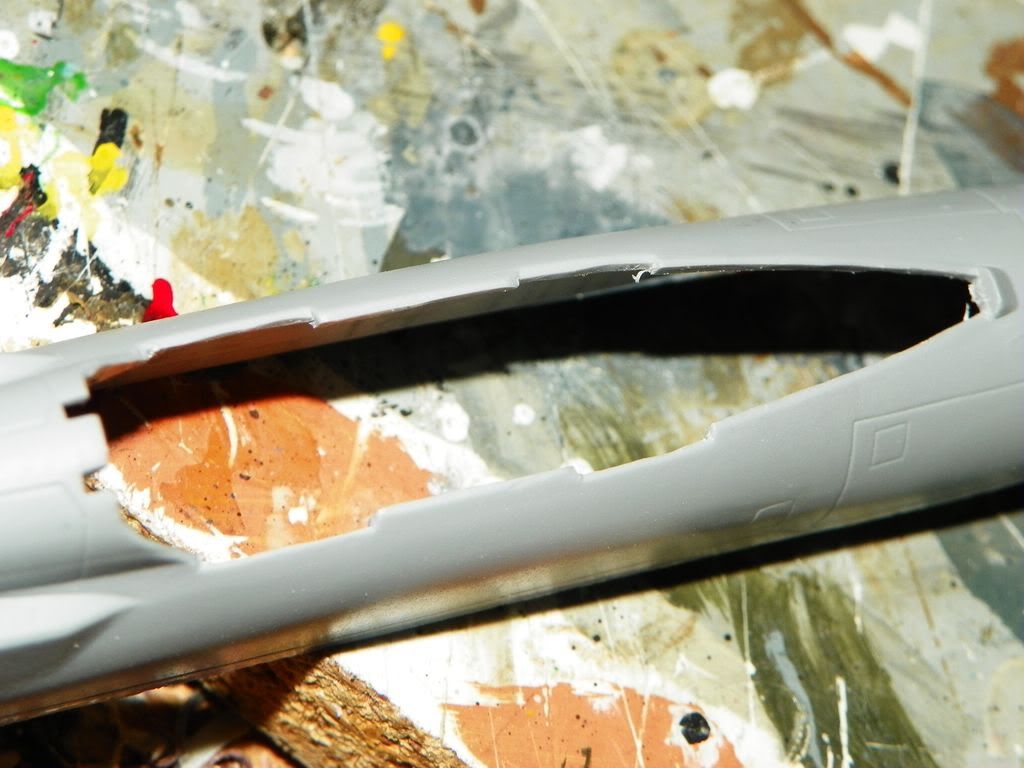
seats started to paint with other two for the mig-29 ub (another two copy for the su-34 probably i add here after)

Works i planned , over the cockpit scratch, is to heavy improvements on nozzles and afterburner chamber, that more than in others plnes are really visible, well , missiles, gears etc etc etc ... and put it in a diorama, something like a pubblic exposition and "some police" as guard Angel

PS

Civilian subject are ok for this GB?


  • Member since
    February 2011
  • From: Bent River, IA
Posted by Reasoned on Thursday, May 26, 2011 2:33 PM

MAJ Mike

You airplane guys continue to amaze me with the amount of detail you can pack into a cockpit.  Very nice!!

You armor guys do the same thing inside the tank....... right?   Wink

Science is the pursiut of knowledge, faith is the pursuit of wisdom.  Peace be with you.

On the Tarmac: 1/48 Revell P-38

In the Hanger: A bunch of kits

  • Member since
    February 2011
  • From: San Antonio
Posted by MAJ Mike on Thursday, May 26, 2011 1:31 PM

T-62A: WIP photos

Using a Barrel Depot gun tube and selected fiddley bits from Eduard.

Wanted to try to make grab rails from brass stock  Some flaws, but they look better than the plastic kit rails.

Not too bad a result for my first try.  Easier than I had thought and looks much better.


Aluminium foil to pose as dust cover on cannon mantlet.


The effort continues.  More detail to add to search lights, etc.

Thanks for looking.


 "I'd "I'd rather be historically accurate than politically correct."

"Sic gorgiamus allos subjectatos nunc!"

  • Member since
    February 2011
  • From: San Antonio
Posted by MAJ Mike on Thursday, May 26, 2011 12:01 PM

You airplane guys continue to amaze me with the amount of detail you can pack into a cockpit.  Very nice!!


 "I'd "I'd rather be historically accurate than politically correct."

"Sic gorgiamus allos subjectatos nunc!"

JOIN OUR COMMUNITY!

Our community is FREE to join. To participate you must either login or register for an account.

SEARCH FORUMS
FREE NEWSLETTER
By signing up you may also receive reader surveys and occasional special offers. We do not sell, rent or trade our email lists. View our Privacy Policy.