SEARCH FINESCALE.COM

Enter keywords or a search phrase below:

The OFFICIAL Panzer III and Its Variants GB

298283 views
2308 replies
1 rating 2 rating 3 rating 4 rating 5 rating
  • Member since
    March 2006
  • From: Right Side of a Left State
Posted by Shellback on Friday, September 16, 2011 11:11 PM

Yes it is . Must be a good story on how it got where it is .Yes

  • Member since
    September 2009
  • From: Rugby, England
Posted by Hinksy on Saturday, September 17, 2011 9:14 AM

Chazzer

Hey Guys, I've been doing a bit of modeling, well maybe puttering. I picked up some goodies from the hobby store:

http://i1204.photobucket.com/albums/bb404/SChazzer/020-1.jpg

The tracks were some from the owners spares box. Got them for $10.00 and the PE stuff for $12.00. Since I have been giving him alot of business he floats me some good deals. I'm hoping to use some of the PE on the Stug "B". Mainly the mud flaps and tool clasps. A good idea or no? The magic tracks are so COOL. I like the way they go together with liquid cement and are pliable for a few minutes.

I've done a bit of building. I still have lots to do. Here is my progress:

http://i1204.photobucket.com/albums/bb404/SChazzer/015.jpg 

http://i1204.photobucket.com/albums/bb404/SChazzer/012-1.jpg

I found a cool Pict:

http://i1204.photobucket.com/albums/bb404/SChazzer/FLES1.jpg

 I've been having some PC issues. I do hope this posts.

http://i1204.photobucket.com/albums/bb404/SChazzer/remoteImage-12-1.gif

Scott

Hey Scott - no obvious problems with the download Yes

Nice photos - thanks. It's amazing how different we view things in our respective countries - in the UK if the wind can blow the dustbins (garbage cans) over then it's a storm. In the USA if the wind can blow down trees taking power lines with them and cause floods it's a storm! LOL!

That final photo is great! A WWI tank! Brilliant!

I was looking at your first photo of what you had bought from your LHS and thought you had bought separate Magic Tracks - then I read your text! God, I wish Dragon would start selling them on their own!

I had a GREAT time building that Tamiya StuG III B and I know Andy built it too. We both had great fun with it and it rates as an all time great kit from any manufacturer imo. It's brilliant. I love it when Tamiya actually take the time to put a bit of PE and a metal barrel into the kit as that sometimes makes the difference on me buying it or not! They would usually have you leave the air intakes uncovered which is obviously very wrong!

My GB entry (Pz. III Ausf N) has the same PE and metal gun barrel as it's the same 75mm Kwk gun which is mainly why I went for it - plus I wanted that Winter scheme too and being a newer kit it's nicely detailed. If you look at the picture below you will see the conduit wiring from the loudhaler speakers and Notek light - I recommend adding the conduit wiring detail as it would have been very visible and it's easy to do. Just run the wire from the speakers/Notek to the rear of the headlights. 

Here's my StuG III B from a while back (I loved this kit):

I know it's not on the instructions but on the two generic Panzer III sprues that contain the wheels you will find two triangular spare whel holders that can be mounted anywhere - Andy and I both mounted them on the rear deck and they look great - you will get two spare wheels with different hubs so you can tell them apart from the other wheels. There are also some long 'pin' things on the sprues that fit in the holes on the hubs. See what you think.

Here:


Best of luck with your build and I'm sorry if you have planned to do all the stuff that I've just mentioned anyway! The spare wheels do look very nice imo.

Take care and keep us posted,

Ben Toast 

NOTE - A quick question for you all: I've been watching my Band of Brothers box set again and watched the 3rd episode called 'Carentan, this morning. During the fighting in the town the Germans bought out a small wheeled 'gun' but it bidn't have a projectile fired from a barrel like an 88 etc - it had an explosive shaped like a bomb dropped from an airplane and it had fins. This was mounted at the end of a pipe thingy and when fired it looked like it had very low velocity and dropped in front of Sgt. Lipton (Donnie Wahlberg), sending him flying! When the medic attended to him, Lipton looked at his combats and the blood and hole in his crotch area and he obviously feared the worse! What was that gun the Germans had? I'm sure that I've never seen anything like it?

On the Bench - Dragon Pz. IV Ausf. G (L.A.H.) Yes

Your image is loading...


  • Member since
    March 2006
  • From: Right Side of a Left State
Posted by Shellback on Saturday, September 17, 2011 10:07 AM

Sounds like a Panzerfaust , but i dont recall the scene in the program

  • Member since
    September 2009
  • From: Spring Branch, TX
Posted by satch_ip on Saturday, September 17, 2011 10:18 AM

Ben, I think it is a Puppchen. From http://www.lonesentry.com/articles/rocket/index.html

The Püppchen ("Dolly"), a carriage-mounted rocket launcher with breechblock, fires the same 88-mm rocket that is used with the Ofenrohr. The breech prevents any flash to the rear while firing is in progress. To lower the Püppchen's silhouette, the wheels may be removed and the piece left standing on two sled-like rests. In preliminary positions the ground is dug out so that the horizontal section of the lower carriage and trail will lie below the surface. For an all-around prepared position, circular trenches with an inner radius of about 2 feet are prepared. The barrel is left just clear of cover, as is done in the case of the preliminary positions. The lower carriage is dug in and the trail wedged, so that the piece can be fired at an angle of 180 degrees. Positions are prepared in defilade or on reverse slopes, and are well camouflaged. In general, enemy doctrine governing the preparation of positions and the conduct of fire is similar to that for the Ofenrohr, except that only two projectors of the Püppchen type are considered necessary for satisfactory interlocking fire.

The maximum effective range of the Püppchen is considered to be 220 yards, although badly dispersed fire up to 275 yards is possible. For this reason the Püppchen, like the Ofenrohr, is employed in the foremost infantry positions. For added protection from artillery fire, the launcher may be detached from its carriage and removed to a shelter some distance away from the prepared position. Alternate positions are prepared only when the terrain restricts the field of fire and provides good cover for the maneuvering piece. In such terrain each position is constructed so that the Püppchen can be run in and out on wheels. Since the Püppchen is harder to conceal than the Ofenrohr, the Germans believe that it is necessary to furnish the larger weapon with antitank protection in the form of obstacles, natural or artificial, supplemented by mines. Because the Püppchen's carriage is not strong enough to stand up under motor towing at high speed, and since horse-draft sacrifices valuable time and involves the problem of replacing animal casualties, the Püppchen generally is transported on trucks and is used only in positional warfare.

[The Püppchen is a recoilless weapon firing the same ammunition as the Ofenrohr. It has no rearward flash and has a greater range than the Ofenrohr.]
The Püppchen is a recoilless weapon firing the same ammunition as the Ofenrohr. It has no rearward flash and has a greater range than the Ofenrohr.

The 88-mm rocket used in both the Ofenrohr and the Püppchen is heavy enough to cause ammunition-supply difficulties in battle. (A box of three rounds weighs 24 pounds.) This is why the Germans try to build up supplies in all main and alternate positions.


  • Member since
    September 2009
  • From: Rugby, England
Posted by Hinksy on Saturday, September 17, 2011 12:35 PM

Hi guys,

Saturday 17th September weekend Panzer III Ausf. N WIP update:

First off re the odd weapon I mentioned: Cheers for looking into it for me Satch and others but I've been 'reliably' informed that it was called a 'Stielgranate 41'. It was a standard 37mm a/t gun, fitted with a hollow charge grenade, to give an obsolete weapon an extra kick (apparently it was pretty crappy and proved ineffective against Allied Armour). Sorted (maybe) Cool

Onto my build:

I got the Winter 'Splinter' Cammo applied. It came out pretty well - I'm really pleased so that's all that counts really. My AB and my AB skills aren't the best so it's all good. I'm really starting to get the hang of the AB now and I'm finding myself wanting to upgrade! A good idea for a 'family' Christmas Present maybe?

I used 'White Tack' (same as 'Blu Tack' but it apparently doesn't mark your wallpaper when you use it to stick posters up or something like that) to mark out the areas that were to be sprayed white. I tried a tester of Gunze 'Off White' but didn't like the outcome so I used good old Tamiya Flat white applied heavily thinned to aid with the pre-shade effect, I didn't want the white looking too bright. After washes and weathering it's going to look nothing like white anyway - probably a mucky very pale grey!

The only bit I didn't like was the top of the stowage bin on the back of the turret but I'm planning a Milliput 'cloth cover' to drape over the lid of the bin so it won't be seen anyway. It's ok but I hit it a bit hard and it looked a bit messy. Everything else was done with masking except the lower hull walls which I did freehand. They'll be nearly totally hidden anyway.

I had to think where the decals were going to be so had to really careful about that. I hope they take ok as my decaling has been pretty crappy lately and if I rip the number or the big Mammoth that goes on the back of the stowage bin I'll be screwed! Why can't they give us two sets of decals? Everyone mucks up occasionally and they must know that - I can't imagine that they are expensive?

Here we go - todays work (good fun):

Stowage ready to be weathered tomorrow and tools primed and ready for painting tomorrow:

I found this handy sprue of Dragon German Parts which might add well to the stowage - there's a perfect selection of kit aerials too. The Magic Tracks are from the SIG 33B and I might fix a small length of them to the outer armour in front of the drivers section between his vision slot and the lower MG hole:


Masked:


Here we go: Big Smile


I've decided that I'm going to paint the circular air intake cover white to break up the big patch of grey on the turret top section:


OOOH! What's on TV now? Only the bridge at Remagen! I'm off!

I hope you like her guys and I'd love to hear any comments.

Many thanks,

Ben Toast 

On the Bench - Dragon Pz. IV Ausf. G (L.A.H.) Yes

Your image is loading...


  • Member since
    September 2009
  • From: Spring Branch, TX
Posted by satch_ip on Saturday, September 17, 2011 2:16 PM

Yep, Ben, that's probably it.  Your N is looking sweet. 


Satch, wishing he was in Manchester tomorrow...

  • Member since
    October 2009
Posted by PANZERWAFFE on Saturday, September 17, 2011 6:31 PM

Hell all, been busy with work and normal things around House.  Looks as if some progress was made here Yes

CHAZZ - good to hear you are recovering and that you are back to building.  The magic tracks should make a big difference, did you try them out on the sprocket to check the fit?  Sometimes you have to add a spacer in between the two sprocket and idler half's to make the magic tracks fit properly.  Thats what I had to do anyway when I put magics on a Tamiya build.  That WWI tank looks to be a British MK IV "Female" pretty cool.

ANDY - Good to see that your going to get started soon.  Sorry for my absent comment on your Pz IV, it looks AMAZING.  You are getting really good and cant wait to see what you do here!  Good to hear your getting better now.

DOOGS - Your III came out beautifully!  Color and weathering are great!  That camo job just looks outstanding!  Very well done Yes

BEN - Thats a great collection of gear when weathered will look great pilled up on the back in the rack.  Nice job!  Good start on the camo.

Good news is that it finally rain here!!! Was not for very long but it was heavy.  Its the first rain we had since I believe April?  Cant even remember?  Believe it was the third or four time for the year!


Rob

  • Member since
    March 2006
  • From: Right Side of a Left State
Posted by Shellback on Saturday, September 17, 2011 7:06 PM

Good to hear you guys got the rain Rob .Yes

Ben , that method of masking for the camo worked really well .Beer

  • Member since
    August 2006
  • From: Cygnus X-1
Posted by ogrejohn on Saturday, September 17, 2011 7:13 PM

Chazz, looks like you're off to a good start.

Ben, the camo came out great!

  • Member since
    June 2010
  • From: Austin, TX
Posted by DoogsATX on Saturday, September 17, 2011 7:21 PM

Chazzer - a friggin' tank!?!? In a hole!?!? WTH?

Ben - the -N is lookin sweet! Throwing paint is always one of my favorite parts of a build!

I know it's not a Pz.III, but I just got my Pz.IV Ausf J Last Production today:

Having just come off a Dragon Pz.IV and III, I'm kind of attuned to the parts assortment, and this kit improves upon them in a lot of areas. There's a lot of commonality, of course (between the III and IV, but especially between the IVs), but there are also several entirely new sprues and some smart fixes to some prior frustrations. For example - the turret hatch hinges. They're now one piece, on a frame, that mounts inside. Way less fiddly, no alignment issues, no installing them the wrong way (as I did on the IV-G).

The mesh schurzen are pretty amazeballs, too. Actual wire mesh. The edges are PE, but the kit has two plastic pieces that act as a folding press for bending them perfectly. Little touches like that abound. 

I know I'm Panzered out at the moment, but I may have to crank the fires on this one anyway...looks like one very, very good kit. 


On the Bench: 1/32 Trumpeter P-47 | 1/32 Hasegawa Bf 109G | 1/144 Eduard MiG-21MF x2

On Deck:  1/350 HMS Dreadnought

Blog/Completed Builds: doogsmodels.com


  • Member since
    March 2006
  • From: Right Side of a Left State
Posted by Shellback on Saturday, September 17, 2011 7:27 PM

sounds like a good kit Doogs . I have yet to purcase one of these "smart kits " .

  • Member since
    April 2011
  • From: imperial beach, ca
Posted by malone duke on Saturday, September 17, 2011 11:04 PM

alright fellas after a few disasters so far this year im finally able to show some pics.  

  • Member since
    March 2006
  • From: Right Side of a Left State
Posted by Shellback on Sunday, September 18, 2011 1:03 AM

Snazzy paint job Duke !

  • Member since
    April 2009
  • From: Carmel, IN
Posted by deafpanzer on Sunday, September 18, 2011 1:21 AM

Chazzer- It is great having you back.  WOW!  Glad you are doing OK.  I can't wait to see more of your work on the Tamiya StuG.  Like I said earlier it was one of most fun kit I have built... I swore I didn't cuss or curse during that build. 

Oh wait a minute, I did cuss... remember not to glue the periscope the interior hull yet until the near end because my piece broke few times.  Glad Ben mentioned about the spare wheel holders because it wasn't mentioned in the instructions but after checking with my reference books there were placed in the rear.

Ben- Camo job looks great... looking forward to see it weatherized next.  It will make it look so alive... Yes

Rob- Hey man!  No worries... figured you were busy building models. Big Smile  I admire how quick you can build those great looking models.  I am way too slow... but this one wasn't too bad as it took me little more than three months this time.  Glad you saw my Panzer IV... its one of my favorites now.  Thanks for the nice words! Beer

Doogs- Crap!  I really want that kit but I already brought a similar kit from Dragon thru Facebook promo without the mesh... maybe you can build it for Panzer IV GB. LOL

Malone- WOW!  I really dig the camo!  I am not kidding... is there a way you can post bigger pictures?  Remember we love pictures and it gets us excited very easily...

Also how did you paint the camo?  Silly putty or airbrushing freehandedly?

Guys- Sorry I have been absent pretty much for last few days... sinus infection. Ick!  But today I was feeling alot better finally and I took my family to a great event by Military Vehicles Perseverance Society in Crawfordsville.  We had great times... we got to see at least 20 tanks mostly from WWII.  Unfortunately no Germans but they had a Japanese and French tank

I plan to post some pictures if you are interested... have a good one my friends!


Andy

  • Member since
    March 2006
  • From: Right Side of a Left State
Posted by Shellback on Sunday, September 18, 2011 1:27 AM

I'm interested Andy ...........................

  • Member since
    April 2009
  • From: Carmel, IN
Posted by deafpanzer on Sunday, September 18, 2011 1:39 AM

Carl- Here's a preview... you asked for it!  Something you can dream about tonight...

Believe it or not... those are part of private collection by one man and it is open to the public.  I will tell you more about this tomorrow.  No question his wife loves him ALOT! 

Andy

  • Member since
    March 2003
  • From: Rain USA, Vancouver WA
Posted by tigerman on Sunday, September 18, 2011 2:16 AM

Very catchy scheme Duke, but it looks like you might have posted thumbnails.

   http://i7.photobucket.com/albums/y269/wing_nut_5o/PANZERJAGERGB.jpg

 Eric 

  • Member since
    February 2003
  • From: Allentown, PA
Posted by BaBill212 on Sunday, September 18, 2011 5:21 AM

Chaz,,    very nice score on the accessories!         Glad you're getting back from Irene too,  wow, what a mess!

Ben,,   (nice stug,,  gotta luv em)  I do remember that clip from Band of Brothers,,,  and I do believe you nailed it with your decription too,,  that's the piece for sure.          Your camo looks good.. the air intake being white will break up that area for sure. Good luck with the decals too.

Rob,,,,   glad  you are getting some rain at least, Hopefully mother nature will cooperate some more for ya

Doogs,,  Isn't that the celebratory Pz J ?         I do believe I voted for that as your pick after the good news on the job,,,  looks nice.

Malone,,  I am liking that paint job too,,    more pics! more pics!

Andy,,  THAT is a private collection?          HolyCrap,,,, and to think my wife says some of my kit stash takes up room!             I'll have to clue her in to this picture.

PS,,,   I will be getting some pics up today.       Either early this morning or late in the day....  I have some non-fun work to do most of the day,,  grrrr....


Enjoy the ride!


  • Member since
    September 2009
  • From: Rugby, England
Posted by Hinksy on Sunday, September 18, 2011 5:56 AM

Hey guys,

Andy - wow, Your pal has it nailed! My Dad's farmer friend nearby has a big collection of nearly modern Brit armour like Scimitars but also Humvees and a few crazy old Soviet bits too but I'd rather look at Shermies and Priests any day! He puts on a public display every year - the noise is just incredible and we can hear the BOOMS from our back garden!

He actually has one of the Humvees that was used on set in Black Hawk Down complete with a shedload of AK bullet holes!

Fellas - thanks for the Yes's about my paint job. It came out ok. A bit of spatter which is doing my head in as I can't find the problem. It's clean as a whistle and the needle is perfect? I think it doesn't like being sprayed on a low pressure and performs faultlessly at full force! That's why I decided I'd paint the air intake on the turret roof with a brush! 

I'm going to make a start on the tools today and will get the decals laid down too.

Update later!

All the best,

Ben Toast

On the Bench - Dragon Pz. IV Ausf. G (L.A.H.) Yes

Your image is loading...


  • Member since
    March 2006
  • From: Right Side of a Left State
Posted by Shellback on Sunday, September 18, 2011 2:54 PM

You posted this after i went to bed Andy ! Need my beauty sleep for gosh sakes !

Man that is a cool looking place ! Just think of the reference pics you can take . Wowzers !

Thanks Yes (no more beer for you today )

  • Member since
    February 2003
  • From: Allentown, PA
Posted by BaBill212 on Sunday, September 18, 2011 4:44 PM

Greetings All....  I promised to get some pics up on the micro pz.... 

(Andy,,  get your asprin out...  sorry pal)

Laid down the primer and the preshade along with the first few coats of pz yellow (Poly S for the yellow)..... so I figured I would tackle the tracks (oye ve)

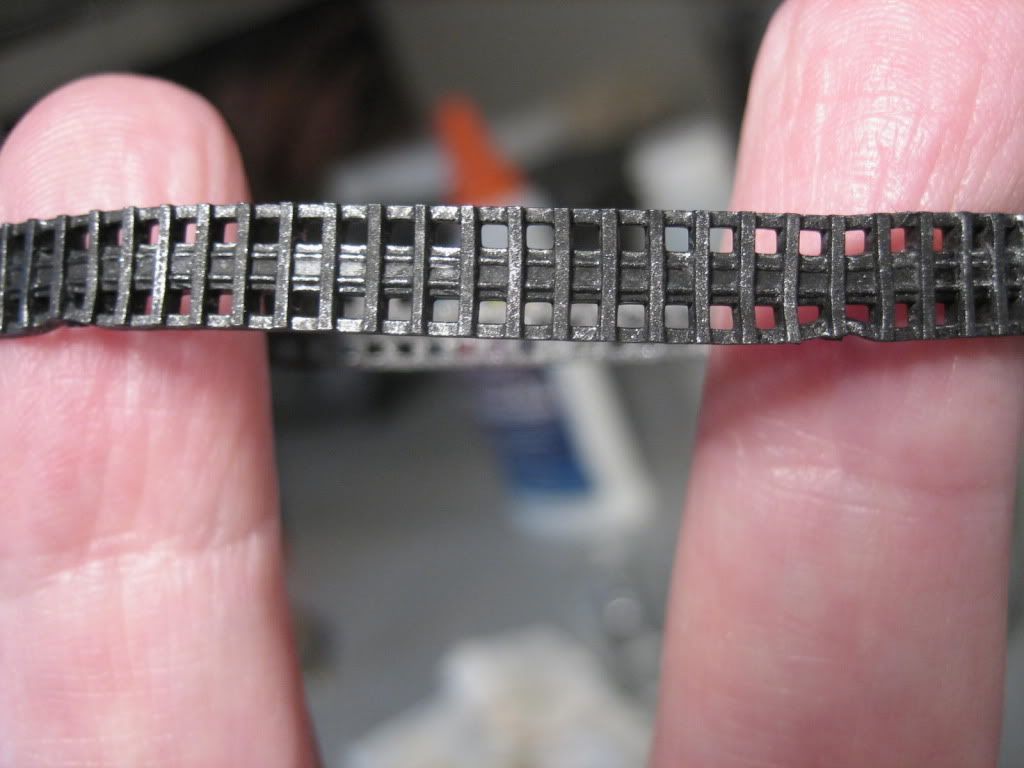
These are the old rubber-band style tracks,,  detail is scant / crap, but heck,, make the best of it I say. One thing on the positive side is they give you 3 connection pins / holes.

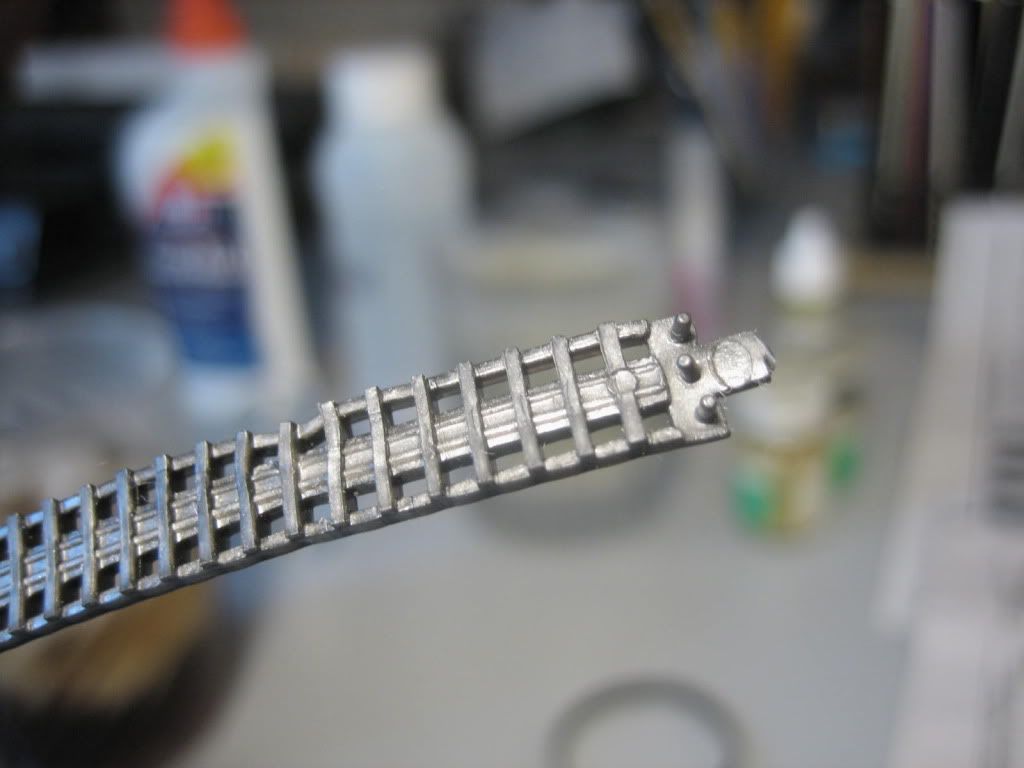
Even so,,   the "male" end has a tongue,,,    this tongue lays over the top of the first few guide teeth of the female end (oh the mind wanders,,,,),,,, ,,  so, I had to cut these teeth off and hope for the best.

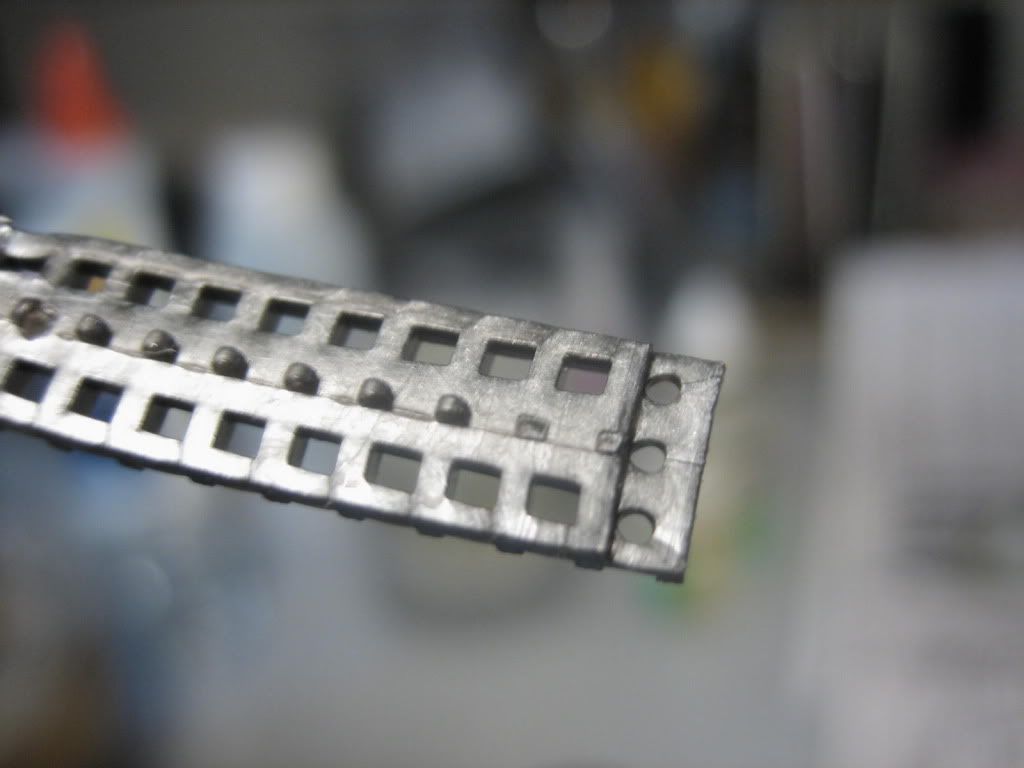
I used the age old proven method of heating up a small flat head screwdriver head and melted the male prongs....  seems like it is holding,, may add some additional glue help though....


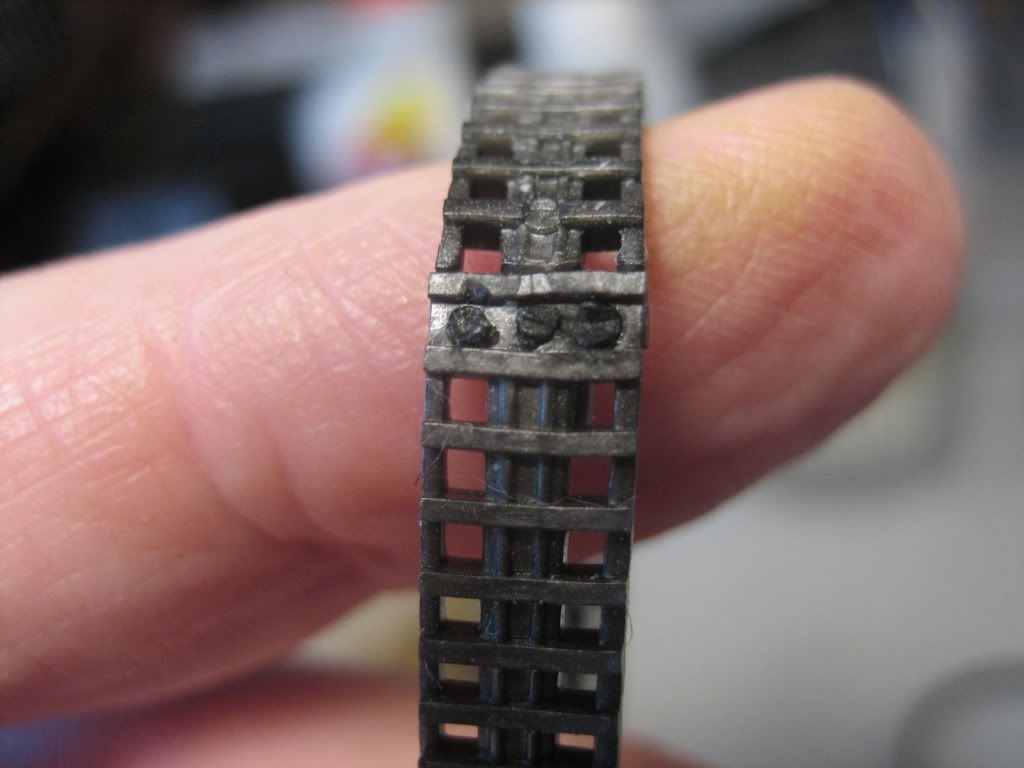
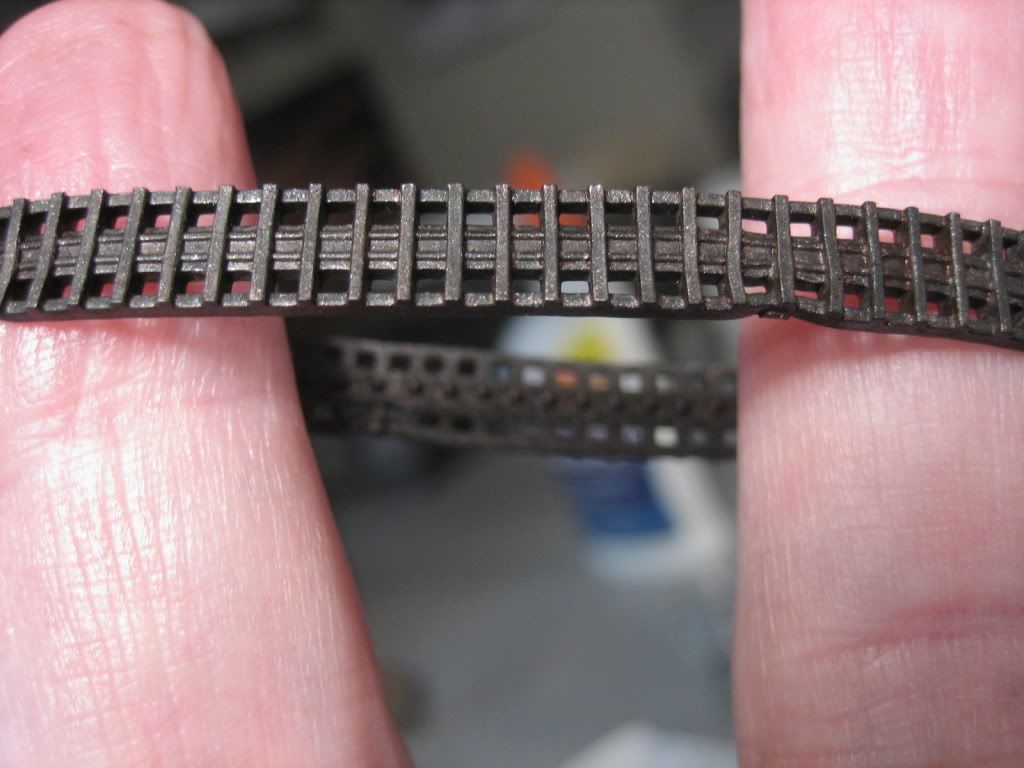
I then painted these beauties with a mix of Tamiya flat black and some Tamiya poly carbonate dark blue.       If you remember from some time ago (or if you were into RC cars)... poly carbonate paint doesn't crack when it is twisted or bent,,,,  I thought this might help when stretching these over the running gear (maybe).

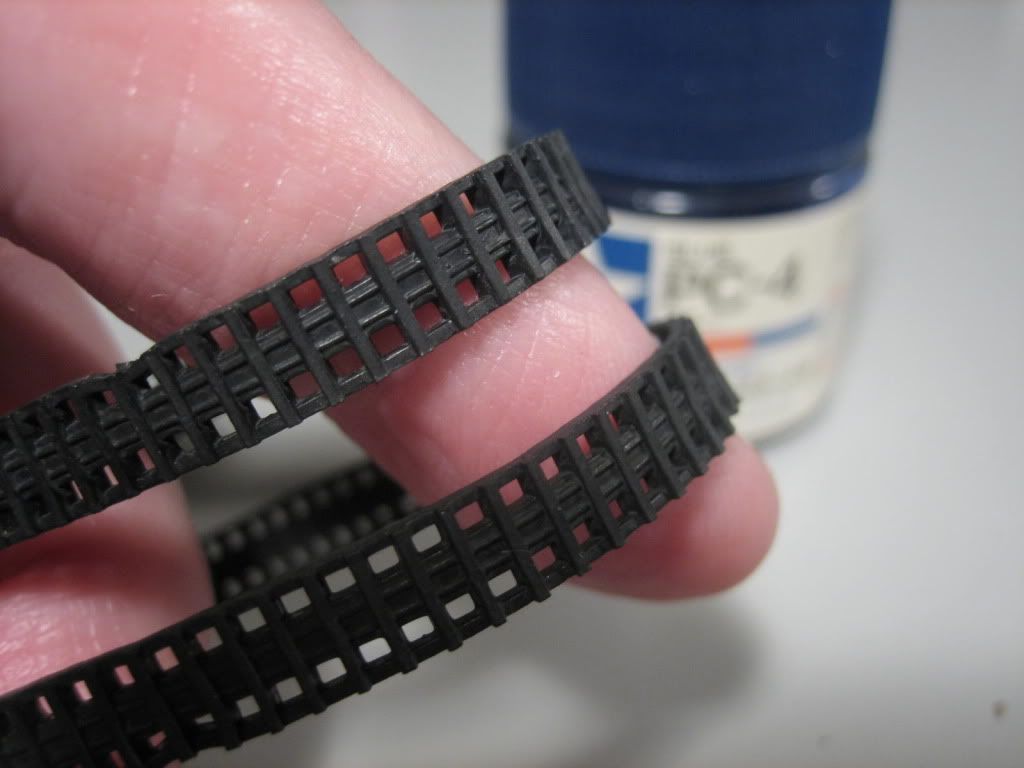
Then I added a mix of oxidized aluminum and flat black,,  sort of a heavy wash....

Then a coat of thinned rust and flat black....

Followed by another light coat / wash of flat black,,,,,

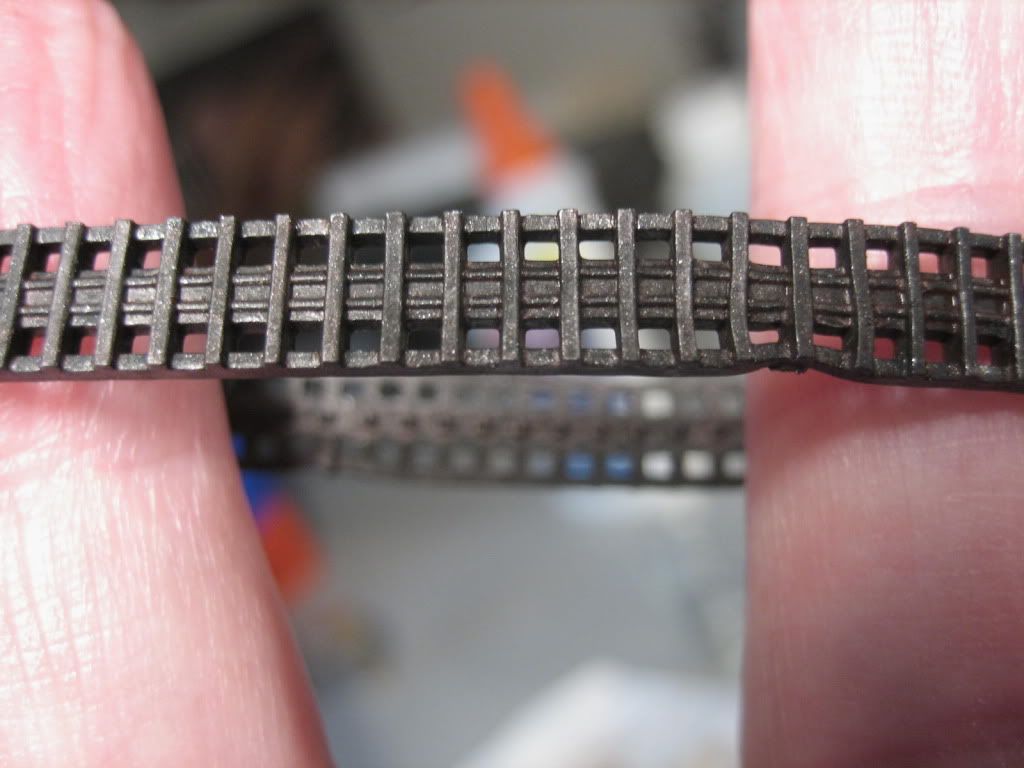
From there I highlighted with a drybrush of flat aluminum...

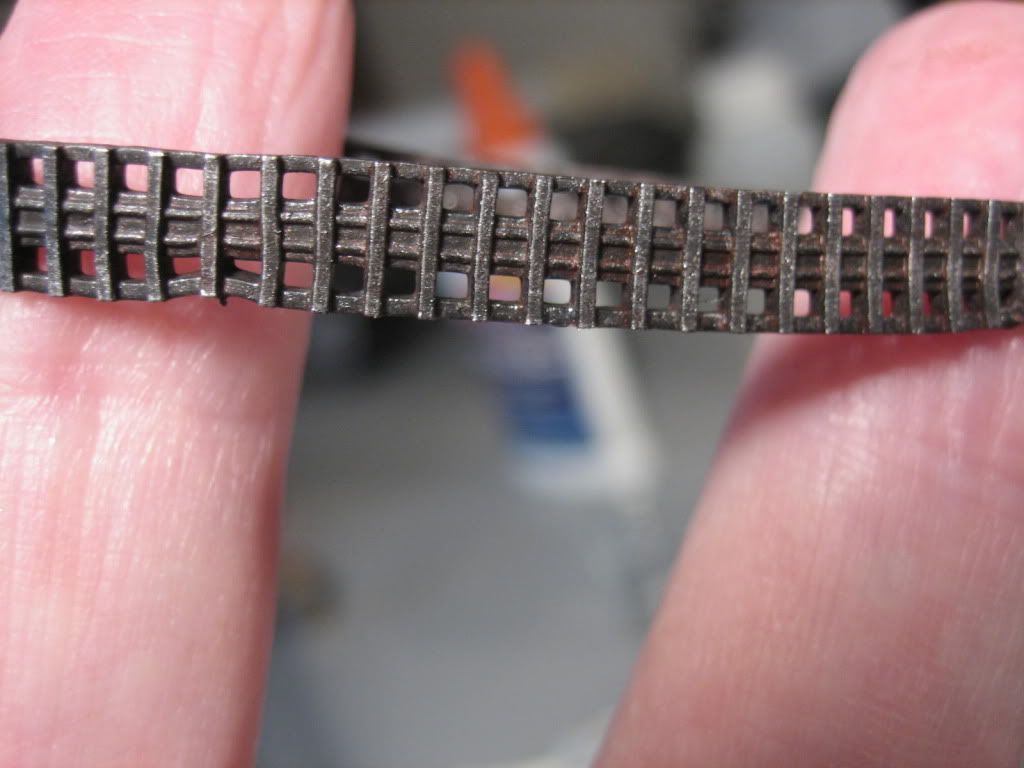
(all this for these crappy tracks?,,,,,     sheesh)


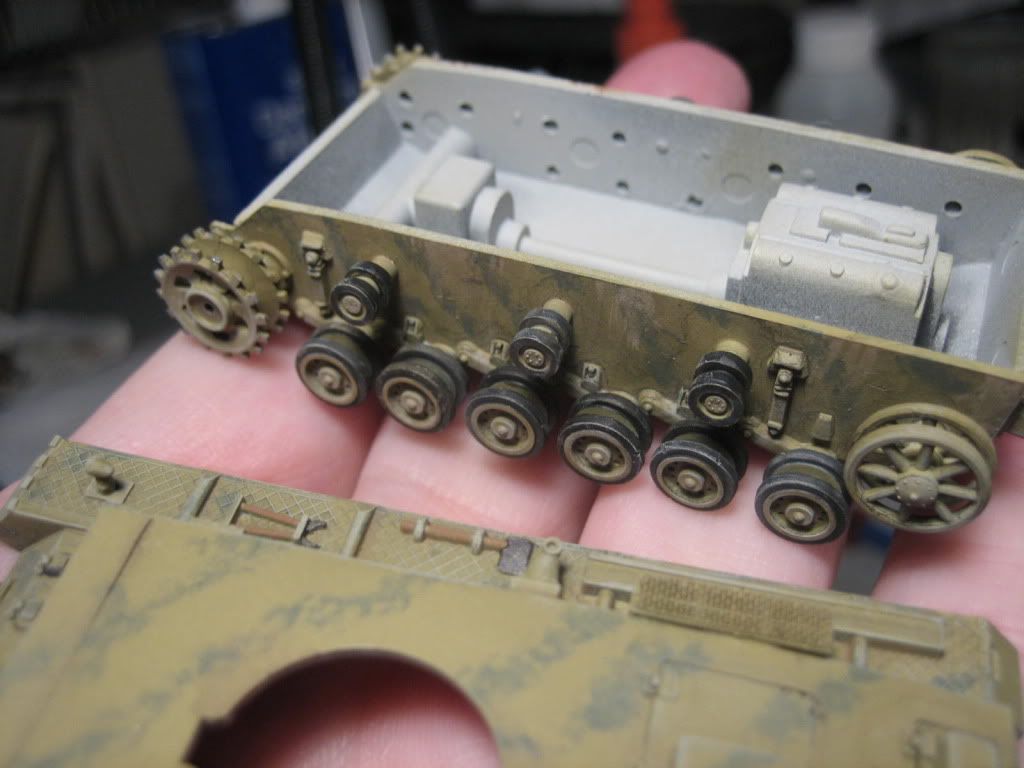
From there I moved into the wash and highlight of the little pz III...

I first painted the road wheels and return rollers.....

And the wash......

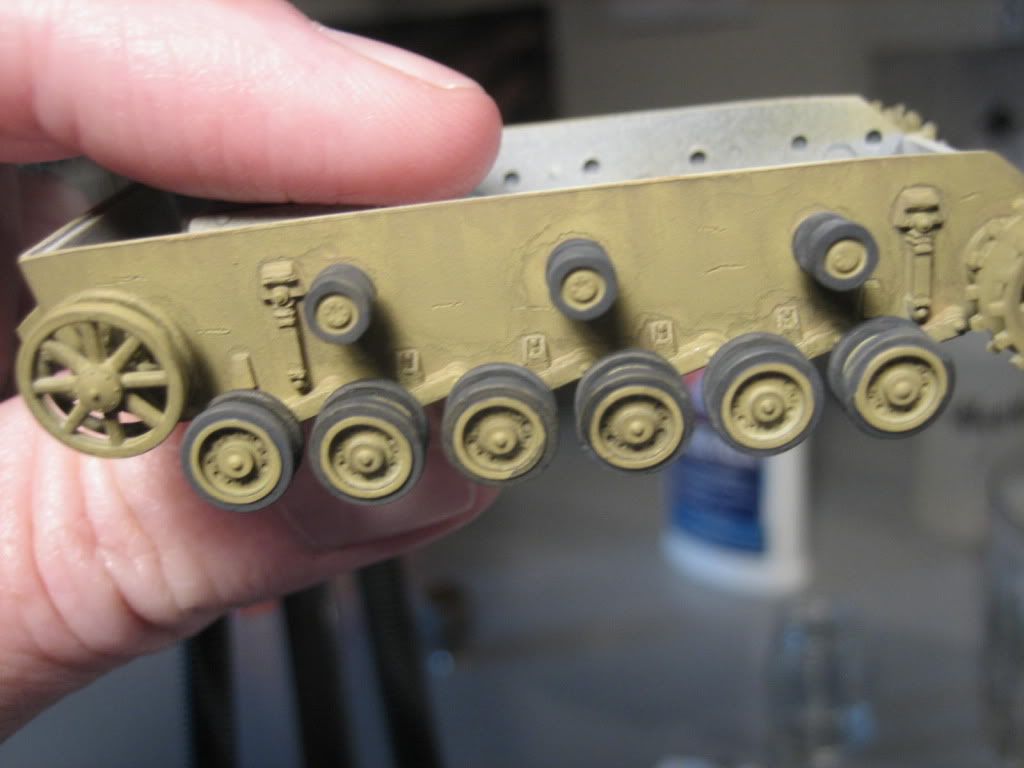
And then some dry brushing for highlights....

While subtle,,  I think the effect comes across....

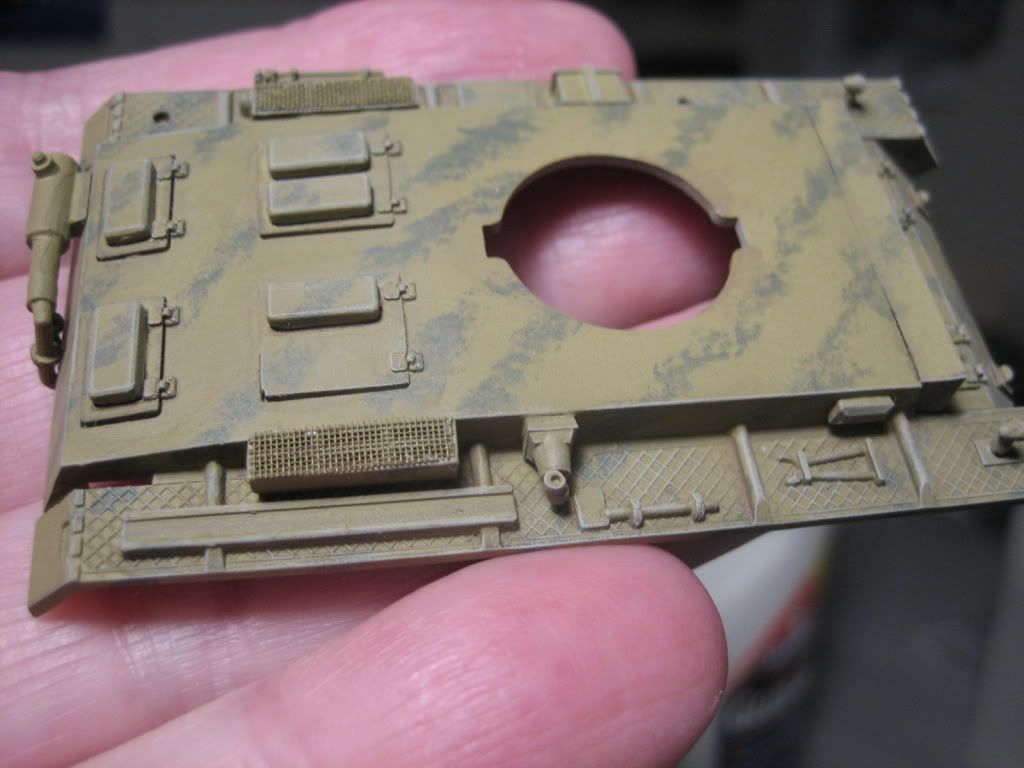
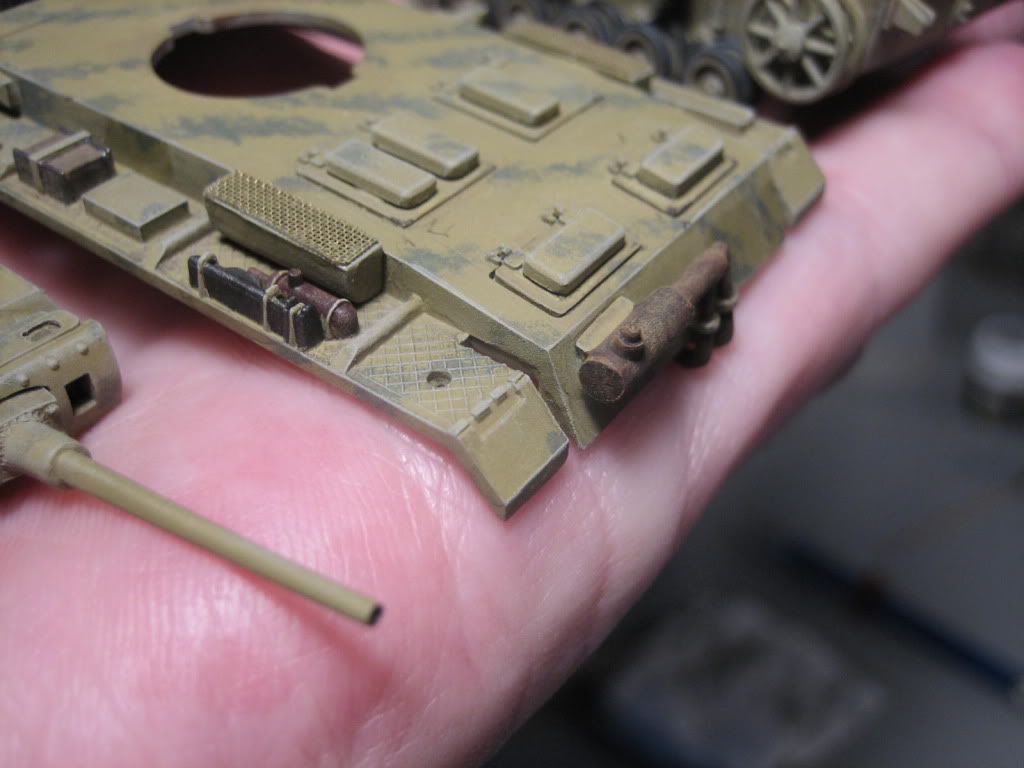
I added the vent screening, lights, muffler, etc.

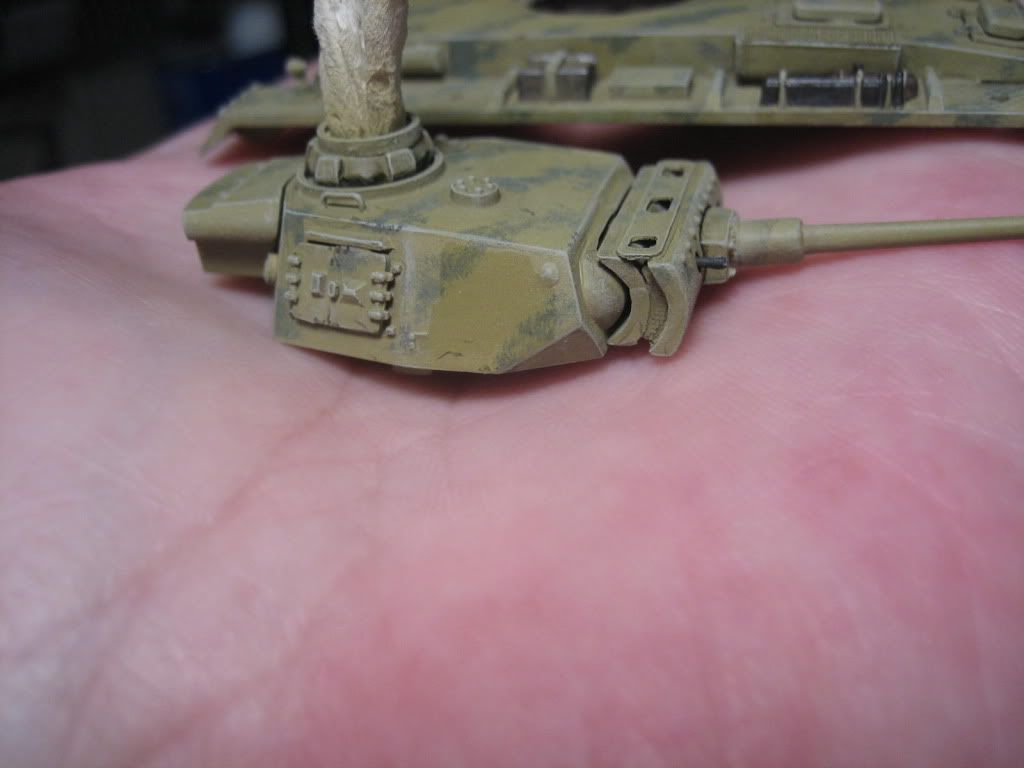
After the wash and drybrushing I moved on to the camo.... I figured the camo could stand on its own with a little additional wash and highlights..  I didn't want to go to crazy with it.        I used green Poly S pz armor dark green and the sponge method for the stripes. I also added a few scrathes and stains into appropriate areas.

PS,,,  hate the antenna tray,,,,  I SO wanted to build a new one, but I would have lost so much by grinding it off and replacing... 

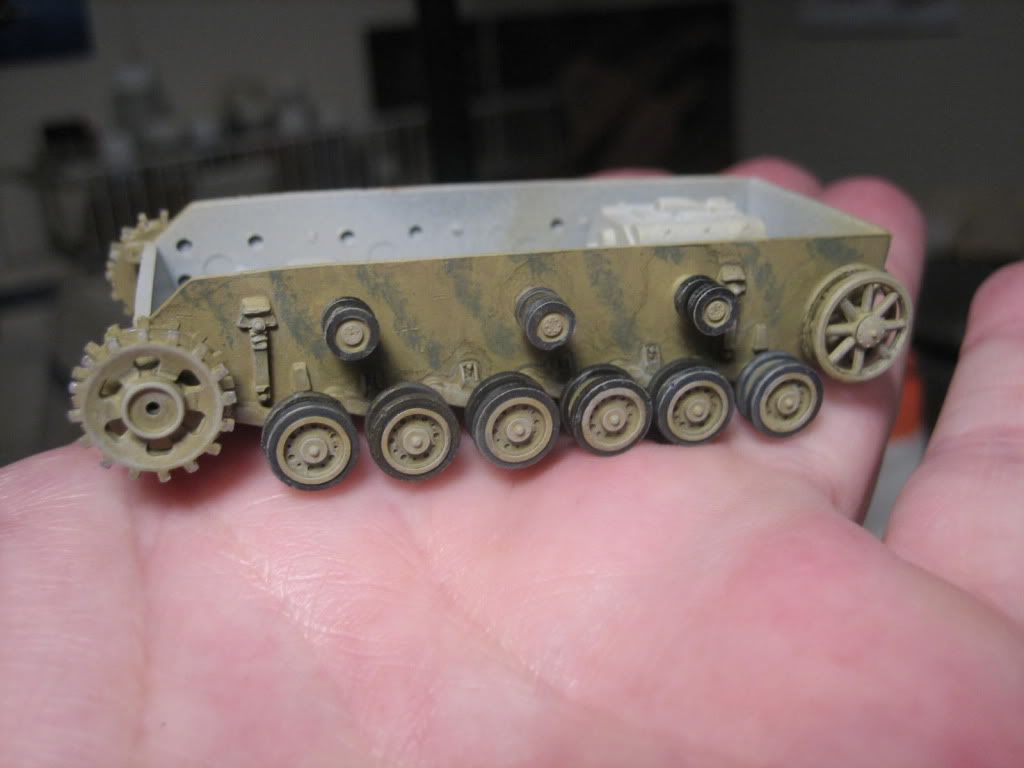
I also started painting the surface / molded in details...  jack, block, etc.

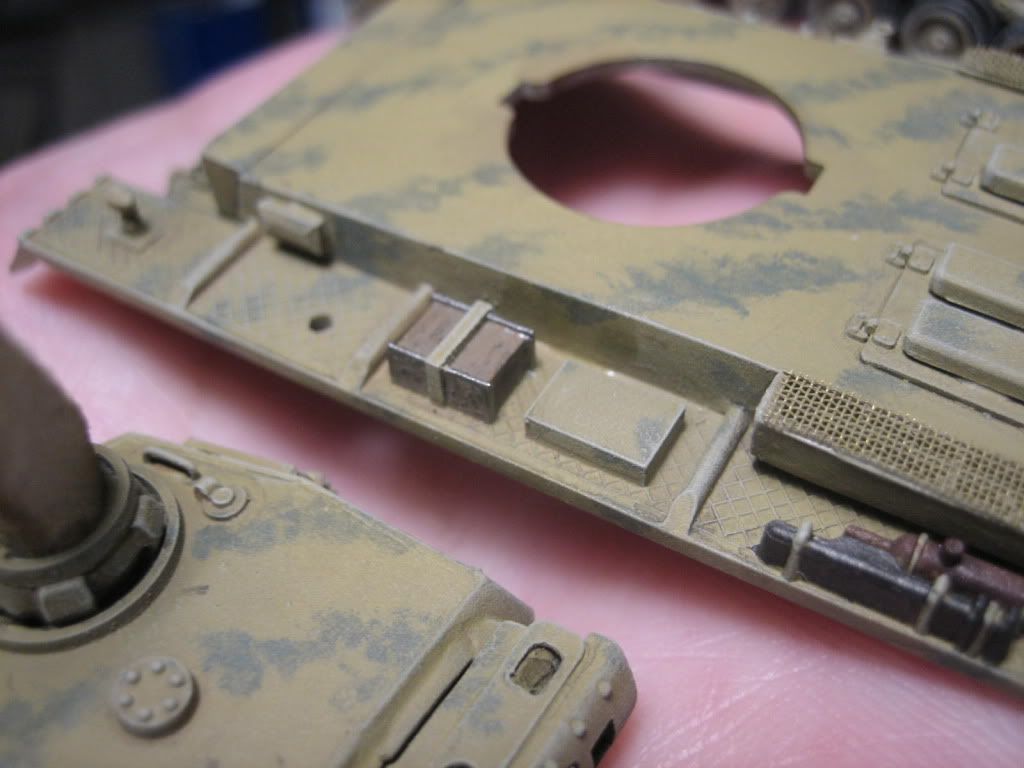
Not than you can see a lot, plus the molded in accessories are frikkin miniscule.... but,, ya gotta give it a go...

So, that is about where I am, up to date..    actually getting closer to finishing this little sonofagun.....

Hope you like,,,, and, as always,,  all comments welcome.......


Bill


Enjoy the ride!


  • Member since
    March 2006
  • From: Right Side of a Left State
Posted by Shellback on Sunday, September 18, 2011 5:35 PM

Bill , tracks and camo, nicely done . That antenna tray is rather wide .

  • Member since
    February 2003
  • From: Allentown, PA
Posted by BaBill212 on Sunday, September 18, 2011 6:23 PM

Thanks Carl,, and yes,,   rather wide indeed,,,,   I despise it,,,  I had visioned replacing but I knew it would be a can of worms...  replacing the fender mounts, rescribing the diamond detail and general pickins from the top of the fender area...  I gave way to letting it ride...  (still bugs the hell-outta me though)

Enjoy the ride!


  • Member since
    October 2009
Posted by PANZERWAFFE on Sunday, September 18, 2011 6:23 PM

BILL - Thats some great work!  Love the paint job, was wondering how you were going to tackle that.  If the turret was not in your hand you could fool someone about the scale.  Very well done!  Agree that the antenna tray is wide, maybe you an cover it with a tarp or something?  Either way really like what you have going on Yes

CARL - Are you still building?

ANDY - Have you started yet?

Rob

  • Member since
    February 2003
  • From: Allentown, PA
Posted by BaBill212 on Sunday, September 18, 2011 6:26 PM

Thank you kindly Rob,,,     that damn tray is going to haunt me,, I know...      I think I will set up the final scene so the vision point is always from the left side...... 

Enjoy the ride!


  • Member since
    October 2009
Posted by PANZERWAFFE on Sunday, September 18, 2011 9:03 PM

Duke, thats some awesome looking camo, anyway you could put up some bigger pictures?  Nice job!

Rob

  • Member since
    April 2011
  • From: imperial beach, ca
Posted by malone duke on Sunday, September 18, 2011 10:07 PM
Yeah guys ill get some more pics tomorrow. Anyways I can at least discuss the kit. As far as the kit itself. Its great. One of the best kits I've ever built. Highly detailed for the most part. I would ask for a bit more interior. And the trap doors in the rear are kinda clunky. I added some pe from aber for one of the rear doors as well the interior got all the upgrades from the same set. I felt all the detail dragon put into the exterior would have gone to waste if I used the aber stuff so I'm gonna save it for my next 3. Its an older dml kit soo... One thing I recommend. Mount the turret schurzen before painting. I didn't and it was a real pain to get right. And the instructions stink. I have no idea what I built an m or a n. Poor painting instructions. And things were called out wrong. So be careful. If I wouldve paid attention better I couldve built any one of problably 6 versions of the tank there are so many extra parts. Ill post some more info tomorrow with the picks.

  • Member since
    April 2009
  • From: Carmel, IN
Posted by deafpanzer on Sunday, September 18, 2011 10:42 PM

Bill- Lucky for me... it was not necessary for me to take out the aspirins this time since I am on heavy antibiotic for my sinus infection.  Unfortunately it is acting up again today after a such exciting day at the tank museum & event yesterday... Ick!

I have to say I love the camo job!  Excellent idea of using tiny sponge to create the camo for that size.  Tracks look pretty good for that size too. Yes 

I won't do something about the antenna tray since you have gone so far... not every kits are perfect.  Sometimes I wish i could go back to do better such as headlights on my Chaffee as they were solid green but it would have been too much trouble to fix it without damaging it. 

Carl- Never too late... you still can dream about those tanks!  Of course along with some Beer and beautiful ladies in camo outfits... I will post more pictures but not tonight as I am not in best mood.

Rob- Not yet... but you have my word I will start this weekend.  I got everything except for the Fruil tracks.  But I have been thinking about stealing the Magic Track winterketten set from my Dragon Pz III Ausf N just for now...

Malone- Can't wait to see your latest process.  I wondered about you few days ago when I was updating the roster list. 


Andy

  • Member since
    March 2006
  • From: Right Side of a Left State
Posted by Shellback on Sunday, September 18, 2011 10:47 PM

deafpanzer


Carl- Never too late... you still can dream about those tanks!  Of course along with some Beer and beautiful ladies in camo outfits... I will post more pictures but not tonight as I am not in best mood.

Andy , no problem ..............just get better .

  • Member since
    September 2009
  • From: Rugby, England
Posted by Hinksy on Monday, September 19, 2011 9:58 AM

Hey guys,

I've had a pretty busy weekend so didn't manage to get a lot done apart from the Winter Cammo and Decals.

The cammo looked great and although tense at times due to recent decal problems, the decals went on perfectly! I certainly didn't want to tear that Mammoth symbol or the outlined 116 numbers as I have nothing in my decal spares to replace them! I gave it a full covering of Vallejo Gloss Varnish out of the AB  and put them on yesterday and gave the tank another single coat of the same today to seal them all in so now it's ready for weathering and pinwashes/washes next week.

I had a bonus as something I'd had on sale for ages (an old rifle and associated kit from my rifle shooting days before I started modelling) suddenly sold and within an hour of the pm on the shooting forum a chap came round and gave me £450 - cash worries over!

So, £300 into the high interest account for my car tax and MOT which is due in the New Year and anything else that might come up - that will pay for Christmas presents too. I popped up town this morning and bought a lovely new pair of shoes for the office, some perfume for Mum and some modelling stuff for me - see below:

So, I have now just ordered my Pz. III Winteketten Friuls, a Tamiya Panzer III Quickwheel Mask, 2 x 2m and 2 x 1.4m RB Models brass German antennae, a set of 4 1/35 metal shackles and some MIG Brown Wash Yes

I love the Mammoth Unit insignia:


I was also reading an old magazine of mine last night and read a piece where the authour built Dragon kit 6600 and it looked amazing. It's the Tiger I initial Production with the same markings as this Panzer III so they'll look great side-by-side Cool I knew I had to order one so it's, well, ordered! Yee haa! No longer will my cabinet be without a 1/35 Tiger!  

Here we go - it's ordered and will by next WIP. I'm thinking Friuls, replacement barrel and lots of detailing - this will be my Christmas time build!


Cheers guys,

Sorry I haven't got much to show you but at least the decals are on, she's varnished ready for wases and the Friuls are ordered!

Enjoy the rest of your week fellas!

All the best,

Ben Toast  

On the Bench - Dragon Pz. IV Ausf. G (L.A.H.) Yes

Your image is loading...


JOIN OUR COMMUNITY!

Our community is FREE to join. To participate you must either login or register for an account.

SEARCH FORUMS
FREE NEWSLETTER
By signing up you may also receive reader surveys and occasional special offers. We do not sell, rent or trade our email lists. View our Privacy Policy.