SEARCH FINESCALE.COM

Enter keywords or a search phrase below:

Japanese GB 2011-2012

204593 views
2250 replies
1 rating 2 rating 3 rating 4 rating 5 rating
  • Member since
    September 2003
  • From: Australia
Posted by Helo H-34 on Tuesday, September 6, 2011 6:41 AM

Hi everyone ;

I made a start on my 1/72 Academy A6M5c Zero ;

I airbrushed the interior parts and wheel wells with Tamiya's XF-71 Cockpit Green (IJN) .

Sadly Academy didn't include decals for the instrument panel Sad , so I'm left with applying black paint blobs from a toothpick .

Hopfully I'll have the cockpit pieces glued in place and the fuselage halves together shortly .

Great work everyone ;

Cliff , I like the first badge you posted ;

                                   John .

  • Member since
    March 2003
  • From: Rain USA, Vancouver WA
Posted by tigerman on Tuesday, September 6, 2011 12:59 AM

Charging Samurai, even though they aren't Imperial. It just looks cool. 

   http://i7.photobucket.com/albums/y269/wing_nut_5o/PANZERJAGERGB.jpg

 Eric 

  • Member since
    November 2009
  • From: SW Virginia
Posted by Gamera on Monday, September 5, 2011 10:40 PM

Tigerman: Ok maybe you didn't sign on but your opinion is appreciated! Thanks!

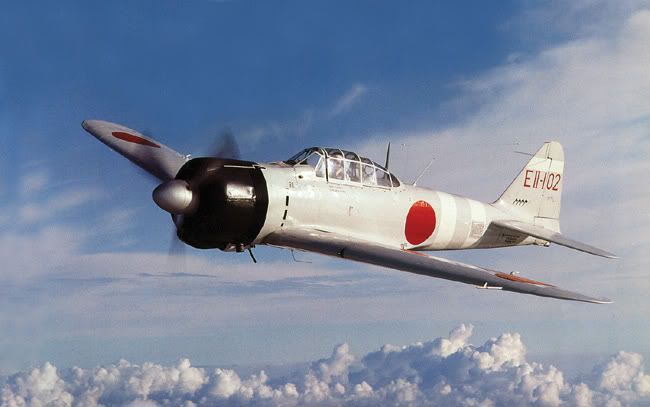
I assume you mean the photo of the real light grey early Zero? I'll put down one vote for it and one vote for 'Imperial Japanese GB'.


"I dream in fire but work in clay." -Arthur Machen


  • Member since
    March 2003
  • From: Rain USA, Vancouver WA
Posted by tigerman on Monday, September 5, 2011 10:23 PM

I know that I'm not in this GB, but I do like the 4th one down. How about Imperial Japanese GB, since most if not all will be doing WW II subjects.

   http://i7.photobucket.com/albums/y269/wing_nut_5o/PANZERJAGERGB.jpg

 Eric 

  • Member since
    November 2009
  • From: SW Virginia
Posted by Gamera on Monday, September 5, 2011 10:10 PM

Bsyamato has reminded me I really need to get some badges turned out. Plus at the rate Trey is moving he's going to have his Zero finished before I get a badge done Embarrassed

Here's the original prototype badges I'd worked out:

1).Female samurai:

2).Samurai and dragon:
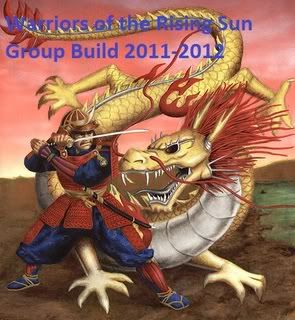
3). Blue samurai and waves:

4). Charging samurai:

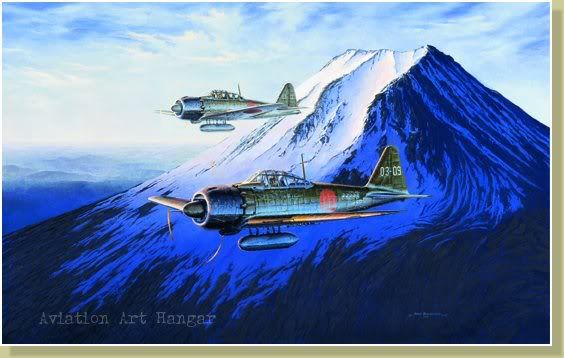
Here's several aircraft by Shigeo Koike and various other artists:

5). Sunset Zero:

6). Mount Fuji Zeros:
7). Zero in the clouds:
8). Real Zero:
9). Nakajima Ki-44 Shoki TOJO
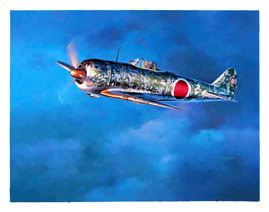
10). Kawasaki Shiden-Kai GEORGE
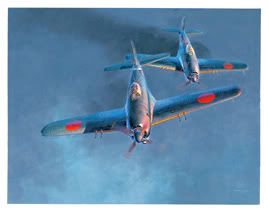
11). Mitsubishi Raiden JACK
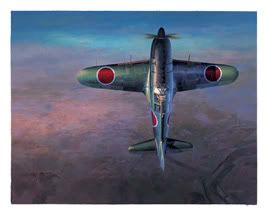
12). Nakajima Tenrai
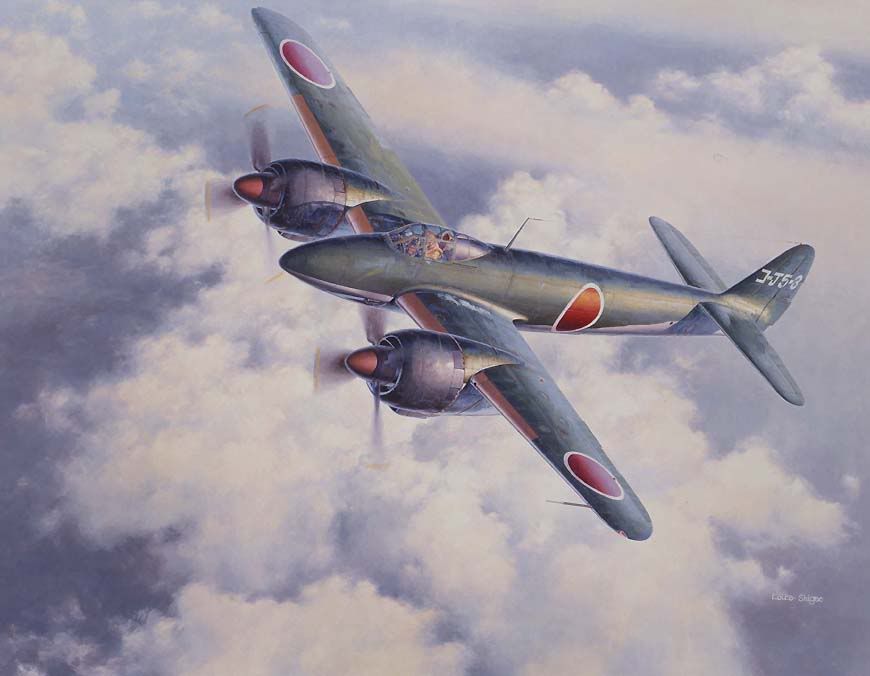
 13). Kawasaki Ki-61 Hien TONY

 

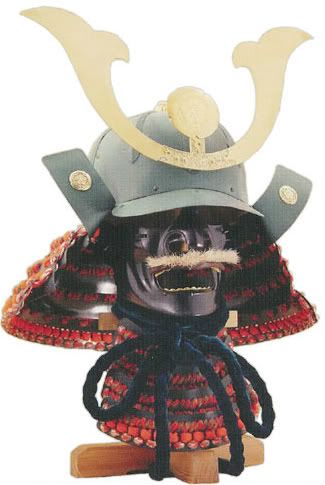
Two kabuto (heavy samurai helmets):

14).
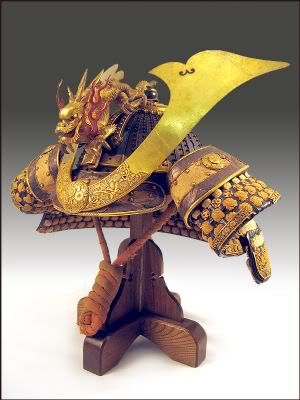
15).
And Big-Z himself:

16).

17).
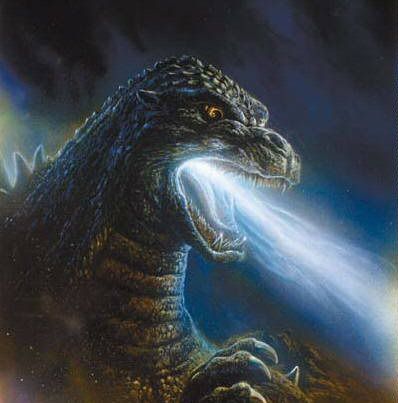
 

Not sure about the name either- we could just go with 'Japanese Group Build 2011-2012'. Personally I think 'Warriors of the Rising Sun 2011-2012' has more pizazz. 'Japanese Machines of War' has also been suggested. 

Guys please discuss this as to what if any of the photos you like and what term you like as a title better. Of course if anyone comes out with a better badge by all means please post it!!! Toast

And of course there is no rule that we must have one badge, we could do a few different ones, probably not more than four or five though.

Cliff


"I dream in fire but work in clay." -Arthur Machen


  • Member since
    August 2009
  • From: Borlando Fla home of the rat
Posted by TREYZX10R on Monday, September 5, 2011 6:14 PM

Cliff thanks!

Eric I used TS-30 silver leaf

Jason thank you

I accented the panel lines and next I'm gonna try this salt thing thats seems to be the rage these days wish me luck!

  • Member since
    July 2003
  • From: Pennsylvania
Posted by jay12472 on Monday, September 5, 2011 5:04 PM

Wow that's some fast and great work

Jason


  • Member since
    March 2003
  • From: Rain USA, Vancouver WA
Posted by tigerman on Monday, September 5, 2011 2:23 PM

What are you spraying for the NMF Trey?

   http://i7.photobucket.com/albums/y269/wing_nut_5o/PANZERJAGERGB.jpg

 Eric 

  • Member since
    November 2009
  • From: SW Virginia
Posted by Gamera on Monday, September 5, 2011 2:23 PM

Lem: Heck you're further along than I am. Still she'll be an interesting subject when she's done, I was amazed that the Emily is bigger than a B-17.

And sharp looking boat, now that the weather is cooling off I think I'd be out on the water instead of modeling though. Good to see you came though the hurricane so well, we're far enough away from the coast we got a pile of wind but no rain at all last weekend.

Trey: Wow, you're about half done already! And the NM looks great, it's going to look fantastic when you chip the surface paint off.

Cliff

"I dream in fire but work in clay." -Arthur Machen


  • Member since
    August 2009
  • From: Borlando Fla home of the rat
Posted by TREYZX10R on Monday, September 5, 2011 1:30 PM

Gamera, Bsyamato thanks !

Len thanks ,the Emily is looking good nice to see a subject off the beaten path like that. I hope the clear parts are'nt as thick as the ones in my Smer SM79 kit lol.

I sprayed the basic under colors  . I'm thinking of trying the salt method for weathering on this so I'm not going to preshade the panel lines

  • Member since
    October 2008
  • From: italy
Posted by bsyamato on Monday, September 5, 2011 10:26 AM

troublemaker66


Trey...That`s kick a$$ so far bud! I can`t wait to finish that Emily so I can start a 1:48 scale kit...remember why I don`t like 72 scale..lol.


why? Whistling

The emily looks good (want to exchange with some old airfix?) ... not too simple but goog. I see the mavis kit is a little more troubled than the emily but a day i want one Stick out tongue

  • Member since
    July 2007
  • From: Southern New Jersey
Posted by troublemaker66 on Monday, September 5, 2011 9:53 AM

TREYZX10R

Fuse is together,small gap on the starboard wing and at the rear joint area underside otherwise tight fit. The wing root gaps were about 1/16 on both sides so I spread the fuse apart and ca glued  the corners of the cockpit floor to hold it apart it. The dihedral would have been too out of scale if I simply bent the wings up to seal the gap

http://img.photobucket.com/albums/v710/treyzx10r/Zeke/Zekeframe001.jpg

http://img.photobucket.com/albums/v710/treyzx10r/Zeke/Zekeframe002.jpg

http://img.photobucket.com/albums/v710/treyzx10r/Zeke/Zekeframe003.jpg

http://img.photobucket.com/albums/v710/treyzx10r/Zeke/Zekeframe004.jpg

I did score some a/m cannon barrels they arrived in the post yesterday,they came 4 in a pack but I've not found any pics of a Zeke with 4 cannons?

Trey...That`s kick a$$ so far bud! I can`t wait to finish that Emily so I can start a 1:48 scale kit...remember why I don`t like 72 scale..lol.

Len Pytlewski

  • Member since
    July 2007
  • From: Southern New Jersey
Posted by troublemaker66 on Monday, September 5, 2011 9:46 AM

Hey All,

Here`s a few WIP pics of my Emily...not the best kit from Hasegawa I`ve ever seen but....

Took these pics outdoors on my back deck...wings with movable flaps/aerlirons


Rudder and stabs...

Fuse halves....clear parts are crazy-thick...

The sprue connection points were so thick that you couldn`t help damaging the plastic removing the parts...

I threw in a pic of my other project...my boat, with top down and cockpit cover still in place from Irene...the other inadamant object with a female name that drove me nuts..lol....

That`s my backyard...you know I was sweatin` it out with Irene!

Len Pytlewski

  • Member since
    November 2009
  • From: SW Virginia
Posted by Gamera on Monday, September 5, 2011 8:57 AM

bsyamato

 Gamera:

Bsyamato: Well, I still need to see about getting the badges done. If you'll remember we did experimental ones on the aircraft forum tread and there was some discussion but we never did a final one. I seem to have been dragging my feet. Sorry Embarrassed

I'll see about throwing up some test badges soonish.


Whistling just breakin' balls till the ki-27 don't landing to my house ..

Lol, and thanks! I've been letting them slide- I really do need to get them done.

"I dream in fire but work in clay." -Arthur Machen


  • Member since
    October 2008
  • From: italy
Posted by bsyamato on Monday, September 5, 2011 8:52 AM

Gamera

Bsyamato: Well, I still need to see about getting the badges done. If you'll remember we did experimental ones on the aircraft forum tread and there was some discussion but we never did a final one. I seem to have been dragging my feet. Sorry Embarrassed

I'll see about throwing up some test badges soonish.

Whistling just breakin' balls till the ki-27 don't landing to my house ..

  • Member since
    November 2009
  • From: SW Virginia
Posted by Gamera on Monday, September 5, 2011 8:27 AM

Trey: Wow, always amazes me how fast you move, and you do such fantastic work. Really looking forward to seeing how she comes out.

Bsyamato: Well, I still need to see about getting the badges done. If you'll remember we did experimental ones on the aircraft forum tread and there was some discussion but we never did a final one. I seem to have been dragging my feet. Sorry Embarrassed

I'll see about throwing up some test badges soonish.


Started work on the JUDY over the weekend. I was hoping to have the cockpit finished but the odd way Finemolds engineered the kit I've had to attach the wings to the fusilage before glueing the fusilage together. Hopefully I'll be able to get her sealed up by the end of the week.

"I dream in fire but work in clay." -Arthur Machen


  • Member since
    October 2008
  • From: italy
Posted by bsyamato on Sunday, September 4, 2011 10:12 AM

nice work TREYZX10R the metallic azure seems reaaly correct.

Gamera i'm updating my gb badge but not found the badge of here Tongue Tied .. i miss something? 

  • Member since
    August 2009
  • From: Borlando Fla home of the rat
Posted by TREYZX10R on Sunday, September 4, 2011 9:34 AM

Fuse is together,small gap on the starboard wing and at the rear joint area underside otherwise tight fit. The wing root gaps were about 1/16 on both sides so I spread the fuse apart and ca glued  the corners of the cockpit floor to hold it apart it. The dihedral would have been too out of scale if I simply bent the wings up to seal the gap

I did score some a/m cannon barrels they arrived in the post yesterday,they came 4 in a pack but I've not found any pics of a Zeke with 4 cannons?

  • Member since
    October 2008
  • From: italy
Posted by bsyamato on Sunday, September 4, 2011 4:36 AM

TREYZX10R

Some progress to report  in

http://img.photobucket.com/albums/v710/treyzx10r/Zeke/Zekeoffice004.jpg

http://img.photobucket.com/albums/v710/treyzx10r/Zeke/Zekeoffice2001.jpg


used some transparent blue over RAF green on the flap and wheel bay interiors

http://img.photobucket.com/albums/v710/treyzx10r/Zeke/Zekeoffice2005.jpg

Stick out tongueStick out tongue

  • Member since
    August 2009
  • From: Borlando Fla home of the rat
Posted by TREYZX10R on Saturday, September 3, 2011 10:27 PM

Some progress to report  in

used some transparent blue over RAF green on the flap and wheel bay interiors

  • Member since
    August 2011
  • From: Panhandle Fl
Posted by Noah T on Saturday, September 3, 2011 12:47 PM

Yes Gamera the kit is in 72nd.

I switched over to 72nd from 48 early in college. I'd like to do a 32nd scale Hellcat or Long Nose Focke Wulf but I dont think my advanced skills are there yet.

My brother bought me an Awata dual control airbrush a long time ago but I dont know where my compressor or hose are now. I'd like to give that another try too.


On the bench: 72nd scale P51D, P47D Razorback

---Everything Is What It Is, And Not Another Thing.---

  • Member since
    November 2009
  • From: SW Virginia
Posted by Gamera on Friday, September 2, 2011 7:05 PM

Sure Noah, I'll put you down now. Glad to have you!

I can see you photo just fine. Is it a 1/72nd scale kit?


"I dream in fire but work in clay." -Arthur Machen


  • Member since
    April 2005
  • From: Monster Island-but vacationing in So. Fla
Posted by carsanab on Friday, September 2, 2011 3:56 PM

an orange Zero...always ineresting

 Photobucket

  • Member since
    August 2011
  • From: Panhandle Fl
Posted by Noah T on Friday, September 2, 2011 3:34 PM

Can I join?

It'd be my first group build.

 I am finishing up an Betty, but it's too far along for the rules. Looking through my stash I found several but most are already chosen. I didn't see any one choose a Babs, but maybe loked past it.

I have an AML A6M2-K. I cant remember when I bought this but its all in a ziplock bag.

This will be my first time using resin, a vacuformed canopy, or photo-etched parts!

I'm pretty excited about trying to step my game up, anyone build this kit before or have any suggestions for me?

I have a pic of the kit how do you upload a pic without having to use a webpage to link it? There is no attatchment tool? nm let's try this:


On the bench: 72nd scale P51D, P47D Razorback

---Everything Is What It Is, And Not Another Thing.---

  • Member since
    April 2005
  • From: Monster Island-but vacationing in So. Fla
Posted by carsanab on Friday, September 2, 2011 3:20 PM

Gamera

 troublemaker66:

 carsanab:

What about Giant Radioactive Lizards?????what was their interior color...Whistling

I will get my Oscar out of hiding and start this long weekend...

Z


I know regular sized lizzard innards are red when you squish `em. A giant, radioactive lizzard?...prolly a pulsating ,flourescent green.......? Haven`t squashed a giant lizzard yet, maybe you could ask Ultra Man.


Hmmmmm, when you swallowed that G-Force submarine and they drilled out their way out of you I think I remember your innards being kinda red and squishy. I hope you're not still sore. I remember you asking to do more of your own stunts and then Toho brings in that submarine with the drill on the prow- jerks...

Be careful when you dump Oscar out of his trash can- he tends to be a bit of a grouch Super Angry

ha!!!! I was actually watching that movie last night....!!!! It did leave a scar but thats Ok....chicks dig big Lizards with scars...

 Photobucket

  • Member since
    November 2009
  • From: SW Virginia
Posted by Gamera on Friday, September 2, 2011 3:12 PM

troublemaker66

 carsanab:

What about Giant Radioactive Lizards?????what was their interior color...Whistling

I will get my Oscar out of hiding and start this long weekend...

Z


I know regular sized lizzard innards are red when you squish `em. A giant, radioactive lizzard?...prolly a pulsating ,flourescent green.......? Haven`t squashed a giant lizzard yet, maybe you could ask Ultra Man.

Hmmmmm, when you swallowed that G-Force submarine and they drilled out their way out of you I think I remember your innards being kinda red and squishy. I hope you're not still sore. I remember you asking to do more of your own stunts and then Toho brings in that submarine with the drill on the prow- jerks...

Be careful when you dump Oscar out of his trash can- he tends to be a bit of a grouch Super Angry

"I dream in fire but work in clay." -Arthur Machen


  • Member since
    July 2007
  • From: Southern New Jersey
Posted by troublemaker66 on Friday, September 2, 2011 3:03 PM

carsanab

What about Giant Radioactive Lizards?????what was their interior color...Whistling

I will get my Oscar out of hiding and start this long weekend...

Z

I know regular sized lizzard innards are red when you squish `em. A giant, radioactive lizzard?...prolly a pulsating ,flourescent green.......? Haven`t squashed a giant lizzard yet, maybe you could ask Ultra Man.

Len Pytlewski

  • Member since
    April 2005
  • From: Monster Island-but vacationing in So. Fla
Posted by carsanab on Friday, September 2, 2011 2:46 PM

What about Giant Radioactive Lizards?????what was their interior color...Whistling

I will get my Oscar out of hiding and start this long weekend...

Z

 Photobucket

  • Member since
    November 2009
  • From: SW Virginia
Posted by Gamera on Friday, September 2, 2011 7:31 AM

Jdice & Bsyamato: No rush guys!

Helo John: Looks very cool, I love the starter truck. I've seen it before but since I generally do 1/48th I've never picked one up.

Lem: Yeah, when I opened mine I thought 'nice detail, too bad when I sand the seams I'm going to lose half of it'. And enough flash to build a second kit out of it.

NB: Japanese interior colours are a confusing mess at best. I'll say what you've got looks correct. The standard Mitsubishi Zero got a yellowish green interior that to me looks very close to US Interior Green/ Zinc Chromate Green. Nakajima aircraft got a grey-green that looks to my eye much like RAF Interior Green. Kawasaki used a tan colour on the Ki-61 and Kawanishi used another colour - whew Dead

The metallic blue was called aotake and was actually a translucent varnish applied to stop rust. The metal showed though the varnish giving it a metallic look. Aotake started very bluish but as it aged turned more greenish. Back in the '70s it was believed that all Japanese a/c were painted aotake in the cockpits but more recent information has proved this wrong- on some older kits you may still find them telling you to paint the interior aotake though. Some cases you did see landing gear wells and the insides of flaps painted aotake, sometimes they were painted the cockpit colour- best check references to be sure. I'm not totally sure on my Judy so I'm going to go ahead and paint everything Mitsubishi interior green which ought to be pretty close.

 Great work guys! I've only got as far as washing the kit with detergent and cleaning up the clear parts and dipping them in Future. Hopefully I'll get the cockpit done this weekend.

Cliff


"I dream in fire but work in clay." -Arthur Machen


  • Member since
    October 2008
  • From: italy
Posted by bsyamato on Friday, September 2, 2011 4:22 AM

good zeros guys! Yes

Len why don't take pictures of the emily 

with or without flash Big Smile

...

the ki-27 is not yet come Crying

JOIN OUR COMMUNITY!

Our community is FREE to join. To participate you must either login or register for an account.

SEARCH FORUMS
FREE NEWSLETTER
By signing up you may also receive reader surveys and occasional special offers. We do not sell, rent or trade our email lists. View our Privacy Policy.