SEARCH FINESCALE.COM

Enter keywords or a search phrase below:

The Official 1942 70th Anniversary Group Build

78945 views
567 replies
1 rating 2 rating 3 rating 4 rating 5 rating
  • Member since
    July 2007
  • From: Southern New Jersey
Posted by troublemaker66 on Thursday, November 1, 2012 7:11 PM

sub revolution

Good to hear! I was going to give you an "honorary" completion anyway. Glad to know at least some stuff survived. How's the rest of the house?

...very wet....got all the appliances and my mom`s room cleaned out. Got some surprise help from my wife`s friends from work. Made significant progress...could not have done it without the extra help. Still have many more days to go to make  it livible again...flood rep coming out Monday, FEMA claims in and processing and ball is rolling with homeowners too. NEVER want to go thru this again!

Len

Len Pytlewski

  • Member since
    September 2009
  • From: Guam
Posted by sub revolution on Thursday, November 1, 2012 1:08 AM

Good to hear! I was going to give you an "honorary" completion anyway. Glad to know at least some stuff survived. How's the rest of the house?

NEW SIG

  • Member since
    July 2007
  • From: Southern New Jersey
Posted by troublemaker66 on Wednesday, October 31, 2012 7:41 PM

Thanks stik! You`re correct...while picking up my destroyed model area, I found my Buffalo, intact...and the antennae wire was still there...amazing to me because if you would`ve seen where I found it, you would not have believed it. My "night Lightning " also survived, rigging and all, the Albatross I built for the Seaplane GB, sans front gear and my Betty Bomber....all were under a ton of crap but still made it. Many more complete builds were not as lucky...had a few "hard to find" kits bite the dust. I`ve only scraped the surface in there, who knows what else may have survived...I`ll keep ya posted...lol.

Len Pytlewski

  • Member since
    July 2004
  • From: Sonora Desert
Posted by stikpusher on Wednesday, October 31, 2012 4:44 PM

Trouble, expect the worst but hope for the best during clean upWink

Well I did a little bit of work on the TBD today. Since I needed to paint the wing cannon barrels on my Ki-84, I figured that I may as well do the nose gun and flex mount gun for my TBD. I used Humbrol Metalcote Gun Metal. Out of the tin it looks like brand new parkerizing. Those paints are enamel and buffable, so I started buffing the flex mount .30 before I took some photos.

both guns

unbuffed nose gun

buffed flex .30 with handles painted. I still need to paint the ammo can and mount framework


F is for FIRE, That burns down the whole town!

U is for URANIUM... BOMBS!

N is for NO SURVIVORS...

       - Plankton

LSM


  • Member since
    September 2003
  • From: AandF in the Badger State
Posted by checkmateking02 on Tuesday, October 30, 2012 10:39 PM

Sorry to hear this.  From the news, things are pretty bad there.


  • Member since
    July 2007
  • From: Southern New Jersey
Posted by troublemaker66 on Tuesday, October 30, 2012 10:12 PM

Hey Guys,

Seems I may be out of this GB as of last night...Sandy destroyed my modeling room, along with the F2A3 Buffalo I had ready to photograph for the finish...spent an hour rigging up the antennae wires, now it`s under a bookshelf, probably smashed to bits. Hurricanes suck!

Len Pytlewski

  • Member since
    July 2004
  • From: Sonora Desert
Posted by stikpusher on Tuesday, October 30, 2012 10:10 PM

Thank you guys. My TBD is on the sidelines for these days off while I finish up another build. Then I can turn my full attention there.


F is for FIRE, That burns down the whole town!

U is for URANIUM... BOMBS!

N is for NO SURVIVORS...

       - Plankton

LSM


  • Member since
    August 2005
  • From: Los Angeles, CA
Posted by corvettemike on Tuesday, October 30, 2012 9:55 PM

Coming along nicely :)

Rise my brothers we are blessed by steel in my sword I trust...

Arm yourselves the truth shall be revealed In my sword I trust...

Havoc Models

  • Member since
    May 2012
  • From: Milford, Ohio
Posted by Old Ordie on Tuesday, October 30, 2012 3:29 PM

Stik,

NIce work on the Devastator, my friend.  I'm looking forward to seeing the finished model.

Ordie

Flight deck:  Hasegawa 1:48 P-40E; Tamiya 1:48 A6M2 N Type 2 ('Rufe')

Elevators:  Airfix 1:72 Grumman Duck; AM 1:72 F-4J

  • Member since
    September 2009
  • From: Guam
Posted by sub revolution on Thursday, October 25, 2012 3:08 AM

Looks great, stik!!

NEW SIG

  • Member since
    September 2003
  • From: AandF in the Badger State
Posted by checkmateking02 on Wednesday, October 24, 2012 8:47 PM

I'm sure there's not as much in the Airfix offering as in yours, but I was impressed with your work on the torpedo, and some of your cockpit work might be helpful.  I haven't opened the boxes yet, so I don't know how they interpreted it.

More impressive work.  Nice paintjob.


  • Member since
    July 2004
  • From: Sonora Desert
Posted by stikpusher on Wednesday, October 24, 2012 6:31 PM

Thank you sir. Although I do not know how much of this will translate over to the 1/72 Airfix TBD. I remember building that kit eons ago... And now that the afternoon airbrush session is done, I have accomplished my main goal of getting this bird painted.

here is a view of the lower surfaces in Non Specular Light Gray

a few views of the upper surfaces in Non Specular Blue Gray

and since photos show some TBDs had the Blue Gray carried around onto to the lower surfaces of the leading edges, I went with that on mine.


F is for FIRE, That burns down the whole town!

U is for URANIUM... BOMBS!

N is for NO SURVIVORS...

       - Plankton

LSM


  • Member since
    September 2003
  • From: AandF in the Badger State
Posted by checkmateking02 on Wednesday, October 24, 2012 6:24 PM

Great work.  I'm taking notes, Stik.  I have a couple of Airfix's Devastators (1/72), and your build log will be helpful when I get around to them.


  • Member since
    July 2004
  • From: Sonora Desert
Posted by stikpusher on Wednesday, October 24, 2012 4:14 PM

My progress from the midday session:

Some quick airbrushing of Black and Aluminum on the prop and a couple cockpit parts (Target scope and DF antenna)

then it was time to install (bombardiers stick, cockpit rollover brace, DF antenna) and or paint (fire extinguisher, gunners cockpit deck radio gear) the last cockpit fiddly bits that I will not be able to before the canopy is glued on.

front cockpit

middle cockpit

rear cockpit/gunner's station

Then I installed the sliding stowed portions of the gunner's canopy

and finally the entire canopy

now here is my Dirty Harry paraphrase, "Ah ah, I know what you're thinking... why did he install that rear canopy unmasked?"

simple- it is my mask. Since I will have the rear portion open and it is already installed under the center, I am using the end portion as a form fitted mask and will dispose of it after painting.


F is for FIRE, That burns down the whole town!

U is for URANIUM... BOMBS!

N is for NO SURVIVORS...

       - Plankton

LSM


  • Member since
    July 2004
  • From: Sonora Desert
Posted by stikpusher on Wednesday, October 24, 2012 12:02 AM

Well I did my airbrushing in the night with my workbench lights & lamps. First up I redid the black that will go under the windscreen. Then the lowers in Light Gray. And finally some of the Blue Gray for the uppers- the tail area, gunners sliding canopies that will be glued in place tomorrow, touch ups on the cockpit upper decking, the lower portions of the outer folding wings, the cowl area, the fiddly bits needing Blue Gray...

fiddly bits

wingfold

cockpit decking

tail w/Light Gray demarcation

and overall upper as of now


F is for FIRE, That burns down the whole town!

U is for URANIUM... BOMBS!

N is for NO SURVIVORS...

       - Plankton

LSM


  • Member since
    July 2004
  • From: Sonora Desert
Posted by stikpusher on Tuesday, October 23, 2012 7:00 PM

Today was spent masking that "greenhouse" canopy. All Thirteen 1/48 scale feet of it. Now she is ready for the major painting to begin. Running out of daylight here to do any serious airbrushing today.


F is for FIRE, That burns down the whole town!

U is for URANIUM... BOMBS!

N is for NO SURVIVORS...

       - Plankton

LSM


  • Member since
    September 2009
  • From: Guam
Posted by sub revolution on Tuesday, October 23, 2012 3:22 AM

Excellent work by everybody!

Sorry, I haven't been around much due to work. Everything looks good though!

Thanks, Budd

NEW SIG

  • Member since
    July 2004
  • From: Sonora Desert
Posted by stikpusher on Monday, October 22, 2012 2:45 PM

Thank you sir. Your Alamein Sherman looks most impressive. You really did that one justice.


F is for FIRE, That burns down the whole town!

U is for URANIUM... BOMBS!

N is for NO SURVIVORS...

       - Plankton

LSM


  • Member since
    August 2011
  • From: Variable
Posted by Lt. Smash on Sunday, October 21, 2012 4:32 PM

Lookin' good, stik. I love the detail you've put on this bird.

On the bench:  Tasca M4A1 Sherman (Direct Vision Type)

Build Log: www.ltsmashsmodels.com

  • Member since
    July 2004
  • From: Sonora Desert
Posted by stikpusher on Thursday, October 18, 2012 1:46 PM

OK, all assembly before major painting now done-

last night I installed the landing gear- the wheels are just pressed on for now. They still can be taken off to ease painting them

and I drilled out the wing fold armatures lightening holes using a pin vise and various size drill bits last nite.

and finally how it all looks as of this morning  I placed the canopy in closed position just to see if it is how I want to go. Aside from painting purposes and masking the cockpit I am thinking no. Most likely I will display it open.

I have also as of now dipped the canopy in Future and it is drying now... but nothing worth taking a photo of there...


F is for FIRE, That burns down the whole town!

U is for URANIUM... BOMBS!

N is for NO SURVIVORS...

       - Plankton

LSM


  • Member since
    July 2004
  • From: Sonora Desert
Posted by stikpusher on Wednesday, October 17, 2012 6:26 PM

yes it is... probably some sort of sight to aid in leading a moving target.


F is for FIRE, That burns down the whole town!

U is for URANIUM... BOMBS!

N is for NO SURVIVORS...

       - Plankton

LSM


  • Member since
    May 2012
  • From: Milford, Ohio
Posted by Old Ordie on Wednesday, October 17, 2012 4:32 PM

Yes, I do see the resemblance.  That is a fancy front post.

Flight deck:  Hasegawa 1:48 P-40E; Tamiya 1:48 A6M2 N Type 2 ('Rufe')

Elevators:  Airfix 1:72 Grumman Duck; AM 1:72 F-4J

  • Member since
    July 2004
  • From: Sonora Desert
Posted by stikpusher on Wednesday, October 17, 2012 3:54 PM

Some kind of fancy front sight post that the PE set provides like on this one.

Click to view full size image


F is for FIRE, That burns down the whole town!

U is for URANIUM... BOMBS!

N is for NO SURVIVORS...

       - Plankton

LSM


  • Member since
    May 2012
  • From: Milford, Ohio
Posted by Old Ordie on Wednesday, October 17, 2012 2:42 PM

stik - What's that thing that looks like a weathervane on the barrel of the gun?  Is that glued to the barrel?  I can't tell, what with fading eyesight and all, lol!

Flight deck:  Hasegawa 1:48 P-40E; Tamiya 1:48 A6M2 N Type 2 ('Rufe')

Elevators:  Airfix 1:72 Grumman Duck; AM 1:72 F-4J

  • Member since
    July 2004
  • From: Sonora Desert
Posted by stikpusher on Wednesday, October 17, 2012 2:08 PM

Nine, it's hard to believe that there is a model airplane under all that!

Lots of little bits of progress today on my TBD-

first up, I cut the gunner's .30 cal. off its mount and changed the mount so that it will sit stowed rather than in ready to fire position. Then from that generic Tom's Modelworks USN Aircraft PE set,  I added the sights to the .30 cal. I also "grooved" out to separate the spade grips and cleaned up the mold seam lines with my needle files.Then I added the ammo can after clean up and reset the .30 in its' mount.

and since no photos that I have seen of TBDs showed flaps down with the wings folded, I installed the flaps up

and here is the shim work on the rear of the wing folds

and finally I glued on the horizontal stabilizers and tacked the engine in place. 

almost ready for paint now....


F is for FIRE, That burns down the whole town!

U is for URANIUM... BOMBS!

N is for NO SURVIVORS...

       - Plankton

LSM


  • Member since
    January 2012
  • From: Belgium, EU
Posted by Ninetalis on Tuesday, October 16, 2012 3:46 PM

Have a little update for now,
I just airbrushed the arrow between the vertical lines on the fuselage and the jap markings on the wings.
this is what she looks like for the moment.

I really hope that for once the paint hasn't crawled under the tape like the last two times.
I tried a new way of applying the paint and I think it helped.
Fingers crossed for now!

With regards, Ninetalis.

  • Member since
    January 2012
  • From: Belgium, EU
Posted by Ninetalis on Monday, October 15, 2012 5:08 PM

I use Gunze for my models, I only use Gunze, Tamiya and Revell.
The Revell ones are used for the interior.

I don't know about the Greenish tone.
I often hear that Gunze is probable the best you can get for those colours out of the bottle.
I don't like to mix colors unless I really have to
(not because of laziness but because I don't want to have 15 different tones of IJA Grey on my 15 different models, maybe I'll change on that part later)

I like most Jap flyers, beeing it homeland defense or from the Japanese-Soviet conflicts.
Actually, can't think of any jap flyer I don't like, except from some anoying shemes.

Anyway, I'm really happy that I'm starting to get the hang of the airbrushing, apart from some mistakes I'm really proud of myself!
I'm hoping on finishing this project before friday (it's my IPMS chapter meeting by then).
Gonna post pic's when I'm done with it.

Btw, nice work on that TBD so far!
With regards, Ninetalis.

  • Member since
    July 2004
  • From: Sonora Desert
Posted by stikpusher on Monday, October 15, 2012 3:48 PM

Nine, I do like the looks of that "Home Defense" Nate. I did mine as one in Thailand/Burma in early 1942 that fell prey to a Flying Tiger off an Aeromaster decal sheet. Cant wait to see yours all done. Your IJA Gray does not seem to have the greenish tone that the bottles of that paint I have do. Or perhaps it is just the lighting there.

Lt, your Sherman is gorgeous! One other color option I may have suggested you could try would have been US Olive Drab, and nobody with knowledge of Lend Lease tanks in the Western Desert could say was not possible. Since US built AFV s were delivered in their factory color of OD and painted in theater by the British, prior to issue to units,  OD was occasionally incorporated in to their desert camo schemes.

here are some progress photos of my TBD up to now:

wing bomb rack panels with corrugations removed- as they should be

Seams and sink marks filled with Gelsuper Glue and cleaned up on the lower wing join

and the shims that I added into the wing fold area above the flap wells.


F is for FIRE, That burns down the whole town!

U is for URANIUM... BOMBS!

N is for NO SURVIVORS...

       - Plankton

LSM


  • Member since
    October 2008
  • From: italy
Posted by bsyamato on Monday, October 15, 2012 5:51 AM

Great work on the Nate Ninetalis !! i did the little one from ICM :)

Well done on the sherman Smash Yes

Hope to get back with the 111 soon :( to busy at work and at the workbench too!!

  • Member since
    August 2011
  • From: Variable
Posted by Lt. Smash on Sunday, October 14, 2012 7:39 PM

Sherman II at El Alamein: Painting

As I moved into the painting phase of my Sherman II at El Alamein build, I was very happy with my progress.  The kit went together well, my attempt at soldering went smoothly and I was finally ready to put paint to plastic.   Unfortunately, this positive trend was not going to continue.

Things started off smoothly.  I started by applying black Vallejo Surface Primer. This was my first attempt at using it and I’m hooked. It comes easily out of my airbrush at 20 psi without thinning. The finish is smooth and coverage is consistent.  There is no comparison between this product and anything that comes out of a rattle can.
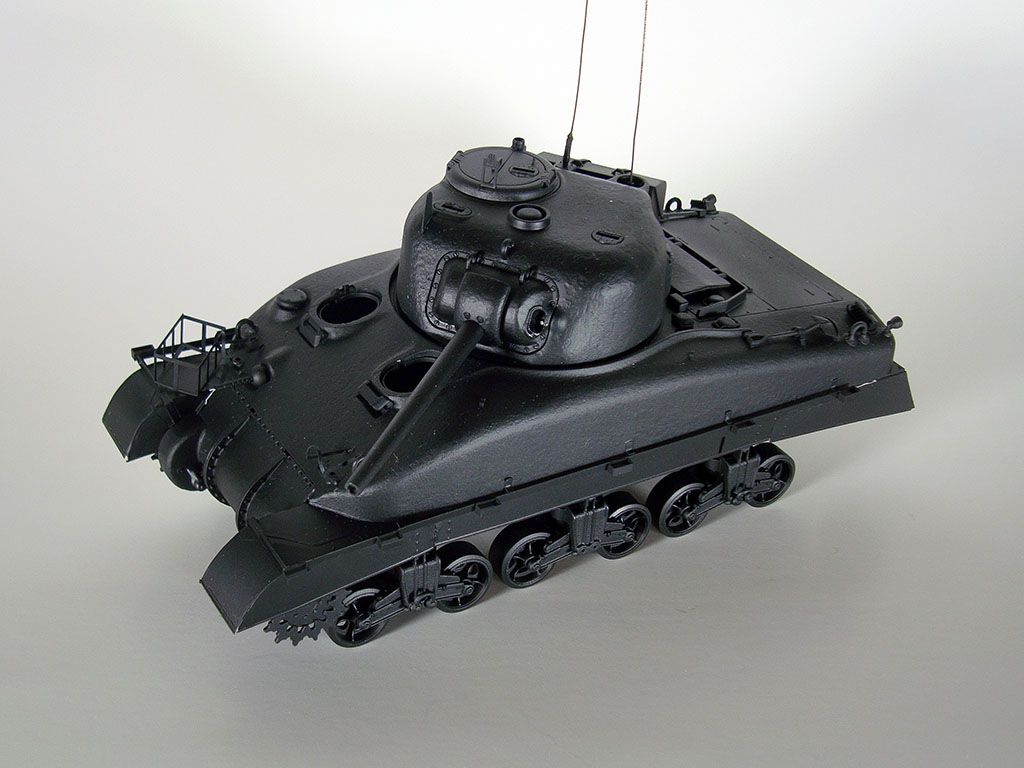
Next, I had to lay down the base coat and this is where I encountered my first challenge. What color is the base supposed to be? 

When I started this build, I knew exactly what tank I wanted to paint:

The good news is that the Dragon kit comes with marking for this very tank.  The bad news is that I quickly lost confidence in Dragon’s paint instructions which suggest using Middlestone for the top color and Dark Green for the bottom color.  Both seemed far too dark for this tank. 

After doing some more research, I found the top color is most likely British Standard Light Stone 61, and, after more research, I realized that this was going to be a tough color to match.  Mike Starmer and Mike Cooper are the experts in regards to British World War II Camouflage and colors.  In a post on Missing-Linx,  Mr. Starmer describes it as a strong, medium-toned, slightly brownish-yellow that fades to a beige-like shade in harsh sun, and Mr. Starmer and Mr. Cooper provide Humbrol and Revell mixes for Light Stone 61.  Unfortunately, I don’t have convenient access to either brand. 

In the Vallejo Model Color line which I wanted to use for this build, Light Stone 61 seems to fall somewhere Beige (917) and Iraqi Sand (819).  Keeping in mind that the color tends to fade, I decided to use Beige as my base color and then added Sunny Skintone (845) to brighten the beige at a 2:1 ratio.  The net result is a little lighter and perhaps a little more yellow than the reference but I liked the result.  It feels like it has been bleached by the sun and it will get darker when I whether it:
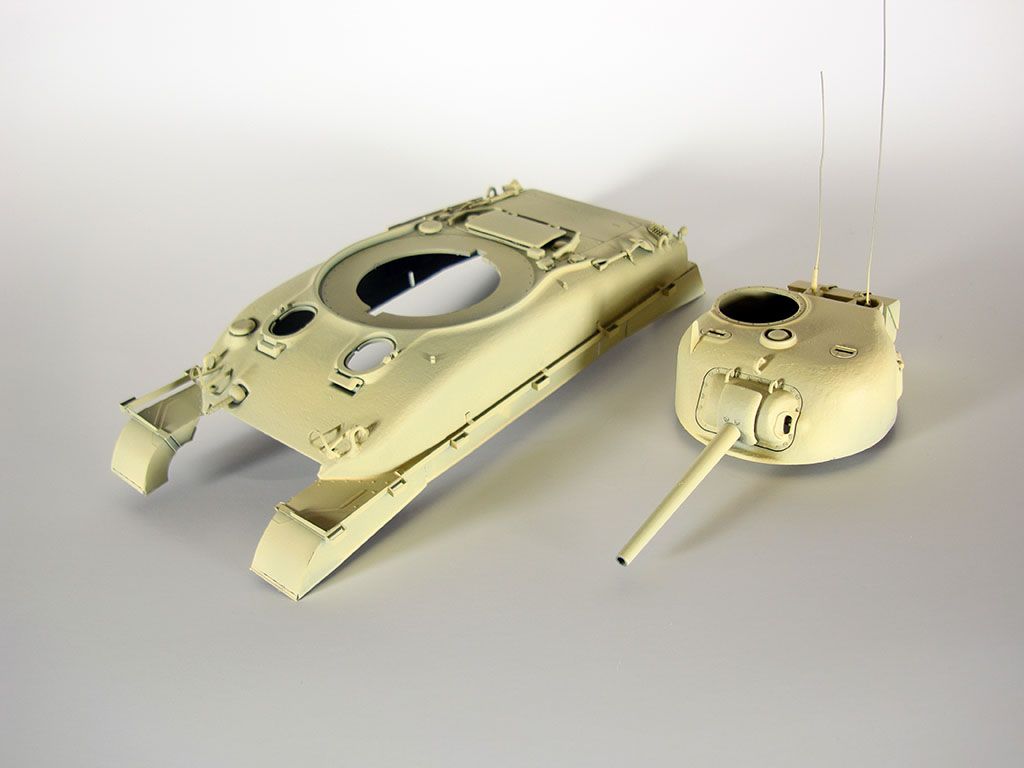
Now, with the base coat on, I moved on to paint the camouflage.  As you can see from the photo of the actual tank above there is a small light colored/white stripe that separates the base color from the darker camouflage color.  My plan was to paint this irregular white stripe next. 

To do that, I created a 1/35-scale mask for each side of the tank by enlarging the scanned painting instructions.  I transferred that mask onto wide painters tape, stuck the tape to the tank and sprayed the visible area with a light coat of white paint.  One side worked perfectly, but when I reloaded my airbrush to do the other side, I thinned my paint too much.  This caused my mask to bleed and paint to pool unevenly!  Drat! 

I wiped off as much of the wet paint as I could and then let the mess dry.  Afterwards, I applied another layer of base to cover what remained of the mistake, re-masked the area and tried again.  Problems persisted.  While not an exact repeat, I had a lot of bleeding and some running.  Double drat!

Again, I wiped off what I could, but at this point, I was starting to lose some detail.  So, I decided to strip the paint from the upper hull (the only part affected) and try again.  To strip the paint I used denatured alcohol, let the part soak in a foil pan for a few hours and then took a soft tooth brush to it. The paint and primer came off easily.

While I need to get better at masking, I exhausted my patience with this this time and needed to move on.  So, I re-primed the upper hull, and this time after laying down the base coat I hand painted the camouflage. 

I started by lightly outlining the 1/35-scale masks I recreated from the painting instructions with a pencil.  Next, I traced this outline with a No. 2 round brush and filled in the lower portion of the hull using Vallejo Model Color White (951) and a wide, flat brush.  It took 4-5 coats to get a solid, stroke-free white. 

Now, I needed to determine what the darker camouflage color needed to be.  One interesting source was from Bison Decals which shows the tank I’m modeling with painting instructions. This helped confirm the top color as Light Stone but showed the bottom color as being “Unknown colour” and illustrated with a medium olive brown.  This gave me the inspiration to use Vallejo Model Color Middlestone (882). 

Using the white shape as a guide, I painted freehand the shape of the now-Middlestone camouflage with a No. 2 brush and filled in the lower portion with a wide, flat brush.  It took 2-3 coats to get a solid, stroke-free finish.
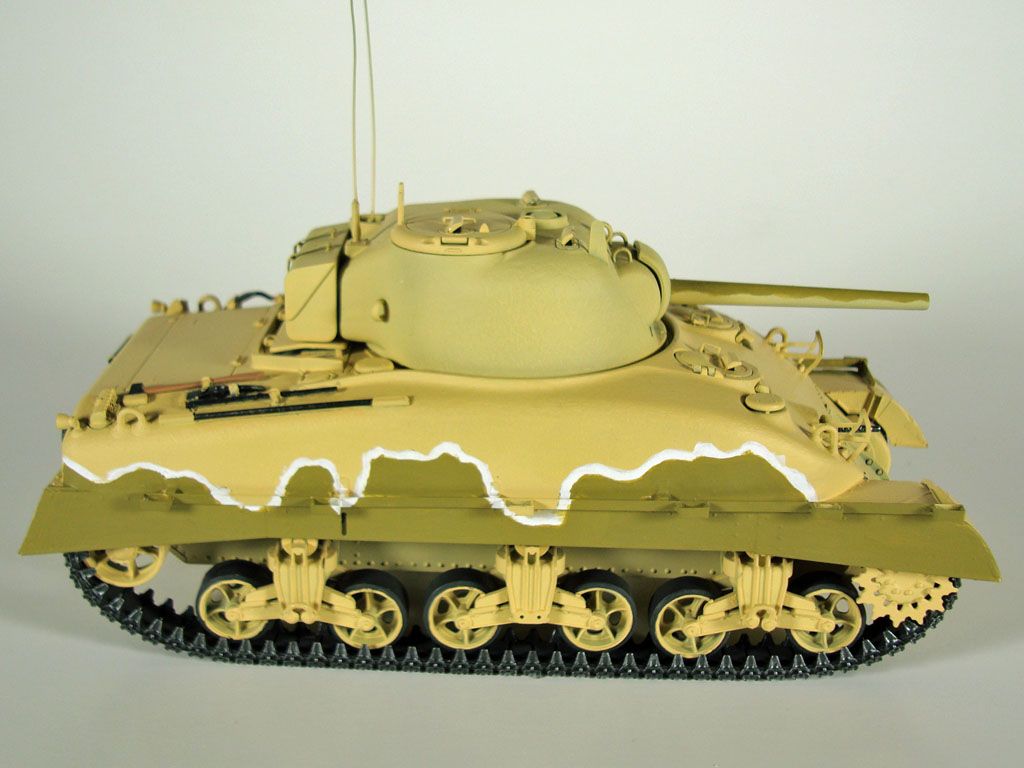
The road wheels and tracks were painted with Vallejo Model Color Black Grey (862) using my airbrush.  The track, except for the track pads, were dry brushed with Vallejo Model Color Oily Steel (865).

I hand painted the tools as well as the bow and coaxial machine guns black, dry brushing metal components with Vallejo Model Color Gunmetal Grey (863).  I layered Vallejo Model Color Cork Brown (843) over the black on all wood tools.
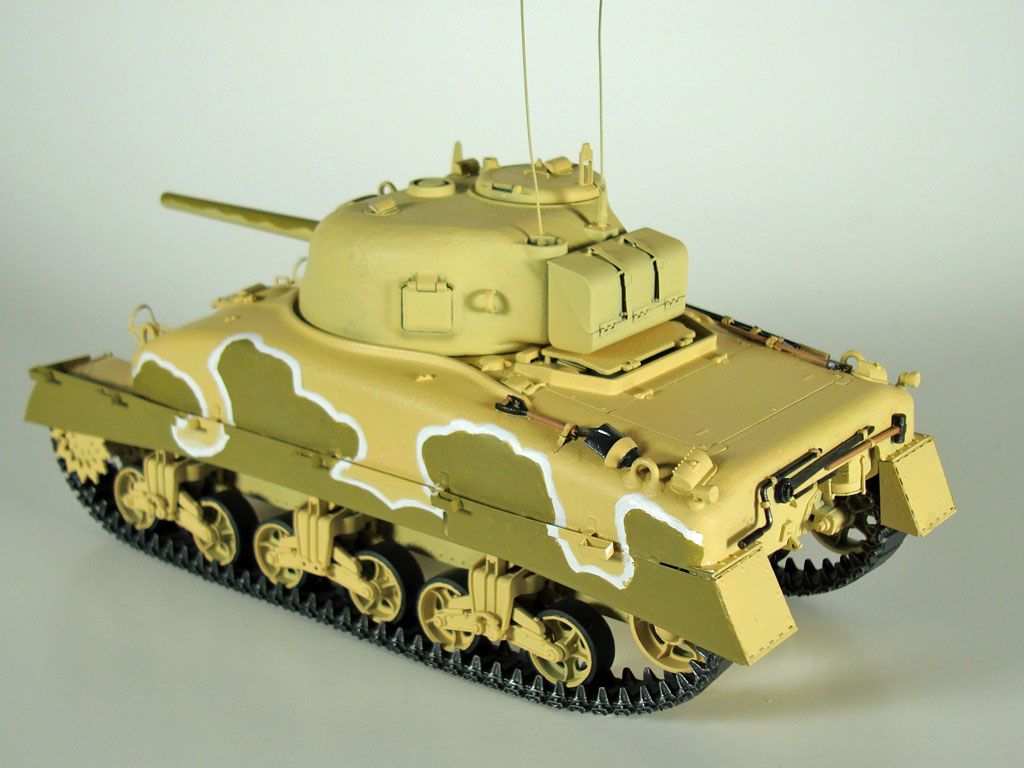
While it took me much longer than anticipated, I am pleased with the results…although after looking at the photos, I realize that I need to do a couple of small touch-ups.  Still, I’m calling this step done and moving on to decals and weathering.

I’m looking forward to making the tank look less factory-fresh and finishing this build.  Hopefully, my next post will come faster than the last took.

On the bench:  Tasca M4A1 Sherman (Direct Vision Type)

Build Log: www.ltsmashsmodels.com

JOIN OUR COMMUNITY!

Our community is FREE to join. To participate you must either login or register for an account.

SEARCH FORUMS
FREE NEWSLETTER
By signing up you may also receive reader surveys and occasional special offers. We do not sell, rent or trade our email lists. View our Privacy Policy.