SEARCH FINESCALE.COM

Enter keywords or a search phrase below:

Force of Nature Group Build

64206 views
674 replies
1 rating 2 rating 3 rating 4 rating 5 rating
  • Member since
    November 2009
  • From: SW Virginia
Posted by Gamera on Monday, November 19, 2012 8:58 AM

Jimmy: Wow, looks great! I free-handed my A-10 but considering your results maybe I should have went with the Blue-Tack.

Joe: Fantastic work on the cockpit there, almost a shame to stick it inside where you can't hardly see it.

BTW: Sprayed the gear bays and the NM leading edges on the Viggen this weekend. Already see a few places I need to clean up but hopefully will be able to get the underside painted soon and then to the fun camo work.  

"I dream in fire but work in clay." -Arthur Machen


  • Member since
    February 2012
  • From: Olmsted Township, Ohio
Posted by lawdog114 on Wednesday, November 21, 2012 9:16 PM

Hello, I'm in for a progress update:  I got her together and primed.  Maybe I'm spoiled by Tamiya kits, but this turkey has been fighting me pretty good so far, albeit some has been operator error.  First, the outboard wing plugs did not match the wing chord.  I had to do a lot of twisting and spot gluing with Tenax to make them look halfway decent.  Surprisingly, the 8 Browning 303 inserts fit good. 

The lower wing to fuselage joint that went right through the nice ribbing detail, however, it did no good.  This area was a bear and I struggled .  All I could do was super glue the joint and sand obsessively, all while shaking my head as I wondered why Hasegawa would do this, especially when there was a nice panel line just north of the area?  I was having alot of trouble getting this area presentable, so I ultimately said to myself "Self....if you can't beat 'em...join 'em".  I decided to sand the whole panel, to include the ribbing, which did blend the joint and once done, it left a faint impression of the ribbing detail.  Since I've heard this kit has overemphasised ribbing in the first place, I suppose I sort of came up with a solution. I suppose we need this type of thing to pop up once in a while to keep us honest. 

I tried to cut apart the canopy with the intent of using the front windscreen and a vacuform for the sliding part.  I unfortunately slipped with the razor saw and gouged the front part.  I then decided to use the damaged part as a makeshift canopy mask.  Now I suppose I have to use the whole Squadron canopy...oh well....hope it fits well (I hate cutting these out).  She's primed and almost ready for paint. 

Joe   

 "Can you fly this plane and land it?...Surely you can't be serious....I am serious, and don't call me Shirley"


  • Member since
    November 2009
  • From: SW Virginia
Posted by Gamera on Thursday, November 22, 2012 9:52 AM

Joe: Nice work there! I love Hasegawa kits but yeah most do have some trouble spots here or there. You might want to hit the rear of the portside wing with a sanding stick, I see a little ridge there on the third photo but otherwise she looks perfect!

"I dream in fire but work in clay." -Arthur Machen


  • Member since
    February 2012
  • From: Olmsted Township, Ohio
Posted by lawdog114 on Tuesday, November 27, 2012 1:59 AM

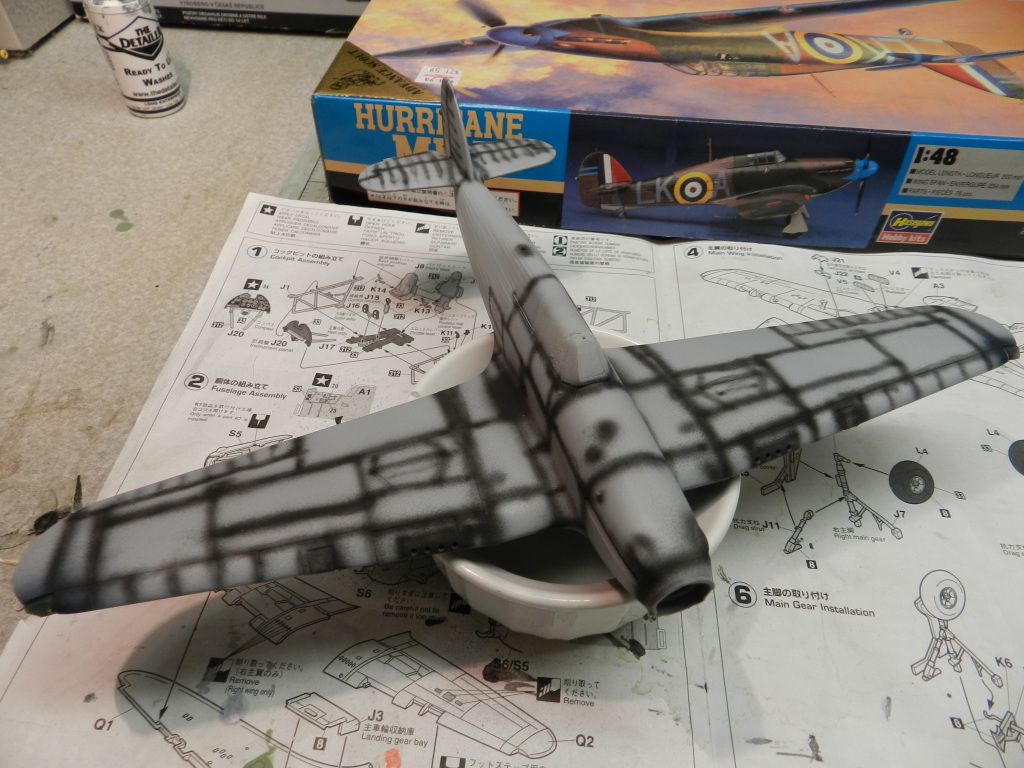
Hello, I'm in for an update.  Thanks for catching that Gamera.  I took care of that sanding mishap.  I added the "headlights" (landing lights?) and then the wing tip lights.  I've been warned there are fit issues with the latter, so I dryfitted them and they seemed to fit ok with some minor gaps as reported  I painted them the appropriate clear red and green, taped off the light portion leaving the frame (bezel?) exposed, then I super glued them in.  I then filled any resulting gaps with white glue.  It looks good enough.  It was pre-shaded the usual XF-1 Flat Black to await the Sky color underneath.
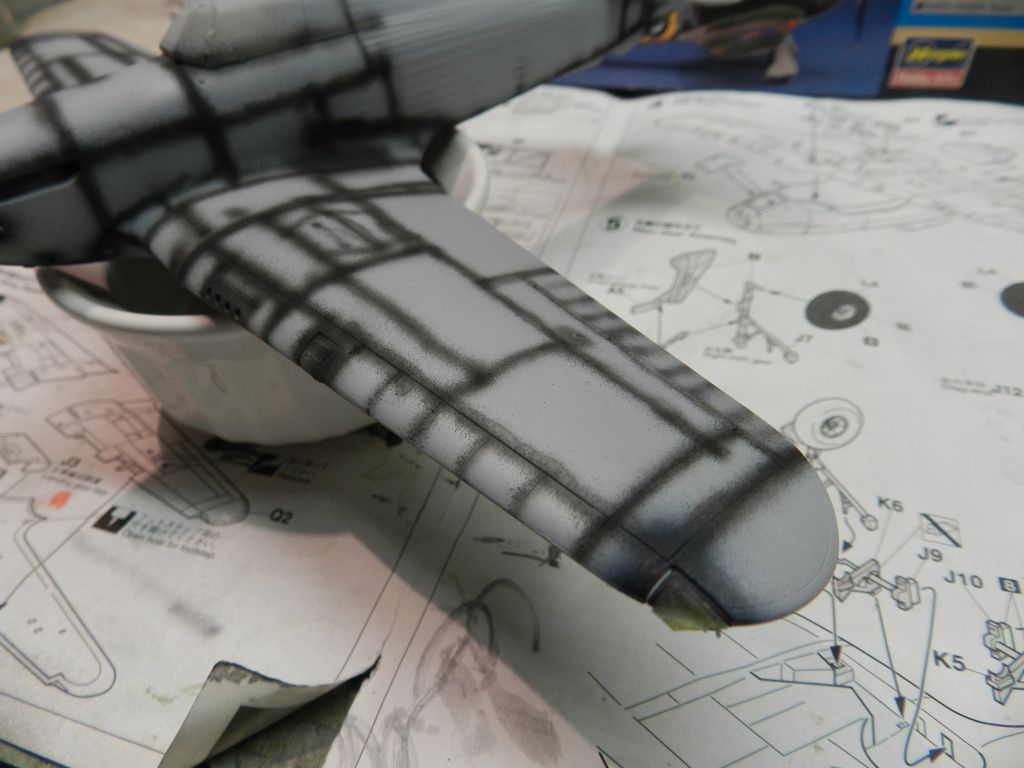
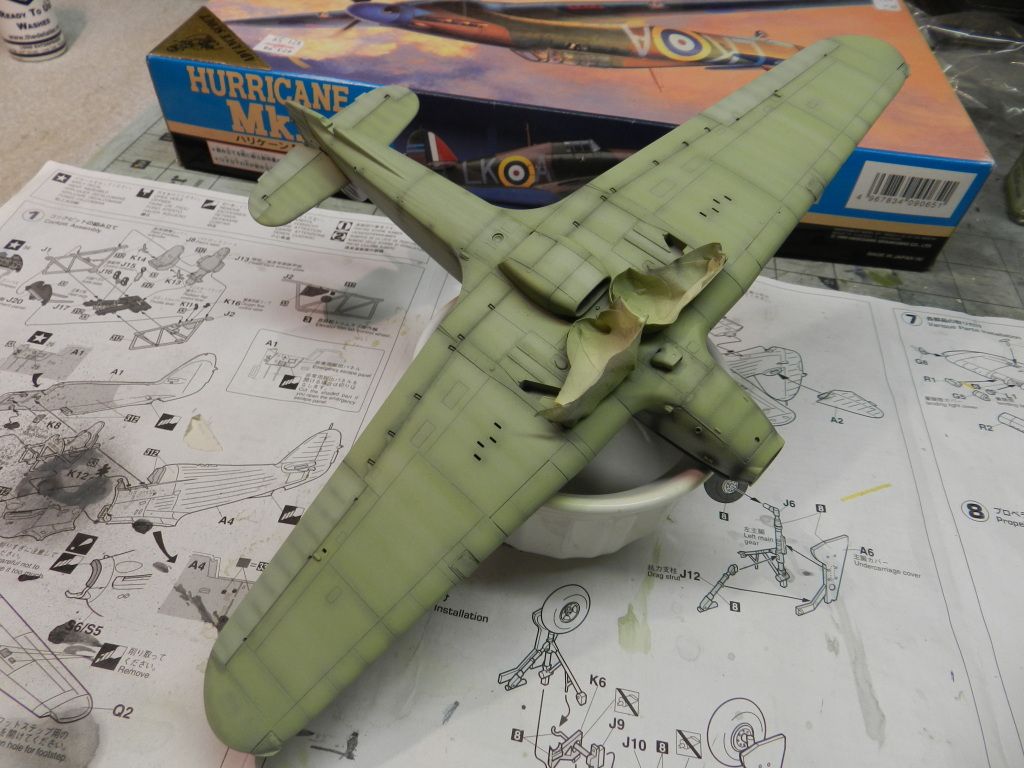
I suspect my airbrush needle is in need of replacement since my lines keep getting fatter and fatter (and Leo is getting larrrrrrrrger!).  "Airplane!" reference aside, I made the same mixture I did for my Spitfire MK I with Tamiya XF-21 Sky and a dash of XF-3 Flat Yellow.  This seems to match the Sky Type S perfectly (I rarely paint straight from the bottle).  At about 15 psi (I prefer lower pressures), the paint was sprayed to where the flat black was just slightly visible. The paint was then lightened with XF-2 Flat White.  I then streaked the lower surface with the airflow.  Once done, I used a diluted mixture of XF-69 NATO black and XF-64 Red Brown (I keep a glass bottle pre-mixed for convenience) on areas subject to grime, mostly around the engine, intakes, flaps and wheel wells.  To my eye, it adds an extra dimension to the overall look.  If anyone should try it, be careful because its easy to overdo.  I think this here (below) is about right.

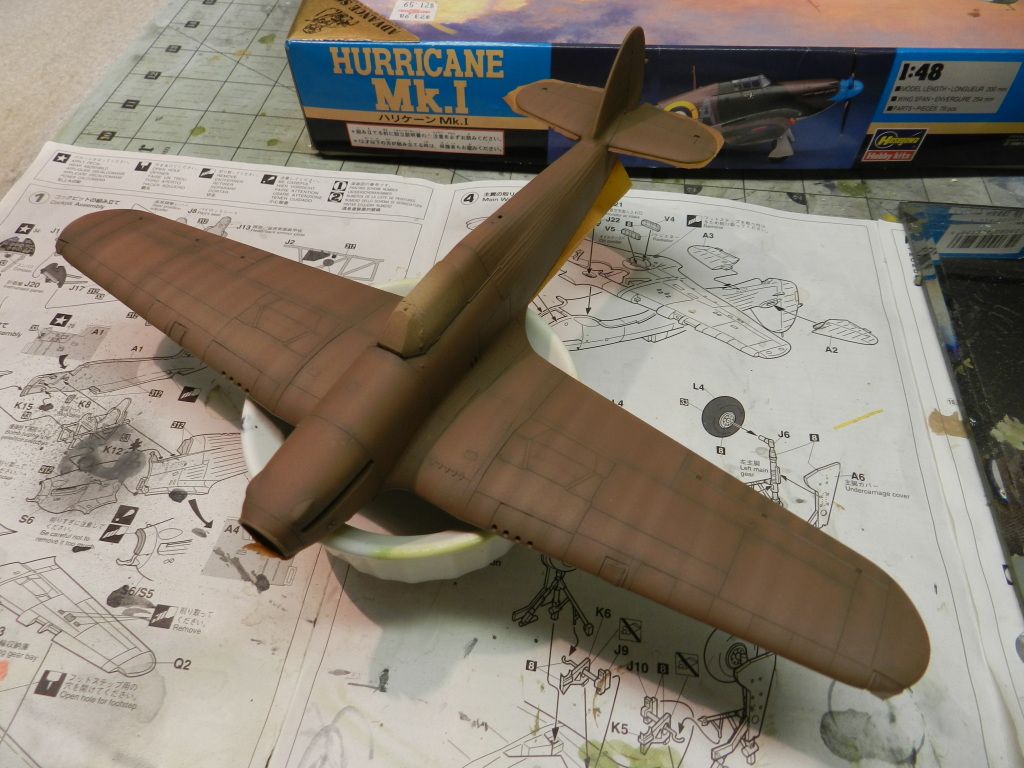
I then sprayed the RAF Dark Earth with a the Tamiya recommended mixture of XF-64 Red Brown and XF-52 Flat Earth.  The last time I mixed this shade for the Spitfire MK I, I thought it seemed too red, so I decided to mix some XF-49 Khaki into it until it turned more brown.  Once satisfied, it was sprayed in the same manner as the Sky.  I made sure some of the distinctive tail plane and rudder ribbing showed through.  This was then lightened with XF-57 Buff.  The wings were then streaked rather heavily. 
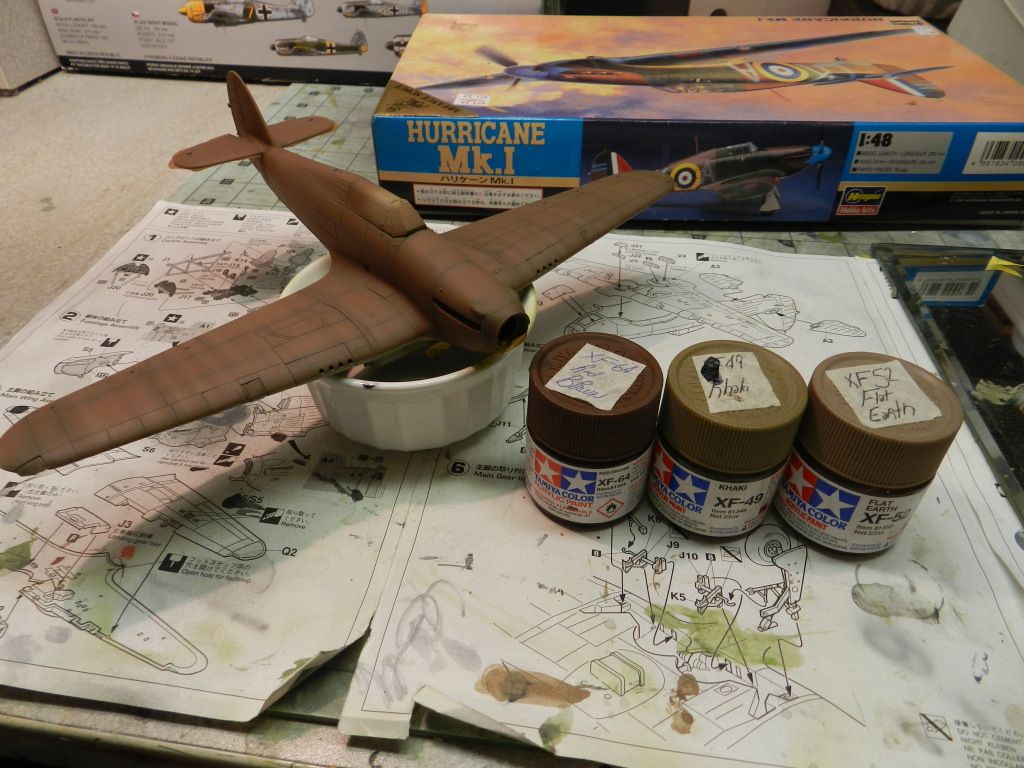
I ordered the Xtradecal sheet 70th Anniversary of the Battle of Britain (#48-086) off E-bay (my go to for decals).  It has several Spits and Canes to choose from.  When it does arrive, I'll decide on which Hurricane to build.  Since I don't know whether it will be an A or B pattern, I decided to hold off on the RAF Dark Green until it gets here. 
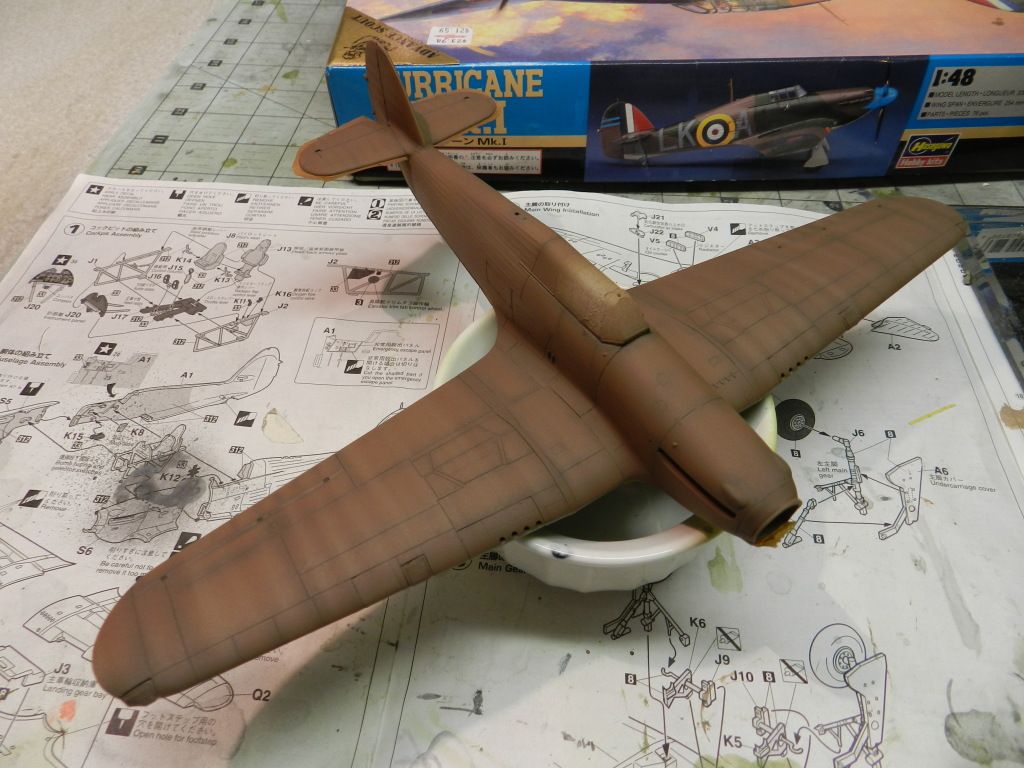
More to follow..

Joe

 "Can you fly this plane and land it?...Surely you can't be serious....I am serious, and don't call me Shirley"


  • Member since
    November 2009
  • From: SW Virginia
Posted by Gamera on Tuesday, November 27, 2012 9:22 AM

Joe: that looks awesome! I've tried some streaking but nothing that aggressive. Will have to give it a try too.

"I dream in fire but work in clay." -Arthur Machen


  • Member since
    January 2010
  • From: Nebraska, USA
Posted by CallSignOWL on Tuesday, November 27, 2012 8:08 PM

wow lawdog, that AB work is impressive!

------------------------

Now that I'm here, where am I??

  • Member since
    March 2010
  • From: New Zealand
Posted by Scorpiomikey on Wednesday, November 28, 2012 4:31 PM

Are those photos round the right way? The top before shot seems to have darker panel lines, or is that just me?

"I am a leaf on the wind, watch how i soar"

Recite the litanies, fire up the Gellar field, a poo storm is coming Hmm 

My signature

Check out my blog here.

  • Member since
    January 2010
  • From: Nebraska, USA
Posted by CallSignOWL on Wednesday, November 28, 2012 5:46 PM

whichever way it goes, I like the effect

------------------------

Now that I'm here, where am I??

  • Member since
    September 2003
  • From: AandF in the Badger State
Posted by checkmateking02 on Wednesday, November 28, 2012 7:37 PM

Nice effect.  Looks good.


  • Member since
    November 2009
  • From: SW Virginia
Posted by Gamera on Thursday, November 29, 2012 8:56 AM

Yeah I like the effect Jimmy. I've had some problems with washes wanting to bead off Metalizer Sealer- I might have to try some pastels and see if they work better.

"I dream in fire but work in clay." -Arthur Machen


  • Member since
    April 2005
  • From: Australia
Posted by taxtp on Thursday, November 29, 2012 9:15 PM

I use them a lot too. There is an infinite variety of colours as you can mix ground up pastels easily, so things like panel variations are really easy too.

Great effect Jimmy, thanks for sharing it.

Cheers

Tony

I'm just taking it one GB at a time.

  • Member since
    February 2012
  • From: Olmsted Township, Ohio
Posted by lawdog114 on Saturday, December 1, 2012 11:21 PM

Hello folks, I'm in for a little update here.  I decided on Carl Davis' 601 Tangmere mount from the Fall of 1940.  Davis was one of the few pilots of American decent to participate in the Battle of Britain and was unfortunately KIA in Septemberof 1940.  I was inspired and decided to homage to this hero.  The markings were from the Aeromaster sheet 48-577 "Yanks in the RAF".  It calls for a bare metal panel on the nose and no underwing roundels.  I decided I would exercise artistic licensing and just build it as a standard Hurricane, by omitting this panel and I may even add the roundels.  Reference the latter, the Aeromaster sheet seems to unclear whether these were present or not.  Heck, I may even go back and throw in the NMF nose panel.   

I used Blue Tac rolled out in the pattern for application of the XF-81 RAF Dark Green.  It was sprayed down then Xf-57 Buff was added for streaking to weather it.  The clear coat has been added and I'm almost ready for the decals. 

Joe

 "Can you fly this plane and land it?...Surely you can't be serious....I am serious, and don't call me Shirley"


  • Member since
    May 2005
Posted by pyrman64 on Sunday, December 2, 2012 2:44 AM

Nice looking bird you got there, Lawdog! Yes Toast

Greg H

"There is many a boy here today who looks on war as all glory, but, boys, it is all hell." Gen. Wm T. Sherman (11 April 1880, Columbus, Ohio)

  • Member since
    January 2010
  • From: Nebraska, USA
Posted by CallSignOWL on Tuesday, December 4, 2012 3:11 PM

that looks great!

------------------------

Now that I'm here, where am I??

  • Member since
    November 2009
  • From: SW Virginia
Posted by Gamera on Tuesday, December 4, 2012 7:41 PM

She looks sharp Joe, the streaking is coming along great!

"I dream in fire but work in clay." -Arthur Machen


  • Member since
    December 2002
  • From: Bury St Edmunds, Suffolk, England
Posted by Bish on Wednesday, December 5, 2012 1:39 AM

Lovely paint work there Joe.

I am a Norfolk man and i glory in being so


On the bench: Airfix 1/72nd Harrier GR.3/Fujimi 1/72nd Ju 87D-3

  • Member since
    April 2005
  • From: Australia
Posted by taxtp on Wednesday, December 5, 2012 4:53 PM

Nice work Joe, very sharp.

Cheers

Tony

I'm just taking it one GB at a time.

  • Member since
    February 2012
  • From: Olmsted Township, Ohio
Posted by lawdog114 on Wednesday, December 5, 2012 10:26 PM

Hello all, Thanks for the compliments.  It shouldn't be long now.  I got her clearcoated and while waiting for it to cure (I use Alclad Clear Gloss, so this is only a matter of a few hours), I turned my attention to the landing gears, wheels and such.  The gears on this kit are nicely detailed and quite impressively intricate.  After paint, I ran the brake lines with fine wire per reference photos to add that extra dimension.  I ended up using a True Details set of wheels since the kit tires seem sort of cartoonish to me (anyone remember that Amazing Stories episode in the '80's with the magical cartoon B-17 wheels.....classic!). 

The decals were Aeromaster and went down beautifully under Micro Sol.  As a matter of fact, I use Aeromaster Decals for all my British roundels since these can be tricky.  I ultimately decided to exercise artistic licensing and add the underwing roundels because I do suspect this plane did have them at one point.   Furthermore, to be quite frank, Battle of Britain planes just don't look right without them.  It just leaves me with that hollow feeling.  Once complete, I gave the panel lines a Flory Wash of Black on top and Dark Dirt on the bottom.  I must admit that at first I didn't like this stuff because it just beaded up on the gloss surface and had a strange gritty texture, however, persistence does pay off as it dries and the stuff does eventually go into the crevices nicely.  The key is to use a large brush and coat everything with it repeatedly.  Once dry, wipe it off with a slightly damp paper towel.  I use paper coffee filters which don't leave behind lint.  I'm in the home stretch....stay tuned. 

Joe

 "Can you fly this plane and land it?...Surely you can't be serious....I am serious, and don't call me Shirley"


  • Member since
    September 2003
  • From: AandF in the Badger State
Posted by checkmateking02 on Wednesday, December 5, 2012 11:35 PM

Outstanding finish.  The underwing roundels do make a nice look.


  • Member since
    November 2009
  • From: SW Virginia
Posted by Gamera on Thursday, December 6, 2012 9:32 AM

Yeah Joe, she looks supercoolawesome!!!

(So good I have to make up new words!)

"I dream in fire but work in clay." -Arthur Machen


  • Member since
    February 2012
  • From: Olmsted Township, Ohio
Posted by lawdog114 on Thursday, December 6, 2012 9:59 PM

I'm gonna call her finished.  To recap, its the 1/48 scale Hasegawa Hurricane MK I in the Battle of Britain era markings of Carl Davis', 601 Squadron out of Tangmere in August of 1940.  Davis was a nine kill ace of American decent.  He was KIA on September 6th 1940 in a dogfight with a BF 109 over the skies of England.

In review of the kit, it scores points for great detail in the cockpit and landing gear, but falls short with the closed canopy and lousy fit in some areas, most notably at the lower wing fuselage joint.  I added Eduard seatbelts, a Squadron Canopy (both pieces) and True Details wheels.    I also used Aeromaster decals 48-577 "Yanks in the RAF" for Davis' Hurricane.  Surprisingly, once the fuselage codes were sealed and dullcoated, I had some trouble with the carrier film showing through and there was some silvering on the starboard side, albeit minor but its there if you look closely.  I normally have little trouble with Aeromaster products, so I must assume the silvering was because I failed to clear coat it enough in this area before application and the decal did not get a good seal in that spot.  The Eduard canopy masks performed flawlessly and I added a scratch built handle to the exterior of the canopy from Evergreen rod.  Here she is and thanks for having me.

Joe


 "Can you fly this plane and land it?...Surely you can't be serious....I am serious, and don't call me Shirley"


  • Member since
    January 2010
  • From: Nebraska, USA
Posted by CallSignOWL on Thursday, December 6, 2012 10:15 PM

stunning! What did you use foe the flatcoat?

------------------------

Now that I'm here, where am I??

  • Member since
    February 2012
  • From: Olmsted Township, Ohio
Posted by lawdog114 on Friday, December 7, 2012 3:07 AM

CallSignOWL

stunning! What did you use foe the flatcoat?

Thanks Owl.  I used to utilize Future cut with 91 % Alcohol then mixed with Tamiya flat base, but since Future changed their formula, I have no use for it.  I've since reverted back to the old tried and true Testor's Dullcote cut with lacquer thinner.  I prefer a satin silk-like finish as opposed to dead flat and I seem to be able to manipulate TDC to get this.  As a matter of fact, ever since I stopped using Future, I've had very few problems with any of my decaling, weathering and finishing....go figure.  As one modeler on here recently said, "Use Future on your floor".....LOL

Joe

 "Can you fly this plane and land it?...Surely you can't be serious....I am serious, and don't call me Shirley"


  • Member since
    May 2005
Posted by pyrman64 on Friday, December 7, 2012 7:06 AM

Joe: daaammmmnnnn...that Hurricane looks nice! Bow Down Toast

Greg H

"There is many a boy here today who looks on war as all glory, but, boys, it is all hell." Gen. Wm T. Sherman (11 April 1880, Columbus, Ohio)

  • Member since
    January 2010
  • From: Nebraska, USA
Posted by CallSignOWL on Friday, December 7, 2012 7:47 AM

future changed its formula? That's news to me. I still use it all the time and never had any troubles

------------------------

Now that I'm here, where am I??

  • Member since
    November 2009
  • From: SW Virginia
Posted by Gamera on Friday, December 7, 2012 2:06 PM

Joe: Excuse the pun but your Hurricane blows me away!!!

Great work! Love the weathering esp on the undersides.

"I dream in fire but work in clay." -Arthur Machen


  • Member since
    February 2012
  • From: Olmsted Township, Ohio
Posted by lawdog114 on Friday, December 7, 2012 5:34 PM

CallSignOWL

future changed its formula? That's news to me. I still use it all the time and never had any troubles

Contrary to what they claim, yes, the new formula is different.  It just doesn't cure like it used to.  I assume you have a "Future" bottle, if so, cherish it.  This new stuff is crap.   

Joe

 "Can you fly this plane and land it?...Surely you can't be serious....I am serious, and don't call me Shirley"


  • Member since
    January 2010
  • From: Nebraska, USA
Posted by CallSignOWL on Friday, December 7, 2012 6:22 PM

I have pledge with future shine

------------------------

Now that I'm here, where am I??

  • Member since
    January 2010
  • From: Nebraska, USA
Posted by CallSignOWL on Friday, December 7, 2012 6:26 PM

frint page updated!

------------------------

Now that I'm here, where am I??

  • Member since
    August 2009
  • From: Borlando Fla home of the rat
Posted by TREYZX10R on Friday, December 7, 2012 7:03 PM

Joe that is a superb looking Hurri! Very nicely done Sir!

JOIN OUR COMMUNITY!

Our community is FREE to join. To participate you must either login or register for an account.

SEARCH FORUMS
FREE NEWSLETTER
By signing up you may also receive reader surveys and occasional special offers. We do not sell, rent or trade our email lists. View our Privacy Policy.