SEARCH FINESCALE.COM

Enter keywords or a search phrase below:

Force of Nature Group Build

64205 views
674 replies
1 rating 2 rating 3 rating 4 rating 5 rating
  • Member since
    August 2009
  • From: Borlando Fla home of the rat
Posted by TREYZX10R on Monday, December 17, 2012 10:12 PM

Owl thanks, I like using that same treatment on the raised details. I've mixed results thoEmbarrassed

Basic Dry fit looks promising

Trying not to go hog wild with a/m goodies on this one so making the most out of whats in the box is a must. First up I gave the wheels a retread and then 'weighted' them,may have weighted them a tad much but I'll roll with it!

Next I opened up the vents behind the cowl flap area

Cleaned up and thinned the aft fuse vents

More cleaning and drilling,will be straying from the oob by adding some tubing here

Razor sawed the cowl flaps ,filed them a bit and thinned the trailing edges

Rescribed and cleaned up the front cowl

on to the office next! cheers Trey

  • Member since
    January 2010
  • From: Nebraska, USA
Posted by CallSignOWL on Monday, December 17, 2012 9:45 PM

nice hurri's checkmate!

oh! for a tip with raised panel lines, I like to either prime in a dark color or preshade along the panel lines. Once the camo is finished, take 600 or finer sand paper and lightly buff the surface. The paint should come off the raised details revealing the dark lines

thats the process I used on my ZERO kit:

------------------------

Now that I'm here, where am I??

  • Member since
    January 2010
  • From: Nebraska, USA
Posted by CallSignOWL on Monday, December 17, 2012 9:33 PM

TREYZX10R

Hey Owl can you put me in for a 1/48 P-47 revelogram next?thanx

updated!

------------------------

Now that I'm here, where am I??

  • Member since
    September 2003
  • From: AandF in the Badger State
Posted by checkmateking02 on Monday, December 17, 2012 5:59 PM

Thanks, Trey.  Saw your P-40 in the Aircraft section.  Excellent build.  The "in-flight" photos were outstandingly good.


  • Member since
    August 2009
  • From: Borlando Fla home of the rat
Posted by TREYZX10R on Monday, December 17, 2012 5:16 PM

Another great looking Hurri CMK ,that pinwash worked perfectly. Very nicely done Sir!

  • Member since
    September 2003
  • From: AandF in the Badger State
Posted by checkmateking02 on Monday, December 17, 2012 4:49 PM

The markings represent the aircraft flown by James Nicolson (249 Squadron) at the time he earned the Victoria Cross.  There is some controversy about how they actually appeared, since no photo of the plane is known to exist.  I followed the placement suggested by Airfix.  Aviaeology includes the markings in their "Vital Storm Pt. 2" decal sheet, and they suggest alternate placement for the codes.

That's it.  Thanks for looking.


  • Member since
    September 2003
  • From: AandF in the Badger State
Posted by checkmateking02 on Monday, December 17, 2012 4:42 PM

And the finish photos.  As you can see, the major blunder here was the shell ejector ports.  I assumed Revell knew what it was doing, and duplicated the placement from the Revell kit.  This I have learned is horribly wrong.  I made them out of black-painted decal stock, since I didn't want to cut holes in the wings, and bungle it.  Unfortunately, the location is where I bungled.  Live and learn.

The panel lines on this Airfix offering are all raised, nothing engraved, so it was a challenge to highlight them.  I used a thin acrylic pinwash and allowed it to sit long enough to "grab," then I wiped it down with a damp q-tip (cotton bud). 

So as to avoid more jamming up, I put the last views on a separate post.


  • Member since
    September 2003
  • From: AandF in the Badger State
Posted by checkmateking02 on Monday, December 17, 2012 4:37 PM

Thanks, Bish.  Yes, the b&w makes a nice change from Sky.  The Casper sheet has a couple of Spitfires on it with variations on the theme:  aluminium fuselage with b&w wings.

I worked on the Hurricane from the VC Icons set from Airfix (1/72) at the same time.

I didn't take many photos of the construction phase.  At least, it came with a seat.  The harness is made of masking tape. 

The fuselage assembly.

The wing assembly.

Everything is basically assembled here, and the undersurfaces have been painted using WEM Colourcoats "Sky."  In better lighting, it looks more pale greenish than the photo shows.


  • Member since
    December 2002
  • From: Bury St Edmunds, Suffolk, England
Posted by Bish on Monday, December 17, 2012 4:22 PM

Stunning looking Hurricane. I do like the black and white bottoms on these. Great work.

I am a Norfolk man and i glory in being so


On the bench: Airfix 1/72nd Harrier GR.3/Fujimi 1/72nd Ju 87D-3

  • Member since
    September 2003
  • From: AandF in the Badger State
Posted by checkmateking02 on Monday, December 17, 2012 4:06 PM

Thanks, TREY.  It took a while.  I just didn't post photos till I knew it'd turn out.


  • Member since
    August 2009
  • From: Borlando Fla home of the rat
Posted by TREYZX10R on Sunday, December 16, 2012 9:10 PM

Wow CMK2 you cranked that one out! Looks awesome too!

  • Member since
    September 2003
  • From: AandF in the Badger State
Posted by checkmateking02 on Sunday, December 16, 2012 6:13 PM

Final shots, and they are probably self-explanatory.

When I can get to it, I'd like to post an Airfix Hurricane I build along with this one.  It was a lot easier.

Thanks again, Ms OWL, for hosting this build.


  • Member since
    September 2003
  • From: AandF in the Badger State
Posted by checkmateking02 on Sunday, December 16, 2012 6:10 PM

Everything jammed up again, when I tried to put six photos into one post, so I'll have to split these again.

Here is both a top and bottom view.  I used a black wash around the control surfaces and a dark gray wash in the panel lines on the bottom of the aircraft.  It doesn't show up too well on the black side in the photo.

On the top side, I used a dark brown wash in the panel lines.

The Casper decals went on very well, and even snuggled somewhat over all those rivets.


  • Member since
    September 2003
  • From: AandF in the Badger State
Posted by checkmateking02 on Sunday, December 16, 2012 5:46 PM

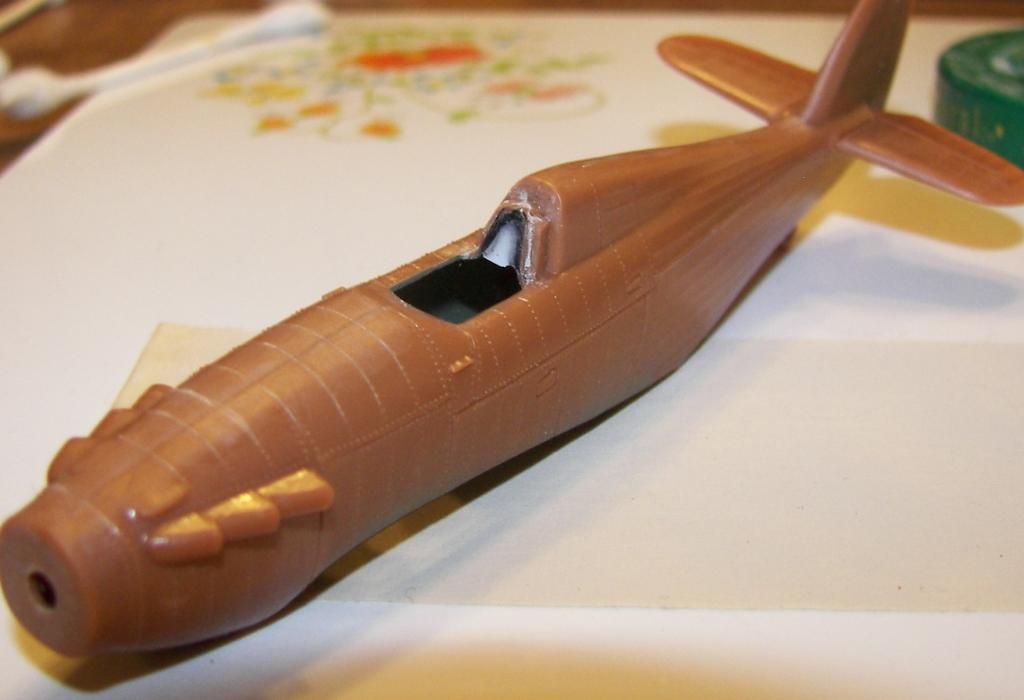
Now about that cockpit--there is none without the odd pilot figure.  Nothing much is visible underneath the canopy, which was severely scratched, maybe because of the age of the moulds.

So I went to the "failed modeling efforts" box and found an old B-17 seat, which I sanded to some semblence of shape, painted it and added seatbelts from painted masking tape.

Then I positioned it with poster tack where it is supposed to sit atop the upper wing and tested its location.  Once that was OK, I glued it in place with superglue and removed the poster tack.

I assembled the propeller by pushing the shaft through the hole in the nose, and attached the retaining bushing from the inside of the assembled fuselage.  Unfortunately this means painting the thing with the prop in place.  I made a mask with a hole in the middle and slipped it between the prop and the fuselage, then got busy painting.  The photo shows the paint work up to the application of MM Dark Earth.


You can see that the model is a wonderful combination of lots of rivets along with engraved panel lines.  One other item let out of the kit was the antenna.  I used one from the spares box, and drilled the hole for it.

Again, to keep the photos to a minimum, I'll post pics of the finished build separately.


  • Member since
    September 2003
  • From: AandF in the Badger State
Posted by checkmateking02 on Sunday, December 16, 2012 4:00 PM

True to form, everything jammed up when I tried to put too many pictures into one post; but--to resume.

The kit is very simple, with very few parts.  One unsophisticated aspect was the huge see-through hole in the radiator (or whatever it is) under the fuselage/wings.  So I used tissue of the Kleenex variety, blocked the hole, soaked it with superglue and eventually painted it black.

Then I masked around the glue surfaces to keep them free from paint.  The insides of the top wing are visible through the landing gear bays.

While that was all setting up, I painted the propeller and landing gear. 

The kit wheels were unacceptable, so I took a pair from an Airfix Hurricane (which I replaced with after market items).  During the Battle of France/Dunkirk era, the RAF painted the undersides of fighters in white (starboard) and black (port).

I think I'll not push my luck with another computer jam, and continue separately.


  • Member since
    September 2003
  • From: AandF in the Badger State
Posted by checkmateking02 on Sunday, December 16, 2012 3:27 PM

It must be hurricane season.  If I might, I'd like to add a couple of Hurricanes to the GB.  The first will be from Revell Germany's Battle of Britain set.  The set comes with the aircraft shown.  They are all in 1/72.
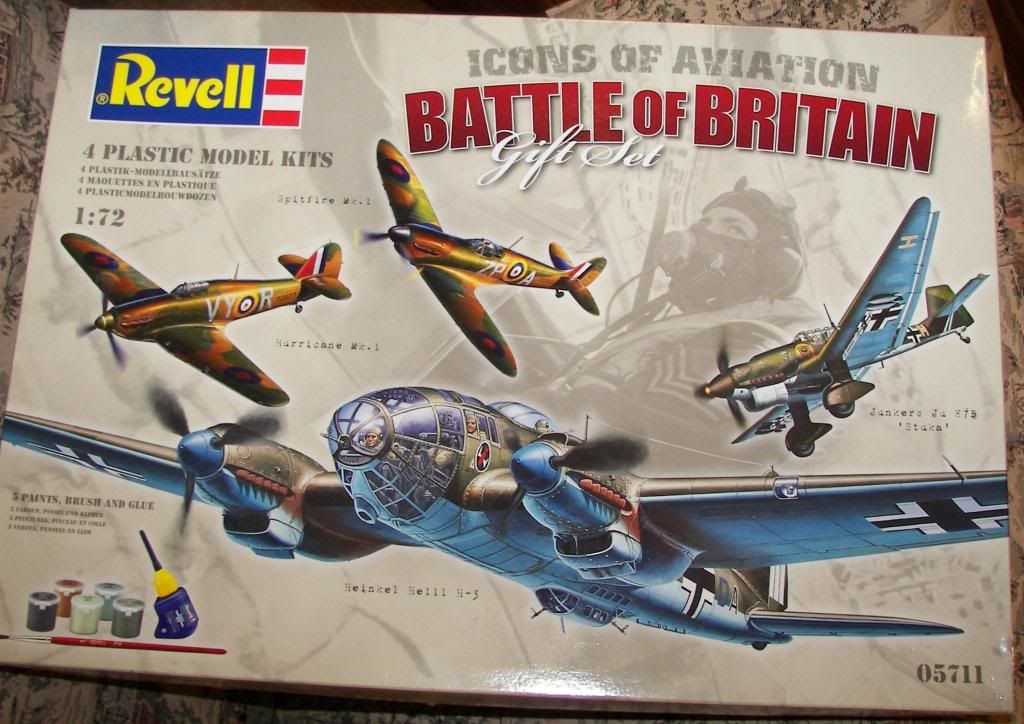
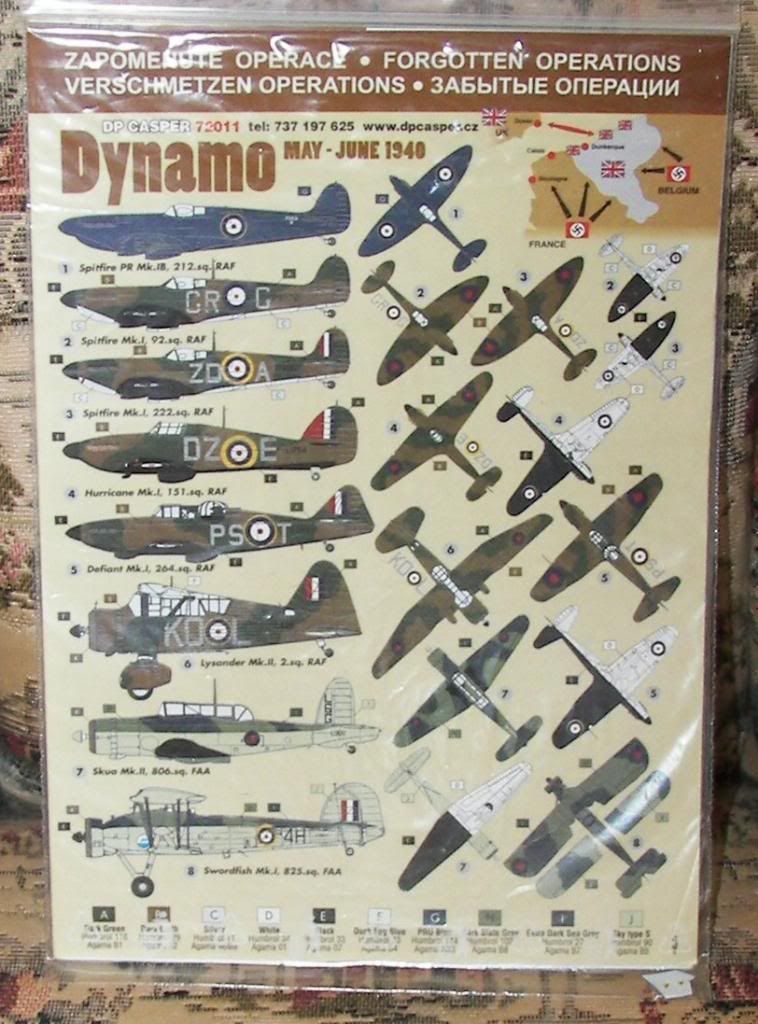
I finished the Spitfire during the summer, using DP Casper's Dunkirk-era decal sheet.  It was a very challening kit, pretty crudely designed and moulded, with rather ill-fitting parts.  The Hurricane was better--but not by much.  I also used the Dunkirk decal sheet for the Hurricane.
First off, I attached the horizontal stabilizers to the fuselage from the inside, then set the proper angle with a protracter.
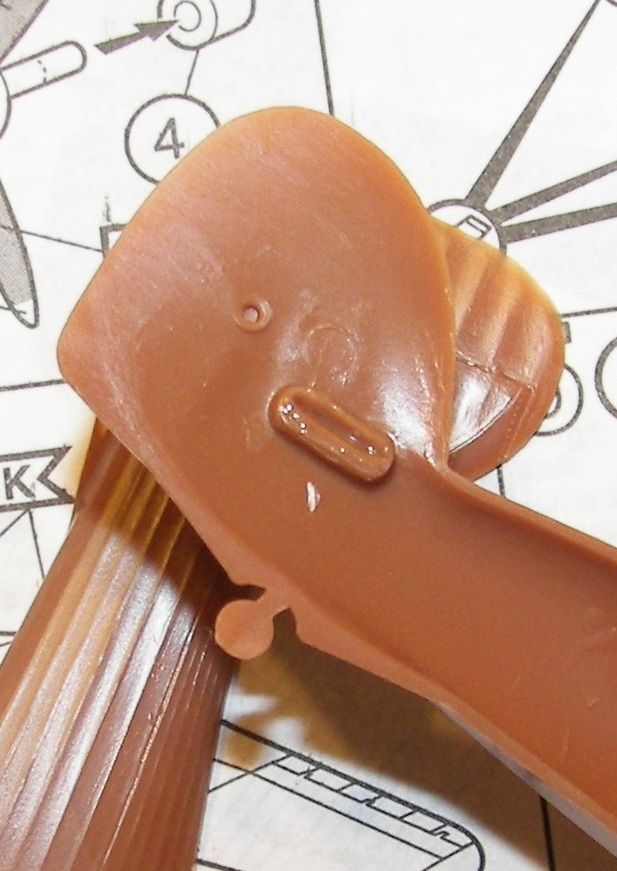
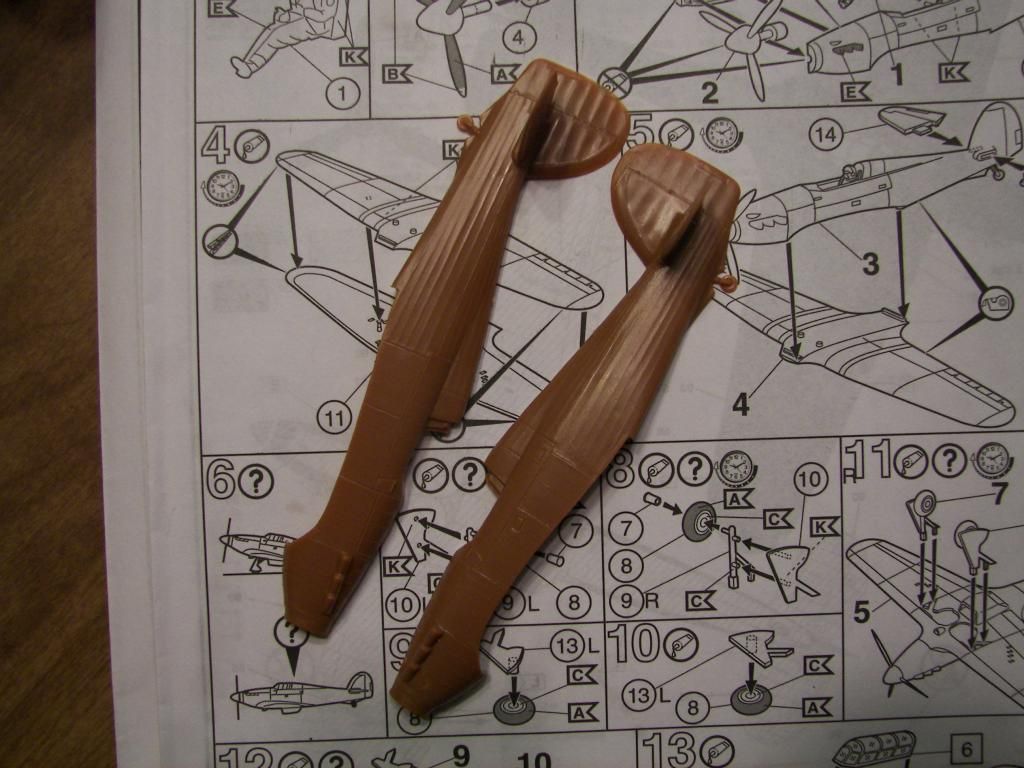
Once the fuselage was glued together, they looked OK.
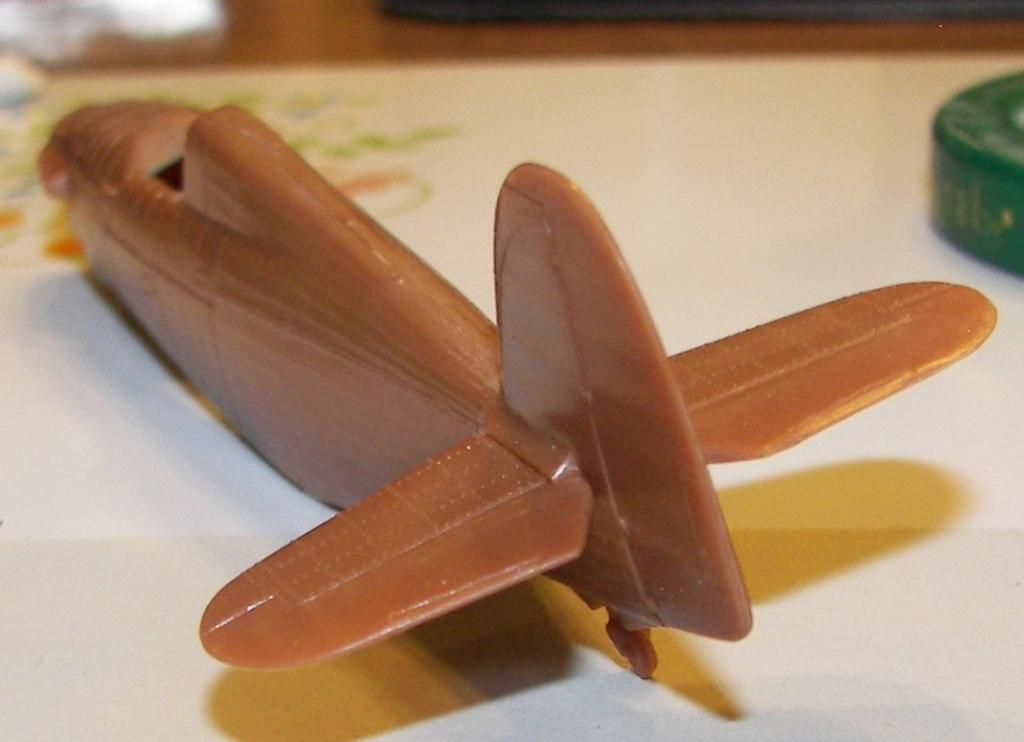
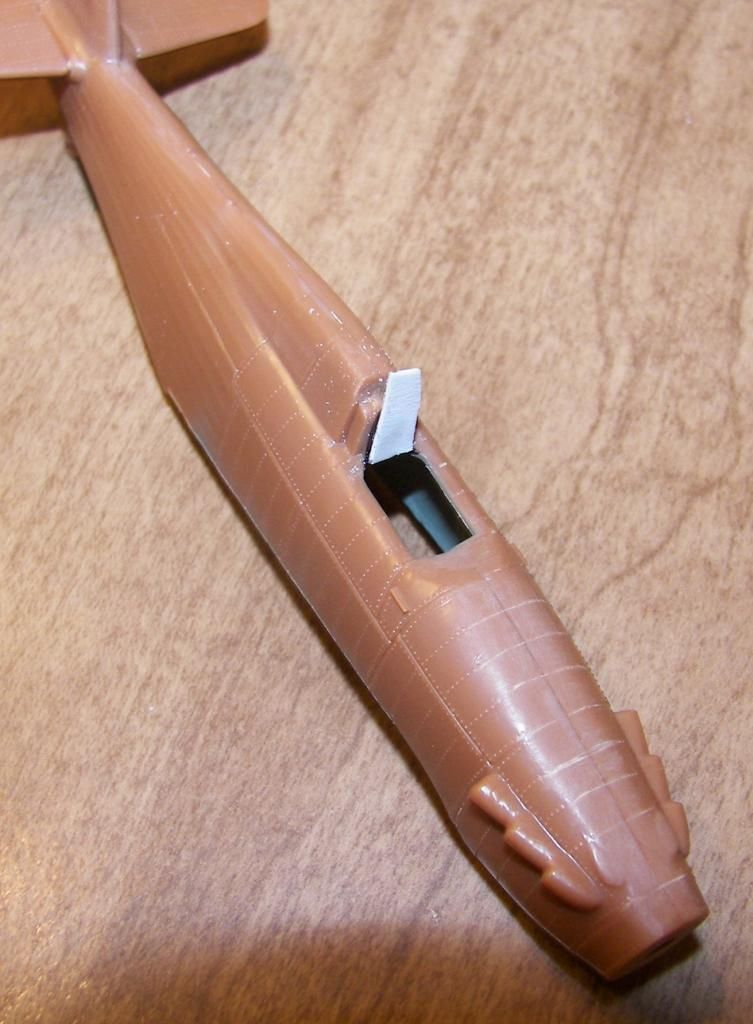
There was a huge gap behind the pilot's seat.  Maybe Revell figured it was OK, because there was no pilot seat included--well, just a pilot figure (wearing a modern jet-type helmet!) moulded into the seat.  More about that later.

Anyway, I glued some styrene over the gap, then sanded it smooth and to shape.
I'll take a break here, since sometimes Photobucket gets ornery if I try to put too many pictures in a thread.  It's been ornery enough since they reformatted.

Thanks for looking.


  • Member since
    August 2009
  • From: Borlando Fla home of the rat
Posted by TREYZX10R on Saturday, December 15, 2012 8:46 PM

Hey Owl can you put me in for a 1/48 P-47 revelogram next?thanx

  • Member since
    August 2009
  • From: Borlando Fla home of the rat
Posted by TREYZX10R on Friday, December 7, 2012 7:03 PM

Joe that is a superb looking Hurri! Very nicely done Sir!

  • Member since
    January 2010
  • From: Nebraska, USA
Posted by CallSignOWL on Friday, December 7, 2012 6:26 PM

frint page updated!

------------------------

Now that I'm here, where am I??

  • Member since
    January 2010
  • From: Nebraska, USA
Posted by CallSignOWL on Friday, December 7, 2012 6:22 PM

I have pledge with future shine

------------------------

Now that I'm here, where am I??

  • Member since
    February 2012
  • From: Olmsted Township, Ohio
Posted by lawdog114 on Friday, December 7, 2012 5:34 PM

CallSignOWL

future changed its formula? That's news to me. I still use it all the time and never had any troubles

Contrary to what they claim, yes, the new formula is different.  It just doesn't cure like it used to.  I assume you have a "Future" bottle, if so, cherish it.  This new stuff is crap.   

Joe

 "Can you fly this plane and land it?...Surely you can't be serious....I am serious, and don't call me Shirley"


  • Member since
    November 2009
  • From: SW Virginia
Posted by Gamera on Friday, December 7, 2012 2:06 PM

Joe: Excuse the pun but your Hurricane blows me away!!!

Great work! Love the weathering esp on the undersides.

"I dream in fire but work in clay." -Arthur Machen


  • Member since
    January 2010
  • From: Nebraska, USA
Posted by CallSignOWL on Friday, December 7, 2012 7:47 AM

future changed its formula? That's news to me. I still use it all the time and never had any troubles

------------------------

Now that I'm here, where am I??

  • Member since
    May 2005
Posted by pyrman64 on Friday, December 7, 2012 7:06 AM

Joe: daaammmmnnnn...that Hurricane looks nice! Bow Down Toast

Greg H

"There is many a boy here today who looks on war as all glory, but, boys, it is all hell." Gen. Wm T. Sherman (11 April 1880, Columbus, Ohio)

  • Member since
    February 2012
  • From: Olmsted Township, Ohio
Posted by lawdog114 on Friday, December 7, 2012 3:07 AM

CallSignOWL

stunning! What did you use foe the flatcoat?

Thanks Owl.  I used to utilize Future cut with 91 % Alcohol then mixed with Tamiya flat base, but since Future changed their formula, I have no use for it.  I've since reverted back to the old tried and true Testor's Dullcote cut with lacquer thinner.  I prefer a satin silk-like finish as opposed to dead flat and I seem to be able to manipulate TDC to get this.  As a matter of fact, ever since I stopped using Future, I've had very few problems with any of my decaling, weathering and finishing....go figure.  As one modeler on here recently said, "Use Future on your floor".....LOL

Joe

 "Can you fly this plane and land it?...Surely you can't be serious....I am serious, and don't call me Shirley"


  • Member since
    January 2010
  • From: Nebraska, USA
Posted by CallSignOWL on Thursday, December 6, 2012 10:15 PM

stunning! What did you use foe the flatcoat?

------------------------

Now that I'm here, where am I??

  • Member since
    February 2012
  • From: Olmsted Township, Ohio
Posted by lawdog114 on Thursday, December 6, 2012 9:59 PM

I'm gonna call her finished.  To recap, its the 1/48 scale Hasegawa Hurricane MK I in the Battle of Britain era markings of Carl Davis', 601 Squadron out of Tangmere in August of 1940.  Davis was a nine kill ace of American decent.  He was KIA on September 6th 1940 in a dogfight with a BF 109 over the skies of England.

In review of the kit, it scores points for great detail in the cockpit and landing gear, but falls short with the closed canopy and lousy fit in some areas, most notably at the lower wing fuselage joint.  I added Eduard seatbelts, a Squadron Canopy (both pieces) and True Details wheels.    I also used Aeromaster decals 48-577 "Yanks in the RAF" for Davis' Hurricane.  Surprisingly, once the fuselage codes were sealed and dullcoated, I had some trouble with the carrier film showing through and there was some silvering on the starboard side, albeit minor but its there if you look closely.  I normally have little trouble with Aeromaster products, so I must assume the silvering was because I failed to clear coat it enough in this area before application and the decal did not get a good seal in that spot.  The Eduard canopy masks performed flawlessly and I added a scratch built handle to the exterior of the canopy from Evergreen rod.  Here she is and thanks for having me.

Joe


 "Can you fly this plane and land it?...Surely you can't be serious....I am serious, and don't call me Shirley"


  • Member since
    November 2009
  • From: SW Virginia
Posted by Gamera on Thursday, December 6, 2012 9:32 AM

Yeah Joe, she looks supercoolawesome!!!

(So good I have to make up new words!)

"I dream in fire but work in clay." -Arthur Machen


  • Member since
    September 2003
  • From: AandF in the Badger State
Posted by checkmateking02 on Wednesday, December 5, 2012 11:35 PM

Outstanding finish.  The underwing roundels do make a nice look.


  • Member since
    February 2012
  • From: Olmsted Township, Ohio
Posted by lawdog114 on Wednesday, December 5, 2012 10:26 PM

Hello all, Thanks for the compliments.  It shouldn't be long now.  I got her clearcoated and while waiting for it to cure (I use Alclad Clear Gloss, so this is only a matter of a few hours), I turned my attention to the landing gears, wheels and such.  The gears on this kit are nicely detailed and quite impressively intricate.  After paint, I ran the brake lines with fine wire per reference photos to add that extra dimension.  I ended up using a True Details set of wheels since the kit tires seem sort of cartoonish to me (anyone remember that Amazing Stories episode in the '80's with the magical cartoon B-17 wheels.....classic!). 

The decals were Aeromaster and went down beautifully under Micro Sol.  As a matter of fact, I use Aeromaster Decals for all my British roundels since these can be tricky.  I ultimately decided to exercise artistic licensing and add the underwing roundels because I do suspect this plane did have them at one point.   Furthermore, to be quite frank, Battle of Britain planes just don't look right without them.  It just leaves me with that hollow feeling.  Once complete, I gave the panel lines a Flory Wash of Black on top and Dark Dirt on the bottom.  I must admit that at first I didn't like this stuff because it just beaded up on the gloss surface and had a strange gritty texture, however, persistence does pay off as it dries and the stuff does eventually go into the crevices nicely.  The key is to use a large brush and coat everything with it repeatedly.  Once dry, wipe it off with a slightly damp paper towel.  I use paper coffee filters which don't leave behind lint.  I'm in the home stretch....stay tuned. 

Joe

 "Can you fly this plane and land it?...Surely you can't be serious....I am serious, and don't call me Shirley"


JOIN OUR COMMUNITY!

Our community is FREE to join. To participate you must either login or register for an account.

SEARCH FORUMS
FREE NEWSLETTER
By signing up you may also receive reader surveys and occasional special offers. We do not sell, rent or trade our email lists. View our Privacy Policy.