SEARCH FINESCALE.COM

Enter keywords or a search phrase below:

Fw 190 Butcher Bird 2013 (extended to June 2014) Group Build

564939 views
5865 replies
1 rating 2 rating 3 rating 4 rating 5 rating
  • Member since
    March 2010
  • From: MN
Posted by Nathan T on Wednesday, November 6, 2013 10:35 AM

falconmod

That is the reason I've not looked into them,  even with my discount at my LHS the hasegawa's are expensive,  but knowing this I could make an exception.

John

I know its good to support the Hobby shop when you can, but in this case ebay is your friend, or try squadron when they have a sale.


  • Member since
    November 2008
  • From: Central Florida
Posted by plasticjunkie on Wednesday, November 6, 2013 10:32 AM

My opinion with Hasegawa quality and fit can be described as superior. I have built several of the Japanese  1/48  WWII aircraft and they basically fall together right out of the box. Years ago I built the 1/32 Hasegawa 190A and it was a joy to build with a complete engine to boot. My only complaint with the Eduard Dora is the lousy fit of the cannon bay doors if you want them closed, otherwise it's been ok.

archangel.. I cried when I saw the kit in the trash, great save with the fit issue.

 GIFMaker.org_jy_Ayj_O


Too many models to build, not enough time in a lifetime!!

  • Member since
    September 2011
  • From: Milaca, Minnesota
Posted by falconmod on Wednesday, November 6, 2013 10:08 AM

That is the reason I've not looked into them,  even with my discount at my LHS the hasegawa's are expensive,  but knowing this I could make an exception.

John

On the Bench: 1/72 Ki-67, 1/48 T-38

1/144 AC-130, 1/72 AV-8A Harrier

  • Member since
    March 2010
  • From: MN
Posted by Nathan T on Wednesday, November 6, 2013 9:57 AM

falconmod

You had mentioned the best 190A kit was a Hasegawa, I just wondered which one that was that you were referring too.

Like Clemens said...All of them!! They kit the 190A-3 to A-9, including the F-8s. More expensive than an Eduard Profipack, though, so I try to find them on sale or good ebay deals.


  • Member since
    September 2011
  • From: Milaca, Minnesota
Posted by falconmod on Wednesday, November 6, 2013 9:57 AM

SchattenSpartan

All the Hasegawa 190s are great kits. They are a lot better than the Tamiya kits and the overall fit of partsis also better. I still have to decide if I like tue Eduard Profipacks or the Hasegawa kits the most. If you want to build a Hasegawa 190, I can recommend their A-5 with the staff car included. It has the best value/money ratio because you get the 190 and a nice looking car for half he prize of their other kits.

And I really liked the Tamiya kit I built first!  Oh no now I gotta add to the 190 stashSurprise  I just checked and out of the 15 190 kits I have i don't have a single Hasegawa kit!
John

On the Bench: 1/72 Ki-67, 1/48 T-38

1/144 AC-130, 1/72 AV-8A Harrier

  • Member since
    April 2013
Posted by SchattenSpartan on Wednesday, November 6, 2013 9:52 AM

All the Hasegawa 190s are great kits. They are a lot better than the Tamiya kits and the overall fit of parts is also better. I still have to decide if I like the Eduard Profipacks or the Hasegawa kits the most. If you want to build a Hasegawa 190, I can recommend their A-5 with the staff car included. It has the best value/money ratio because you get the 190 and a nice looking car for half he prize of their other kits.

  • Member since
    September 2011
  • From: Milaca, Minnesota
Posted by falconmod on Wednesday, November 6, 2013 9:32 AM

You had mentioned the best 190A kit was a Hasegawa, I just wondered which one that was that you were referring too.

On the Bench: 1/72 Ki-67, 1/48 T-38

1/144 AC-130, 1/72 AV-8A Harrier

  • Member since
    March 2010
  • From: MN
Posted by Nathan T on Wednesday, November 6, 2013 9:28 AM

Which kit John? The Dora I'm building or you looking for a certain Hasegawa kit?


  • Member since
    September 2011
  • From: Milaca, Minnesota
Posted by falconmod on Wednesday, November 6, 2013 8:59 AM

Nathan,

  which kit number is that?

John

On the Bench: 1/72 Ki-67, 1/48 T-38

1/144 AC-130, 1/72 AV-8A Harrier

  • Member since
    March 2010
  • From: MN
Posted by Nathan T on Wednesday, November 6, 2013 8:30 AM

Noo!! Don't through away those nice brass barrels! Lol! Glad you decided to salvage the model. Nice recovery on the wing gaps. And you did ask if there was a 190 kit that did fit perfect, you are in luck. Hasegawa makes the best 1/48 190A.


  • Member since
    March 2012
  • From: Corpus Christi, Tx
Posted by mustang1989 on Wednesday, November 6, 2013 5:54 AM

Well if it aint ol' Archangel Shooter!!! Its good to see you back around Scott! You know I've been there and done the exact same thing with the trash can! Good save so far and really looking forward to seeing you build this thing and overcome all of the faults that the kit has. Glad youre here buddy!


 Forum | Modelers Social Club Forum (proboards.com) 

  • Member since
    October 2006
  • From: Tucson, AZ
Posted by Archangel Shooter on Tuesday, November 5, 2013 11:43 PM

Been awhile since I last posted any progress pics which has been slow going here due to other commitments and that this is an Airfix kit that for a couple of days sat in the trash can under the hobby desk.

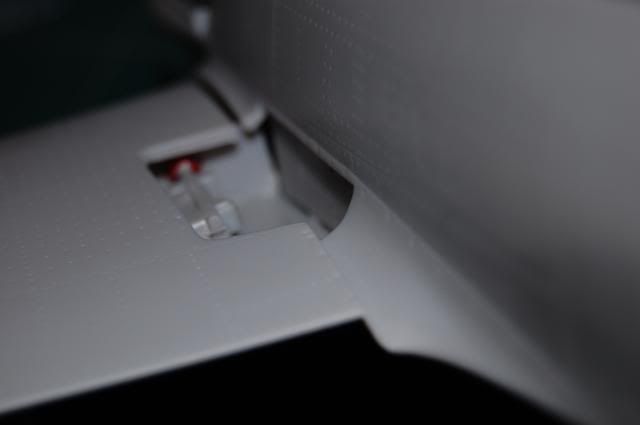
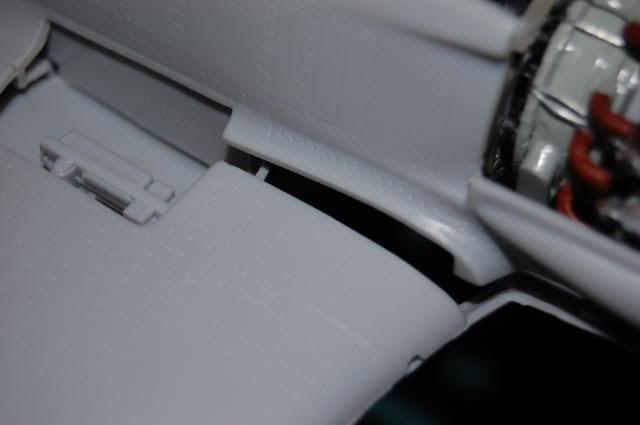
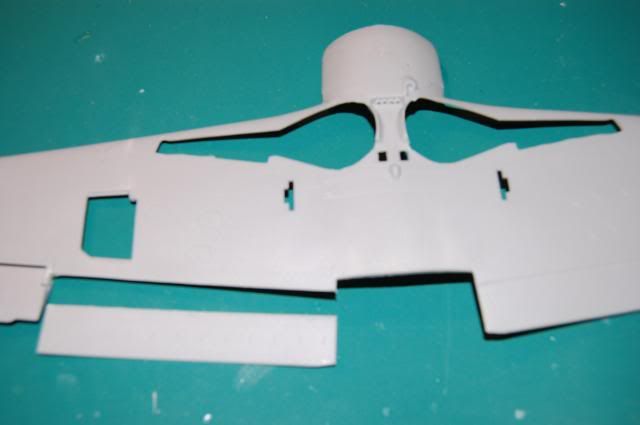
Thought I would have the flaps in the down position so I removed the bottom halves which was easy enough to do than will later add detail to them,
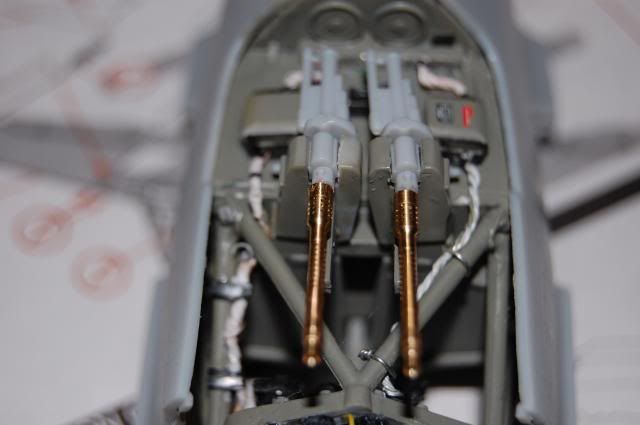
Added some brass barrels which looks great and to be painted later.
Now the trouble begins.This is what it looked like after gluing the wing assy to the fuselage. I did test fit everything first and this was the gaps I got. The wing would only make a solid contact to the fuselage on the bottom aft end of the wing assy.
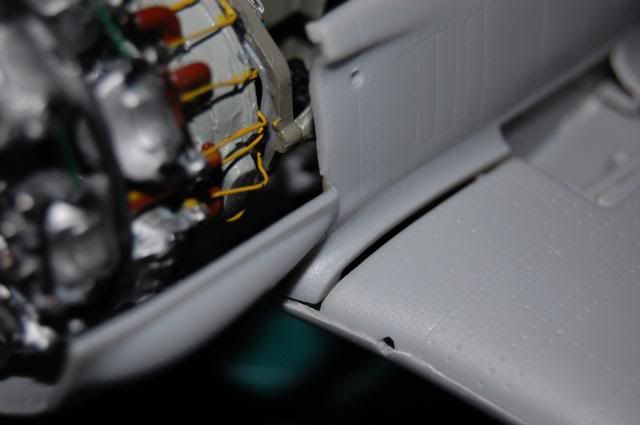
Bang Head

Starboard side was even worst! Super Angry

After spending some considerable time trying to glue, super glue, anything to close in the gaps with no luck and I'm getting madder than an obama supporter having his insurance cancelled, it's into the trash can she goes.
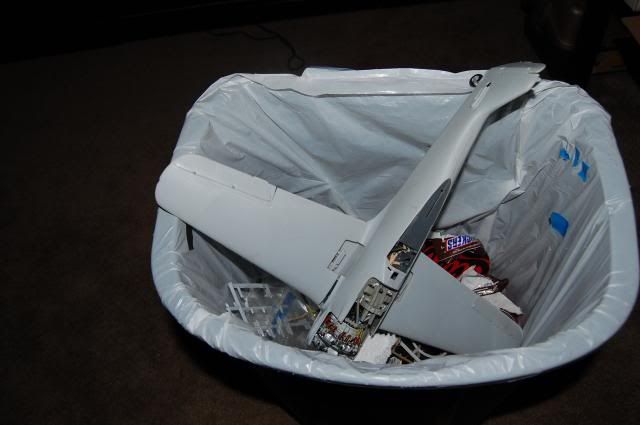
Well after a few days to cool off and realizing the fit issues on my two back-up 1/48 FW's are no better (are there any FW kits that doesn't have a major fit problem?)  I thought I give it one more shot and pull her out of the can.

irst I pick up some fresh super glue which may have been the problem, and slowly worked my way from the leading edges to the trailing edge. Of course in the process I lost the engine but it came away from the mounts cleanly so that's an easy fix later. Not pretty but it's a lot better than when I started. Hopefully I can get it to clean up well.
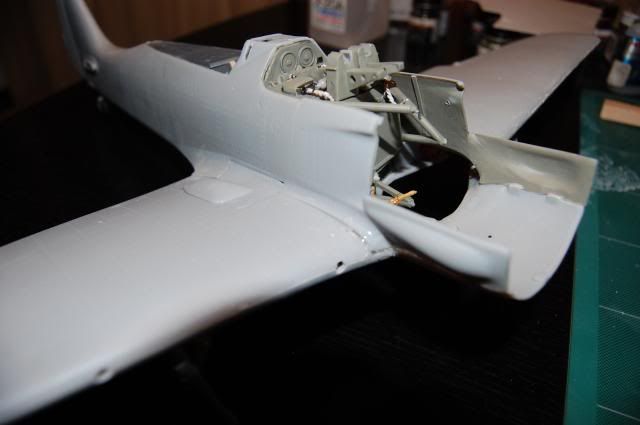
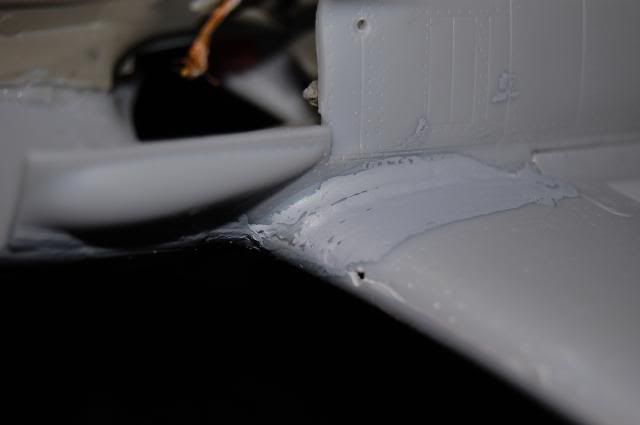
Decided to close off the wing gun bays so to have some more surface area to mate the wing-fuselage together.
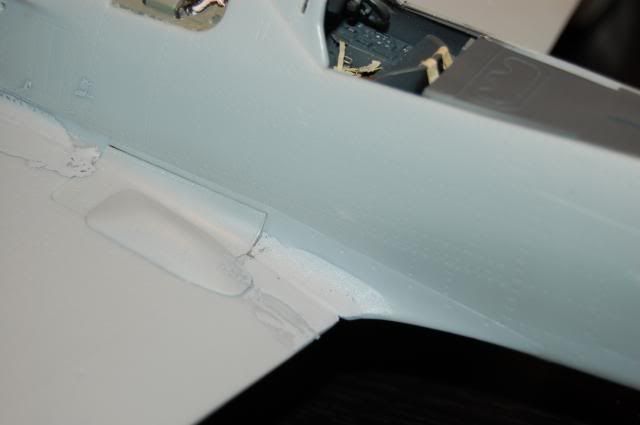
.

I was using the Tamiya putty which I applied this afternoon, will give it at least a day to dry before I start sanding it down.

Well that's what I been facing with this kit and it is a bear. I built other Airfix 1/24th planes and none were has bad as this one. The Airfix Stuka I built years ago is an excellent model and that was a fun build to do which I have another in the stash. Don't think I would pick up another of their FW's  though.

Scott


 Your image is loading...

 On the bench: So many hanger queens.


  • Member since
    February 2012
  • From: Olmsted Township, Ohio
Posted by lawdog114 on Tuesday, November 5, 2013 10:55 PM

Thanks guys.  I ran into some trouble mating the fuselage to the wings the other night (nothing photo worthy).  The whole thing is slightly crooked, so the gun trays don't quite line up to get the gun covers in place.  Who the blank-itty-blank designed this (expletive) kit....and I haven't even reached the engine area.  Anyways, nice Alclad work Nathan.  Clemens, that PE looks fantastic, especially that rear deck work.  

Joe  

 "Can you fly this plane and land it?...Surely you can't be serious....I am serious, and don't call me Shirley"


  • Member since
    August 2009
  • From: MOAB, UTAH
Posted by JOE RIX on Tuesday, November 5, 2013 8:02 PM

Joe (Law) - Nice progress. your work on those pipes definitely adds to the detail. Very nicely done.

Nathan - Your work with Alclad looks sweet. The off shaded panels really adds to overall effect and look to the paint job.

Clemens - That's some very well done PE work. Have you got such PE work planned for each of your 190 kits?

"Not only do I not know what's going on, I wouldn't know what to do about it if I did". George Carlin

  • Member since
    May 2013
  • From: Indiana, USA
Posted by Greg on Tuesday, November 5, 2013 12:12 PM

Joe, she's looking great. Great work on the exhausts, love 'em. I just can't tell you guys how much I am learning watching you build your 190's, it's a wonderful thing.

Nathan, really glad you are taking the time to show your Alclad job in progress. Something I want to try one day, and it's neat to be able to watch. Thanks.

Clemens, really liking the PE addition to the interior. Good work as usual.

  • Member since
    March 2012
  • From: Corpus Christi, Tx
Posted by mustang1989 on Tuesday, November 5, 2013 11:43 AM

plastikjunkie:That alclad looks totally awesome on that Sea Fury. I saw it earlier this morning and forgot to comment:

Nathan T:Good start on the alclad and I like the pre-shading idea. I'll give that a shot on my Tamiya D-9 build.

Clemens:I'm with Nathan. I wished Eduard would throw that in the profipak stuff. Great start on that interior!!


 Forum | Modelers Social Club Forum (proboards.com) 

  • Member since
    April 2013
Posted by SchattenSpartan on Tuesday, November 5, 2013 11:39 AM

Thank you very much!

Yeah, they want to make some extra money with those additional PE sets. The profi-packs only include their "Zoom" sets. They only include the real goodies in their Royal boxings... This D-13 is the weekend edition BTW...

  • Member since
    March 2010
  • From: MN
Posted by Nathan T on Tuesday, November 5, 2013 11:36 AM

Nothing wrong with that. Great pe work. Why can't eduard through those extra parts in the profipack box?...I suppose then they can't market it seperately...


  • Member since
    April 2013
Posted by SchattenSpartan on Tuesday, November 5, 2013 11:12 AM

Nathan: Great work on the Alclad finish!

Everyone: The cockpits are not finished yet. I have only very limited bench time ATM, mostly very late at night and that's just not a great time to do detail painting and work with tiny PE parts, so progress is really slow. I completed the PE work for the D-13 cockpit though and I thought I'll show you some pics before everything gets painted:

Right fuselage half:

Left fuselage half:

 Cockpit (the rudder pedals are from the HGW seatbelt set):

Everything put together:

Some of the PE parts (the sratched ones) have a brass color. That's because I used a glass-fibre brush to remove any superglue residue from gluing the parts (I use extremely thin CA glue). The scratches shouldn't be visible after painting.

Cheers, Clemens

  • Member since
    November 2008
  • From: Central Florida
Posted by plasticjunkie on Tuesday, November 5, 2013 8:41 AM

Joe Rix

Thanks again bud.  The Sea Fury was a mean, lean and fast plane for it's time. It has such elegant lines, just a classy aircraft.

Lawdog

Killer job on those pipes, you nailed them good. You have such great detail on the engine that I would keep as many panels open to show off all the details. Beer

Nathan

She's coming along just fine. The Alclad looks great!

 GIFMaker.org_jy_Ayj_O


Too many models to build, not enough time in a lifetime!!

  • Member since
    March 2010
  • From: MN
Posted by Nathan T on Tuesday, November 5, 2013 8:37 AM

I'm making friends with Alclad-Started with Gunze Gloss black:

Then I started with Airframe aluminum and masked various panels, and sprayed Duraluminum and straight Aluminum:

Then I finished pre-shading-

I guess this means its time to commit to color now. Cool


  • Member since
    April 2013
Posted by SchattenSpartan on Tuesday, November 5, 2013 7:52 AM

She looks absolutely gorgeous, Joe!

I second the recommendation of that PE set. It has PE cowling panels included as well, so you can display it opened up.

  • Member since
    March 2012
  • From: Corpus Christi, Tx
Posted by mustang1989 on Tuesday, November 5, 2013 7:36 AM

Almost forgot....that is a NEATO idea on the exhausts pipes!!!


 Forum | Modelers Social Club Forum (proboards.com) 

  • Member since
    March 2012
  • From: Corpus Christi, Tx
Posted by mustang1989 on Tuesday, November 5, 2013 7:36 AM

Man Joe youre really doing a good job on that bird! Like Nathan said be sure to test fit that engine / cowling set up because that fan can be an issue. I guess it depends on what day of the week it is and what day the kit was molded on. Some folks have trouble and others don't. I was one of the lucky guys who had to trim the motor mounts to get the fan to sit where it was supposed to. Looks like you are past this point but I'll throw it out there anyways(should have done this sooner). Eduard makes a PE set for this engine that cannot be beat. It comes with the wiring harnesses, fuel lines, rocker covers and all that stuff. Its Eduard PE set 48 556. It comes with the PE exhaust ovals too.


 Forum | Modelers Social Club Forum (proboards.com) 

  • Member since
    March 2010
  • From: MN
Posted by Nathan T on Monday, November 4, 2013 10:21 PM

Nicely pluggin along Joe. I like the gearbay painting. Great work on those exhaust. I think its worth the effort. You can see them when veiwed at a certain angle once they are tucked into the cowling. Just go easy on the engine and cowling installation, and remember not to let that darn fan stick out too far!


  • Member since
    February 2012
  • From: Olmsted Township, Ohio
Posted by lawdog114 on Monday, November 4, 2013 8:06 PM

Thanks guys for the compliments.  Junkie, nice work on a challenging kit.  I had nothing but trouble with my Eduard Dora.  Anyways, its nice to back amongst friends.  Well, after competing and again losing at the local model show Sunday (I don't know why I keep torturing myself...the toolboxes in the local IPMS chapter always mysteriously take the awards) I decided to vent my frustration at the bench (end of rant...I may have Tourette's..they're checking in to it).  I'm such a sore loser...lol.  Anyways, as you know, I decided I wasn't satisfied with 801's exhausts, so I decided to take some copper Albion Alloy tube and flaten it to an oval with tweezers.  I then lapped of the ends the kit part replaced it with these.  I'm hoping just the ends will be seen in the cowl and look more realistic.  Heres how it looks...

I then commenced to assemble the fuselage and started having Dora flashbacks.  I remember what a wonderful kit this would have been if everything fit right....like their Spit MK. IX.  I assembled the cowl gun area then realized the hood will not fit on top of it with the guns installed, so I took them out (I prefer my models closed up).  

A test fit of the cowl gun cover showed that the starboard side was slightly narrow.  I might need a spreader bar to force it outward to fit right.  I may just use Styrene tabs inside instead.  Its apparent Eduard wants this kit built opened up, but thats just not my thing.... 

I directed my attention to the gear bay assembly.  I had no trouble here, probably from lessons learned on my Dora.  I sprayed it XF-1 Flat Black as a shadow effect then used Gunze RLM 02.  It then got a post shade to give the area that used look.  For the gear roof, I used styrene stock to reinforce the joint up front, thus avoiding glue seepage and giving strength to the area. 

I hacked off the cannon barrels and added the remainder to the gear bay.  I'll add Albion Alloy tubing for the barrels later.  These were painted XF-69 NATO Black then drybrushed with Floquil Old Silver.  

I used the exhaust tubing trick on the lowers too...

Now for a test fit of everything.  I had to hack off the bottom of the fuselage gun magazine to get the fuselage to fit on top of the wing.  I screwed something up somewhere.....got me..  This aside, everything looks like it will fit ok.  It might need some putty at the wingroots...we shall see. 

I started gluing the cowl together so its almost time to try and attach the engine.  For some reason I'm dreading this....

Joe   

 "Can you fly this plane and land it?...Surely you can't be serious....I am serious, and don't call me Shirley"


  • Member since
    August 2009
  • From: MOAB, UTAH
Posted by JOE RIX on Monday, November 4, 2013 2:55 PM

PJ, I can't help myself. I have to tell you that your Sea Fury is absolutely stunning. Those are indeed very cool markings. I saw a Sea Fury compete in the Reno Air Races in 1991 and I'll tell you that was one impressive aircraft to watch fly around the course.

"Not only do I not know what's going on, I wouldn't know what to do about it if I did". George Carlin

  • Member since
    November 2008
  • From: Central Florida
Posted by plasticjunkie on Monday, November 4, 2013 9:10 AM

Nathan

It's a 1/48 Trumpeter Sea Fury and the decals are from Aeromaster. The kit needed some TLC as some details were lacking, wing folds, wheel wells, the cockpit and what they call a gun sight. I had to scratch one from plastic. I thought about doing different panel shades but the few pictures I found seemed to show the color to be pretty even overall except the engine exhaust panel that had a bluish tone to it from the engine exhaust heat. Apparently, Britain pulled out a bunch of Sea Furies from front line service and had them stripped of paint and polished up for resale to several countries. Batista, the then Dictator of Cuba purchased several Sea Furies for the Cuban Army Air Force in late 1957 and had them delivered in 1958.

 GIFMaker.org_jy_Ayj_O


Too many models to build, not enough time in a lifetime!!

  • Member since
    March 2010
  • From: MN
Posted by Nathan T on Monday, November 4, 2013 8:34 AM

SchattenSpartan

plastickjunkie

If you shoot the Eduard pre-painted pe with clear flat, it will tone down the pe color and actually matches my MM RLM66.

That's interesting to hear. Now if I only knew how MM RLM 66 looks compared to my Gunze colors... Do you have any info on that, Nathan? (I think you are using Gunze as well, right?)

I do use Gunze but I use Tamiya xf-63 German gray for my 66. From what I remember though Gunze 66 is a little too dark and blackish so I'd say it would be tough to match Eduard's pe color to it by only using a flat coat.

PJ- I love that Sea Fury. And the cuban markings are an eye catcher. Is that the Hobbycraft kit? Did you mask for different shades of Alclad on that build?


  • Member since
    November 2008
  • From: Central Florida
Posted by plasticjunkie on Monday, November 4, 2013 7:14 AM

Mustang

Thanks dude. Hey I posted something on your car post a few days ago.

Joe & Greg

Glad you guys are following and commenting, thanks.

SchattenSpartan

I'm sorry I wont be able to comment on the Gunze comparison but I can tell you that after shooting clear flat on the Eduard pe the MM 66 matches pretty well.

Nathan

Thanks  a ton for the kind comments and glad you like my work. Speaking of Alclad, that stuff makes plastic look like real metal, unlike other the so called metallic tone paints. The gloss black undercoat will produce a bright and shiny Alclad top coat. Just make certain that there is no orange peel and all imperfections are taken care of because the Alclad will show even the tiniest scratch or gap. I recently completed this Sea Fury in pre-communist markings during the Batista period in Cuba. I used Testors (in the mall bottle) gloss black undercoat and Alclad polished aluminum over it and was amazed at the tone and reflection of the Alclad. I submitted it as a build article a couple of weeks back and hope it will be chosen for publication.  I also noticed in the current FSM magazine that the January issue will feature my Tamiya M8 Howitzer Motor Carrier article so keep an eye peeled for it.

 GIFMaker.org_jy_Ayj_O


Too many models to build, not enough time in a lifetime!!

JOIN OUR COMMUNITY!

Our community is FREE to join. To participate you must either login or register for an account.

SEARCH FORUMS
FREE NEWSLETTER
By signing up you may also receive reader surveys and occasional special offers. We do not sell, rent or trade our email lists. View our Privacy Policy.