SEARCH FINESCALE.COM

Enter keywords or a search phrase below:

The 2013 Automotive Group Build

66929 views
584 replies
1 rating 2 rating 3 rating 4 rating 5 rating
  • Member since
    March 2011
Posted by ewheeler454 on Wednesday, June 12, 2013 9:37 PM

Crisis averted. I was able to sand off the glue smears and after dipping it about 3 or 4 times in floor wax it actually came out pretty clear.

  • Member since
    February 2013
  • From: Podunkville, USA
Posted by rommelkiste on Thursday, June 13, 2013 7:33 PM

Good save on the windshield wheeler!  Tony, this is my third and last choice for the build, Lindbergs 1/16 1914 Stutz.  Its a pretty simple kit but I think it has potential for some scratch building and extra detail.  My research shows the racing versions with the artillery style wheel so I can keep the kit item and not go to the trouble of lacing each one.  I should be able to fit this one in between everything else and still get it done.  After looking the kit over I have some ideas and tried one on the front spring.  The kit item looked a little bulky with little detail so I modified it with some strip and brass.  I think it will work out ok.  I will also replace the floorboards with real wood as on the 1:1 car.  More pics as I get more done.  By the way, Tony, you can use either pic of the porsche that pulls your trigger or I can post up another, your call

Nothing ever fits……..and when it does, its the wrong scale.

To make mistakes is human.  To blame it on someone else shows management potential. 


  • Member since
    March 2011
Posted by ewheeler454 on Thursday, June 13, 2013 9:35 PM

rommelkiste,

I would have never thought of doing that with the springs. Thanks for the tip. It really makes them stand out. I still can't get over over how great your farm truck looks. :)

Also, I got this in the mail today. I am a happy camper. This one will wait until I have all the others done and a few more techniques worked out (airbrushing etc...).

Later,

Eric.

  • Member since
    April 2005
  • From: Australia
Posted by taxtp on Friday, June 14, 2013 7:56 AM

Great work on the windshield Eric. It looks good enough now. I agree with you on the bumper  and grille. I'm really taken with that pickup, they're usually not my thing but yours is exceptional. Enjoying the camping trip.

I've updated the Build Roster with your Jag.

Rommelkiste, I've added a photo of the Porsche to the Build Roster as well, and added your intended Stutz. I'll be fascinated to see it , I have no idea what that kit would be like. That leaf suspension looks heaps better with your improvements.

Not much progress here, will try toget some done on the weekend.

Cheers

Tony

I'm just taking it one GB at a time.

  • Member since
    April 2005
  • From: Australia
Posted by taxtp on Sunday, June 16, 2013 8:48 AM

All of this talk about Jaguars jolted me into action with my Jaguar XJR-9LM. I cleaned up, sanded, filled, sanded again ,primed and sprayed the undertray, and also cleaned up and sanded the body ready for some primer tomorrow.

I'll try and do some photos then, it's a bit late now.

Cheers

Tony

I'm just taking it one GB at a time.

  • Member since
    April 2005
  • From: Australia
Posted by taxtp on Sunday, June 16, 2013 8:52 AM

I've just been to look at the build roster. It's a really good looking array of finished models. Keep up the good work guys. Hope you're enjoying it as I am.

Cheers

Tony

I'm just taking it one GB at a time.

  • Member since
    March 2013
Posted by MikeyBugs95 on Monday, June 17, 2013 10:44 AM

Taxtp: can you remove my 61 Impala, it's too far gone for me to continue working it like this, and can you replace it with an AMT 1951 Chevy Fleetline.

I ordered the replacement part for my Hudson so it should come in soon and I should be finished it the car very soon..

 In progress:

CAD:

1/35 SINCGARS ICOM/ASIP; 1/35 Flat screen TVs; 1/35 tactical light that I shall reveal later Devil

Models:

1/35 DML M4A1 DV; AFV Club M18 Hellcat; DML StuG IV; DML Armored Jeep w/ .50 cal; Panda Cougar 4x4 MRAP; Academy M3A1 Stuart; 1/700 Midship Models USS Miami; 1/700 Skywave Rudderow Destroyer Escort

  • Member since
    April 2005
  • From: Australia
Posted by taxtp on Monday, June 17, 2013 3:29 PM

Hi Mikey,

The Impala is out, the Fleetline is in.

Cheers

Tony

I'm just taking it one GB at a time.

  • Member since
    April 2005
  • From: Australia
Posted by taxtp on Tuesday, June 18, 2013 4:28 PM

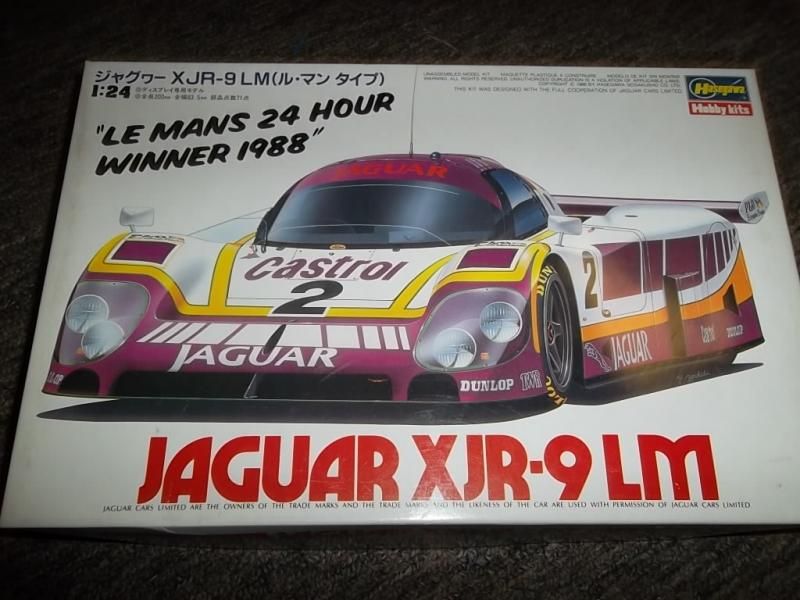
I've finally got back to my Jaguar XJR-9LM, since it's been a while, I'll post a picture of what it should look like.

Hasegawa released four different versions of the Jaguar XJR-8 and XJR-9. Once I complete this one I will have completed them all. It's taken me 22 years to get there though. Indifferent

I've actually got a couple of resin ones now, which I'll slowly add to the collection, and Tamiya did a full detailed version of the same car, but I'm waiting for the day when I feel like going details mad on it before adding that one.

Getting back to the Hasegawa series, they did a series of 24 1980s era Group C Endurance and Le Mans racers. The kits are great fun to build, don't take too long and allow you to go for a lot of very pretty schemes. One day I'll get through them all, think I've done six of them so far.
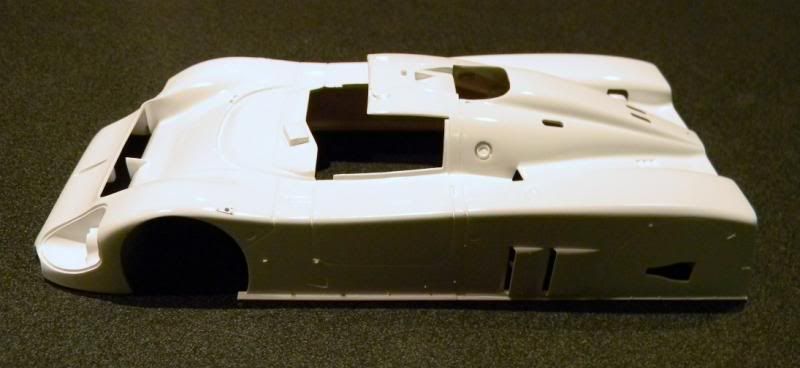
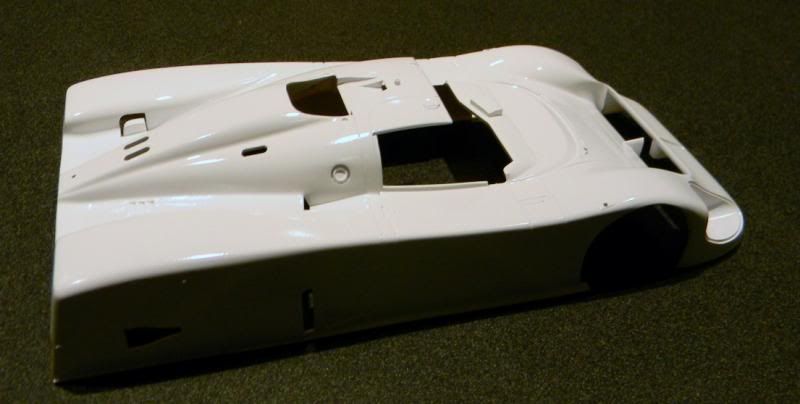
The body has been prepped, primed (a couple of times) and has the gloss white on. Next step will be to mask the purple areas and spray them.

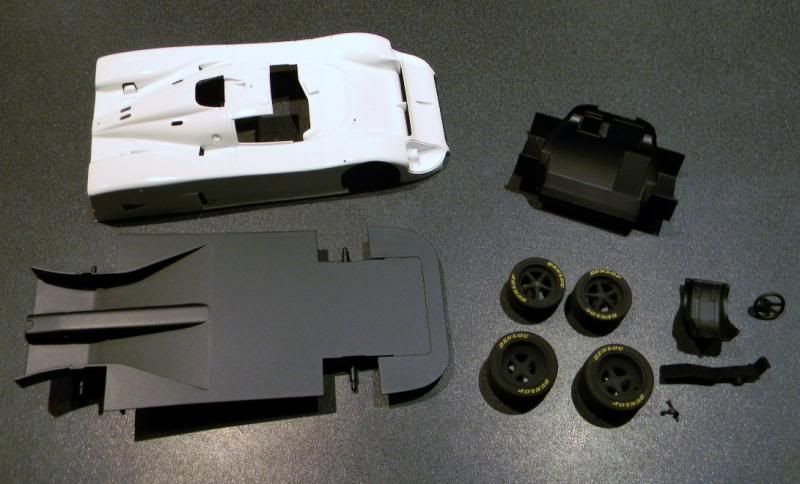
The chassis is sprayed, the wheels are done, I need to paint the details of the cockpit and continue with a few other things.

Cheers

Tony
I'm just taking it one GB at a time.

  • Member since
    March 2011
Posted by ewheeler454 on Friday, June 21, 2013 9:41 PM

Tony,

Your Jag is looking great!

I had a blast on my camping trip. Can't wait for next year. :)

Here's a picture of the 55 Cameo. The truck itself is done. I still had some issues getting the windshield in ( had to use tape to hold it in and some of the glue ran out of the gap into the corner of the windshield) but at this point I'll live with it hehehe. I just need to finish up the wood grain and channels for the bed.

Later,

Eric.

  • Member since
    August 2009
  • From: Borlando Fla home of the rat
Posted by TREYZX10R on Tuesday, June 25, 2013 8:01 PM

Tony great to see the Jag back on,its looking great!

Eric the Truck looks awesome!

  • Member since
    March 2011
Posted by ewheeler454 on Wednesday, June 26, 2013 7:25 PM

Thanks Trey,

rommelkiste, I chickened out on spoking the Jag. Just couldn't bring myself to make the first cut hehehehe.

Later,

Eric

  • Member since
    February 2013
  • From: Podunkville, USA
Posted by rommelkiste on Thursday, June 27, 2013 2:34 PM

LOL!  I understand E!  play with some old scrap wheels first, then jump in head first. thats what I did!

Nothing ever fits……..and when it does, its the wrong scale.

To make mistakes is human.  To blame it on someone else shows management potential. 


  • Member since
    April 2005
  • From: Australia
Posted by taxtp on Tuesday, July 2, 2013 6:09 AM

Hey folk,

I'm just back from a couple of weeks of business travel. I thought I would be able to continue updating this GB whilst travelling, but just didn't get the chance.

That's look pertty smart EW, is that the final picture for the Build Roster ? I really like the paintwork and the chrome, which I know you've redone. The bright blue brake calipers caught my eye too, nice detail.

Here's to a good 2nd half of the year and GB, let's see if we can get a few more done.

Cheers

Tony

I'm just taking it one GB at a time.

  • Member since
    March 2011
Posted by ewheeler454 on Tuesday, July 2, 2013 8:57 PM

Hi Tony.

You can use that photo for the truck. It is done except the wood grain in the bed. I'm still working out a way to get the channels and quilting pins to stay straight so when I cut the sharp ends off they don't wiggle. I bought some sheet styrene so I am going to cut a piece to match the bed and then drill the holes. I think that should be stable enough to keep the pins straight. It looks neat. The quilting pins look like chrome carriage bolts. :) I will post a pic of the bed when that part's done.

Here's some of the progress I've made on my Jag. The body is Boyd Chezoom Teal and the running boards are going to be Classic Black. I also have the running boards sanded to include a rectangle of bumps on each side that may be for dual spare tires or something. I filled in all the pin marks underneath and still need to sand those out.

Got the body and wheels primered. It took a lot of sanding to get the sharp lines out of curved part.

Got the body painted.

Got the wheels painted.

And I have the chrome soaking in bleach to strip it. :)

I have a long weekend this week so I hope to get a lot done. I also have an AMT 1957 Bel Air I'm working on that my son got me for Father's day. You can add it to the list if you like Tony :) (Yep I will have them all done by the dead line hehehehe

Thank all,

Eric.

  • Member since
    April 2005
  • From: Australia
Posted by taxtp on Wednesday, July 3, 2013 8:34 AM

EW, I'm getting the feeling that you like the General's product ! THe Build Roster has your 57 Bel Air listed, and the Cameo completed. You are flying. That's an interesting colour combo for the Jag, I'll look forward to seeing how the thing looks. Nice start, BTW, the rims look ok too.

Cheers

Tony

I'm just taking it one GB at a time.

  • Member since
    April 2005
  • From: Australia
Posted by taxtp on Thursday, July 4, 2013 10:45 PM

I'm going to add this thing to my list of builds.

It's pre-painted, but there is a bit of work you can do. I like to do panel line washes and also wash the rims, and the interior and chassis is bare plastic, so I paint them too.

I don't go too far, it's just a way of adding some pretty racing cars to my collection. I wouldn't build these subjects otherwise. It usually takes about a week. so it's quite a soft, easy, relaxing project.

I've done a dozen so far, all in 1/32, including some where I've stripped the Revell paint and decals, and resprayed and decalled with aftermarket decals.

More pics to follow.

Cheers

Tony

I'm just taking it one GB at a time.

  • Member since
    April 2005
  • From: Australia
Posted by taxtp on Friday, July 5, 2013 6:55 AM

Some more starting photos:

I'm just taking it one GB at a time.

  • Member since
    April 2005
  • From: Australia
Posted by taxtp on Saturday, July 6, 2013 6:09 PM

With the windscreen, wipers, mirrors and panel line wash done.

Seatbelts, gearshift and interior painting.

Underneath, just painted. No detail whatsoever.

Dashboard.I tried to follow a photo of one of these I found on the 'net.

Attached the tyres to the rims, and added a wash to bring out some detail.

The roll cage, sprayed gloss white with some rubber padding too.

Main assembly.

Cheers

Tony

I'm just taking it one GB at a time.

  • Member since
    April 2005
  • From: Australia
Posted by taxtp on Monday, July 8, 2013 4:27 PM

Done. Told you it would be quick.

I'm just taking it one GB at a time.

  • Member since
    February 2013
  • From: Podunkville, USA
Posted by rommelkiste on Monday, July 8, 2013 11:01 PM

That was quick!  It takes me longer than that to get them out of the box!!!  Looks great to me.

Nothing ever fits……..and when it does, its the wrong scale.

To make mistakes is human.  To blame it on someone else shows management potential. 


  • Member since
    March 2011
Posted by ewheeler454 on Monday, July 8, 2013 11:22 PM

Tony,

The BM'er looks great. What size brush do you use to paint the details on the dash? The smallest I've been able to find so far was 0. I have seen some that had 0/3 and such but not sure how to how to read the sizes.

Here's some progress I made on the 57'. I also have the interior painted, just doing the trim stuff ( need a smaller brush hehehe).

Got the red part painted on the body. After it dries for a day or two I'll paint the roof white.

Got the re-chroming done. After it dries I need to buff it out a little to get some fine dusty stuff off. Here is a shot after the first coat and a shot of the grille (Ignore the dusty stuff :)

  • Member since
    April 2005
  • From: Australia
Posted by taxtp on Monday, July 8, 2013 11:35 PM

Looks really good EW. I really like your choice of subjects, and I aspire to doing more of these older subjects. The chrome will be good again, you've really nailed that.

I'm a little worried that the red body color will bleed through the white roof. Have you got that covered too ?

I dry brushed the dashboard, using a chisel edged brush. However, I think went over it with a silver paint pen, which worked really well.

I have brushes down to size 000. I think they're too fine for general modelling use, but I bought them to paint fine details and eyeballs on some 54mm figures that I was doing.

Thanks for the comments on the Bimmer. I might try and photograph the entire 1/32 racing collection.

Cheers

Tony

I'm just taking it one GB at a time.

  • Member since
    November 2010
  • From: Florida-West Central
Posted by Eagle90 on Friday, July 12, 2013 2:58 PM

Hey Tony,

I know it's July, but I was wondering if you have room for one more in your GB?  My wife loves all things British and is crazy about Mini Coopers.  Well, I got this idea to build her a model of one for her birthday in August.  As I researched the best kit for this, I found Airfix's Mini Cooper S Twin Pack!  Brilliant!  His and Her Coopers!  I figured I'd do hers in the red with the Union Jack and decided mine would be done in blue with a Union Jack.  I also have a great idea for displaying these little gems (with a little help from my friends), but more to come on that later.  So.........permission to enter your GB with Airfix's 1/32 Mini Cooper S Twin Pack!

Eagle90


  • Member since
    April 2005
  • From: Australia
Posted by taxtp on Friday, July 12, 2013 5:25 PM

You're very welcome to join Eagle90. I'll add your entries to the build roster on page 1. That is a kit that I intend to build myself one day, so I'll be following with great interest.

Cheers

Tony

I'm just taking it one GB at a time.

  • Member since
    November 2010
  • From: Florida-West Central
Posted by Eagle90 on Friday, July 12, 2013 5:46 PM

taxtp

You're very welcome to join Eagle90. I'll add your entries to the build roster on page 1. That is a kit that I intend to build myself one day, so I'll be following with great interest.

Cheers

Tony

Thank you sir!  It looks like a great kit!  I'm excited about it.  First auto I've done since 197? when I did the General Lee!  Didn't turn out very well, but hey at that age!  Anything you want to know about the kit let me know, I'd be happy to send pics or anything.  I plan on doing some sprue shots when I get them out of the plastic bags.  Thanks again!

Eagle90


  • Member since
    April 2005
  • From: Australia
Posted by taxtp on Sunday, July 14, 2013 9:02 AM

I'll ask questions as you go Eagle, thanks for the offer.

I did some work on my Jaguar XJR-9LM today. The dashboard is done as well as some other interior details. I'll post photos soon.

Cheers

Tony

I'm just taking it one GB at a time.

  • Member since
    May 2013
Posted by StewieDude on Monday, July 15, 2013 3:33 PM

Hey guys how is everybody? I would like to get in on this Group build. Here are the kits I will start with. First up is the Revell 69 Nova with scratchbuilt Full Tube ProStreet frame. The second is a kit I got from my good friend Rommelkiste, it's a 51 Henry J ProStreet that Rommel started but I guess just lost interest in. I don't really have any specific plans for either build at this point, so for now I will just wing it. All comments and critiques are welcomed and encouraged.

Its only plastic until you add imagination! Michael. aka CG63. Too many ongoing projects to list here. LOL.

  • Member since
    March 2011
Posted by ewheeler454 on Monday, July 15, 2013 11:10 PM

The Nova looks interesting Stewie. Of course I love anything Pre-75" GM. Ah the bane of plastic bumpers, it ruin't them all hehehehe

Haven't been able to get to mine due to the "honey do's" and it's making me cranky hehehehe.

Later,

Eric

  • Member since
    February 2013
  • From: Podunkville, USA
Posted by rommelkiste on Monday, July 15, 2013 11:22 PM

EW, keep an eye on ol Stew, he builds stuff that would make Pappy Lemmons jaw drop!  Stewie, glad your here, maybe it will get me off my duff and finish some of these projects I have going.  Glad you liked the Henry J and all that other 27 year old junk I dumped on ya! LOL!  Maybe I can get motivated and post some progress in the next couple of days.            Rommel

Nothing ever fits……..and when it does, its the wrong scale.

To make mistakes is human.  To blame it on someone else shows management potential. 


JOIN OUR COMMUNITY!

Our community is FREE to join. To participate you must either login or register for an account.

SEARCH FORUMS
FREE NEWSLETTER
By signing up you may also receive reader surveys and occasional special offers. We do not sell, rent or trade our email lists. View our Privacy Policy.