SEARCH FINESCALE.COM

Enter keywords or a search phrase below:

The 2013 Automotive Group Build

66927 views
584 replies
1 rating 2 rating 3 rating 4 rating 5 rating
  • Member since
    December 2010
  • From: T-34 Hunting
Posted by TheWildChild on Sunday, February 24, 2013 3:44 PM

this is to be the hauler for 2 cars/trucks(in the future) at a time. the tractor is a pete 359 conventional (revell) and a Fruehauf 40' flatbed trailer (amt)ive added some of the pit essentials for a derby team to the trailer (chains, jack, cutting torch, misc tools, etc.) oil stained the deck, went for the black-for-chrome look on everything, im not much of a chrome guy.


pretty much how it sits right now, added the brushguard to the tractor, but thats about it.

Regards, Logan

1/35 XM77  "Sledgehammer", 1964 Chevy Impala Derby Car

Whats next? Aircraft for Ground Attack Group Build

"I dont just tackle to make a play, I tackle to break your will." -Ray Lewis

"In the end, we're all just chalk lines on the concrete, drawn only to be washed away"- 5 Finger Death Punch

"Ahh, my old enemy.......STAIRS"- Po, Kung Fu Panda

  • Member since
    December 2010
  • From: T-34 Hunting
Posted by TheWildChild on Sunday, February 24, 2013 4:08 PM

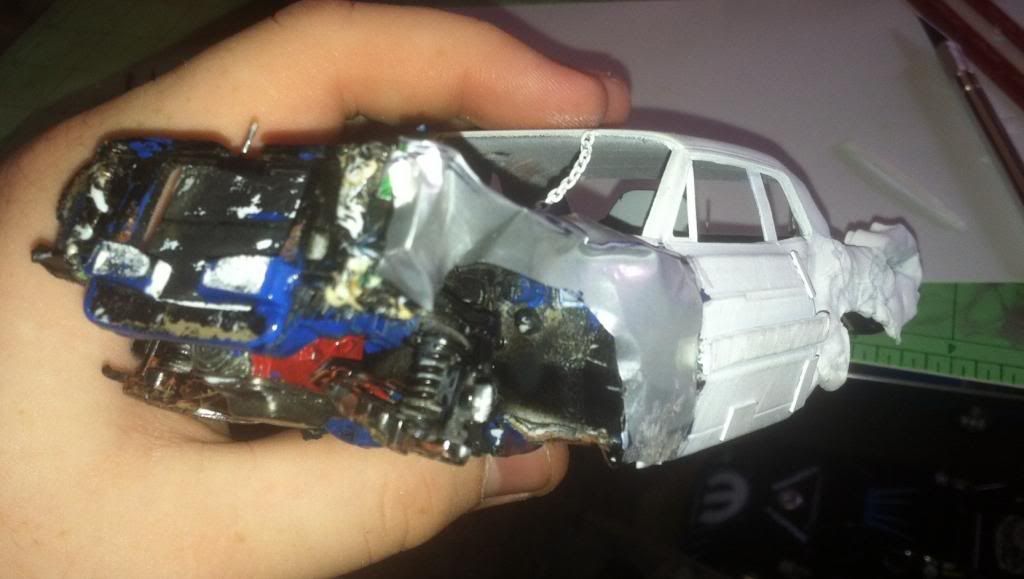
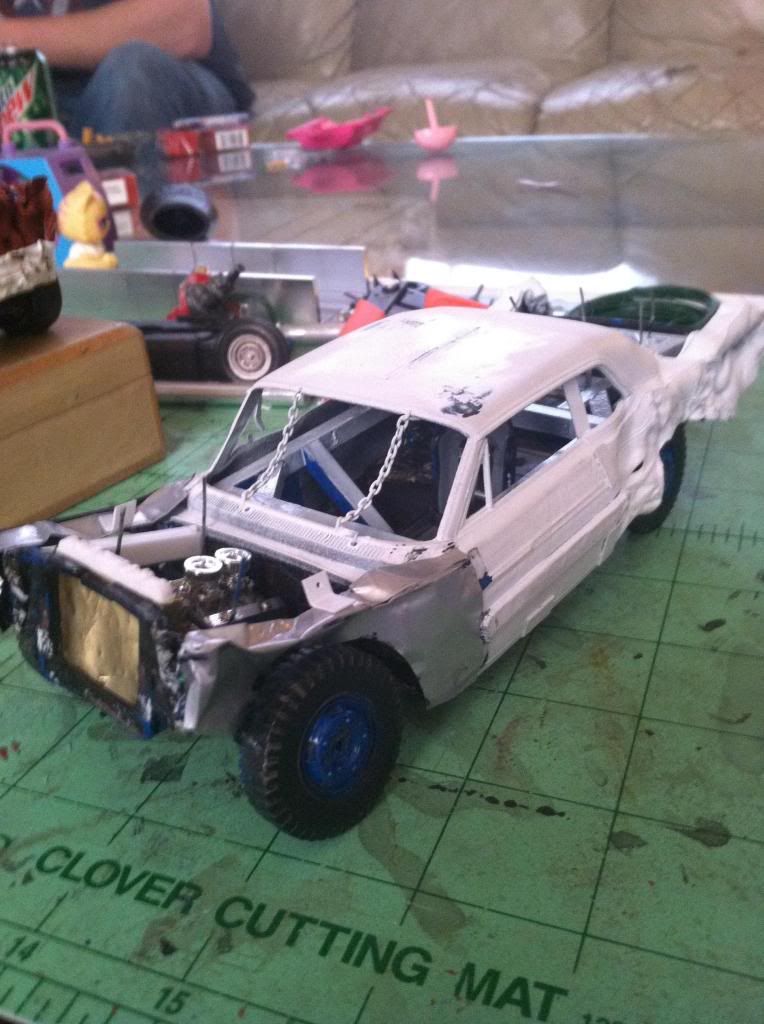
here's a little more in depth look at my 77x car.
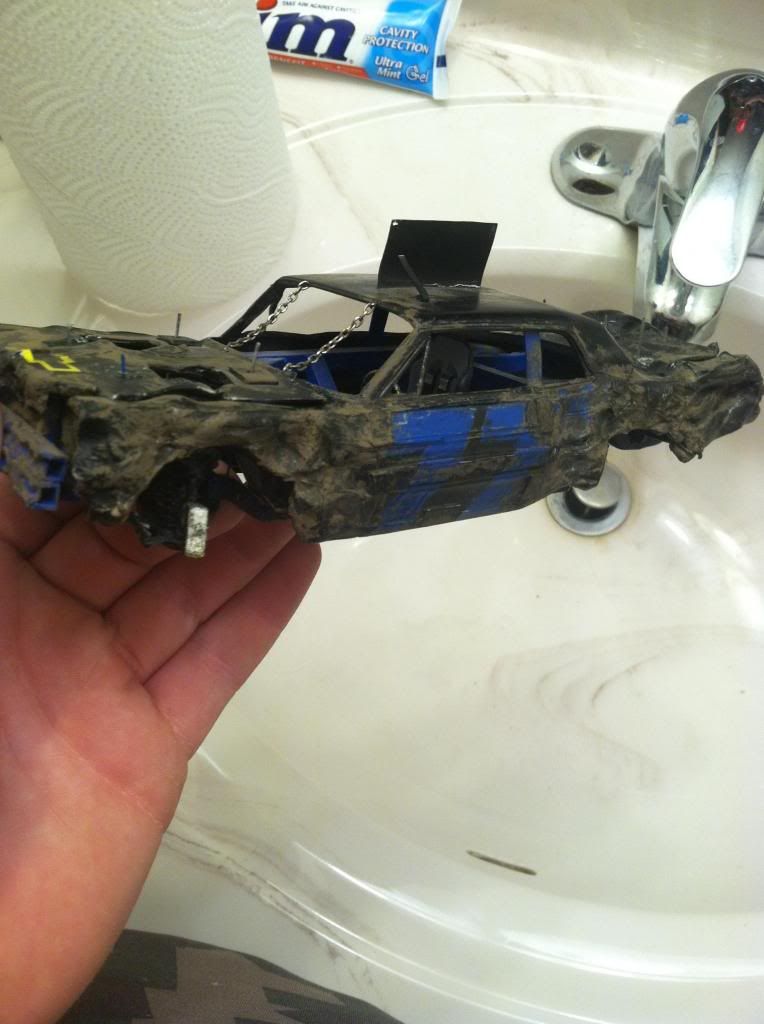
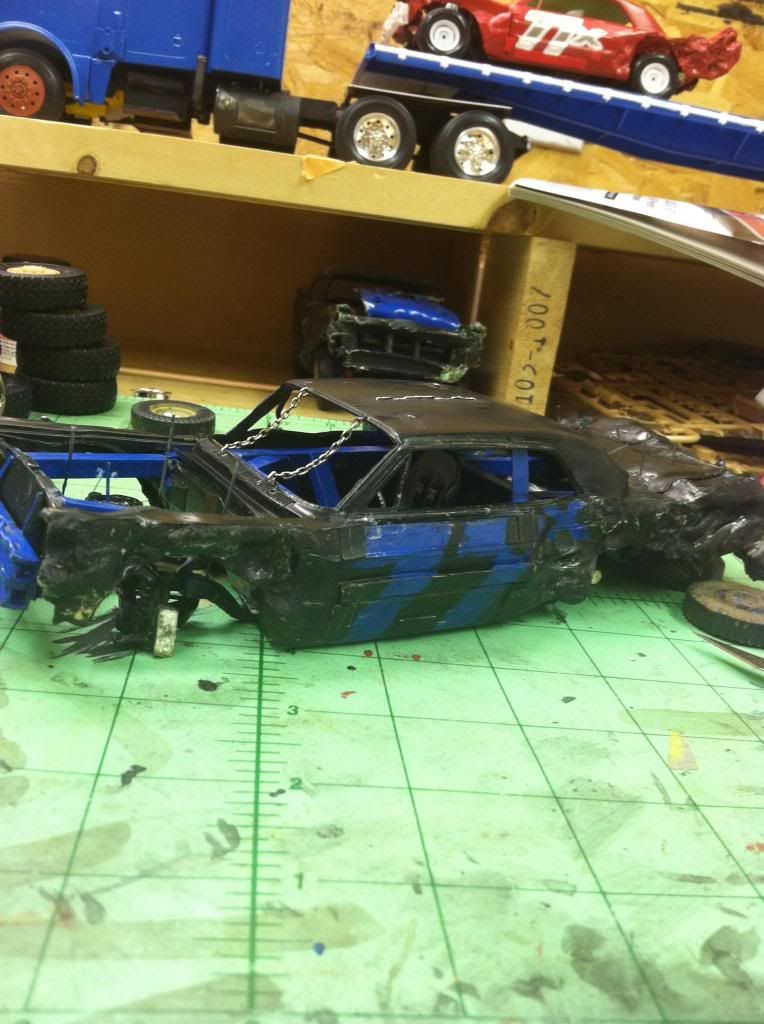
i began the rebuild by scrubbing my previous attempt at weathering away to reveal the paint: thick, semi-gloss black. i knew that the paint was going to keep me from "denting" the body with the lighter method anymore, so i sat back, started thinking as i began to strip paint. i was thinking of photoetch for some reason,and i thought "i can made my own photoetch... with aluminum".

i experimented with the other car first, with promising results. so i sprayed some primer, and made more body panels. i bent the frame up more, and tailored the panels to fit by bending them with the frame
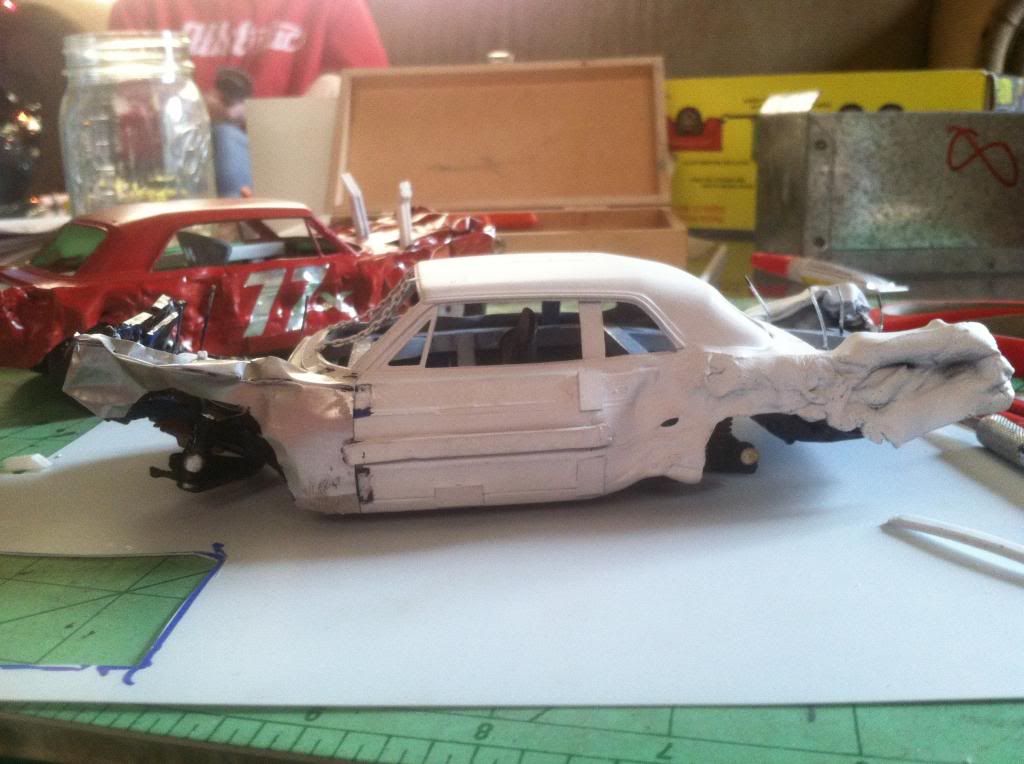
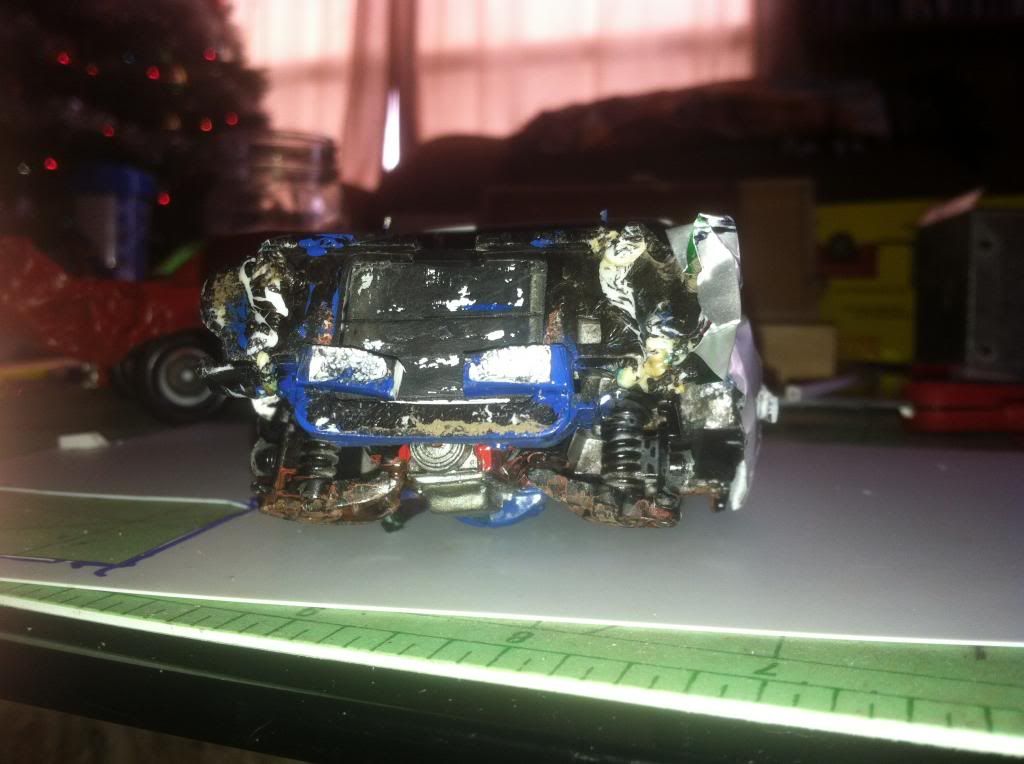
this was the original motor i was going to use, the 383 stroker that comes in the revell special edition 69 nova. i was going to use it with upright headers, but felt i needed something with a little more kick.
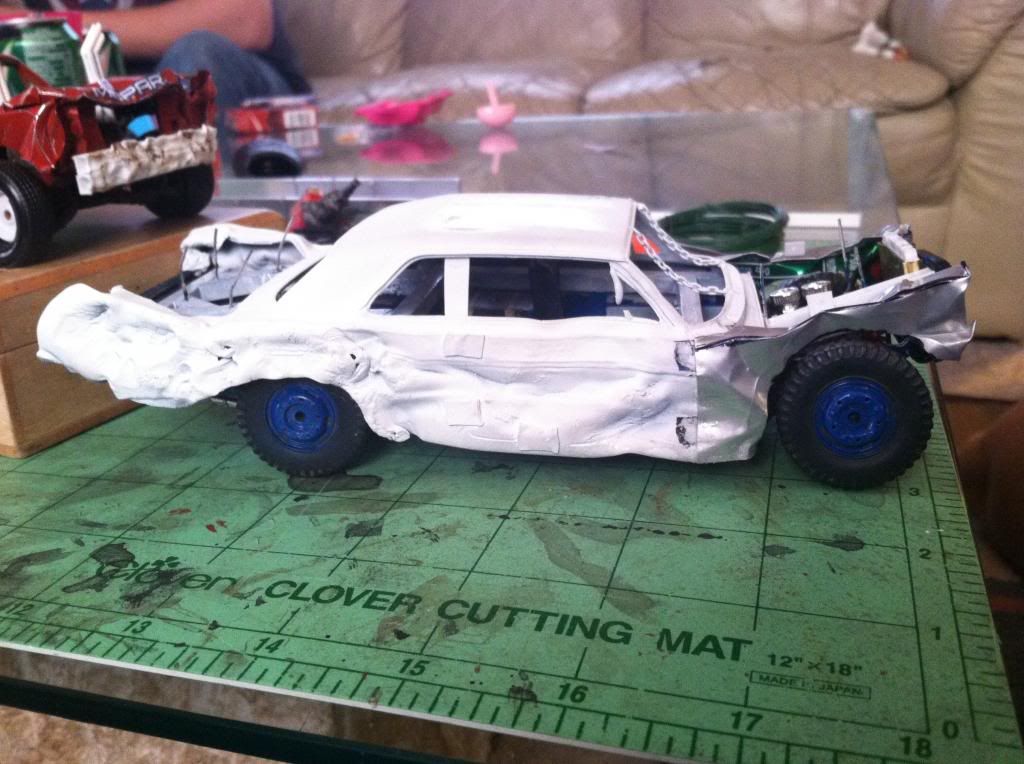
ill post more later, having trouble with photobucket at the moment.

Regards, Logan

1/35 XM77  "Sledgehammer", 1964 Chevy Impala Derby Car

Whats next? Aircraft for Ground Attack Group Build

"I dont just tackle to make a play, I tackle to break your will." -Ray Lewis

"In the end, we're all just chalk lines on the concrete, drawn only to be washed away"- 5 Finger Death Punch

"Ahh, my old enemy.......STAIRS"- Po, Kung Fu Panda

  • Member since
    April 2005
  • From: Australia
Posted by taxtp on Sunday, February 24, 2013 4:23 PM

That is an enormous amount of work, WIldchild. I can't imagine what it would be like to be in a car whilst it takes all those hits. I am fascinated by your use of aluminium cans to make body panels, and the process to give them the creased and dented look. I like the hauler,and the tools too. Really tells a story.

Cheers

Tony

I'm just taking it one GB at a time.

  • Member since
    August 2009
  • From: Borlando Fla home of the rat
Posted by TREYZX10R on Sunday, February 24, 2013 4:48 PM

Greg that dash looks choice! Glad to see the parts arrived!

Tony I like the way the belts look. And never heard of using flour before, nice tip!

Wildchild thats some serious intense building,I too like the aluminum can technique.

  • Member since
    December 2010
  • From: T-34 Hunting
Posted by TheWildChild on Sunday, February 24, 2013 6:11 PM

Thanks guys! It works pretty good, but I need to find some a tad thicker, as thin as this is it doesent take much to over-bend and tear it unrealistically bad.

1/35 XM77  "Sledgehammer", 1964 Chevy Impala Derby Car

Whats next? Aircraft for Ground Attack Group Build

"I dont just tackle to make a play, I tackle to break your will." -Ray Lewis

"In the end, we're all just chalk lines on the concrete, drawn only to be washed away"- 5 Finger Death Punch

"Ahh, my old enemy.......STAIRS"- Po, Kung Fu Panda

  • Member since
    December 2010
  • From: T-34 Hunting
Posted by TheWildChild on Sunday, February 24, 2013 6:16 PM

It's a pretty bone-jarring ride, especially in an unlimited mod car like this. They run cars with this much steel around here, and a guy broke his leg a few years ago because he braced it against the firewall. Normally, it's not a problem because the car bends/dents/buckles to absorb the impact. In these, not so much. They were bringing imperials in that weighed almost 8000lbs, the heaviest car ever run was a 65 suicide door Lincoln, weighed a shade under 9000lbs, but all the steel you want to put into it doesent matter: an imperial is a stronger car to start with lol. They run full-size pickups that way too.

1/35 XM77  "Sledgehammer", 1964 Chevy Impala Derby Car

Whats next? Aircraft for Ground Attack Group Build

"I dont just tackle to make a play, I tackle to break your will." -Ray Lewis

"In the end, we're all just chalk lines on the concrete, drawn only to be washed away"- 5 Finger Death Punch

"Ahh, my old enemy.......STAIRS"- Po, Kung Fu Panda

  • Member since
    April 2005
  • From: Australia
Posted by taxtp on Tuesday, February 26, 2013 10:49 PM

Thanks Wildchild.

I've managed to clean up and spray the chassis on the Ferrari F186. It doesn't seem like much, but it's quite a milestone as I can build it up from there.

Will post some pics when I get a chance, but it's just black.

Cheers

Tony

I'm just taking it one GB at a time.

  • Member since
    October 2010
  • From: Hoodsport, WA
Posted by Dogfish_7 on Thursday, February 28, 2013 5:14 PM

So many fine builds going on here! Finished putting the chassis to gether and decided to add another coat of paint to represent this more.

Now I'll wet sand this down to make it look weathered.

Bruce

  • Member since
    August 2009
  • From: Borlando Fla home of the rat
Posted by TREYZX10R on Thursday, February 28, 2013 7:35 PM

Looking good Dogfish!

  • Member since
    March 2011
Posted by ewheeler454 on Thursday, February 28, 2013 9:40 PM

Nice work Dogfish.

I finally finished my real truck (control arm bushings, ball joints tie rods etc), so I am hoping to finish the Nova this weekend. I'm starting to have withdrawals hehehehehe.

  • Member since
    October 2010
  • From: Hoodsport, WA
Posted by Dogfish_7 on Friday, March 1, 2013 1:08 PM

Thanks. Here's how it looks with a little weathering.

Bruce

  • Member since
    August 2009
  • From: Borlando Fla home of the rat
Posted by TREYZX10R on Friday, March 1, 2013 5:03 PM

Nice looking weathering Dogfish,I like your technique!

  • Member since
    April 2005
  • From: Australia
Posted by taxtp on Saturday, March 2, 2013 2:50 PM

That looks really good Dogfish. It really is loooong isn't it ?

Sorry about the lack of updates from my end. I've been busy cleaning up the resin body for the Ferrari F186. I'll post a picture once it's done, it's not too far away now, but has been a little time consuming.

Cheers

Tony

I'm just taking it one GB at a time.

  • Member since
    April 2005
  • From: Australia
Posted by taxtp on Tuesday, March 5, 2013 4:50 PM

Here's the next update on the S27 Ferrari F186.
You can see here where I filled the screw holes in the chassis with plastic rod and CA.

The chassis has been sprayed black, and the cockpit interior assembled and mounted to it. You might see a small area of unpainted resin immediately next to the cockpit side walls, this is where I masked off the chassis to allow a reasin to resin join, rather than having paint there. The rather thick resin body will sit directly on top of it, so it won't be visible at all.


I've all but completed the clean up of the body, this is a curbside (Kerbside ?) so I won't be cutting off the engine cover.


You can see where the chassis will fit in. I will have to fill the gap and respray that part of it once it's all put together.
The fit of this white metal strut and insert into the locating recess on the body was very poor. I would have preferred to fit it after spraying and finishing the body, but I've had to blend it in. I guess I'll just mask and spray it later.

Finally, the recess for the air intake is about 1.5mm deep. I can use a motor tool to hollow it out, but how deep, and I've always had a hard time getting a smooth finish inside the hole. I've also never done it in resin.

The next steps are to fit and blend in the etched vent cover on the sidepods, and to build up the new front wing fitting, as I'm not using the S27 parts.
Hope you enjoy, cheers for now,
Tony

I'm just taking it one GB at a time.

  • Member since
    May 2005
Posted by pyrman64 on Tuesday, March 5, 2013 6:04 PM

Tony: nice start on your F186.

Dogfish: Insteresting way to weather that ambulance!

Greg H

"There is many a boy here today who looks on war as all glory, but, boys, it is all hell." Gen. Wm T. Sherman (11 April 1880, Columbus, Ohio)

  • Member since
    April 2005
  • From: Australia
Posted by taxtp on Wednesday, March 6, 2013 4:53 AM

Thanks Greg.

I'm just taking it one GB at a time.

  • Member since
    October 2010
  • From: Hoodsport, WA
Posted by Dogfish_7 on Wednesday, March 6, 2013 10:54 AM

Yes. Thanks Greg. It is so very nice to see the diversity of builders here! Great bunch of builds going on!

Bruce

  • Member since
    April 2005
  • From: Australia
Posted by taxtp on Wednesday, March 6, 2013 1:35 PM

S27 Ferrari F186 update
I fitted the louvered vent cover last night. Lots of CA around it to fair it in as the gaps were significant within the recess for it.
Cheers
Tony

I'm just taking it one GB at a time.

  • Member since
    August 2009
  • From: Borlando Fla home of the rat
Posted by TREYZX10R on Wednesday, March 6, 2013 8:03 PM

That resin is looking tasty !!!

  • Member since
    December 2002
  • From: Fort Knox
Posted by Rob Gronovius on Saturday, March 9, 2013 12:47 PM

Building a 1/32(?) scale Lamborghini Countach with my 8 year old son. It is a long out of production, snap together model kit molded in a neon clear orange color. He wanted to paint it and chose gold from my paint collection. I had to convince him to leave the tires black or else they would be gold too.

The undercarriage is still in the original color. We'll hit it with some spray later.

  • Member since
    October 2009
  • From: Oil City, PA
Posted by greentracker98 on Saturday, March 9, 2013 9:30 PM

Hey Everyone,

I just finished up a P 38 for a couple of other builds. Please don't look at it. I'm not happy with how it turned out.There were jsut too many problems with it. Some my fault and others beyond my control. I will be doing it over. I'm thinking of an Academy kit for it.

Anywho, I am now able to spend more time on the Camaro and the semi trailer for this build, as well as a P 47 for the other builds.

The Camaro and the trailer still look the same as I've been working on a high gloss finish for the Camaro and getting the Trailer sides finished so I can start putting it together.

A.K.A. Ken                Making Modeling Great Again

  • Member since
    April 2005
  • From: Australia
Posted by taxtp on Tuesday, March 12, 2013 2:16 AM

Ken - I won't go looking for your Lightning. It's a bummer when it doesn't quite work out. Anyway, welcome back.

I've been busy mounting the front suspension to the body of my Ferrari F186. White metal to resin, poor fit, very hard to clean up and make a nice smooth job. I think I'm getting close now and have also attached the front wing. I'll post some photos later.

Cheers

Tony

I'm just taking it one GB at a time.

  • Member since
    March 2011
Posted by ewheeler454 on Friday, March 15, 2013 9:31 PM

Hey all,

I did make some progress with the Nova.

Also, is there a way to delete a NEW POST?? I accidentally hit that and it made another thread outside of this that I didn't want to do.

Interior is done. This kit didn't have a lot of detail in the interior so I didn't spend much time on it.

I still have some body work to do which I'm hoping knock a dent in this weekend. I am visiting my mother tomorrow and my older brother has a 69 Chevelle kit he s going to give hehehehe.

Welding the custom exhaust. Why they stick them under the doors is beyond me hehehehe.

  • Member since
    October 2010
  • From: Hoodsport, WA
Posted by Dogfish_7 on Saturday, March 16, 2013 6:25 AM

Very nice work on your Nova!

Bruce

  • Member since
    May 2005
Posted by pyrman64 on Saturday, March 16, 2013 7:59 AM

EW: love the body color....nice work on the engine.

Greg H

"There is many a boy here today who looks on war as all glory, but, boys, it is all hell." Gen. Wm T. Sherman (11 April 1880, Columbus, Ohio)

  • Member since
    May 2005
Posted by pyrman64 on Saturday, March 16, 2013 10:12 AM

Well, I made a lil progress on the `77 GMC overnight......

The seat, I thought I'd add a bit of color on the 4WD shifter

The cab interior, still need to add the radio, siren and plow controls

Here's the partially completed cargo bed   

As always, comments encouraged.

Greg H

"There is many a boy here today who looks on war as all glory, but, boys, it is all hell." Gen. Wm T. Sherman (11 April 1880, Columbus, Ohio)

  • Member since
    April 2005
  • From: Australia
Posted by taxtp on Saturday, March 16, 2013 6:54 PM

EWheeler, that Nova is looking really nice. I like your work on the engine.

Greg, your GMC is coming along too. The dash and interior look great.

Are a LOT of work, I've finally primed the body of the Ferrari F186. I've been working diligently on it every night, I guess there is just a lot of work marrying the white metal front wing and front suspension to the resin body. It's pretty as a picture now.

I might give it one more go before a light sand and some Ferrari red, then I hope it'll come to life.

Cheers

Tony

I'm just taking it one GB at a time.

  • Member since
    March 2011
Posted by ewheeler454 on Saturday, March 16, 2013 10:45 PM

Dogfish: Thanks.

pyrman: The color is Model Master Dark Red Metallic Flake. And the dash and bed are looking good.

Tony: Thanks also. The Ferrari looks almost like a jet hehehehe.

  • Member since
    July 2008
  • From: USA California
Posted by vetteman42 on Saturday, March 16, 2013 11:19 PM

Taxtp might I join in with an Edmunds Super Modified ?? I started it a month or so ago but still have a ways to go. Here is the box art.

To the engine I added volocity stacks, plug wires, in the correct firing order LOL, fuel and water lines.

And here is the body with the base color on.


Randy So many to build.......So little time

  • Member since
    April 2005
  • From: Australia
Posted by taxtp on Saturday, March 16, 2013 11:49 PM

Hi Randy

That's an interesting model you've got there, please feel welcome to join.

I'll update the build roster now..

Who makes the kit, I've never seen one of these before.

Last question - what's the red roll cage in the background of the last photo ?

Cheers

Tony

I'm just taking it one GB at a time.

JOIN OUR COMMUNITY!

Our community is FREE to join. To participate you must either login or register for an account.

SEARCH FORUMS
FREE NEWSLETTER
By signing up you may also receive reader surveys and occasional special offers. We do not sell, rent or trade our email lists. View our Privacy Policy.