SEARCH FINESCALE.COM

Enter keywords or a search phrase below:

Rommel vs Monty (North African GB 1941-43) Jan. 1 - Aug. 31 2014

137511 views
1455 replies
1 rating 2 rating 3 rating 4 rating 5 rating
  • Member since
    April 2006
  • From: Denver, Colorado
Posted by waynec on Sunday, February 23, 2014 7:46 PM

wip to date. everthing in pic 5 oe the weapons tools, etc are in progress except the spare tire.doors will be open when i put them oon. i also need the 3 frames for the partial cargo bed canvas but won't put them or the mirrors on until the weathering is done.

Никто не Забыт    (No one is Forgotten)
Ничто не Забыто  (Nothing is Forgotten)


  • Member since
    March 2003
  • From: Rain USA, Vancouver WA
Posted by tigerman on Sunday, February 23, 2014 10:50 PM

Don, beautiful Pz. III. I like the chain and weathering on her. I will add it to the wall of fame.

   http://i7.photobucket.com/albums/y269/wing_nut_5o/PANZERJAGERGB.jpg

 Eric 

  • Member since
    July 2004
  • From: Sonora Desert
Posted by stikpusher on Sunday, February 23, 2014 11:38 PM

Wayne that is coming along beautifully!!! Excellent work on that old kit!


F is for FIRE, That burns down the whole town!

U is for URANIUM... BOMBS!

N is for NO SURVIVORS...

       - Plankton

LSM


  • Member since
    April 2005
Posted by Thunderbolt379 on Monday, February 24, 2014 1:54 AM

Hi guys,

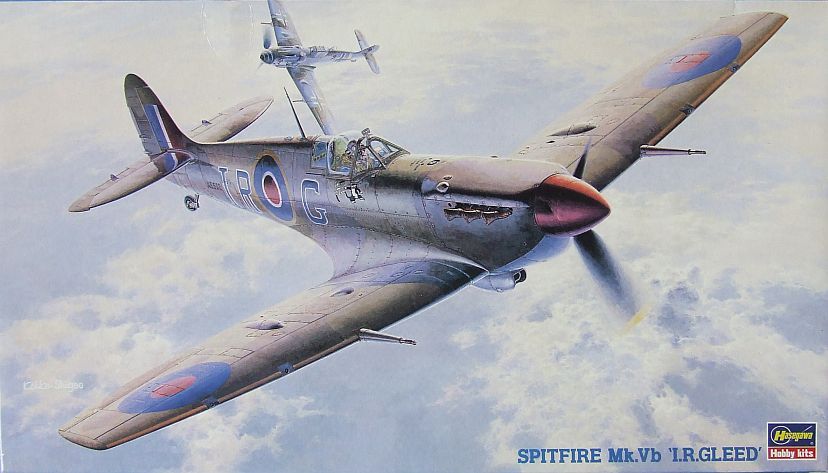
With Eric's permission, I'm adding another aircraft to this GB, this time a direct counterpart and adversary of Shroer's Bf 109 F in '42/'43, this time it's Hasegawa's 1:48th scale Spitfire Vb in markings for British ace Ian R. Gleed. Here's the kit:
I started this one as a companion to my Academy Mk. 14 for the Spitfire GB about two years ago but never got beyond basic construction. I took some photos at the time of the cockpit going together, here they are:
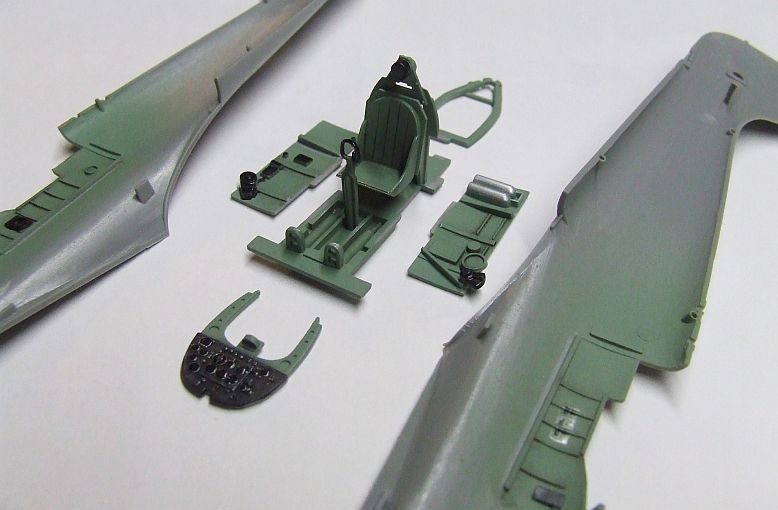
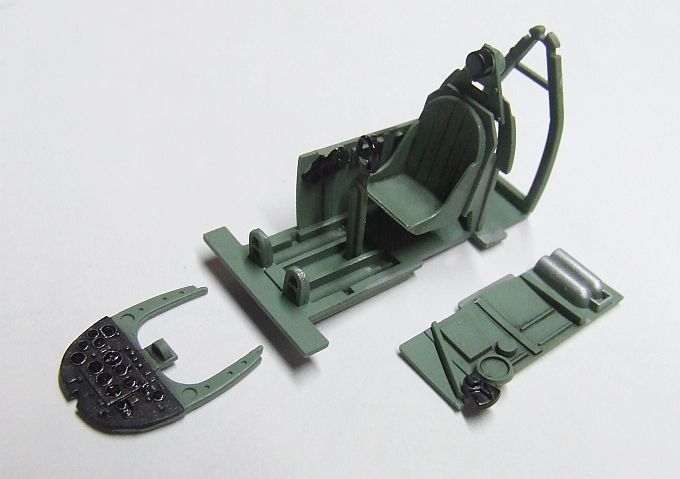
As you can see, nothing terribly fancy, OOB, but tidy enough, and that's plenty for a closed canopy build.

I got her closed up and mated to the wing, but that was where she lay ever since. Here's the state of play as I came to her:
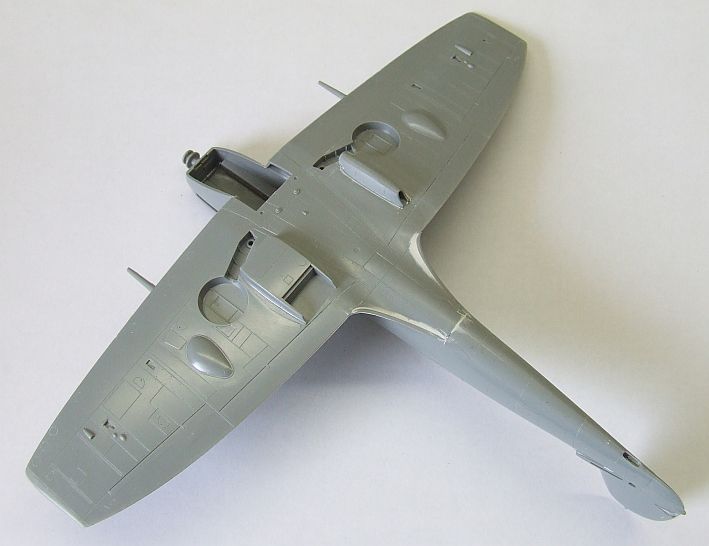
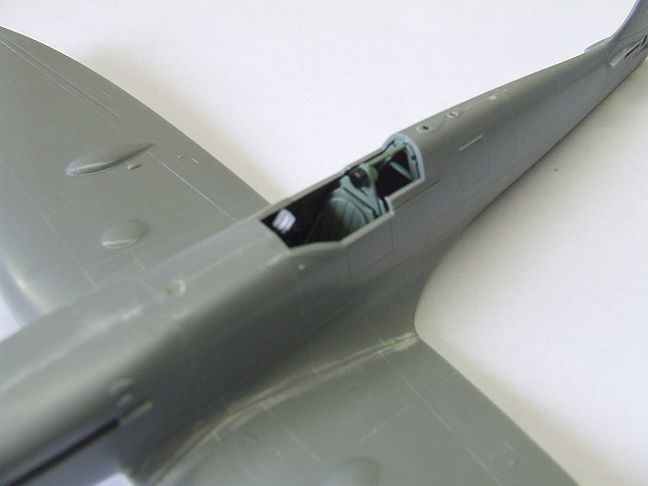
A close up on the cockpit as installed:
Then I got busy the other day, fitted the under-chin cowling with the tropical filter, fitted the canopy and the tail surfaces:
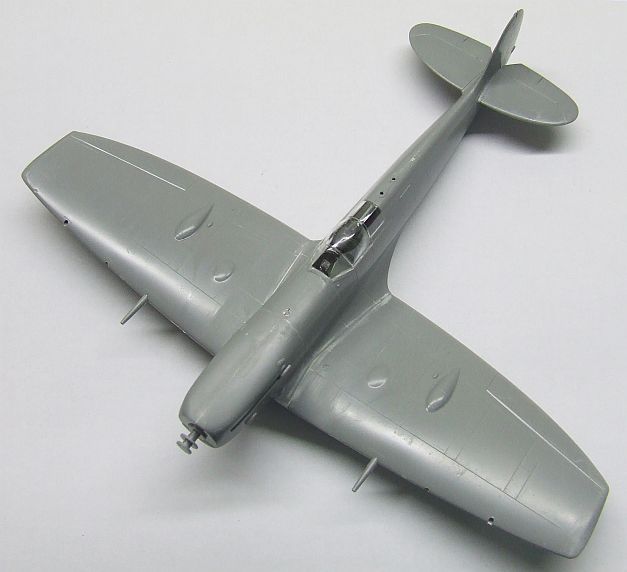
Next was a round of masking, including the canopy, exhaust wells, gear strut locators, canon barrels and clear formation light on the spine:
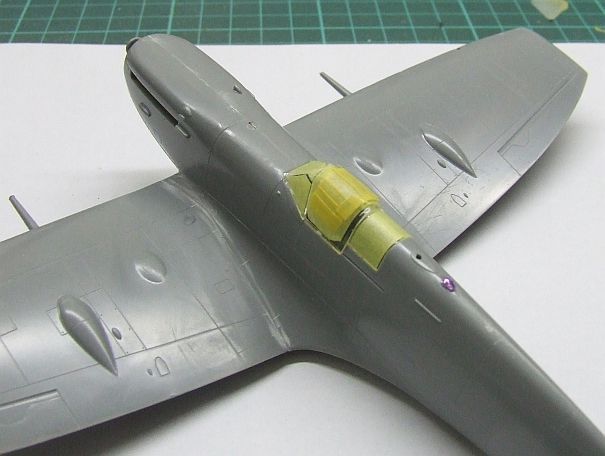
Tomorrow I'll make a call on whether to add the radio mast before painting, and give the model a thorough wash, ahead of hopefully spraying the interior green for the canopy struts, and possibly also pre-shading the airframe as a whole.

Cheers, thanks for looking,

Mike/TB379

http://worldinminiature.blogspot.com/

  • Member since
    November 2009
  • From: SW Virginia
Posted by Gamera on Monday, February 24, 2014 7:48 AM

Don: Fantastic job there all around- kudos sir!!!

Wayne: Great work there! I didn't realize the vehicle sat that high, it must have been a bear to push the gun up on there.

Mike: Looks good, I've build a couple of those Hasegawa Spits and they're just all around great kits.  

"I dream in fire but work in clay." -Arthur Machen


  • Member since
    April 2006
  • From: Denver, Colorado
Posted by waynec on Monday, February 24, 2014 11:37 AM

stikpusher and the gun is from a PEERLESS MAX canadian 15cwt 4x4 kit that may show up in the 1944 GB

gamera there is a winch forward with hand cranks on either side. i added a "real (or reel ha)" cable so now have to add the hook on the end which could be amusing.

Никто не Забыт    (No one is Forgotten)
Ничто не Забыто  (Nothing is Forgotten)


  • Member since
    July 2004
  • From: Sonora Desert
Posted by stikpusher on Monday, February 24, 2014 11:53 AM

Now I am under the impression that the "portee" guns were usually fired from off of the truck bed moountand not dismounted for fire in order to give a "shoot and scoot" capability more often than not.


F is for FIRE, That burns down the whole town!

U is for URANIUM... BOMBS!

N is for NO SURVIVORS...

       - Plankton

LSM


  • Member since
    April 2006
  • From: Denver, Colorado
Posted by waynec on Monday, February 24, 2014 2:29 PM

yep that was the plan. i suspect the high silhouette and lack of hull down positions were determining factors. it does have a winch and ramps to ground mount it.

Никто не Забыт    (No one is Forgotten)
Ничто не Забыто  (Nothing is Forgotten)


  • Member since
    December 2002
  • From: Bury St Edmunds, Suffolk, England
Posted by Bish on Monday, February 24, 2014 2:34 PM

wayne, that's looking great, I like all the extras.

I am a Norfolk man and i glory in being so


On the bench: Airfix 1/72nd Harrier GR.3/Fujimi 1/72nd Ju 87D-3

  • Member since
    April 2006
  • From: ON, Canada
Posted by jgeratic on Monday, February 24, 2014 5:39 PM

Wayne, yes that is looking grand.

I haven't come across any official doctrine for these portees, but do know the 2-pdr could not sustain travel over rough terrain, nor long distances, so had to be piggy-backed around.  It's wheel attachments were not very robust and would literally fall off.  I don't know if the early 6-pdr suffered similarly.

Originally the concept grew from a need to have mobile anti-tank weapons for the fast moving units (both for motorized infantry and AT sections of armoured units), so as to be able to participate in a mobile warfare.  They were quite successful against the Italians, and the early desert campaign.  Once the Germans learned about these though, they quickly found a way to take care of them.  

As mentioned, depending on the type of vehicle platform, they could have a very high silhouette. That, combined with minimal armour and limited traverse (the vehicle and it's turning ratio) made it susceptible to even machine gun fire.  The shoot n' scoot principal worked great if the terrain was ideal, such as dunes or wadis where the vehicle could constantly move  and hide while changing it's location.

I've also seen mention of the platform being unstable, particularly for the larger guns.  I'm guessing this means the vehicle would shift upon firing.  This would make necessary to re-target, instead of just a recalculation, if the target was missed?

regards,

Jack

  • Member since
    April 2006
  • From: Denver, Colorado
Posted by waynec on Monday, February 24, 2014 8:07 PM

well looking at mine there is limited traverse, ie the gun, like an STG. the trails are secured so the entire truck takes the recoild and i doubt the brakes would hold much not to mention no one sits in the driver's seat when the gun is firing. it's really even worse than the US M3 75mm at halftrack (which i will be building for the AT GB and HA:LFTRACK GB since they are almost trucks)

obviously easier on the gun wheels but harder on the truck with the extra weight.

the homemade racks are on and look rough which they should. will probably rust them up (between spilled water and , poor initial paint job and it will add some color)

i will have to pull up STEEL PANTHERS and play with portees and see how they do.

Никто не Забыт    (No one is Forgotten)
Ничто не Забыто  (Nothing is Forgotten)


  • Member since
    July 2004
  • From: Sonora Desert
Posted by stikpusher on Monday, February 24, 2014 10:33 PM

Here is my now fully base coated Carro Commando, along with the Sahariana recon vehicle I am working on as well


F is for FIRE, That burns down the whole town!

U is for URANIUM... BOMBS!

N is for NO SURVIVORS...

       - Plankton

LSM


  • Member since
    November 2009
  • From: SW Virginia
Posted by Gamera on Tuesday, February 25, 2014 7:32 AM

Hey SP, those are looking good! Never that big a fan of Italian tanks but they had some nice looking armoured cars.

Close to done on the Crusader, I need to get some photos up I know. I did scavenge a commander figure from a Tamiya Grant over the weekend and am painting him now.

"I dream in fire but work in clay." -Arthur Machen


  • Member since
    January 2013
Posted by jibber on Tuesday, February 25, 2014 8:44 AM

Wayne that looks terrific, it really turned into a great build. Loads of detail, love it.

  • Member since
    April 2006
  • From: Denver, Colorado
Posted by waynec on Tuesday, February 25, 2014 3:50 PM

decided i needed a rear tow chain to go with front tow chain. used styrene to create brackets. the racks deliberately look rough. they would be bolted on or possibly welded but, as the cans and tires will hide the bolt heads i left them off. will uuse masking tape for can straps and tie the spare tire on with rope and a clove hitch. rifle rack on the other side

Никто не Забыт    (No one is Forgotten)
Ничто не Забыто  (Nothing is Forgotten)


  • Member since
    October 2007
  • From: Louisville, KY
Posted by pordoi on Tuesday, February 25, 2014 5:53 PM

Great stuff Wayne; love the attention to detail.

Good start on the Spitfire, GB379.  A perfect counterpart to your 109.

SK:  will be interested to follow how your Italian vehicles take shape. 

Don

  • Member since
    July 2004
  • From: Sonora Desert
Posted by stikpusher on Tuesday, February 25, 2014 10:43 PM

Thank you pordoi. They are coming along slow but sure.


F is for FIRE, That burns down the whole town!

U is for URANIUM... BOMBS!

N is for NO SURVIVORS...

       - Plankton

LSM


  • Member since
    April 2005
Posted by Thunderbolt379 on Wednesday, February 26, 2014 2:42 AM

A little progress on the Spit -- interior green on the struts, plus preshading, not quite as precise as on the Bf...

I'm not sure how much of this will show through the camo. I hope to lay on the underside Azure Blue tomorrow, then let it harden off before masking for the Desert Yellow. I'm also considering soft-masking for the Dark Earth...

M/TB379

http://worldinminiature.blogspot.com/

  • Member since
    April 2013
Posted by SchattenSpartan on Wednesday, February 26, 2014 4:53 PM

Don: She's an absolute beauty! Awesome work!

Wayne: I really like how your Bedford is coming along!

Mike: Nice work so far!

  • Member since
    October 2010
  • From: Rockford, IL
Posted by AlanF on Wednesday, February 26, 2014 5:48 PM

I’ve been away from the bench for a couple weeks. I got caught up in the Olympic drama.

There’s a lot to catch-up on. Fantastic work. The completed builds by Taxtp, Castelnuovo, Jibber, Thunderbolt379 and Pordoi are just fantastic. I love the weathering on the Sdkfz 232 and the Dragon PzIII J. I have a lot to learn. It’s great to see all of your techniques and gotcha’s freely shared.

Well the end is in sight for the M3A1 Scout.

The camo has been applied along with a gloss coat for the decals.

Top view:

Sides:

Front:

I need to put on a few machine guns, the antenna, the side window armor (closed or open?), and the hood (closed or open?).

Some wheels would be nice along with the front windshield. I still have to get some “sand” streaks on the windshield. Oh, many thanks to those that suggested Nato Black for the tires - great color. My LHS didn’t have it so I had to mail order it.

All that should go fairly fast and then the decals, flat coat and weathering with some grime and sand need to be applied. Still, the end is in sight.  

Tags: M3A1 Scout
  • Member since
    November 2009
  • From: SW Virginia
Posted by Gamera on Thursday, February 27, 2014 9:43 AM

Mike: She looks good, I wouldn't worry too much about staying in the lines with pre-shading. I've tried it using a large black Sharpie felt-tip marker and it looks TOO regular- a little sloppy makes best results.

Alan: Really cool, looking forward to seeing her with decals!

"I dream in fire but work in clay." -Arthur Machen


  • Member since
    December 2002
  • From: Bury St Edmunds, Suffolk, England
Posted by Bish on Thursday, February 27, 2014 2:17 PM

Another good looking build coming along there Mike.

I am a Norfolk man and i glory in being so


On the bench: Airfix 1/72nd Harrier GR.3/Fujimi 1/72nd Ju 87D-3

  • Member since
    April 2005
Posted by Thunderbolt379 on Thursday, February 27, 2014 6:06 PM

Gamera and Bish -- thanks! I got the underside blue mixed and applied but decided I had homebrewed it way too dark, so adjusted it lighter, with the result that the preshade has vanished on the underside -- meh. I also sprayed the canopy interior in the wrong colour -- I grabbed Israeli pale green, not RAF Interior Green. Well, too late now! I'm out for the day, but hopefully will get the blue masked when I get home and maybe even the desert yellow mixed and applied -- we'll see.

Cheers, M/TB379

http://worldinminiature.blogspot.com/

  • Member since
    May 2011
  • From: Illinois
Posted by armor86 on Friday, February 28, 2014 12:47 AM

Nice work everyone - Don Pz III looks nicely done - some more photos of the RAD 8 with some German Grey (Tamiya Color) XF-63 - next up a coat of AK Heavy Chipping Acrylic Fluid. Then the small details and tools. Armor86


Dan

  • Member since
    November 2009
  • From: SW Virginia
Posted by Gamera on Friday, February 28, 2014 8:51 AM

Dan: Looks good! I've been playing around with the chipping fluid and looking forward to seeing your results.

"I dream in fire but work in clay." -Arthur Machen


  • Member since
    December 2002
  • From: Bury St Edmunds, Suffolk, England
Posted by Bish on Friday, February 28, 2014 9:50 AM

Dan, looking nice. I have not come across that AK chipping fluid, so I will be watching that as well.

I am a Norfolk man and i glory in being so


On the bench: Airfix 1/72nd Harrier GR.3/Fujimi 1/72nd Ju 87D-3

  • Member since
    December 2002
  • From: Bury St Edmunds, Suffolk, England
Posted by Bish on Friday, February 28, 2014 9:51 AM

Alan, that's looking good, I like the scheme.

I am a Norfolk man and i glory in being so


On the bench: Airfix 1/72nd Harrier GR.3/Fujimi 1/72nd Ju 87D-3

  • Member since
    October 2007
  • From: Louisville, KY
Posted by pordoi on Friday, February 28, 2014 6:49 PM

Dan:  Nice progress on the 8 Rad.  Anxious to see this build completed.

Bish

Dan, looking nice. I have not come across that AK chipping fluid, so I will be watching that as well.

Ditto    Don't be shy about giving us a step by step guide on using the chipping fluid.  Maybe something else that I can add to my arsenal of weathering skills (well, I call two or three techniques an arsenal.... Smile)

Don

  • Member since
    April 2005
Posted by Thunderbolt379 on Friday, February 28, 2014 10:30 PM

Hi guys, quick update on Gleed's Spit. ASs I posted last time, I homebrewed the Azure Blue, found ity too dark and resprayed with a lighter mix. Then I masked the underside, and homebrewed the Middle Stone. here's the evidence:

First the too-dark mix (more like the Mediterranean Blue than the Azure...)


Then the lighter mix:


Then the lighter mix masked:


And finally the Middle Stone (XF-59 and XF-60 at 1:1):


The good news is the preshade showed through. I'm leaning toward hard-masking for simplicity, and I might redo the preshade in the areas to be Dark Earth -- I have to load up tire black so why not use it on the airframe too?

Cheers, Mike/TB379

http://worldinminiature.blogspot.com/

  • Member since
    October 2010
  • From: Rockford, IL
Posted by AlanF on Saturday, March 1, 2014 5:46 PM

M3A1 White Scout Car Finished

Well, I'm calling her done.  I must say, I enjoyed the build. I made my fair share of mistakes but, overall, I'm pleased with the finished model.

The final steps:

After the gloss coat, the decals were placed as well as the final model pieces (tires, tools, weapons, windshield). I then did an overcoat of Model Master Flat Clear Acryl, fairly thick with a bit of flat white added.  I wanted to give a flat dusty/sandy look. I then did a heavy "wash" with Floryl Sand and Dirt/Grime.  This was done over flat instead of gloss because I wanted it to stick over the entire surface, including decals, and still "pool" in recesses like the tire treads. I pretty pleased with the overall look.  The windshield was masked with masking tape along the wiper blade route and then sprayed with a mist of Desert Yellow to simulate a dusty/sandy environment.  Thanks for suggesting that approach. However, next time I will use something other than masking tape as the edge was more ragged than I like.

I hope you enjoy the pics. 

Now, I'm off the start the second build for this group - the Hobby Boss Sd.Kfz 222 Leichter Panzerspahwagen.

Tags: M3A1 Scout
JOIN OUR COMMUNITY!

Our community is FREE to join. To participate you must either login or register for an account.

SEARCH FORUMS
FREE NEWSLETTER
By signing up you may also receive reader surveys and occasional special offers. We do not sell, rent or trade our email lists. View our Privacy Policy.