SEARCH FINESCALE.COM

Enter keywords or a search phrase below:

Rommel vs Monty (North African GB 1941-43) Jan. 1 - Aug. 31 2014

137511 views
1455 replies
1 rating 2 rating 3 rating 4 rating 5 rating
  • Member since
    July 2004
  • From: Sonora Desert
Posted by stikpusher on Tuesday, February 25, 2014 10:43 PM

Thank you pordoi. They are coming along slow but sure.


F is for FIRE, That burns down the whole town!

U is for URANIUM... BOMBS!

N is for NO SURVIVORS...

       - Plankton

LSM


  • Member since
    October 2007
  • From: Louisville, KY
Posted by pordoi on Tuesday, February 25, 2014 5:53 PM

Great stuff Wayne; love the attention to detail.

Good start on the Spitfire, GB379.  A perfect counterpart to your 109.

SK:  will be interested to follow how your Italian vehicles take shape. 

Don

  • Member since
    April 2006
  • From: Denver, Colorado
Posted by waynec on Tuesday, February 25, 2014 3:50 PM

decided i needed a rear tow chain to go with front tow chain. used styrene to create brackets. the racks deliberately look rough. they would be bolted on or possibly welded but, as the cans and tires will hide the bolt heads i left them off. will uuse masking tape for can straps and tie the spare tire on with rope and a clove hitch. rifle rack on the other side

Никто не Забыт    (No one is Forgotten)
Ничто не Забыто  (Nothing is Forgotten)


  • Member since
    January 2013
Posted by jibber on Tuesday, February 25, 2014 8:44 AM

Wayne that looks terrific, it really turned into a great build. Loads of detail, love it.

  • Member since
    November 2009
  • From: SW Virginia
Posted by Gamera on Tuesday, February 25, 2014 7:32 AM

Hey SP, those are looking good! Never that big a fan of Italian tanks but they had some nice looking armoured cars.

Close to done on the Crusader, I need to get some photos up I know. I did scavenge a commander figure from a Tamiya Grant over the weekend and am painting him now.

"I dream in fire but work in clay." -Arthur Machen


  • Member since
    July 2004
  • From: Sonora Desert
Posted by stikpusher on Monday, February 24, 2014 10:33 PM

Here is my now fully base coated Carro Commando, along with the Sahariana recon vehicle I am working on as well


F is for FIRE, That burns down the whole town!

U is for URANIUM... BOMBS!

N is for NO SURVIVORS...

       - Plankton

LSM


  • Member since
    April 2006
  • From: Denver, Colorado
Posted by waynec on Monday, February 24, 2014 8:07 PM

well looking at mine there is limited traverse, ie the gun, like an STG. the trails are secured so the entire truck takes the recoild and i doubt the brakes would hold much not to mention no one sits in the driver's seat when the gun is firing. it's really even worse than the US M3 75mm at halftrack (which i will be building for the AT GB and HA:LFTRACK GB since they are almost trucks)

obviously easier on the gun wheels but harder on the truck with the extra weight.

the homemade racks are on and look rough which they should. will probably rust them up (between spilled water and , poor initial paint job and it will add some color)

i will have to pull up STEEL PANTHERS and play with portees and see how they do.

Никто не Забыт    (No one is Forgotten)
Ничто не Забыто  (Nothing is Forgotten)


  • Member since
    April 2006
  • From: ON, Canada
Posted by jgeratic on Monday, February 24, 2014 5:39 PM

Wayne, yes that is looking grand.

I haven't come across any official doctrine for these portees, but do know the 2-pdr could not sustain travel over rough terrain, nor long distances, so had to be piggy-backed around.  It's wheel attachments were not very robust and would literally fall off.  I don't know if the early 6-pdr suffered similarly.

Originally the concept grew from a need to have mobile anti-tank weapons for the fast moving units (both for motorized infantry and AT sections of armoured units), so as to be able to participate in a mobile warfare.  They were quite successful against the Italians, and the early desert campaign.  Once the Germans learned about these though, they quickly found a way to take care of them.  

As mentioned, depending on the type of vehicle platform, they could have a very high silhouette. That, combined with minimal armour and limited traverse (the vehicle and it's turning ratio) made it susceptible to even machine gun fire.  The shoot n' scoot principal worked great if the terrain was ideal, such as dunes or wadis where the vehicle could constantly move  and hide while changing it's location.

I've also seen mention of the platform being unstable, particularly for the larger guns.  I'm guessing this means the vehicle would shift upon firing.  This would make necessary to re-target, instead of just a recalculation, if the target was missed?

regards,

Jack

  • Member since
    December 2002
  • From: Bury St Edmunds, Suffolk, England
Posted by Bish on Monday, February 24, 2014 2:34 PM

wayne, that's looking great, I like all the extras.

I am a Norfolk man and i glory in being so


On the bench: Airfix 1/72nd Harrier GR.3/Fujimi 1/72nd Ju 87D-3

  • Member since
    April 2006
  • From: Denver, Colorado
Posted by waynec on Monday, February 24, 2014 2:29 PM

yep that was the plan. i suspect the high silhouette and lack of hull down positions were determining factors. it does have a winch and ramps to ground mount it.

Никто не Забыт    (No one is Forgotten)
Ничто не Забыто  (Nothing is Forgotten)


  • Member since
    July 2004
  • From: Sonora Desert
Posted by stikpusher on Monday, February 24, 2014 11:53 AM

Now I am under the impression that the "portee" guns were usually fired from off of the truck bed moountand not dismounted for fire in order to give a "shoot and scoot" capability more often than not.


F is for FIRE, That burns down the whole town!

U is for URANIUM... BOMBS!

N is for NO SURVIVORS...

       - Plankton

LSM


  • Member since
    April 2006
  • From: Denver, Colorado
Posted by waynec on Monday, February 24, 2014 11:37 AM

stikpusher and the gun is from a PEERLESS MAX canadian 15cwt 4x4 kit that may show up in the 1944 GB

gamera there is a winch forward with hand cranks on either side. i added a "real (or reel ha)" cable so now have to add the hook on the end which could be amusing.

Никто не Забыт    (No one is Forgotten)
Ничто не Забыто  (Nothing is Forgotten)


  • Member since
    November 2009
  • From: SW Virginia
Posted by Gamera on Monday, February 24, 2014 7:48 AM

Don: Fantastic job there all around- kudos sir!!!

Wayne: Great work there! I didn't realize the vehicle sat that high, it must have been a bear to push the gun up on there.

Mike: Looks good, I've build a couple of those Hasegawa Spits and they're just all around great kits.  

"I dream in fire but work in clay." -Arthur Machen


  • Member since
    April 2005
Posted by Thunderbolt379 on Monday, February 24, 2014 1:54 AM

Hi guys,

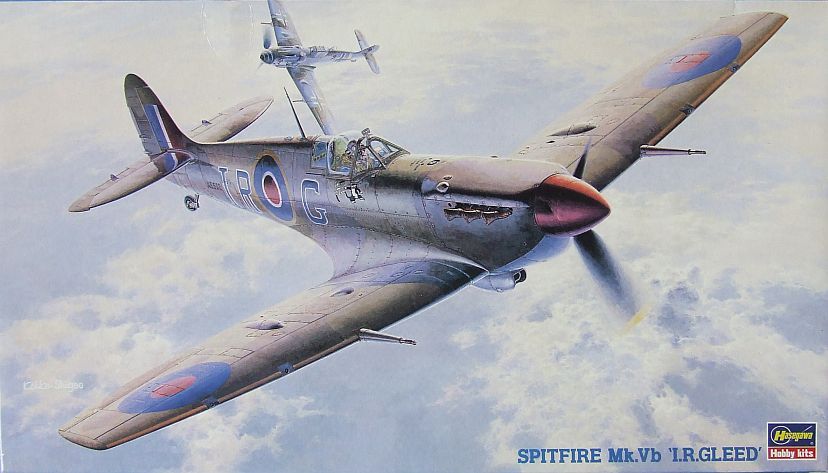
With Eric's permission, I'm adding another aircraft to this GB, this time a direct counterpart and adversary of Shroer's Bf 109 F in '42/'43, this time it's Hasegawa's 1:48th scale Spitfire Vb in markings for British ace Ian R. Gleed. Here's the kit:
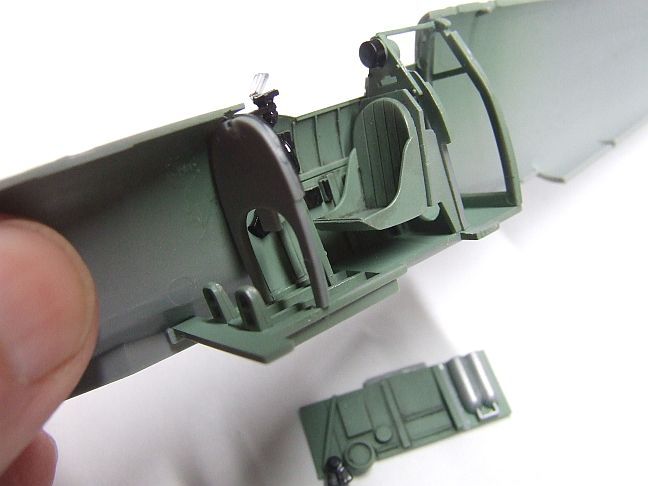
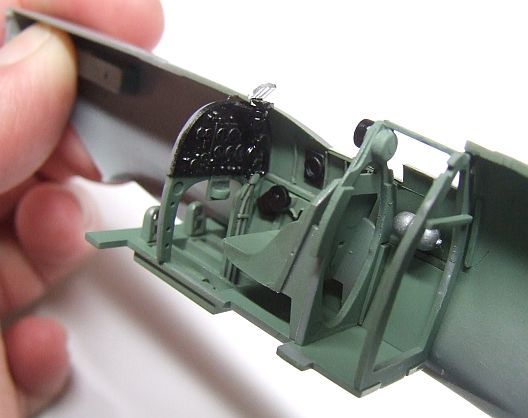
I started this one as a companion to my Academy Mk. 14 for the Spitfire GB about two years ago but never got beyond basic construction. I took some photos at the time of the cockpit going together, here they are:
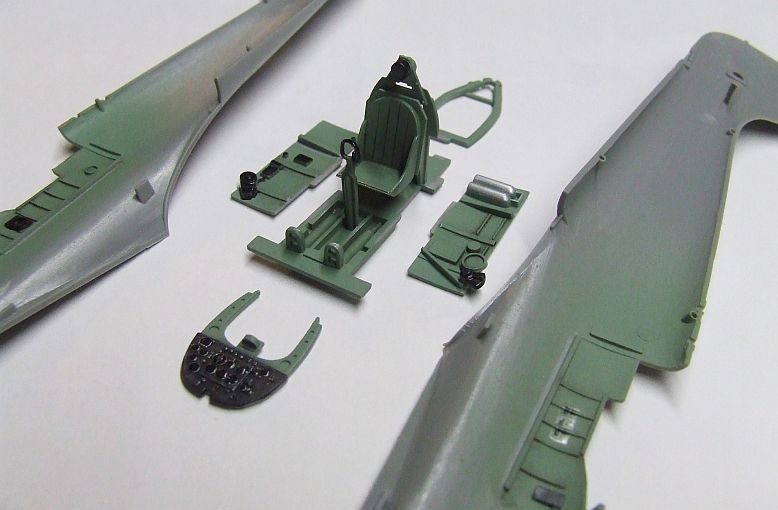
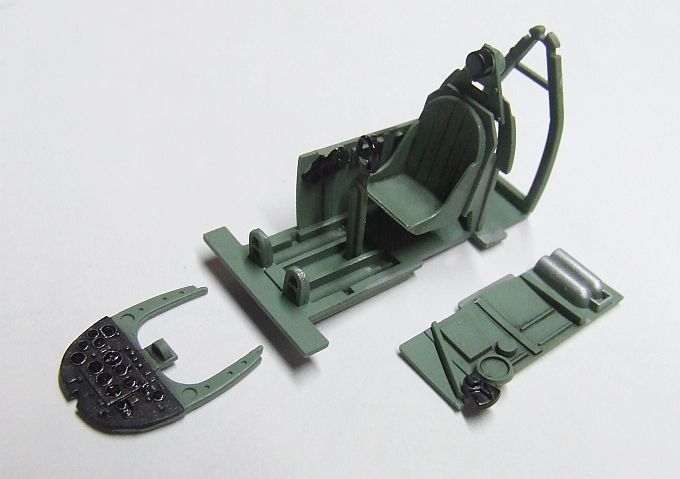
As you can see, nothing terribly fancy, OOB, but tidy enough, and that's plenty for a closed canopy build.

I got her closed up and mated to the wing, but that was where she lay ever since. Here's the state of play as I came to her:
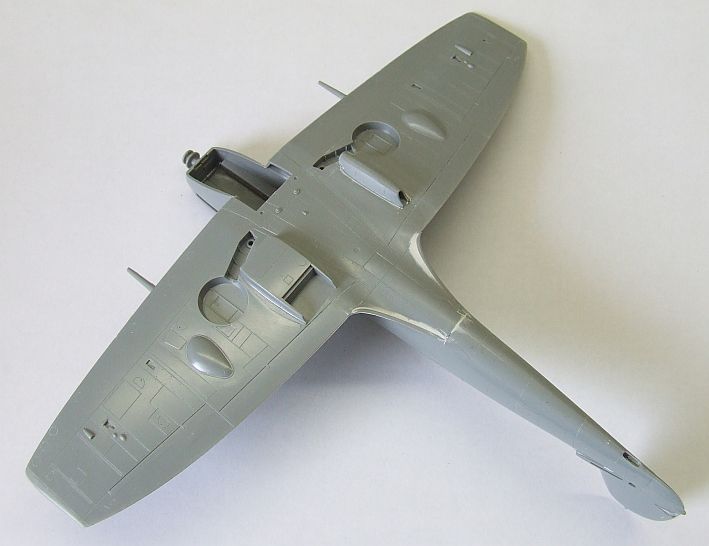
A close up on the cockpit as installed:
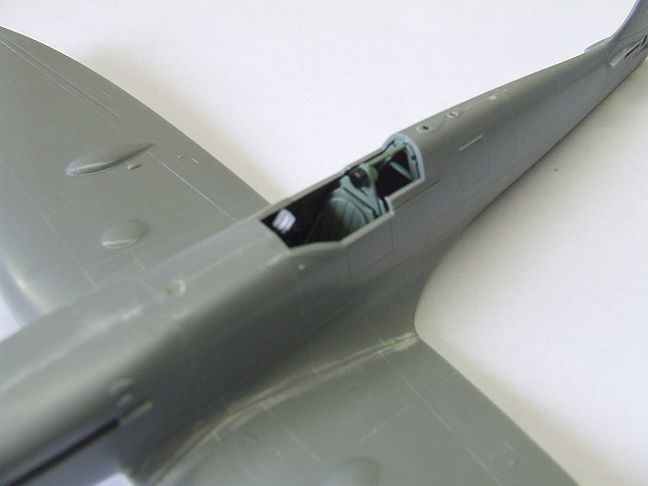
Then I got busy the other day, fitted the under-chin cowling with the tropical filter, fitted the canopy and the tail surfaces:
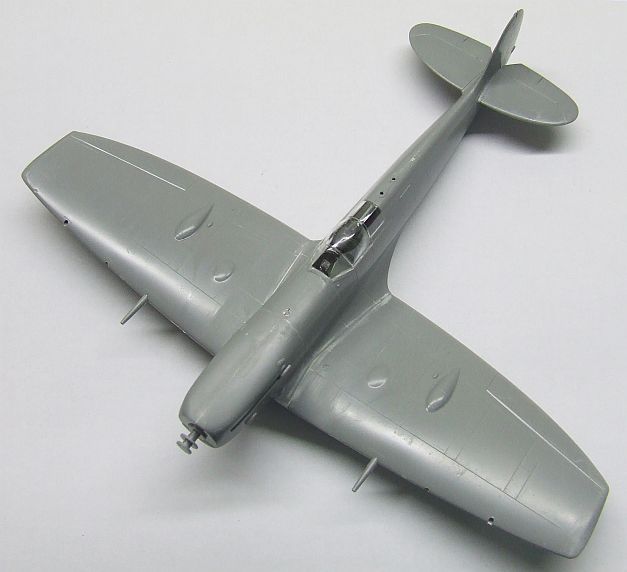
Next was a round of masking, including the canopy, exhaust wells, gear strut locators, canon barrels and clear formation light on the spine:
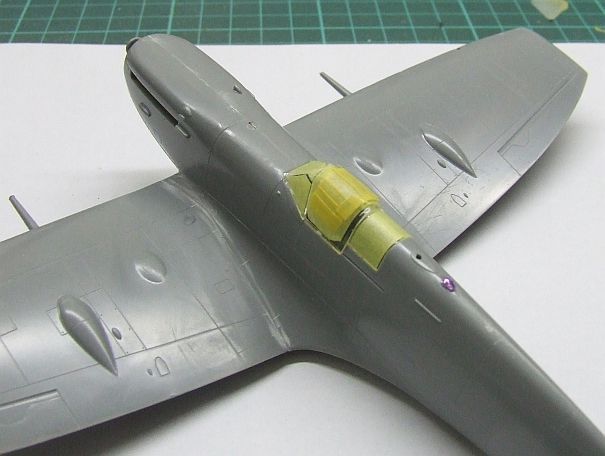
Tomorrow I'll make a call on whether to add the radio mast before painting, and give the model a thorough wash, ahead of hopefully spraying the interior green for the canopy struts, and possibly also pre-shading the airframe as a whole.

Cheers, thanks for looking,

Mike/TB379

http://worldinminiature.blogspot.com/

  • Member since
    July 2004
  • From: Sonora Desert
Posted by stikpusher on Sunday, February 23, 2014 11:38 PM

Wayne that is coming along beautifully!!! Excellent work on that old kit!


F is for FIRE, That burns down the whole town!

U is for URANIUM... BOMBS!

N is for NO SURVIVORS...

       - Plankton

LSM


  • Member since
    March 2003
  • From: Rain USA, Vancouver WA
Posted by tigerman on Sunday, February 23, 2014 10:50 PM

Don, beautiful Pz. III. I like the chain and weathering on her. I will add it to the wall of fame.

   http://i7.photobucket.com/albums/y269/wing_nut_5o/PANZERJAGERGB.jpg

 Eric 

  • Member since
    April 2006
  • From: Denver, Colorado
Posted by waynec on Sunday, February 23, 2014 7:46 PM

wip to date. everthing in pic 5 oe the weapons tools, etc are in progress except the spare tire.doors will be open when i put them oon. i also need the 3 frames for the partial cargo bed canvas but won't put them or the mirrors on until the weathering is done.

Никто не Забыт    (No one is Forgotten)
Ничто не Забыто  (Nothing is Forgotten)


  • Member since
    October 2007
  • From: Louisville, KY
Posted by pordoi on Sunday, February 23, 2014 7:13 PM

jgeratic

Don (pordoi) - a real fine job on the pz.III

The sandbags seem to stand out a bit more, did you do something extra since your last set of in progress pics?  It would be great to see this on a base, and maybe even a figure or two if you've the time.

Something different?  Yes, I added a third light at camera level  when I photographed the finished model.  The more uniform lighting probably shows the model more like it really looks to the eye.  And you and Bish have twisted my arm to mount this on a base with a fig or two, not that I really needed that much convincing.  Might be a while though, since I'm off to Poland on business for a week or two.  Leaving this week and will try to keep current on the GB.

Wayne:  We need pics, buddy!  Take some shots and post them Smile

Don

  • Member since
    April 2006
  • From: Denver, Colorado
Posted by waynec on Sunday, February 23, 2014 6:31 PM

hey jack

(note never say Hi Jack in an airport. bah dum dum). cool thanks

this is the portee kit sans gun (vendor buy) so one would think it would have the storage lockers but alas no. just went to the bunker and checked. i could do it but it would be tight, partially sticking out the back, and i would probably break something. plus there is no room for the "ladder" between the 2 ramps (which i could tie to the sides).

just tried putting the gun shooting off the back. i could do that but the 2 parts for the trail when shooting forward would have to be removed. and it's tto late for that. only 2 seats in back but 2 in cab so that's good.

there is a chain  by the trails so i could put the gun in travel and twrap the chain around it. have the winch handles and haven't decided but leaning towards windscreen folded down and wrapped in canvas and cab top rolled up and stuffed behind. and there are only 2 ammo boxes thoiugh i could fit a couple more in if i wanted.

the only difficulty with the gun partially of is attaching the hook to the cable.

my friend yhinks thinking of a real load plan and all this extra work is "amazing." i told him it's just normal modeling, at least for the guys i hang out with.

Никто не Забыт    (No one is Forgotten)
Ничто не Забыто  (Nothing is Forgotten)


  • Member since
    April 2006
  • From: ON, Canada
Posted by jgeratic on Sunday, February 23, 2014 5:32 PM

Don (pordoi) - a real fine job on the pz.III

The sandbags seem to stand out a bit more, did you do something extra since your last set of in progress pics?  It would be great to see this on a base, and maybe even a figure or two if you've the time.

--------------------------------------------

Wayne - came across this, special just for you:

Note the mention of the locker underneath the body, more scratch building for you?

regards,

Jack

  • Member since
    April 2006
  • From: Denver, Colorado
Posted by waynec on Sunday, February 23, 2014 4:45 PM

i have crossed over into anal. was looking at the load plan, which is for the truck BIT NOT the portee version, imagining me as the gun crew chief in an army that probably allows more "creativity" than the british army back home and i said to myself "self we need more water and a spare tire would be nice especially if i am swanning around in the desert.. given i have a gun in the cargo bed that has to be unloaded and i am in good with the RSM what would i do?"

so now i am building racks for additional 5gal water cans, perhaps stolen from jerry, a spare tire and personal weapons

so i just build and primed racks for all of that

Никто не Забыт    (No one is Forgotten)
Ничто не Забыто  (Nothing is Forgotten)


  • Member since
    July 2004
  • From: Sonora Desert
Posted by stikpusher on Sunday, February 23, 2014 3:31 PM

Ok, I got my Commando Carro back on the workbench again today. Since I was having such problems with my Polly Scale Italian Sand Yellow, I decided to try a new approach. I airbrushed the whole thing with Humbrol Light Yellow, a VERY smililar color.  After it has dried I will give a top coat of teh Polly Scale color to get the right shade in a much easier manner. Photos in the next few days.


F is for FIRE, That burns down the whole town!

U is for URANIUM... BOMBS!

N is for NO SURVIVORS...

       - Plankton

LSM


  • Member since
    December 2002
  • From: Bury St Edmunds, Suffolk, England
Posted by Bish on Sunday, February 23, 2014 2:29 PM

Don, that looks great. Defiantly deserves a base.

I am a Norfolk man and i glory in being so


On the bench: Airfix 1/72nd Harrier GR.3/Fujimi 1/72nd Ju 87D-3

  • Member since
    April 2006
  • From: Denver, Colorado
Posted by waynec on Sunday, February 23, 2014 2:13 PM

nice work on the PZ-III and the 109 guys.

my truck is at the fiddley pieces stage; doing the weapons and tools and various little pieces i always leave off until the very end such as MIRRORS. also haven't decided on windshiel up with top or folded doen and top rolled up. for the cargo bed may make a tissue tarp or try another draped camp netwill have pics later. life caught up with me the past couple of days plus i will need some advice on how this is going to sit finished. it will be on a base as one wheel is 1mm too high unless i weigh down the vehicle and it will probably have to go in IPMS vignette, not guns as the base will be more than a piece of wood and a bit of sand. my 2 options (it is a portee) are

1. gun is loaded so everything is within the truck or

2. gun is 3/4 off the rear ramps, equipment strewn around like it was hastily abandoned or overrun. may add a body and a dak soldier or 2 depending on what is oin the stash.

Никто не Забыт    (No one is Forgotten)
Ничто не Забыто  (Nothing is Forgotten)


  • Member since
    October 2007
  • From: Louisville, KY
Posted by pordoi on Friday, February 21, 2014 7:58 PM

Ditto TB/379

Very nice work on the trop 109.  Comforting to know that all of the 4-, 6-, 8-rad and tracked vehicles being built have some air support!

Here is my completed PzIIIJ...., just pics with little commentary.

Still deciding whether to mount this on a base with a figure or two, so maybe not really completed...

... modeled as one of the early 50mm L/60 tanks delivered to Rommel;  didn't last too long since this is apparently how she ended up at Tobruk in 1942...

Don

  • Member since
    April 2005
Posted by Thunderbolt379 on Friday, February 21, 2014 1:37 AM

Many thanks, Valkyrie and Tigerman! I had a blast!

M/TB379

http://worldinminiature.blogspot.com/

  • Member since
    March 2003
  • From: Rain USA, Vancouver WA
Posted by tigerman on Friday, February 21, 2014 1:33 AM

Mike, thanks for the addition of a 109 in desert scheme. A nice change of pace to the GB and quite appropriate. Well done sir.

   http://i7.photobucket.com/albums/y269/wing_nut_5o/PANZERJAGERGB.jpg

 Eric 

  • Member since
    February 2014
  • From: Cincinnati, OH
Posted by Valkyrie on Thursday, February 20, 2014 6:59 PM

Thunderbolt, that's truly beautiful work!  You achieved magnificence.  It looks REAL!

  • Member since
    April 2005
Posted by Thunderbolt379 on Thursday, February 20, 2014 4:31 PM

Thanks SMJ! The idea with dusting the wheels is to reflect the terrain they're operating from, so desert dust was the brief -- to me they don't look quite sandy enough!

M/Tb379

http://worldinminiature.blogspot.com/

  • Member since
    April 2007
  • From: Schroon Lake, NY
Posted by SMJmodeler on Thursday, February 20, 2014 4:24 PM

Thunderbolt379:  That is one sweeeeeeeeeeet looking airplane!  I love the custom color blend, I'd describe her as "crisp" and or "tight".  Well done!YesYes!!!

...but I have to say, the dirty wheels look a bit "off"....and I can't quite figure out why...hmmmTongue Tied...maybe it's the color...a bit too brownish?.   How about a black/graphite wash...brake dust???  Drybrush on the rubber?Tongue Tied

take a second look...Indifferent...maybe it's just me.

JOIN OUR COMMUNITY!

Our community is FREE to join. To participate you must either login or register for an account.

SEARCH FORUMS
FREE NEWSLETTER
By signing up you may also receive reader surveys and occasional special offers. We do not sell, rent or trade our email lists. View our Privacy Policy.