SEARCH FINESCALE.COM

Enter keywords or a search phrase below:

Rommel vs Monty (North African GB 1941-43) Jan. 1 - Aug. 31 2014

137511 views
1455 replies
1 rating 2 rating 3 rating 4 rating 5 rating
  • Member since
    October 2010
  • From: Rockford, IL
Posted by AlanF on Friday, January 3, 2014 11:03 PM

M3A1 Scout Engine

The HobbyBoss kit has a nicely detailed engine although it is lacking in some areas (Where is the radiator?). My reference doesn't show the same engine as the kit but I did find a few photos using Google that were similar.  I doubt the silver color they suggest. Most of the photos I've seen are grey/black.  I did a bit of scrap building. The alternator didn't have a fan belt wheel so I had to make one and I used some Heavy EZLine to make the fan belt. The engine was painted, dry brushed with flat aluminum and subjected to a Flory Black Dirt/Grime wash.  Maybe a bit overdone? A flat coat will tone it down a bit. Do you think it would benefit from using some lighter EZLine to simulate spark plug wires? Or is there some other technique you use?

All in all, I'm pretty happy with how it's coming out, especially since it's my first non-aircraft engine.

  • Member since
    April 2006
  • From: Denver, Colorado
Posted by waynec on Friday, January 3, 2014 6:02 PM

i have a pair of these that are in the may build in the future so i will watch your build closely

Никто не Забыт    (No one is Forgotten)
Ничто не Забыто  (Nothing is Forgotten)


  • Member since
    April 2006
  • From: Denver, Colorado
Posted by waynec on Friday, January 3, 2014 5:47 PM

italeri BEDFORD truck. i got at a vendor sale. hopefully all the pieces are there, looks like an opportunity to try my hand at making canvas ttarps/tops. if the weather holds off  i woll get started on it at my ship club workshop. if not it's backburnered and i will be airbrushing shelf queens.


Никто не Забыт    (No one is Forgotten)
Ничто не Забыто  (Nothing is Forgotten)


  • Member since
    December 2002
  • From: Bury St Edmunds, Suffolk, England
Posted by Bish on Friday, January 3, 2014 4:53 PM

Tony, nice work, off to a good start already.

Stik, same as, good start.

I am a Norfolk man and i glory in being so


On the bench: Airfix 1/72nd Harrier GR.3/Fujimi 1/72nd Ju 87D-3

  • Member since
    October 2007
  • From: Louisville, KY
Posted by pordoi on Friday, January 3, 2014 4:01 PM

armor86

Don - When I was working on it I thought about using the Pz III Ausf N DAK kit rack which I have, however reviewing photos with the vehicle I was building didn't match the N's rack so I scratch built the rack using left over PE material. Pz IIIs could be ID just looking at the storage rack on and were unique to different regiments. I have several reference books on DAK units so let me know which regiment / unit you plan to build. Books include Panzers in the Sand - History of Panzer-Regiment 5 Vol. 1 and 2. Rommel's Afrika Korps - El Agheila to El Alamein and Panzer III Work Horse in North Africa. Armor86

          Thanks for the info, Dan.  I was planning to build one of the kit options; No. 3 from Pz.Rgt. 8, 15th Pz Div.  Found a photo on the web that looks to be this vehicle abandoned outside of Tobruk.  It had a rear mounted rack although I haven't yet compared it to the PzIII AusfN kit rack.  Actually, the photo is on another computer; I'll post a copy as soon as I retrieve it.  If your refs have any additional photos, I would greatly appreciate having a look, or at least tell me which book and I'll hunt down a copy.

Don

  • Member since
    November 2009
  • From: SW Virginia
Posted by Gamera on Friday, January 3, 2014 2:34 PM

Those look great guys!

"I dream in fire but work in clay." -Arthur Machen


  • Member since
    July 2004
  • From: Sonora Desert
Posted by stikpusher on Friday, January 3, 2014 11:21 AM

PM, thanks!

Tony, all right! Another Italian AFV building up fast! I do like those Italian armored cars. Good lines to them.


F is for FIRE, That burns down the whole town!

U is for URANIUM... BOMBS!

N is for NO SURVIVORS...

       - Plankton

LSM


  • Member since
    May 2005
Posted by pyrman64 on Friday, January 3, 2014 8:09 AM

Stik: nice progress, so far.

Tony: looking good.

Greg H

"There is many a boy here today who looks on war as all glory, but, boys, it is all hell." Gen. Wm T. Sherman (11 April 1880, Columbus, Ohio)

  • Member since
    April 2005
  • From: Australia
Posted by taxtp on Friday, January 3, 2014 5:30 AM

Here's a start on my 1/48 AB41. It went together pretty easily. I've used a little filler to tidy up some joins, but the flash has accentuated it.

This one will just be an out of the box build, nothing extra. I'd just started when I remembered to take the initial photo.

Cheers

Tony

I'm just taking it one GB at a time.

  • Member since
    May 2011
  • From: Illinois
Posted by armor86 on Thursday, January 2, 2014 11:13 PM

Don - When I was working on it I thought about using the Pz III Ausf N DAK kit rack which I have, however reviewing photos with the vehicle I was building didn't match the N's rack so I scratch built the rack using left over PE material. Pz IIIs could be ID just looking at the storage rack on and were unique to different regiments. I have several reference books on DAK units so let me know which regiment / unit you plan to build. Books include Panzers in the Sand - History of Panzer-Regiment 5 Vol. 1 and 2. Rommel's Afrika Korps - El Agheila to El Alamein and Panzer III Work Horse in North Africa. Armor86


Dan

  • Member since
    July 2004
  • From: Sonora Desert
Posted by stikpusher on Thursday, January 2, 2014 10:07 PM

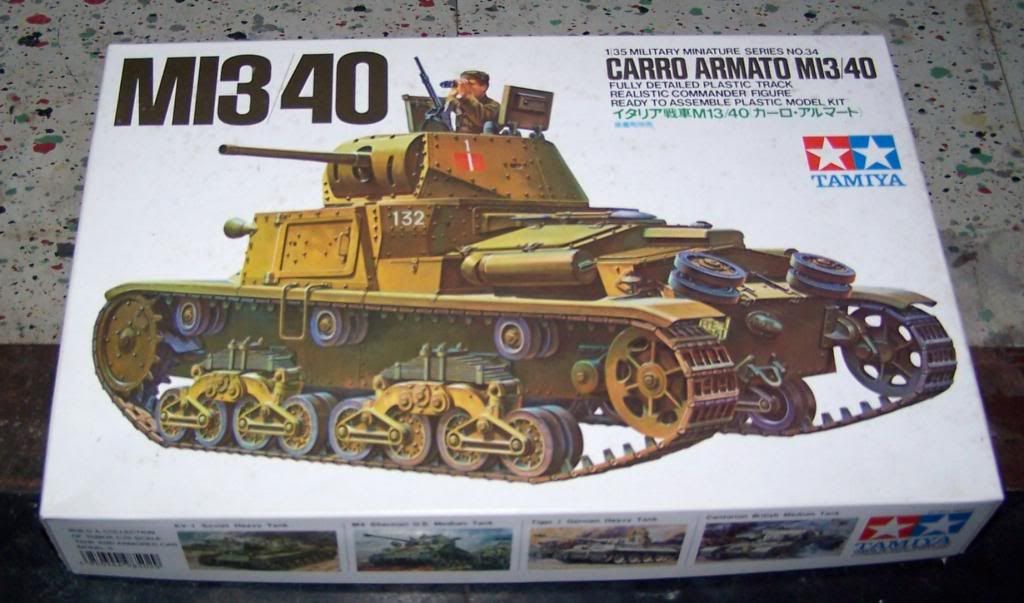
Well I decided to give this a start today, and lets just say that the build gathered momentum and went faster than I would have imagined.

So this is my basic kit- Tamiya's 1976 vintage M13/40 that with the help of a left over part from an Italeri kit of the same subject I will use to make a Carro Commando per Semoventi, basicly the Italian equivelant of a Befehlspanzer for theit assault guns (Semoventi). 
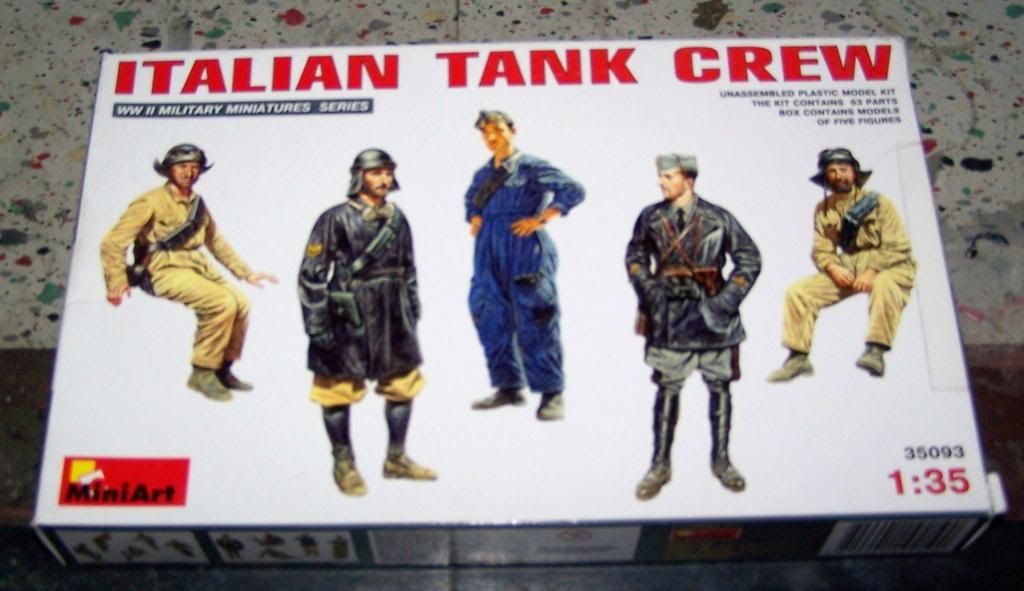
I figured that I could find a suitable commander figure from this figure set
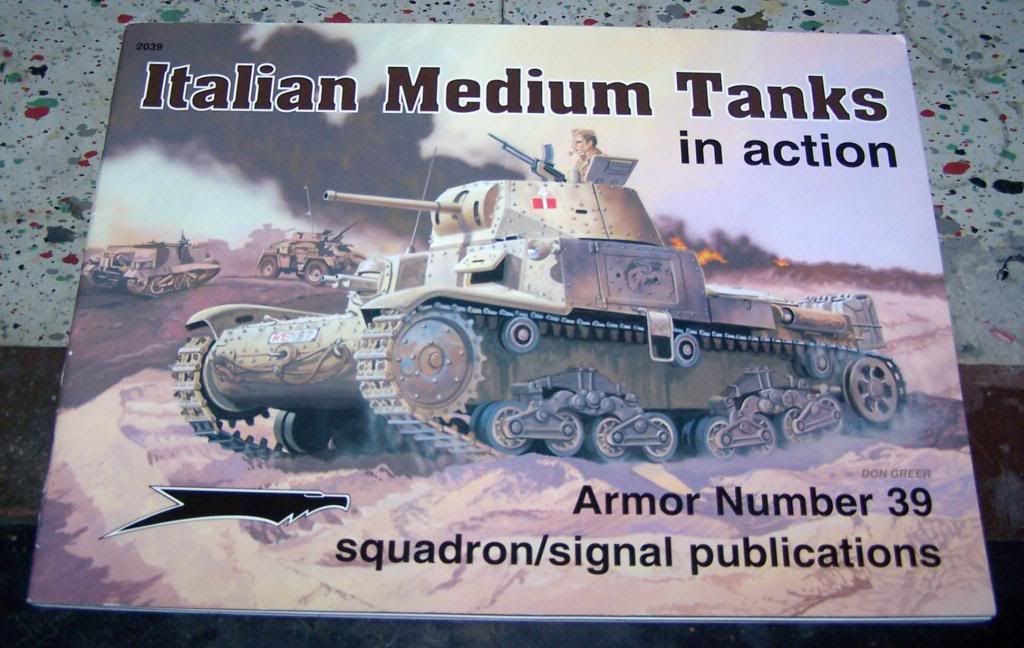
And this is my prime reference source- it has a small section on the vehicles
of course step one is the roadwheel bogie units

and step two is the idler wheels and drive sprockets

steps three and four is attaching these items and other items to the lower hull- Dinner hppened sometime in step three

step five was building the fighting compartment superstructure- and here is where I added teh flat plate in place of the turret

Step six was buiding the turret- obviously skipped. Seven is adding the superstructure to the lower hull as well as some fiddly bits such as headlights, the machine guns. One thing that I did do was open up the bores for teh twin ball mount machines guns

and here is everything placed together 

I still need to add the pioneer tools on the engine deck, the crew step rails on the sides of the superstructure, and the tracks. But in less than 4 hours, BOOM a tank. And to think that I had almost chosen this kit for Weekend Madness this year until this North Africa GB was announced.


F is for FIRE, That burns down the whole town!

U is for URANIUM... BOMBS!

N is for NO SURVIVORS...

       - Plankton

LSM


  • Member since
    April 2006
  • From: Denver, Colorado
Posted by waynec on Thursday, January 2, 2014 7:49 PM

put a towel across your lap when you are working and it will catch a lot. cut really small parts off the sprue by putting the sprue inside a big clear freezer bag and cutting in there. and most important

THE LAWS OF PHYSICS DO NOT APPLY TO DROPPED PARTS!.

as for the camo i would say any us halftrack (infantry, at, mortar) would probably work.

Никто не Забыт    (No one is Forgotten)
Ничто не Забыто  (Nothing is Forgotten)


  • Member since
    October 2010
  • From: Rockford, IL
Posted by AlanF on Thursday, January 2, 2014 7:25 PM

This is my first GB and "armor" build.  I have received both the HobbyBoss M3A1 and Sd.Kfz.222 kits.  I decided to start with the M3A1 since it looked easier.

I had a good laugh reading the instructions. You just have to love wooden translations:

It is nicely packaged..

I did begin the engine. Wow, these parts are small and getting ready for some paint. I really hope the carpet monster doesn't eat too many of these.

Now for a big question.  Does anyone have a picture of the desert camo that was used on these?  I have found some British ones in B&W, and one Patton used, also in B&W.  I would love to see some pics, in color, of some US Camo.

Tags: M3A1 Scout
  • Member since
    April 2006
  • From: ON, Canada
Posted by jgeratic on Thursday, January 2, 2014 7:23 PM

... ditto on the 221.

There was mention on another forum of a French publication having a photo of one in Africa, only added description being it had it's antenna extended.  So wonder if this is the one:

Have not found definite caption for it, but if it is Africa it might be Tunisia due to the vegetation, and what looks to be a slight hill in the background - but this could be Europe/Russia too - inconclusive!

The Kstn files for 1941 are incomplete, but the charts do allow the 221 and 222 to be intermixed in recon units.  The vehicle was still around in 1943, many being equipped with a light AT weapon.

regards,

Jack

  • Member since
    April 2006
  • From: Denver, Colorado
Posted by waynec on Thursday, January 2, 2014 6:00 PM

i haven't found anything either. given they were build stating in 1935 it would nmake sense they were upped to 222s due to poland and france experiences.

Никто не Забыт    (No one is Forgotten)
Ничто не Забыто  (Nothing is Forgotten)


  • Member since
    May 2005
Posted by pyrman64 on Thursday, January 2, 2014 5:53 PM

Johan: from my research, I can't find any use of the 221 in Afrika.

Greg H

"There is many a boy here today who looks on war as all glory, but, boys, it is all hell." Gen. Wm T. Sherman (11 April 1880, Columbus, Ohio)

  • Member since
    December 2002
  • From: Bury St Edmunds, Suffolk, England
Posted by Bish on Thursday, January 2, 2014 3:38 PM

Johan, I have had a look, online and in books. I can find some models of 221's in DAK colours, but not the real thing. I would have said yes, but now not to sure.

I am a Norfolk man and i glory in being so


On the bench: Airfix 1/72nd Harrier GR.3/Fujimi 1/72nd Ju 87D-3

  • Member since
    December 2006
  • From: N. Georgia
Posted by Jester75 on Thursday, January 2, 2014 3:11 PM

What brand and color did you use on that Pz. I Ernest if you dont mind my asking?

Eric


  • Member since
    April 2005
  • From: Gothenburg
Posted by JohanT on Thursday, January 2, 2014 1:49 PM

The MII looks very convincing Ernest.
Any 221 scouts around on the African scene?

  • Member since
    April 2006
  • From: Denver, Colorado
Posted by waynec on Thursday, January 2, 2014 11:34 AM

i did the tamiya DAK one a few years ago. assumed it was overpainted when it got to africa so the interior of the turet, under the fenders and behind the markings stayed gray.i base coated it gray, painted the yellow and i think i tokk 1500 sandpaper and sanded off some yellow on the edges.

Никто не Забыт    (No one is Forgotten)
Ничто не Забыто  (Nothing is Forgotten)


  • Member since
    November 2009
  • From: SW Virginia
Posted by Gamera on Thursday, January 2, 2014 11:17 AM

Hey Jack, thanks! That's a wealth of useful information there.

Greg: Good to see you coming along. Hopefully I'll get some photos up sometime this weekend.

"I dream in fire but work in clay." -Arthur Machen


  • Member since
    May 2005
Posted by pyrman64 on Thursday, January 2, 2014 10:14 AM

Well, I got started on my Sd.kfz.222 yesterday morning.  Here's a few pics of what I got together....

the chassis


the upper hull - I filled in the indents for the jerry can racks

Tags: RAF , Sd.kfz.222

Greg H

"There is many a boy here today who looks on war as all glory, but, boys, it is all hell." Gen. Wm T. Sherman (11 April 1880, Columbus, Ohio)

  • Member since
    April 2006
  • From: ON, Canada
Posted by jgeratic on Thursday, January 2, 2014 1:15 AM

Best research I've seen on British camou/vehicle colours is that by Mike Starmer:

http://www.mafva.net/other%20pages/Starmer%20camo.htm

I'm not sure definitely where British desert vehicles were painted, but back on page nine of our thread I had posted a war film of equipment being painted at a workshop in Egypt.  There is the odd dark vehicle in the background (waiting to be painted?).  So maybe some, many, all? were sent over in their European scheme?

There is also this well known photo of a shipment arriving in Egypt, and to me they do look dark:

You're probably right in going with a simple one tone scheme for the Crusader.  Only the first few Mark I's of that type carried the Caunter system, and by October 1941 the scheme had changed to just one disruptive colour over the base.  By the beginning of 1942, many vehicles were just finished in one desert tone.

regards,

Jack

  • Member since
    November 2009
  • From: SW Virginia
Posted by Gamera on Wednesday, January 1, 2014 9:37 PM

Thanks guys, I'm going with the bronze green in the nooks and crannies unless I find out something different. I can always take a brush and get in there and paint over it if I have to.

That Panzer IB looks great Ernest, now I'm wondering if could use the same sponge method with the bronze green! I think I'm just going to skip it though as well as the Caulter (sp?) scheme and just go with the sand and do her as an experiment in shading and colour modulation. I've tried it a few times on olive drab and liked the results- this will be the first time on a yellow/tan vehicle.

"I dream in fire but work in clay." -Arthur Machen


  • Member since
    July 2006
  • From: San Francisco Bay Area
Posted by bufflehead on Wednesday, January 1, 2014 8:01 PM

Wish I could help you Cliff, but I know almost nothing about British armor in North Africa.  

Eric, I've been thinking the same thing for the last few days.  I was planning on using the h-s method on the Pz.I B, but I've had pretty good results with just drybrushing/sponging dark grey over the sand color to represent the paint wear.   That's how I did this old Tamiya Pz. II a few years ago.

The effect is rather subtle though.  The h-s method might yield more dramatic results.  I may try experimenting with that on a scrap turret first.

Ernest

Last Armor Build - 1/35 Dragon M-26A1, 1/35 Emhar Mk.IV Female


Last Aircraft Builds - Hobby Boss 1/72 F4F Wildcat & FW-190A8


  • Member since
    March 2003
  • From: Rain USA, Vancouver WA
Posted by tigerman on Wednesday, January 1, 2014 7:17 PM

Great question Cliff, but if they knew they were heading to the desert, might they have been sprayed in desert-yellow?

So I'm thinking of Dark-yellow or whatever color was prevelent with Panzers in the desert with some sponging of dark grey to show wear. Is this a better move then the hair-spray method? It just seems a waste to spray it twice.

   http://i7.photobucket.com/albums/y269/wing_nut_5o/PANZERJAGERGB.jpg

 Eric 

  • Member since
    November 2009
  • From: SW Virginia
Posted by Gamera on Wednesday, January 1, 2014 6:48 PM

Nice looking stuff guys!!!

I broke out the Crusader and since I had the day off got a good bit of work done on the suspension. One question here though- I'm assuming the tanks left the factory in UK bronze green and were repainted in sand. So I'm assuming in the nooks and crannies there might be some bronze green left? I've started painting the kit that colour and will spray her sand when assembled leaving a little bronze green on the bottom and under the fenders etc. I think this is right- any issues here?!?

"I dream in fire but work in clay." -Arthur Machen


  • Member since
    October 2007
  • From: Louisville, KY
Posted by pordoi on Wednesday, January 1, 2014 9:07 AM
armor86

Hey Don, built same Dragon Kit for Pz III GB in 2012 - III Late Ausf. J Vorpanzer - excellent kit. Photo below. Armor86

Very nice. I hope that mine turns out half as good as yours. Is the jerry can rack from the Dragon DAK PzIII Ausf N kit? I've got that one in the stash as well and was planning to use the rack for this build. I'll be sure to look up the 2012 PzIII GB before I start. Don
  • Member since
    December 2002
  • From: Bury St Edmunds, Suffolk, England
Posted by Bish on Wednesday, January 1, 2014 6:38 AM

Dan, nice selection of kits you got there. That road wheel set looks handy.

Nice to see you making an early start Ernst. Going to be digging mine out of the shed later, but there two to do before I start that.

I am a Norfolk man and i glory in being so


On the bench: Airfix 1/72nd Harrier GR.3/Fujimi 1/72nd Ju 87D-3

  • Member since
    July 2006
  • From: San Francisco Bay Area
Posted by bufflehead on Wednesday, January 1, 2014 2:56 AM

Happy New Year and Welcome 2014!!  I think this is going to be a good year for modelmaking!!

This is the earliest I've ever started a GB!  Lets hope I finish in time!  Stick out tongue

The open box!

A couple of AM accessories I've had for a few years.   Lion Marc corrected idlers and Adler's Nest MG13 metal gun barrels. 

And a few roadwheels cleaned up and started working on the suspension!

Ernest

Last Armor Build - 1/35 Dragon M-26A1, 1/35 Emhar Mk.IV Female


Last Aircraft Builds - Hobby Boss 1/72 F4F Wildcat & FW-190A8


JOIN OUR COMMUNITY!

Our community is FREE to join. To participate you must either login or register for an account.

SEARCH FORUMS
FREE NEWSLETTER
By signing up you may also receive reader surveys and occasional special offers. We do not sell, rent or trade our email lists. View our Privacy Policy.