SEARCH FINESCALE.COM

Enter keywords or a search phrase below:

USMC GB : Now until Sept 2015

39746 views
499 replies
1 rating 2 rating 3 rating 4 rating 5 rating
  • Member since
    March 2005
  • From: Lancaster, South Carolina
Posted by Devil Dawg on Monday, May 18, 2015 11:02 PM

Rob,

OUTSTANDING JOB on that Crusader! Great-looking weathering job, too. I just gotta know one thing - how did you get it to sit on that upside-down cup without breaking off the gear doors? Must be some really good super glue!

Devil Dawg

On The Bench: Tamiya 1/32nd Mitsubishi A6M5 Model 52 Zeke For Japanese Group Build

Build one at a time? Hah! That'll be the day!!

  • Member since
    March 2005
  • From: Lancaster, South Carolina
Posted by Devil Dawg on Monday, May 18, 2015 10:59 PM

Rob S.

Right on Devil Dawg...I was worried I was the only one still on board with this GB...LOL...Looks fantastic, great update!

Thanks, Rob. Unfortunately, I've been letting too many things get in the way of my modeling, hence the large gaps between build sessions. I'm hoping to get more build time in this week and the coming holiday weekend. I've still gotta get another build restarted in the Monogram Mafia III Group Build. It's at the "needs paint" stage now, and has been awaiting my presence for almost 4 months. I just gotta get myself motivated........

Devil Dawg

On The Bench: Tamiya 1/32nd Mitsubishi A6M5 Model 52 Zeke For Japanese Group Build

Build one at a time? Hah! That'll be the day!!

  • Member since
    January 2014
  • From: Toronto
Posted by Rob S. on Monday, May 18, 2015 3:44 PM

Thanks Josiah...great build, thanks for hosting!!

______________________________________________________________________________


On the Bench: Nothing on the go ATM

  • Member since
    October 2004
  • From: Northern Virginia
Posted by ygmodeler4 on Monday, May 18, 2015 3:35 PM

Third time's the charm Rob (the first two were as well) great looking plane and another great addition to the gb thanks for being such an active participant!

DD, the -53 is coming along very nicely indeed!

-Josiah

  • Member since
    January 2014
  • From: Toronto
Posted by Rob S. on Monday, May 18, 2015 1:08 PM

I am finished the Crusader. What a pleasurable  build. I cannot say anything negative about this older Academy kit. It was perfectly engineered and went together without incident or frustration. This build marks the 3rd in this GB and it was a sincere treat to be a part of this excellent build. I am moving on now, but, will certainly keep USMC topics close at hand. Good luck and happy building!!

Thanks for looking and the support. I will collect the 3rd badge and become a 'Sharpshooter'....LOL

______________________________________________________________________________


On the Bench: Nothing on the go ATM

  • Member since
    December 2003
  • From: Charleston, SC
Posted by sanderson_91 on Sunday, May 17, 2015 8:52 PM

Great looking work going on here!  Still slowly working on the Harrier.  I have initial paint on and need to clearcoat for decals.  Haven't taken any photos - will try to take some soon.

Steve


  • Member since
    January 2014
  • From: Toronto
Posted by Rob S. on Sunday, May 17, 2015 8:47 PM

Here's where I'm stopping for today. Almost calling this one done..

Dull coated, weapons mounted:

______________________________________________________________________________


On the Bench: Nothing on the go ATM

  • Member since
    January 2014
  • From: Toronto
Posted by Rob S. on Sunday, May 17, 2015 8:43 PM

Right on Devil Dawg...I was worried I was the only one still on board with this GB...LOL...Looks fantastic, great update!

______________________________________________________________________________


On the Bench: Nothing on the go ATM

  • Member since
    March 2005
  • From: Lancaster, South Carolina
Posted by Devil Dawg on Sunday, May 17, 2015 7:48 PM

Awwww, MAN!  I can hardly believe that my last in-progress post was 01 Feb!!!! Sorry guys! But, finally, I got some much-needed work done on the Super Stallion today. Let me know whatcha think.....
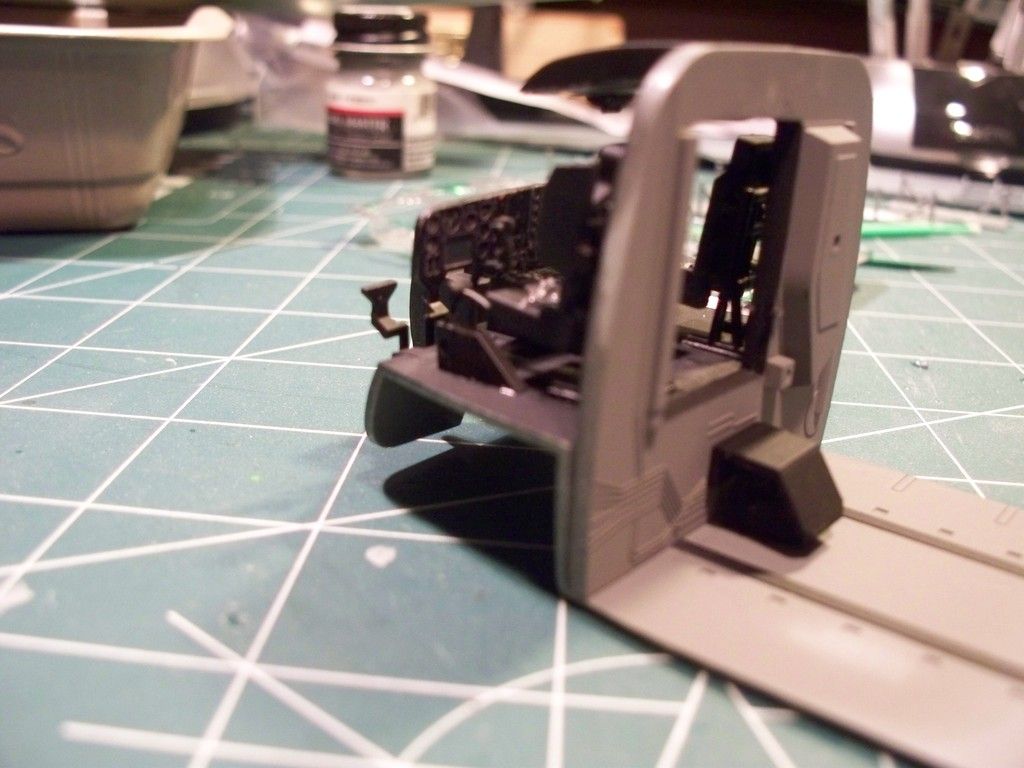
I used the Eduard ColorZoom photo-etch instrument panel set instead of the kit stuff. Much, much easier than painting it. The only thing that I could not get right with the photo-etch set was the glare shield/coaming over the instrument panel. It just would not stay glued on, even after 4 attempts with super glue and ZAP Zip Kicker accelerator. So, consequently, it got left off. Not sure why it wouldn't stay in place. Some of the other little handles and odds-n-ends were too small for my eyes & hands to handle, so they were left off, too. Still, it looks much better than the kit parts......

.

.

Looking through the cabin door to the cockpit. As I said previously, it looks much better than the kit parts.

.

.
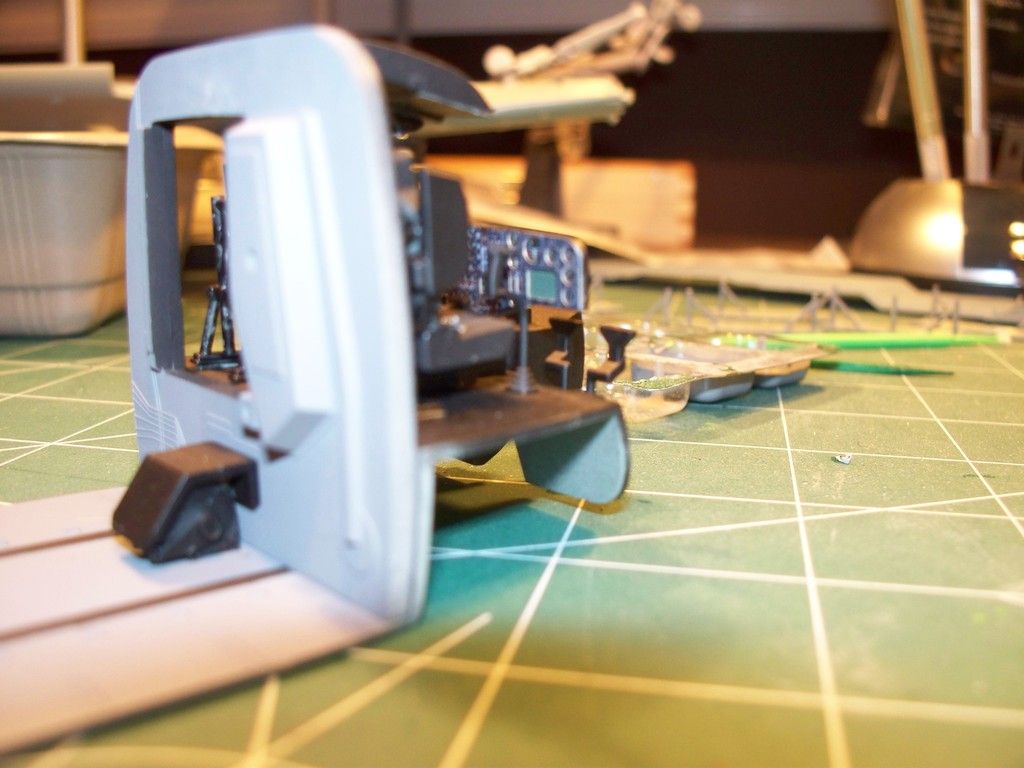
Another view. Sorry about the poor focus. I gotta take some time and figure out this camera......

.

.

Front quarter view. The photo-etch seat belts look nice, too.

.

.
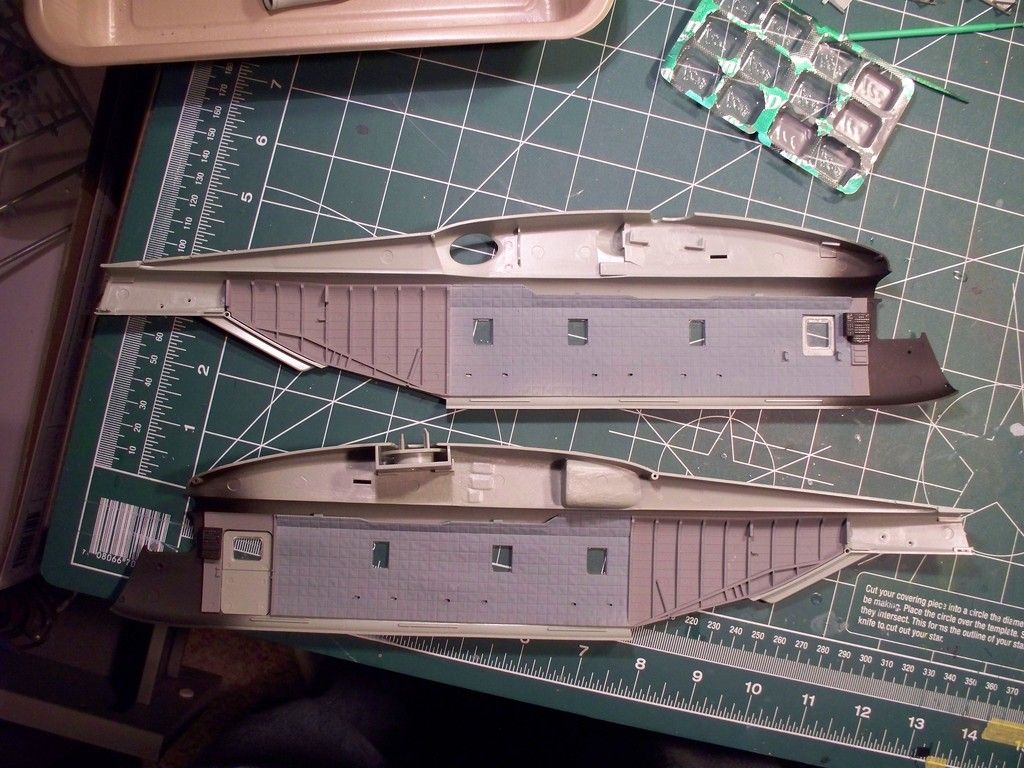
The fuselage halves are ready for the internals..........

.

.

The cockpit and cabin floor are in place in the right fuselage half. The roof (below the two fuselage halves) is ready to go in. The engine pods have had the exhaust pipes shot with Burnt Iron Non-Buffing metalizer, and are ready to be attached once the fuselage is together.

.

.
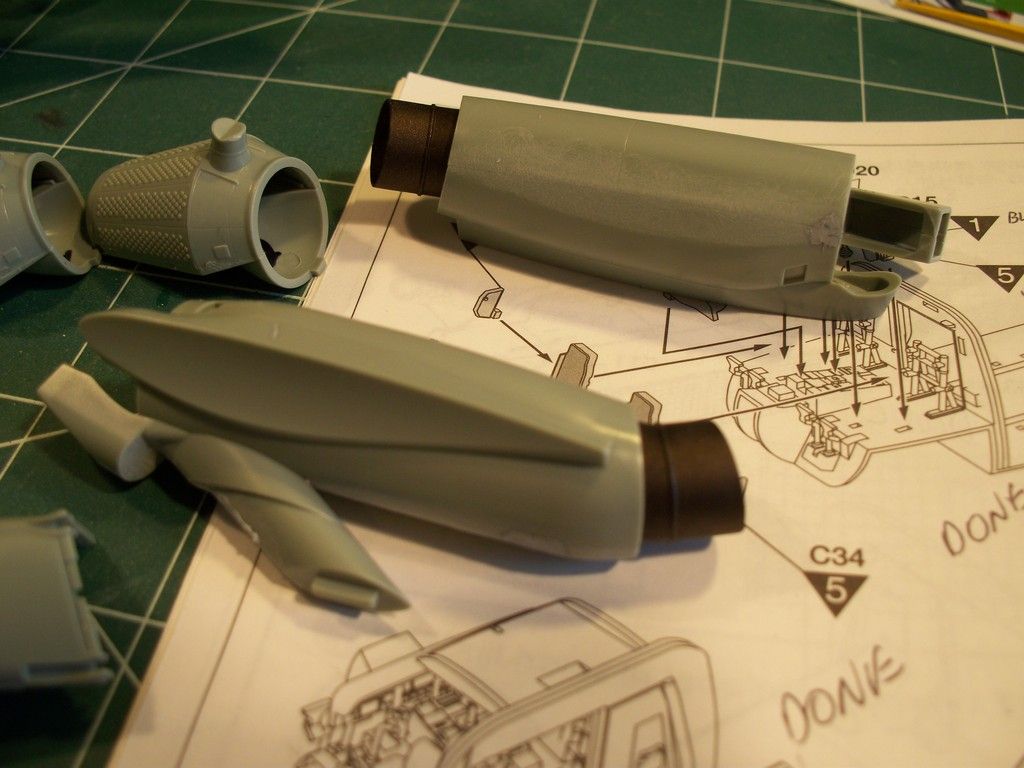
The engine pods. Very easy to assemble, once you paint the exhaust pipes. Just some minor filling had to be done where the sprue attachments points were.

.

.

Another view of the cabin floor/cockpit assembly in place in the right fuselage half. Hope it all fits nicely when I attempt to assemble the halves.

Hope that it's not another 3 months before my next posting! I still gotta get some paint on my F-100D for the Monogram Mafia Group Build! 

Devil Dawg

On The Bench: Tamiya 1/32nd Mitsubishi A6M5 Model 52 Zeke For Japanese Group Build

Build one at a time? Hah! That'll be the day!!

  • Member since
    October 2006
  • From: Tucson, AZ
Posted by Archangel Shooter on Sunday, May 17, 2015 5:20 PM

She's a beauty! An excellent job on the shading, I have tried that twice now and just can't seem to nail it down yet....practice,  practice, practice I guess.  I'm just about ready to try it again on the A-6 in a day or two.

Scott

 Your image is loading...

 On the bench: So many hanger queens.


  • Member since
    January 2014
  • From: Toronto
Posted by Rob S. on Sunday, May 17, 2015 2:52 PM

Decals...done...final overcoat done...wing mounted.

______________________________________________________________________________


On the Bench: Nothing on the go ATM

  • Member since
    January 2014
  • From: Toronto
Posted by Rob S. on Friday, May 15, 2015 1:15 PM

This decal job is massive. An evening into it and I'm not that far and I have a ways yet to go, so, here's some progress.

______________________________________________________________________________


On the Bench: Nothing on the go ATM

  • Member since
    November 2013
Posted by jarhead on Friday, May 15, 2015 10:43 AM

Finally some time to work on my kit.  I am in the process of arming her up.  I will have some photos soon.

  • Member since
    October 2004
  • From: Northern Virginia
Posted by ygmodeler4 on Thursday, May 14, 2015 10:50 PM

Ah, lucky. My bench is downstairs, no windows either, so it has to be an either enjoy the weather or model type thing

-Josiah

  • Member since
    January 2014
  • From: Toronto
Posted by Rob S. on Thursday, May 14, 2015 5:47 PM

Our weather up here in Quebec has been awesome...modelling with the patio door wide open!

______________________________________________________________________________


On the Bench: Nothing on the go ATM

  • Member since
    October 2004
  • From: Northern Virginia
Posted by ygmodeler4 on Thursday, May 14, 2015 10:20 AM

Great job Rob! She's coming together very nicely.

I thought I would be able to get back on mine fairly quickly but I've got another project I have to finish up. That, job hunting, and the gorgeous weather here in VA mean slow modeling for me

-Josiah

  • Member since
    January 2014
  • From: Toronto
Posted by Rob S. on Wednesday, May 13, 2015 7:28 PM

Not sure if anyone is on this GB or not, but, I've made some big progress. All principal painting and postshading is done. Contrasting white work is done and a bit of black on the vert stab. Now, just gotta rub it all down, big clear coat (prob 2-3 coats), washes, decals and start super detailing the armament and small details.

______________________________________________________________________________


On the Bench: Nothing on the go ATM

  • Member since
    January 2014
  • From: Toronto
Posted by Rob S. on Monday, May 11, 2015 6:55 PM

Preshading....done!

______________________________________________________________________________


On the Bench: Nothing on the go ATM

  • Member since
    October 2004
  • From: Northern Virginia
Posted by ygmodeler4 on Sunday, May 10, 2015 9:17 PM

Very nice! Everything being white definitely would make it a bit easier to paint and assemble for sure.

-Josiah

  • Member since
    January 2014
  • From: Toronto
Posted by Rob S. on Sunday, May 10, 2015 8:13 PM

Got the canopy sealed and masked. Also, all the landing gear installed. Everything will be white, allowing me to install everything in advance.

______________________________________________________________________________


On the Bench: Nothing on the go ATM

  • Member since
    January 2014
  • From: Toronto
Posted by Rob S. on Sunday, May 10, 2015 4:13 PM

Well, 'some' progress today...lol!

______________________________________________________________________________


On the Bench: Nothing on the go ATM

  • Member since
    June 2003
  • From: Rowland Heights, California
Posted by Duke Maddog on Tuesday, May 5, 2015 2:47 PM

Sweet job on that pit and well done on the rest. I have a few Crusaders in the stash I need to dig out and start.

  • Member since
    October 2004
  • From: Northern Virginia
Posted by ygmodeler4 on Tuesday, May 5, 2015 7:34 AM

As everybody else said Rob, great looking pit, and the rest of the bird is shaping up nicely too

-Josiah

  • Member since
    October 2006
  • From: Tucson, AZ
Posted by Archangel Shooter on Monday, May 4, 2015 8:58 PM

I'm wrapping up on an A-7 for the Viet Nam GB and should be finish with that by Weds then I can get back to the Revell A-6 for this build.

 Your image is loading...

 On the bench: So many hanger queens.


  • Member since
    January 2014
  • From: Toronto
Posted by Rob S. on Monday, May 4, 2015 7:12 PM

Got some progress tonight. Spend a bunch of time sealing the midline seam and needed to use some filler. I got 'er sealed and polished and confirmed with a silver Sharpie...she's not bad. The main wing assembled and dry fit. It will go in actually last as it will be posed in the 'open' position (air braked).

The best feature, thus far, is the busy'ness of the cockpit. The PE siderails really pop and I'm quite pleased how it all worked out. I just need to seal the pit soon to protect it. The ejection seat handles are bloody delicate and will require a bit of planning to protect.

______________________________________________________________________________


On the Bench: Nothing on the go ATM

  • Member since
    January 2014
  • From: Toronto
Posted by Rob S. on Sunday, May 3, 2015 8:31 PM

Thanks Steve, love Eduard...makes for a super detailed pit.

______________________________________________________________________________


On the Bench: Nothing on the go ATM

  • Member since
    December 2003
  • From: Charleston, SC
Posted by sanderson_91 on Sunday, May 3, 2015 6:48 PM

Hey Rob, nice looking cockpit you've got there!

Steve


  • Member since
    January 2014
  • From: Toronto
Posted by Rob S. on Sunday, May 3, 2015 6:41 PM

This is where I'll leave 'er for tonite and get back at it tomorrow.

______________________________________________________________________________


On the Bench: Nothing on the go ATM

  • Member since
    January 2014
  • From: Toronto
Posted by Rob S. on Sunday, May 3, 2015 12:39 PM

Cockpit coming along nicely:

______________________________________________________________________________


On the Bench: Nothing on the go ATM

  • Member since
    January 2014
  • From: Toronto
Posted by Rob S. on Saturday, May 2, 2015 5:54 PM

Ejection seat done with Eduard AM kit...nice seatbelts and ejection handles...makes a big difference to a  plain seat!

______________________________________________________________________________


On the Bench: Nothing on the go ATM

JOIN OUR COMMUNITY!

Our community is FREE to join. To participate you must either login or register for an account.

SEARCH FORUMS
FREE NEWSLETTER
By signing up you may also receive reader surveys and occasional special offers. We do not sell, rent or trade our email lists. View our Privacy Policy.