SEARCH FINESCALE.COM

Enter keywords or a search phrase below:

Airliner Group Build 2014-2015

24109 views
219 replies
1 rating 2 rating 3 rating 4 rating 5 rating
  • Member since
    July 2014
Posted by modelcrazy on Sunday, November 22, 2015 9:23 PM

This is where I'm at so far on the 727. I have the light blue and metallic blue on, however the metallic blue blead through the mask. I'll need to touch that up before applying the stripes.
(The instructions are of the Tamiya P-51 I'm also working on)

Steve

Building a kit from your stash is like cutting a head off a Hydra, two more take it's place.


http://www.spamodeler.com/forum/

  • Member since
    July 2014
Posted by modelcrazy on Sunday, November 8, 2015 4:25 PM

lostagain
Do you paint the body before the wings go on?

I'm going to on this build. The wings fit so well and the paint/markings need to be so exact that I thought I'd give it a try.

Steve

Building a kit from your stash is like cutting a head off a Hydra, two more take it's place.


http://www.spamodeler.com/forum/

  • Member since
    April 2014
  • From: Australia
Posted by lostagain on Sunday, November 8, 2015 3:59 PM

Steve

Thanks for the kind words.

I am looking forward to doing a Hasegawa kit next for a change. If this year is like the last I will get four kits done, three of those in the last two months...

Looking forward to seeing how you get that deep Braniff blue. Do you paint the body before the wings go on?

Piers

  • Member since
    July 2014
Posted by modelcrazy on Sunday, November 8, 2015 1:06 AM
Here is the Braniff so far. As you can see on the reference photo, it has a thin light blue line on the border of the Artic blue. I did forget to paint the light blue on the intakes though. No problem, I'll get it tomorrow.
 

Steve

Steve

Building a kit from your stash is like cutting a head off a Hydra, two more take it's place.


http://www.spamodeler.com/forum/

  • Member since
    July 2014
Posted by modelcrazy on Saturday, November 7, 2015 8:47 AM

Lost, 

You did an amazing job on your Sikorsky, I'm envious. It was a long hard job, but watching your carefully building it was a pleasure.

Something to be proud of.  Museum quality Yes

Steve

Building a kit from your stash is like cutting a head off a Hydra, two more take it's place.


http://www.spamodeler.com/forum/

  • Member since
    April 2014
  • From: Australia
Posted by lostagain on Saturday, November 7, 2015 7:00 AM

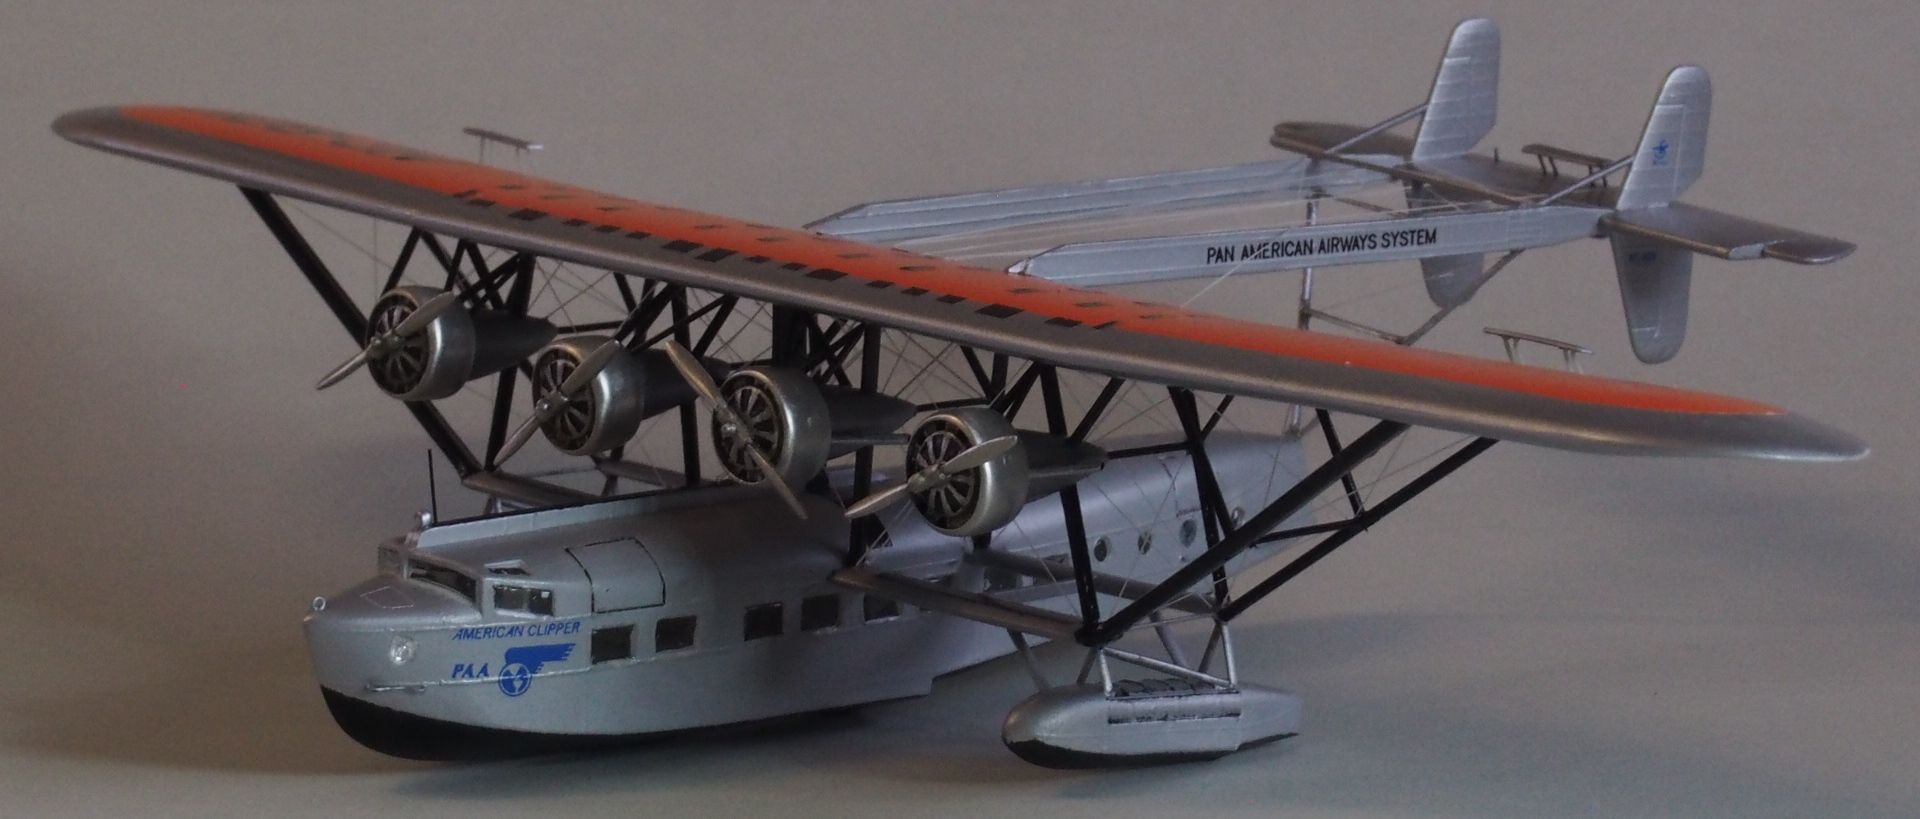
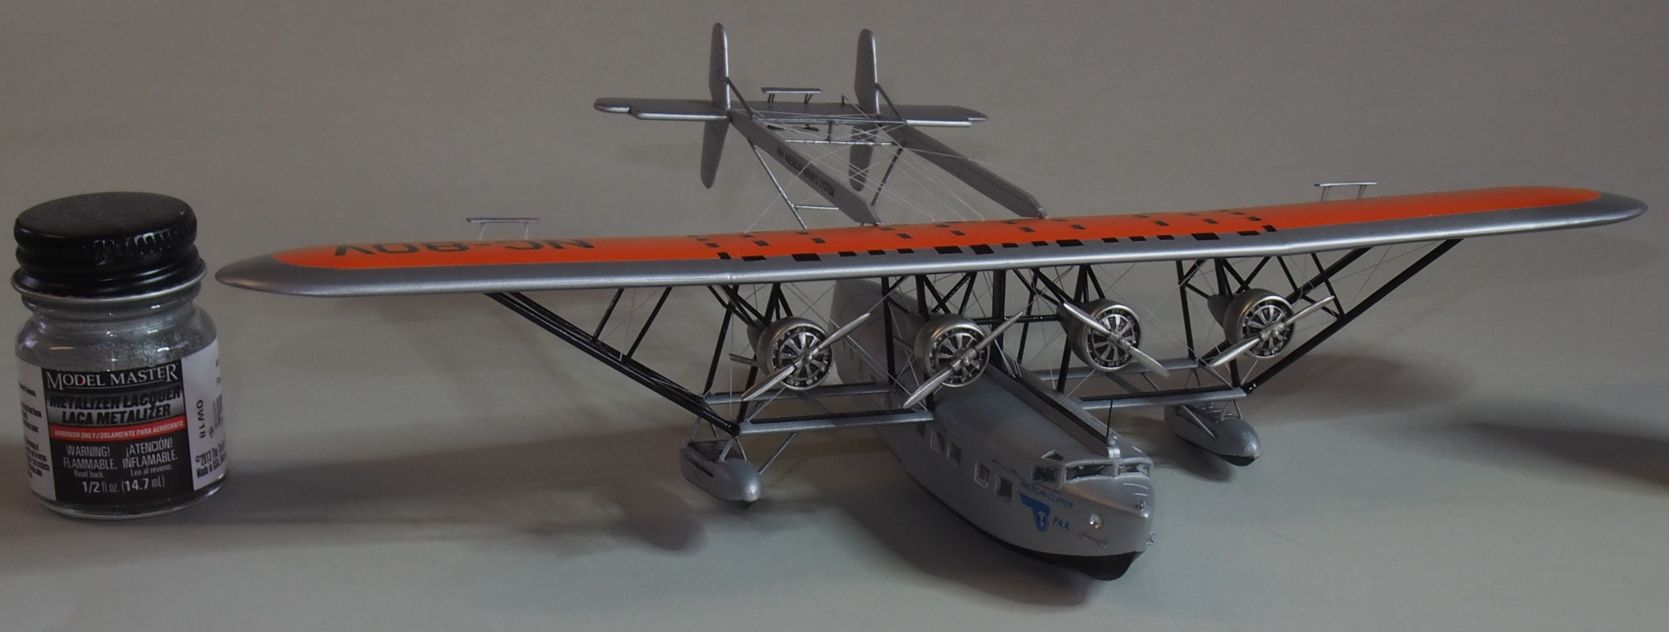
I can't say the fit was so good on the Sikorsky, but it is FINISHED...I think.
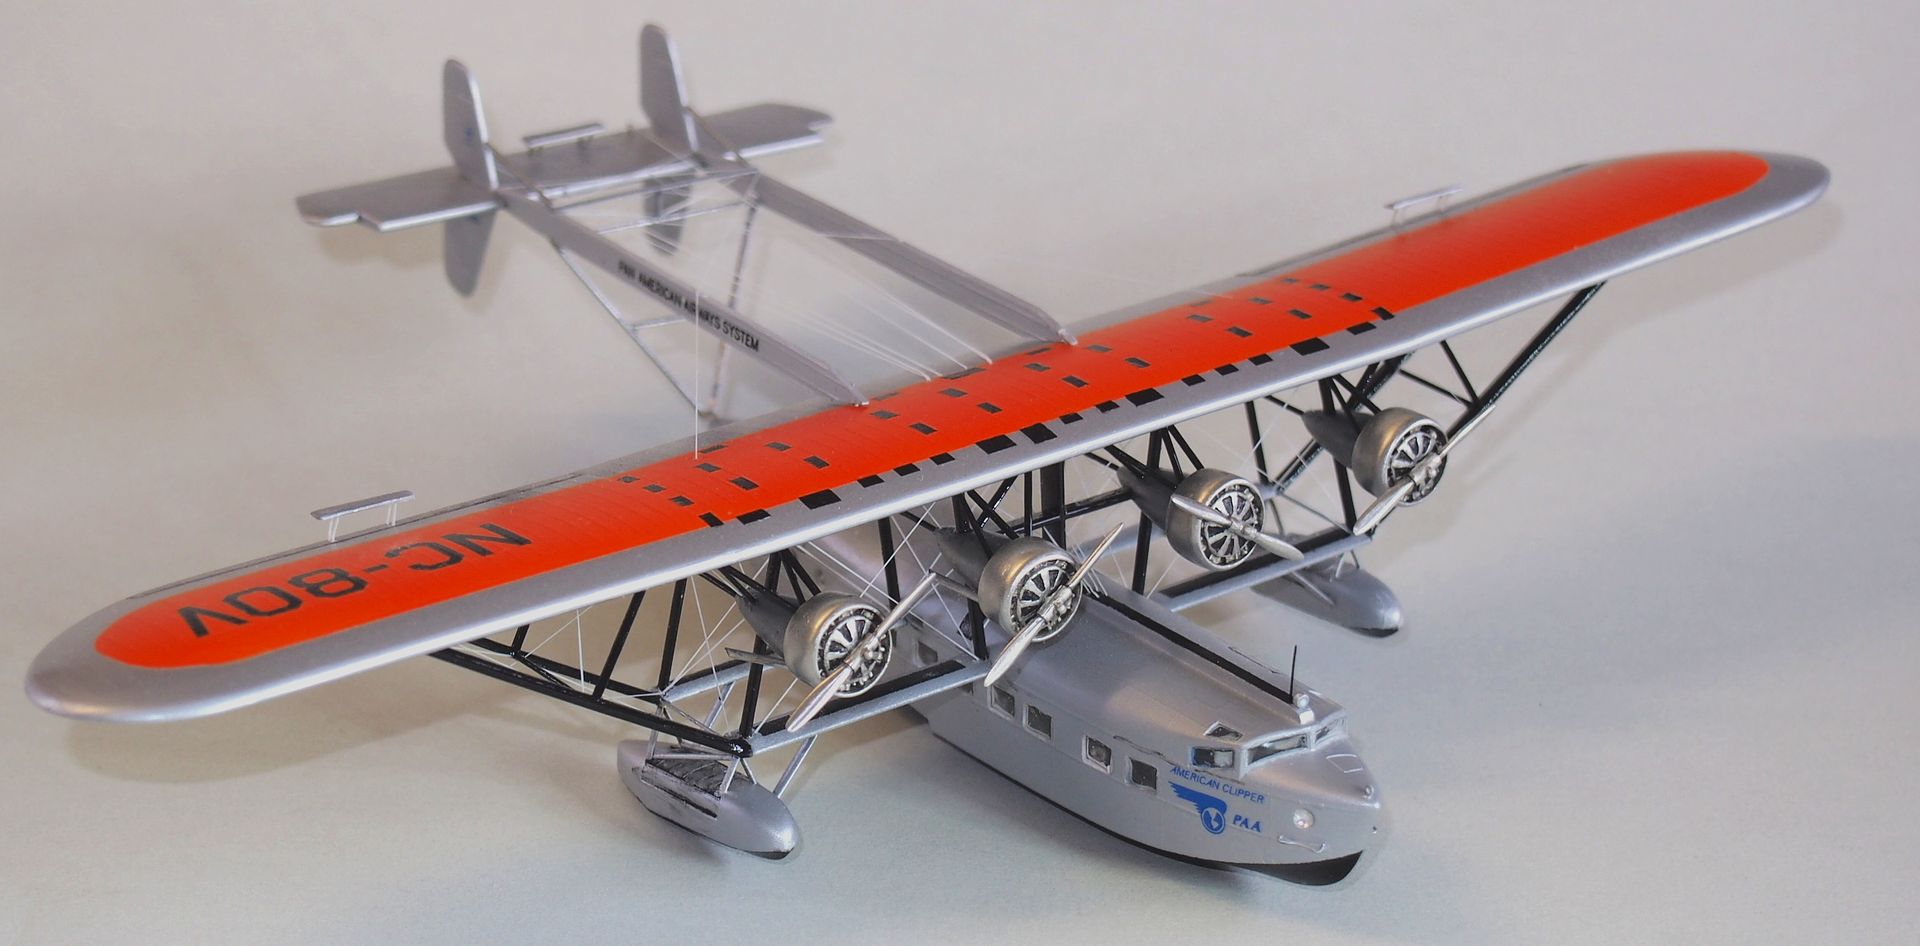
Making a vacform was a new experience for me, as was all the rigging. Has not totally put me off, I have another vacform for the 1946 GB
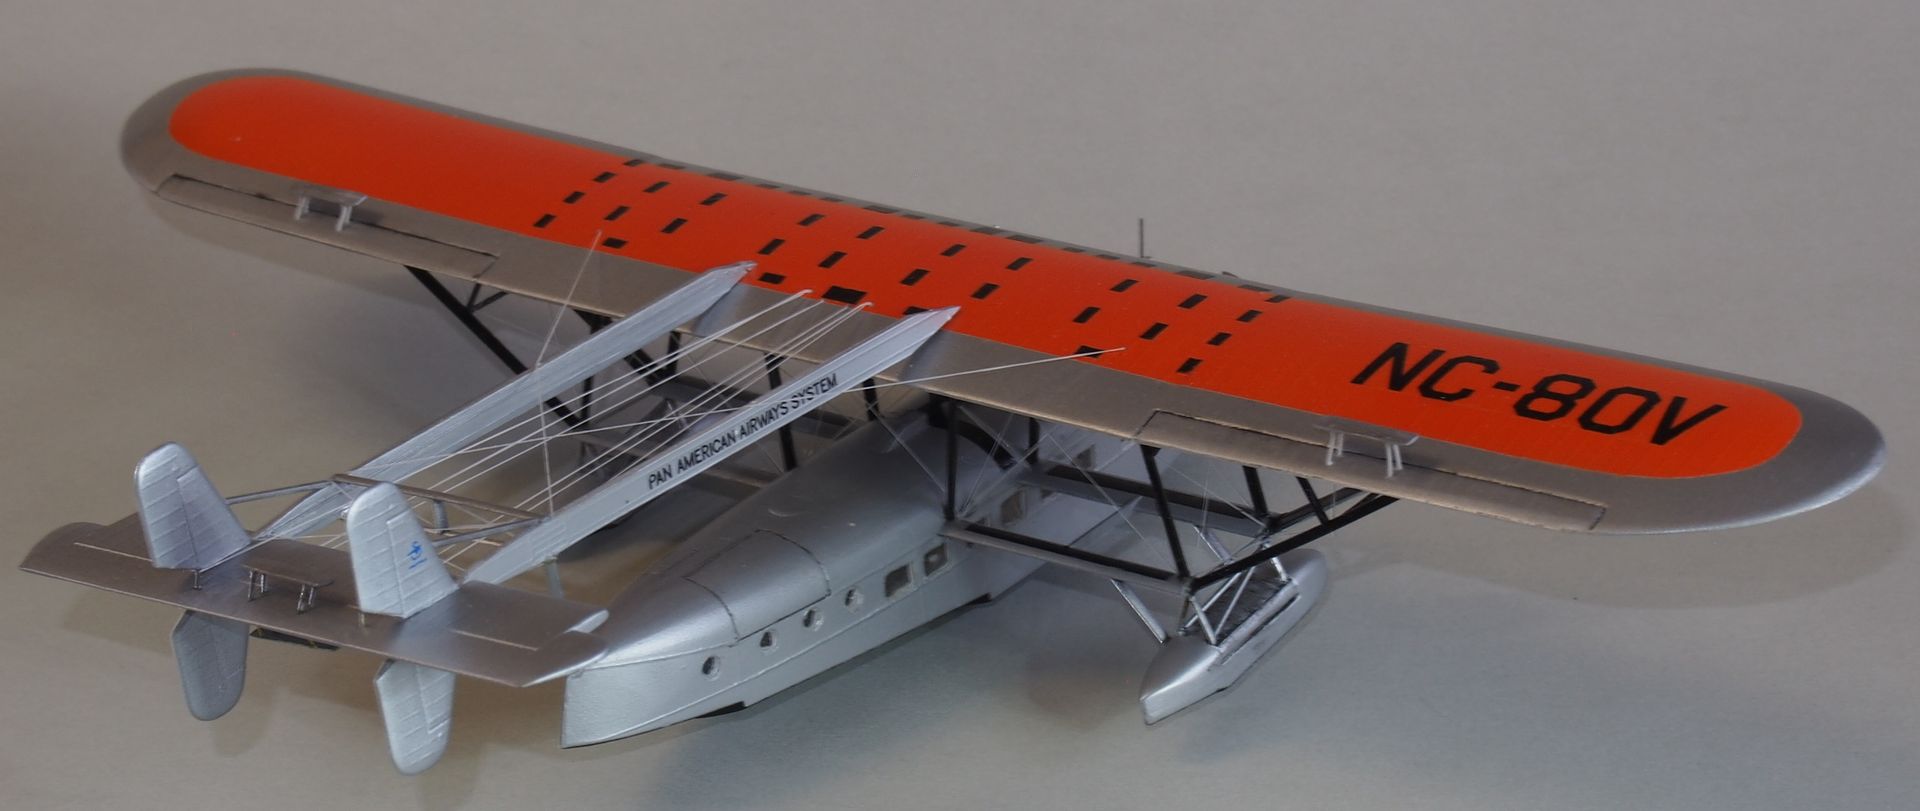
It has been fun (sometimes more than others) and I am glad that the Airliners GB was here to get me to finish this model.
This gives an idea of the size, less than 10 inch wingspan, the body is 5 inches long.
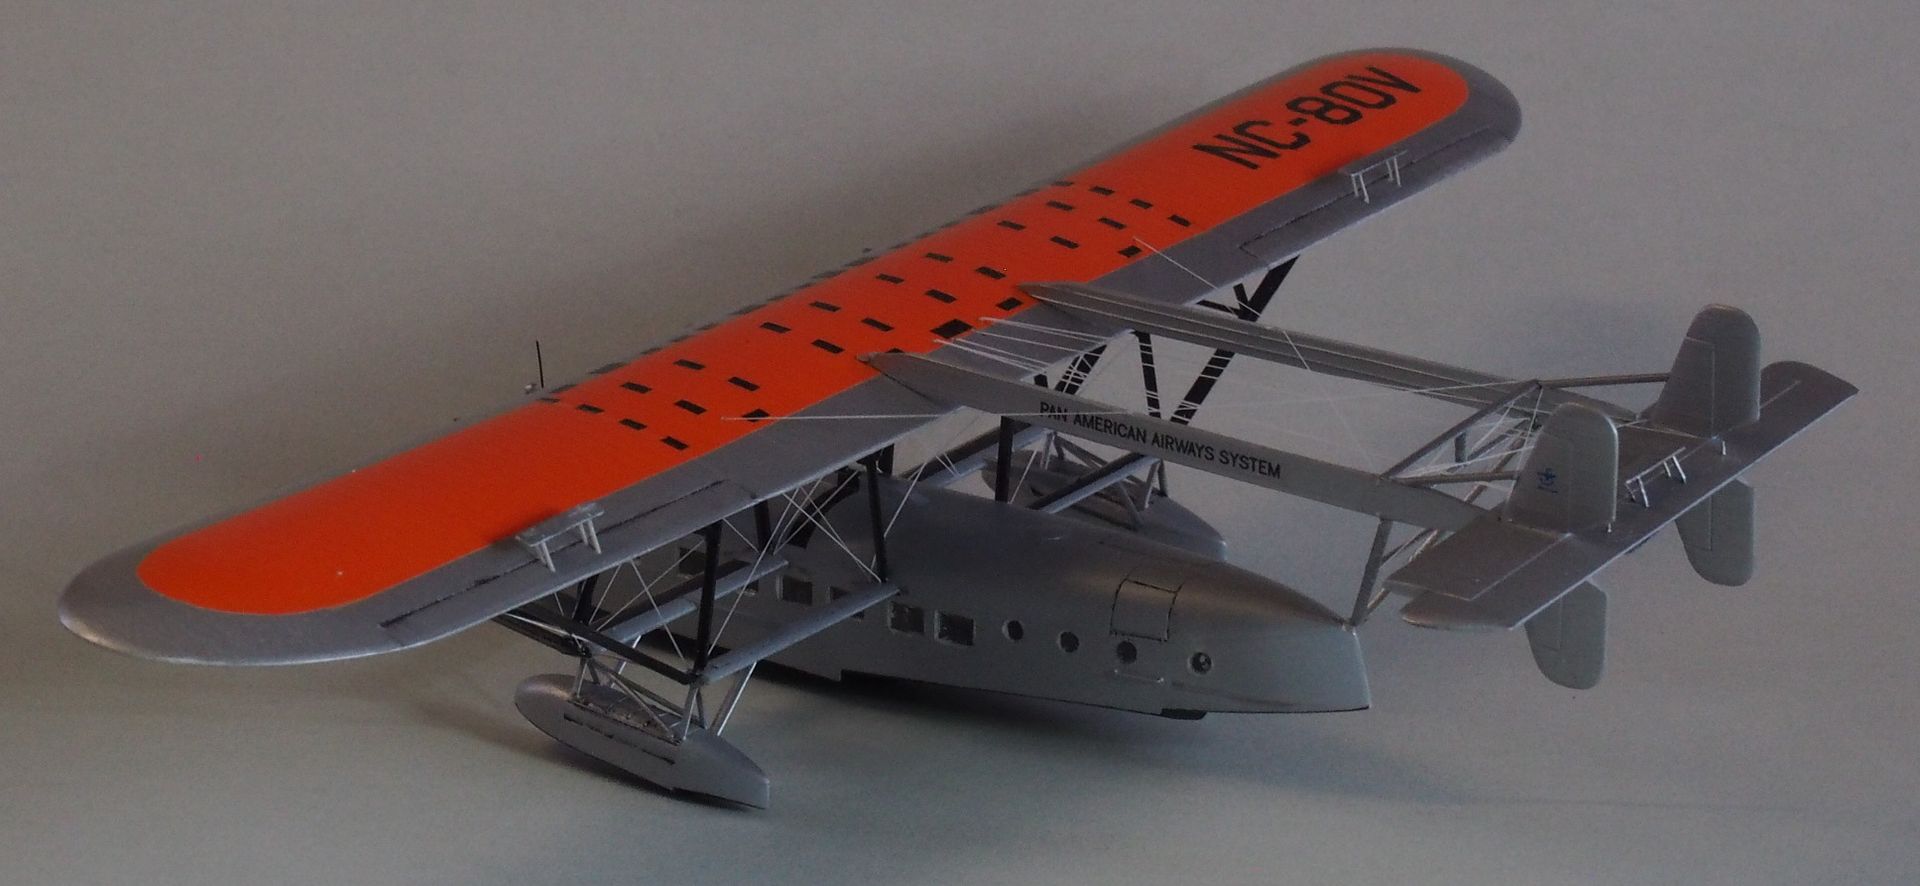
Fly-n-hi, thanks for hosting the build. Everyone, thanks for the kind comments and your builds. Look forward to seeing you in another group build soon.

Piers


  • Member since
    July 2014
Posted by modelcrazy on Saturday, November 7, 2015 12:26 AM

I've started on the 727 and this is going fast. Here's where I am tonight.

The fit is fantastic. Typical Hasegawa kit.
I should be able to start the painting tomorrow.

Steve

Steve

Building a kit from your stash is like cutting a head off a Hydra, two more take it's place.


http://www.spamodeler.com/forum/

  • Member since
    July 2014
Posted by modelcrazy on Wednesday, November 4, 2015 9:22 AM

With all that rigging, it looks as complicated as a sailing ship. I'll bet the air drag on those control cables played havoc on the pilots.

Fly,


I will be starting on my 727 very soon, I hope I can get-er-done by the end of the year.


As

Steve

Building a kit from your stash is like cutting a head off a Hydra, two more take it's place.


http://www.spamodeler.com/forum/

  • Member since
    April 2014
  • From: Australia
Posted by lostagain on Wednesday, November 4, 2015 6:52 AM

Getting close now with the Sikorsky. The cast pewter engines and props have been cleaned up and are ready for mounting. Exhausts have been cut from brass tube and coated with AK silver paste.

To help me stick the engines on, I extended the jig with a 'foot' to hold it vertical. Still managed to get the inner right on wonky.

The tail is held down while the epoxy sets after I clumsily dropped it - this close...

Only a few more things to go and this will be done

  • Member since
    April 2014
  • From: Australia
Posted by lostagain on Friday, October 30, 2015 7:38 PM

Welcome aboard 7474

I like the look of that bird - looks like a colourful scheme.

  • Member since
    December 2006
  • From: Phoenix, AZ
Posted by Fly-n-hi on Friday, October 30, 2015 9:40 AM

7474, no problem!  Welcome aboard.  There are only a few people participating and we aren't the most active GB but then again airliners tend to be a less popular subject.

  • Member since
    December 2002
Posted by 7474 on Thursday, October 29, 2015 1:40 PM

Can I join in on this build? I have a 1/72 C-47 that I'm building into a "What if" cargo/passenger airline? 


  • Member since
    April 2014
  • From: Australia
Posted by lostagain on Saturday, October 24, 2015 5:18 AM

I had a couple of weeks off for a cycling holiday, hence the pause.

So there has been more work done to finish the rigging around the tailplane, all the control and supports are done.

So getting closer, but I am currently hung up on how to do the control vanes on top of the ailerons - the first attempts have not been inspiring, so the test work continues.

  • Member since
    April 2014
  • From: Australia
Posted by lostagain on Saturday, October 3, 2015 9:27 PM

Thanks MC, fly and John.

Yes Fly it is a small model - wingspan is just under 250 mm - just a touch bigger than the 1/48 Me 109 I have going. Body is 23mm wide.

The build continues with tail support structure and its rigging added:

Have added more of the tail rigging since - closer to complete. I will post the photos once it is done.

The motors and props are cast metal, I have started the clean up - going from rough cast to polished - in fact too polished looking at the references. These are only 10mm across:

Have calculated there are still around 50 detail parts for me to make, paint and attach before the model is done.

  • Member since
    July 2014
Posted by modelcrazy on Tuesday, September 29, 2015 10:58 AM

Most excellent Lost, that will make a nice addition. 

Steve

Building a kit from your stash is like cutting a head off a Hydra, two more take it's place.


http://www.spamodeler.com/forum/

  • Member since
    December 2006
  • From: Phoenix, AZ
Posted by Fly-n-hi on Tuesday, September 29, 2015 9:02 AM

Model and B-one, thanks alot!

Lost, excellent work!  I like the little jig you came up with.  I didn't realize how tiny that model was until I saw it right next to the thumb pins!

I've got more work done on the DC-10 and I'll post some pics soon!

  • Member since
    April 2014
  • From: Australia
Posted by lostagain on Tuesday, September 29, 2015 8:47 AM

really top notch paint job there fly. Are the metallics also Mr Colour? And what thinner are you using to get it so smooth?

I have got the side floats on, now I am moving on to the tail structure. To get it all stuck together right, I cobbled together this jig to hold it all in place.

Despite this I have still given it a few good accidental knocks.

I have got a bit further with the tail structure, more photos to come

  • Member since
    July 2014
Posted by modelcrazy on Wednesday, September 9, 2015 2:23 PM

Agreed, I just can't seem to get my masking a good as you Fly.

Steve

Building a kit from your stash is like cutting a head off a Hydra, two more take it's place.


http://www.spamodeler.com/forum/

  • Member since
    April 2014
Posted by B_one fixer on Wednesday, September 9, 2015 2:21 PM

That looks really good fly, As much as I love good quality decals, nothing beats a paint job.

  • Member since
    December 2006
  • From: Phoenix, AZ
Posted by Fly-n-hi on Wednesday, September 9, 2015 1:35 PM

Ok, here's some progress!  I've managed to paint the colors on this bird.  Its not perfect but I'm really happy with the results.  I probably should have used more of a bronze color instead of gold but it looks close enough I think..

I also painted the windshield framing instead of using the decals.  This is my first time trying this I think it should look good.

There are a few places that need to be touched up and I still need to paint the black glare shield and the bare metal underside...

  • Member since
    December 2002
  • From: Northern California
Posted by jeaton01 on Tuesday, September 8, 2015 12:24 PM

What a nice project!  Well done .

John

To see build logs for my models:  http://goldeneramodel.com/mymodels/mymodels.html


  • Member since
    December 2006
  • From: Phoenix, AZ
Posted by Fly-n-hi on Tuesday, September 8, 2015 9:37 AM

Thanks Lost!  I used Mr Color Gloss White.  The stuff goes on really well and is rock solid after it dries.

I've got the red, orange and gold colors on.  Just need to upload the pics.  The wife has the SD card reader, though, and she's out of town.

  • Member since
    April 2014
  • From: Australia
Posted by lostagain on Tuesday, September 8, 2015 8:52 AM

I have to say MC, it has been a ton of work. Doing a model with no molded parts or locating tabs and lots of rigging has been quite an experience.

But now the outer struts and rigging is done, it is looking closer to the real thing.

Also the nacelle struts are complete - the kit supplied struts were way too big, so I carved some up out of 30 thou rod. 3 struts for each nacelle made life interesting.

Next up, the side floats at the end of the lower struts.

Hey simpilot34, hopefully that wasn't the plane I took up to Phuket... maybe I need to take a closer look next time...

  • Member since
    March 2006
Posted by simpilot34 on Tuesday, September 8, 2015 4:01 AM

Builds are looking great guys! Would like to have joined, maybe the next oneSmile

Want to post a referance pic for anyone that can use it. I work at Melbourne Airport in Australia and was driving past JetStar terminal and saw this one parked. Had to grab a pic and share it with you guys. Lol kinda makes you wonder what kind of life this bird has had. This is one way to add interest to an otherwise mono scheme Toast

Cheers, Lt. Cmdr. Richie "To be prepared for war, is one of the most effectual means of preserving the peace."-George Washington
  • Member since
    July 2014
Posted by modelcrazy on Sunday, August 23, 2015 12:20 AM

That looks like a TON of work Lost.

Steve

Building a kit from your stash is like cutting a head off a Hydra, two more take it's place.


http://www.spamodeler.com/forum/

  • Member since
    April 2014
  • From: Australia
Posted by lostagain on Sunday, August 23, 2015 12:12 AM

Well I have got the rigging complete for (I think) a big step of the way. All of the inner struts and rigging is complete for the main plane. So I stopped and had a breather before carrying on:

Next are the nacelle bracing struts and outer struts, but first I am enjoying having this done. The rigging is happening quicker as I go along, until I stuff something up by being too cocky.

  • Member since
    April 2014
  • From: Australia
Posted by lostagain on Sunday, August 16, 2015 6:16 AM

Thanks fly-n-hi

Painting stripes on the DC 10? Well done, I've never managed to carry it off yet.

What are you thinning the Mr Colour with - the finish looks very smooth.

Got a bit more rigging done - will post pics later.

  • Member since
    December 2006
  • From: Phoenix, AZ
Posted by Fly-n-hi on Wednesday, August 12, 2015 9:44 AM

Lost, that's looking really good!

  • Member since
    December 2006
  • From: Phoenix, AZ
Posted by Fly-n-hi on Wednesday, August 12, 2015 9:43 AM

Well I finally have an update for my DC-10!  Its been a while and I've been a terrible host!  Sorry guys.Embarrassed

Anyway, I've painted the fuselage Mr Color gloss white and masked off the areas that will be gold/red/orange.  I'm going to roll the dice and paint the stripes on.  I'm feeling lucky:

JOIN OUR COMMUNITY!

Our community is FREE to join. To participate you must either login or register for an account.

SEARCH FORUMS
FREE NEWSLETTER
By signing up you may also receive reader surveys and occasional special offers. We do not sell, rent or trade our email lists. View our Privacy Policy.