SEARCH FINESCALE.COM

Enter keywords or a search phrase below:

1945 GB

95958 views
1851 replies
1 rating 2 rating 3 rating 4 rating 5 rating
  • Member since
    August 2009
  • From: MOAB, UTAH
Posted by JOE RIX on Friday, January 23, 2015 7:46 AM

Marvelous detailing and weathering Stik. Looks great.

"Not only do I not know what's going on, I wouldn't know what to do about it if I did". George Carlin

  • Member since
    December 2002
  • From: Bury St Edmunds, Suffolk, England
Posted by Bish on Friday, January 23, 2015 11:28 AM

That's looking really nice there Stik.

I am a Norfolk man and i glory in being so


On the bench: Airfix 1/72nd Harrier GR.3/Fujimi 1/72nd Ju 87D-3

  • Member since
    July 2004
  • From: Sonora Desert
Posted by stikpusher on Friday, January 23, 2015 11:11 PM

Thanks guys... it's taking shape nicely now...

And now for today's progress report... last night before bed I added drops of Testors Clear Parts cement over the instruments to represent their lenses

Then today in the afternoon I added some Eduard pre painted PE seat belts to the seat. What you see here is about two hours worth of work... with a few curse words and hand cramps thrown in... note to self, do not do tiny precision work after a long hard bike ride, the body needs more time to recover...

Now as you can see from this photo, there was some light framework around the dust filter...

so I spent the later afternoon with wire and superglue making up that stuff for mine

I think that it looks the part....

and as my last bit of progress for today I glued the IP in place

and oil cooler assembly

more to come tomorrow...


F is for FIRE, That burns down the whole town!

U is for URANIUM... BOMBS!

N is for NO SURVIVORS...

       - Plankton

LSM


  • Member since
    January 2014
  • From: Toronto
Posted by Rob S. on Saturday, January 24, 2015 7:08 AM

Yeah..that wire framework was a great addition!

______________________________________________________________________________


On the Bench: Nothing on the go ATM

  • Member since
    July 2004
  • From: Sonora Desert
Posted by stikpusher on Saturday, January 24, 2015 12:02 PM

I really debated about it, and not all the photos show it or a clear view, but I figured the ones that did, show that framing was rather noticeable, so why not? At least now I'm done with almost all the add on stuff and can really get down to progress...


F is for FIRE, That burns down the whole town!

U is for URANIUM... BOMBS!

N is for NO SURVIVORS...

       - Plankton

LSM


  • Member since
    January 2013
Posted by jibber on Saturday, January 24, 2015 3:10 PM

Bish, if you could, I'd like to change my entry to a German WR360 Locomotive by Trumpeter in 1/35.

Thanks, Terry 

  • Member since
    July 2004
  • From: Sonora Desert
Posted by stikpusher on Saturday, January 24, 2015 5:39 PM

Jibber, that looks like a good kit choice. I will get your selection changed.

Today's update...
first thing at the bench today, I added the seat...

then it was time to glue the fuselage halves together

after that I glued the cockpit bottom portion in place. I Had to do a bit of adjusting due to the PE additions I made to the IP and rudder pedals, etc.

and looking down thru the top with the wing in place...

after I sanded the fuselage seam and scribed in some lines to replace lost ones, I glued the wings on

then a couple views of the back side of the oil cooler that I scratched up... much better than the open space that was there

and finally a test fitting of the stabilizers- once I filed away the mold seam lines where they mate up with the fuselage they fit nice and tight!

I have reached my stopping point for today while the glue dries. After I get the lower wing/fuselage seam sanded I can get the stabilizers glued on and then it will be just about ready for paint!


F is for FIRE, That burns down the whole town!

U is for URANIUM... BOMBS!

N is for NO SURVIVORS...

       - Plankton

LSM


  • Member since
    December 2002
  • From: Bury St Edmunds, Suffolk, England
Posted by Bish on Saturday, January 24, 2015 6:07 PM

O, nice, a train. Looking forward to seeing that terry.

SP, that looks really nice, love that wire detail, its a really nice touch. Would be something that's easily missed but rather noticeable. Good move.

I am a Norfolk man and i glory in being so


On the bench: Airfix 1/72nd Harrier GR.3/Fujimi 1/72nd Ju 87D-3

  • Member since
    July 2004
  • From: Sonora Desert
Posted by stikpusher on Tuesday, January 27, 2015 12:56 PM

Bish, that is pretty much what I thought as well. Like I said not all photos show that bracing, but those that do show it was something rather noticeable.

Well here are today's photo updates. Nothing too exciting.

Stabilizers on and seams sanded up a bit- I really am pleasantly impressed with the fit of this kit. aside from one bit on the lip of the chin intake, I have not had to use any filler...

and the Ultracast bomb racks added. They come with resin shackles/sway braces as well, But I am gonna replace those with some wire instead.

she is now officially a "bombphoon"

Thanks for looking, more to come in a few days....


F is for FIRE, That burns down the whole town!

U is for URANIUM... BOMBS!

N is for NO SURVIVORS...

       - Plankton

LSM


  • Member since
    January 2014
  • From: Toronto
Posted by Rob S. on Tuesday, January 27, 2015 1:50 PM

Bomb-phoon...love it.

______________________________________________________________________________


On the Bench: Nothing on the go ATM

  • Member since
    December 2002
  • From: Bury St Edmunds, Suffolk, England
Posted by Bish on Tuesday, January 27, 2015 4:51 PM

That does look a nice fit on the tail and those bomb racks look nice.

I am a Norfolk man and i glory in being so


On the bench: Airfix 1/72nd Harrier GR.3/Fujimi 1/72nd Ju 87D-3

  • Member since
    July 2004
  • From: Sonora Desert
Posted by stikpusher on Tuesday, January 27, 2015 5:20 PM

Yes, between the basic kit, some Ultracast and Reheat bits, and odds & ends from my spares stores, this one is shaping up very nicely!


F is for FIRE, That burns down the whole town!

U is for URANIUM... BOMBS!

N is for NO SURVIVORS...

       - Plankton

LSM


  • Member since
    November 2003
  • From: Naples, FL
Posted by tempestjohnny on Tuesday, January 27, 2015 6:58 PM

Fantastic work Stik


  • Member since
    August 2009
  • From: MOAB, UTAH
Posted by JOE RIX on Tuesday, January 27, 2015 8:17 PM

Your Bomb-phoon is really coming along sweet. Nice work Stik.

"Not only do I not know what's going on, I wouldn't know what to do about it if I did". George Carlin

  • Member since
    July 2004
  • From: Sonora Desert
Posted by stikpusher on Friday, January 30, 2015 5:11 PM

Johnny & Joe, thank you for the kind words on this project!

today's photo update of the work I did on this kit in the mornings before my job during the work week...

Yellow airbrushed on for the wing leading edge ID markings

final fiddly bits off the sprues, mold seams cleaned up and attached to toothpicks for painting...

clear parts dipped in Future and dried overnite in a dust free place

final details added to the cockpit area: a PE gunsight, some PE and strip styrene canopy hood slide tracks

and a shot with the prop in place to show how beefy this beast will look... Surprise


painting will commence soon here after some dad duties...


F is for FIRE, That burns down the whole town!

U is for URANIUM... BOMBS!

N is for NO SURVIVORS...

       - Plankton

LSM


  • Member since
    October 2008
  • From: Georgia
Posted by Rigidrider on Friday, January 30, 2015 6:04 PM

Love the old Typhoon!  Great work so far. Looking forward to the paint!

Doug

When Life Hands You A Bucket Of Lemons...

Make Lemonade!

Then Sell It Back At $2 Bucks A Glass...

  • Member since
    August 2012
Posted by AndrewW on Friday, January 30, 2015 6:49 PM

Stick, you're making that look easy!  I'm envious.  I'll put up some photos of where my stuka is tomorrow, but it's been a busy week with the little lady away visiting her sick mom and transmission issues on my truck, I seem to be moving along at a snail's pace these days.

Life is hard, it's even harder when you're stupid - John Wayne.


  • Member since
    July 2004
  • From: Sonora Desert
Posted by stikpusher on Friday, January 30, 2015 11:32 PM

Thanks guys! Andrew, this really is a simple kit and all my few add ons are pretty simple in themselves...

Here are my evening updates... painting has begun

a coat of Model Master Sea Grey Medium on the lower surfaces

and on the lower surface parts to be added later

now you may notice a slightly different tone on a portion of the rear fuselage- Iused Humbrol Medium Sea Grey there to represent 1944 ID markings that had been overpainted in early 1945 as specified by 2 ATAF directives on 3 January. The Humbrol version of the color is not so bluish

then I went to work with Flat Black...
the propellor

and the cockpit top decking

you can also better see the PE canopy hood slide track railing here

I'll be back to work on this tomorrow...


F is for FIRE, That burns down the whole town!

U is for URANIUM... BOMBS!

N is for NO SURVIVORS...

       - Plankton

LSM


  • Member since
    December 2002
  • From: Bury St Edmunds, Suffolk, England
Posted by Bish on Saturday, January 31, 2015 12:34 AM

Nice to see the paint going on SP, looking really nice.

I am a Norfolk man and i glory in being so


On the bench: Airfix 1/72nd Harrier GR.3/Fujimi 1/72nd Ju 87D-3

  • Member since
    July 2014
Posted by modelcrazy on Saturday, January 31, 2015 12:38 AM

That monster is really looking like the beast it was SP.

Steve

Building a kit from your stash is like cutting a head off a Hydra, two more take it's place.


http://www.spamodeler.com/forum/

  • Member since
    July 2004
  • From: Sonora Desert
Posted by stikpusher on Saturday, January 31, 2015 10:31 AM

Bish, it is great to be at this point of getting paint on!

MC, I agree 100% She is a big brute of a single seater!


F is for FIRE, That burns down the whole town!

U is for URANIUM... BOMBS!

N is for NO SURVIVORS...

       - Plankton

LSM


  • Member since
    August 2009
  • From: MOAB, UTAH
Posted by JOE RIX on Sunday, February 1, 2015 7:00 AM

Excellent progress and paint work Stik. I especially like your attention to detail with the over painting of the ID markings. Nicely done.

"Not only do I not know what's going on, I wouldn't know what to do about it if I did". George Carlin

  • Member since
    June 2014
Posted by BrandonK on Sunday, February 1, 2015 11:38 AM

Stik, I am always in awe of how awesome your kits fall together. I can't wait to see that in paint.

On the bench:

A lot !! And I mean A LOT!!

2024 Kits on deck / in process / completed   

                         14 / 5 / 2  

                              Tongue Tied

  • Member since
    August 2012
Posted by AndrewW on Monday, February 2, 2015 2:09 PM

Well, I've been picking away at the Stuka, now down to the etched bits by and large.  I still have to build the prop up and another cannon.  I've made a disappointing discovery, in that the pilots' access canopy will not fit over the fixed portion aft, making it difficult at best to display open.  After a little hunt for vacuform canopies, I've come up empty.

Anyhow, since I last posted, my brass barrels for the flak cannons have arrived.  I've got one built and most of the etched bits from Eduard attached.
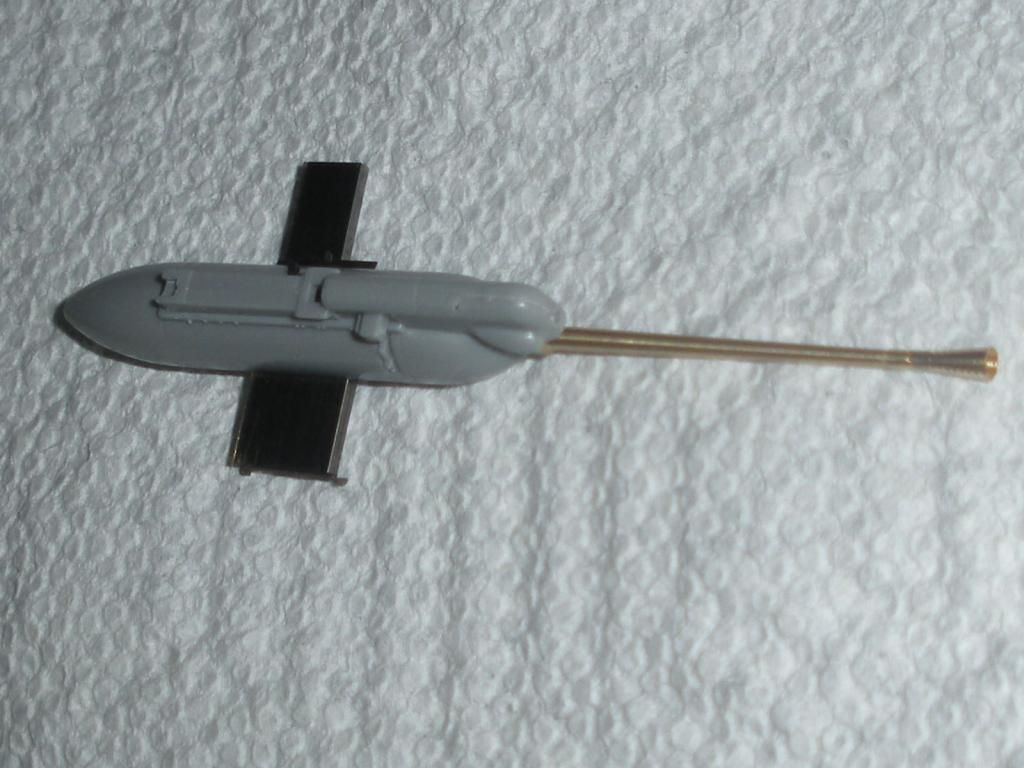
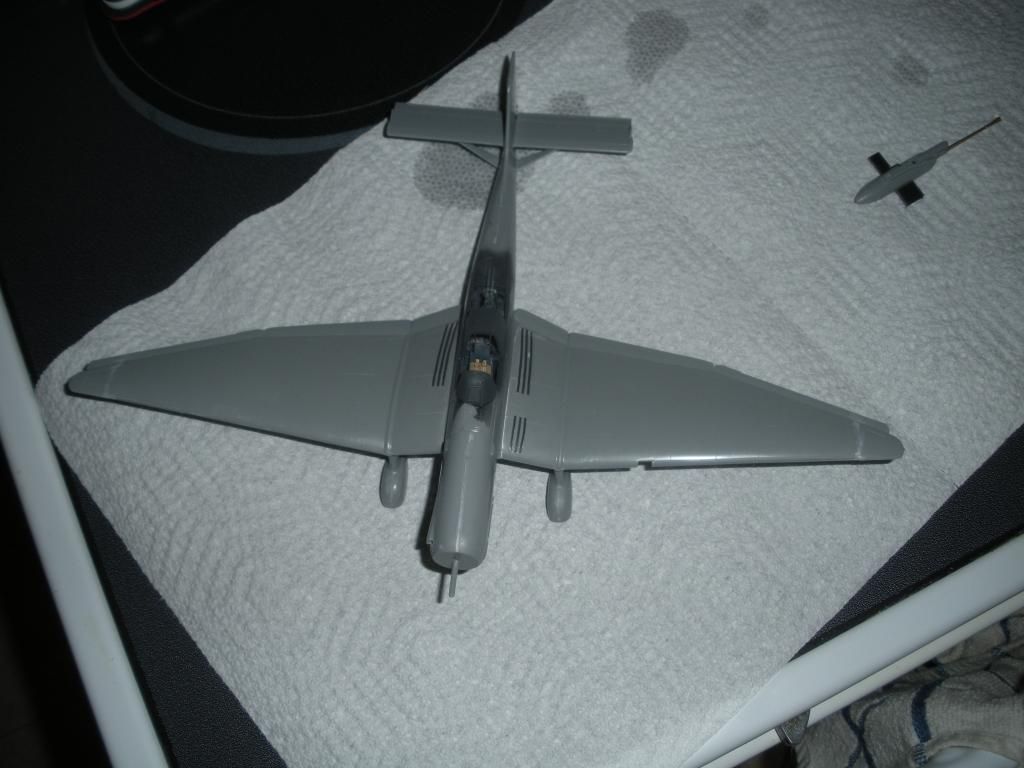
I've attached my nose and wings, with wing walks, stabilizers and struts.
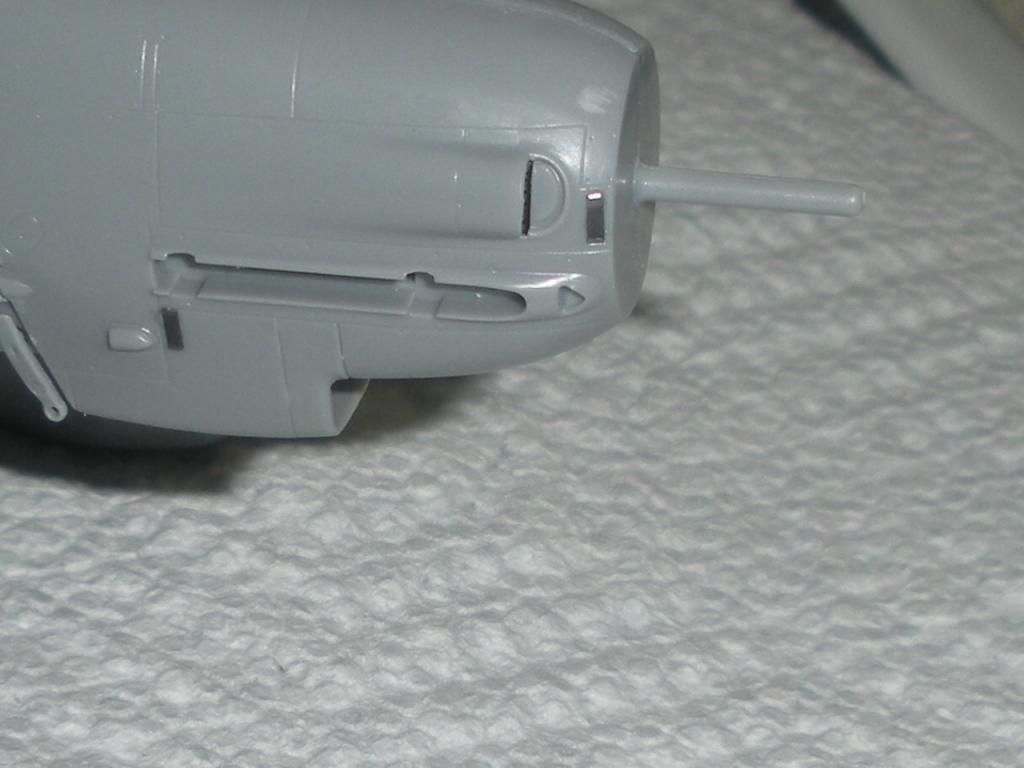
Eduard provides even a couple of little metal hasps for the engine cowls.
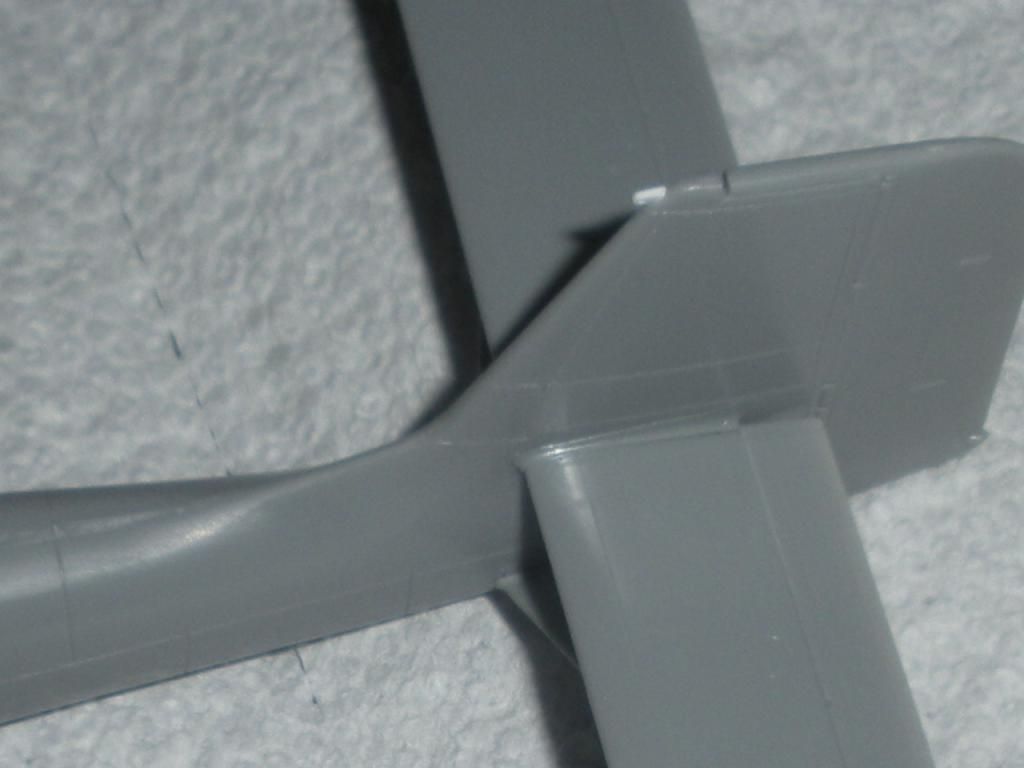
I've added a scratchbuilt anchor for the antenna wire in the tail.
Eduard's beautifully done flap actuators along one wing
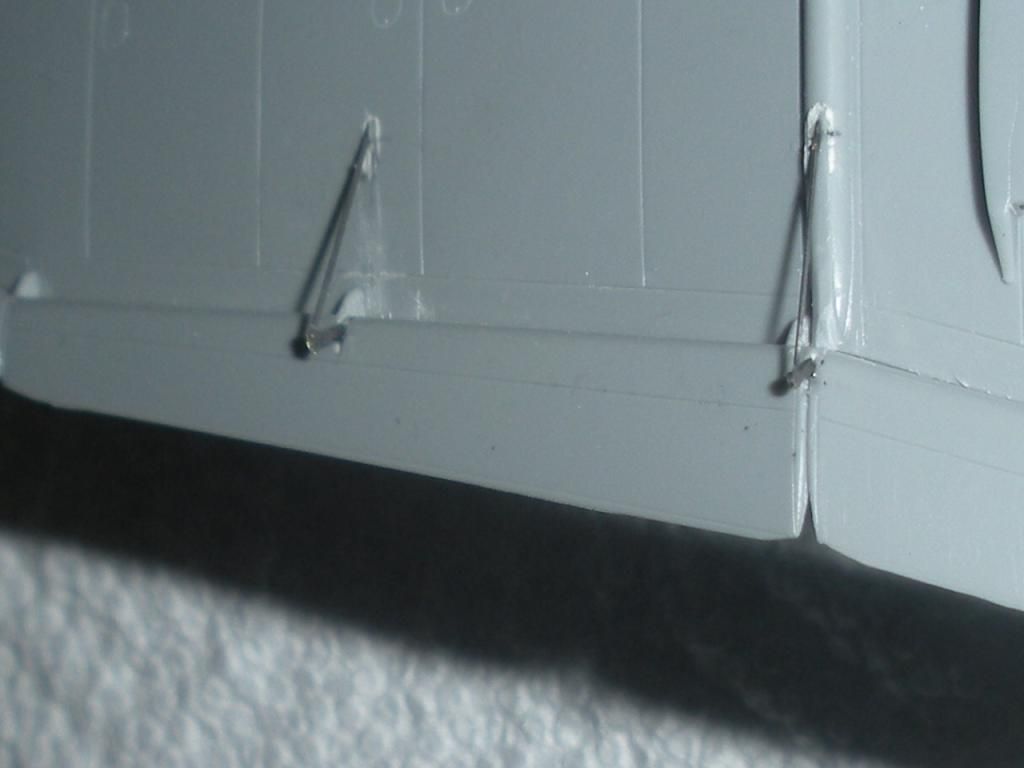
So much nicer than the little triangular globs of plastic provided with the kit.

I had to work in a bit of putty to eliminate a step between the lower wing and fuselage.
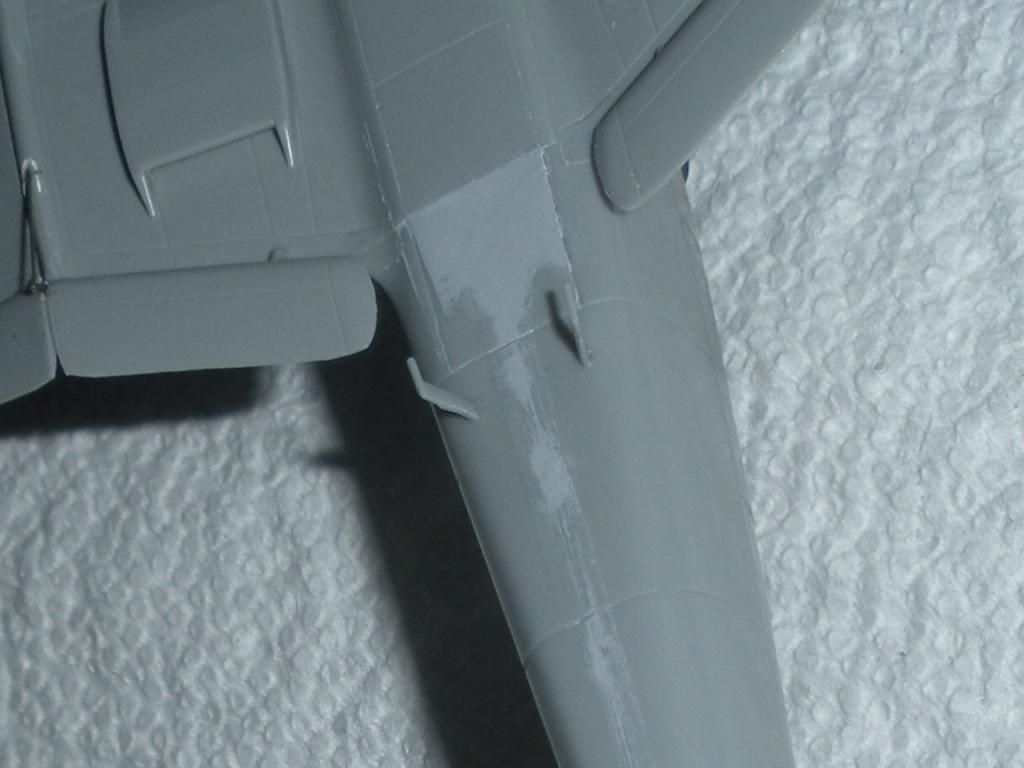
And some more around the wheel to wing mounts.  There was quite a gap in there.
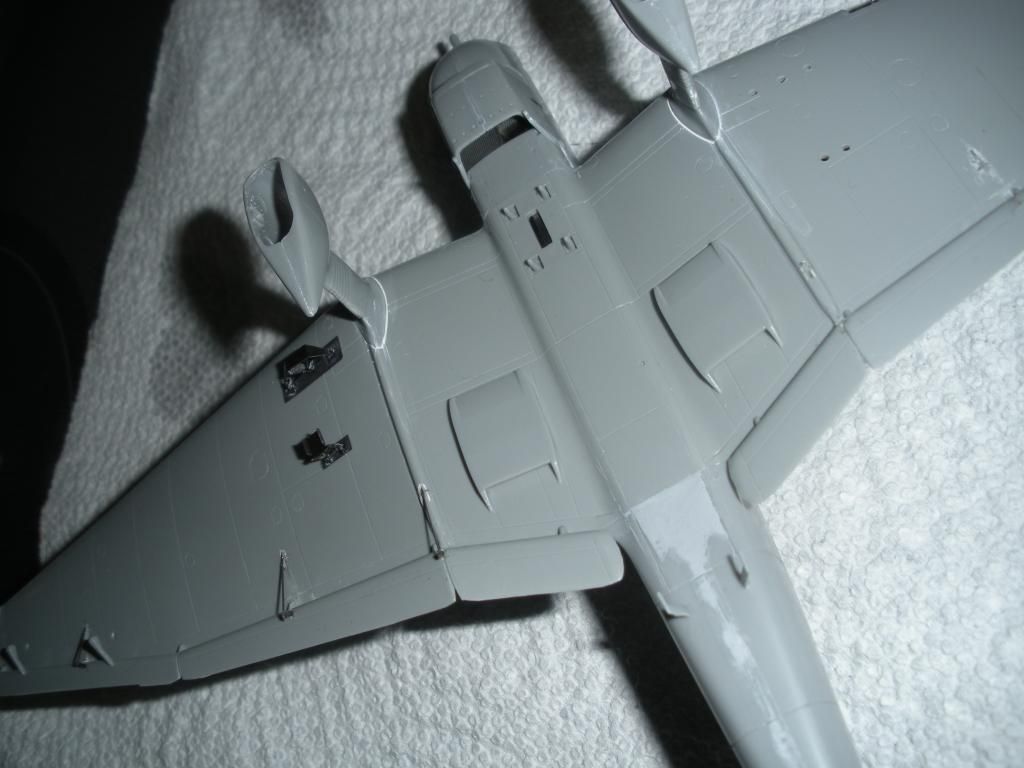
And finally, just in case all the fiddly bits weren't nightmare enough, I've decided to torture myself further by using Eduard's etched cannon mounts. 
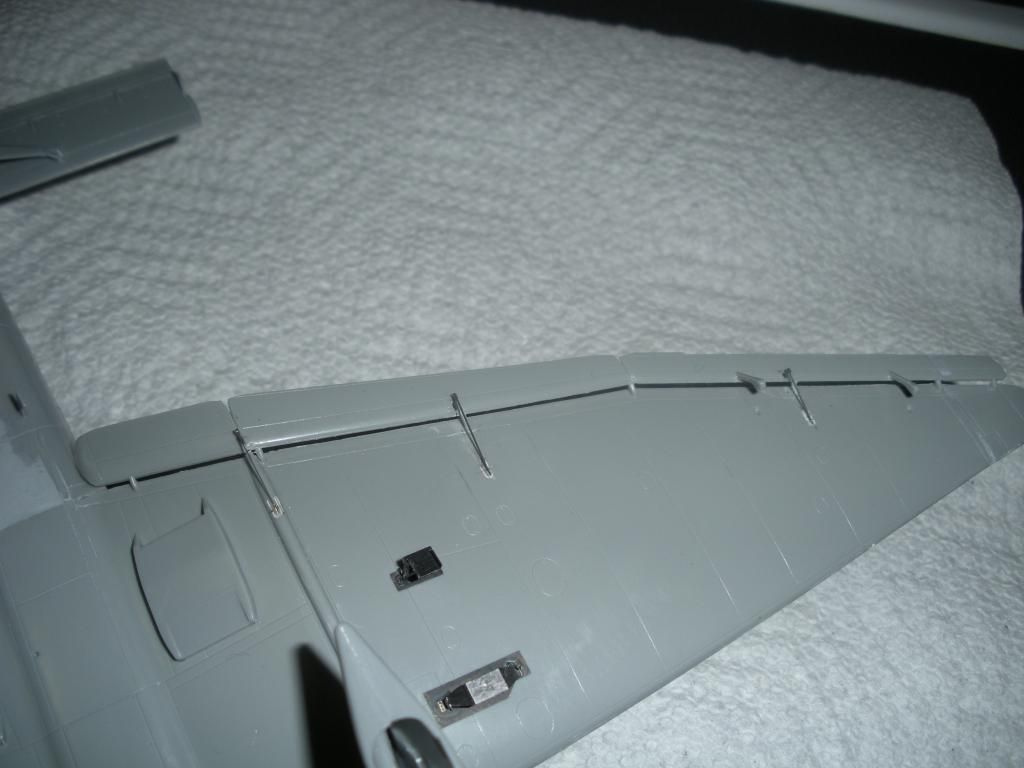
Now, to work along the other wing with those same actuators and mounts, then the elevators and rudder.   A few etched wires for cannon plumbing and I should be ready to shoot some primer.

I am planning to paint on the yellow V on the port wing, and am debating making my own masks using the decal kit for a template for most of the markings.  A lot more work, but I really like weathering all my markings along with the paint.  I think it tends to lend a little more realism. 

So, I have to decide what to do about the pilot's canopy section, whether or not to use aftermarket wheels that barely fit, and whether to use decals or paint...  Along with attaching a few more fiddly bits.  On the plus side, my truck's transmission issues were only an O ring and a hose. 

Happy building everyone.

Life is hard, it's even harder when you're stupid - John Wayne.


  • Member since
    December 2002
  • From: Bury St Edmunds, Suffolk, England
Posted by Bish on Monday, February 2, 2015 2:22 PM

Looking nice Andrew. Will be keen to see how you get on with the yellow wing marking. I am thinking about painting that as well rather than the decals.

I am a Norfolk man and i glory in being so


On the bench: Airfix 1/72nd Harrier GR.3/Fujimi 1/72nd Ju 87D-3

  • Member since
    January 2014
  • From: Toronto
Posted by Rob S. on Monday, February 2, 2015 3:30 PM

Looks great Andrew...love those sexy brass barrels!!

______________________________________________________________________________


On the Bench: Nothing on the go ATM

  • Member since
    December 2002
  • From: Bury St Edmunds, Suffolk, England
Posted by Bish on Monday, February 2, 2015 3:45 PM

Andrew, I just did a little search. There is a squadron vac canopy for the D/G but its for the Monogram kit.

www.hannants.co.uk/.../SQS9540

And there is one by falcon, but it does not specify a kit brand and unfortunately threes only come in sets, so quite pricey if you only want one out of it.

www.hannants.co.uk/.../FNCV1648

Not sure if that's any help, its all I could find.

I am a Norfolk man and i glory in being so


On the bench: Airfix 1/72nd Harrier GR.3/Fujimi 1/72nd Ju 87D-3

  • Member since
    August 2012
Posted by AndrewW on Monday, February 2, 2015 4:35 PM

Thanks, Bish.  Not sure about them, but I was thinking of doing an order thru Hannants, so I may pick oneup and give it a try.  I wish I hadn't used my Eduard masks on the kit piece before I'd dry fitted...

Life is hard, it's even harder when you're stupid - John Wayne.


  • Member since
    August 2012
Posted by AndrewW on Monday, February 2, 2015 4:37 PM

And thanks Rob, they definitely are a worthwhile addition.  I've always loved Master's guns.  I think next I'm going to tackle a mk iic hurricane, and I have a set of their barrels with recoil springs... so pretty.

Life is hard, it's even harder when you're stupid - John Wayne.


  • Member since
    December 2002
  • From: Bury St Edmunds, Suffolk, England
Posted by Bish on Monday, February 2, 2015 4:50 PM

You may be able to get those through Sprue Brothers, could save you quite a bit. Or is there something Hannants have you can get over there.

I am a Norfolk man and i glory in being so


On the bench: Airfix 1/72nd Harrier GR.3/Fujimi 1/72nd Ju 87D-3

JOIN OUR COMMUNITY!

Our community is FREE to join. To participate you must either login or register for an account.

SEARCH FORUMS
FREE NEWSLETTER
By signing up you may also receive reader surveys and occasional special offers. We do not sell, rent or trade our email lists. View our Privacy Policy.