SEARCH FINESCALE.COM

Enter keywords or a search phrase below:

1945 GB

95958 views
1851 replies
1 rating 2 rating 3 rating 4 rating 5 rating
  • Member since
    November 2008
  • From: Central Florida
Posted by plasticjunkie on Saturday, February 7, 2015 3:13 PM

Thanks guys!

 GIFMaker.org_jy_Ayj_O


Too many models to build, not enough time in a lifetime!!

  • Member since
    August 2009
  • From: MOAB, UTAH
Posted by JOE RIX on Saturday, February 7, 2015 6:12 PM

Hi PJ. Welcome on board. You're definitely off to a fine start for sure. Your drybrushing on the IP turned out amazing. Top notch work.

"Not only do I not know what's going on, I wouldn't know what to do about it if I did". George Carlin

  • Member since
    February 2010
  • From: Berkeley CA/St. Paul MN
Posted by EBergerud on Saturday, February 7, 2015 7:13 PM

The wheels for the M8 from Verlinden arrived. I'm not a resin fan, but I don't think it would have been easy to scratch the chains on these guys.

More soon

Eric


A model boat is much cheaper than a real one and won't sink with you in it.

  • Member since
    August 2009
  • From: MOAB, UTAH
Posted by JOE RIX on Saturday, February 7, 2015 7:21 PM

Whoa. Those look cool Eric. Very nice detail painting. The chains are really convincing.

"Not only do I not know what's going on, I wouldn't know what to do about it if I did". George Carlin

  • Member since
    July 2004
  • From: Sonora Desert
Posted by stikpusher on Saturday, February 7, 2015 7:54 PM

I think it would have been a real beach to replicate that with scratch work, such as using real chain... Those look just the part indeed. I think that Tank Workshop makes the same sort of thing also.

As for me, I finished getting the decals on my Tiffy before work today. I will get photos taken, uploaded, and posted tomorrow...


F is for FIRE, That burns down the whole town!

U is for URANIUM... BOMBS!

N is for NO SURVIVORS...

       - Plankton

LSM


  • Member since
    November 2008
  • From: Central Florida
Posted by plasticjunkie on Saturday, February 7, 2015 8:25 PM

Stik

Excellent paint on that Typhoon. That is one cool looking AC. The new 1/24 scale must be a delight to build.

Joe

Thanks for the kind words.

 GIFMaker.org_jy_Ayj_O


Too many models to build, not enough time in a lifetime!!

  • Member since
    July 2004
  • From: Sonora Desert
Posted by stikpusher on Saturday, February 7, 2015 9:54 PM

Thanks PJ. The new Airfix 1/24 Tiffy is really one of those kits that is a dream project for me... Big bad and beautiful! To my eye it has the same level of appeal in its immediate post D-Day markings as a Gulf War I Warthog in 23rd TFW markings. Certain death to bad guys at the receiving end on the ground.


F is for FIRE, That burns down the whole town!

U is for URANIUM... BOMBS!

N is for NO SURVIVORS...

       - Plankton

LSM


  • Member since
    February 2010
  • From: Berkeley CA/St. Paul MN
Posted by EBergerud on Saturday, February 7, 2015 10:41 PM

Usually I'm stubborn and if I had owned the right scale chains, I would have taken a shot at a scratch build. But mine are much too small and would have cost as much as the wheels - $10 or so. I think I need them to justify having the fenders off and the M8 was not famous for its traction (6X6 or no: the jeep was much preferred for off-road rece) so it's no accident that a lot of winter photos show the chains mounted.

I'm stuck with 1/48 for aircraft (or 1/72 for bombers) - except for 1/32 WWI fighters. My wife won't let me put models in the living room and space is a very serious problem. So no trouble passing on a 1/24 Typhoon. Be neat to see one though. Also be neat to see a 1/200 battleship. I really should go to a model show some day. Wish every IPMS chapter I've ever contacted has not been eager about getting members - maybe I have a reputation.

Eric


A model boat is much cheaper than a real one and won't sink with you in it.

  • Member since
    July 2004
  • From: Sonora Desert
Posted by stikpusher on Sunday, February 8, 2015 12:24 AM

Well if you ever swing by the Los Angeles area, you're more than welcome to join us at So.Cal AMPS or OC IPMS... They can't be too picky there... They took me in ;)


F is for FIRE, That burns down the whole town!

U is for URANIUM... BOMBS!

N is for NO SURVIVORS...

       - Plankton

LSM


  • Member since
    July 2004
  • From: Sonora Desert
Posted by stikpusher on Sunday, February 8, 2015 8:19 PM

I finished the decals yesterday before work. Today I was finally able to get some photos taken and uploaded.

Upper view... In January 1945 2 ATAF, the RAF companion to US 9th Air Force, re instated the use of white on the upper wing roundels in an attempt to reduce friendly fire incidents.

lower wings

fuselage right side

fuselage left side

as you can see that there is not much to the markings. No nose art, name, mission marks etc. Just basic standard RAF/RCAF markings worn in NW Europe in 1945. The only real delay on getting the decals all done in one day was having to add the red centers to all the roundels. That just kind of annoys me, as they had no problem getting the red on the fin flash aligned properly. Why can't they do the roundels at the same time? Ah well, in the grand scheme of things it is really no big deal but still...


F is for FIRE, That burns down the whole town!

U is for URANIUM... BOMBS!

N is for NO SURVIVORS...

       - Plankton

LSM


  • Member since
    February 2010
  • From: Berkeley CA/St. Paul MN
Posted by EBergerud on Sunday, February 8, 2015 11:23 PM

Just stumbled on a color photo of a M8 from 1945. Shows the mines carried as painted yellow. Makes sense to make them stand out. (Most M8s carried six) That sound right?

Eric


A model boat is much cheaper than a real one and won't sink with you in it.

  • Member since
    July 2004
  • From: Sonora Desert
Posted by stikpusher on Sunday, February 8, 2015 11:29 PM

Yellow sounds a bit unusual. The US Army loves to paint everything Olive Drab. Ordnance usually has yellow markings. Yes older stuff was yellow, so it's not unheard of. But in the long run its up to you.


F is for FIRE, That burns down the whole town!

U is for URANIUM... BOMBS!

N is for NO SURVIVORS...

       - Plankton

LSM


  • Member since
    December 2002
  • From: Bury St Edmunds, Suffolk, England
Posted by Bish on Monday, February 9, 2015 12:48 AM

Looks good SP.

Yellow mines do sound a bit unusual. Could these be dummy mines used for training.

I am a Norfolk man and i glory in being so


On the bench: Airfix 1/72nd Harrier GR.3/Fujimi 1/72nd Ju 87D-3

  • Member since
    July 2004
  • From: Sonora Desert
Posted by stikpusher on Monday, February 9, 2015 1:38 AM

Blue is the standard color for US training ordnance


F is for FIRE, That burns down the whole town!

U is for URANIUM... BOMBS!

N is for NO SURVIVORS...

       - Plankton

LSM


  • Member since
    January 2014
  • From: Toronto
Posted by Rob S. on Monday, February 9, 2015 6:08 AM

Yup..even in the Cdn military our training stuff is blue and stamped INERT.

______________________________________________________________________________


On the Bench: Nothing on the go ATM

  • Member since
    December 2002
  • From: Bury St Edmunds, Suffolk, England
Posted by Bish on Monday, February 9, 2015 12:14 PM

Ok, scrape that idea then.

I am a Norfolk man and i glory in being so


On the bench: Airfix 1/72nd Harrier GR.3/Fujimi 1/72nd Ju 87D-3

  • Member since
    August 2012
Posted by AndrewW on Monday, February 9, 2015 12:47 PM

Over the last week, I've got all of my control surface actuators attached, begun building up my second cannon, finished the cannon mounts, shot primer over the tail and tail wheel, the wing in way of the yellow chevron and the main wheel spats.  This morning I've finished colour coats on the main wheel spats.  The only photo I'm going to put up today has taken me most of the week and is going to be the ambitious part of all of this.  I've spent my week cutting out paint masks, mostly pretty easy to do, but I'm also going to try to paint on the spinner spiral.  I'm also going to try to paint the two colour chevrons and bars along the fuselage side.  Tomorrow, I hope to have a weathered white laid on the tail, this will be the hakencruz outline and the white stripes along the rudder, and a weathered yellow laid in for the wing chevron.  After that, masking and onto the main colours.

Life is hard, it's even harder when you're stupid - John Wayne.


  • Member since
    December 2002
  • From: Bury St Edmunds, Suffolk, England
Posted by Bish on Monday, February 9, 2015 1:19 PM

wow, that's some session of mask cutting Andrew. can't wait to see how that all comes out.

I am a Norfolk man and i glory in being so


On the bench: Airfix 1/72nd Harrier GR.3/Fujimi 1/72nd Ju 87D-3

  • Member since
    August 2012
Posted by AndrewW on Monday, February 9, 2015 1:28 PM

Me too, Bish.  I've not always had the best luck with paint masks, as they sometimes want to lift the underlying paint, but this time I'm taking my time and doing every step right.  Before I started any paint, I cleaned the entire kit with isopropyl alcohol, handing it with latex exam gloves, and de-tacking all of my tape even before I cut it.  No wet layers of paint, just a light mist, and fingers crossed this time no paint comes away with the mask.  That's where this is a bit ambitious, but I really like weathering my paint, and an unweathered decal in the midst of it just ruins the image for me.  

Life is hard, it's even harder when you're stupid - John Wayne.


  • Member since
    November 2008
  • From: Central Florida
Posted by plasticjunkie on Monday, February 9, 2015 1:44 PM

Stik

The paint and decals look flawless. Yes


Andrew

That is indeed some masking job. Can't wait to see the finished product.

 GIFMaker.org_jy_Ayj_O


Too many models to build, not enough time in a lifetime!!

  • Member since
    July 2004
  • From: Sonora Desert
Posted by stikpusher on Monday, February 9, 2015 2:07 PM

Andrew, I have been thinking of trying some masking on some armor builds. Seeing your work with that here has inspired me to do it for sure. I am eager to see how your efforts here pay off and learn as I watch your painting.

PJ, thanks for the kind words. It may look good, but it's certainly not flawless. I'm gonna be starting the final steps here soon.


F is for FIRE, That burns down the whole town!

U is for URANIUM... BOMBS!

N is for NO SURVIVORS...

       - Plankton

LSM


  • Member since
    August 2012
Posted by AndrewW on Monday, February 9, 2015 3:00 PM

I'll be certain to put a lot of 'in progress' photos up, then.  One of the big tricks I've done, as I'm sure is at least a little bit visible, is alignment marks for any two part masks, like the bars and chevrons.  This way, I can lay in the white, align the second mask over top, paint the black in, and wind up with a black chevron and a white outline.  Fairly easy to do with linear markings, I'm not sure I'd cut my own roundels.  I have seen on here a circular cutter by Olfa, I'm debating investing in one of those.  At 90 dollars in town here, it's something I want to make sure I'll use, that's the price of a kit or two.  The biggest trick to all of that cutting, a brand new blade in the knife handle.

Life is hard, it's even harder when you're stupid - John Wayne.


  • Member since
    July 2014
Posted by modelcrazy on Monday, February 9, 2015 3:25 PM

Bish,

I'll be starting my Indy here very soon. I just need to complete my Kawasaki T-4 Blue Impulse for the Acrobatic Build and then get her into the dockyard. I seem to only be able to work on 2 builds at a time to give them any real attention.

Steve

Building a kit from your stash is like cutting a head off a Hydra, two more take it's place.


http://www.spamodeler.com/forum/

  • Member since
    April 2006
  • From: ON, Canada
Posted by jgeratic on Monday, February 9, 2015 3:37 PM

Andrew - impressive work in cutting those masks, keeping my fingers crossed it all works out.

Not sure if it's the same product, but amazon.ca has the olfa circle cutter for 10 dollars and some change.  I've  put it to good use for a couple projects with the Japanese hinomaru markings.

regards,

Jack

  • Member since
    August 2012
Posted by AndrewW on Monday, February 9, 2015 5:00 PM

It may be the same product, Jack, and thank you.  I had seen the unit when fabric shopping with the little lady, so I am sure that was way overpriced.  I've got my fingers crossed too, and thanks.

Life is hard, it's even harder when you're stupid - John Wayne.


  • Member since
    February 2010
  • From: Berkeley CA/St. Paul MN
Posted by EBergerud on Monday, February 9, 2015 6:30 PM

I've done meatballs on IJ planes too - especially if I'm putting on streaks or stripes and want them to match. I have also found that a bucket of Pledge will allow a decal to set very nicely over some pretty irregular surface - much better in my eyes than the Micro Sol / Set. (I still like their old decal stuff.) Used it to get this star to lay down nicely over a very irregular surface on a recent Cromwell build:

Worked nicely on getting decals down on a Revell Ju-52 which has a corrugated surface (the yellow stripe was painted).

You really lay Pledge down - a proper puddle - then gently push the decal down and it will stick pretty well. Take some of the excess off with a brush and let it dry. You'll end up with some gloss finish, but I always end up changing gloss/matte a couple of times.

You can also move the decal a little from a hard place to an easy one. A purist wouldn't do that, but I would.

A real purist would use those rub-off gizmos - they look very neat but I think take a little practice. Some day - maybe.

Eric


A model boat is much cheaper than a real one and won't sink with you in it.

  • Member since
    August 2012
Posted by AndrewW on Tuesday, February 10, 2015 12:42 PM

Those are impressive, Eric.

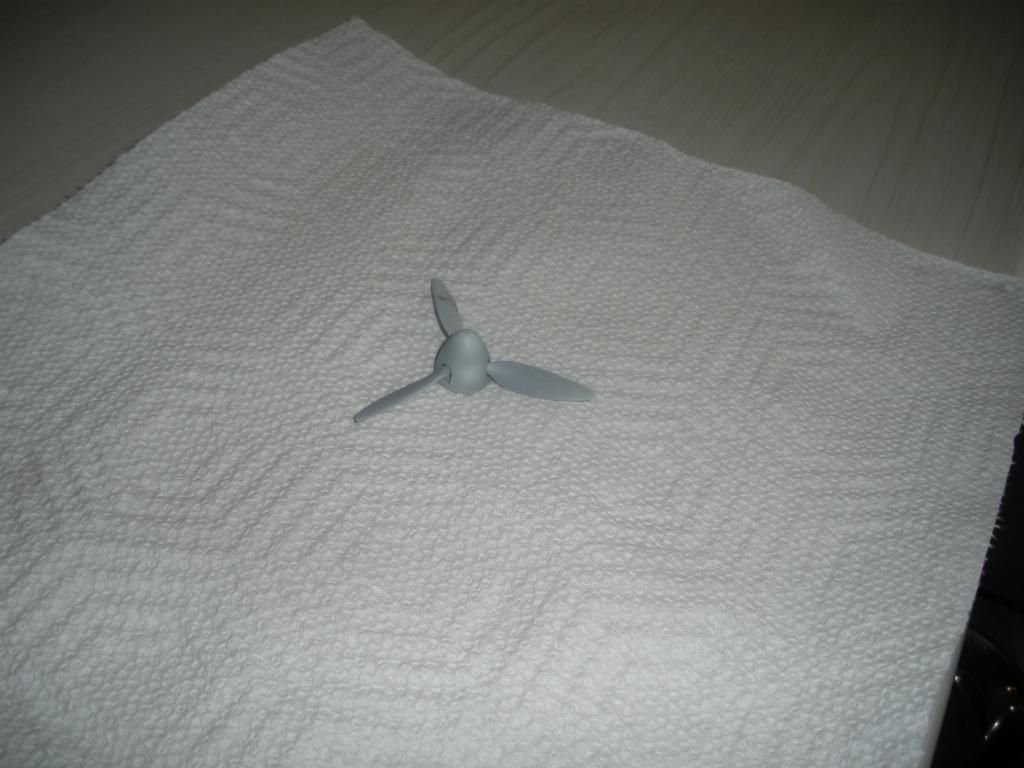
Today, I started laying in a bit of my weathered white on the prop
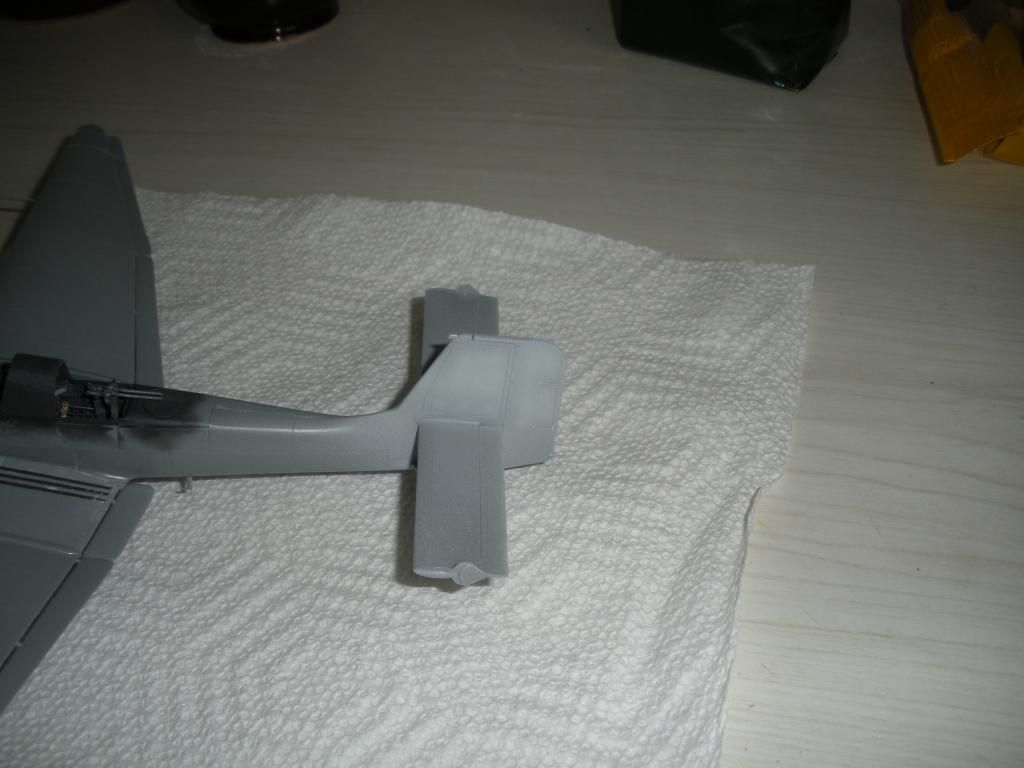
And over the tail
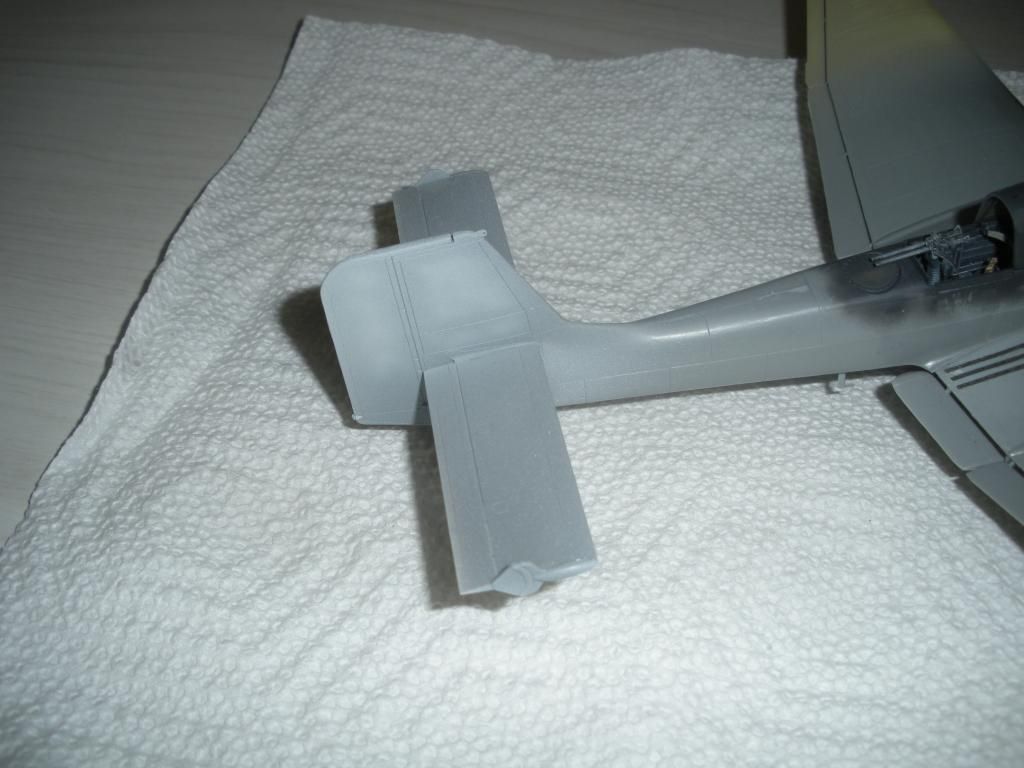
The worn look was accomplished with a base layer of medium grey, highlights of white, and a thin top layer of white grey.  I will then mask these spots for the white lines along the rudder and the hakencruz on the tail.

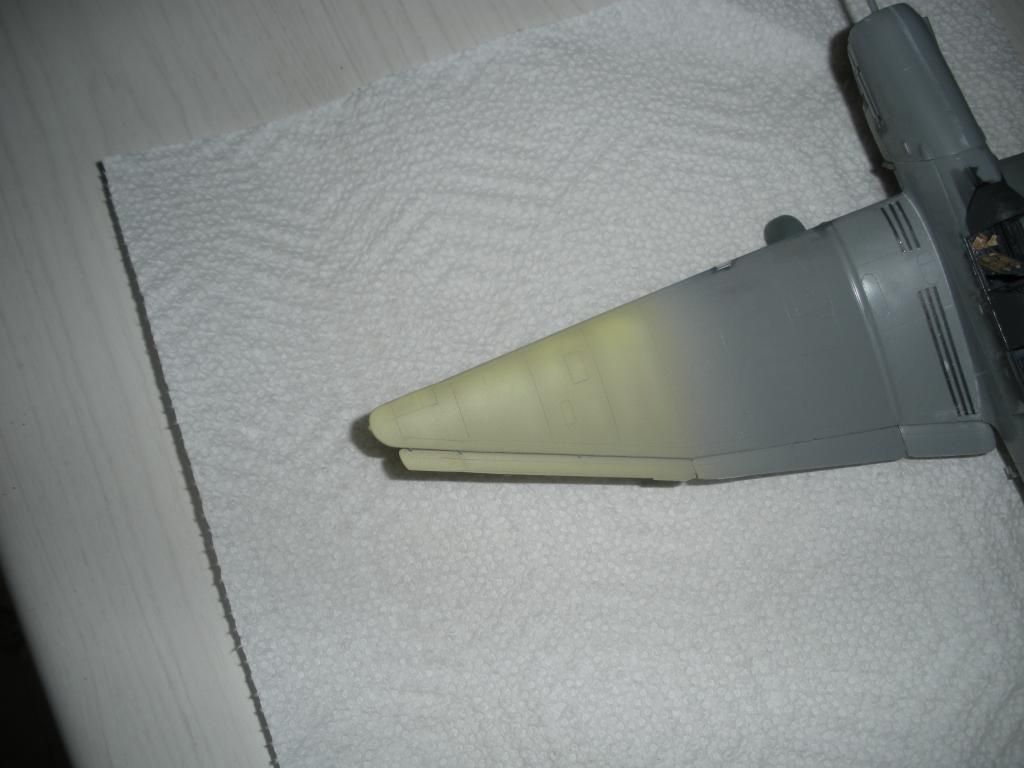
I also got some weathered yellow laid down
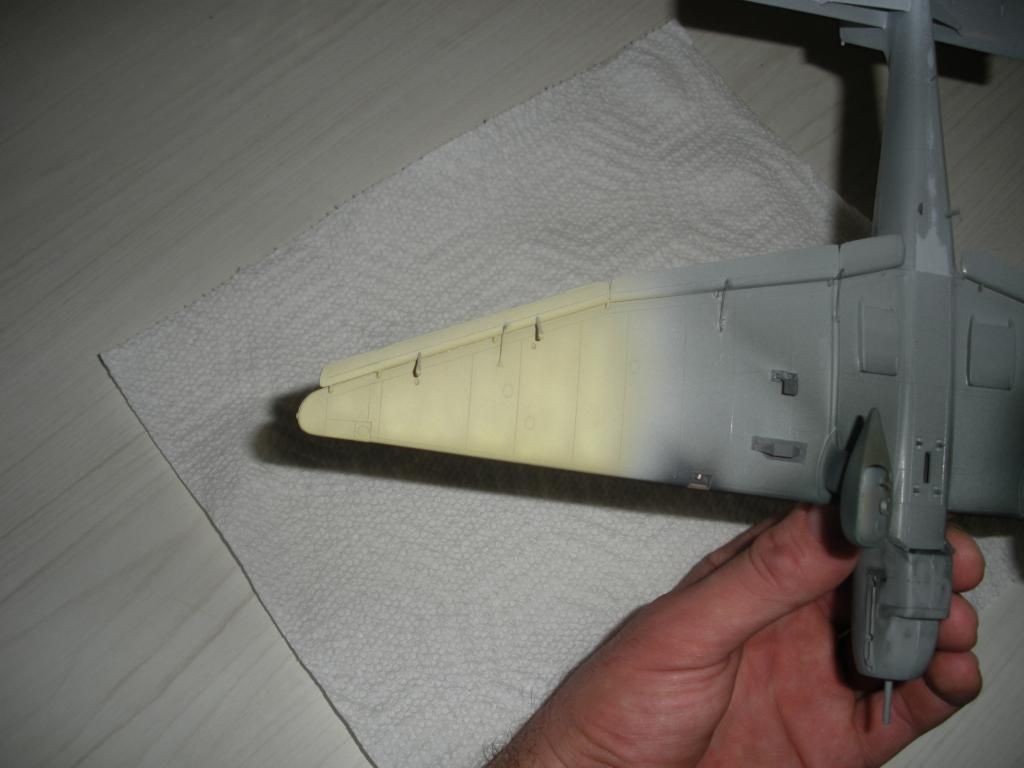
For some reason, the top of the wing photographed better, but both top and bottom are equally shaded to the naked eye.  This was a base of sand yellow (a light brown), highlights of aged white (an ivory shade), extreme highlights of white (very sparingly) and a top coat of rlm 05, gelb.

For both of these effects, I've tried to put emphasis on the contrast, even overdoing it a touch, because I know once I lay in the greens, the pale colours will lose their contrast in comparison.  My gloss layer will also darken things up a bit, thereby decreasing the contrast as well.  I don't want to have weathered my white only to have it come away looking monotone like a decal, then I may as well have applied decals.

I also have my main wheel spats painted.
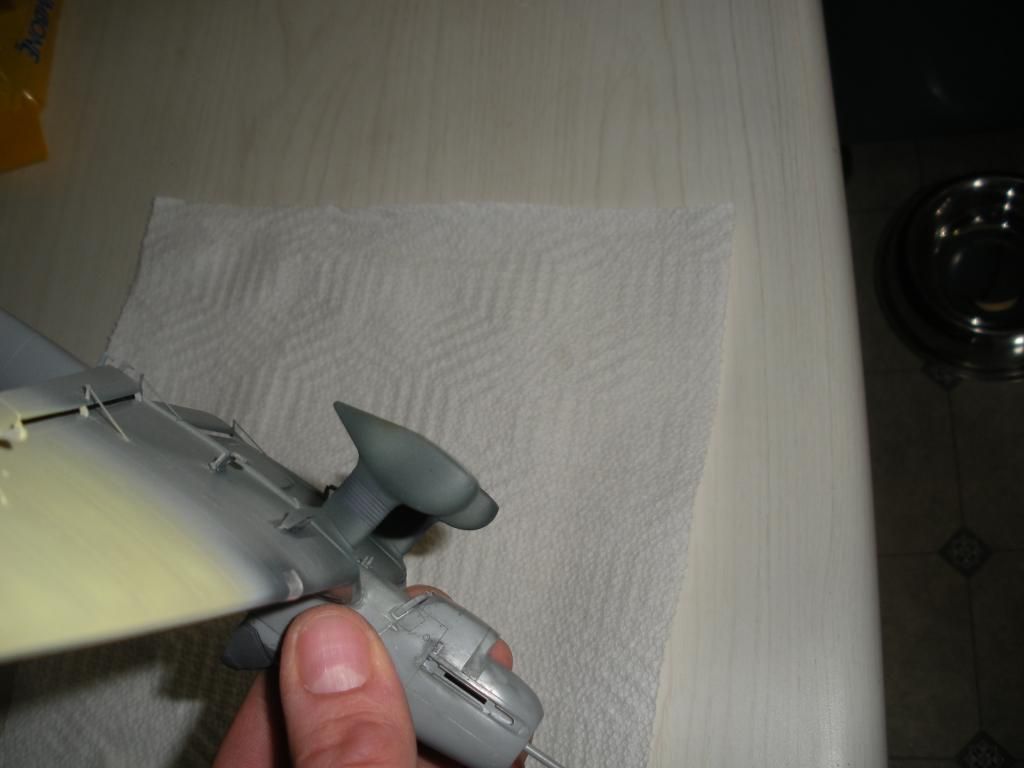
So, I'll give all of this a day or two, finish building my other cannon, and then apply some masks.  I want to make sure that paint is really cured nicely prior to laying my masks down.  Before long, I should be able to finish out my primer layer and start shooting some 65.

Life is hard, it's even harder when you're stupid - John Wayne.


  • Member since
    November 2003
  • From: Naples, FL
Posted by tempestjohnny on Tuesday, February 10, 2015 7:36 PM

Andrew you are an artist. The paint shading is right on


  • Member since
    July 2004
  • From: Sonora Desert
Posted by stikpusher on Tuesday, February 10, 2015 10:24 PM

Andrew, your Stuka is progressing very nicely!

My first bit of progress today was to add the exhaust stacks. Then after that, I airbrushed on another coat of Future to seal in the decals. After giving that a few hours to dry I decided to try an old school technique to highlight the raised panel lines- pencil. I used an HB lead pencil along most of the panel lines and then smudged it back in the direction of airflow using a cotton ball or tissue...

exhaust stacks

overall upper and lowers penciled in panel lines

and a close up

and finally, some RAF 500 Lb bombs that came from my spares bin off the old Monogram Mossie kit that I have been working on. I filled in the hollow areas and thinned down the fins a bit

Tomorrow I am going to work on some washes in the recessed areas such as the control surfaces and lines that I rescribed and in the wheel wells and on the landing gear...


F is for FIRE, That burns down the whole town!

U is for URANIUM... BOMBS!

N is for NO SURVIVORS...

       - Plankton

LSM


  • Member since
    August 2012
Posted by AndrewW on Wednesday, February 11, 2015 6:51 AM

That is looking great, Stick!

Life is hard, it's even harder when you're stupid - John Wayne.


JOIN OUR COMMUNITY!

Our community is FREE to join. To participate you must either login or register for an account.

SEARCH FORUMS
FREE NEWSLETTER
By signing up you may also receive reader surveys and occasional special offers. We do not sell, rent or trade our email lists. View our Privacy Policy.