Thanks! One more quick update before tomorrow. I'm about to drop everything in order to rush this -A paint job. I think I can do it. I might have to skip cutting the grass though...lol =D
Here's a couple of things I've been doing with the time I've got in between being Daddy.
Along with completing the NMF painting on the -D, I've addressed the gear doors and props.
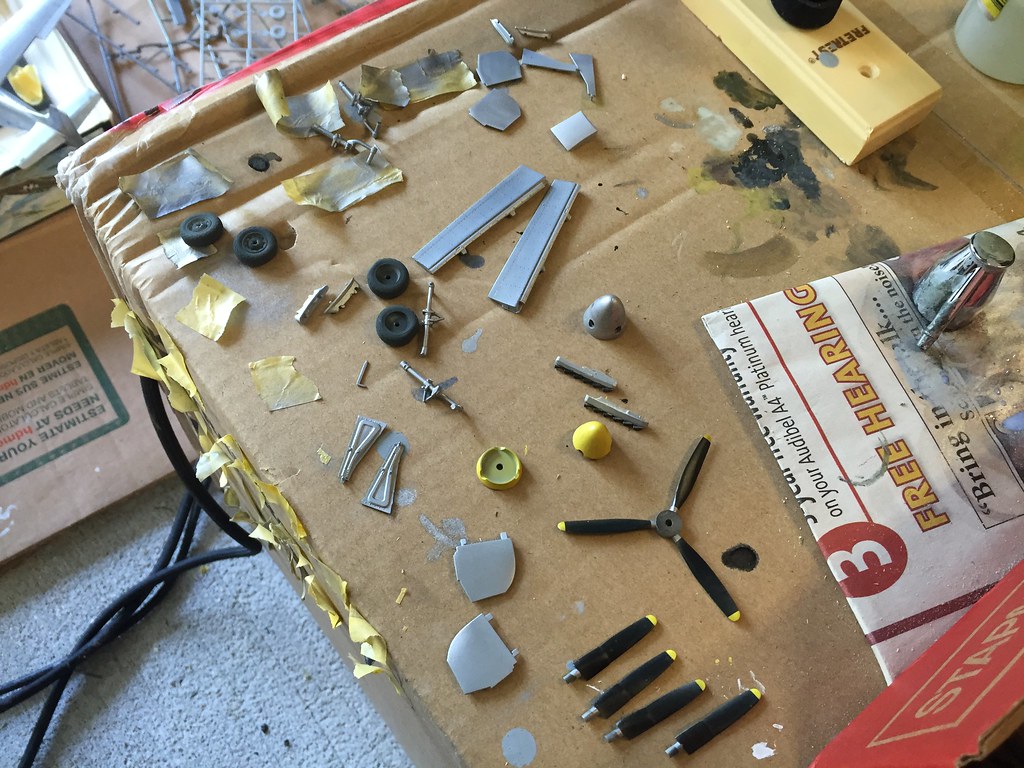 Untitled by Britt Vallot, on Flickr
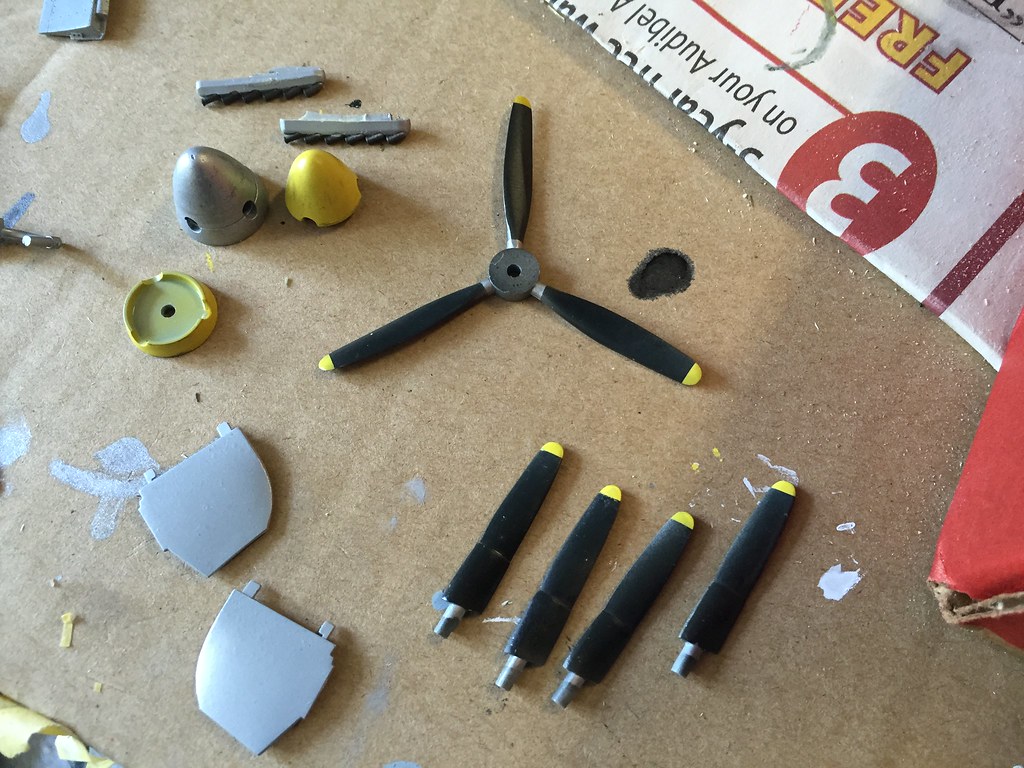 Untitled by Britt Vallot, on Flickr
As for the spinner, I've noticed in a lot of bare metal spinners there's a certain pattern of light and dark bands that run down to the base. I'm not sure what exactly causes it or rather how, but I knew how I'd represent it. In the past, I'd have gone to my trusty Tamiya tape where I cut a cross in to it and then a circle out from connecting the ends and stretch it out across the conical surface to get a tight seal for paint. But with the Tamiya curve tape available it's much easier to tape off sections like this. Here's what I came up with.
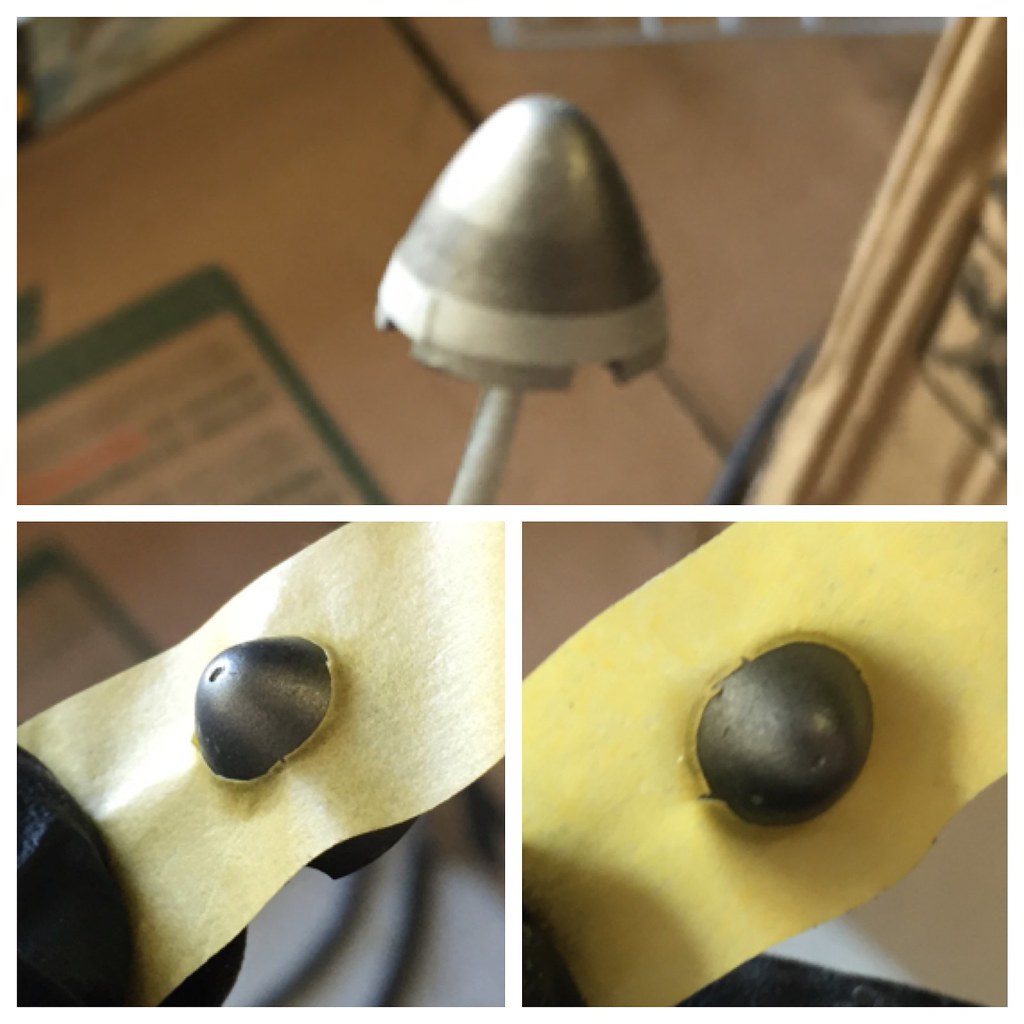 Untitled by Britt Vallot, on Flickr
After a couple of marked off sections and removal and the overlap of Aluminum over Magnesium, this was the result. I came back and very lightly buffed the surface to bring out a little extra character. The pictures aren't quite doing it justice but it did come out rather close to the picture in the left frame.
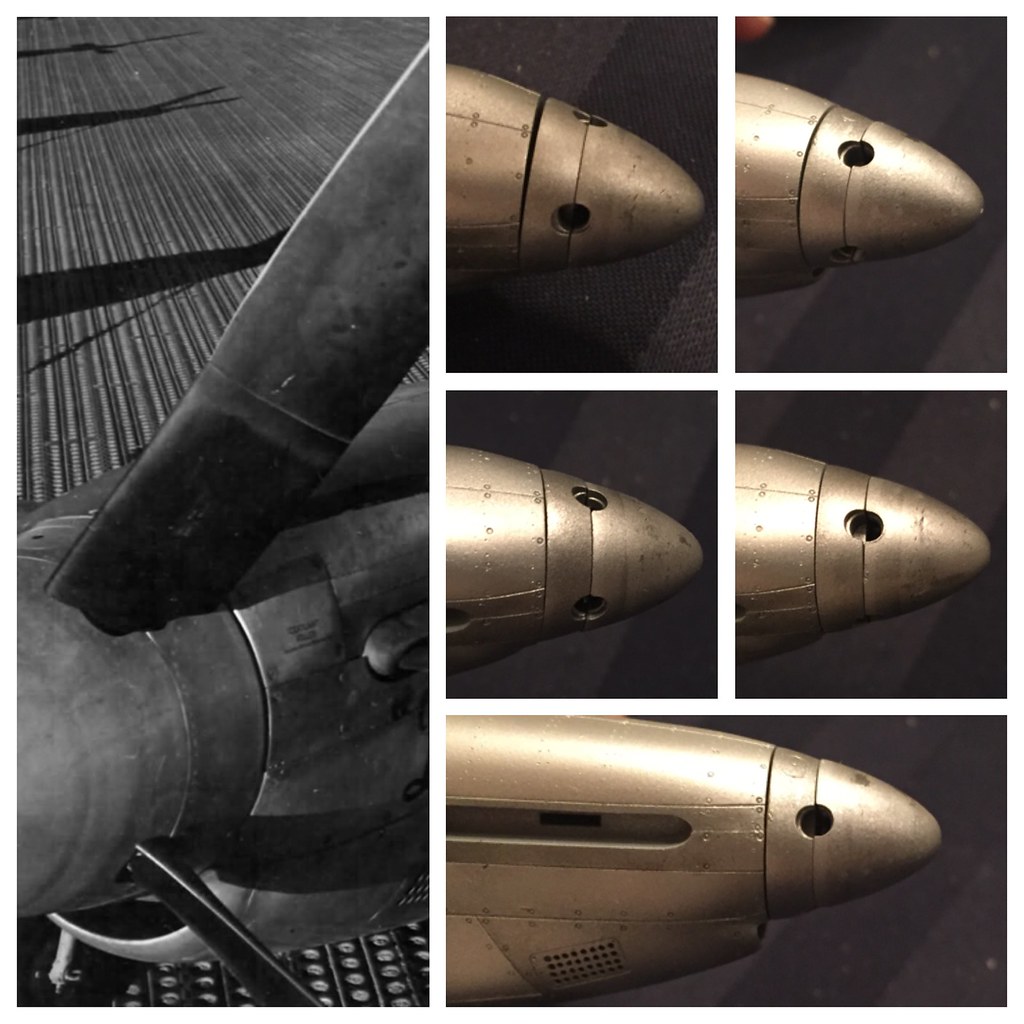 Untitled by Britt Vallot, on Flickr
Bringing my attention back to the landing gear, I noticed the oleo scissors were solid. No problem. I drilled three holes to mark three points that I'd clean up with a brand new No. 11 blade based off of photos. It opens up this space and makes it a bit more true to life. In the top right frame, you'll notice a flat filled in space that shoots off the strut at the base near the tire. This should be two flanges that apparently are set up to accomodate something. I haven't been able to find out what...perhaps a mustang pro can provide some input here but I've carved out the middle very carefully and you'll notice in the photos how this looks after. I sanded some seams down that I noticed slipped my attention...repaint is on the way. On the -D I've drilled out the hole for the eyelets that fit into here. I'll be doing that with brass wire later. Easy. The -A from AccuMinn already had a piece here that I simply drilled a tiny hole through to make this feature. Carefully too I might add. =]
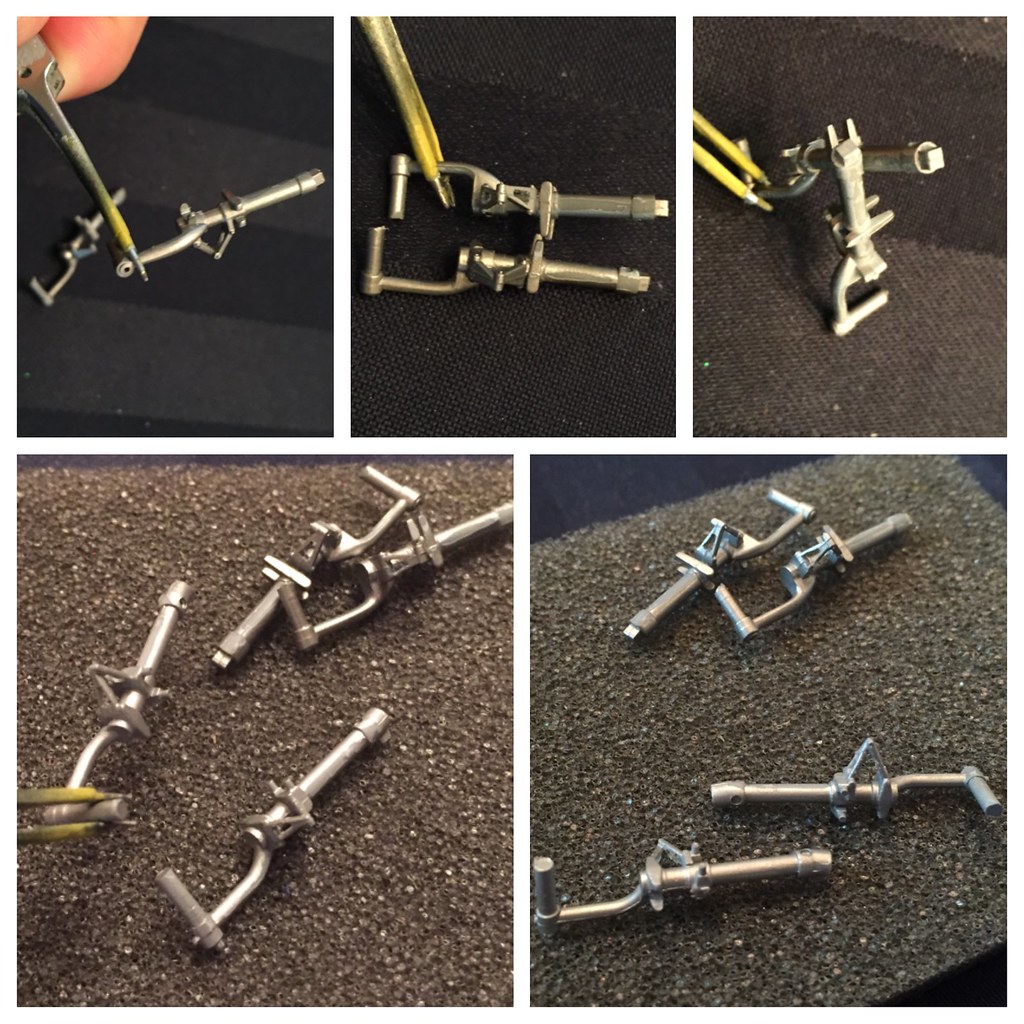 Untitled by Britt Vallot, on Flickr
I did have a small epiphany earlier yesterday when I finally pulled out the decal sheet to tidy up the props. I started looking at everything listed when it occurred to me that there were an awful lot of 4's listed in the serial BuNo's. 4's and 1's. Shomo's actual F-6D that he made his MOH flight in is hard to come by in decals. I even just last night found a site describing a set for his P-40 and the F-6D WITH a resin set for the camera bay parts that are protruding for $7 from War Eagle decals. It was also the only site with a mention of it on the entire Internet apparently too. (womp womp) No matter...the serial number was 414841...and I had plenty of 4's, more than enough 1's, and a couple of 9's and 6's and 3's that I could blend to make an "8". So ten minutes later...done. Surgery was a success. I cut the numbers out as close as I could with my new blade so as to limit any extra decal film. Some times with weathering the borders of the film will show up and I hate this. It's almost unnoticeable until you're right up on it and damnit if you always see it after that. So skipping ahead, here's that. =]
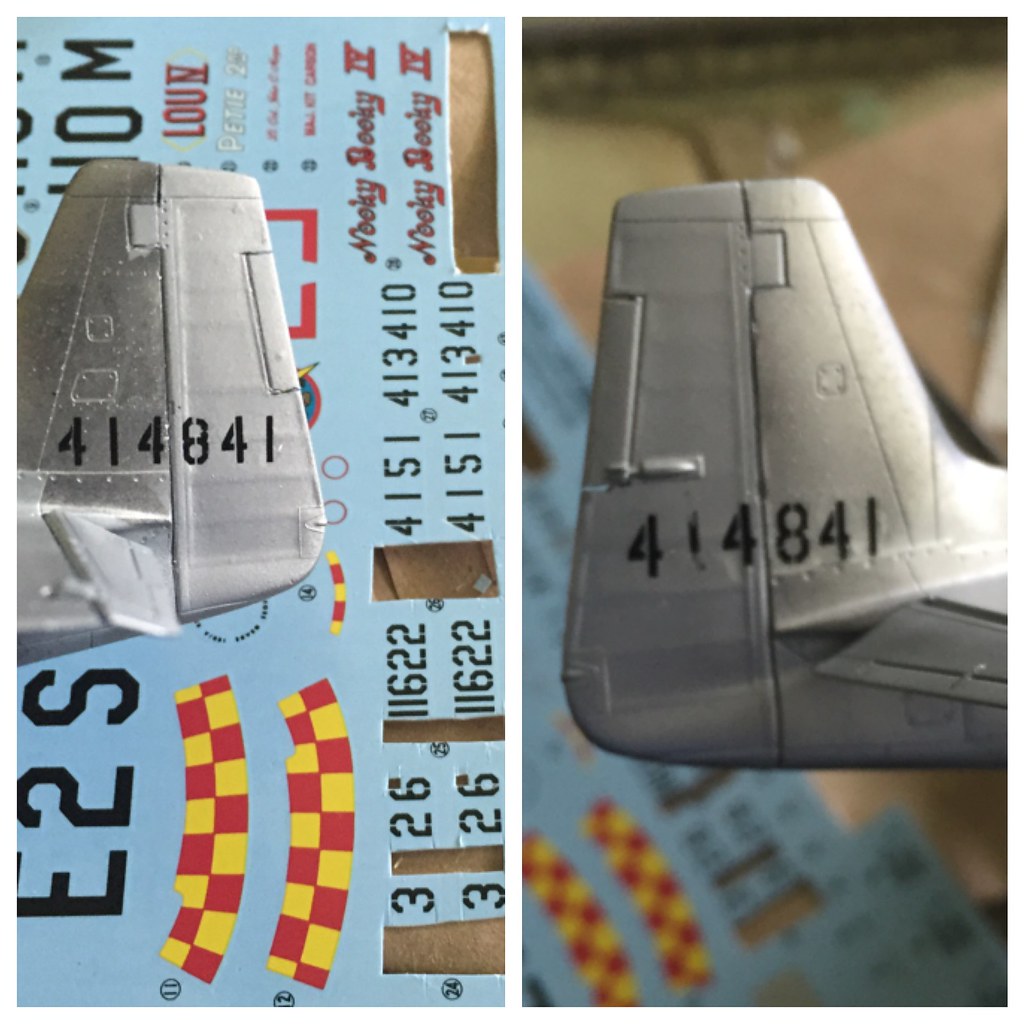 Untitled by Britt Vallot, on Flickr
Tomorrow. PAINT!! If I can, I may even make a quickie base since I've got plenty of scenery stuff to go around. I won't be able to make my wooden block base just yet, but I will update a post to show how that comes out on the Aircraft section. Larry's inspired me to do a pretty grass scene and seeing as I've a pretty pond in my back yard I might just be able to make it work for a quick front page photo...assuming I can square this up by tomorrow night.