Mark, that's moving along fast. I better pick up the pace here. =] Your cockpit turned out pretty nice. I've actually never seen an Academy mustang built up before, or at least not that I can recall. Looking forward.
Larry, I know I already mentioned on the other GB, but I don't think made mention of the pulling off those checkered colors. Nice go of it! I've seen Joe's tutorial and I've been anixous to try it. Just haven't gotten around to it yet. I think what's tricky about them is that they aren't actual squares at all for the most part as they have to go around a curved body. Your use of the decal to make a copy is clever. I'll have to remember that when I try it. Sounds to be more user friendly. =] How's it going so far? I should think it wouldn't be too difficult to fix...just bothersome.
I have a quick update on the F-6D. I'm trying to get through this part so I can close her up and then focus on getting her prepped for primer. Afterwards, I'll try to bounce back and forth between this and the P-51A I've neglected.
So to start, I've completed the cockpit. I've added the thin support arms to the seat, which were absent on the TD pit, and I've scratched out the intervalometer-a device used to for timing and filming for the reconnainsance equipment on board. It sat just to the left of the stick on the floor by the pilot's feet. I guess there's no good place to put it, and that made the most sense. It's basically two parts...a small square piece I sanded down to the appropriate size (comparing photographs) and a thin face to go on top. The thin plastic face was drilled with a pinvise to make the dial that's seen and glued on top with Tamiya ETC. That's all =] Then, some tinier bits of thin plastic rod and stretched sprue make up knobs and buttons that are seen. Albion tube makes up the receiver end for the cable you see...the cable is stretched sprue. Also, there's the fuselage fuel tank dial I scratched to place on the tank to the left. Warmed up a plastic rod and bent it into shape. Easy.
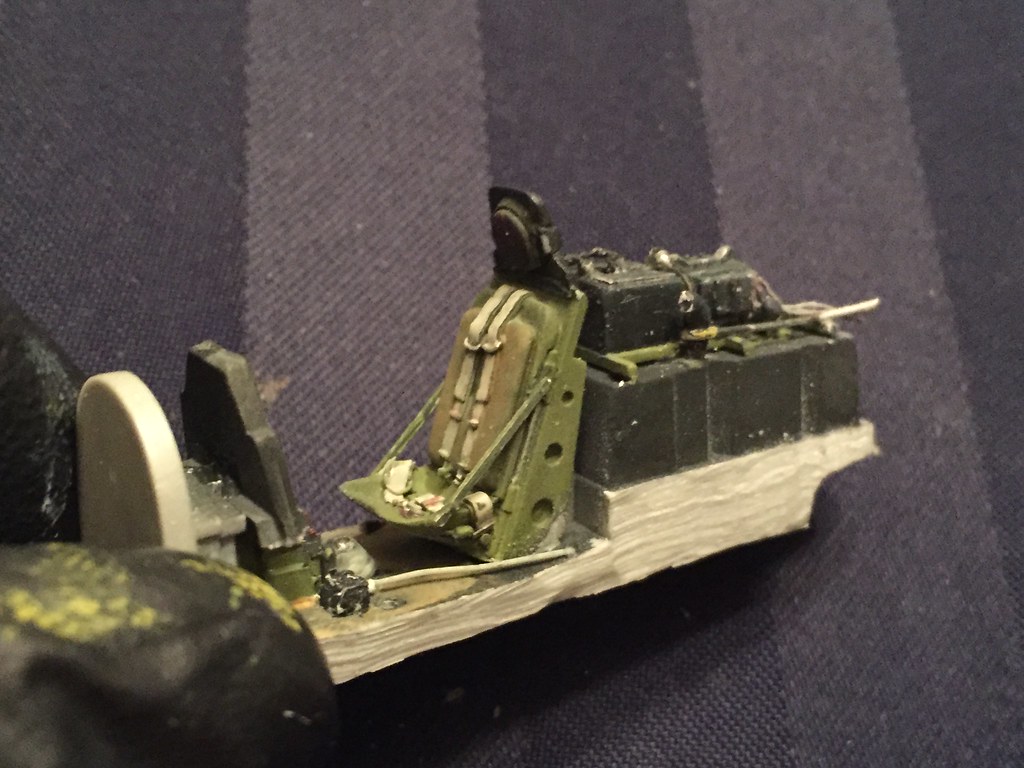 Untitled by Britt Vallot, on Flickr
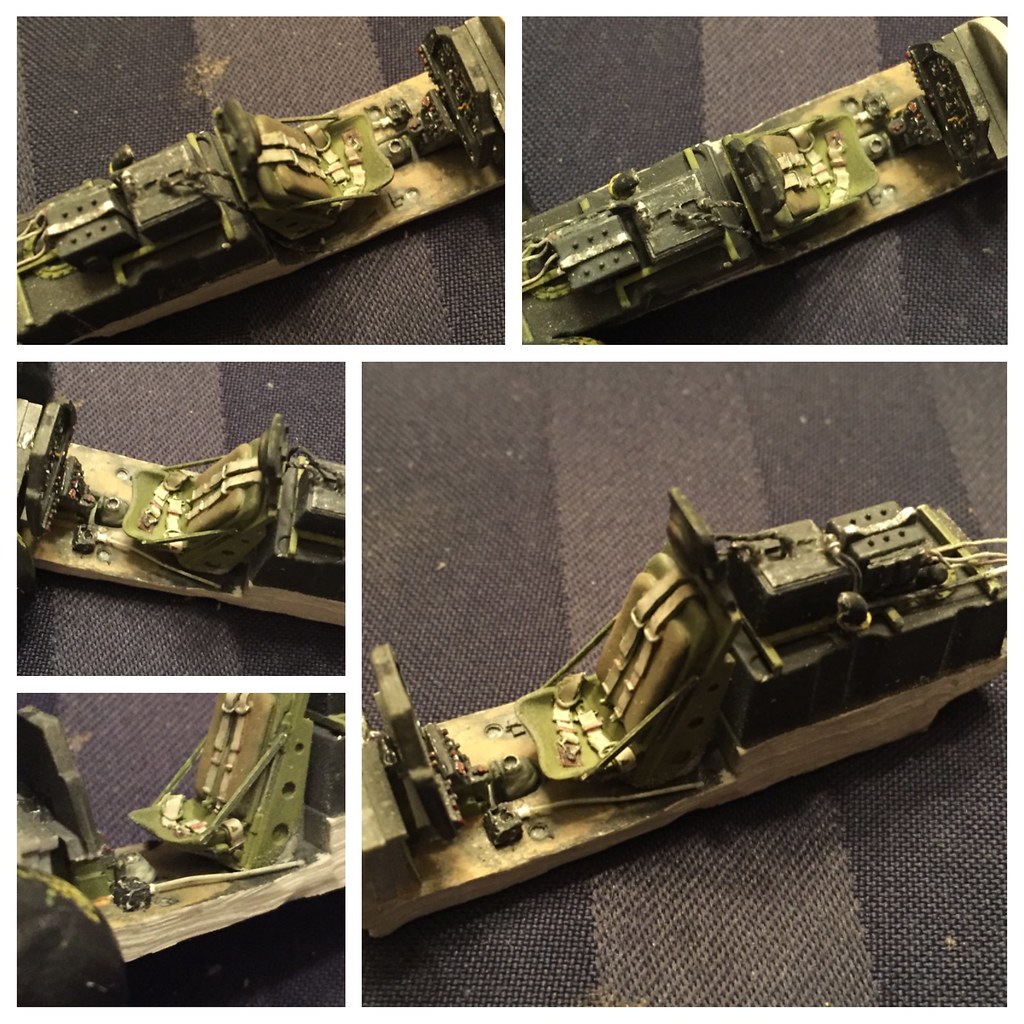 Untitled by Britt Vallot, on Flickr
Next, is the K-24 camera. Painted it up and dropped her into place.
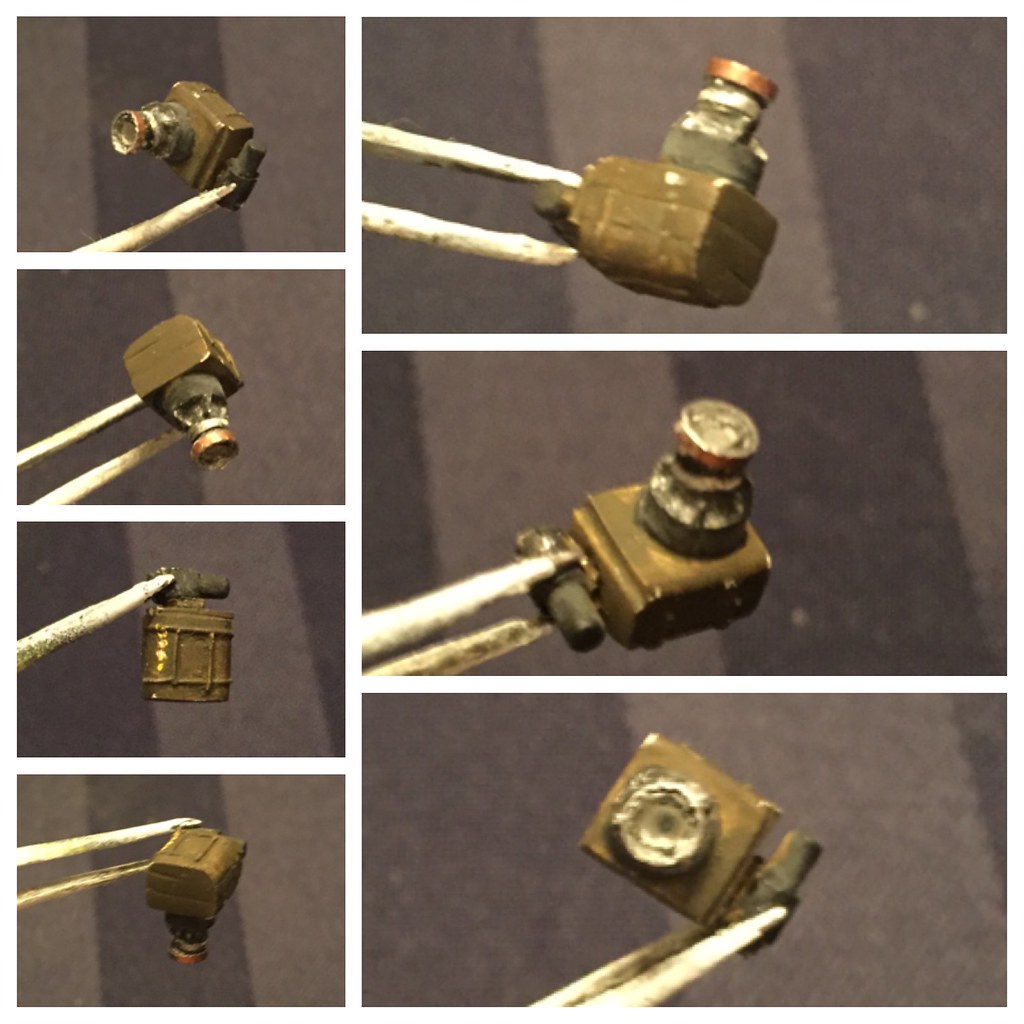 Untitled by Britt Vallot, on Flickr
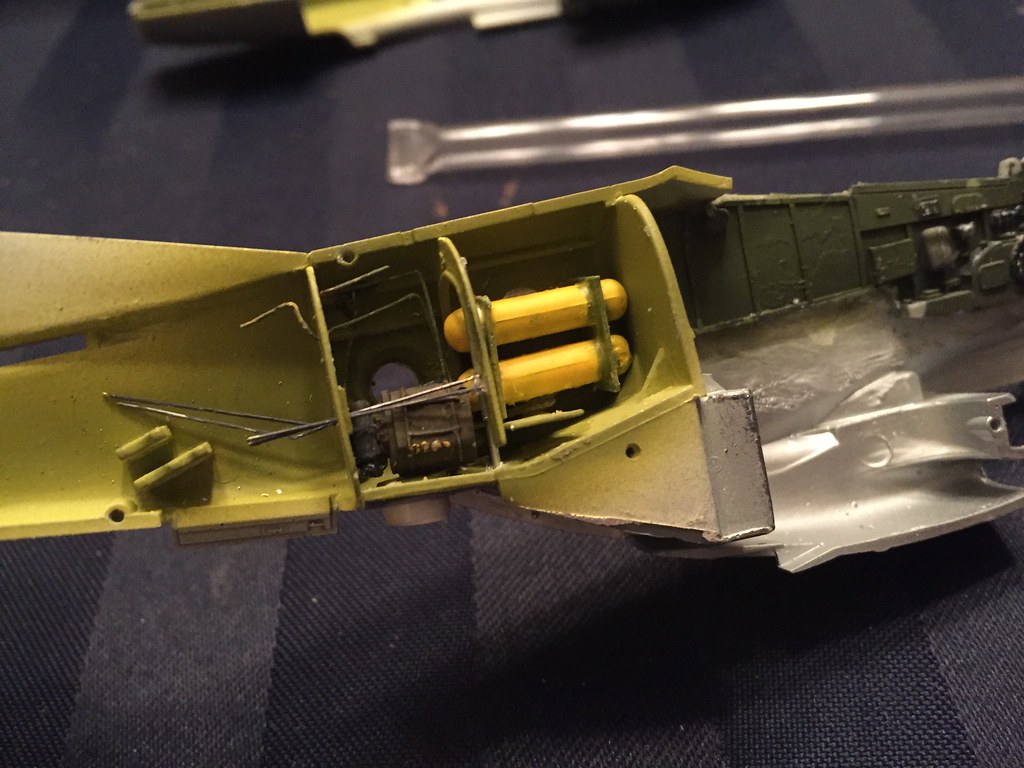 Untitled by Britt Vallot, on Flickr
And that's about where I am for now. I stopped to assess how I was coming with all the internal detail for the camera bay to see how visible any of it was...and naturally, I couldn't see Jack Sh!t. Virtually...it's not terribly impossible to see what's going on in there, but for the time and effort you always hope it comes out a little better. So, I'm going to hit the breaks on further detail. It gets hard to cram everything in there after awhile even when there's space to put it (eventually your tools are too big to put them in there). It's sufficiently busy in there and I can live with it I suppose. =]
The cockpit has been glued in place, camera set in place, and here's that:
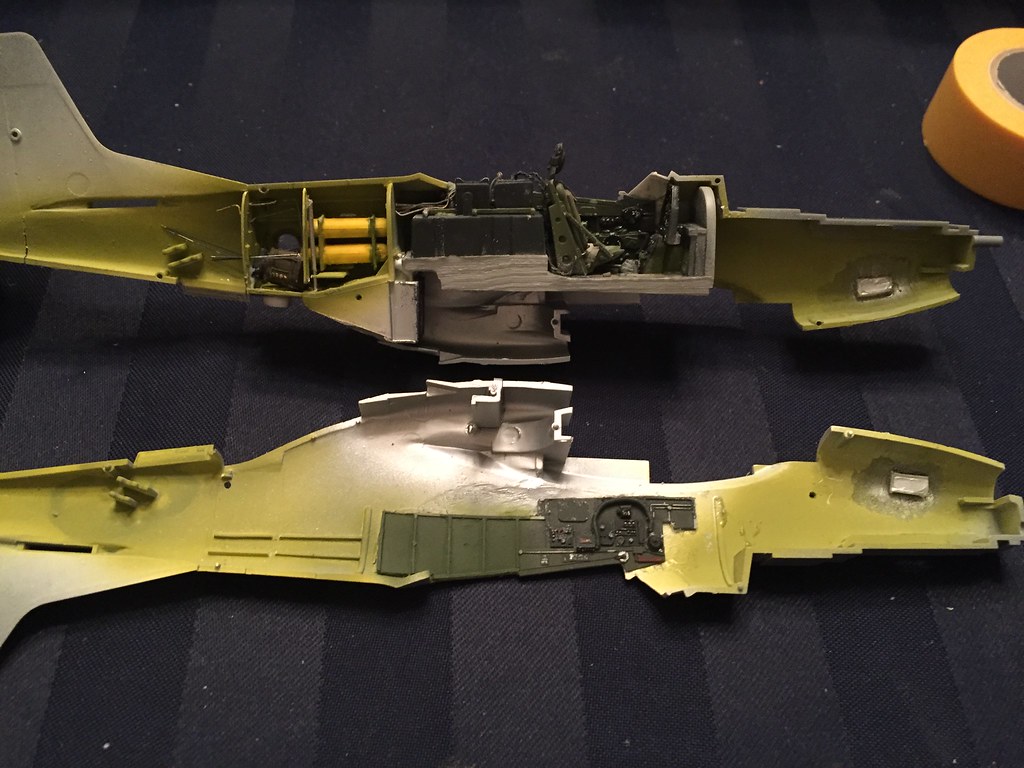 Untitled by Britt Vallot, on Flickr
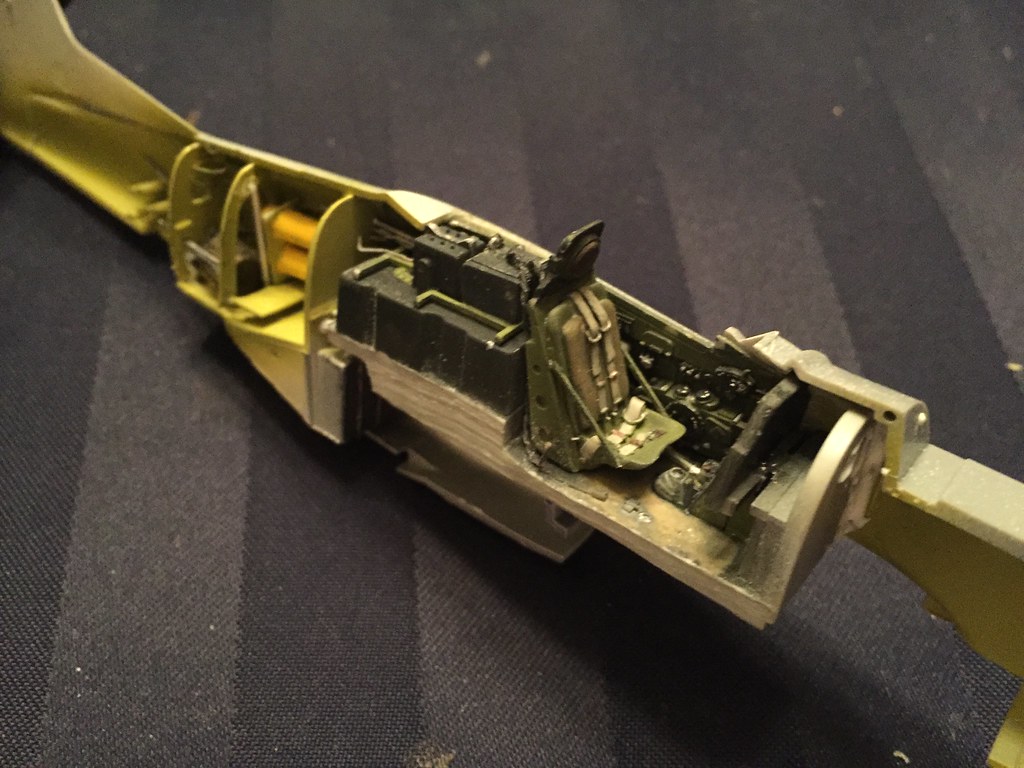 Untitled by Britt Vallot, on Flickr
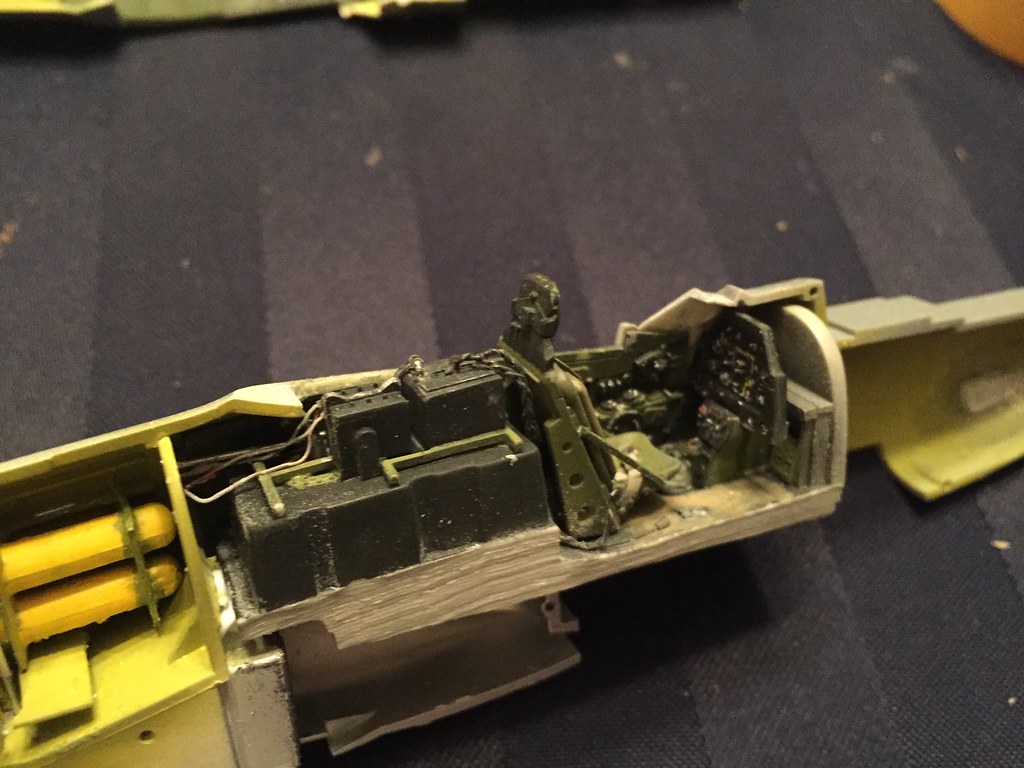 Untitled by Britt Vallot, on Flickr
Tonight I plan to close up these halves after the glue is set. =]