SEARCH FINESCALE.COM

Enter keywords or a search phrase below:

Battle of Britain 75th Anniversary GB

21706 views
279 replies
1 rating 2 rating 3 rating 4 rating 5 rating
  • Member since
    September 2014
Posted by rooster513 on Thursday, October 8, 2015 7:02 AM

Underside looks great Rob! Looks like those masks came in handy with all that glass! I know what you mean with supplies. I find myself using paint colors that aren't quite right b/c I have no where close to pick more up and I can be a little impatient when it comes to modelingWhistling Keep up the great work!

-Andy

  • Member since
    January 2014
  • From: Toronto
Posted by Rob S. on Thursday, October 8, 2015 6:39 AM

More progress...slow going...keep running out of supplies and having to wait until the next day of shopping to get back on track!! Anyway, she's all together, masked and the underside is pre/post shaded and colour modulated. 

______________________________________________________________________________


On the Bench: Nothing on the go ATM

  • Member since
    January 2014
  • From: Toronto
Posted by Rob S. on Monday, October 5, 2015 8:36 PM

rooster513

Coming along nicely Rob! Looks like the kit fits up pretty smoothly. Looking forward to seeing more!


Thanks rooster...yeah, these modern Airfix kits are great. Took a bunch of sanding and polishing to get the nose down, but, it worked out. I got a bunch more done tonite and will post tomorrow or so. 

______________________________________________________________________________


On the Bench: Nothing on the go ATM

  • Member since
    September 2014
Posted by rooster513 on Monday, October 5, 2015 3:32 PM

Coming along nicely Rob! Looks like the kit fits up pretty smoothly. Looking forward to seeing more!

-Andy

  • Member since
    January 2014
  • From: Toronto
Posted by Rob S. on Sunday, October 4, 2015 7:43 AM

Great looking colour Andy...I am trying to get outta this building funk I'm in, so, I forced myself to get to the bench and get some progress on the Defiant.

Now, just to get the masking down today!!


______________________________________________________________________________


On the Bench: Nothing on the go ATM

  • Member since
    September 2014
Posted by rooster513 on Friday, October 2, 2015 12:47 PM

Thanks for the comments guys! Finished decaling and got the legs on her! Decals settled down nicely. Next up will be another clear coat and some weathering...

 Thanks for looking!

-Andy

  • Member since
    September 2014
Posted by rooster513 on Monday, September 28, 2015 11:53 AM

Alright got the RAF Dark Green on and started decaling!

-Andy

  • Member since
    January 2014
  • From: Toronto
Posted by Rob S. on Wednesday, September 23, 2015 4:29 PM

Looks great Andy... I gotta get back to my British warbird too....thanks for the nudge!

______________________________________________________________________________


On the Bench: Nothing on the go ATM

  • Member since
    September 2014
Posted by rooster513 on Wednesday, September 23, 2015 7:55 AM

Quick update here. I've got the Tamiya Sky sprayed on the underside and Tamiya Flat Earth on the top. The earth came out a little darker than I wanted and have since lightened up some with a post shade. It's still darker than some of the pics I've seen but I don't want to mess with it too much:) Waiting for this to cure and then I'll mask for the Dark Green! Thanks for looking!


-Andy

  • Member since
    January 2015
Posted by BrandonD on Saturday, September 19, 2015 4:59 PM

Dan, those Spitfires look great!

Rob - I love seeing a Defiant, and yours is coming along very nicely.

-BD-

  • Member since
    June 2008
Posted by lewbud on Friday, September 18, 2015 7:15 PM

Andy, the Hurricane is looking great!

Dan, your new tool Spits are looking great!  Is the Lanc a new tool as well?

Rob, I like the Defiant.  The aluminum lacquered cockpit threw me for second.


Buddy- Those who say there are no stupid questions have never worked in customer service.

  • Member since
    January 2014
  • From: Toronto
Posted by Rob S. on Thursday, September 17, 2015 8:22 PM

______________________________________________________________________________


On the Bench: Nothing on the go ATM

  • Member since
    February 2006
  • From: Cincinnati Ohio
Posted by DantheMan85 on Sunday, September 13, 2015 5:11 PM


Excellent work everyone, been doing some work on the spitfires.  Have both fuselages glued together, now working on filling. Should be to long and they'll be ready for primer. I plan to start the Lancaster after both spitfires are completed.


On my Work Bench: Tamiya Ford GT 1/24

Up Coming: ?


  • Member since
    June 2008
Posted by lewbud on Saturday, September 12, 2015 8:57 PM

Ladies and gents, the front page has been updated!

Brandon, your Stuka looks great!

Rob S, welcome aboard.

Scott, hope the home repairs aren't too serious.

Modelcrazy, it will take you longer to mask that munchkin than it will to build it.

For those that I've missed, keep up the good work!

Buddy- Those who say there are no stupid questions have never worked in customer service.

  • Member since
    June 2008
Posted by lewbud on Saturday, September 12, 2015 9:39 AM

Rob,

The new Defiant is a gem of a kit, isn't it?  Of course it's welcome.  We look forward to your build.


Scott, 

Sorry to hear this.  You're welcome back at anytime.

Buddy- Those who say there are no stupid questions have never worked in customer service.

  • Member since
    December 2003
  • From: 37deg 40.13' N 95deg 29.10'W
Posted by scottrc on Saturday, September 12, 2015 8:22 AM

Looks like I may have to drop out of this GB.  My house needs attention that will take me away from build time.


Cheers and Tally Ho

Scott

  • Member since
    January 2014
  • From: Toronto
Posted by Rob S. on Saturday, September 12, 2015 6:40 AM

lewbud...I've got the snazzy new 1/72 Airfix Boulton Paul Defiant which needs a GB home and she'll fit in this one niceley. Can I come on board?

______________________________________________________________________________


On the Bench: Nothing on the go ATM

  • Member since
    January 2015
Posted by BrandonD on Sunday, September 6, 2015 11:56 PM

As for me, the Stuka is done. This kit fought me in a few places, and I didn't do myself any favors by breaking the tail wheel housing off and losing it forever. Fortunately I still had the wheel, and the housing is probably the easiest thing to scratchbuild, so I was able to fix it.

Anyway, here she is: a veteran Stuka of 3/StG2, based in France in August, 1940. A few things I would have liked to have done better, but she looks the part of a mean old bird.

All comments and critiques welcome, as always :)

Also, there isn't any white under the canopy. I think that's a weird lighting or photo editing quirk. It's black pastel chalk for exhaust streaks. I think I brought the highlights up too much. oops.

Lewbud - as for the gallery pic, let's go with pic no. 2 since it most closely resembles the actual colors (for some reason all my photos came out with a bad magenta tinge I couldn't quite edit out correctly).

This is my last entry to the build, but I will definitely be watching all these other great builds come along. Thanks for hosting and joining - it's been a fun one for me.

-BD-

  • Member since
    January 2015
Posted by BrandonD on Sunday, September 6, 2015 11:51 PM

Modelcrazy - great start on that Heinkel. I always loved the look of those. I fubarred the Monogram 1/48 kit as a kid, but I want to do one someday. I'm looking forward to seeing yours.

Rooster - Nice job so far on that Hurricane. Looks like you and I had to fill the same part, but you did it better by not having to also fill the rear portion. I can't wait to see it as you progress.

-BD-

  • Member since
    June 2008
Posted by lewbud on Sunday, September 6, 2015 5:59 PM

Lots of good work going on here ladies and gents!  I guess my Star Wars build has affected my judgement.  I'm officially throwing my hat into the ring with Airfix's new tool Me-110, in 1/72.  I have the canopy mask set already, but with that much glass, the PE set is needed as well.  Tally Ho!

Buddy- Those who say there are no stupid questions have never worked in customer service.

  • Member since
    September 2014
Posted by rooster513 on Friday, September 4, 2015 2:28 PM

Thanks Kim! The belts are actual printouts that I got from a gentlemen close to where I live. I may try PE belts sometime but for now I really like the way these look.

-Andy

  • Member since
    November 2007
  • From: Wisconsin Rapids, WI
Posted by moose421 on Wednesday, September 2, 2015 8:36 PM

Nice work Rooster.  Those belts look top notch.  Keep up the great work.


Brandon, Your Ju-87 looks awesome.  I love the filters using the salt.


Keep up the great work. 


I am getting close to starting my Bf-109E-4.  Just have to finish up a build for a friend.


Kim

  • Member since
    September 2014
Posted by rooster513 on Wednesday, September 2, 2015 1:44 PM

Great start MC! I have a small update here. Progress has been slow but it's still progressBig Smile

Glued the belts down so they look a little more naturalSmile

Then closed up the fuselage and attached the wing assembly. This thing really falls together nicely. I had one place where I needed to putty and sand but I'm sure that it was something I did, not the kit.

See a few more gaps I need to fill after reviewing the pictures.

Also forgot to take a pic of the IP before closer her up so here is the best I could do. Decal went down very nicely...

Next came the tail bits that will keep it flying straight...

Added the ailerons and that's where I left off. Next is prepping some of the small bits for painting. Thanks for looking!


-Andy

  • Member since
    July 2014
Posted by modelcrazy on Tuesday, September 1, 2015 11:19 PM
Tally Ho! Here’s my start with my wee little He 111. This should take longer to paint than to build.

Steve

Building a kit from your stash is like cutting a head off a Hydra, two more take it's place.


http://www.spamodeler.com/forum/

  • Member since
    July 2014
Posted by modelcrazy on Tuesday, September 1, 2015 9:13 AM
Brandon, Your builds are always impressive, fantastic weathering and attention to detail. Just great!!!

Steve

Building a kit from your stash is like cutting a head off a Hydra, two more take it's place.


http://www.spamodeler.com/forum/

  • Member since
    January 2015
Posted by BrandonD on Monday, August 31, 2015 10:56 PM

Thanks, lewbud. I've never been the first one done before.

Speaking of the next one done, for me it's going to be my Stuka. I got some time with it this weekend and put down the last gloss coat, then a panel line wash.
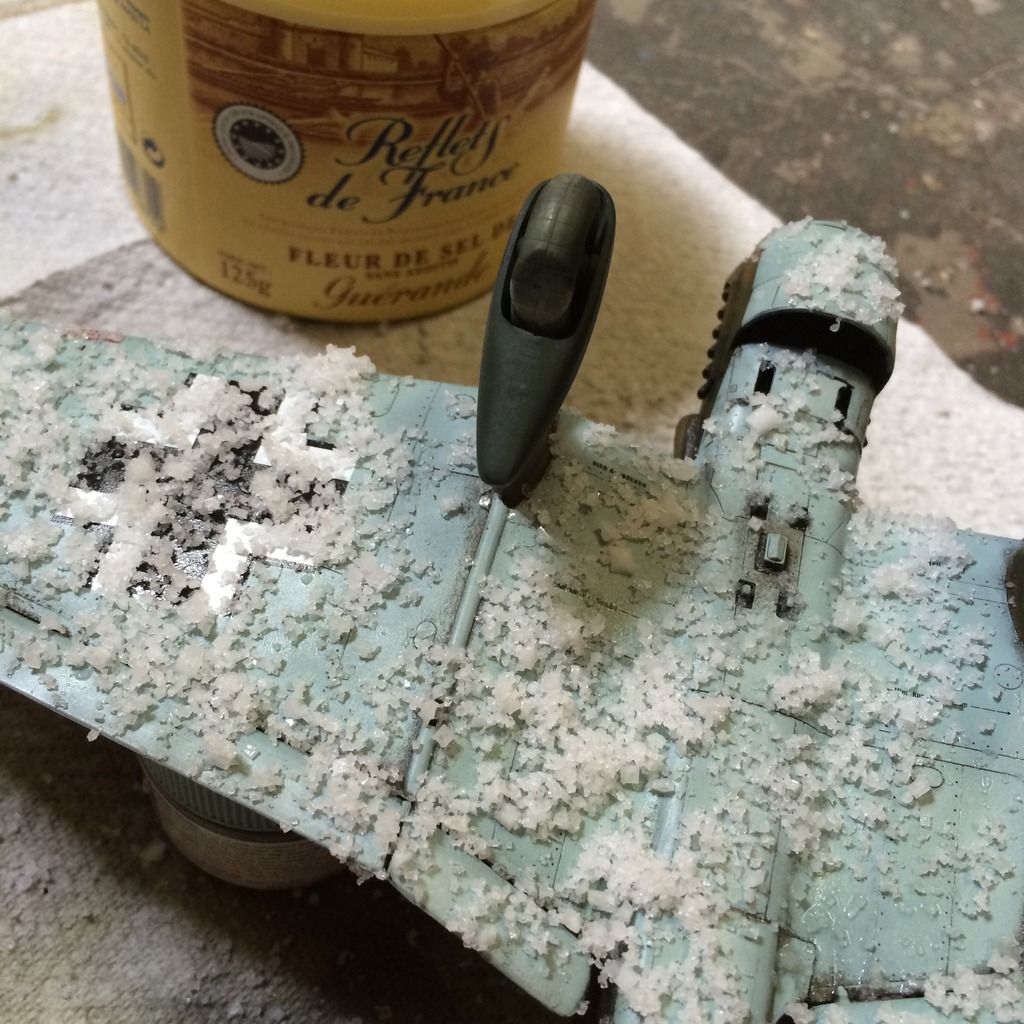
I wanted to dirty this one up a bit because I feel like most of my builds have been pretty clean, and I liked the dirt on my Hurricane, so why not try something new? I decided to do salt weathering. I practiced on the underside, using a mixture of water and dish soap brushed onto the plane to hold the salt in place (the dish soap is just to break the surface tension of the water and keep it from beading up on the gloss coat.

Then I dumped salt all over it. I didn't have cheap sea salt, so I ended up using some of the fancier stuff Whistling.

I let it dry (mostly) before laying down a highly thinned coat of Tamiya smoke, which was probably too thin, as it seems to have had very little effect, if any. I then hinned some flat earth and shot it over the salt. Once that had dried, I blew off the salt with the airbrush (no paint) and then, for the parts that were stuck on, I wiped in the direction of airflow with a paper towel.

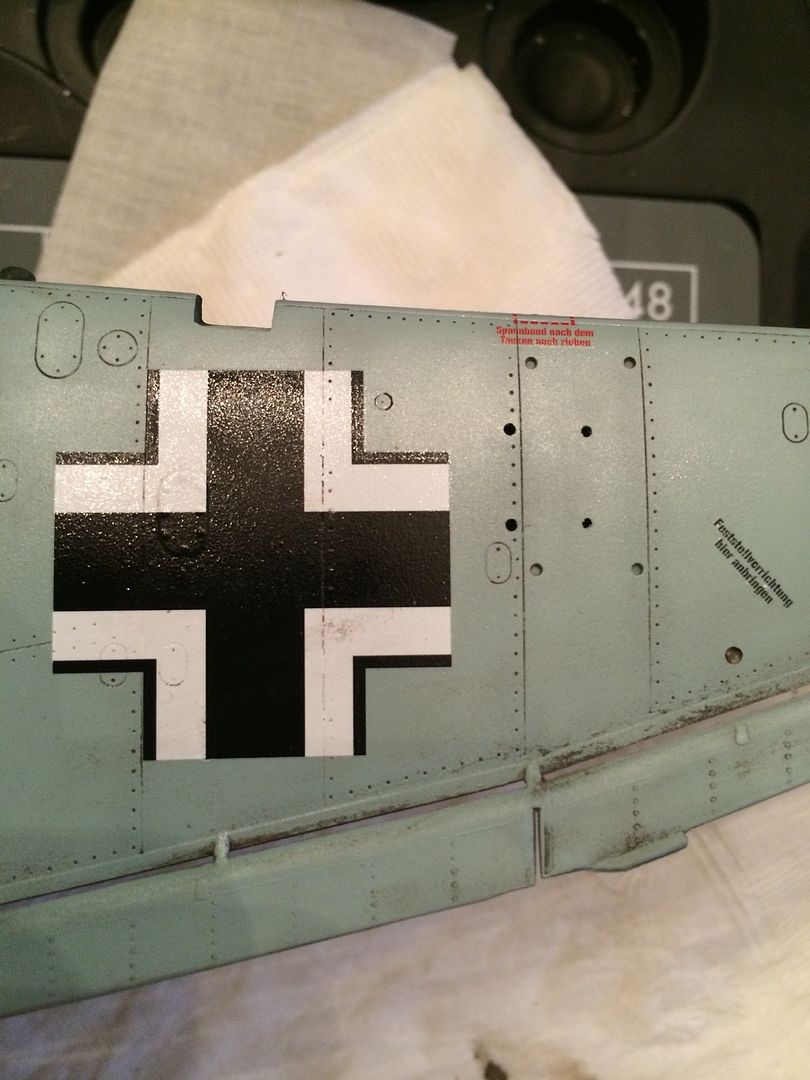
Here is the result:
I decided that while I went a little heavy in a few places, I really liked the random weathering and dirtiness, especially for a dive bomber working at low altitudes and flying through a bunch of debris, smoke and dust from planes in front of it.

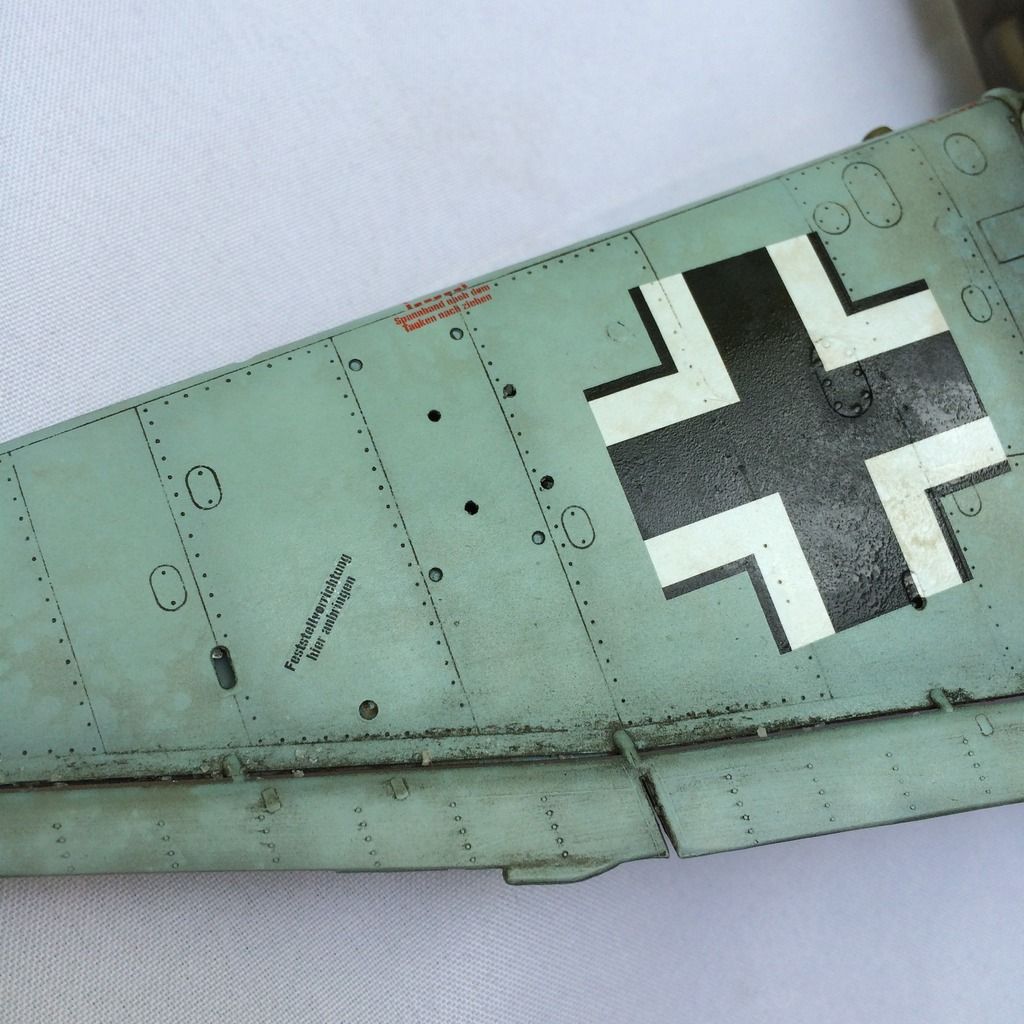
Up top, I didn't like how stark the contrast was in the splinter camo, and how bright white the sweet Cartograf decals were, so I sprayed a REALLY thin mist coat of RLM 02 over the whole topside. Then I revisited the salt technique and used the black green color, hoping it would further tone down the contrast between the two as well as darken bits of the darker patches now that they'd been somewhat lightened with RLM 02. I thought the look was too subtle, so I salted it again and then hit it with a thinned coat of NATO black, sinc eit has a greenish tint to it.

Here is the result (kind of hard to see in the lighting, and it's a lot more cleaned up around crew walkway and wing root now):
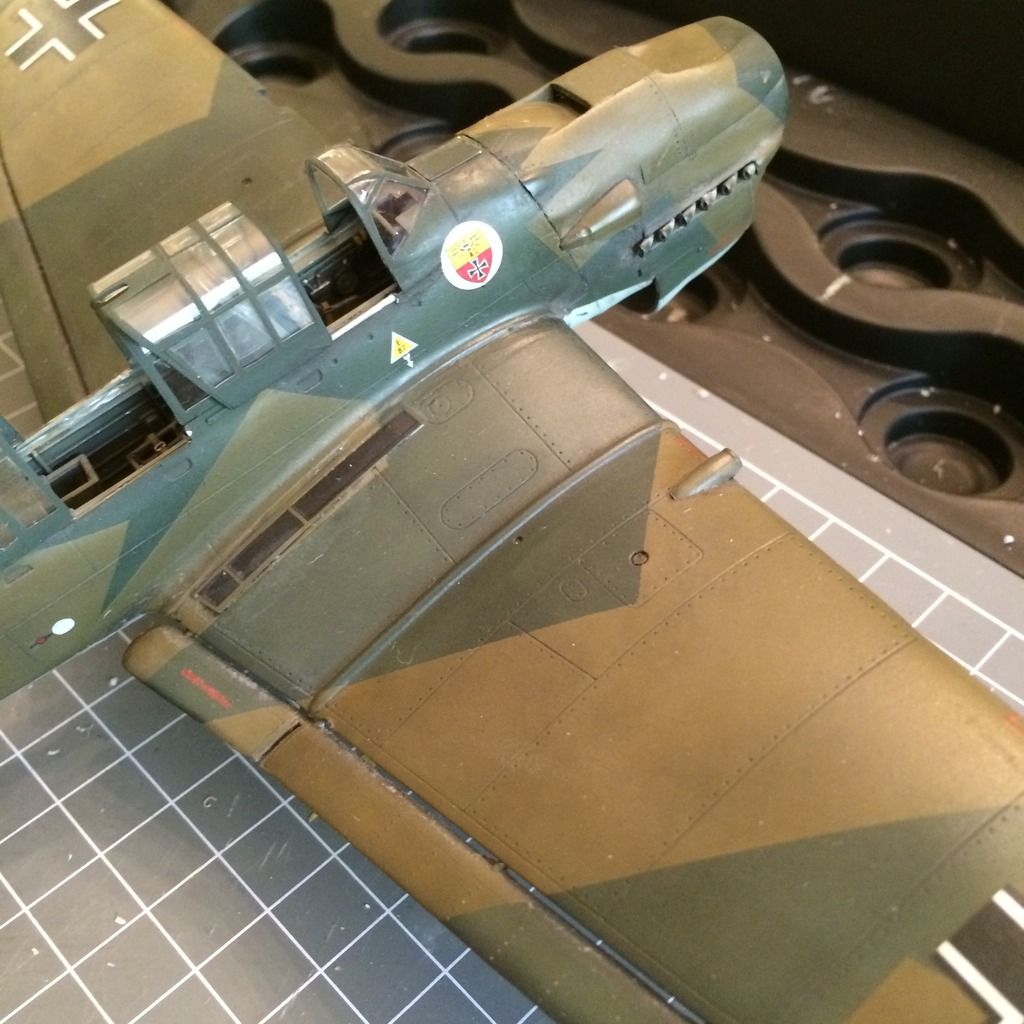
Once that was all done, I wiped the plane with a damp paper towel to remove salt residue and clear coated it with Tamiya flat clear. I missed a few spots with the salt, but I used a Q-tip with Tamiya acrylic thinner to remove the staining (it didn't eat through the Alclad lacquer gloss coat into the colors below, so all is well).

I've now added a bunch of the little bits like dive flaps (which I'm glad I cut off and left till the end), control surface linkage, counterweights and those sorts of things.

I also used a short-bristled brush to smash some silver on the leading edge of the wings and the nose cone to simulate paint shipping there.

Now all that's left is some exhaust streaking, chipping around the wing root and final touch up around the canopy. Oh, and the ordnance.

-BD-

  • Member since
    June 2008
Posted by lewbud on Friday, August 28, 2015 2:49 PM

Ladies and gentlemen,

The front page has officially been updated with a pic of our first completion.  Who and what will be next? Only the Shadow knows!  Seriously, lots of fine work going on here. I look forward to what's next.

Buddy- Those who say there are no stupid questions have never worked in customer service.

  • Member since
    September 2014
Posted by rooster513 on Thursday, August 27, 2015 7:32 AM

REALLY liking the way this one is turning out Brandon! Keep up the great work!

-Andy

  • Member since
    January 2015
Posted by BrandonD on Thursday, August 27, 2015 1:16 AM

Modelcrazy - I'm looking forward to seeing that one. Love the He-111s.

-BD-

  • Member since
    January 2015
Posted by BrandonD on Thursday, August 27, 2015 1:15 AM

Ok, after some research and info from other modelers, I decided that the colors are fine as they are.

So I got the decals on tonight, then I finished up with adding all the stencils except the ones on the aerial, since I haven't installed that yet.

It looks like it's nearing completion, but I have some work to do on the ordnance now, and there are still actually quite a few pieces to add to the plane.

-BD-

JOIN OUR COMMUNITY!

Our community is FREE to join. To participate you must either login or register for an account.

SEARCH FORUMS
FREE NEWSLETTER
By signing up you may also receive reader surveys and occasional special offers. We do not sell, rent or trade our email lists. View our Privacy Policy.