SEARCH FINESCALE.COM

Enter keywords or a search phrase below:

1946 What If GB

55535 views
1775 replies
1 rating 2 rating 3 rating 4 rating 5 rating
  • Member since
    April 2014
  • From: Australia
Posted by lostagain on Wednesday, March 23, 2016 6:01 PM
Yes, the canopy... There is one vac canopy, no spare, and it's the part of the build I am really not looking forward to. Never tried one before, got no practice pieces, what could possibly go wrong? I have got some AM for wheels exhaust and cockpit details, will need to scratch landing gear legs and cockpit bits. Fortunately, someone has documented this build on Brit modeller.com a few years back so I have a good guide.

  • Member since
    November 2009
  • From: SW Virginia
Posted by Gamera on Friday, March 25, 2016 7:53 AM

Ok, camo and decals are on. Sorry, wish the photos were a little better quality. I applied a gloss coat and then took the photos so everything is sorta shiney. I then tried some dot filtering and set her aside to dry.  Cross your fingers it turns out ok. 

"I dream in fire but work in clay." -Arthur Machen


  • Member since
    May 2013
  • From: From the Mit, but live in Mason, O high ho
Posted by hogfanfs on Friday, March 25, 2016 8:51 AM

It's worth saying again, Cliff, she looks fantastic! Looking forward to seeing it weathered. Are you going to beat her up, or tone it down a bit?

 Bruce


 On the bench:  1/48 Eduard MiG-21MF

                        1/35 Takom Merkava Mk.I


  • Member since
    August 2009
  • From: MOAB, UTAH
Posted by JOE RIX on Friday, March 25, 2016 8:54 AM

Whoa! That is excellent. What a cool looking camo scheme. And very nicely executed I might add.

"Not only do I not know what's going on, I wouldn't know what to do about it if I did". George Carlin

  • Member since
    November 2009
  • From: SW Virginia
Posted by Gamera on Friday, March 25, 2016 9:23 AM

Hey thanks Bruce and Joe! 

Bruce: Well I figure they probably wouldn't be in service very long- being thrown into combat and knocked out by superior Allied armour pretty quickly so I wasn't going for much damage or weathering. I'm hoping the dot filters tone down the brightness and contrast a little. Then I plan to add pin washes to bring out the detail. A little mud and dirt next. And finally a few light filters added to 'bring everything together'. Or so I plan, fingers crossed it all works out. 

"I dream in fire but work in clay." -Arthur Machen


  • Member since
    December 2002
  • From: Bury St Edmunds, Suffolk, England
Posted by Bish on Friday, March 25, 2016 9:26 AM

Gamera

Ok, camo and decals are on. Sorry, wish the photos were a little better quality. I applied a gloss coat and then took the photos so everything is sorta shiney. I then tried some dot filtering and set her aside to dry.  Cross your fingers it turns out ok. 


I like the look of that, really nice scheme.

I am a Norfolk man and i glory in being so


On the bench: Airfix 1/72nd Harrier GR.3/Fujimi 1/72nd Ju 87D-3

  • Member since
    November 2009
  • From: SW Virginia
Posted by Gamera on Friday, March 25, 2016 11:23 AM

Thanks Bish, one of the reason I like Japanese AFVs, the weird camo patterns. 

Good luck with your halftrack GB, I looked though my stash and am embaressed to say I don't have a single US halftrack. I may have a second entry to this GB though when I finish this tank. Haven't decided on which though:

The Centaro saw limited action during the last years of the war. 

Only two prototypes of this tank destroyer version of the ISU-152 were built. The two part ammo took forever and day to load and the 25foot/8metre gun barrel were seen as a mite impractical. 

"I dream in fire but work in clay." -Arthur Machen


  • Member since
    January 2015
Posted by BrandonD on Friday, March 25, 2016 5:54 PM

Lostagain - thanks for the kind words -- and WOW, I don't have the courage to take on a vac kit. I can't wait to see you bring it together, though.

-BD-

  • Member since
    January 2015
Posted by BrandonD on Friday, March 25, 2016 5:54 PM

Well I have been doing a lot of fitting, sanding, building, etc., and all are now in various stages of paint.

The Special Hobby Seafire took the most work with the wing-to-fuselage seam, as it didn't close up properly, and there was a prominent step at the join. I shaved it somewhat, and then used Tamiya putty to smooth it out.
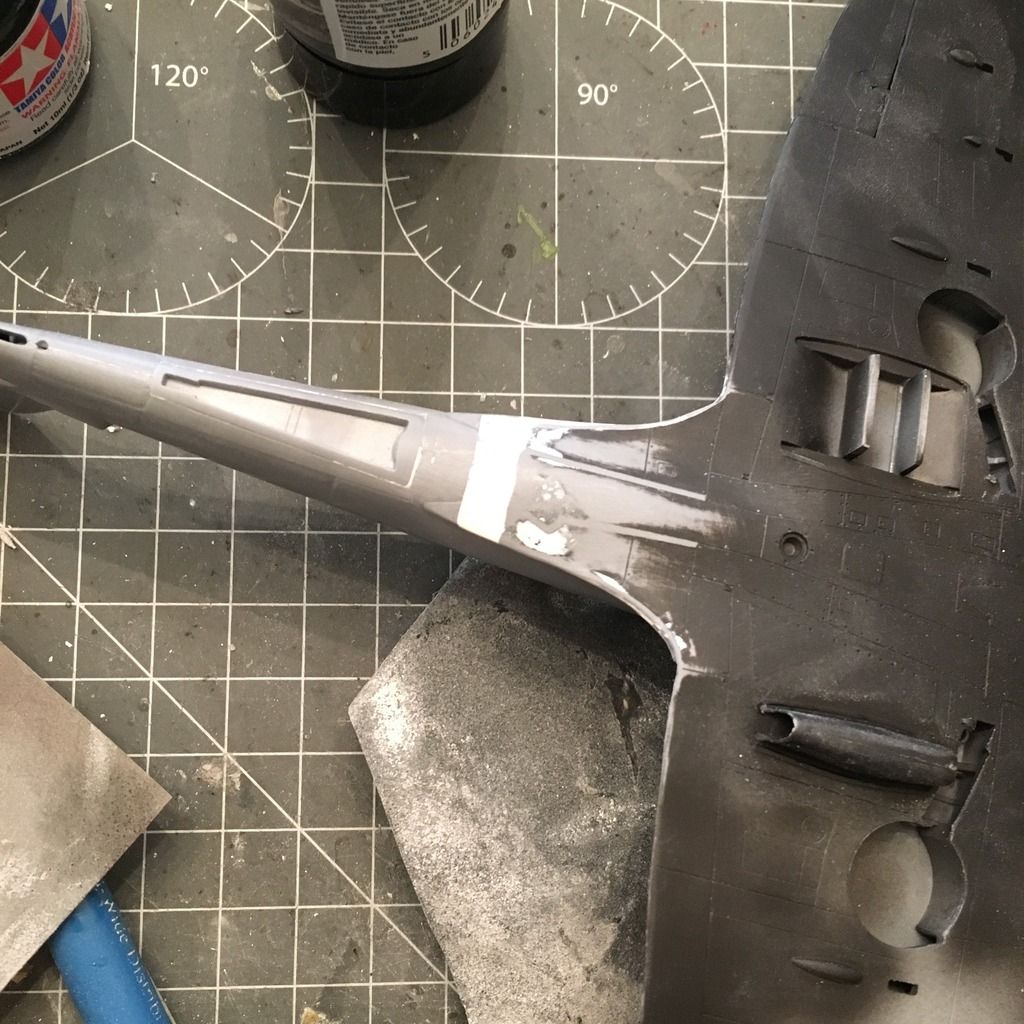
In the end, it doesn't look like I changed the profile much, if at all, and while it was a lot of work, I am pretty happy with the result.

I then got all three constructed and primed with Mr. Surfacer 1500 black.
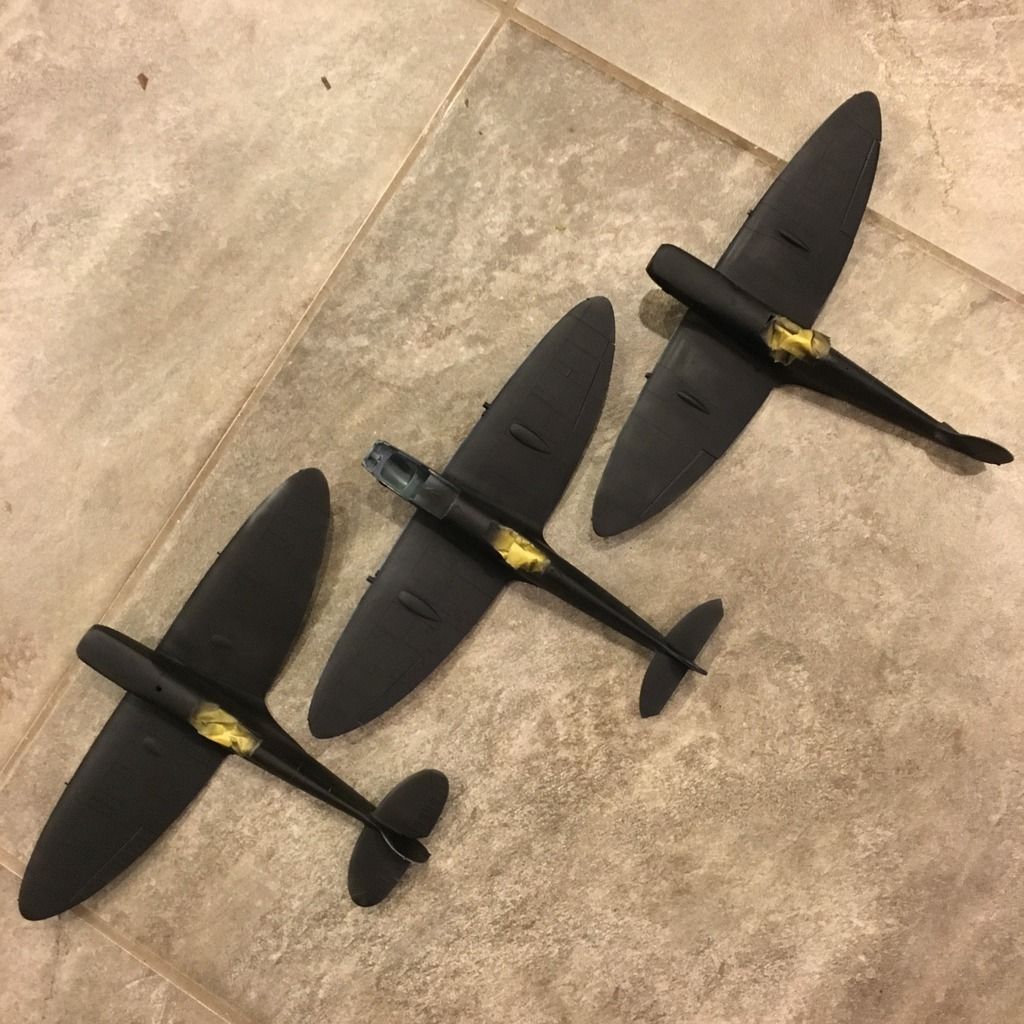
The Tamiya kit went together the easiest, and the Eduard was next. The only knock against Eduard I have is the two-piece cowling, which is a victim of its own success in a way. The other two kits have the same cowling seam, but they don't have the rivet detail present on the Eduard, so even though they still need sanding and filling, it somehow feels like less of a problem. With Eduard already using slide molding on the kit, I wish they had just done more of that and made the cowl one piece. Oh well, the Ultracast resin one is on the way (the part is NOT unbuildable - I'm just lazy).

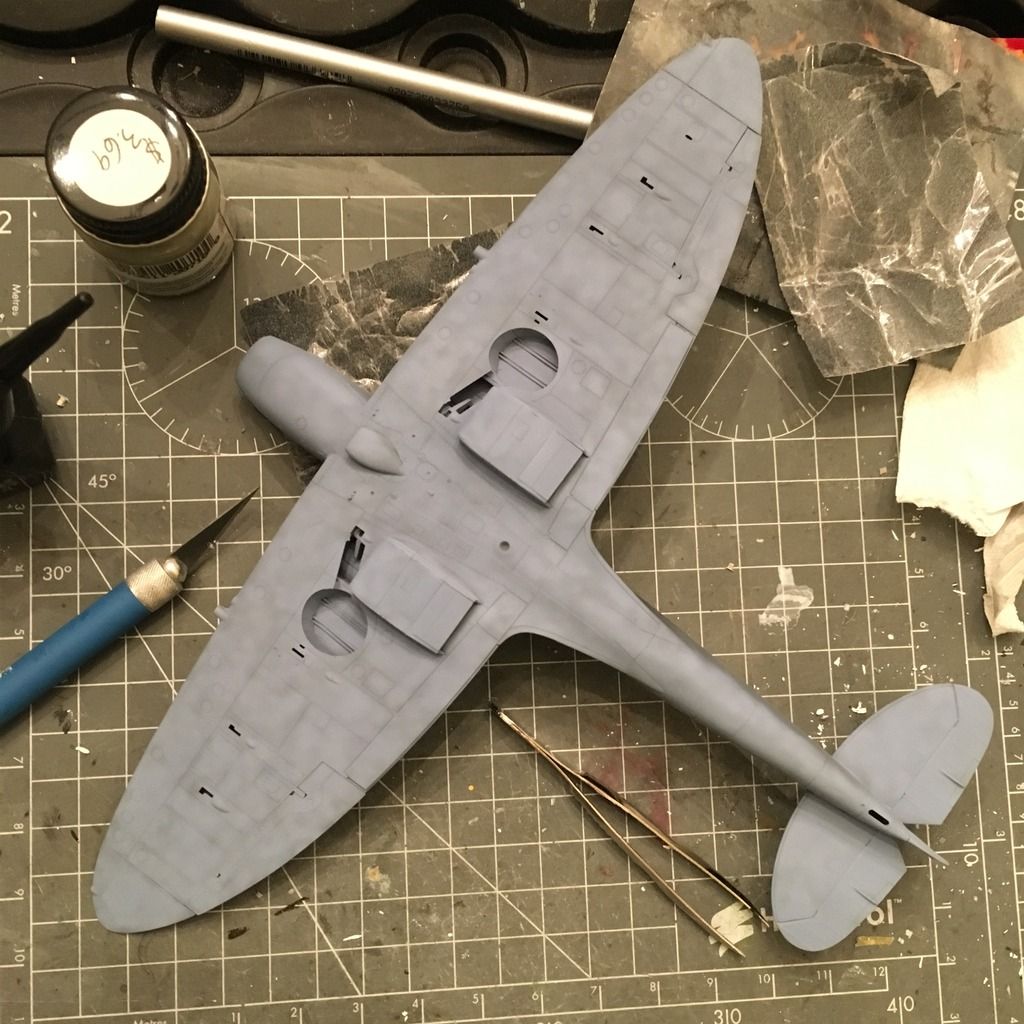
The next thing I did was paint the Model Master Azure Blue on the underside of the Eduard Mk.IX.
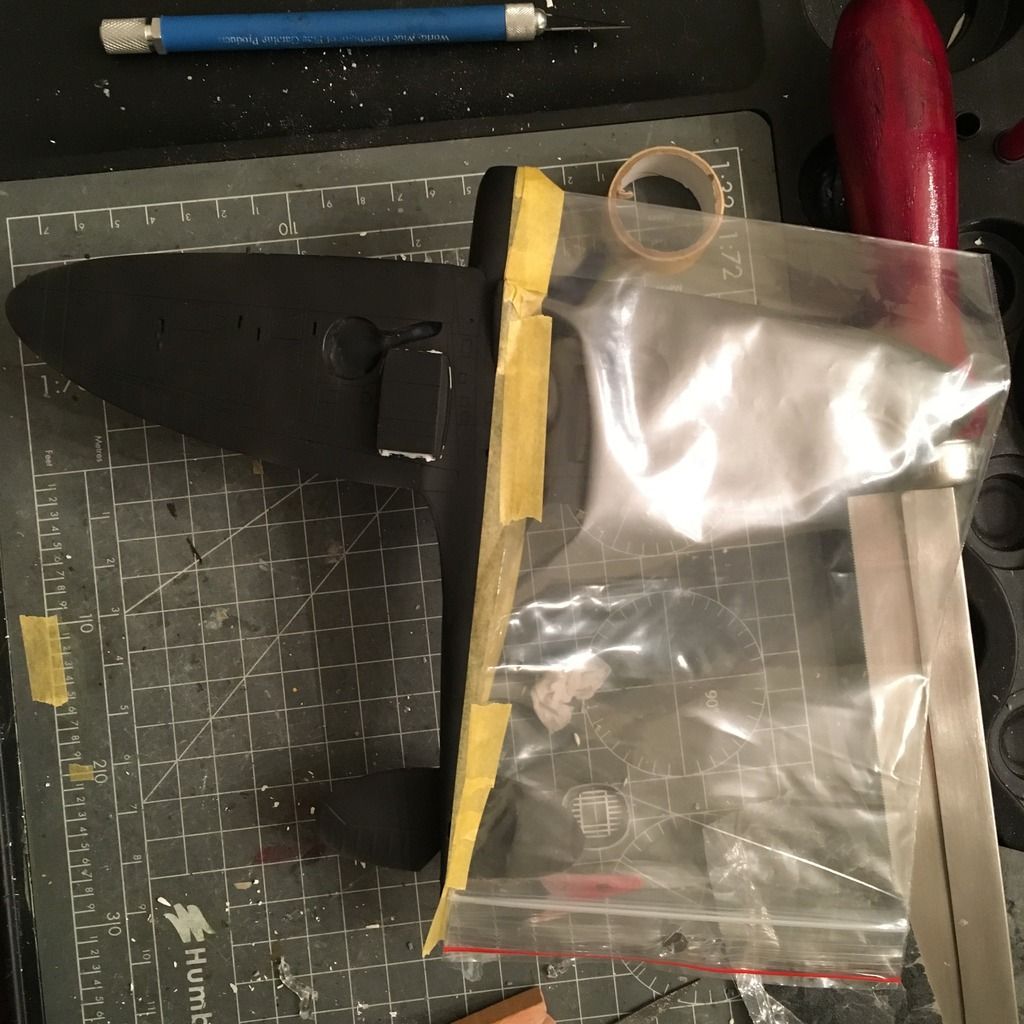
When it came time to paint the Tamiya one, I went with a black/white underside to go with some Montex markings I have. I used Tamiya Medium Blue to mottle the black-primered surface, and then I came back with a blend coat of Tamiya Rubber Black to even it out, give some depth and not appear so starkly black. You'll get a pic of it once I finish the white, which the photo below shows the masking for. Yes, as I was masking, I kind of wished I hadn't filled the fuselage seam...
On the Seafire, I painted the underside Tamiya Sky. It took the most work to get to the paint stage, but I guess I got on a roll with it, and I masked the underside and shot the top colors last night.

Though it's in French Aeronavale markings, it wears its Fleet Air Arm scheme, and after spraying the rudder Alclad Duraluminum (it was replaced on this particular plane and left in doped silver), I shot Model Master Dark Slate Gray for the upper surface camouflage. In the past, I've always waited for one color to dry before masking and shooting the next, but I decided to see if I could freehand the pattern, and I mixed Tamiya Dark Sea Gray 3:1 with Tamiya NATO Black to get an approximation of Extra Dark Sea Gray, and I sprayed that on freehand.
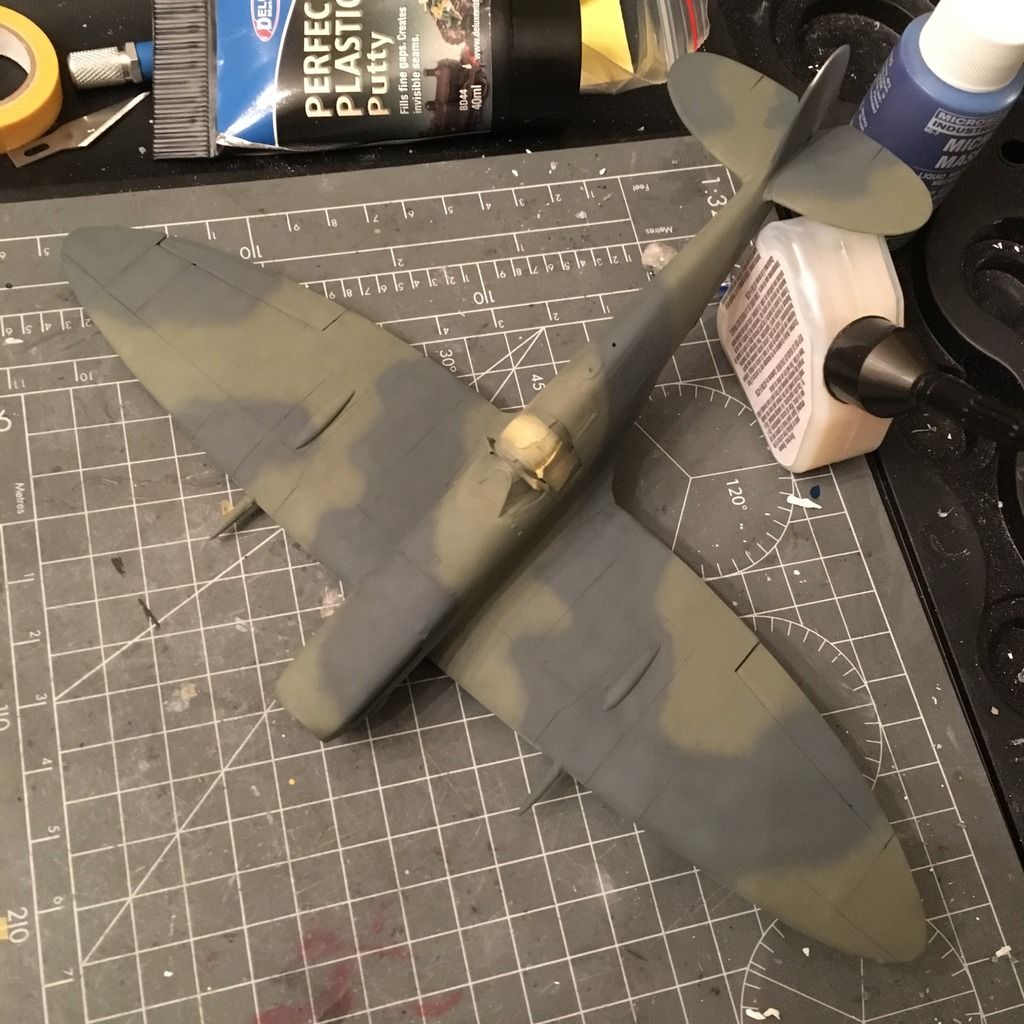
With that done, I masked the wing walk lines and the black strips at the wing roots, then shot them at lunch today (and fixed a little bit of the camouflage on the cowling and starboard horizontal stabilizer.
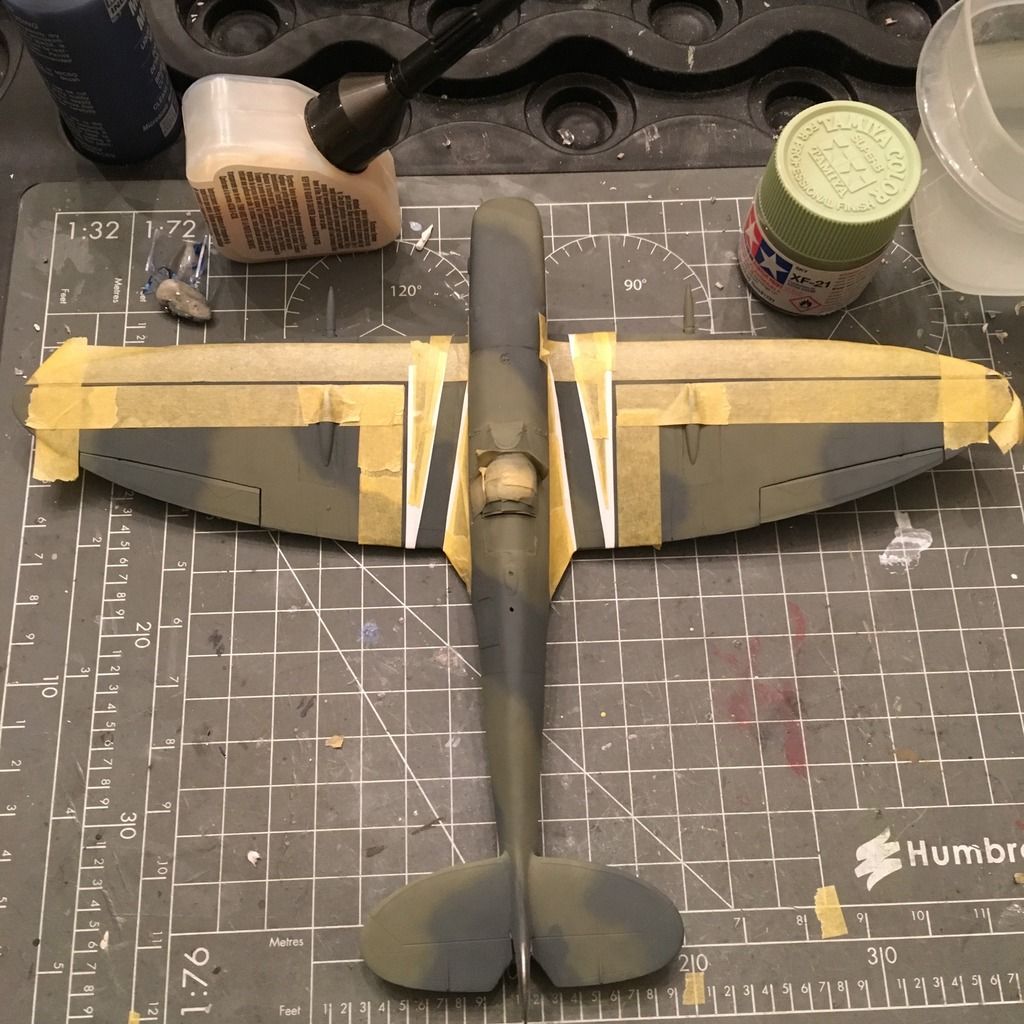
After painting it, I pulled off the masks. I think the wing walk lines are a little thick but not enough for me to worry about redoing them, and I will shoot a gloss clear on it hopefully tonight.
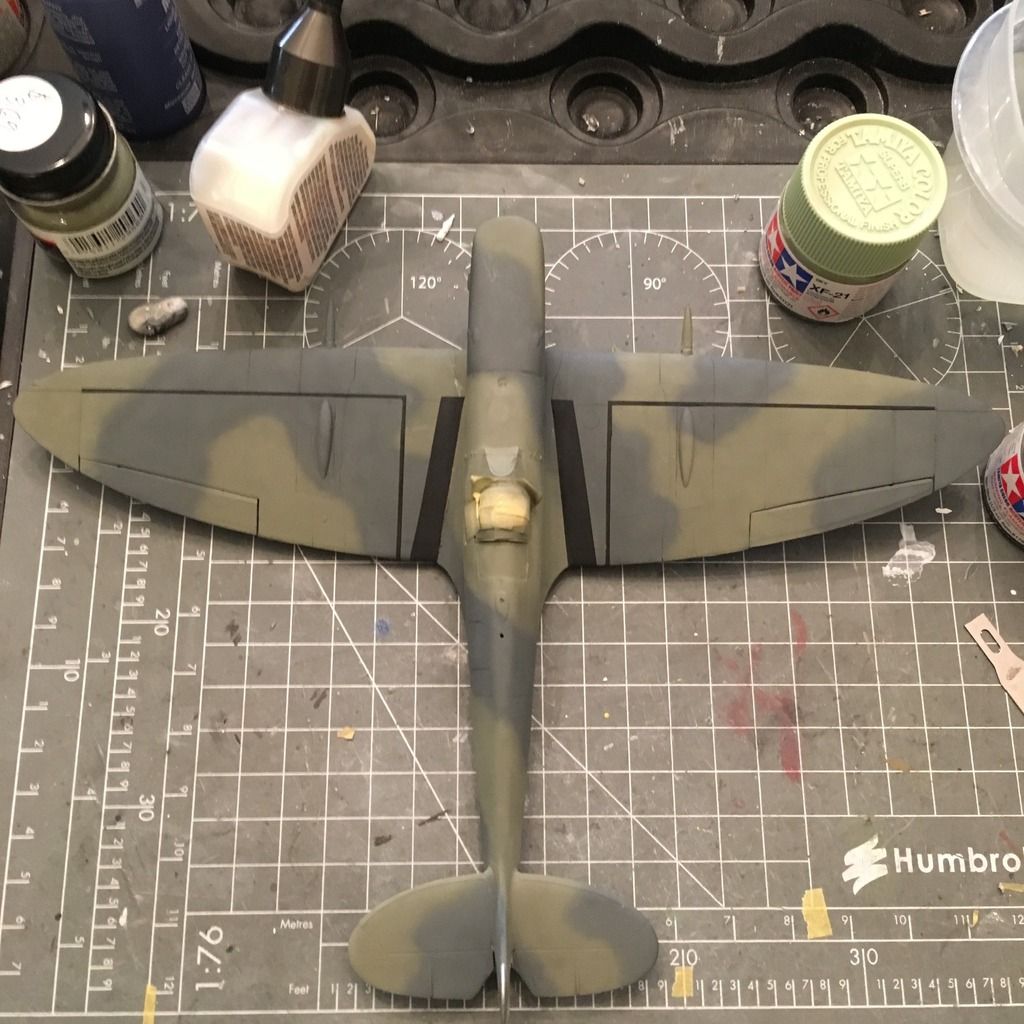
One thing to note about the Special Hobby Seafire that I really like: The strakes along the fuselage and the strenghtening piece around the panel behind the cockpit are provided as vinyl self-adhesive parts, and they work great (you get a spare of each piece, too). As I understand it, these were to strengthen then airframe for catapult launches. They're a nice touch and complement the PE parts well.

-BD-

  • Member since
    December 2002
  • From: Bury St Edmunds, Suffolk, England
Posted by Bish on Saturday, March 26, 2016 3:43 AM

Gamera

Thanks Bish, one of the reason I like Japanese AFVs, the weird camo patterns. 

Good luck with your halftrack GB, I looked though my stash and am embaressed to say I don't have a single US halftrack. I may have a second entry to this GB though when I finish this tank. Haven't decided on which though:

The Centaro saw limited action during the last years of the war. 

Only two prototypes of this tank destroyer version of the ISU-152 were built. The two part ammo took forever and day to load and the 25foot/8metre gun barrel were seen as a mite impractical. 


Hay, don't be embarressed. Those 2 lok really interesting kits, that 152 is a real monster. Will be a pleasure to have either of those.

I am a Norfolk man and i glory in being so


On the bench: Airfix 1/72nd Harrier GR.3/Fujimi 1/72nd Ju 87D-3

  • Member since
    December 2002
  • From: Bury St Edmunds, Suffolk, England
Posted by Bish on Saturday, March 26, 2016 3:47 AM

BrandonD

Well I have been doing a lot of fitting, sanding, building, etc., and all are now in various stages of paint.

The Special Hobby Seafire took the most work with the wing-to-fuselage seam, as it didn't close up properly, and there was a prominent step at the join. I shaved it somewhat, and then used Tamiya putty to smooth it out.

In the end, it doesn't look like I changed the profile much, if at all, and while it was a lot of work, I am pretty happy with the result.

I then got all three constructed and primed with Mr. Surfacer 1500 black.

The Tamiya kit went together the easiest, and the Eduard was next. The only knock against Eduard I have is the two-piece cowling, which is a victim of its own success in a way. The other two kits have the same cowling seam, but they don't have the rivet detail present on the Eduard, so even though they still need sanding and filling, it somehow feels like less of a problem. With Eduard already using slide molding on the kit, I wish they had just done more of that and made the cowl one piece. Oh well, the Ultracast resin one is on the way (the part is NOT unbuildable - I'm just lazy).

The next thing I did was paint the Model Master Azure Blue on the underside of the Eduard Mk.IX.

When it came time to paint the Tamiya one, I went with a black/white underside to go with some Montex markings I have. I used Tamiya Medium Blue to mottle the black-primered surface, and then I came back with a blend coat of Tamiya Rubber Black to even it out, give some depth and not appear so starkly black. You'll get a pic of it once I finish the white, which the photo below shows the masking for. Yes, as I was masking, I kind of wished I hadn't filled the fuselage seam...

On the Seafire, I painted the underside Tamiya Sky. It took the most work to get to the paint stage, but I guess I got on a roll with it, and I masked the underside and shot the top colors last night.

Though it's in French Aeronavale markings, it wears its Fleet Air Arm scheme, and after spraying the rudder Alclad Duraluminum (it was replaced on this particular plane and left in doped silver), I shot Model Master Dark Slate Gray for the upper surface camouflage. In the past, I've always waited for one color to dry before masking and shooting the next, but I decided to see if I could freehand the pattern, and I mixed Tamiya Dark Sea Gray 3:1 with Tamiya NATO Black to get an approximation of Extra Dark Sea Gray, and I sprayed that on freehand.

With that done, I masked the wing walk lines and the black strips at the wing roots, then shot them at lunch today (and fixed a little bit of the camouflage on the cowling and starboard horizontal stabilizer.

After painting it, I pulled off the masks. I think the wing walk lines are a little thick but not enough for me to worry about redoing them, and I will shoot a gloss clear on it hopefully tonight.

One thing to note about the Special Hobby Seafire that I really like: The strakes along the fuselage and the strenghtening piece around the panel behind the cockpit are provided as vinyl self-adhesive parts, and they work great (you get a spare of each piece, too). As I understand it, these were to strengthen then airframe for catapult launches. They're a nice touch and complement the PE parts well.

-BD-


Some really nice work there BD, really nice job on the painting, love the look of the Seafire.

I am a Norfolk man and i glory in being so


On the bench: Airfix 1/72nd Harrier GR.3/Fujimi 1/72nd Ju 87D-3

  • Member since
    August 2009
  • From: MOAB, UTAH
Posted by JOE RIX on Saturday, March 26, 2016 8:08 AM

That is sweet! You did an outstanding job of free handing the camo and masking the walk lines. Really exceptional work my friend.

"Not only do I not know what's going on, I wouldn't know what to do about it if I did". George Carlin

  • Member since
    July 2014
Posted by modelcrazy on Saturday, March 26, 2016 1:44 PM
Gam,


Go with the Centaro. Those Italian fighters are so cool.

Steve

Building a kit from your stash is like cutting a head off a Hydra, two more take it's place.


http://www.spamodeler.com/forum/

  • Member since
    November 2009
  • From: SW Virginia
Posted by Gamera on Monday, March 28, 2016 7:57 AM

BD: Fantastic work there! The camo looks great and I love those wing-walks. I should try that myself but I hate masking- even if it looks much better than decals. 

And thanks Bish and Steve, I'll try to make up my mind by the time I finish this project. The 152 is one colour. I'll have to weather it but no masking. The Centaro has a three colour scheme I want to do, mucho masking but it looks awesome. 

"I dream in fire but work in clay." -Arthur Machen


  • Member since
    May 2013
  • From: From the Mit, but live in Mason, O high ho
Posted by hogfanfs on Monday, March 28, 2016 10:22 AM

@Brandon,

The Spits look great! I really like the camo pattern on the seafire. And  great touch by painting the walk lines. I really like it.


@Cliff,

Put my vote in for the 152! I'll be impressed by either of these builds. But, someone had to give a little love for the big beast! lol

 Bruce


 On the bench:  1/48 Eduard MiG-21MF

                        1/35 Takom Merkava Mk.I


  • Member since
    January 2015
Posted by BrandonD on Monday, March 28, 2016 4:52 PM

Bish, Joe, Gamera and Hogfanfs - thank you! With some of the frustrations I had initially with this build, I was half expecting it to be a write-off, but I'm actually liking it a lot now, and it's been an enjoyable build. I wouldn't recommend it to a novice, but to someone with several builds under their belt, it's definitely a kit with a lot of detail, and a great subject.

-BD-

  • Member since
    January 2015
Posted by BrandonD on Monday, March 28, 2016 4:52 PM

Ok, I got the clear on the Seafire and then went about decaling this weekend. The decals were, for the most part, very nice. They laid down smoothly and really sank into the recessed detail. However, even with Micro Set beneath them, there wasn't much room to maneuver them, and I was glad Special Hobby supplied another aeronavale plane's markings, as the one I intended to do folded on itself and became a mess.

I have since added a panel line wash and flat coat, and I painted the prop spinner today. I used a mix of Tamiya tape, Montex vinyl msk and liquid mask for the canopy, and I have to say my favorite is the Montex mask, with the Tamiya tape being a close second. I felt the liquid mask didn't give as sharp of a line as I'd like, and was kind of a pain to get on the piece.

For the Tamiya Mk.I, I painted the underside colors of split black and white. I cut the white a little with neutral gray (5:1 white:gray), and it might look a little too gray now. I may go back and mask it off again and spray a super thin coat of white to lighten it. Not sure if I have the patience for that, though...

With theunderside masked, I shot the Gunze Dark Earth on the upper surfaces this morning (yay for a day off of work!)

It's been drying for several hours now, and I should be able to mask it and get the dark green on this evening.

The Eduard kit needed some final filling and sanding on one part, and I primed it, hopefully for the final time, this morning. I should get color on it tomorrow evening.

-BD-

  • Member since
    August 2009
  • From: MOAB, UTAH
Posted by JOE RIX on Monday, March 28, 2016 11:07 PM

What a tremendous effort Brandon. I really like the Aeronavale scheme. Very impressive.


"Not only do I not know what's going on, I wouldn't know what to do about it if I did". George Carlin

  • Member since
    December 2002
  • From: Bury St Edmunds, Suffolk, England
Posted by Bish on Tuesday, March 29, 2016 12:46 AM

I do like that BD. I don't think i have seen a Apit in those markings before, really nice.

I am a Norfolk man and i glory in being so


On the bench: Airfix 1/72nd Harrier GR.3/Fujimi 1/72nd Ju 87D-3

  • Member since
    November 2009
  • From: SW Virginia
Posted by Gamera on Tuesday, March 29, 2016 12:08 PM

Whoa BD, those look terrific!! 

"I dream in fire but work in clay." -Arthur Machen


  • Member since
    January 2015
Posted by Moff on Friday, April 1, 2016 8:08 AM

Nice work Brandon! The camoflauge on both aircraft looks really nice! Did you freehand the camo?

"Gaiety is the most outstanding feature of the Soviet Union." - Josef Stalin 

  • Member since
    November 2009
  • From: SW Virginia
Posted by Gamera on Friday, April 1, 2016 11:25 AM

Hey Moff, good to see you again. Have you gotten any more work done on that Death Star mega-cannon WaffleTiger thingee? Stick out tongue

"I dream in fire but work in clay." -Arthur Machen


  • Member since
    December 2002
  • From: Bury St Edmunds, Suffolk, England
Posted by Bish on Friday, April 1, 2016 1:02 PM

Moff, where you been hiding. Nothing serious keeping you away i hope.

I am a Norfolk man and i glory in being so


On the bench: Airfix 1/72nd Harrier GR.3/Fujimi 1/72nd Ju 87D-3

  • Member since
    January 2015
Posted by BrandonD on Friday, April 1, 2016 4:08 PM

Thanks, guys!

Moff: Good to see you back. I free-handed the camo on the Seafire, and what is pictured above on the Mk.I is free-handed, but I masked the rest of it with Tamiya tape for curves.

I have mostly been working on the markings for the Mk.I (painting them this time), so I haven't been spamming you here (it's in the WIP thread in aircraft), as the 1946 subject was shelved again until today. I got some time with it at lunch for weathering, and I will have an update for you shortly.

-BD-

  • Member since
    August 2009
  • From: MOAB, UTAH
Posted by JOE RIX on Saturday, April 2, 2016 8:41 PM

Hi Ho Gentlemen. Well, after some deep thought, I have decided that I still want to build something for this GB. And I have found something that solves 2 issues for me. I will get back in with this sweet kit:

First, this should be a fairly straight forward build with a simple paint scheme. The added bonus is that it has 3 decal options for '46 aircraft. The second thing is that I will finally get around to building a kit of my all time favorite aircraft. My father flew these as a Naval flight instructor and as such I have always loved the Corsair, as well as the PBY Catalina. Funny thing is that I have held off building either of these aircraft as I wanted to hone my skills since getting back into the hobby some 8 yrs ago and I really wanted to do them justice. Well, it's high time I put the rubber to the road and this 1/72 beauty is a grand start.

I already had the PE sets for this kit. They came with an ebay score I made a couple of years ago which was a 1/72 Tamiya F4U-1A that came with a load of AM resin and PE for $20.00. I've ordered the Montex masks and Barracuda resin wheels. I've also ordered vacu-form canopies in hopes of building this with an open canopy which is not an option on this kit.

Here is a prelim of what I have so far:

I'm quite excited to build this kit. It will be slow going for the next month as my step daughter, her husband and our 2 grand children will be coming for a couple of weeks. It will be the first time our grand children have come to visit us so, it's pretty exciting. But, after that I should be able to make steady headway.

So, Bish, would you be so kind as to change my project from the Richilieu to the Corsair.

Thanks everyone for all the positive encouragement. Helped get me through a slight funk. You guys Rock!

"Not only do I not know what's going on, I wouldn't know what to do about it if I did". George Carlin

  • Member since
    December 2002
  • From: Bury St Edmunds, Suffolk, England
Posted by Bish on Sunday, April 3, 2016 2:45 AM

Wil do Joe, will be looking forward to seeing that.

I am a Norfolk man and i glory in being so


On the bench: Airfix 1/72nd Harrier GR.3/Fujimi 1/72nd Ju 87D-3

  • Member since
    November 2009
  • From: SW Virginia
Posted by Gamera on Sunday, April 3, 2016 11:18 AM

BD: Nice job there masking- is that the new Tamiya curvable tape?

Joe: Don't think you can ever go wrong with a Corsair!

"I dream in fire but work in clay." -Arthur Machen


  • Member since
    January 2015
Posted by Moff on Monday, April 4, 2016 4:18 PM

Bish

Moff, where you been hiding. Nothing serious keeping you away i hope.


No, just life. I needed a rest after the JS-3 build. I'm in a modeling dry spell currently, but I'm attempting to pull out of it. 


I'm still keeping an eye on the GB though Smile

"Gaiety is the most outstanding feature of the Soviet Union." - Josef Stalin 

  • Member since
    December 2002
  • From: Bury St Edmunds, Suffolk, England
Posted by Bish on Monday, April 4, 2016 4:29 PM

Moff
 
Bish

Moff, where you been hiding. Nothing serious keeping you away i hope.


No, just life. I needed a rest after the JS-3 build. I'm in a modeling dry spell currently, but I'm attempting to pull out of it. 


I'm still keeping an eye on the GB though Smile


I think we all go through those now and again. I get short spells where i can't get motivated.

I am a Norfolk man and i glory in being so


On the bench: Airfix 1/72nd Harrier GR.3/Fujimi 1/72nd Ju 87D-3

  • Member since
    January 2015
Posted by BrandonD on Monday, April 4, 2016 5:10 PM

Gamera - Yeah that's the Tamiya tape for curves. I can't remember if it's the 2mm or 3mm. I want to say 2mm.

-BD-

JOIN OUR COMMUNITY!

Our community is FREE to join. To participate you must either login or register for an account.

SEARCH FORUMS
FREE NEWSLETTER
By signing up you may also receive reader surveys and occasional special offers. We do not sell, rent or trade our email lists. View our Privacy Policy.