Hey Larry. Sorry I couldn't reply over the weekend. I still don't have the internet at my new home and for some reason I can't log in with my iphone. It did occur to me though that I do have some pictures that may help you along the way if you plan on using the Gloss Black primer as your base to paint from. I'm always looking to improve what I do and how I approach it, so I'm thinking along different lines than someone doing it for the first time...that's why it took me till now to realize it.
Anyhow. I have some (poorly taken) pics of the first NMF I did from a few years ago. You'll get the idea though. Some of this might look more complicated to see, but I promise it's not. First, I lightly put on the Duraluminum over the wings in a front to back fashion. I think the Duraluminum works just fine the way it is for the wings (if you're looking to make it easy on yourself the first time around). What I was aiming for here is allowing some of the darker surface underneath to show variation in the metal wrapping over internal structures. My way of trying to "pre-weather" to do more with less. So light coats and more light coats until I was happy with the outcome...it took some playing with. For the ammo/gun bays, I masked off each and painted them individually with a Magnesium on top of the Duraluminum. This was done very lightly also and I was only looking to make them stand out slightly more from the wing surface. Many of the reference pics I was looking at back then didn't show much difference for the most part. I was trying to reflect that.
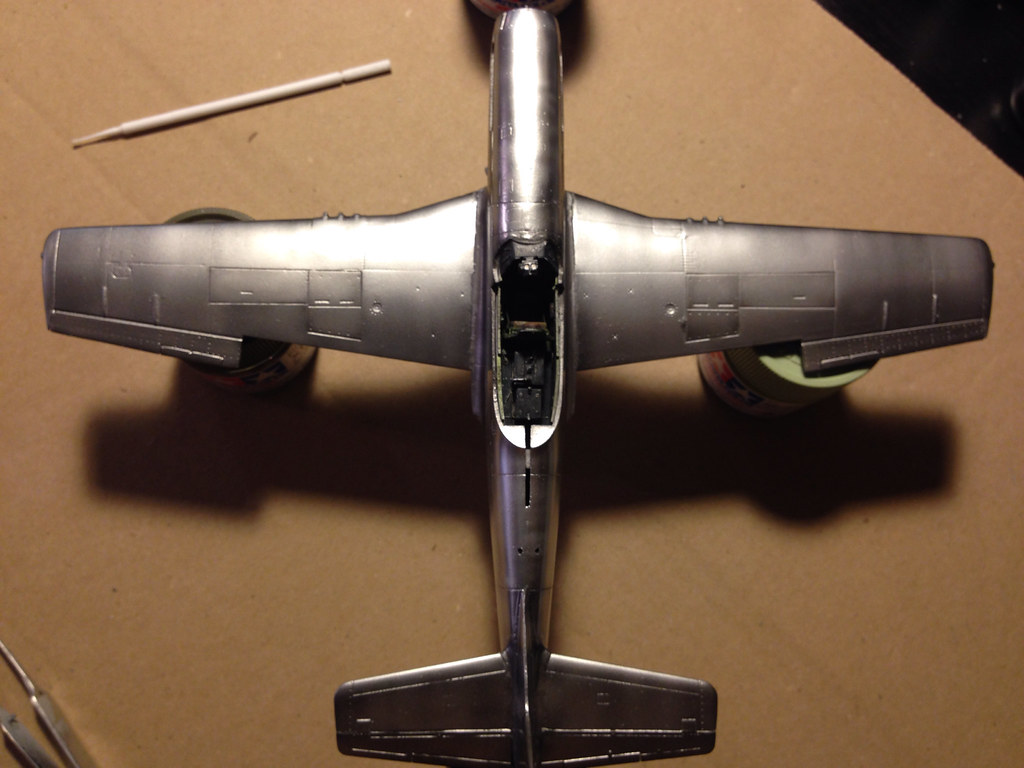 image by Britt Vallot, on Flickr
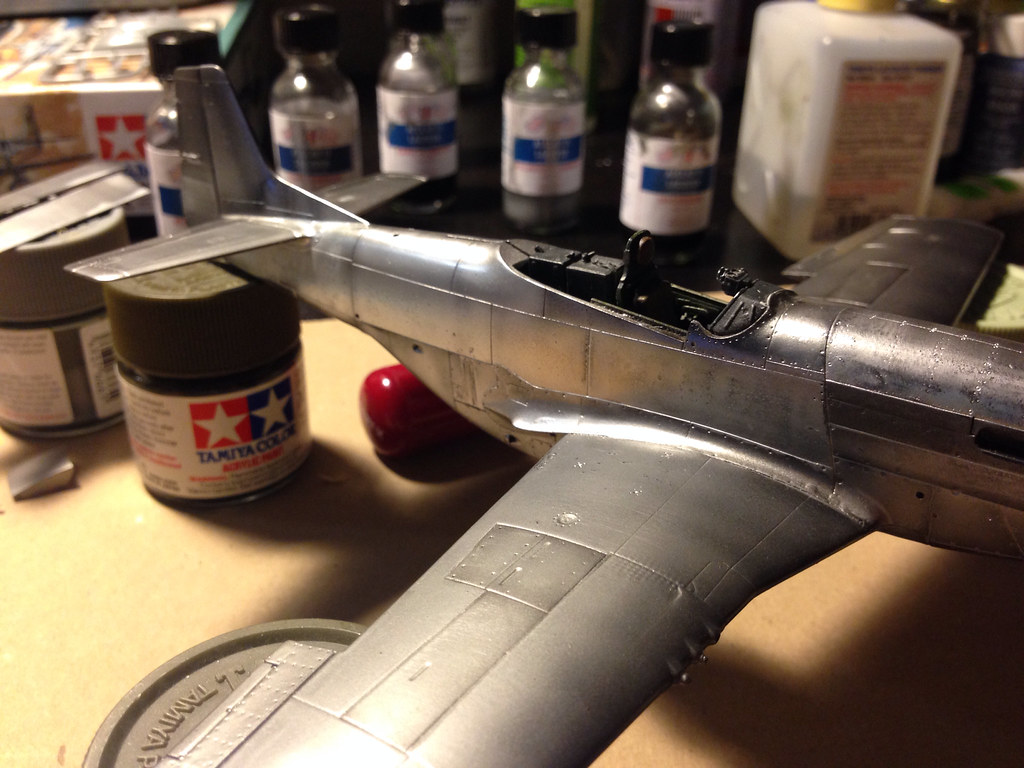 image by Britt Vallot, on Flickr
The other thing I did was to rivet the entire plane before I began. After sanding, polishing, and priming/painting, I slightly buffed certain parts along the fuselage and inboard parts of the wings to bring this out a little more. I used a fine sanding stick from Squadron to do it. It may have even been a very fine stick. If you decided to do something like that, test it out...use your judgement. I like it though. It works great to show some real wear and tear around heavily maintenanced/trafficked parts like the cowl and wing root and fuselage.
You can make it out above if you look around the fuselage. Here are some other pics. Sorry, these are very dark.
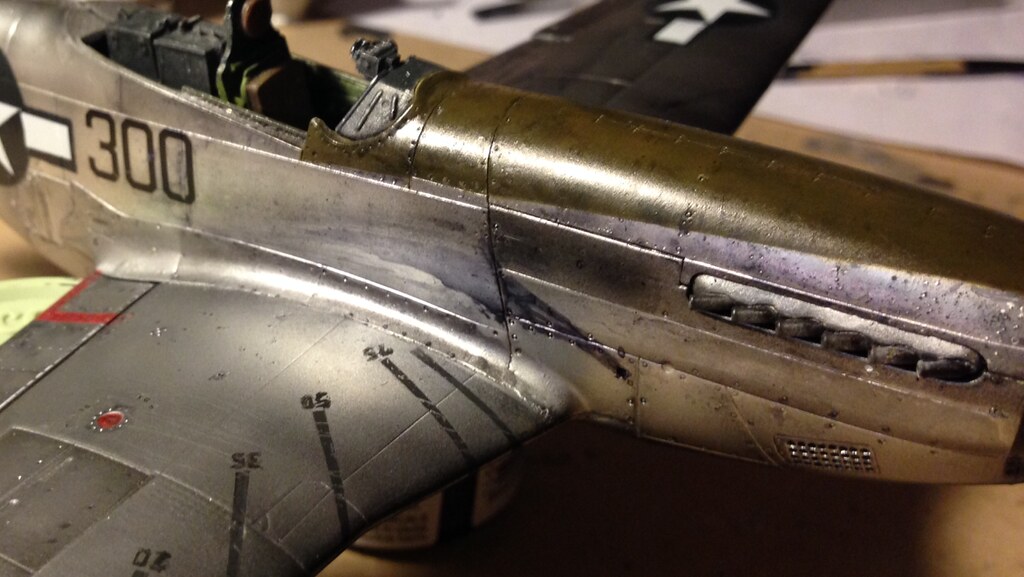 image by Britt Vallot, on Flickr
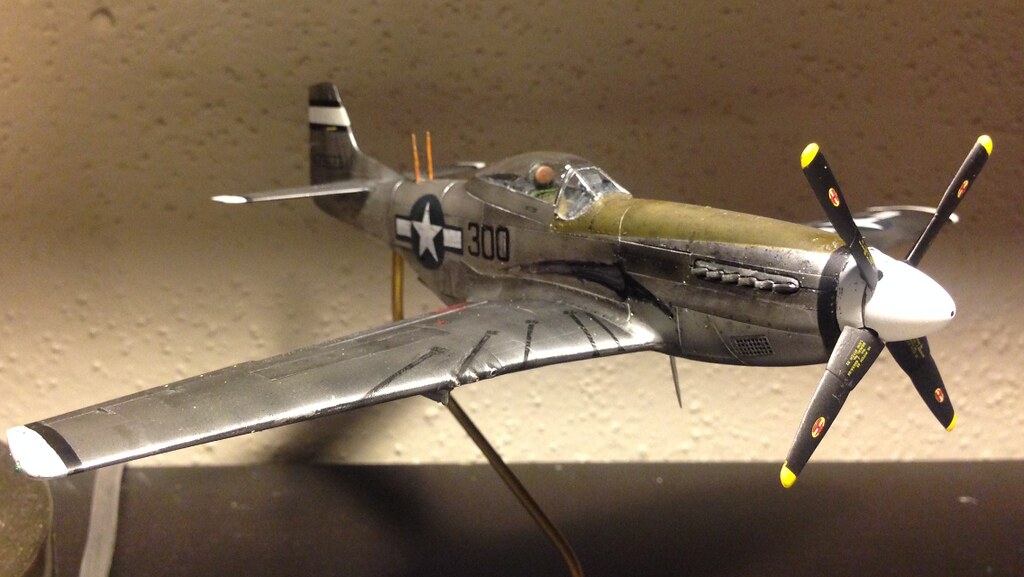 image by Britt Vallot, on Flickr
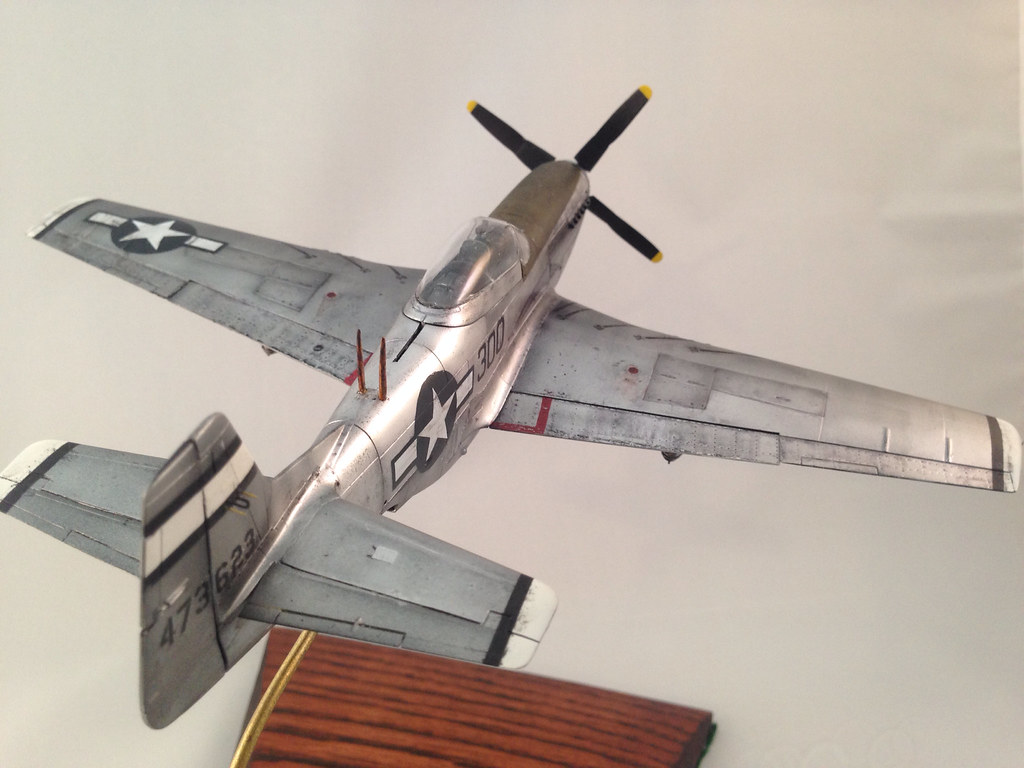 image by Britt Vallot, on Flickr
That should kind of give you the idea of what I'm getting at. If you want to browse through that WIP to take your time with it:
http://cs.finescale.com/fsm/modeling_subjects/f/2/t/155345.aspx
I think it was the second one I ever did so don't laugh. The pictures are terrible.
So hopefully that provides some building blocks to get you thinking. If something I said doesn't make sense, just ask. I was having to rush through some of this. =]