SEARCH FINESCALE.COM

Enter keywords or a search phrase below:

The 2017/ 2018 Too Little Too Late Group Build

41911 views
1197 replies
1 rating 2 rating 3 rating 4 rating 5 rating
  • Member since
    September 2013
Posted by blackdog62 on Saturday, June 10, 2017 3:34 PM

wow how do you guys make those dashes so nice. i have tryed so many times. thank goodnes for decals.Indifferent

  • Member since
    September 2013
Posted by blackdog62 on Saturday, June 10, 2017 4:06 PM

thank you yes that is hartmans k4 its 1/48 academy/ hobbycraft ?  {the box is i limbo| it has true datails resin K-4 pit in it also.

  • Member since
    September 2013
Posted by blackdog62 on Saturday, June 10, 2017 4:09 PM

thanks bish it cant be seen much but its good practice for me. i have yet to take on a motor that will be on display.

  • Member since
    September 2013
Posted by blackdog62 on Saturday, June 10, 2017 4:12 PM

wow  jack that is some mighty fine work your doing.


  • Member since
    December 2002
  • From: Bury St Edmunds, Suffolk, England
Posted by Bish on Saturday, June 10, 2017 4:35 PM

Jack, some great work as always. And some interesting info, didn't know that about the drop tanks.

I am a Norfolk man and i glory in being so


On the bench: Airfix 1/72nd Harrier GR.3/Fujimi 1/72nd Ju 87D-3

  • Member since
    June 2010
  • From: Rochester, New York USA
Posted by rocker286 on Saturday, June 10, 2017 8:39 PM

I've spent most of the afternoon and evening working on my 262, here's the latest update! I've added the RLM81 Braunviolett, and the RLM 74 Graungrun stripes to the top surfaces of the jet. I don't have an airbrush, so everything that you see is brush painted. I also added a bit of RLM 23 Rot to the nose. The only reference to this color being added to the jet was on the box art- but it looked cool so I added it. I'll be painting the lower surfaces black tomorrow night!

2017-06-10_09-01-39

4badges

  • Member since
    March 2012
  • From: Corpus Christi, Tx
Posted by mustang1989 on Saturday, June 10, 2017 8:50 PM

That's not bad at all for not having an AB there blackdog!! I do like that pattern!


 Forum | Modelers Social Club Forum (proboards.com) 

  • Member since
    April 2015
Posted by Mopar Madness on Saturday, June 10, 2017 9:57 PM

Ah, those magical moments when we find an empty afternoon for modeling!!  They seem to come few and far between.  Man, that's some nice camo, both splinter and squiggly, made without an airbrush!  Great job.

Chad

God, Family, Models...

At the plate: 1/48 Airfix Bf109 & 1/35 Tamiya Famo

On deck: Who knows!

  • Member since
    September 2013
Posted by blackdog62 on Sunday, June 11, 2017 3:22 PM

That's great hand painting.

Are you seeing squiggles in your sleepBig Smile

  • Member since
    December 2002
  • From: Bury St Edmunds, Suffolk, England
Posted by Bish on Sunday, June 11, 2017 3:25 PM

Nice job on that camo rocker.

I am a Norfolk man and i glory in being so


On the bench: Airfix 1/72nd Harrier GR.3/Fujimi 1/72nd Ju 87D-3

  • Member since
    February 2014
  • From: Michigan
Posted by silentbob33 on Sunday, June 11, 2017 9:08 PM
Rocker, that's some really nice work for not having an airbrush. I doubt I could do it that well.

On my bench: Academy 1/35 UH-60L Black Hawk

  • Member since
    April 2006
  • From: ON, Canada
Posted by jgeratic on Sunday, June 11, 2017 10:44 PM

rocker, that looks good.  Your brush method certainly does convey the squiggle camou pattern. Beer
Thank you for the comment, interesting analogy about  muscle and hot rod cars. Cool
--------------------
Thanks blackdog and bish.  The bad thing about scrutinizing details on the real deal -   it gets me thinking on how to improve or even add more detail to the kit.  I ended up removing the hard points on the rack, and plan to replicate those with some brass.  Will post some photos in next day or so.

regards,

Jack

  • Member since
    April 2015
Posted by Mopar Madness on Monday, June 12, 2017 3:31 PM

Well, the fit is as bad as I had anticipated!  The 4 subassemblies do not go together well and require quite a bit of filler.  I had to shave off plastic with my Proxxon rotary tool to make the nose clip fit properly. All seams require filler too.  But, the show must go on!


Chad

God, Family, Models...

At the plate: 1/48 Airfix Bf109 & 1/35 Tamiya Famo

On deck: Who knows!

  • Member since
    June 2010
  • From: Rochester, New York USA
Posted by rocker286 on Monday, June 12, 2017 9:16 PM

Thanks for the kind words, guys! And yes Blackdog, I AM seeing squiggles in my sleep! Mopar, don't let that Horten get the best of ya. Like you said, the show must go on!


I painted the first coat of flat black on the underside of the jet, and on the engine nacelles. After another coat tomorrow night I'll assemble the landing gear and fuel tanks!

2017-06-11_07-43-56

4badges

  • Member since
    September 2014
Posted by rooster513 on Thursday, June 15, 2017 10:42 AM

Nice progress rocker286! Just noticed you are from my neck of the woods. I'm over in Waterloo NY, only a stone's throw compared to most on the siteSmile

I've got a quick update. Was able to do a little "preshading" with some Nato black and then laid down the RLM 76 (Tamiya light blue mixed with flat white and a little light grey to grey it up some). I did some test mixing to get RLM 81 & 82 so I will hopefully get those down soon. After dealing with bad overspray/spitting from my airbrush for too long, so I put in a new needle and wouldn't you know it, I get a nice spray pattern now...who'd have guessedStick out tongue Anyway, I'm going to try to freehand the camo pattern so we shall see how that goes...


-Andy

  • Member since
    September 2014
Posted by rooster513 on Friday, June 16, 2017 6:52 AM

Was able to get the topside camo done last night. One nice thing about freehand camo...don't have to wait for paint to cure to maskBig Smile

Perhaps foolishly, but I'm also going to try to mask and paint the cross insignia.


-Andy

  • Member since
    December 2002
  • From: Bury St Edmunds, Suffolk, England
Posted by Bish on Friday, June 16, 2017 7:29 AM

Nice work on those 262's guys.

Good luck with the crosses Andy.

I am a Norfolk man and i glory in being so


On the bench: Airfix 1/72nd Harrier GR.3/Fujimi 1/72nd Ju 87D-3

  • Member since
    August 2015
  • From: the redlands Fl
Posted by crown r n7 on Friday, June 16, 2017 9:47 AM

getting back to the sing of things before the 14:00 showers start up. sprayed RLM 83 this morning wait abit more due to 95% humidity and its not August yet


 Nick.

  • Member since
    April 2015
Posted by Mopar Madness on Friday, June 16, 2017 11:36 AM

Masking is such a pain but there's a lot of satisfaction when you start pulling off tape to reveal the camo.  Looks great so far!

Chad

God, Family, Models...

At the plate: 1/48 Airfix Bf109 & 1/35 Tamiya Famo

On deck: Who knows!

  • Member since
    April 2006
  • From: ON, Canada
Posted by jgeratic on Friday, June 16, 2017 7:43 PM

Andy, good looking colours, and that mottling is primo.

---------------------------

crown,  couple nice teaser shots there.  Looking forward to the tape removal.

--------------------------

So the belly rack is now in place, but picture quality not the best.


Couple areas also needed putty.  First under the nose to smooth out the transition from the pair of bulges that were removed.  Then in  the strut location, as this will be a wheels up display.


Spruced up the drop tank a bit, most of the details outlined in the photo.

The rudder also needs to be backdated to the G-6, this being a rounded instead sharp bottom corner.  Tail light had to be reintroduced at a slightly higher point, and a trim tab added to round out the fixes here.

regards,

Jack

  • Member since
    April 2015
Posted by Mopar Madness on Friday, June 16, 2017 9:41 PM

Jack - Love the attention you give to the small details!

Chad

God, Family, Models...

At the plate: 1/48 Airfix Bf109 & 1/35 Tamiya Famo

On deck: Who knows!

  • Member since
    November 2003
  • From: Naples, FL
Posted by tempestjohnny on Saturday, June 17, 2017 7:18 AM

Well I broke away from building British wingy thingies to a German one.  Here is the start of my 152. OOB cockpit


  • Member since
    March 2012
  • From: Corpus Christi, Tx
Posted by mustang1989 on Saturday, June 17, 2017 8:16 AM

There is some VERY good paint work going on within this page of the GB fellas!!!!!!


 Forum | Modelers Social Club Forum (proboards.com) 

  • Member since
    June 2010
  • From: Rochester, New York USA
Posted by rocker286 on Saturday, June 17, 2017 3:41 PM

Andy- How about that! I'm not the only upstate guy in this forum after all- ironic that we're both building 262's!  Waterloo is a nice town, my buddy was just out there to see the Warrant and Firehouse show last week - we're suckers for 80's bands Cool . I really dig that paint job you've got going on there!

Crown- Humidity stinks! Great progress so far though!  


Jack- That drop tank is a kit in it's own right - awesome job!

Johnny - Sweet cockpit!

Well, I finished painting AND I glued on all of the fragile bits, including the landing gear! As soon as this paint is dry, I'll be adding the first gloss coat to this thing so I can apply some decals.


2017-06-17_04-00-12

4badges

  • Member since
    April 2015
Posted by Mopar Madness on Monday, June 19, 2017 9:55 AM

That 262 looks great!

Well, my kit woes continue.  I thought it would be a good idea to put my decals in a ziploc bag and place in the window to let the sun bleach the yellowing decals.  Here is the result!  Each decal has cracked into several bits. Bang Head  I can only imagine what would happen if I submerged them in water at this point.  I'm going to have to figure out a solution soon because Im about ready to paint.  The good news is, the decals that had a yellowish hue are now gleaming white!

Chad

God, Family, Models...

At the plate: 1/48 Airfix Bf109 & 1/35 Tamiya Famo

On deck: Who knows!

  • Member since
    April 2006
  • From: ON, Canada
Posted by jgeratic on Monday, June 19, 2017 10:22 AM

MM, sorry to see what happened to the kit decals.  Wondering why the ziploc baggie - never heard of that before.  Whenever I need to 'bleach' decals with natural sunlight, I just use a strip of scotch tape directly to the back of the sheet and window.

You could try salvaging the decals by spraying on a clear gloss coat of some kind?  If it works, there is the downside of thicker decals.  Maybe some light sanding once they are fixed to the kit surface?

regards,

Jack

  • Member since
    March 2012
  • From: Corpus Christi, Tx
Posted by mustang1989 on Monday, June 19, 2017 11:35 AM

Jack: Man that auxliary fuel cell looks utterly fantastic!!! Wow man! You're really going all out on this little guy.

Andy: Beautiful paint work so far bud!!!!

Rocker: Looks like you're hummin' right along on that 262!! Good lookin' progress!!

MM: Hate to see your decal issues man. Jack is right about the gloss coat. It does work but like he said , you might have a little thicker decals out of it.  Hang in there with all the body work. It'll pay off in dividends!!!

Johnny: That cockpit in that 152 looks pretty well detailed from where I'm sittin'. Good progress brutha!! Yes

Nick: What a masking job dude!!! Color is RIGHT ON!!!

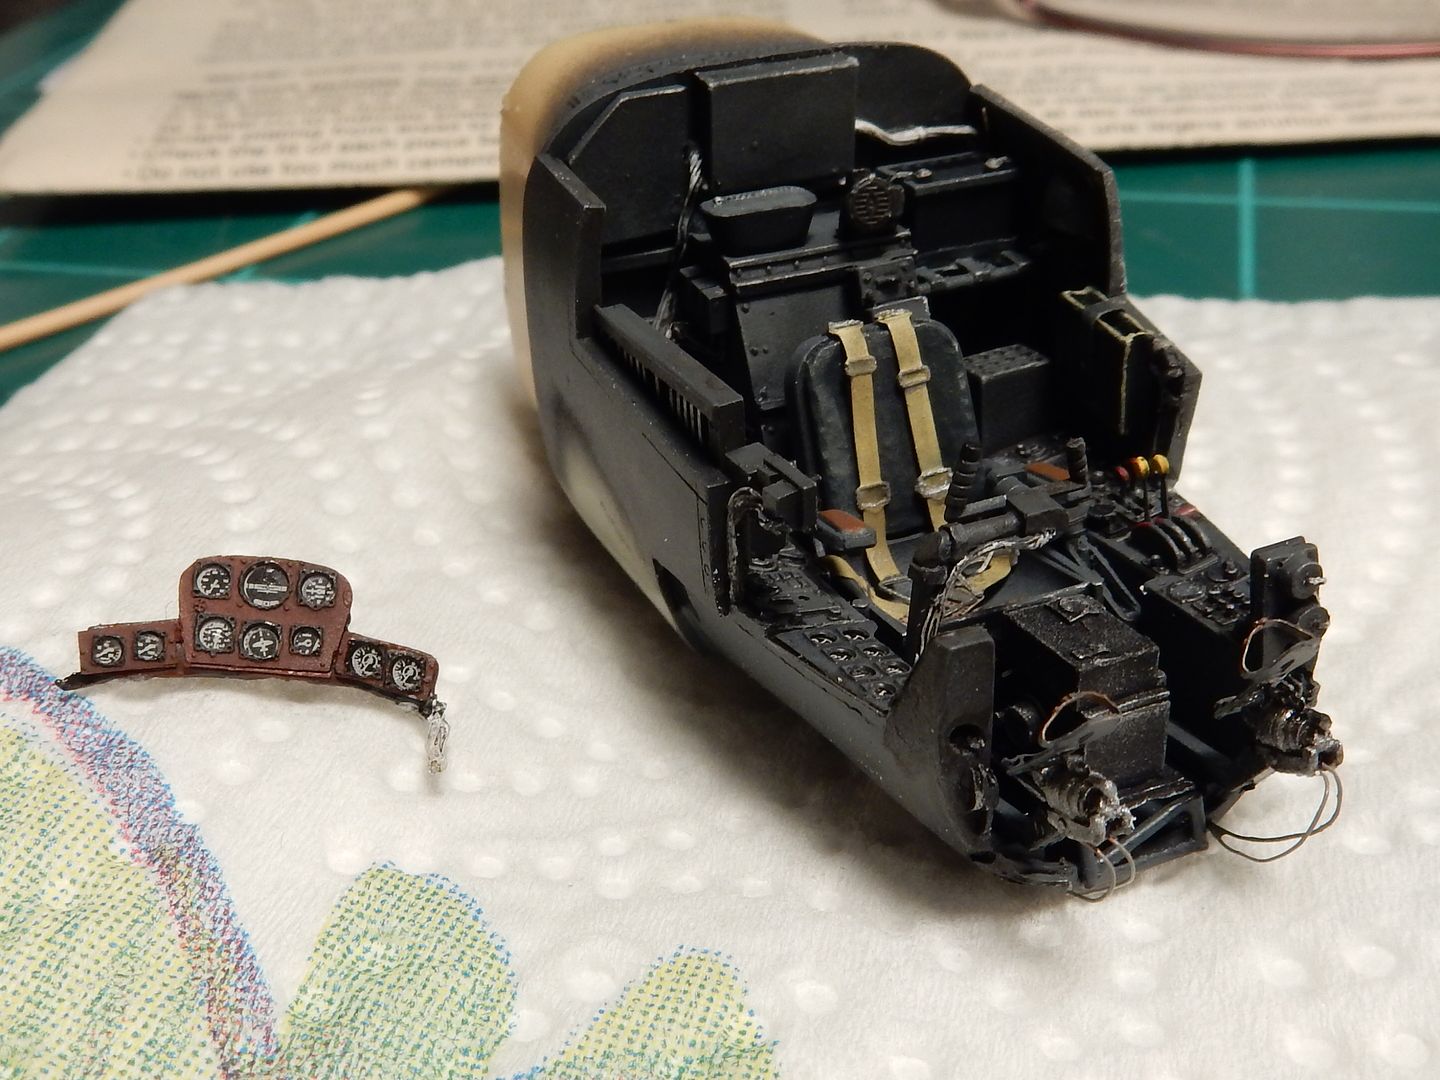
Everybody: Got the side walls installed and the IP painted and slightly weathered. Just gotta pick out some details, do a little touch up and fade the entire IP a little bit and we're good to go it looks like.
Image


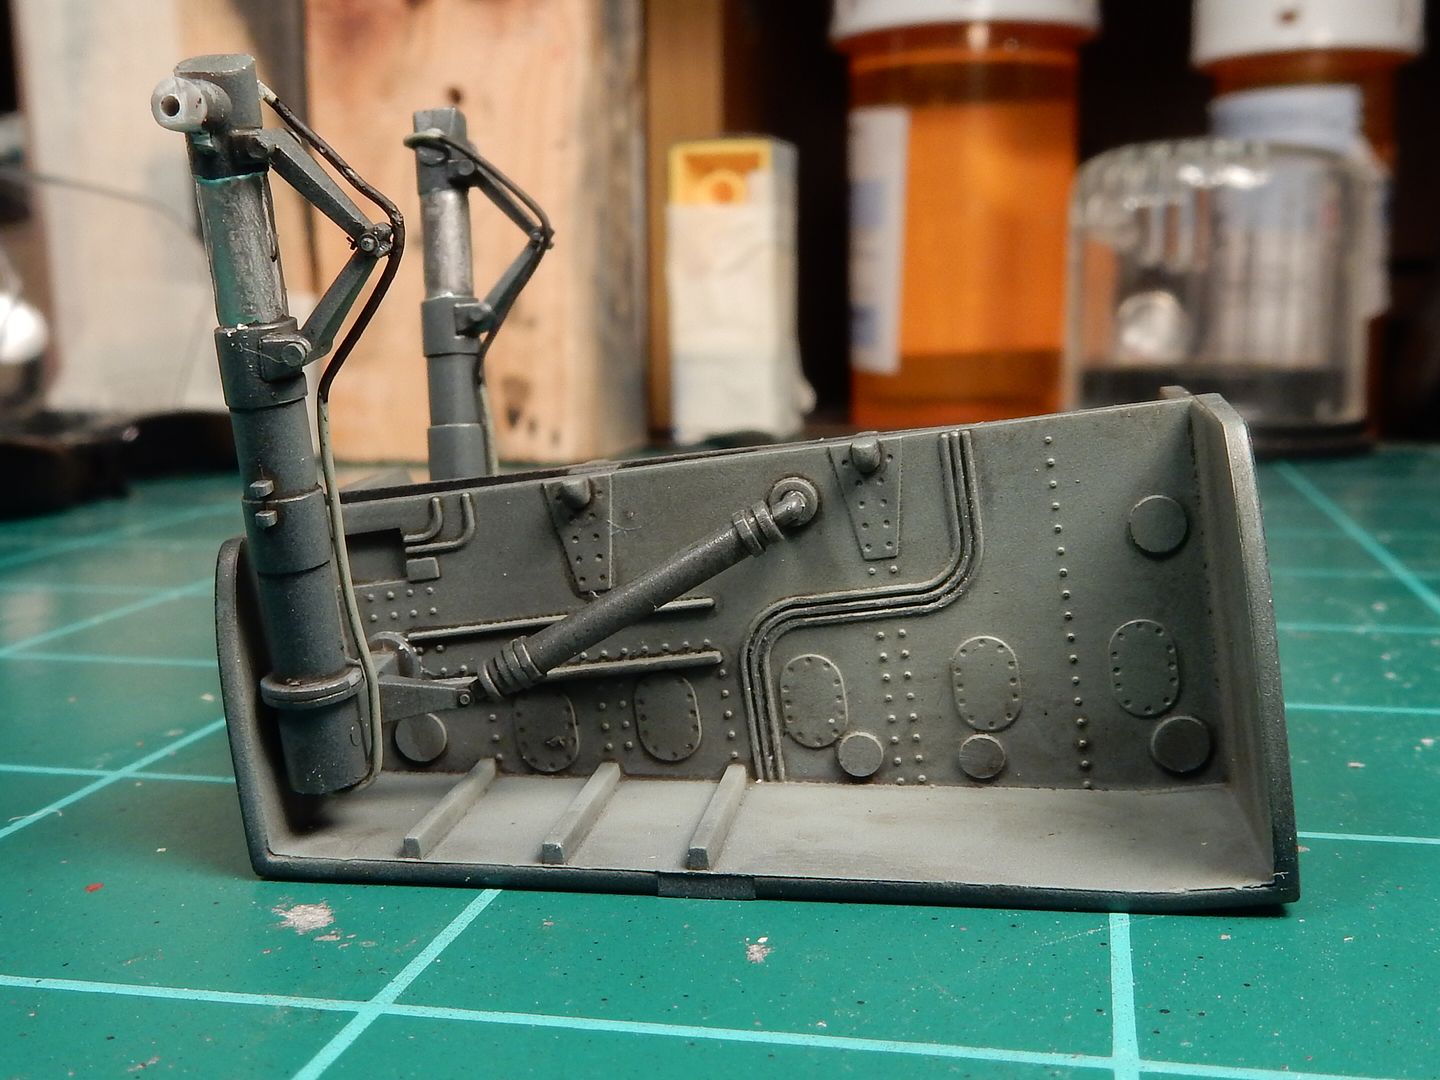
 If you ask anybody closely associated with me in the modeling realm about my thoughts on landing gear, they'll tell you that I cannot stand this part of an aircraft build. To me it's the one thing that can absolutely make or break an aircraft build outside of a really obvious flaw or wing dihedral especially when it comes to shows. I judged aircraft at the last show I went to back last February and it was the one area of the build that was the deciding factor in a lot of the aircraft that were candidates for an award. Outside of the show and award realm, it's really irritating to spend a lot of time and put all kinds of work into a build only to see it either lean because the gear wasn't set up right or to see two landing gear legs that are waaay off in angles. I've got an Fw190 A8 build that I had such an experience with. It still sits in my display cabinet but has the flaw of incorrectly angled gear. I put all that time into the build and neglected to get the angles right and it really shows when it sits right next to my Fw190 D-9. So I get really nervous during this part of construction. This build is no exception to that rule and is IMO a lot harder to get the angles right because the gear has to be assembled in separate pods and then inserted into the fuselage as the halves are joined which is one aspect of this kit that REALLY sucks. I think I've got it though after a lot of time aligning and making sure everything was just "so-so". I didn't care for the RLM 02 that turned to more of a 66 after my shadowing attempts though, I can tell ya that!! :hissy:
Here's the progress on that so far:
Image                                                                                                                


 Forum | Modelers Social Club Forum (proboards.com) 

  • Member since
    September 2014
Posted by rooster513 on Monday, June 19, 2017 11:47 AM

Thanks Joe. The pit looks great and I hear you about setting the landing gear. Even if that color isn't perfect RLM02 (I don't think it looks too bad) the shadowing and highlights you did turned out awesome buddy! Very convincing!


Was able to get the cross insignia masked a painted. First time doing this so it was a little time consuming, and some of the lines aren't as sharp and straight as I'd like but they look the part. They pass the 3 foot quick glance test at least! lol.

On to the fuselage bands and a clear coat for a few decals!

-Andy

  • Member since
    April 2015
Posted by Mopar Madness on Monday, June 19, 2017 12:13 PM

Joe - Live he cockpit and wheel wells!

Andy - Great crosses.  That might be the direction I go for my crosses that were destroyed.

Jack - I actually got the baggie idea from one of my issues of FSM.  Regarding the clear coat, would I spray that on the decals then soak them as normal prior to application?  Sounds like a great tip.

Chad

God, Family, Models...

At the plate: 1/48 Airfix Bf109 & 1/35 Tamiya Famo

On deck: Who knows!

  • Member since
    December 2002
  • From: Bury St Edmunds, Suffolk, England
Posted by Bish on Monday, June 19, 2017 12:22 PM

Andy, great job on those markings. Not seen in done in this scale before, great work.

I am a Norfolk man and i glory in being so


On the bench: Airfix 1/72nd Harrier GR.3/Fujimi 1/72nd Ju 87D-3

JOIN OUR COMMUNITY!

Our community is FREE to join. To participate you must either login or register for an account.

SEARCH FORUMS
FREE NEWSLETTER
By signing up you may also receive reader surveys and occasional special offers. We do not sell, rent or trade our email lists. View our Privacy Policy.