SEARCH FINESCALE.COM

Enter keywords or a search phrase below:

British Army Group Build 2020

61482 views
1206 replies
1 rating 2 rating 3 rating 4 rating 5 rating
  • Member since
    September 2018
  • From: Vancouver, Washington USA
Posted by Sergeant on Saturday, September 19, 2020 9:45 PM

GreySnake
Harold, you are making some very good progress. 
 

Thank you G.S. I completed step 1 through 9 which includes the frame, lower half of the engine, transmission, drive lines, suspension, axels, and wheels. The next phase is the truck bed, steps 10 through 19 then the cab interior steps 20 through 27. The last step is 28 which joins the bed and cab with the chassis. Like other models with an interior the exterior assembly work will be interrupted to paint the interior. 

I had one minor problem with assembly today. In photograph #1 and #3 you can see a white part next to the frame. It is a transmission mount that I had to build from styrene. The instructions show installation of a transmission mount before the transmission is installed, but you cannot get the transmission in place with that mount installed. I try to plan ahead at least two steps during assembly, but sometimes I overlook this kind of problem until it is too late.

Harold

#1

#2

#3

#4

#5

  • Member since
    February 2011
Posted by GreySnake on Saturday, September 19, 2020 6:52 AM
Eric, you did excellent work on the Valentine.
 
 
Harold, you are making some very good progress. 
  • Member since
    September 2018
  • From: Vancouver, Washington USA
Posted by Sergeant on Friday, September 18, 2020 11:31 PM

I completed steps 4 through 6 and started step 7. The undercarriage of this model is much more detailed than I realized. Steps 1 through 9 is a full running gear with drive lines and transmission. If AFV Club had included the upper half of the engine it would be a complete model inside and out. There is a full interior in the cab and the bed has all the detail you would expect in a truck model. I am very pleased with the way this model was engineered.

If you are interested in classic military vehicles like the AEC Matador here is a good resource http://www.classicmilitary.co.uk/aec-matador-gun-tractor-classic-military-vehicle/

  • Member since
    September 2018
  • From: Vancouver, Washington USA
Posted by Sergeant on Friday, September 18, 2020 11:20 PM

EricB

Very nice work Eric.

Harold

  • Member since
    November 2009
  • From: SW Virginia
Posted by Gamera on Friday, September 18, 2020 5:04 PM

Gee, should I do a William Wallace figure next???

Thanks guys!

And Steve, I have no idea if it's the correct clan pattern or not- I just copied the back of the MiniArt box.

"I dream in fire but work in clay." -Arthur Machen


  • Member since
    July 2014
Posted by modelcrazy on Friday, September 18, 2020 2:50 PM

Did you get the correct clan patern Cliff?Wink

Excelent job on the kilt!

Steve

Building a kit from your stash is like cutting a head off a Hydra, two more take it's place.


http://www.spamodeler.com/forum/

  • Member since
    December 2002
  • From: Bury St Edmunds, Suffolk, England
Posted by Bish on Friday, September 18, 2020 1:44 PM

GS, the touch up has worked a treat.

And thanks for the info, i am hearing the same thing from a few people. If the subject is right, i don't mind paying a bit extra for a good kit.

I am a Norfolk man and i glory in being so


On the bench: Airfix 1/72nd Harrier GR.3/Fujimi 1/72nd Ju 87D-3

  • Member since
    December 2002
  • From: Bury St Edmunds, Suffolk, England
Posted by Bish on Friday, September 18, 2020 1:42 PM

G, like those figures and your a brave man for doing the kilt. Well done.

I am a Norfolk man and i glory in being so


On the bench: Airfix 1/72nd Harrier GR.3/Fujimi 1/72nd Ju 87D-3

  • Member since
    December 2002
  • From: Bury St Edmunds, Suffolk, England
Posted by Bish on Friday, September 18, 2020 1:41 PM

That came out really nice there Eric. Great finish and i really like the base.

Thanks for taking part.

I am a Norfolk man and i glory in being so


On the bench: Airfix 1/72nd Harrier GR.3/Fujimi 1/72nd Ju 87D-3

  • Member since
    September 2018
  • From: Vancouver, Washington USA
Posted by Sergeant on Friday, September 18, 2020 12:50 PM

Gamera


Great workmanship Gamera, I especially like the Tartan kilt, nice detail.

Harold

  • Member since
    September 2018
  • From: Vancouver, Washington USA
Posted by Sergeant on Friday, September 18, 2020 12:41 PM

GreySnake
 
Started work on correcting the Sherman early this morning. In the end I decided the best course of action was to go in with a very low air pressure and carefully fix the overspray. I carefully fixed the problem areas taking my time for around an hour and I’m pleased with the result. The only problem that occurred was one sand skirt falling off.  
 
 
The little tonal variation doesn’t matter as the fourth coming wash will put things in order. There’s also some very minor overspray onto the charcoal color that doesn’t matter as I’ll be doing a light dust effect as well.
 
 
The next thing to address is very minor paint corrections on the bottom of the gun mantlet and the front of the final drive. I need to mask those areas out as I can’t get in close enough without risking overspray.  The charcoal color also needs some minor touch ups such as on the left side. The counter shading needs painted on the front of the tank as well.  Within the next couple of weeks this Sherman should be ready for action.
 

Nice work GS, I would never know you had touch up the desert pink.

Harold

  • Member since
    April 2006
  • From: ON, Canada
Posted by jgeratic on Friday, September 18, 2020 10:12 AM

Hello Eric, nicely presented.  Yes


I think the only downfall of the Valentine (and the 2-pounder in general) is that there was no HE shell designed for it. 

For the upgunned 6-pdr version in the desert, author/researcher Peter Brown does mention a few were used by 50RTR at the battle of Wadi Akarit in April 1943.  The other desert unit I've found mention of was the 26th Armoured Brigade  (6th Armd. Div.) that landed during Operation Torch.   The regiments here had a mixture of both the 2-pdr and 6-pdr, as well as Crusaders.


regards,

Jack

  • Member since
    November 2009
  • From: SW Virginia
Posted by Gamera on Friday, September 18, 2020 10:02 AM

Eric: Ohhhhhhhhhhhh I love the Valentine! That turned out very well- love her, she looks like a weathered desert warrior! 

Greysnake: Neat job there on the Sherman- great job cleaning up the overspray. 

"I dream in fire but work in clay." -Arthur Machen


  • Member since
    July 2020
Posted by EricB on Friday, September 18, 2020 5:19 AM


 ValMKIII by Eric Bergerud, on Flickr


 !brt-ft by Eric Bergerud, on Flickr


 Valentine Mark III Infantry Tank by Eric Bergerud, on Flickr


 b-left-ft by Eric Bergerud, on Flickr


1/35 Tamiya Valentine


Paints - Golden High Flow Acrylics


Weathering - Iwata Com.Art Paints, Gamblin Fast Matte Oils, Sennelier, Gamblin, MIG Pigments


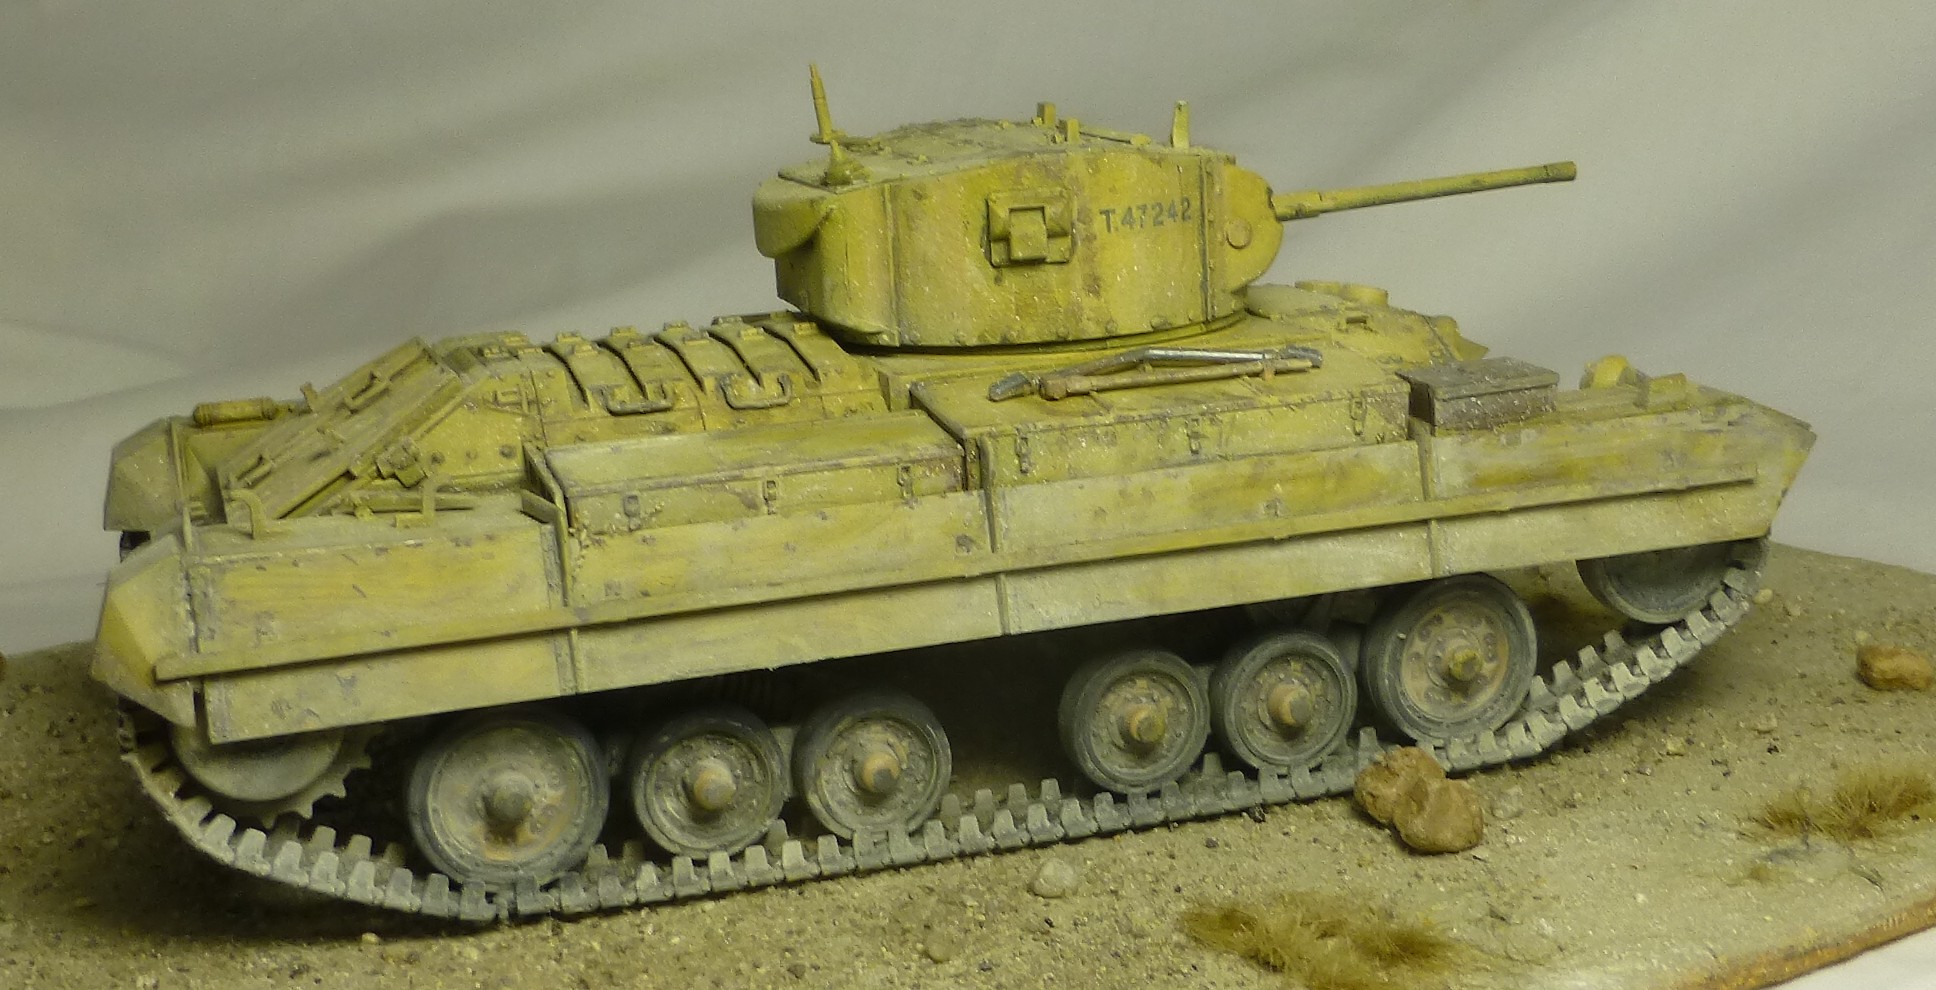
The Tamiya Valentine is a wrap.


The kit was excellent with exceptional fit. Although the length and link tracks weren't needed for the British version - most of which carried skirts which hide the sag - they were easy for the breed. It's a small tank, but the detail is exceptional. Anyone who likes Brit tanks should build this kit - and, if you want something late war, the Archer tank killer (mounting a 17lb gun) is available - although the gun points to the rear. The Valentine was well worth a good kit (figure this one at 2018 new tool) - I've heard the Mini-Art is a handful. It entered serious service in 1941. Many stayed at home (few students of the war realize how few tanks were in the UK - Churchill sent most of new UK production during 1940 to Egypt/Libya - pretty cool move with Sealion still a possibility.) But most joined 8th Army first appearing in large numbers for Crusader in 1941. They served with Monty's forces until the fall of Tunis at which time they were replaced with Shermans, Cromwells and Churchills. Although its time in the British sun was short, it gave excellent service. Although hampered by the 2lb gun, it had performance superior to the Matilda and reliability far in front of the Crusader. And in the desert a 40mm gun could handle almost any Axis AFV of the time - only the very best of Pzw IIIs and IVs had armor that was proof. Everything else under Rommel's command that moved could be stopped by the 2lb gun - and the Valentine was able to bring the gun to battle. Later in the war a 6 lb gun was fitted in a substantial redesign - these Vals were all sent to the USSR. The Soviets were great fans of the early Valentine because of its excellent reliability. (Many of the earliest British convoys to Murmansk carried Valentines and other tanks - they were much appreciated in the dark days of fall 1941.) Soviet officials specifically requested the UK to continue to produce Valentines of all types for the East and they were in action in 1945. (Personally I think Soviet colors and markings would make a very neat Valentine - but this is a British Army GB.)


The last post made had the tank done through filters. As noted, I probably didn't handle the color as well as I should have. Instead of looking at AK Real Color, LifeColor, MRP and Vallejo Model Air color samples I should have looked at museum tanks. The colors there aren't identical, but clearly Bovington and others see BSC 61 Light Stone as almost close to buff - with just a hint yellow. (None of the paints available look right to my eyes). And, as noted, although I had a perfect match for AK Real Color, when put over black primer an olive hue showed up. (Which both LifeColor and Vallejo call for.) I damped it greatly with filters. In retrospect I could have just laid down more base color and forgot the black basing and employed the extensive weathering that followed to give the tonal variation I wanted. Live and learn.


After the filters were on, I put on a coat of Vallejo Gloss varnish. For acrylic varnishes, Vallejos are very good - they went down perfectly with a Creos single action brush I bought kind of by accident - also used it on the Stynelrez primer - excellent gadget and well worth the $70. And I wanted a gloss acrylic on the tanks for the Gamblin umber/black pin washes that went on panel lines, bolts etc - there's a lot of stuff to highlight on a Valentine. I like oil washes a lot. Gamblin's Gamsol is the mildest imaginable solvent, but the real trick is to not use much of it. Panel line washes were cut with Gamsol, but a lot of detail were done carefully with straight oils. (Fast Matte paints dry very quickly, and you should be using only a very tiny bit.) There's going to be some excess - that can be removed. But as you get the hang of it, the excess should be minimal and when given a bit more solvent adds a very good base for a soiled tank. We are talking desert here. Then one goes another coat of matte varnish and the oils are used for fading. I've copied Mike Rinaldi's approach to this. I don't use "dot filters" where you put on tiny bits of several colors and then blend them. Instead I'm using mostly white, and buff, and a white-yellow palette. I apply the oils with a tooth pick and rub them in with a dry paint brush in a kind of circular motion. Do a few dozen of these little blotches and the result is what I consider a very good rendition of high sun fading. (Unfortunately I didn't remember to snap a pic after fading this time. Trust me.)


This brings on the pigments. There's a video on YouTube where a modeler illustrates how you can weather armor with no pigments - enamels only. Leave me out. First of all, I don't use any solvents outside of what I use to clean an airbrush - enamels are horrible - and might get me divorced if widely used. More to the point, pigments are perfect for dust and dirt - nothing else is better. Before going further, I should point out my basic approach to modeling. A few years back Mig Jimenez made the very interesting observation that it's folly to think that anyone can make a small plastic object look like a big metal object. And because this is so, Mig encourages modelers to use artistic license to their heart's content. Hmmm. Point taken. That said, to the extent that it's possible, I try to make my little plastic objects emulate the real artifacts. This means accepting the fact that war is the enemy of art. There are brilliant modelers in Europe and Asia that specialize in wrecked armor or badly damaged aircraft. The results can be jaw dropping. But, during WWII the life expectancy of a vehicle wasn't long. I've stared at a few thousand photos of wartime AFVs and I think rust was very rare, and unless a vehicle operated for an extended period in urban rubble I think chipping would have been rare. (I did very little on the Valentine - there's some on the skirts and the equipment boxes.) Now, you might very well see battle damage - as you can see from both pics above, the Valentine skirts were not doubt most vulnerable to being smashed, broken off, bent or shot-up. I chose not to put shell damage on, but that would a real possibility. (I'd sure put it on a Tiger or an IS2).


OK - what are we left with. Tonal variation primarily due to fading is for sure. (Might note that wartime paints were often of poor quality if any pigments - like cadmium - had other industrial uses. And paints weren't as good as they are now.) That stuff would fade - and unfortunately that's not something you'd see at Bovington. Men crawled all over tanks in service. You had to get in and out, fix things, fuel things, stow things. There would have scuffs and scratches all over and fluids galore over the engine and wherever the tank was fueled. (For this I used Iwata Com.Art transparent "smoke". The stuff is hard to describe unless you try them. But its texture is grimy, the transparent hue is perfect for light crew produced imperfections.)


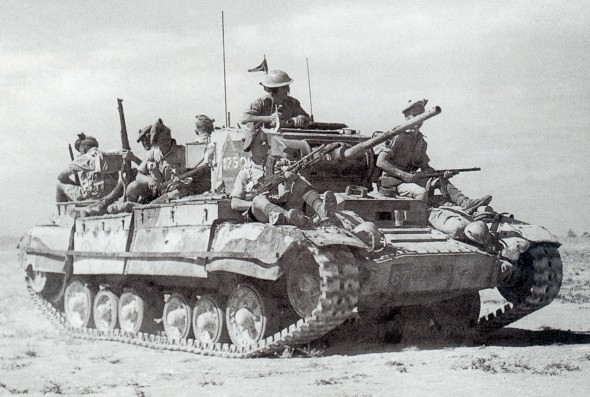
But above all AFVs in wartime were really dirty. And the desert, really dusty. (I've talked to several tankers - most who served in WWII, but not all. Everybody cursed the dust which got into everything - and that was true in Western Europe and not just the desert.) When I was thinking pigments I something in mind that would emulate a vehicle which went through the dust storm caused by the Crusader below:


 sandcrusader by Eric Bergerud, on Flickr


I put my Valentine in Egypt or Libya. Had it been in Tunisia there might have been call for some caked on mud. But I didn't really see that on desert AFVs. This time I didn't put on any real "mud" although I did build up multiple layers of pigments behind the road wheels. So the tanks will mega-dusty. But how to pull that off?. I've done desert vehicles before (nothing from the Afrika Korps though) and after this project I can see that I didn't get the pigments colors right. Now, there are enough color pics from the war so you can find soil & sand that was sienna, even umber. But the more I looked the more I decided that I really wanted a kind of buff. So I mixed up a brew made up of MIG Panzer Grau, Gamblin White and Gamblin Yellow Ocher. The base I fixed up is pretty simple. (It was done over Blick hard cardboard and painted with Blick Matte Acrylics - which I recommend for everyone. Figure $3 for 2 ounces. The stuff is very matte.) I used, beige, a bit of sienna and off-white paint. Then a heavy blast with Scenic Express Prepared Matte Medium which comes out of a spray bottle nicely. Then I threw on some gravel, glued on a few stones with Vallejo matte varnish, a few clumps of dead foliage and a lot of the pigment brew described above. I hand brushed some of the pigments over the road wheels. For putting it over the tank itself, I mixed some pigments together with ISP and blew out a fine spray with an airbrush. ISP is not a fixer so it doesn't discolor the surface and it lays down in an irregular manner which is above what I want. Now, here I'm confronting "war and art." For visual interest I would not have put on much dust - perhaps left it off the body of the tank altogether. It would have looked neater and the fine points of the weathering - that took a lot of time to apply - would have been more visible. And maybe next time I will. But don't just look at the dust storm creating Crusader, check the two Valentine pics above. Those things are very dusty. So is mine. I think it looks right. (It also lessens the importance of a spot on base color, although that was not the plan.)


Bish, as usual another great GB. I look forward to spending some time tomorrow examining the work of other modelers: there's some very sweet models here.


More pics below.


Eric


 b-rt-ab by Eric Bergerud, on Flickr


 b-right-r-ab by Eric Bergerud, on Flickr


 b-lft-rer by Eric Bergerud, on Flickr


 !r-r-det by Eric Bergerud, on Flickr


 !turretdet by Eric Bergerud, on Flickr


 b-left by Eric Bergerud, on Flickr


 b-left-r by Eric Bergerud, on Flickr
 

 B-rt by Eric Bergerud, on Flickr


  • Member since
    February 2011
Posted by GreySnake on Thursday, September 17, 2020 5:19 PM
Jgeratic and Sergeant thank you for the suggestions on correcting the overspray.
 
 
Bish, I can’t speak how well Gecko Models does with vehicles. However I do have a box of Early War British tank crew by them and they are nicely molded. There’s been a few kits by them I’d like to get just they are rather expensive.
 
 
Gamera, nice work on the figures in particular the Tartan.   
 
Started work on correcting the Sherman early this morning. In the end I decided the best course of action was to go in with a very low air pressure and carefully fix the overspray. I carefully fixed the problem areas taking my time for around an hour and I’m pleased with the result. The only problem that occurred was one sand skirt falling off.  
 
 
The little tonal variation doesn’t matter as the fourth coming wash will put things in order. There’s also some very minor overspray onto the charcoal color that doesn’t matter as I’ll be doing a light dust effect as well.
 
 
The next thing to address is very minor paint corrections on the bottom of the gun mantlet and the front of the final drive. I need to mask those areas out as I can’t get in close enough without risking overspray.  The charcoal color also needs some minor touch ups such as on the left side. The counter shading needs painted on the front of the tank as well.  Within the next couple of weeks this Sherman should be ready for action.
  • Member since
    November 2009
  • From: SW Virginia
Posted by Gamera on Thursday, September 17, 2020 11:34 AM

Thanks Jack! 

I think the Tartan doesn't look so good close up- but looking at a 54mm figure from about a foot / 30cm away it looks good enough for me.  

"I dream in fire but work in clay." -Arthur Machen


  • Member since
    December 2002
  • From: Bury St Edmunds, Suffolk, England
Posted by Bish on Thursday, September 17, 2020 10:00 AM

Thanks jack. I have not seen any of their builds either. They are producing a range of british stuff, both WW2 and Post 2010, including figures. Would be nice to get some 80's, 90's and 2000's figures, but its better than nothing.

I am a Norfolk man and i glory in being so


On the bench: Airfix 1/72nd Harrier GR.3/Fujimi 1/72nd Ju 87D-3

  • Member since
    April 2006
  • From: ON, Canada
Posted by jgeratic on Thursday, September 17, 2020 9:45 AM

Very nice looking figures, Cliff.  Good job on the Tartan.

--------------

Concerning Gecko brand, I've not seen much in terms of completed builds and associated comments.   I am interested in their early cruiser tanks, but am put off by their steep prices.  I did see one online review state they appear to put more time and research into their subjucts as compared to Bronco.


regards,

Jack

  • Member since
    November 2009
  • From: SW Virginia
Posted by Gamera on Thursday, September 17, 2020 9:13 AM

Harold and Greysnake: Those look great guys- coming along really nicely! And what the guys already said sounds good to me Greysnake - I'm reluctant to add anything. 

Piers: Ohhh that Achilles looks cool! 

Bish: Sorry, Gecko Models is one company I've not touched yet. I have no idea of the quality or lack of it there. 

"I dream in fire but work in clay." -Arthur Machen


  • Member since
    November 2009
  • From: SW Virginia
Posted by Gamera on Thursday, September 17, 2020 9:08 AM

Piers: Thanks! I put some dust and dirt on the Comet and sealed it early this week. The figures are almost ready to go, the Scotsman's left eye was a little messed up and I saw it in the photo so I fixed it last night. And you can see the driver though the open driver's hatch so I just threw together a figure for him- you can't see much beyond his face so I didn't expend a lot of effort on this chest and arms. Cross your fingers I'll be ready with the finished photos by this weekend. 

"I dream in fire but work in clay." -Arthur Machen


  • Member since
    December 2002
  • From: Bury St Edmunds, Suffolk, England
Posted by Bish on Wednesday, September 16, 2020 3:40 PM

Does anyone have any experiance with Gecko Models kits. Just spotted this on scalemates.

Would deffinetly make a nice addition alongside the quad bike.

They are doing another boxing carrying a pallet of 105mm L31A3 ammo which they are also relleasing on its own. That has me hoping they are planning an L118 light gun.

I am a Norfolk man and i glory in being so


On the bench: Airfix 1/72nd Harrier GR.3/Fujimi 1/72nd Ju 87D-3

  • Member since
    December 2002
  • From: Bury St Edmunds, Suffolk, England
Posted by Bish on Wednesday, September 16, 2020 3:37 PM

Chassis looks good Harold. Deffinetly a versitle vehicle.

I am a Norfolk man and i glory in being so


On the bench: Airfix 1/72nd Harrier GR.3/Fujimi 1/72nd Ju 87D-3

  • Member since
    December 2002
  • From: Bury St Edmunds, Suffolk, England
Posted by Bish on Wednesday, September 16, 2020 3:36 PM

GS, looks good with the camo. I think i would follw jack's idea, once weathered you won't even know.

I am a Norfolk man and i glory in being so


On the bench: Airfix 1/72nd Harrier GR.3/Fujimi 1/72nd Ju 87D-3

  • Member since
    September 2018
  • From: Vancouver, Washington USA
Posted by Sergeant on Wednesday, September 16, 2020 3:19 PM

GreySnake
 

GS, you have done such a nice job I am reluctant to suggest. The overspray appears to be more pronounced in certain sections of the desert pink. If it were my project, I would wait 24-hours then mask off with Tamiya 6mm masking tape and painters paper (brown - lightweight paper used for painting trim) everything except one section of desert pink, like in the picture above. Use the area that was under the noodles to make your masking line. Then repaint just that section with pink to cover the overspray. Give it 24-hours to dry then carefully remove the masking and do another section. This method will take quite a bit of time, but I think your other alteratives are to repaint the whole tank, or try and cover it with weathering.
 
I have used Tamiya masking tape and painters' paper in a similar way to mask interiors without getting white paint all over the exterior. It is time consuming, but if you allow 24-hours for each section to dry the tape should not pull off any paint. Also, the overspray should not need much desert pink to cover it, so I would use as little as possible, to avoid creating a paint line.
 
Harold

  • Member since
    April 2003
  • From: USA
Posted by keavdog on Wednesday, September 16, 2020 3:18 PM

Checking back in on this thread.  Lot's of great progress and continued new starts.  Great GB.

Thanks,

John

  • Member since
    September 2018
  • From: Vancouver, Washington USA
Posted by Sergeant on Wednesday, September 16, 2020 2:56 PM

Thank you Gamera and Bish. I really enjoy being part of this group build. I completed step 3 this morning which surprised me with how much time I spent. I usually have a three-hour period each morning to work on models and thought I could finish two, or three steps today. However, this morning I started a little late and even though I underestimated how much time it would take I did not break anything, so it was a good session. Step 3 includes the frame, cross-members, lower engine half and winch assembly. Keeping it level and square was my main objective, so I do not have trouble later with the suspension and body assembly.

I find the AEC Matador one of the most interesting and iconic British military vehicles of World War II. With a low geared 7580 cc diesel engine it could pull the heaviest load through the muddiest field. It was designed for towing artillery pieces, but also served in different versions as an aircraft fuel truck, flatbed cargo truck, personnel carrier, tow truck and even a dump truck. The British really put this vehicle to good use during the war.

Harold

  • Member since
    April 2006
  • From: ON, Canada
Posted by jgeratic on Wednesday, September 16, 2020 2:21 PM

Greysnake, that looks good. 

For the overspray, I would just dab the pink colour back on with a brush.  Doesn't need to be competely covered over, just enough to break it up and no longer look like overspray, and instead appears to resemble some dirt here and there.  Keep the paint thin so it doesn't build up too fast.  While the paint is still wet,  you can also dab your fingertip at it to further blend into the surface.


regards,

Jack

  • Member since
    February 2011
Posted by GreySnake on Wednesday, September 16, 2020 2:03 PM
Sprayed the blue/black camouflage using Tamiya XF-69 NATO black on this morning and used masks rather than free handing. The model looks good at a glance.
However Monty is not going to be very happy when he sees the mess I’ve caused. I over sprayed very badly and should have made the blue tack noodles much bigger and  could have lowered the airbrush pressure more as well along with watching the angle I was spraying at.
 
The overspray is too pronounced to rely on weathering to fix/cover I believe. I suppose the best course of action is to carefully go back with the desert pink and try to blend in the overspray and hope of the best? If anyone else has any suggestions I’d be grateful as if it wasn’t for the overspray I’d be happy with how the tank looks.
  • Member since
    December 2002
  • From: Bury St Edmunds, Suffolk, England
Posted by Bish on Wednesday, September 16, 2020 9:02 AM

Glad to have you on board LA

I am a Norfolk man and i glory in being so


On the bench: Airfix 1/72nd Harrier GR.3/Fujimi 1/72nd Ju 87D-3

  • Member since
    April 2014
  • From: Australia
Posted by lostagain on Wednesday, September 16, 2020 8:03 AM


Eric I never liked the look of the Valentine, but I do like what you have done with it. Enjoy watching the blackbasing process. The mottle of the finished scheme is very effective. Like you I will not be too fixated on the right colour.


PJ Great work on the Firefly, looked great and love the dedication to make the changes and make them seamless.


Cliff, nice work on the Comet, the details pop out nicely – surely it needs a bit of dirt…


The Conqueror looks like a beast! Those are nasty sink marks in the bogies and a lot of work in the tracks


Steve, Good start on the Apache, know what you mean about those little bits getting knocked off. Good dedication getting the colour right – not sure it would be able to take off with that much paint on board…


BK The Challenger was a really quick build, great work with the painting, looks really good.


GreySnake Sherman soldering  - sunshields? Ahhhh, that could make an interesting diorama. The desert pink is an interesting colour.


Harold, like the look of the AEC Tractor. Grey Snake may want to borrow it to hide his Sherman…


Bish, I’d like to join with the 1/48 Tamiya Achilles. It will be OOB as a refreshing eaay build.


JOIN OUR COMMUNITY!

Our community is FREE to join. To participate you must either login or register for an account.

SEARCH FORUMS
FREE NEWSLETTER
By signing up you may also receive reader surveys and occasional special offers. We do not sell, rent or trade our email lists. View our Privacy Policy.