SEARCH FINESCALE.COM

Enter keywords or a search phrase below:

AIRCRAFT - On The Warpath: The Curtiss P-40

57845 views
729 replies
1 rating 2 rating 3 rating 4 rating 5 rating
  • Member since
    December 2002
  • From: NYC, USA
Posted by waikong on Saturday, July 2, 2005 3:28 PM
I'm actually in the home stretch, just minor work, gear doors, attenna's etc.. to finish up. Just have to have patience as its usually around now that I can't wait to finish up and mess something up in the process. Hopefully will have pictures in the 2 days or so. For all everyone in the US, have a Happy 4th of July.
  • Member since
    September 2011
Posted by fightnjoe on Saturday, July 2, 2005 2:19 PM
joe i am very interested to see how you tackle the pit. i look forward to the pics.


joe

Veterans,

Thank You For Your Sacrifices,

Never To Be Forgotten

Where you can find me:

Workbench on FaceBook  Google Plus  YouTube

  • Member since
    November 2003
  • From: Virginia
Posted by JoeRugby on Saturday, July 2, 2005 2:17 PM
A little, very little progress an a Revell-O-Gram P40B. 1/48 scale, sort of strange as I do almost exclusively 1/72. The upper fuselage half shows the weathering/wear contrast I am attempting (yes I know I need to go back and knock off those mold marksAngry [:(!])

I have also started rebuilding the seat. Filled in the slot for where the pilot is supposed to go and am beginging to build the frame around the seat it self.
Sorry no photos of that, my camera and more importantly photography skills would make that a waste of time.


Check out the WW I Special Interest Group @ http://swannysmodels.com/yabb/YaBB.pl?board=WW1SIG
  • Member since
    September 2003
  • From: N.E. Ohio
Posted by dragonfly on Saturday, July 2, 2005 11:26 AM
Thanks Mark, that's very interesting reading. Now if I can find some RAF light grey.

Jerry
  • Member since
    March 2004
  • From: Placerville, CA USA
Posted by Mark Joyce on Saturday, July 2, 2005 8:56 AM
QUOTE: Originally posted by dragonfly

I'm sorry, I was unclear about the colors. I'm planning to use the kit markings with Dk. green and Dk. earth over hasegawa's recommendation of nuetral gray underneath. 23rd FG China 1942. I assumed the topside colors were the same as the RAF, which I have left over from a Spit I finished. Am I right or wrong?


Hi Jerry,

If I'm not mistaken, for P-40's with the Temperate Land scheme, the underside color was the equivalent of RAF Light Grey, FS36463 (although a few P-40E's might have been painted in the Curtiss equivalent of RAF Light Blue). Neutral Grey was used for P-40's with Olive Drab on the topside. An excellent discussion regarding P-40E colors can be found here:

http://www.cybermodeler.com/history/meteor/cresswell.shtml

Although the article discusses Cresswell's Kittyhawk specifically, it talks of Dana Bell's research on P-40E colors in general.

HTH,

Mark
Ignorance is bliss
  • Member since
    February 2003
  • From: A Spartan in the Wolverine State
Posted by rjkplasticmod on Friday, July 1, 2005 4:09 PM
QUOTE: Originally posted by dragonfly

Thanks alot Rick, I hope I'm not becoming a pain. I guess I'll go with neutral gray cause there's just a little more contrast. Neutral and medium are very close.

Jerry


Sounds like a good plan to me Smile [:)]

Regards, Rick
RICK At My Age, I've Seen It All, Done It All, But I Don't Remember It All...
  • Member since
    September 2003
  • From: N.E. Ohio
Posted by dragonfly on Friday, July 1, 2005 3:59 PM
Thanks alot Rick, I hope I'm not becoming a pain. I guess I'll go with neutral gray cause there's just a little more contrast. Neutral and medium are very close.

Jerry
  • Member since
    February 2003
  • From: A Spartan in the Wolverine State
Posted by rjkplasticmod on Friday, July 1, 2005 3:50 PM
Jerry, The answer I gave applied to P-40B's of the AVG & may or may not apply to the later Birds. Osprey #35 has a profile of the Aircraft you're building & calls the color out as Medium Grey. Not very helpful I know. For what it's worth, the color profile shows it in Neutral Grey.

Regards, Rick
RICK At My Age, I've Seen It All, Done It All, But I Don't Remember It All...
  • Member since
    September 2003
  • From: N.E. Ohio
Posted by dragonfly on Friday, July 1, 2005 2:45 PM
Rick,

I'm sorry, I was unclear about the colors. I'm planning to use the kit markings with Dk. green and Dk. earth over hasegawa's recommendation of nuetral gray underneath. 23rd FG China 1942. I assumed the topside colors were the same as the RAF, which I have left over from a Spit I finished. Am I right or wrong? Thanks Rick.

Jerry
  • Member since
    February 2003
  • From: A Spartan in the Wolverine State
Posted by rjkplasticmod on Friday, July 1, 2005 12:28 PM
Dragonfly, The RAF Birds left the factory with the undersides painted Aircraft Grey. Most of them were not repainted, with the exception of those given the Desert camo.

Regards, Rick
RICK At My Age, I've Seen It All, Done It All, But I Don't Remember It All...
  • Member since
    September 2003
  • From: N.E. Ohio
Posted by dragonfly on Friday, July 1, 2005 11:12 AM
I thought I was just about ready for some paint untill I put some primer on to check the joins. Those two little filler panels in front of the exhuast are going to need some more attention. I tried Mr. Surfacer 500 for the first time only to find out it shrunk some. I'll go back to the old tried and true CA for filling from now on. As far as the trailing edge on the wing, I tapered it as much as I could without chewing up the fabric detail. It's still a little thick, but I guess it's ok for me.

Question on paint; If I'm using the RAF colors topside, is nuetral gray correct, or should I use Sky on the underside?

Dragonfly
  • Member since
    April 2005
  • From: Piscataway, NJ!
Posted by wing_nut on Friday, July 1, 2005 10:25 AM
Daniel,

Sometime the easiest solutuions are overlooked. That sounds like a nice easy way to get the same thing done. Great idea.

Marc  

  • Member since
    February 2003
  • From: A Spartan in the Wolverine State
Posted by rjkplasticmod on Friday, July 1, 2005 10:06 AM
Marc, the technique you describe works great if you want to super detail the wing tip lights. For the taxi light on the underside of the wing, it's a little different situation & not worth the effort IMHO.

Regards, Rick
RICK At My Age, I've Seen It All, Done It All, But I Don't Remember It All...
  • Member since
    April 2003
  • From: NSW, Australia
Posted by pingtang on Friday, July 1, 2005 9:57 AM
I was a bit disapointed with the thickness of the trailing edges too. Don't know what to do with them now. But, it sort of makes it more enjoyable when you have to do all this patch up work. It's more satisfying than just slapping together a Shake-n-bake kit in some ways.

Might have to give that nav light technique a go one day. Most of the time, I just drill a hole in the back of the clear piece and fill that with a clear colour. Looks like a bulb under glass to me.
-Daniel
  • Member since
    April 2005
  • From: Piscataway, NJ!
Posted by wing_nut on Friday, July 1, 2005 7:33 AM
Rick,

A technique for nav light I saw in a book recently is very cool. I have been practicing on old parts etc and results have been good. You may be able to adapt it to this application.

The procedure is for wingtip lights. After the wing is together file a notch when the tip light would be following the panel line. Drill a small hole in the notch. I have been using a #75 bit but the size can of course be adjusted to the application. Stretch some clear sprue so it will fit in the hole. This needs a lit candle so care must be taken. Point the end of the stretched sprue directly at the candle and slow move closer. The end will swell and round itself over into a nice “bulb” shape. Really be careful here. Make sure the end does not start to burn so it stays nice and clear. Paint the bulb the appropriate clear color. After the paint has had a good cure time, glue it in and place a drop of thick CA in the notch. In my testing so far, sometimes the drop is just right and it will form a nice lens over the bulb sometimes it needed a little polishing. The results have been incredible. They really look like a bulb under glass. Can’t wait to actually use it on a model.

Marc  

  • Member since
    April 2005
  • From: Piscataway, NJ!
Posted by wing_nut on Friday, July 1, 2005 7:00 AM
Work is progressing on the P-40N and I have to agree with statements by Rick and Daniels. Daniel… good choice on doing the fuselage that way, I wish I had. Something was just a hair off and I gave the files a real workout getting it right. Everything rescribed now and ready for the first primer coat so I will see what problems are left. I believe that the rear deck form the pit could have been made to fit “inside’ the fuselage and not have to sand and fill the little strip all around behind the canopy. This is basically straight OOTB but decided to scratch some seat belts (that and AM decals are the only add-ons) with lead foil and bent wire buckles. The nice big clear canopy allows a great view of the cockpit detail when closed.

Wingtip did in fact need work as did the trailing edge of the wing. Not up to Hasegawa’s usual standards. I like to keep a little 1/48 pilot figure sitting near by so when I wonder how something scales out I look at the figures fingers, look at the part in question and them look at my fingers. The trailing edge was really thick. I tried to thin them some but was worried about changing the shape of the airfoil too much. All the landing gear doors are like armor plate… see the before and after pic below. I hope Steve doesn't come on here and tell me that they were and I was wasted all that time Disapprove [V] (How they lookin' Abe?)


And given the model itself that is not necessarily geared to a beginner… do we really need a little raised line on the tips of the prop so we know how far down to point the yellow?

All this having been said…. In a away I am glad. I am enjoying fixing all these little things. Would be as much fun it they all just glued together perfect every time.

Marc  

  • Member since
    April 2003
  • From: NSW, Australia
Posted by pingtang on Thursday, June 30, 2005 9:39 PM
Dragonfly I just thought it might eliminate the possibility of there being a step from the front section to the rear section. It worked fine for me. I cleaned up the join before glueing the fuselage halves together, so it was just like assembling a "normal" two fuselage halves kit. The alignment took care of itself pretty much. I just used a slow setting glue so I could adjust the fit.

Rick Tell me about it! I'm working on the wing gun inserts now, and I've still got alot of join lines to do. The fit of parts is excellent so far (except the wing tips....), but I'm still doing alot of filling and sanding. Not how it should be......
-Daniel
  • Member since
    February 2003
  • From: A Spartan in the Wolverine State
Posted by rjkplasticmod on Thursday, June 30, 2005 1:24 PM
The Hasegawa 1/48 P-40 kits are great, but you do pay a price for all the possible versions from one set of tooling. This is the most seam filling I've had to do on a kit in a long time. Not from poor fit, but eliminating join lines where there are no panel lines on the real AC.

Regards, Rick
RICK At My Age, I've Seen It All, Done It All, But I Don't Remember It All...
  • Member since
    September 2003
  • From: N.E. Ohio
Posted by dragonfly on Thursday, June 30, 2005 10:10 AM
Daniel'

That's an interesting approach for attaching the tail section to the fuselage. I never would have thought of that. It sounds feasible. That way you could line up the panel lines, and keep everything flush. How did it go?

Dragonfly
  • Member since
    September 2011
Posted by fightnjoe on Wednesday, June 29, 2005 9:21 PM
steve make it the academy p-40c in 1/48.


joe

Veterans,

Thank You For Your Sacrifices,

Never To Be Forgotten

Where you can find me:

Workbench on FaceBook  Google Plus  YouTube

  • Member since
    April 2003
  • From: NSW, Australia
Posted by pingtang on Wednesday, June 29, 2005 9:05 PM
Dragonfly Nice work on your cockpit. Can't wait to see your finished build.Thumbs Up [tup]

My build is coming along well. I haven't closed the fuselage yet, but that's because I decided to attach the rear fuselage pieces to their respective halves first. I also filled and sanded the joint and re-scribed the panel lines I lost during sanding. The fuselage is ready to go together now.

One problem I've had is that I lost the part that goes on the back of the instrument panel. You know the part with the rudder pedals on it. I've had to make my own pedals and pegs to support the IP in the cockpit.Banged Head [banghead]

Can't wait to start filling and sanding the join lines of the fuselage insert behind the cockpit. Why couldn't there be panel lines there on the real thing????Ashamed [*^_^*]
-Daniel
  • Member since
    February 2003
  • From: A Spartan in the Wolverine State
Posted by rjkplasticmod on Wednesday, June 29, 2005 7:15 PM
I've been fighting temptation ever since it was announced. So far I've not succumbed. One thing not mentioned in the review is the landing gear struts which must be either reenforced or replaced with metal tubing or brass rod.

Regards, Rick
RICK At My Age, I've Seen It All, Done It All, But I Don't Remember It All...
  • Member since
    August 2004
  • From: Buffalo NY
Posted by Thehannaman2 on Wednesday, June 29, 2005 3:28 PM
Looky looky. Here is an interesting kit. Kind of pricey, but I think it's the only show in town. Just thought someone here would find of interest.

http://kits.kitreview.com/planet104reviewse_1.htm

Justen

"The distance between genius and insanity is measured only by success."

Member IPMS Niagara Frontier. "The BuffCon Boys."

IPMSUSA Member 45680 

  • Member since
    February 2003
  • From: A Spartan in the Wolverine State
Posted by rjkplasticmod on Wednesday, June 29, 2005 1:31 PM
I think it's a landing light. I won't use the tiny clear part. I'll paint the small depression chrome silver to represent the reflector & fill the depression with Krystal Klear to represent the bulb. After all of the painting & weathering of course Smile [:)].

Regards, Rick
RICK At My Age, I've Seen It All, Done It All, But I Don't Remember It All...
  • Member since
    September 2003
  • From: N.E. Ohio
Posted by dragonfly on Wednesday, June 29, 2005 11:55 AM
Steve-o,

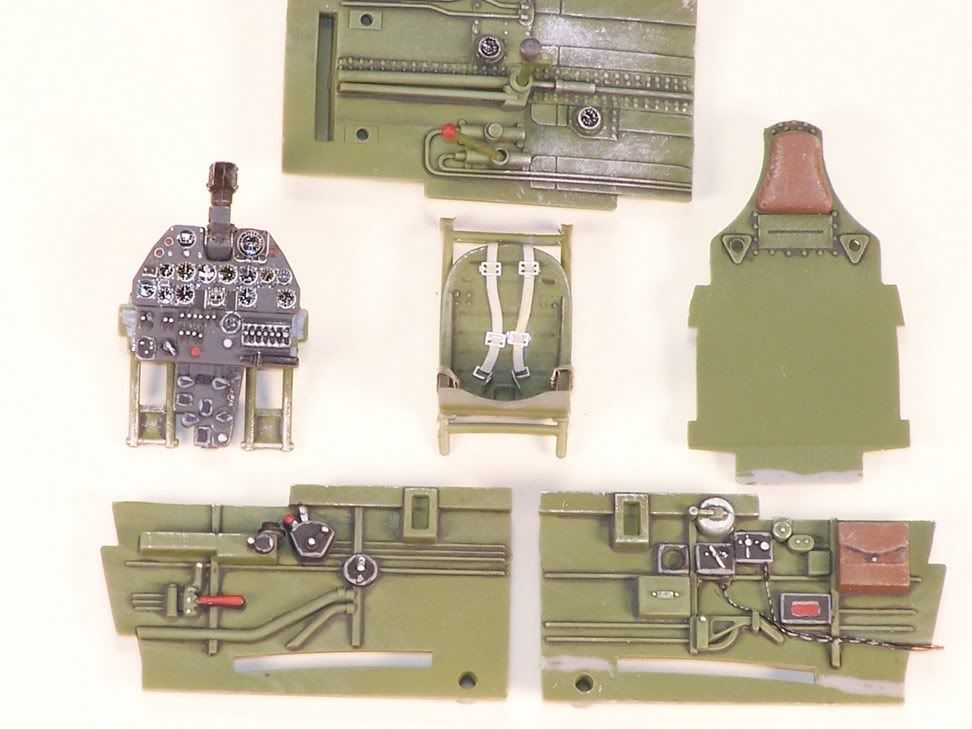
Thanks for letting me in.Smile [:)] I originally started this kit for the ooob GB, but now that I discovered the Warhawk GB, I definitely will learn more here. Tongue [:P] This is the Hase. P-40E. The cockpit is installed, and I'm just finishing sanding.Dead [xx(] Here's a pic before I closed the fuse. Thanks goes out to Rick for pointing out that my shoulder harness was installed incorrectly. I've since corrected that.


Question for Rick, or anyone else that may know

Parts A2,A24, and A25, include a clear part(U2). Is this some kind of formation light? Should this part remain clear? The unit, installed under the left wing, kind of looks like a small gun pod. What am I dealing with here?

cheers,

Dragonfly
  • Member since
    February 2003
  • From: A Spartan in the Wolverine State
Posted by rjkplasticmod on Wednesday, June 29, 2005 9:34 AM
Thanks Mike. The IP is from the new Eduard Color PE fret for the Hasegawa kit.

Regards, Rick
RICK At My Age, I've Seen It All, Done It All, But I Don't Remember It All...
  • Member since
    February 2003
  • From: Niagara Falls NY
Posted by Butz on Tuesday, June 28, 2005 11:49 PM
Hey Rick,
Love your office... Extremely detailed especially for the instrument panel. What did you use to detail it? Did you use the decal for the instru. panel as well??
Can't wait to see her finished...
Flaps up, Mike

  If you would listen to everybody about the inaccuracies, most of the kits on your shelf would not have been built Too Close For Guns, Switching To Finger

  • Member since
    February 2003
  • From: Niagara Falls NY
Posted by Butz on Tuesday, June 28, 2005 11:46 PM
Yo Justen,
Your lil Warhawk is sweet..... Like what I see so far..!!! WOW, can't believe you could keep the exato from rolling. You must be a good teacher to boot... LMAOTongue [:P]
Flaps up, Mike

  If you would listen to everybody about the inaccuracies, most of the kits on your shelf would not have been built Too Close For Guns, Switching To Finger

  • Member since
    September 2011
Posted by fightnjoe on Monday, June 27, 2005 11:41 PM
well steve i am in for another if you will let me. either the academy p-40c or the promodeler p-40e. not sure which one yet.


joe

Veterans,

Thank You For Your Sacrifices,

Never To Be Forgotten

Where you can find me:

Workbench on FaceBook  Google Plus  YouTube

  • Member since
    April 2005
  • From: Piscataway, NJ!
Posted by wing_nut on Monday, June 27, 2005 10:36 PM
QUOTE: Originally posted by waikong

Marc, Glad you fixed the problem. But I notice your exhaust are not in, does it go in from the outside? Looks kinda like it was meant to be installed from the inside?


Nope... they go on from the outside. I am going blind drilling them out... oh baby they're tiny.

Marc  

JOIN OUR COMMUNITY!

Our community is FREE to join. To participate you must either login or register for an account.

SEARCH FORUMS
FREE NEWSLETTER
By signing up you may also receive reader surveys and occasional special offers. We do not sell, rent or trade our email lists. View our Privacy Policy.