SEARCH FINESCALE.COM

Enter keywords or a search phrase below:

Spanish Civil War GB.

34024 views
434 replies
1 rating 2 rating 3 rating 4 rating 5 rating
  • Member since
    July 2003
  • From: Bicester, England
Posted by KJ200 on Monday, March 5, 2007 1:22 PM

Aaron, I built Italeri's tiny 1/72 Panzer 1 for this GB, and went with a fairly dark mid green.

The Italeri box does have the FS code for this green on the back, however I binned the box a few weeks back.

Sorry I can't be of more help.

Progress Update

Not a lot. 

Painted the pit, all 5 square cm of it!

Oh, and the IP. 

Karl 

Currently on the bench: AZ Models 1/72 Mig 17PF

Moderator
  • Member since
    April 2006
  • From: my keyboard dreaming of being at the workbench
Posted by Aaron Skinner on Monday, March 5, 2007 2:19 PM
Karl,

Thanks. I was leaning toward the green, but, you know how it is, you decide to go one way and another reference pops up and shows something different.

I saw the photos of your Panzer. I didn't realize the first time that it was 1/72 scale. It's small enough in 1/35!

Aaron Skinner

Editor

FineScale Modeler

  • Member since
    December 2004
  • From: 288921 E, 5659868 N UTMz12, NAD83
Posted by jboutin on Wednesday, March 7, 2007 8:56 AM
Yikes! only three weeks away till deadline!  Karl I hope you accept late completions.Ashamed [*^_^*]  March is going to be very busy as I am trying to do some renos in my basement.  My Bf-109b is almost ready for paint.  Unfortunately I was concentrating on my other Bf-109 (a g6) lately I didn't realize this one was up very very soon and I probably won't finish it before April 1!  Sigh [sigh]
JAY - fighting evil since 2:15pm, July 8,1976 -
  • Member since
    September 2004
  • From: Vernon, BC, Canada
Posted by razordws on Wednesday, March 7, 2007 10:50 AM

Looking forward to some pics Jay!  Those deadlines always seem to sneak up on us don't they,Wink [;)] 

Good luck with the basement renos.  I've been at it for almost a year now and I'm still not done but progress is being made (especially since my Dad came to stay for a few months, Yippee!).

Dave

  • Member since
    December 2005
Posted by solid on Wednesday, March 7, 2007 11:19 AM

Hi Everyone..........

 Well I got sidetracked and on the way I finished building this Savoia Marchetti SM-81
"Pipistrello" (Bat) sent by  Mussolini to battle the Republicans.

The SM-81 was at the time one of the latest Italian Bombers which had distinguished
itself in the Ethiopian Campaign of 1935................I am building other models but if
I have the time I´ll finish off with the "DH-89"...........The one that brought Franco
from his  African Base to  the mainland to battle the Reds........


  • Member since
    February 2003
  • From: A Spartan in the Wolverine State
Posted by rjkplasticmod on Wednesday, March 7, 2007 12:35 PM

Nicely done Solid. 

Regards,  Rick

RICK At My Age, I've Seen It All, Done It All, But I Don't Remember It All...
  • Member since
    July 2003
  • From: Bicester, England
Posted by KJ200 on Saturday, March 10, 2007 12:41 PM

Another great looking duild Solid.

Jay, don't worry about end dates, I'll keep this open until everyone has completed all the builds they want.

Not a lot of progress on the I-15...
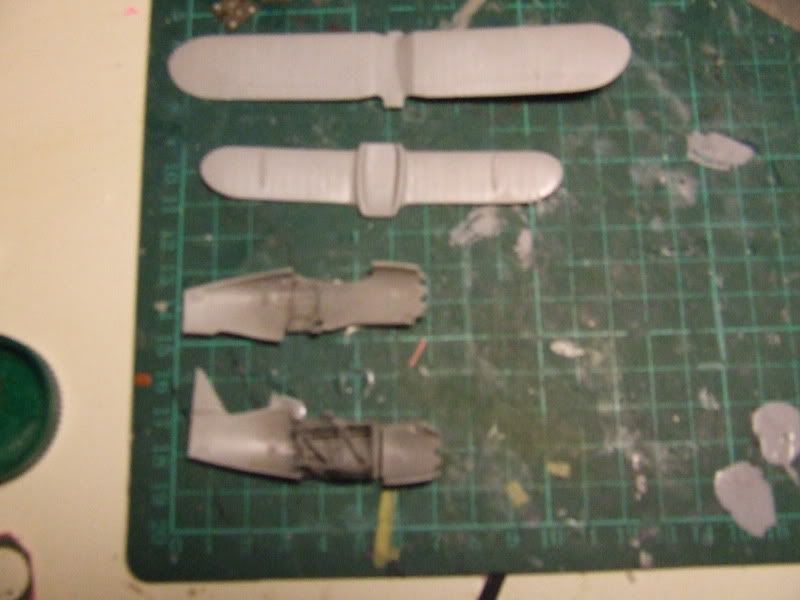
....as you can see.

As you can also see, this thing is tiny.

I'm not going overborad on the pit, as most of it isn't visible through the cockpit opening anyway.

Just needs a coat of matt, then I'll close up the fuselage.

Karl 


Currently on the bench: AZ Models 1/72 Mig 17PF

  • Member since
    February 2003
  • From: A Spartan in the Wolverine State
Posted by rjkplasticmod on Saturday, March 10, 2007 1:11 PM

Looks like progress to me Karl.

Regards,  Rick

RICK At My Age, I've Seen It All, Done It All, But I Don't Remember It All...
  • Member since
    December 2002
  • From: Reno, NV
Posted by espins1 on Saturday, March 10, 2007 1:31 PM

I was debating on whether or not to even attempt to build the Cr.32 while working on the Bf109B-2, but since you're not worried about the deadline I'll build it, thanks!  Big Smile [:D]

Now, off to my LHS (High Sierra Models) to get some strip styrene. 

Must not buy more kits.... just styrene... no more kits... must resist.... must.......  Angel [angel] Evil [}:)] Laugh [(-D]

Scott Espin - IPMS Reno High Rollers  Geeked My Reviews 

  • Member since
    July 2003
  • From: Bicester, England
Posted by KJ200 on Saturday, March 10, 2007 2:54 PM
 espins1 wrote:

Must not buy more kits.... just styrene... no more kits... must resist.... must.......  Angel [angel] Evil [}:)] Laugh [(-D]

Yeah, right.Wink [;)]

Did that, this morning. Went to the LHS to get some Tamiya tape, came back with a Tamiya 1/48 Tiger instead!

Could have been worse, I almost bought Dragon's new Panther D!

Rick, progress, but definitely slow. Mainly due to the Tamiya 1/48 T34 on the bench. 

Karl 

Currently on the bench: AZ Models 1/72 Mig 17PF

  • Member since
    December 2002
  • From: Reno, NV
Posted by espins1 on Saturday, March 10, 2007 3:09 PM

Big Smile [:D] I'm so proud of myself, I only bought the styrene.... no kits..... just styrene....

oh, and a reference book... but that's it.... Smile [:)]

I almost walked out of there with the Dragon PzKpfw IVJ but decided to wait until I could find out more about the kit. 

Ok, going to wash the Z real quick to earn some more wifey points, then off to work on some resin bits for this build.  I hope to have some cockpit photos for you later today.  Smile [:)]

Scott Espin - IPMS Reno High Rollers  Geeked My Reviews 

  • Member since
    December 2002
  • From: Reno, NV
Posted by espins1 on Saturday, March 10, 2007 6:49 PM

Ok, all the resin parts are cleaned up, except for the back of the wheel wells.  The razor saws, dremel and sanding sticks made the work a snap.  Much easier than I expected, but just need to remember to back off with the dremel and use the sticks when you get into the fragile areas.  The rudder pedels were a bit tricky and one of them fell off got knocked off by the torque of the dremel but wasn't damaged at all.  A quick spot of super glue will do the trick.  Whistling [:-^]

I am going to lay some interior paint color on these cockpit pieces before my wife and I go to Bullys with friends friends for good food and good beer, and not necessarily in that order  Dinner [dinner] Make a Toast [#toast] 

I know... pics... you want pics.  They're coming, really!  Laugh [(-D]

Scott Espin - IPMS Reno High Rollers  Geeked My Reviews 

  • Member since
    February 2003
  • From: A Spartan in the Wolverine State
Posted by rjkplasticmod on Saturday, March 10, 2007 7:18 PM

Sounds like good progress Scott.  On the whell bays, clen the resin as close as you dare without breaking through.  I work for a while & then hold the part up to a light.  when it begins to look translucent, go slow as you can inadvertantly break through.  If your kit is like mine, you will also need to thin the plastic on the upper wing sections in order to get the wings to close properly over the wheel bays.

Regards,  Rick

RICK At My Age, I've Seen It All, Done It All, But I Don't Remember It All...
  • Member since
    December 2002
  • From: Reno, NV
Posted by espins1 on Saturday, March 10, 2007 7:40 PM

Thanks for the heads up on the wheel bays and wings Rick, appreciate it.  Smile [:)]

Well those rudder pedals were a bit tricky.  As I was trying to glue the one back on,  the other one came off.  The attachment points for both pedals is EXTREMELY delicate.  If I had to do it all over agian, I would have left some of the excess resin on the back to reinforce them. 

As this is my first time working with resin I'm trying to be extra careful to dry fit, dry fit, dry fit so as to avoid problems later.  The one bad thing about the Classic Airframes kits is the lack of positive locating pins etc, which makes it very difficult to hold the fuselage together to make sure all the cockpit parts will fit.  As far as I can tell everything should be a go.  I know, famous last words.  Whistling [:-^] 

Scott Espin - IPMS Reno High Rollers  Geeked My Reviews 

  • Member since
    December 2002
  • From: Reno, NV
Posted by espins1 on Saturday, March 10, 2007 11:32 PM

Here is a quick photo of the painted interior bits, to include the wheel bays.  I'm going to paint all the interior details tomorrow and get the instruments put together as well.  Not much to look at, but now things will really start picking up speed.  Smile [:)]

Scott Espin - IPMS Reno High Rollers  Geeked My Reviews 

  • Member since
    February 2003
  • From: A Spartan in the Wolverine State
Posted by rjkplasticmod on Sunday, March 11, 2007 9:10 AM

Looks like good progress from here Smile [:)].

Regards,  Rick

RICK At My Age, I've Seen It All, Done It All, But I Don't Remember It All...
  • Member since
    December 2002
  • From: Reno, NV
Posted by espins1 on Sunday, March 11, 2007 11:18 AM

Hey Rick, what color did you paint your seatbelt straps? 

I would have assumed they were a light tan or canvas color but I just saw another build in a review and they painted the belts dark.  Can you shed any light on this amigo?  Smile [:)]

Scott Espin - IPMS Reno High Rollers  Geeked My Reviews 

  • Member since
    February 2003
  • From: A Spartan in the Wolverine State
Posted by rjkplasticmod on Sunday, March 11, 2007 11:22 AM

Scott, they varied in color from a medium gray to a light tan/khaki.  I used the tan in mine.

Regards,  Rick

RICK At My Age, I've Seen It All, Done It All, But I Don't Remember It All...
  • Member since
    December 2002
  • From: Reno, NV
Posted by espins1 on Sunday, March 11, 2007 11:35 AM

Cool, thanks.  I'll go with the light tan I was planning on.  I'm painting the cockpit details as we speak... well, if I can tear myself away from these forums.  Shock [:O]

I must say, these Classic Airframes kits are pretty nice, but you definately needs some modeling skills to do these justice.  So far I've been able to rise to the challenge. 

Oh, and I figured out what I did wrong with the elevator pedals.  That bar of resin on the bottom was supposed to stay there.  I got on such a roll with my dremel and sanding sticks that I neglected to simply look at the directions.  I just assumed it needed to be removed.... Sigh [sigh], another lesson learned the hard way, but at least it was recoverable.

Scott Espin - IPMS Reno High Rollers  Geeked My Reviews 

  • Member since
    December 2002
  • From: Reno, NV
Posted by espins1 on Sunday, March 11, 2007 4:09 PM

Got another question for you Rick, sorry to keep bugging you.  What glue did you use to sandwich the Acetate instrument sheet between the PE and the resin? 

Finished the interior detail work (except for the IP).  I'll do an oil wash with some burnt umber before I install it in the fuselage.  Going to work the seatbelts now.  Here is a teaser shot of the panel sides.


Scott Espin - IPMS Reno High Rollers  Geeked My Reviews 

  • Member since
    February 2003
  • From: A Spartan in the Wolverine State
Posted by rjkplasticmod on Sunday, March 11, 2007 8:01 PM

Scott, I used Quickset Epoxy to attach the film to the resin & Future to attach the PE to the film.

regards,  Rick

RICK At My Age, I've Seen It All, Done It All, But I Don't Remember It All...
  • Member since
    September 2004
  • From: Vernon, BC, Canada
Posted by razordws on Sunday, March 11, 2007 9:16 PM
I came accross that issue when I built my He 111.  Would never have thought to use future. Shock [:O]  Thanks for the tip Rick Thumbs Up [tup]

Dave

  • Member since
    December 2002
  • From: Reno, NV
Posted by espins1 on Sunday, March 11, 2007 9:25 PM
 rjkplasticmod wrote:

Scott, I used Quickset Epoxy to attach the film to the resin & Future to attach the PE to the film.

regards,  Rick

Cool, thanks Rick.  Did you paint your IP background panel white?

Scott Espin - IPMS Reno High Rollers  Geeked My Reviews 

  • Member since
    February 2003
  • From: A Spartan in the Wolverine State
Posted by rjkplasticmod on Monday, March 12, 2007 9:21 AM

Scott, No. I prefer to paint the back of the film.  It usually gives better definition.  I use Vallejo acrylic.

Regards,  Rick

RICK At My Age, I've Seen It All, Done It All, But I Don't Remember It All...
  • Member since
    December 2002
  • From: Reno, NV
Posted by espins1 on Monday, March 12, 2007 10:28 AM

Cool [8D]Thanks Rick, I didn't even think to just paint the back of the sheet.  Bow [bow]

I should have the cockpit, including seat belts etc finished in the next day or two.  I can't wait to start laying down that splinter camo. 

Scott Espin - IPMS Reno High Rollers  Geeked My Reviews 

  • Member since
    July 2003
  • From: Bicester, England
Posted by KJ200 on Wednesday, March 14, 2007 2:15 PM

Scott, looking forward to seeing more pics.

The work on the pit looks great so far.

Not a lot of progress on the I-15. Fuselage is together, just need to clean up the seams, then I can attach the wings.

Karl 

Currently on the bench: AZ Models 1/72 Mig 17PF

  • Member since
    December 2002
  • From: Reno, NV
Posted by espins1 on Wednesday, March 14, 2007 10:03 PM

Cruising right along on the Bf109B.  The back of the acetate instrument panel has been sprayed white and will be installed tomorrow.  Burger [BG]

Work has begun on the CR.32 as well.  The parts have been washed and I'm working on getting the resin parts cleaned up and ready for painting.  The photo etched parts in this kit are pre-painted, very nice touch!  Approve [^]

The resin nose of the CR.32 is gorgeous, however two of the cooling vanes on the front of the cowl are damaged.  I hope Classic Airframes can give me a replacement.  I'll try to contact them.  Anyone have any experience with Classic Airframes customer service?

Scott Espin - IPMS Reno High Rollers  Geeked My Reviews 

  • Member since
    July 2003
  • From: Bicester, England
Posted by KJ200 on Thursday, March 15, 2007 3:21 PM

Scott, bad luck on the CR32 nose.

From what I've heard CA are not too hot on customer service, but hopefully this was an isolated experience.

From doing next to nothing on the I-15, I managed to attach the wings,horizontal stabilisers and rudder last night, all in about 25 minutes last night!

Fit is not too bad, but I had to file down the wing struts to get them to fit.

I'll post some pics when I get an opportunity.

Karl 

Currently on the bench: AZ Models 1/72 Mig 17PF

  • Member since
    December 2002
  • From: Reno, NV
Posted by espins1 on Friday, March 16, 2007 11:41 AM
 KJ200 wrote:

Scott, bad luck on the CR32 nose.

From what I've heard CA are not too hot on customer service, but hopefully this was an isolated experience.

Karl 

Wow!  I sent an e-mail to Classic Airframes customer service yesterday regarding the malformed cooling slats on the resin CR.32 nose.  I've already received an e-mail back from them, they're sending me a new resin nose!  Outstanding customer service!  Less than 24 hours and they're already handling it! Smile [:)] Thumbs Up [tup] Thumbs Up [tup]

Scott Espin - IPMS Reno High Rollers  Geeked My Reviews 

  • Member since
    September 2004
  • From: Vernon, BC, Canada
Posted by razordws on Friday, March 16, 2007 11:49 AM
Good News Scott! Thumbs Up [tup]  Now let's see some pics!!!  That goes for you too Karl! Wink [;)]

Dave

JOIN OUR COMMUNITY!

Our community is FREE to join. To participate you must either login or register for an account.

SEARCH FORUMS
FREE NEWSLETTER
By signing up you may also receive reader surveys and occasional special offers. We do not sell, rent or trade our email lists. View our Privacy Policy.