SEARCH FINESCALE.COM

Enter keywords or a search phrase below:

The P-51"mustang" Group Build. 2008

90749 views
760 replies
1 rating 2 rating 3 rating 4 rating 5 rating
  • Member since
    February 2003
  • From: Niagara Falls NY
Posted by Butz on Tuesday, February 12, 2008 3:29 AM

 Wow, I like what I see so far w/ the WIP's especailly the built ups.. Very sweet in deed guys..!!

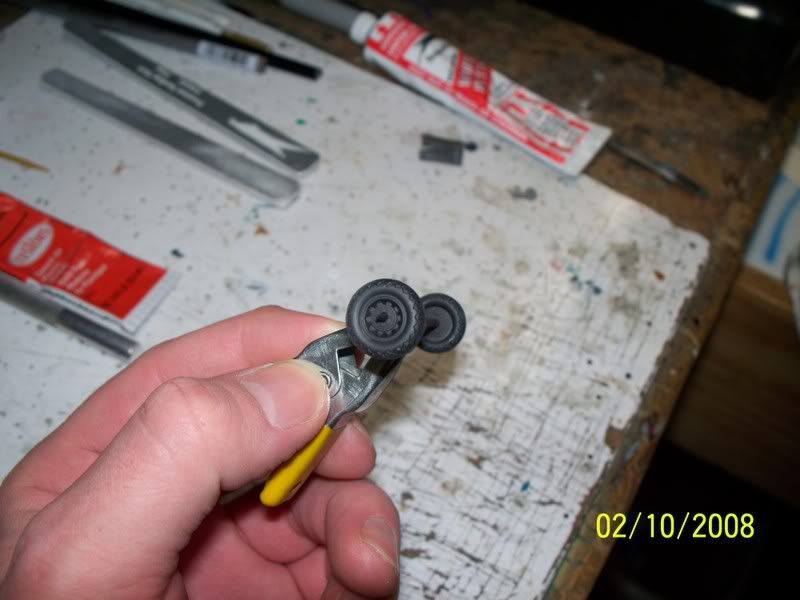
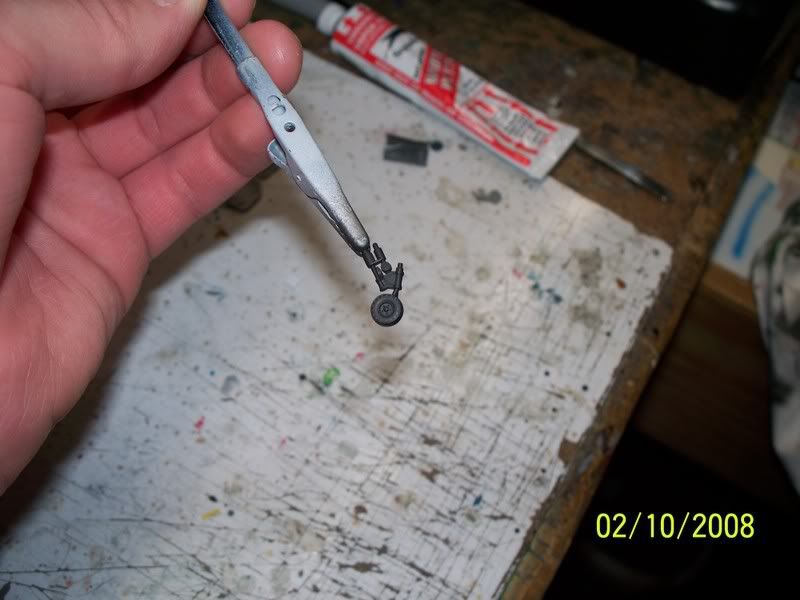
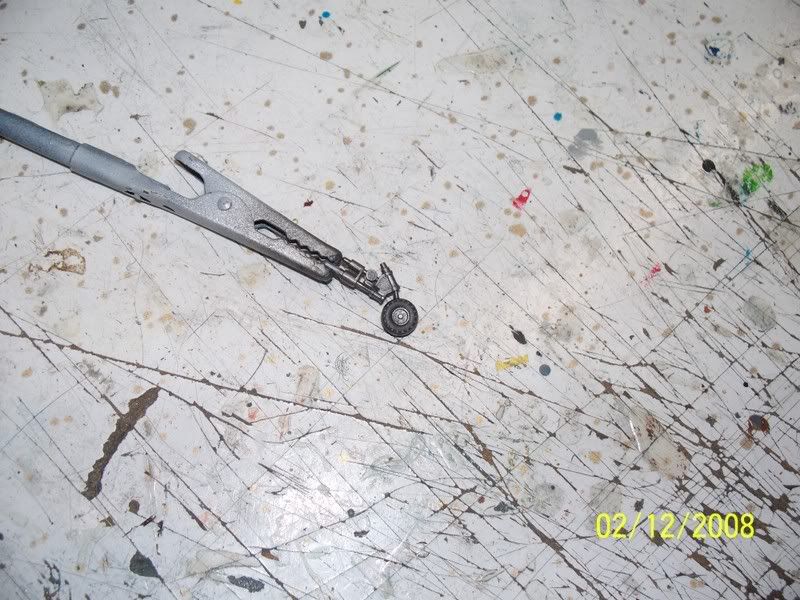
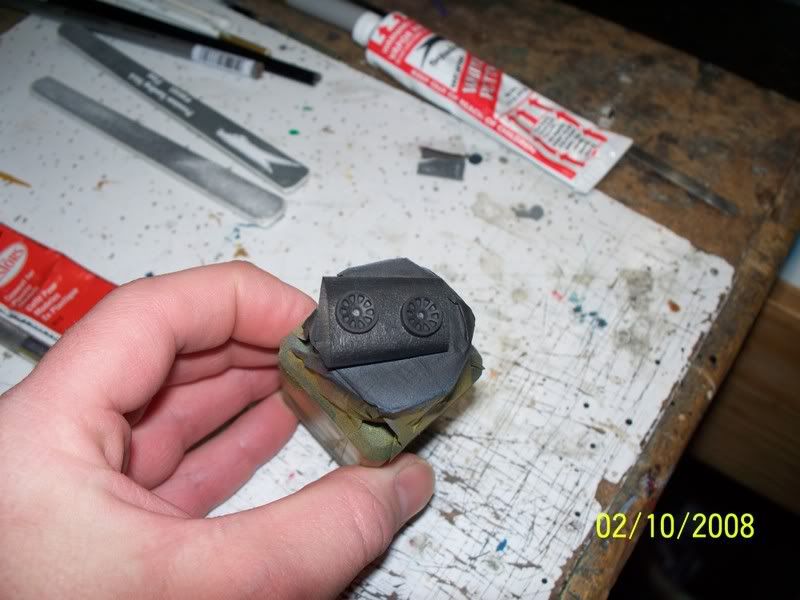
Well here is what I have thus far... I put some black on my tires, tail wheel and wheel wells as my base coat.

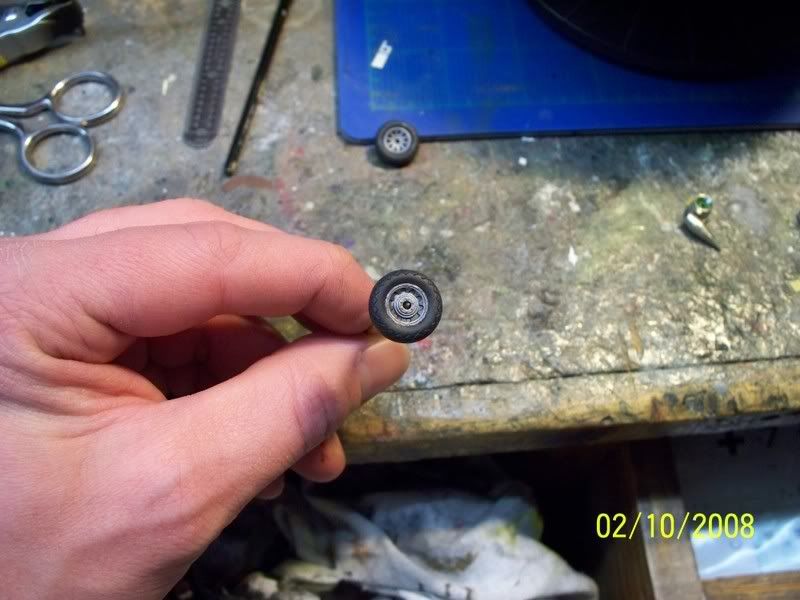
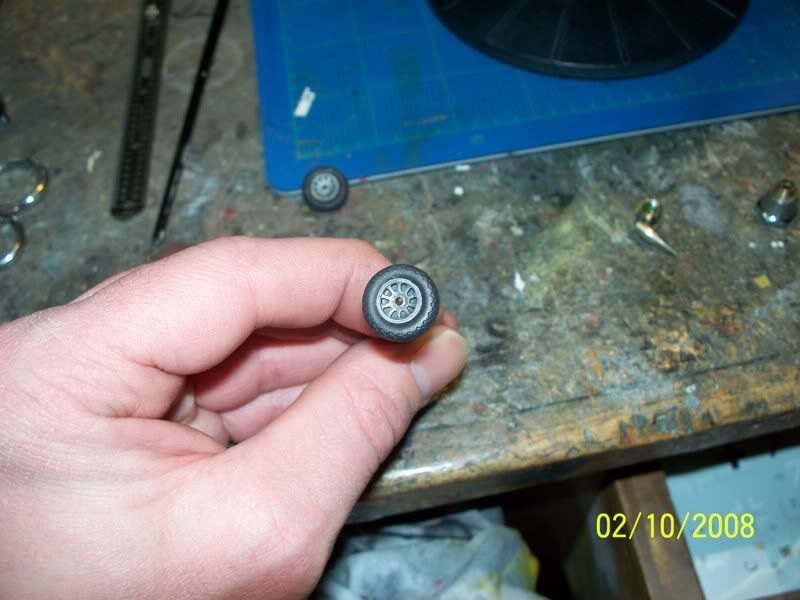
 Used buffing Magesium for a secondary base coat for the tires & tail wheel... From there I dry brushed a light coat of buffing Aluminum.. Not too shabby me thinks.

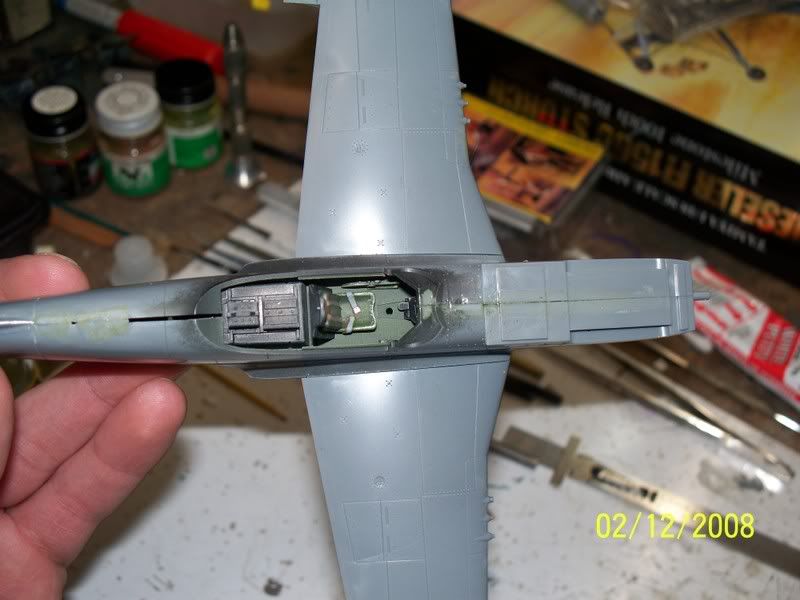
 As for the wheel wells, I used the same method that I used on the interior!! Hope you all like the slow process so far..!!

 I also glued the fuselage together and dry fitted the wings to see what needs to be done before I glue them as well.. 

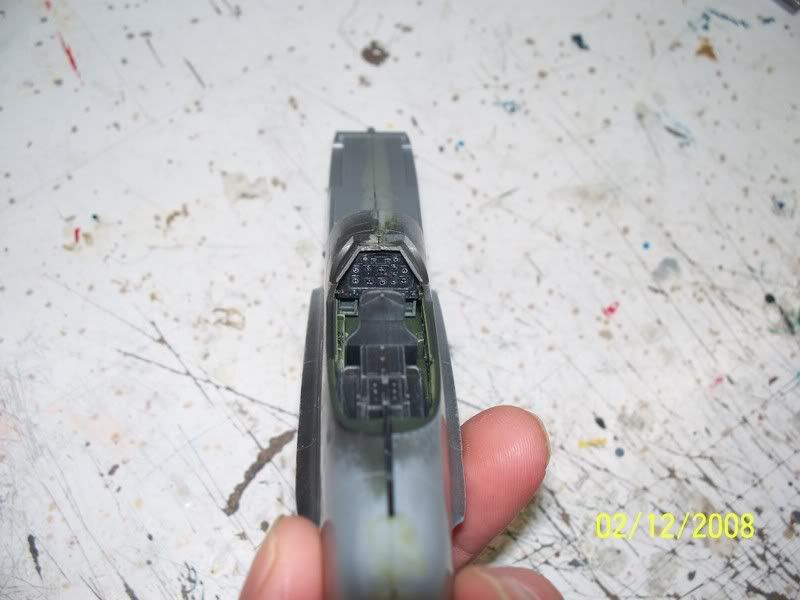
 O before I forget, I installed my IP and as you can see, I used the instrument decal. I placed a few drops of futire to represent the glass.. So far so good..... crossing fingers n toes..!! 
Thanks fer takin a peek..
Flaps up,

Mike

Rangers Lead The Way 



  If you would listen to everybody about the inaccuracies, most of the kits on your shelf would not have been built Too Close For Guns, Switching To Finger

  • Member since
    February 2003
  • From: Niagara Falls NY
Posted by Butz on Tuesday, February 12, 2008 3:22 AM

Hey Fred,

 Ah very cool.. Thank you for the feed back my friend..!!

Howdy dupes,

 Your too funny..!!! Na this kit is so far a breeze... Knockin on woodBanged Head [banghead]

Hi Drew,

 Thank you, glad you like it thus far..!!! By the way, I am going to send you a PM..!!

  If you would listen to everybody about the inaccuracies, most of the kits on your shelf would not have been built Too Close For Guns, Switching To Finger

  • Member since
    September 2006
  • From: From Vernal UT OH YEA!!
Posted by raptordriver on Monday, February 11, 2008 7:38 PM
NiceThumbs Up [tup]

Andrew


  • Member since
    December 2006
  • From: Kennewick, WA
Posted by kbuzz01 on Monday, February 11, 2008 4:05 PM

Windhawk, thanks much for the reply and pictures.  I might give the flaps a try, although I already have the wing halves glued together.  Or maybe I'll just leave them incorrectly up and do it the right way on my next Hasegawa build.  The Tamiya kit comes with a choice to go either way.  (Yup, the flaps drop when the hydraulic pressure drops.)

Here's my Tamiya 1:48

Thanks, again

Ken 

animation6.gif image by kbuzz_photos
  • Member since
    November 2003
  • From: Virginia
Posted by JoeRugby on Monday, February 11, 2008 12:19 PM

Nice work fellas!

Here are a pair from my collection...


Tamiya 1/72 on the left in Yeager's OD livery with Eagle Strike decals and a RNZAF Otago Squadron Hasegawa 1/72 with Ventura Decals.  No AM parts on these

This is part of a wider personal project, the "Mustang Ranch".  I am attempting as many models of the "Stang as possible...P51A, F6 (A or later mark), A36, P51B, Foreign Service D/K (done) ETO bird (done) PTO bird, Twin Mustang, Racer Mustang, P51H and perhaps an attempt at the Cavilier/C.O.I.N. (all in 1/72 scale) version which should be a kit bash/scratchbuild.


Check out the WW I Special Interest Group @ http://swannysmodels.com/yabb/YaBB.pl?board=WW1SIG
  • Member since
    March 2007
  • From: NJ
Posted by JMart on Monday, February 11, 2008 11:49 AM

kbuzz01 - nice progress so far! I just built that kit, I know how much of a pain it is ;) Lots of dry fitting and re-painting, but I learned a TON from that kit. I know about the fitting, I ended up cutting off the "guides", dry fit a lot, and Tenax the fuselage, followed by 2 rounds of putty/sanding.


  • Member since
    July 2013
Posted by IL2windhawk on Monday, February 11, 2008 11:25 AM

 kbuzz01 wrote:
Windhawk - nice looking Revell.  My main problems have been the fit in the nose and underside fuselage.  I'm trying to decide if I want to tackle cutting off the flaps.  I know that they should be dropped if the gear doors are open.  Can you describe what you did and also do you happen to have additional pics of that area?

So are the flaps hydralically operated like the inner gear doors? 
They come down when the engine is turned off?  I've wondered
for years why all parked mustangs have their flaps down.

Here are some photos per your request.  I think the best way to
cut out control surfaces is to use the backside of an exacto blade
(the standard triangular ones) to litely scribe the panel line.  Just
apply enough pressure to keep the blade in the slot and drag it
accross about 10-20 times, then the control surface will easily
come off.  I do this on almost every kit now.  Really makes the
model look more dynamic (especially rudder/ailerons/elevators).
Let me know if you still have questions.


Terrible silvering Yuck [yuck] (this was before I learned the clear-gloss trick) 

  1/32 Revell Duo Discus
  1/32 Revell ASK-21
  1/48 Ardpol SZD-51 Junior
  1/48 Czech Models Grumman Goose
  1/144 FineMolds Millennium Falcon

  • Member since
    January 2007
  • From: Cherry valley il.
Posted by invertman on Monday, February 11, 2008 6:47 AM

hey guys,

picked up the tamiya mkIII kit yesterday,and wow what a difference

in quality.

i've built a couple tamiya a/c kits in the past and wasn't dissapointed.

i'm done trial fitting parts and gave them a bath.

started painting the cockpit parts last night.

will start posting pics tonight.


jason

  if you want permission for a test flight.... the answer is "no".

  • Member since
    December 2006
  • From: Kennewick, WA
Posted by kbuzz01 on Monday, February 11, 2008 12:48 AM

Thanks, guys.

Windhawk - nice looking Revell.  My main problems have been the fit in the nose and underside fuselage.  I'm trying to decide if I want to tackle cutting off the flaps.  I know that they should be dropped if the gear doors are open.  Can you describe what you did and also do you happen to have additional pics of that area?

Thanks, Ken 

animation6.gif image by kbuzz_photos
  • Member since
    July 2007
  • From: Sweden
Posted by Azgaron on Monday, February 11, 2008 12:40 AM

Nice work, Ken! Love to see more!

Cheers,

Azgaron


  • Member since
    July 2013
Posted by IL2windhawk on Sunday, February 10, 2008 11:03 PM

I built that Revell kit a while back.  It was the first kit that I'd built
for years prior.  I had alot of fun with it, have learned alot since then.   
The only modification I did was cutting the flaps off so I could position
them down.  The pilot figure is molded nicely.  I saved him and and he's
actually sitting in my P-51A for this build.  This kit features a sliding
canopy.  I thought that was a nice touch.  Wish more kits were like that.


Invertman, you will be very pleased with the Tamiya MkIII kit. 
It's essentially the same kit as ICM.  There is alot of suspicion that
ICM just blatantly made their molds from Tamiya parts, because the
kits are identical (except Tamiya is better quality plastic and decals).

Keep the good work rolling in!

  1/32 Revell Duo Discus
  1/32 Revell ASK-21
  1/48 Ardpol SZD-51 Junior
  1/48 Czech Models Grumman Goose
  1/144 FineMolds Millennium Falcon

  • Member since
    September 2006
  • From: From Vernal UT OH YEA!!
Posted by raptordriver on Sunday, February 10, 2008 9:11 PM
KBuzz great progress I think the Revell kit is good though although I've never built the Tamiya kit.Laugh [(-D]

Andrew


  • Member since
    February 2004
  • From: Second City
Posted by arki30 on Sunday, February 10, 2008 8:37 PM

Nice progress going in here!

Building Now:

1/48 Academy Bf-109G6 - 100%

1/48 Tamiya F4U-1A - 5%

Upcoming:

1/48 Revell F-14D

  • Member since
    December 2006
  • From: Kennewick, WA
Posted by kbuzz01 on Sunday, February 10, 2008 7:44 PM

Well, I've started my cheapie Revell P-51D.  Boy, I wish I hadn't built that Tamiya kit first!  This one is quite a challenge.  I doubt that there is much here to interest you more experienced folks but here is my progress so far.  This one is going to be pretty much OOB, but I have added a few hydraulic lines and did my first exhaust drill.  (By the way, that seat isn't glued in yet - hopefully the pilot will be able to pull that stick back to climb when I'm through  Cool [8D] )


 Ken

animation6.gif image by kbuzz_photos
  • Member since
    July 2007
  • From: Sweden
Posted by Azgaron on Sunday, February 10, 2008 11:00 AM

Mike,

You're welcome! I hope it all goes well! Yes, I told Raptor that I wanted to join with a Mustang in Swedish markings, and I'm pretty sure that Raptor have put me on the roster.

Cheers,

Azgaron


  • Member since
    January 2007
Posted by Gigatron on Sunday, February 10, 2008 10:16 AM

Thanks, guys Big Smile [:D]

Andrew, it's a mix of airbrushing and regular brushing.  The basecoats were applied with the airbrush, small details and weathering were done with a regular brush and some colored pencils.

Mike, the wood floor was done using a base of dark tan (I used a combo of radome tan and leather) and a top coat of leather.  I brushed on the basecoat and while it was still tacky, I used a stiff bristled brush to add grain texture.  Then, after it dried I used the same stiff brush to brush on the leather color.  And when that was tacky, I used a clean brush to sort of dry brush and blend the colors.  The metal kickplates are just small pieces of aluminium foil adhered with crazy glue.

-Fred


  • Member since
    September 2006
  • From: From Vernal UT OH YEA!!
Posted by raptordriver on Sunday, February 10, 2008 10:14 AM

Great progress Butz

Invertman no problemBig Smile [:D]

Andrew


  • Member since
    November 2006
  • From: Coastal Maine
Posted by dupes on Sunday, February 10, 2008 9:29 AM
BUTZ! You look like you're starting to turn into The Incredible Hulk in a couple of those WIP pics! Is that kit making you that mad? Laugh [(-D]
  • Member since
    January 2007
  • From: Cherry valley il.
Posted by invertman on Sunday, February 10, 2008 9:15 AM

hey all,

well i openend up the icm kit last night,and i have to say i'm

pretty dissapointed in the kit. the right upper wing panel was

damaged deyond repair. the root portion of the panel was melted off.

i talked to the owner of the l.h.s. and he told me i could exchange the

kit for another one. but he is out of stock on the icm mk.III but he has

the tamiya raf mkIII. so he set it aside for me.

so i'm building the tamiya mkIII kit.


raptordriver: sorry to inconvinence you.


thanks.

jason

  if you want permission for a test flight.... the answer is "no".

  • Member since
    February 2003
  • From: Niagara Falls NY
Posted by Butz on Sunday, February 10, 2008 3:52 AM
 Azgaron wrote:

That looks very nice Mike! Excellent work!

Cheers,

Azgaron 


Thanks Azgaron for the compliment.. Much appreciated!! Hopefully the final scheme will be just as good.. Crossing fingers n toes. By the way, are you in the GB as well?? I have not lookedat the roster in a while..

Flaps up,

Mike

Rangers Lead The Way 
  If you would listen to everybody about the inaccuracies, most of the kits on your shelf would not have been built Too Close For Guns, Switching To Finger

  • Member since
    February 2003
  • From: Niagara Falls NY
Posted by Butz on Sunday, February 10, 2008 3:50 AM
 Gigatron wrote:

ok, here's a WIP pic of the cockpit.

-Fred


Hey Fred,

 I like what I see thus far... What did you do or what method did you use to get that wood look?

Flaps up,

Mike

Rangers Lead The Way 

  If you would listen to everybody about the inaccuracies, most of the kits on your shelf would not have been built Too Close For Guns, Switching To Finger

  • Member since
    July 2007
  • From: Sweden
Posted by Azgaron on Sunday, February 10, 2008 3:34 AM

That looks very nice Mike! Excellent work!

Cheers,

Azgaron 


  • Member since
    February 2003
  • From: Niagara Falls NY
Posted by Butz on Sunday, February 10, 2008 1:59 AM

Hey all,

 I also posted these WIP's in the a/c section as well..... Well heres my start for the GB deal... As I was mentioned to Drew about markings.. I am still up in the air w/ which one I want to do.. So how's bout this, we will all see when she is all done.. Laughs

 As usual, Tamiya does an outstanding job on their kits over all w/ the exception of lacking dials in the IP... No biggy since I am doing this Stang OOB, I will use the decal they provide.. Not bad looking actually.. 

 I started out w/ using flat black as a base coat then did a light coat of dark green mixed with a little hint of interior green. From there I dry brushed the rest using interior green all the way up to a light yellow for the hight lights..

 Well, here she is as of right now... Hope you like what I have done so far as I do.. I am really enjoying this GB with all of you... Learning a lot from everyone here thats fer sure Wink [;)]

 Thanks fer taking a peek and thank you Drew for leting me sit a spell w/ ya'll..!!

Flaps up,

Mike

Rangers Lead The Way 

  If you would listen to everybody about the inaccuracies, most of the kits on your shelf would not have been built Too Close For Guns, Switching To Finger

  • Member since
    February 2003
  • From: Niagara Falls NY
Posted by Butz on Sunday, February 10, 2008 1:50 AM
 gzt wrote:

I did not open the plastic wrap yet, but the sprues look really nice. There is small PE set incliuded, not eduard Smile [:)] but contains seatbelts and IP plus few other parts.

The kit has markings for four aircrafts.

Guess what am I going to use ? Smile [:)]

Yes, you absolutely right... it will be a "Polish Squadron" ... shocked ? LOL

The plane will be from Westfield - home of Mass ANG of "Polish Squadron"  

I just got inspiration to build quite few more airplanes Smile [:)]


Hey Greg,

 Please up date us(me) on that P-51H kit... My local guard unit also flew them and yes you guessed it... I want to built one of em..!!

 I did not realize that the Mass unit was essentially a Polish oufit..!! Now thats cool... Hey before I forget, how did your package arrive?? Safely I hope..!!

 Looking forward to seeing her built up..!!

Flaps up,

Mike

Rangers Lead The Way 

  If you would listen to everybody about the inaccuracies, most of the kits on your shelf would not have been built Too Close For Guns, Switching To Finger

  • Member since
    September 2006
  • From: From Vernal UT OH YEA!!
Posted by raptordriver on Saturday, February 9, 2008 4:20 PM
Thats some great progress there do you do that all with a brush?

Andrew


  • Member since
    January 2007
Posted by Gigatron on Saturday, February 9, 2008 2:04 PM

ok, here's a WIP pic of the cockpit.

-Fred


  • Member since
    September 2006
  • From: From Vernal UT OH YEA!!
Posted by raptordriver on Friday, February 8, 2008 3:54 PM

Ok mike your down. Glad alot of people signed upBig Smile [:D]


IL2 that is amazing your grandpa got to fly in a P-51H Those go pretty fastWink [;)]

Andrew


  • Member since
    July 2003
  • From: Cincinnati, Ohio
Posted by ridleusmc on Friday, February 8, 2008 4:37 AM

Mike, If you haven't built one before...

... It's a great kit.  It's just fun to build. 

Semper Fi,

Chris

  • Member since
    April 2003
  • From: Hayward, CA
Posted by MikeV on Friday, February 8, 2008 1:54 AM

Andrew,

Put me down also my friend.

I will be building the 1/48 Tamiya P-51B OOB and with the kit decals.... Shangri-La  Thumbs Up [tup]

Wisdom is the right use of knowledge. To know is not to be wise. Many men know a great deal, and are all the greater fools for it. There is no fool so great a fool as a knowing fool. But to know how to use knowledge is to have wisdom. " Charles Spurgeon
gzt
  • Member since
    May 2007
  • From: Massachusetts
Posted by gzt on Thursday, February 7, 2008 11:59 PM

This is nice !

I will have to do some additional research, what I plan for the next Week or two. I need to go there and find more pictures, maybe pilots ... I have to know more about this squadron. 

Flying is a thrill #2 known to mankind. Landing is #1.

http://www.rwd-6.org

JOIN OUR COMMUNITY!

Our community is FREE to join. To participate you must either login or register for an account.

SEARCH FORUMS
FREE NEWSLETTER
By signing up you may also receive reader surveys and occasional special offers. We do not sell, rent or trade our email lists. View our Privacy Policy.