SEARCH FINESCALE.COM

Enter keywords or a search phrase below:

Red Storm on the Reich GB - Sept. 8, 2008 - May 9, 2009

61951 views
710 replies
1 rating 2 rating 3 rating 4 rating 5 rating
  • Member since
    April 2007
  • From: Schroon Lake, NY
Posted by SMJmodeler on Thursday, January 8, 2009 3:40 PM

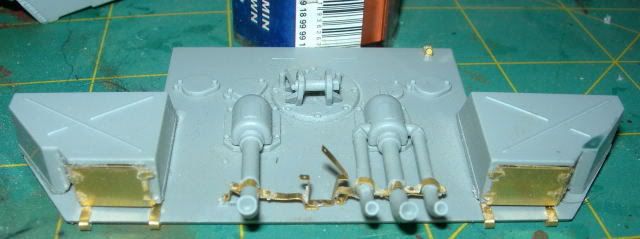
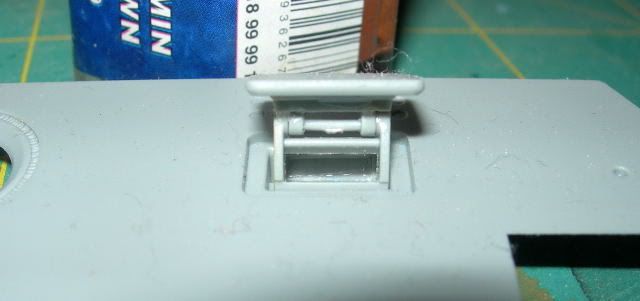
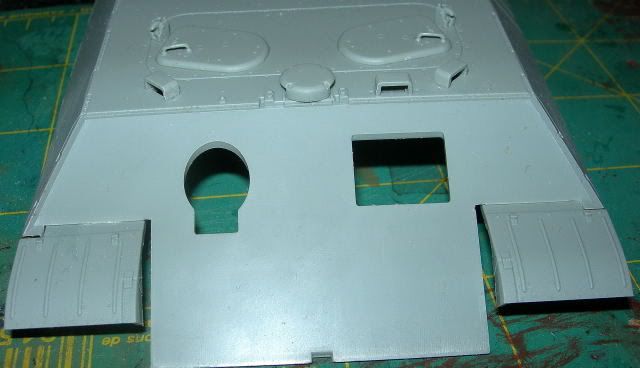
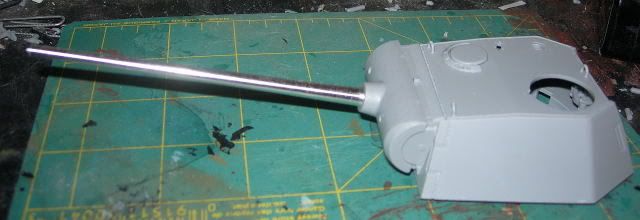
Guys: I finally have a chance to post some WIP pic's.  Here's the evolution of my T34/85...

Added 01/15/09:

Added 01/21/09:


mmc
  • Member since
    February 2007
  • From: Newcastle upon Tyne, England
Posted by mmc on Wednesday, January 7, 2009 7:31 AM

Mike I was wondering the same thing, there seems to be a lot of photos of Russian armour showing lots of sag in the tracks. Is there a reason for the excessive sag?

Mark

  • Member since
    July 2003
  • From: Perth, Western Australia
Posted by madmike on Wednesday, January 7, 2009 2:49 AM
 Geist wrote:

Alright, here is my ISU152. Painting and markings are done. I'm going to let the red star decals set overnight and then its on to weathering. I'n not entirely sure what I'm going to do yet. I think that I may give it a dusting and some signs of use in the city so that means no mud.


All the markings were hand painted except for the stars. The stripes are intentionally messy since I've seen some bad Soviet painting. The stars are from a Dragon T34 decal sheet that I'm not planning on using. I'm getting better at free handing, but if you think my paint writing is bad you should see my hand writing Black Eye [B)]Tongue [:P].   


Erik

Now that is looking great! Though the tracks are very saggy! I often wonder how the Soviets actually advanced with tracks like that, surely they threw them every other kilometer?

Cheers

Mike


"I do not feel obliged to believe that the same God who has endowed us with sense, reason, and intellect has intended us to forgo their use." - Galileo Galilei
  • Member since
    August 2008
  • From: Round Lake Heights, IL
Posted by Lofweir on Tuesday, January 6, 2009 1:21 PM
 Geist wrote:

Thanks for the comment Tigerman. The fruil tracks are hard to set in one place. Everytime I move it I'm constantly resetting the tracks to their proper posisition. They shouldn't be that saggy once I stop moving it.


These are some pics I used as inspiration for the painting and the tracks. 


 Thanks for looking,


Erik


Based on your reference photos, it looks like there was a fair amount of sag in the tracks.  That's a really nice build.  The hand-painted markings give it a nice look. 

Currently Building: Tamiya 1/35 Panther Ausf. A
  • Member since
    December 2002
  • From: Reno, NV
Posted by espins1 on Tuesday, January 6, 2009 10:48 AM
Nice work Erik and Brandon!  Smile [:)]

Scott Espin - IPMS Reno High Rollers  Geeked My Reviews 

  • Member since
    September 2007
  • From: Relocating
Posted by Mobious on Tuesday, January 6, 2009 10:09 AM

 Hey guys, very nice work going on.

 mmc, nicely done SdKfz 7/2.

 Geist really like the painted slogans. Looks the Part! Looking forward to seeing weathering begin on su 152.

 dupes, the Jagdtiger is looking good. Ready for the weathering.

 Modelfreak, there is alot of detail going in the Marder. Looking good.

 Looking forward to updates all!

 Mobious


"It's a problem of applied physics" Roy Brown

  • Member since
    November 2006
  • From: Coastal Maine
Posted by dupes on Tuesday, January 6, 2009 9:45 AM
Wow, great work fellas. Especially like those hand-painted markings, Geist! Thumbs Up [tup]Thumbs Up [tup]
mmc
  • Member since
    February 2007
  • From: Newcastle upon Tyne, England
Posted by mmc on Tuesday, January 6, 2009 1:59 AM

Thanks for the kind words Scott and Modelfreaks was really nervous about this build.

Geist: Your ISU-152 is amazing, havent built any Soviet armour yet, might have to go shoppingWhistling [:-^]

Modelfreaks: Looking forward to seeing your Marder, one of my favourites.

Dupes: Fantastic Jagdtiger, love the camo.

Mark

  • Member since
    November 2007
  • From: NW Chicago Suburbs
Posted by modelfreaks on Monday, January 5, 2009 10:23 PM

The ISU-152 looks great Geist. The hand painted markings look very realistic.

Alright, I was able to accomplish some small steps on my Marder. Im getting close to the point where I'll start painting the interior.

Small parts attatched to the side and top armor of fighting compartment:

AP rounds are now painted green (tip in the armor forum):

Completed gun:

Filled injection holes on walls of fighting compartment:

Ammunition rack in main compartment (Although it should be flipped):

Thanks for looking

-Brandon When something alines itself with something else, BAD THINGS WILL HAPPEN.
  • Member since
    July 2007
  • From: Ohio
Posted by Geist on Monday, January 5, 2009 9:05 PM

Thanks for the comment Tigerman. The fruil tracks are hard to set in one place. Everytime I move it I'm constantly resetting the tracks to their proper posisition. They shouldn't be that saggy once I stop moving it.


These are some pics I used as inspiration for the painting and the tracks. 


 Thanks for looking,


Erik

On the bench: Italeri Leopard 1A2 correction build with Perfect Scale turret and Eduard PE

  • Member since
    March 2003
  • From: Rain USA, Vancouver WA
Posted by tigerman on Monday, January 5, 2009 8:37 PM
Nice markings Geist, that always adds a little extra when done yourself. Man, that guy's got some serious sagging with the tracks going on.

   http://i7.photobucket.com/albums/y269/wing_nut_5o/PANZERJAGERGB.jpg

 Eric 

  • Member since
    July 2007
  • From: Ohio
Posted by Geist on Monday, January 5, 2009 8:32 PM

Alright, here is my ISU152. Painting and markings are done. I'm going to let the red star decals set overnight and then its on to weathering. I'n not entirely sure what I'm going to do yet. I think that I may give it a dusting and some signs of use in the city so that means no mud.


All the markings were hand painted except for the stars. The stripes are intentionally messy since I've seen some bad Soviet painting. The stars are from a Dragon T34 decal sheet that I'm not planning on using. I'm getting better at free handing, but if you think my paint writing is bad you should see my hand writing Black Eye [B)]Tongue [:P].   


Erik

On the bench: Italeri Leopard 1A2 correction build with Perfect Scale turret and Eduard PE

  • Member since
    November 2007
  • From: NW Chicago Suburbs
Posted by modelfreaks on Monday, January 5, 2009 4:47 PM

Thanks scott, tigerman, and glamdring. This is probably the quickest progress of made on a model recently.

Dupes-love the Jagdtiger. it's lookin great... especially the camo!

mmc- awesome SdKfz 7/2. Very nice weathering.

-Brandon When something alines itself with something else, BAD THINGS WILL HAPPEN.
  • Member since
    December 2002
  • From: Reno, NV
Posted by espins1 on Monday, January 5, 2009 3:43 PM

Looking good Brandon and welcome aboard!  Smile [:)]

Glamdring, that's some nice PE work on the Panther fanny!  Big Smile [:D]

Mark - nice work on the flak piece "Achtung!  Jabo!"  Make a Toast [#toast]

Dupes - looking forward to seeing the final stages of your JagdTiger!  Pirate [oX)]

Scott Espin - IPMS Reno High Rollers  Geeked My Reviews 

mmc
  • Member since
    February 2007
  • From: Newcastle upon Tyne, England
Posted by mmc on Monday, January 5, 2009 7:58 AM

Afternoon All.

First can I say a big thanks to Scott for letting me take part in Red Storm GB, after looking through the builds that have been done so far I realise I have a long way to goSign - Oops [#oops].

It was touch and go whether I was going to finish the SdKfz 7/2 as the whole build was turning into a chore and I wasn't enjoying it, if I'm honest. I tried a couple of new things on this build, firstly using Vallejo spray primer and secondly doing a winter wash. The results are ok but a little dissapointing, more practice is needed I think.I decided against adding the Flak Crew figures, going to use them at a later date.

Thanks again and look forward to seeing more top class work

Mark


  • Member since
    March 2003
  • From: Rain USA, Vancouver WA
Posted by tigerman on Sunday, January 4, 2009 4:20 PM

Looking good Marc.

Great start Modelfreaks.

   http://i7.photobucket.com/albums/y269/wing_nut_5o/PANZERJAGERGB.jpg

 Eric 

  • Member since
    February 2005
  • From: Nashotah, WI
Posted by Glamdring on Sunday, January 4, 2009 3:31 PM

Mobius- I agree it has been going together prett well thusfar.  I haven't had any issues thusfar.   I did testfit the upper hull to the lower hull and experience some fit problems.  I'll cross that bridge when I have to though. 

Geist- Looking forward to the ISU.  I've had a fascination with the 122 and 152 as of late and finally managed to win the -152 off of Ebay.

Modelfreak- Love the Marder!  Glad you  could join up and show it off.

Dupes- As usual, amazing work.  I can't wait to see your finished product.

Robert 

"I can't get ahead no matter how hard I try, I'm gettin' really good at barely gettin' by"

  • Member since
    November 2006
  • From: Coastal Maine
Posted by dupes on Sunday, January 4, 2009 3:14 PM

Shoot fellas, lots of good work going on! Got something small of my own to update:

Still need to do a bit of detail painting, then a flat coat, and on to weathering.

  • Member since
    November 2007
  • From: NW Chicago Suburbs
Posted by modelfreaks on Saturday, January 3, 2009 3:34 PM

Well over the past few days Idecided to break the marder out and start building. I've made it through the first twelve steps (about halfway through the building process). Those steps were focused on some of the interior, suspension and parts of the front hull and engine deck.

 The driver's seat and hull machinegun:

Wheels/sprockets:

Ammo boxes/tubes and main gun ammo:

Interior:

Overall view:

Thanks again espins1 for letting me join late!

-Brandon When something alines itself with something else, BAD THINGS WILL HAPPEN.
  • Member since
    July 2007
  • From: Ohio
Posted by Geist on Saturday, January 3, 2009 10:12 AM

My Fruils for the ISU152 are weathered and washed so they are complete. They look great. The next step is to work on the tools and paint the markings becasue the decals are old and thick. I'll try to get some pics later today.


Erik

On the bench: Italeri Leopard 1A2 correction build with Perfect Scale turret and Eduard PE

  • Member since
    September 2007
  • From: Relocating
Posted by Mobious on Friday, January 2, 2009 2:37 AM

 Hey Glamdring,  DML's Panther does build up pretty nice. I haven't built there newest offering yet but it looks great. Looking forward to seeing the hull assembled and more fiddly bits installed.

 Mobious


"It's a problem of applied physics" Roy Brown

  • Member since
    February 2005
  • From: Nashotah, WI
Posted by Glamdring on Thursday, January 1, 2009 9:11 PM

I'm back to report some progress on my Panther A.  A different Panther for the Big Cats GB was occupying my time for the last month or so, but that cat is done. 

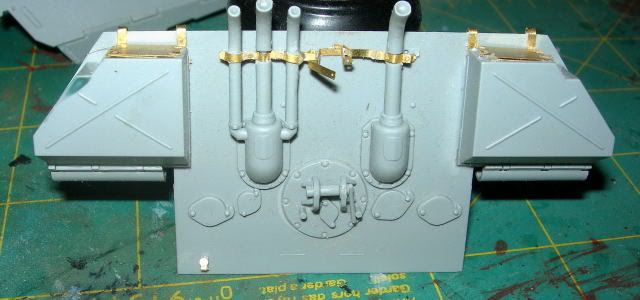
Yesterday was a productive day for me, the majority of this was done yesterday.  It's a premium kit, and I'm going to use as much of the PE as possible.  The rear plate has been sitting completed for some time, but I decided to break the camera out finally.  Anyways....
I love these MGs that DML makes, I always feel it is a shame to cover it up inside to be never seen again.  Interiors DML so I can keep the hatches open!!!!
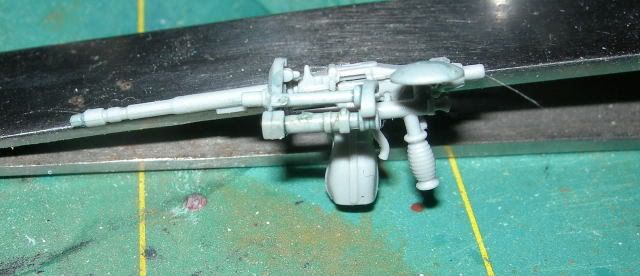
I was very annoyed with myself not taking a picture of the breech before gluing since it was one of the nicest ones I had ever seen....

Robert 

"I can't get ahead no matter how hard I try, I'm gettin' really good at barely gettin' by"

  • Member since
    August 2008
  • From: Round Lake Heights, IL
Posted by Lofweir on Wednesday, December 31, 2008 2:26 PM
 SMJmodeler wrote:
 Lofweir wrote:

I really like the way the road wheels came out.  I stuck them onto a bit for my Dremel, spun them up, and brushed them with thinned steel acrylic paint.  I put down a nice, uneven coat of paint which matches a couple of reference pics I have.

They do look good, I typically don't add the wash until their mounted...I like how you did that early!  I've used the Dremel for road wheel work too (sanding mostly), it works great!!!


I generally wait till further along in the build, but the Panther has road wheels tucked behind road wheels, so I figured I hit them with an initial wash before installation. 

Currently Building: Tamiya 1/35 Panther Ausf. A
  • Member since
    November 2007
  • From: NW Chicago Suburbs
Posted by modelfreaks on Wednesday, December 31, 2008 1:08 PM

Ok, well on my painting guide for the marder it gives you a choice of a marder that served on the eastern front. I reasearched the division and they fought against the Russians in Slovenia and Austria from April 1945 thru May 1945. So, i guess I'll give this a spin. Put me down for Dragon's Marder III H.

-Thanks a lot, Brandon

-Brandon When something alines itself with something else, BAD THINGS WILL HAPPEN.
  • Member since
    September 2007
  • From: Relocating
Posted by Mobious on Wednesday, December 31, 2008 11:09 AM
 SMJmodeler wrote:
 Lofweir wrote:

I really like the way the road wheels came out.  I stuck them onto a bit for my Dremel, spun them up, and brushed them with thinned steel acrylic paint.  I put down a nice, uneven coat of paint which matches a couple of reference pics I have.

They do look good, I typically don't add the wash until their mounted...I like how you did that early!  I've used the Dremel for road wheel work too (sanding mostly), it works great!!!

 I've used my variable speed drill to sand the roadwheels but never to paint them. the variable speed works great for control of speed.

 Mobious

"It's a problem of applied physics" Roy Brown

  • Member since
    April 2007
  • From: Schroon Lake, NY
Posted by SMJmodeler on Wednesday, December 31, 2008 11:07 AM

 Lofweir wrote:
...it went flying off the Dremel and across the workbench like a discus.  i would recommend eye protection (which I put on after the second occurrence) and a light touch.

Who would have thought, eye protection for model buildingShock [:O]?!?!?...I guess it's just one of the hazards of our occupation....

  • Member since
    April 2007
  • From: Schroon Lake, NY
Posted by SMJmodeler on Wednesday, December 31, 2008 11:04 AM
 Lofweir wrote:

I really like the way the road wheels came out.  I stuck them onto a bit for my Dremel, spun them up, and brushed them with thinned steel acrylic paint.  I put down a nice, uneven coat of paint which matches a couple of reference pics I have.

They do look good, I typically don't add the wash until their mounted...I like how you did that early!  I've used the Dremel for road wheel work too (sanding mostly), it works great!!!

  • Member since
    December 2002
  • From: Reno, NV
Posted by espins1 on Wednesday, December 31, 2008 10:42 AM
 modelfreaks wrote:

Hello, im just curious right now but would i be able to join this GB this late? If yes im not totally sure if I will or not. If so then would Dragon's Marder III H fit the deal?

-Brandon

As long as it served during the final Soviet assault on the "Reich" you're good to go!  Big Smile [:D]

Scott Espin - IPMS Reno High Rollers  Geeked My Reviews 

  • Member since
    August 2008
  • From: Round Lake Heights, IL
Posted by Lofweir on Wednesday, December 31, 2008 9:28 AM
Thanks Mobious.  One warning on using the Dremel.  My Dremel has two speeds, 7500 rpm and 15000 rpm (which is way too fast).  At 7500, the first couple of times I tried this, the pressed a little too hard with the brush, unbalanced the wheel, and it went flying off the Dremel and across the workbench like a discus.  i would recommend eye protection (which I put on after the second occurrence) and a light touch.
Currently Building: Tamiya 1/35 Panther Ausf. A
  • Member since
    September 2007
  • From: Relocating
Posted by Mobious on Wednesday, December 31, 2008 6:24 AM

Hey Lofweir, Looks like a great tip on painting roadwheels, will be giving that a try. Looking forward to seeing the Panther progress updates.

 Best Regards,

 Mobious

"It's a problem of applied physics" Roy Brown

JOIN OUR COMMUNITY!

Our community is FREE to join. To participate you must either login or register for an account.

SEARCH FORUMS
FREE NEWSLETTER
By signing up you may also receive reader surveys and occasional special offers. We do not sell, rent or trade our email lists. View our Privacy Policy.