SEARCH FINESCALE.COM

Enter keywords or a search phrase below:

PAGE 5-FINISHED PICS! The "MIG-nificent" DML King Tiger!

33644 views
133 replies
1 rating 2 rating 3 rating 4 rating 5 rating
  • Member since
    January 2007
Posted by the doog on Tuesday, December 23, 2008 1:20 PM

Mark, Russ, and John, thanks for your kind compliments! I'm glad you guys are enjoying the build! Big Smile [:D]

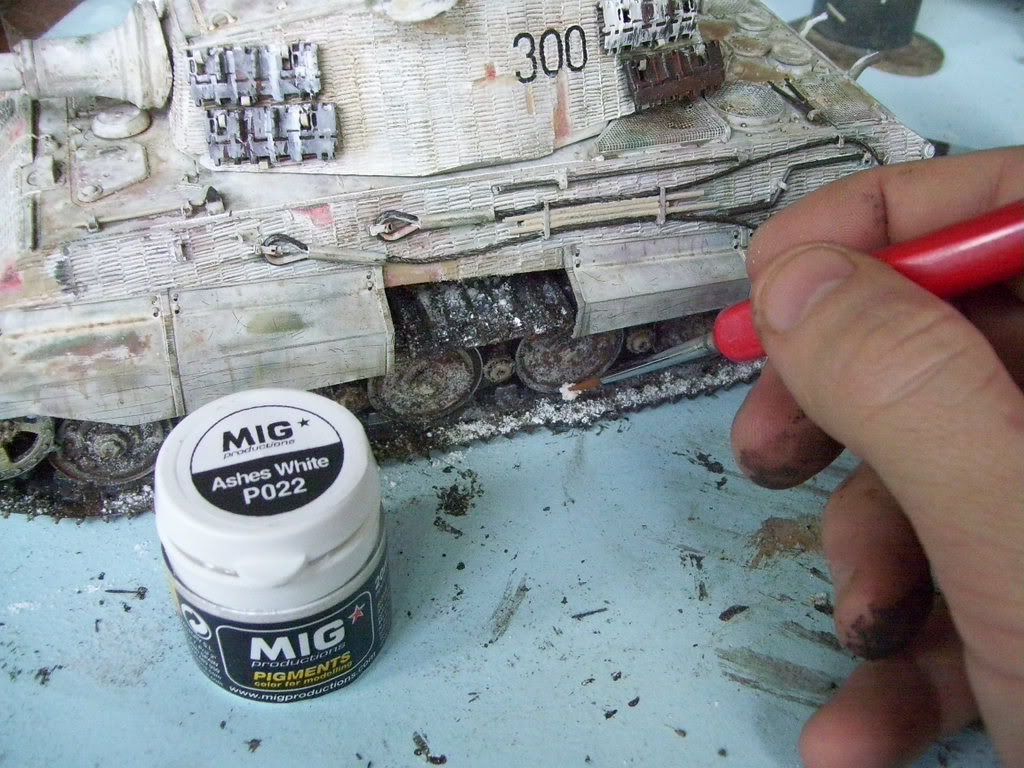
So here it is--the final installment in the finishing my "MIG-nificent" King Tiger. First, a litle more how-to; first I want to show a little more of how I got the snow on the tracks. The Woodland Sceneics snow just didnt want to stay opaque-white; it kept changing to a semi-translucent-looking powwder, so I gave the MIG powder #022 "Ashes White" a try--and it worked beautifully!

I set it down on the tracks with a brush...
Hit it with some MIG Pigment Fixer, and it dries perfectly white!
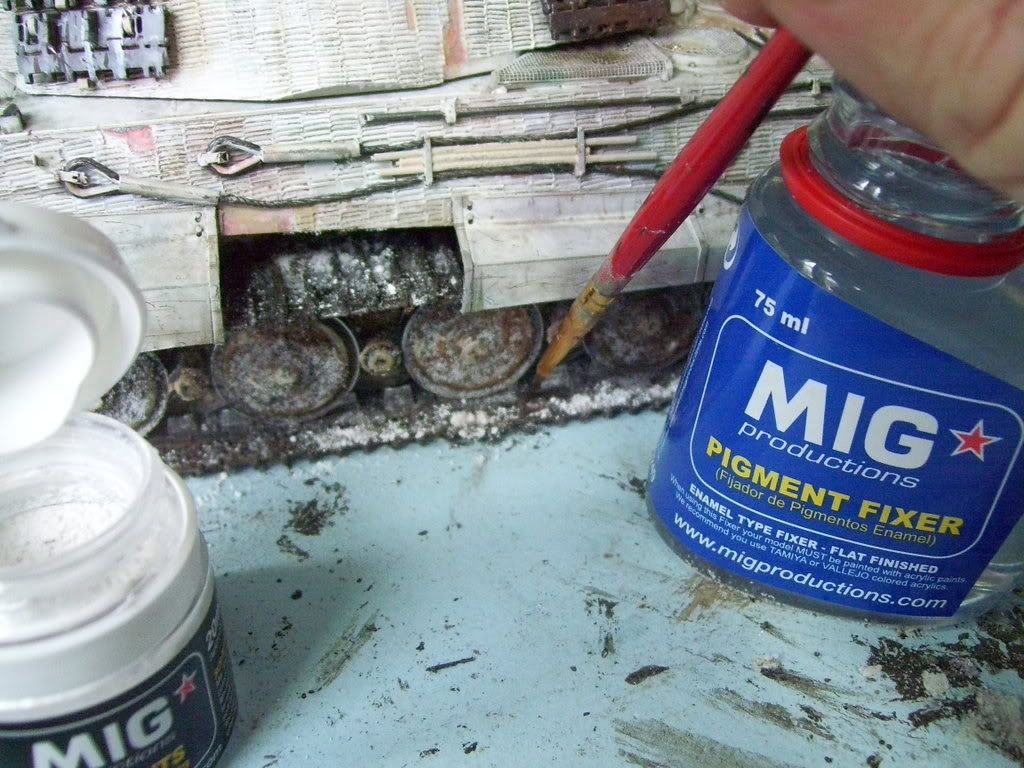
 

Voila! It really keeps it's color! I also went over a lot if the tracks and other areas with this powder, and got similar results, so I'm very pleased with this use for what is touted as a burnt ash color for roadwheels, eyc--yes, you can also use it for snow! Tongue [:P]

Next, I also used pigments on the mufflers. First, here'stwo of the three powders I used.
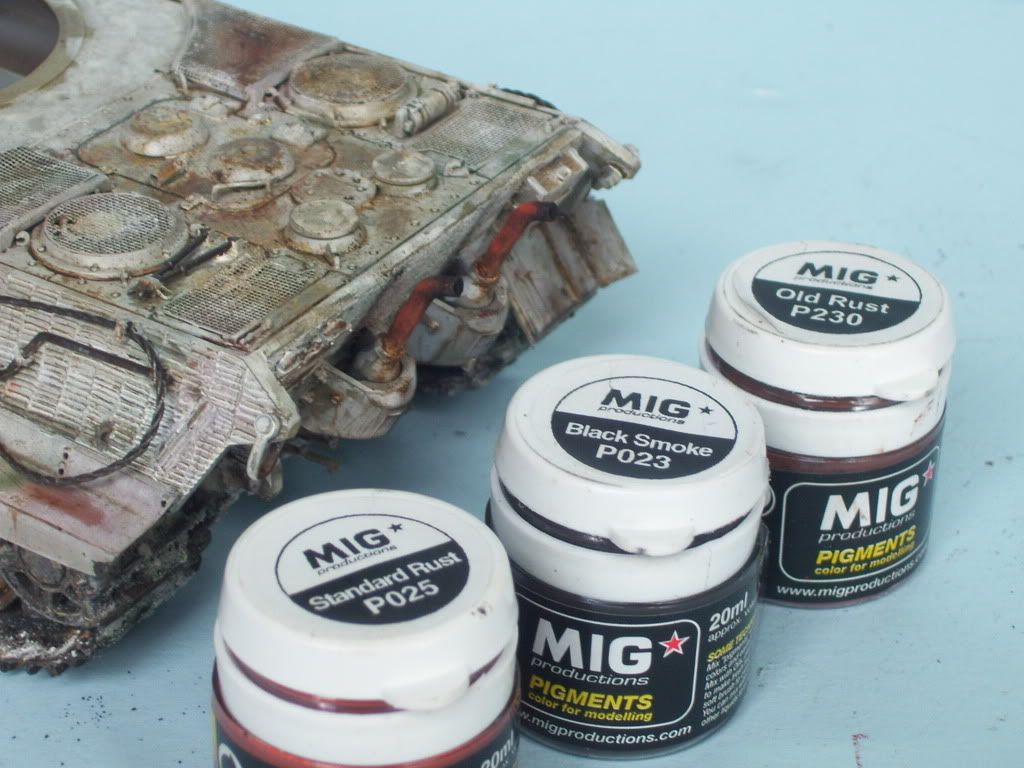
First, I take the "Old Rust" with some of the 502 Oils color #060 Light Rust Brown, and after getting some of it on the brush, I dip the paint brush into the pigment jar so that I have both oil and pigments on the brush, and then I apply it to the muffler.
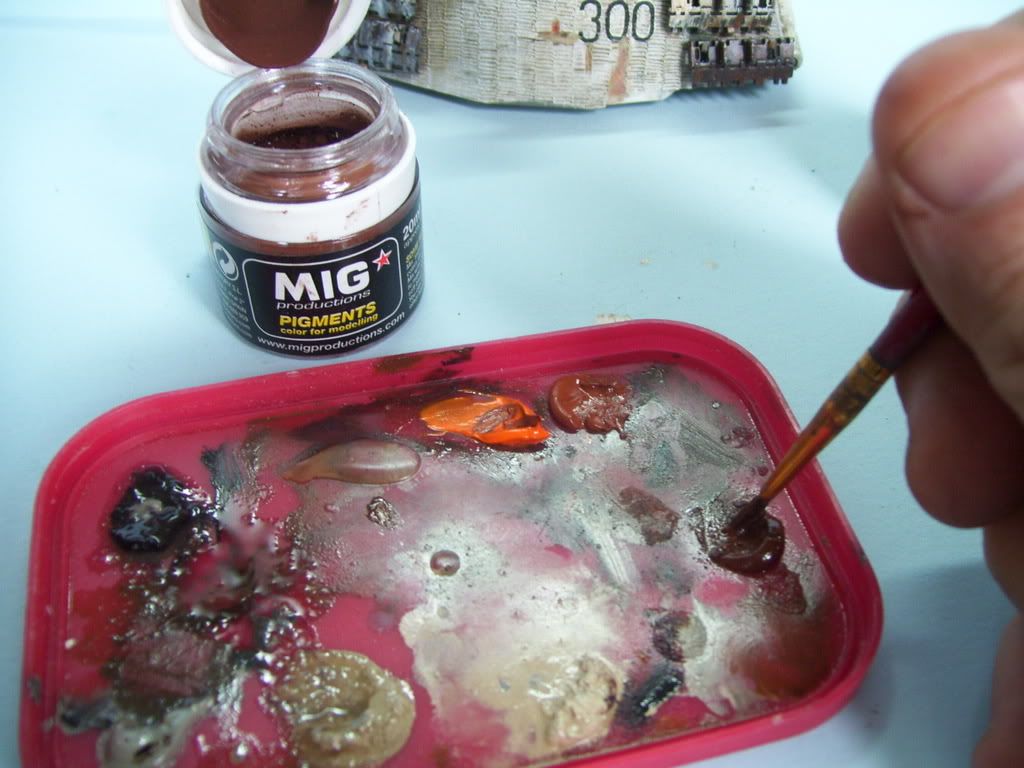
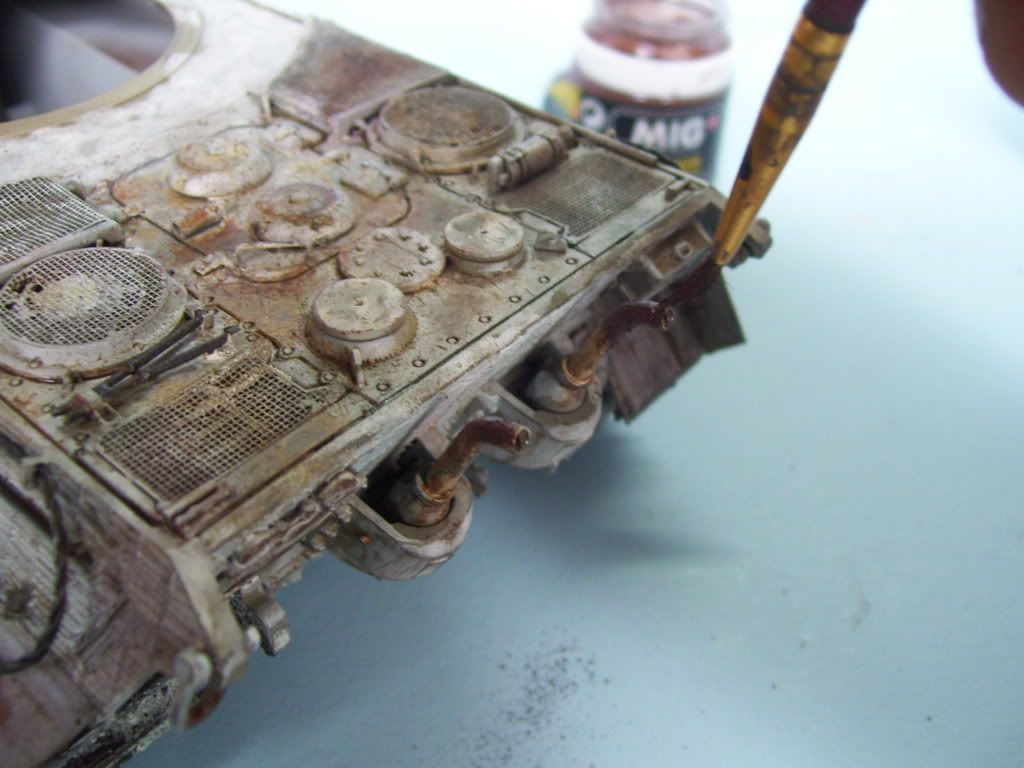
Then, with a CLEAN, short-bristled brush, I scrap away some of the excessive color. I do thisto graduate the color from top to bottom. I figure the tops would be more discolored than the bottoms.
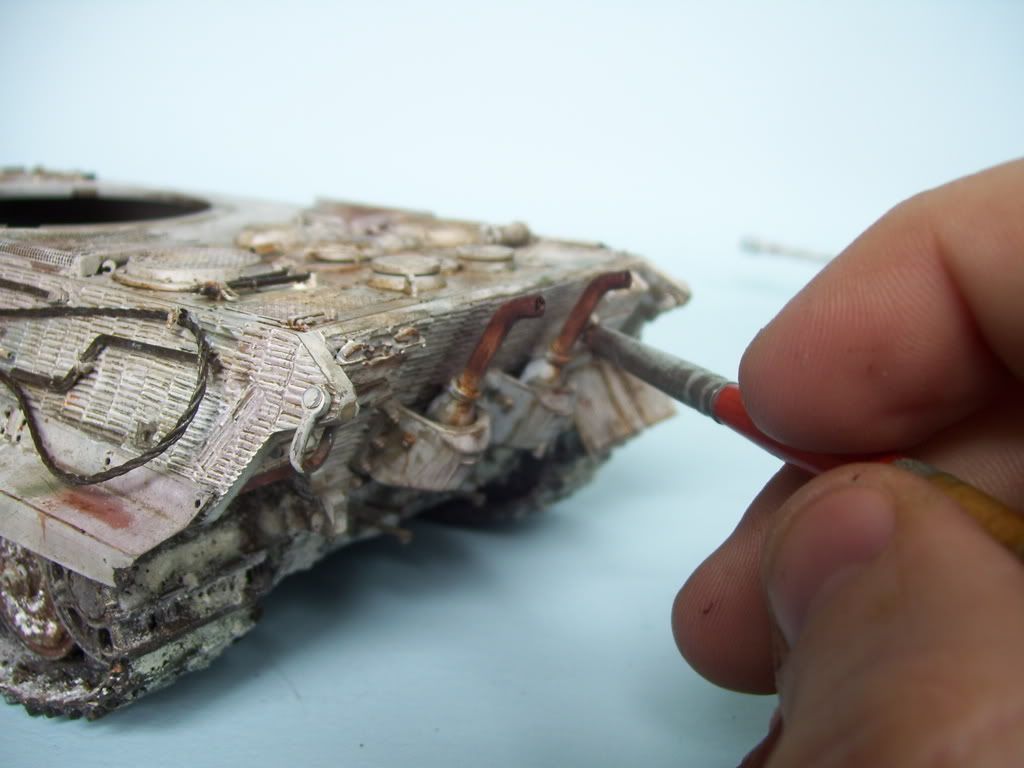
Now what I have is a still "sticky" mix of oil+pigments on the tops and side. SO I then apply the "Medium" rust powder (POWDER ONLY!) to the top of the muffler.
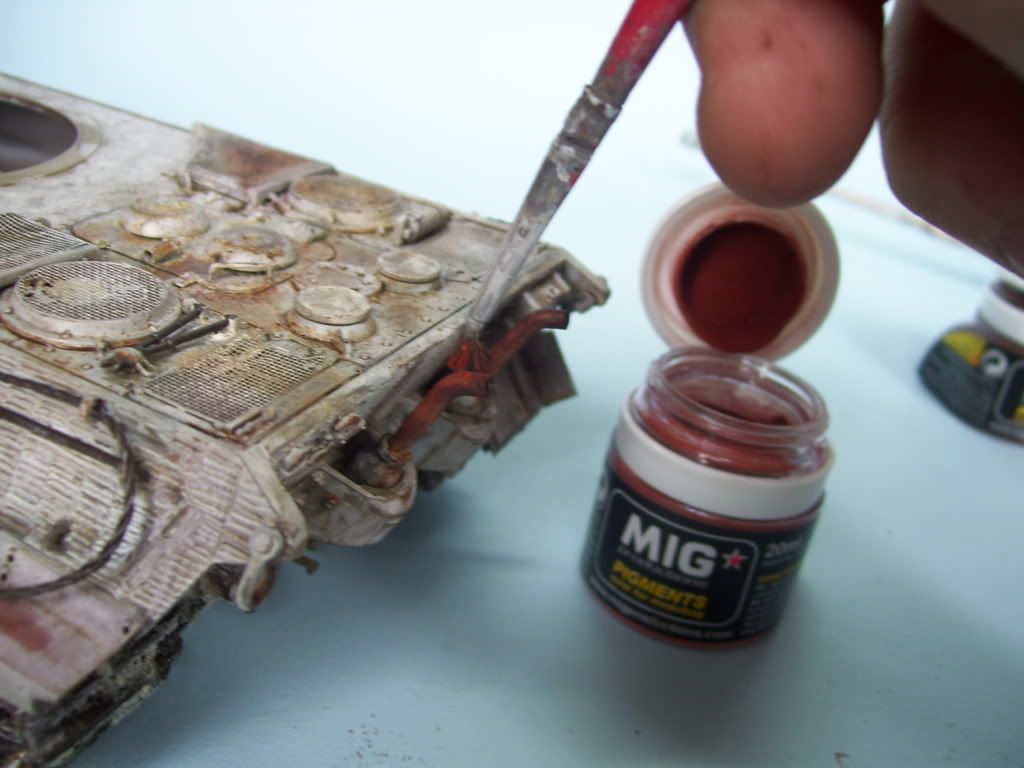
And finally some Black Smoke to the tops...
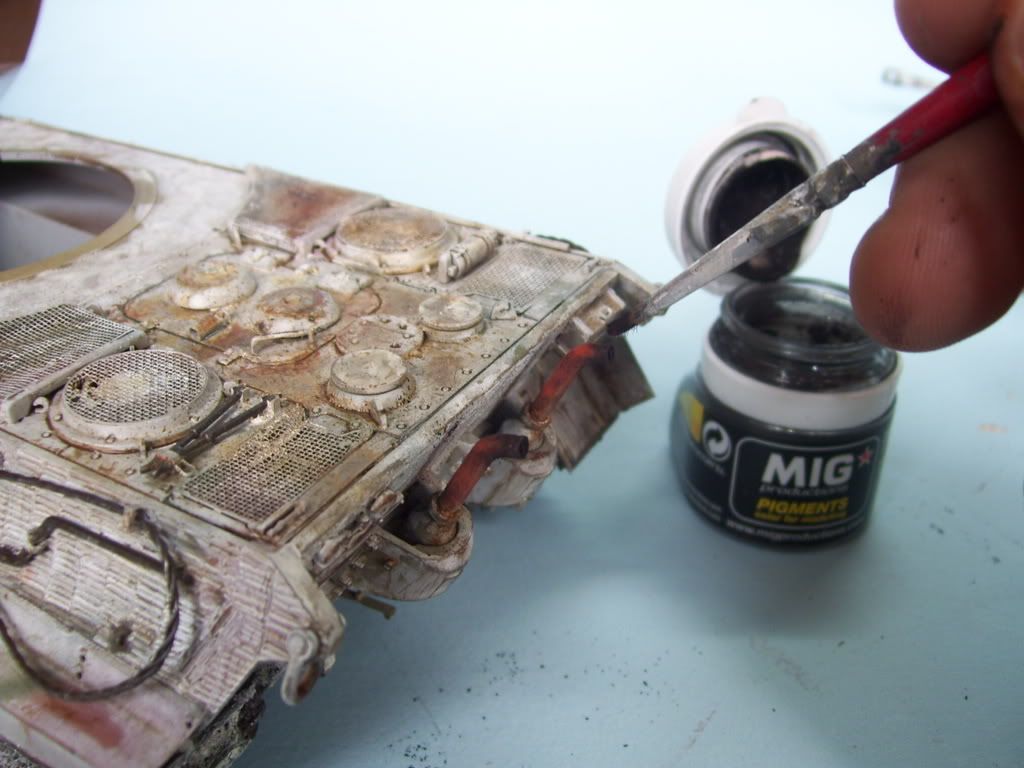
Here's what they eventuallly look like after adding the last color--"Light Rust" to the top for a little more contrast.
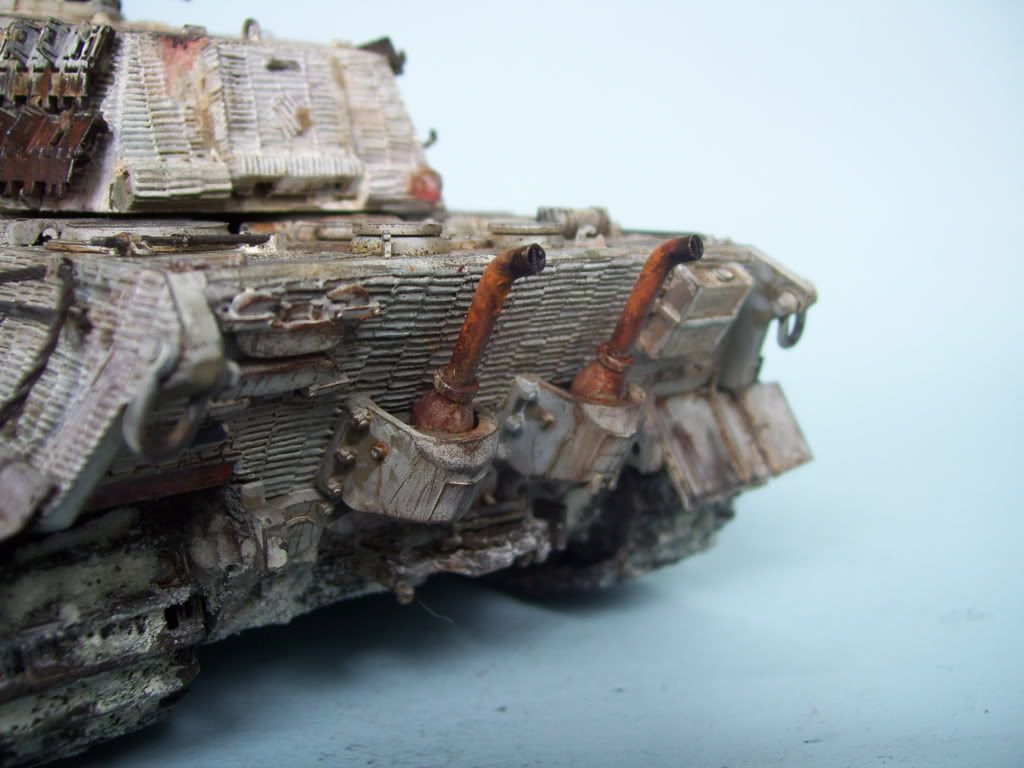
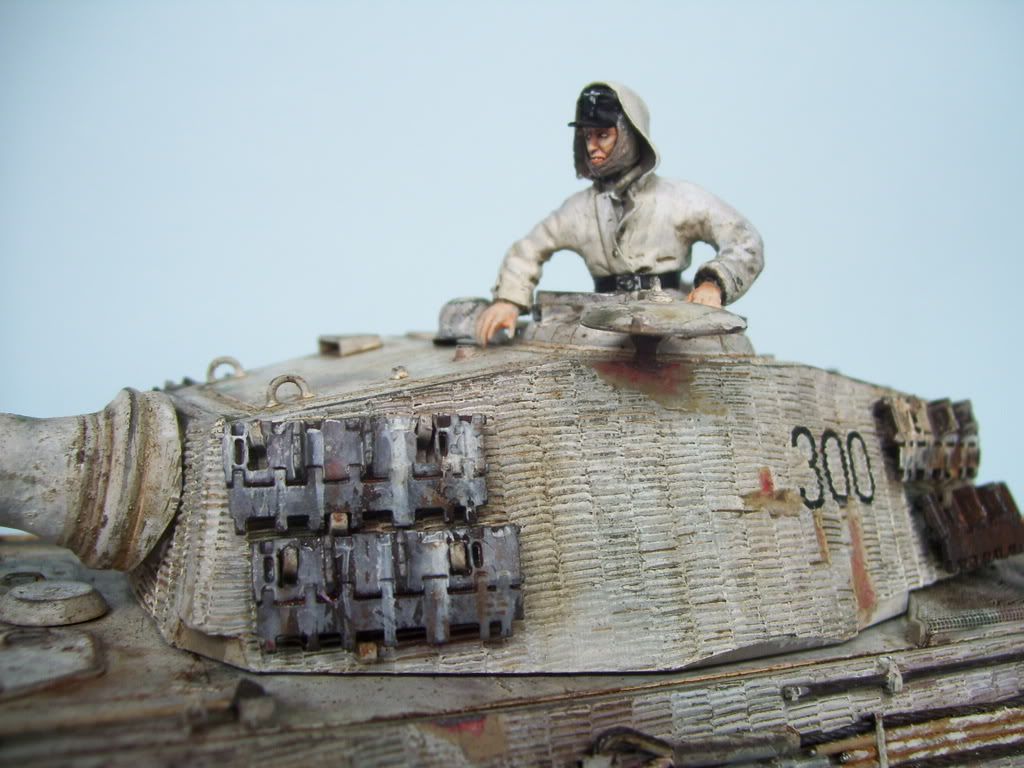
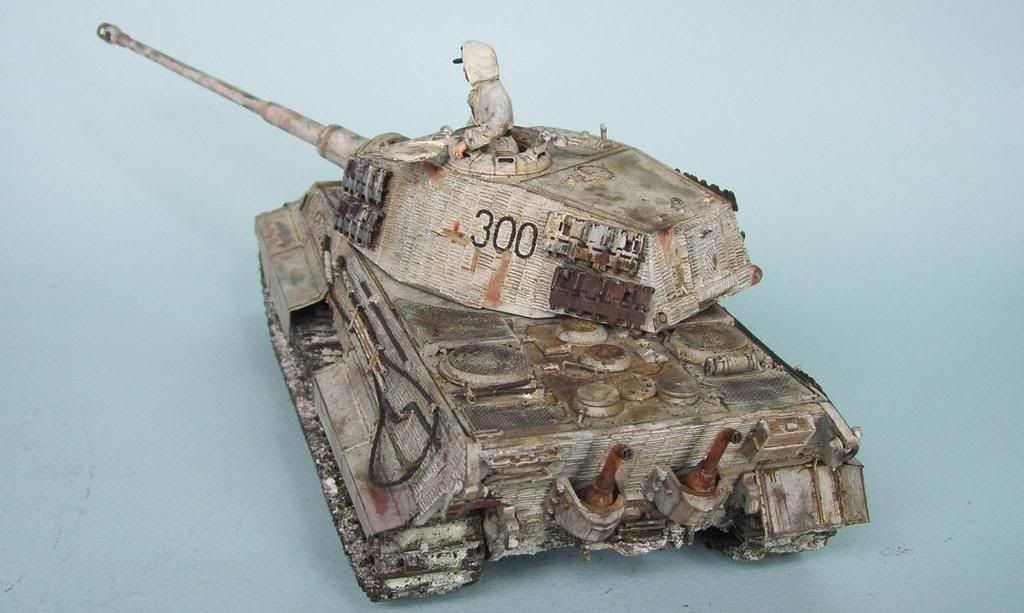
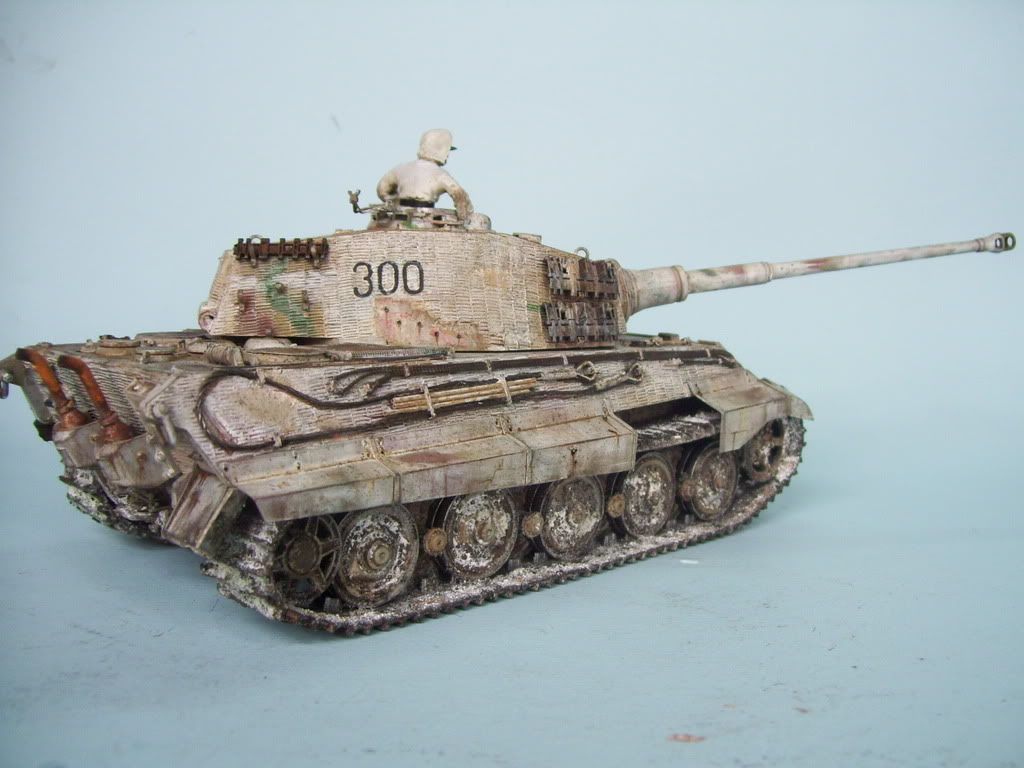
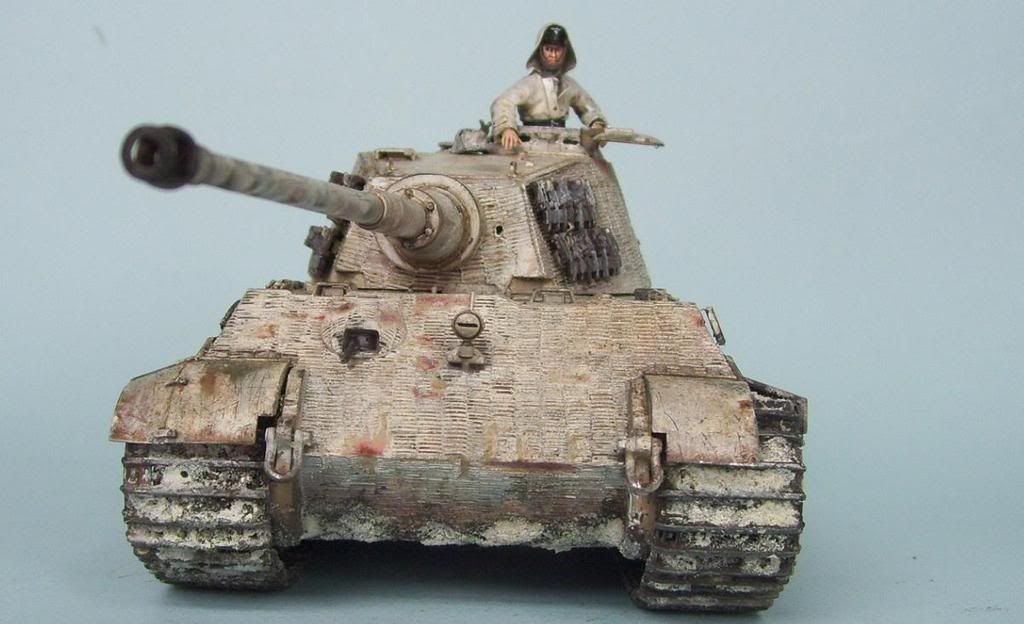
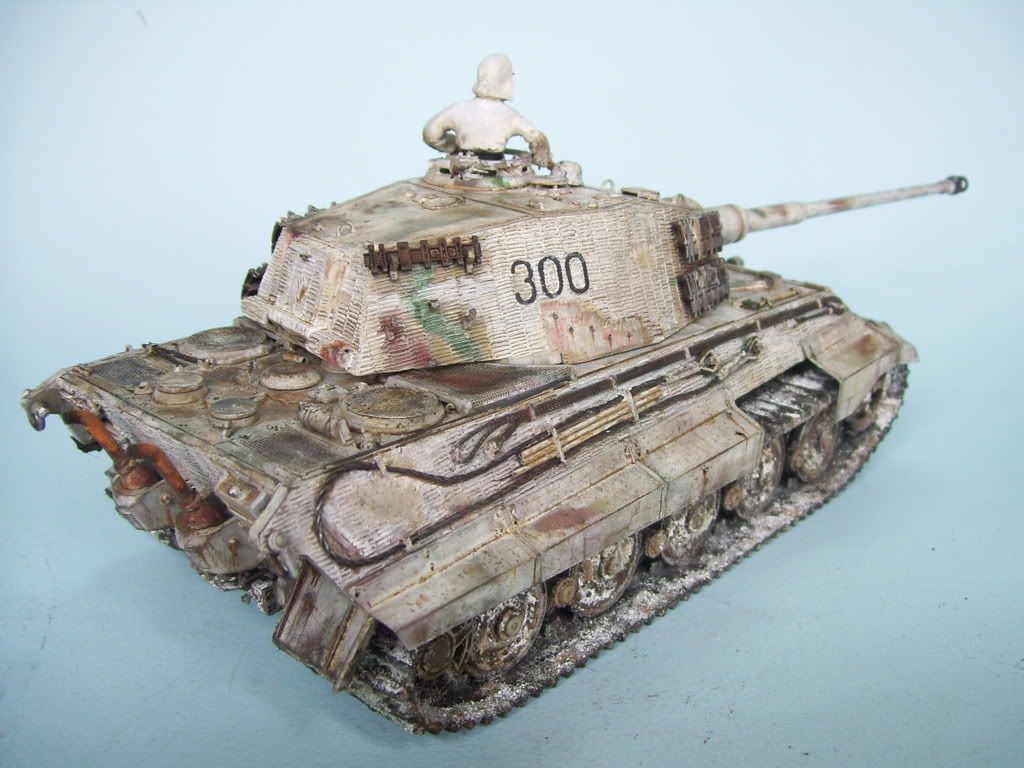
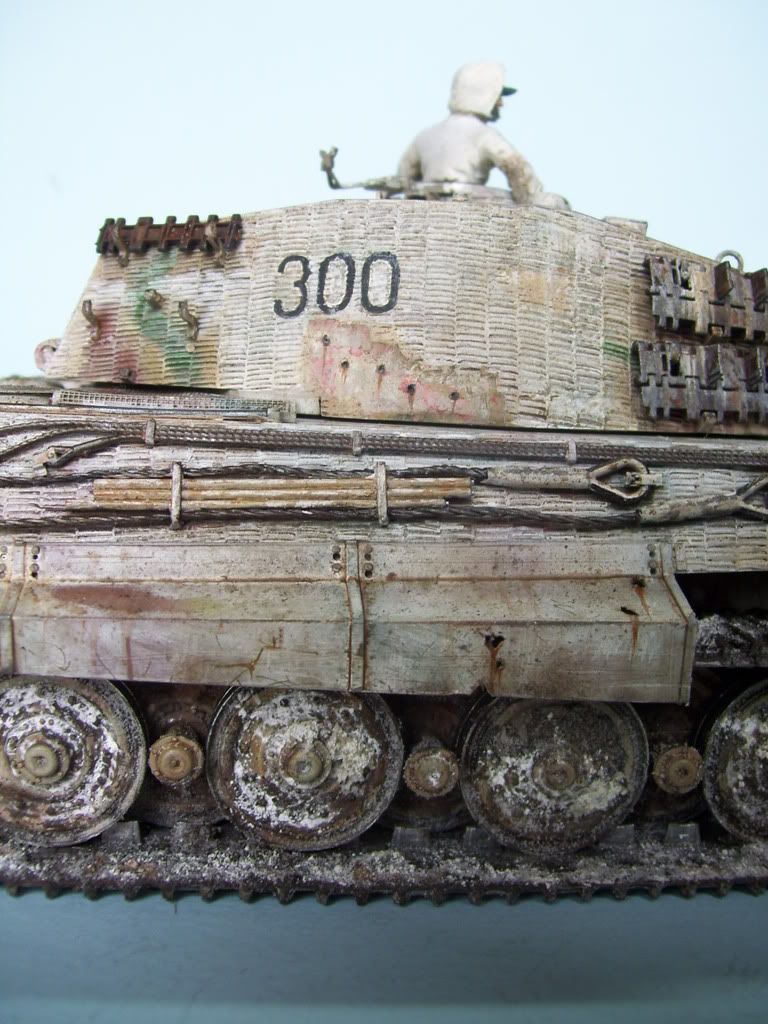
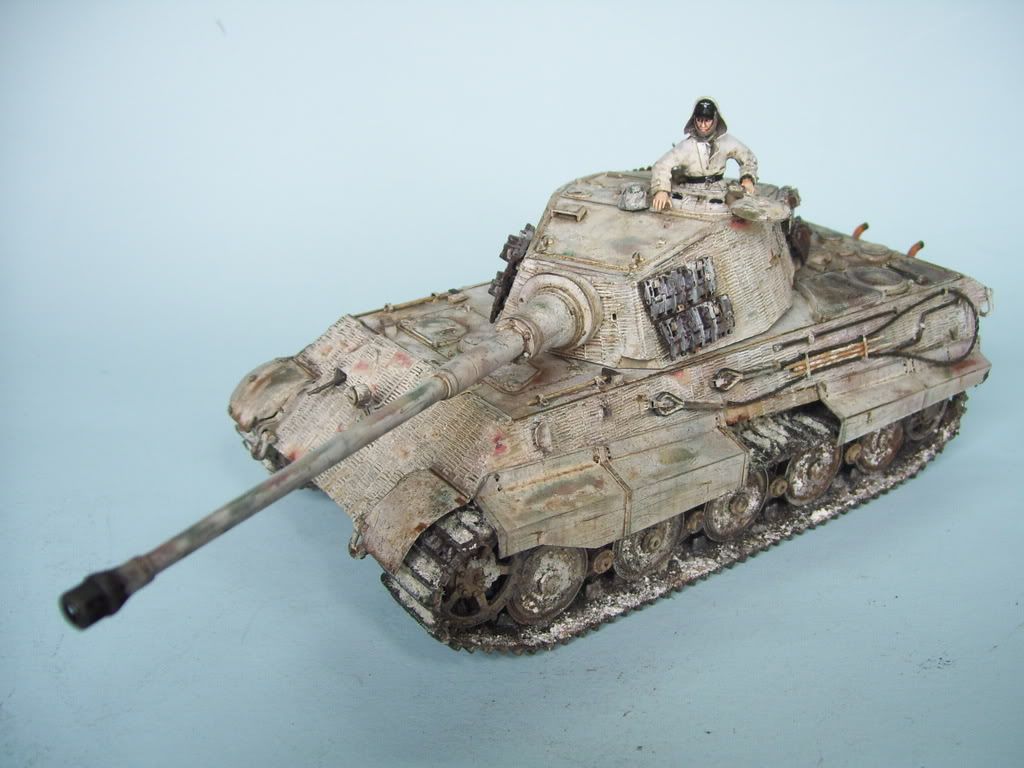
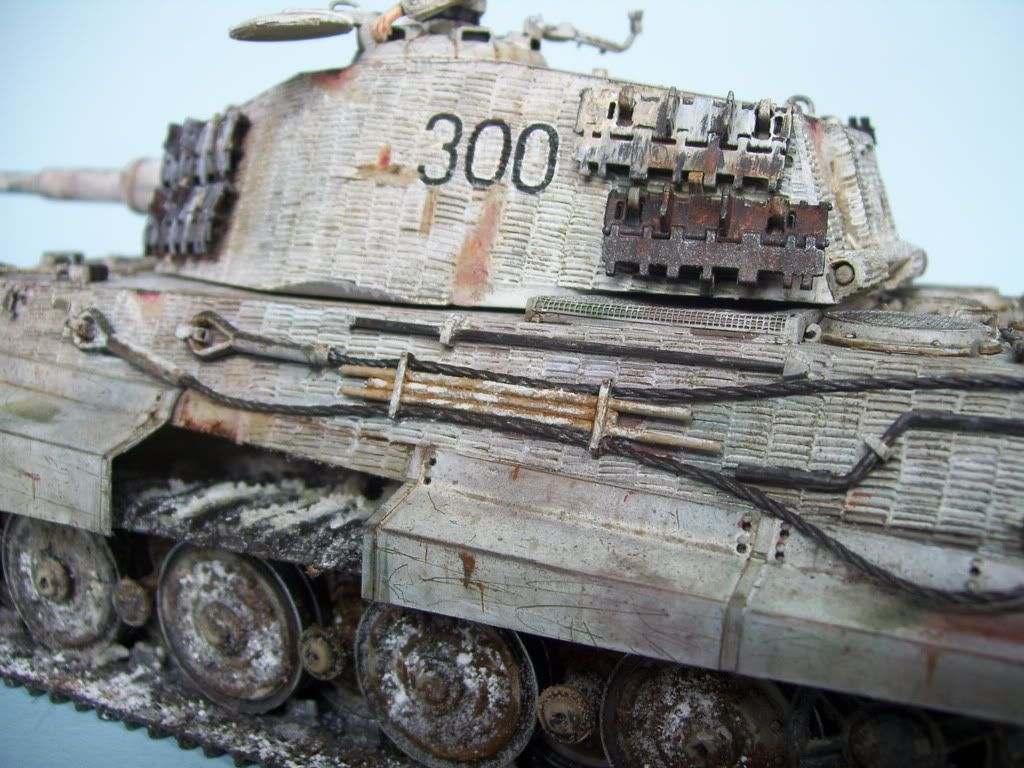
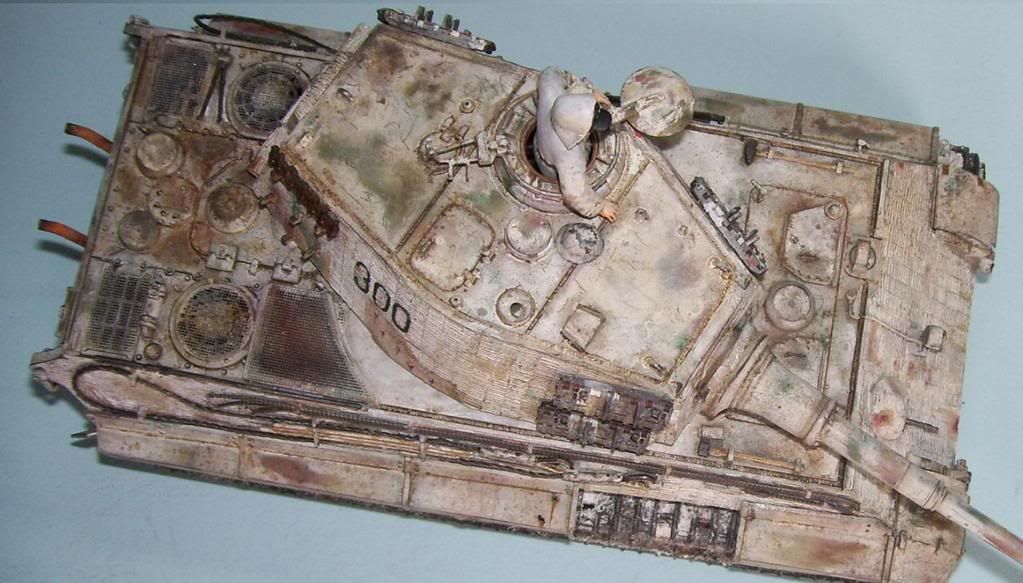
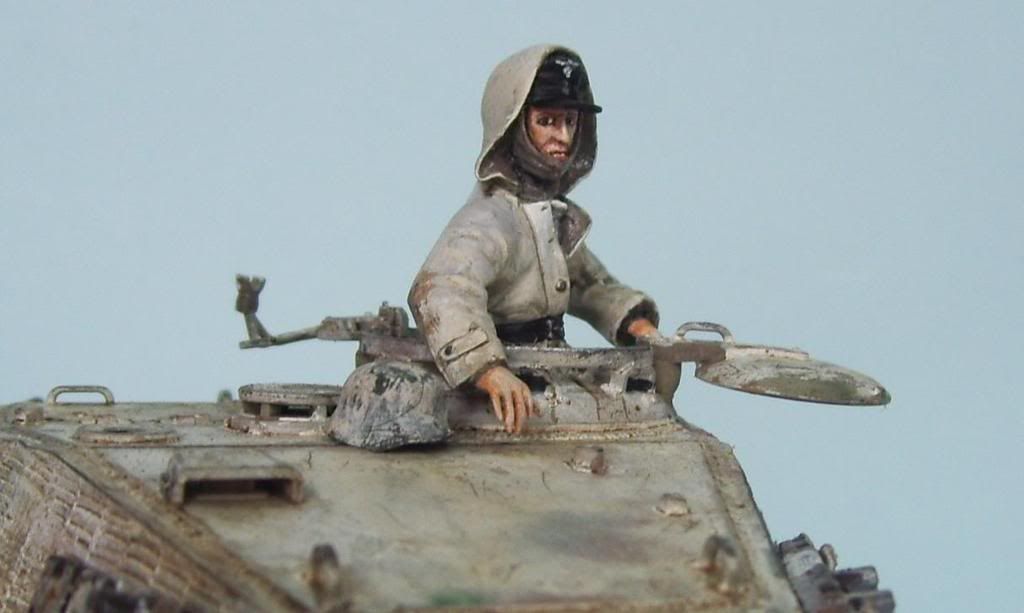
And here's the final product with the Warriors figure painted up, in Tamiya acrylics and oils..again, alll the weathering was accomplished using 99% of MIG "502 Abteilung" oils, MIG pre-mixed washes and filters, and MIG powders, kindly and generously provided by MIG Productions . I used the "Neutral Wash" for all the pin washes, and 502 oils for the rust streaks and discolorations. There are MIG pigments on the upper hull surfaces to show dirt/discoloration--several different shades. And finally, a light application was made of MIG "Gunmetal" powder on the edges--it's like a graphite powder, and relaly gives a nice 'metallic" edge to some of the parts that really need it. I applied it by putting some on my finger and rubbing it where I could. I'm sorry I couldn't document these parts more--a lot of it is done at night, when the lighting from my flash was too harsh to capture it.
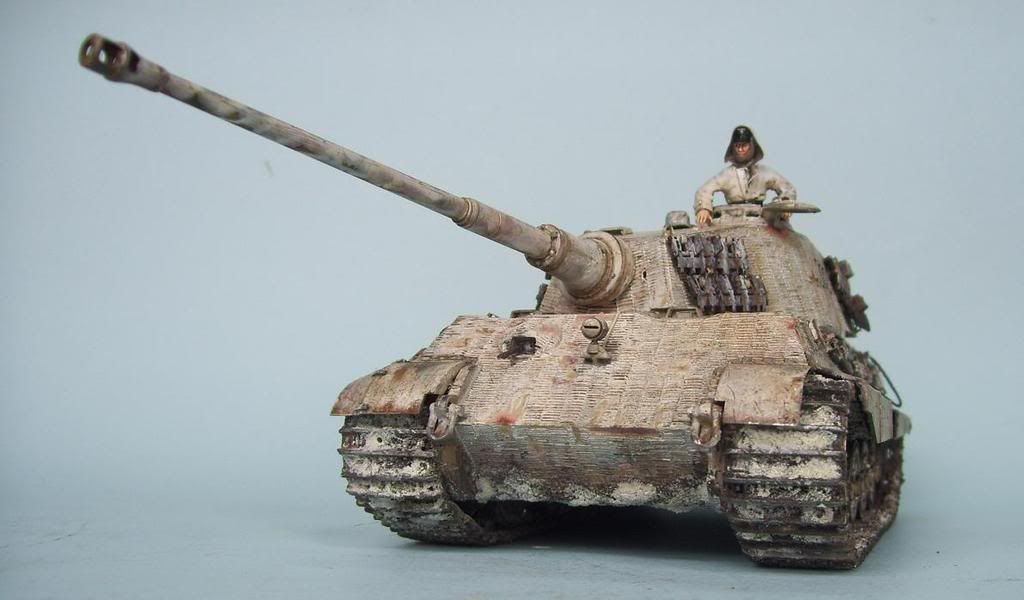
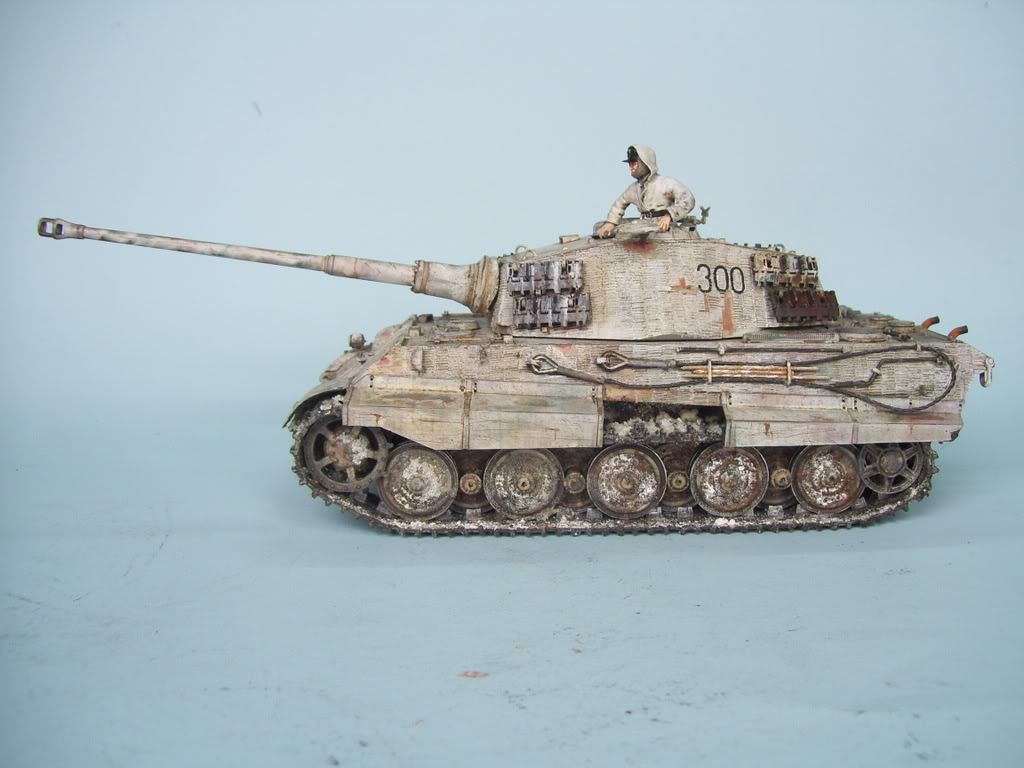
I thinned out the side skirts from behind with a Dremel tool, and poked some more bullet holes IN A RANDOM PATTERN! Whistling [:-^]...Smile,Wink, & Grin [swg]

"That's 'Herr' Peiper to you!" 

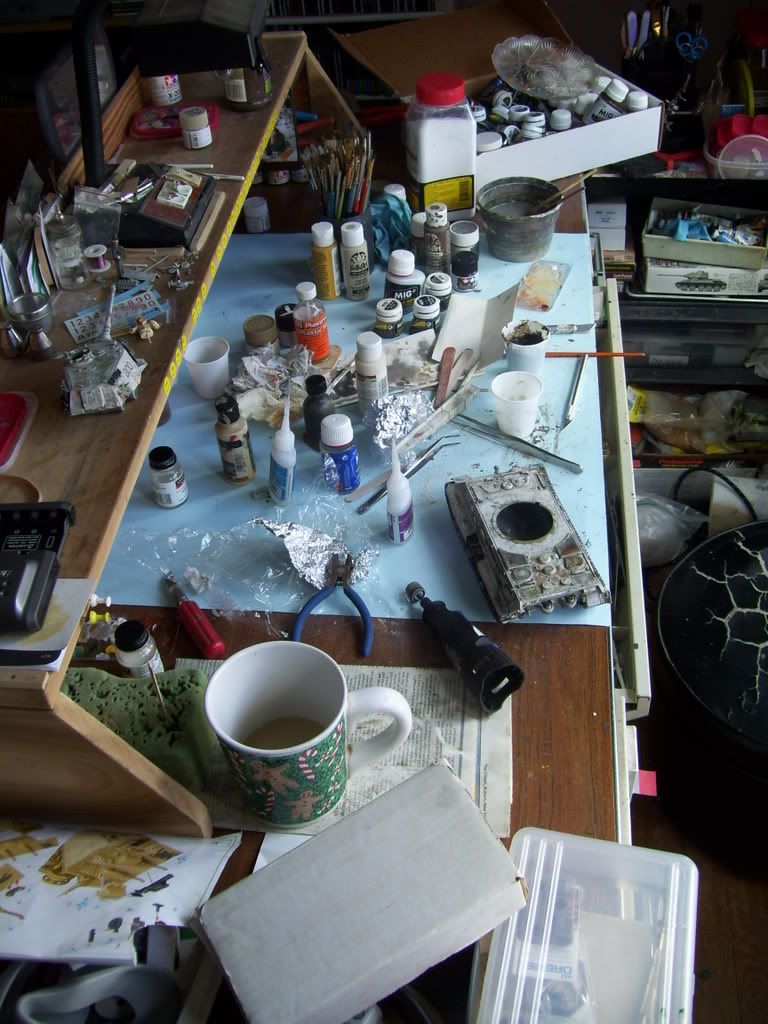
Lastly--why I can never work on more than one project at a time--here's the bench during the weathering phase--where would I possibly fit anything else?!!
                                                                                                                               

So. in closing,my review "verdict" of the MIG Products are as folllows--

I have nothing but good to report about the 502 Oils line. They are all high-quality oils, and the color range is very broad, and pefectly adequate for armor finishing. The only color I questioned was the #020 "Faded Dark Yellow" which is. in fact, a bright, rust-orange. I can only assume that this is a mis-labelling of this tube. The inclusion of colors such as "Fresh Mud" and "Buff" are a nice convenience for colors that I used to have to mix alone.

The only thing I didn;t care for was the looooong drying time of the MIG "Thinner for Washes"--I'm not sure if I used it right, but when I used it to thin the oil paints, it took a long time for them to dry. I must assume that perhaps it's an enamel or even similar to linseed oil product? I much preferred just plain mineral spirits for use with the 502 oils. I also believe that they have enamel properties because the white oil spot-washing I did on top f the turret dried semi-glossy, and very hard.However, there may be benefits to this product that I have yet to ascertain, or which I will learn of in the future. Anyone who has experience with it, and who would like to leave some hints aout it would be most welcomed!

The pre-mixd washes and filters were, IMO. spot-on as far as being great weathering shades. They are consistent in their application, spread very easily, and dry quickly as well. They flow as well or better than my regular mineral spirit washes, and a little bit actually does go a long way. I was afraid of using the whole bottle up at first, but for this one build, I used less than 5% of the "Neutral Wash", so IMO, I have to say that they actually ARE a good deal for the money, if you want consistent colored washes EVERY time. My favorite is that "Neutral" color--it just screams "DIRTY BOY!!!" LOL! Blush [:I]

I have not had the opportunity to try the liquid mask yet.

The Pigments are something that I have used quite a bit before this build of course, THEY ROCK!!!--but I have to say that the Pigment fxer stuff is primo--it just works really well! And it doesn't discolor the pigments. 10/10!

The Acrylic Resin too, is a first-rate product. It dries fast, and rock-hard! It's VERY durable! I actually mixed up waaaay more than I really used or needed in this build, so be frugal with it at first, until you learn its properties. Great stuff!

So, in closing, I must again thank Adam Wilder and Rick Lawler and all at MIG Productions for this enjoyable build and review, and for the nice cache of MIG products which I will continue to use here. And thanks to all of you for your comments and suggestions! Only question is...what's next?! (I'm leaning toward a Nashorn!?)

Comments, and questions welcomed and appreciated! Big Smile [:D]


  • Member since
    December 2008
  • From: Philadelphia
Posted by Byrne0ut on Tuesday, December 23, 2008 1:31 PM

Bow [bow]Bow [bow]Bow [bow]

I am not worthy...

 Incredibly inspirational.  You could easily put that bad boy on ebay and sell the finished product for a couple hundred dollars at least...

ON The Bench: Tristar 1/35 Panzer 38(t) Ausf. B Glencoe 1/400 SS United States Tamiya 1/35 Panther Ausf. A Early On The Shelf Tamiya 1/35 King Tiger Tamiya 1/48 F4U-1D Corsair
  • Member since
    April 2005
  • From: Piscataway, NJ!
Posted by wing_nut on Tuesday, December 23, 2008 1:50 PM

Well doog you have done it again. Turned plastic and some wet and dry ingredients and turned into something awe inspiring.  Hope you don't mind that I keep this short... I wanna go back and look at the pics again.


EDIT   OK I'm abck.  It was like seeing a movie the 2nd time.  Bunch of stuff I did not notice the 1st time.  May have to go back for a 3rd Big Smile [:D]

Marc  

  • Member since
    January 2008
  • From: Tulsa, OK
Posted by acmodeler01 on Tuesday, December 23, 2008 2:00 PM

It looks awesome, I'm very impressed, but I think we've all come to expect this caliber of work from you, Doog!

The MIG pigments look like they should be a worthwhile purchase... How long would they last or how many kits do you think they would cover? And what is the price you can expect to pay for them?

  • Member since
    July 2004
  • From: Texas
Posted by wbill76 on Tuesday, December 23, 2008 2:44 PM
You've done a great job detailing this one (and relating the "how" of the details as well) doog, enjoyed watching you experiment with the MIG stuff along the way. Herr Peiper would be pleased with the results I'm sure! Thumbs Up [tup]
  • Member since
    November 2005
Posted by Anonymous on Tuesday, December 23, 2008 3:09 PM

One of your better efforts, IMO...great "how to" as well...top shelf work...

Peiper would be pleased, and I should know; we were at Kharkov together...Big Smile [:D]

  • Member since
    June 2005
  • From: San Tan Valley,AZ
Posted by smokinguns3 on Tuesday, December 23, 2008 3:13 PM
That is  just friggin awsome man just awsome.
Rob I think i can I think i can
  • Member since
    December 2005
  • From: Syracuse, NY
Posted by lexesbenz on Tuesday, December 23, 2008 3:24 PM
Nice job Karl!! are you taking this to Buffcon or Noreastcon this year?
The flying hamster of doom rains coconuts on your pitiful city!!!!
  • Member since
    September 2008
  • From: North Carolina
Posted by WarHammer25 on Tuesday, December 23, 2008 4:12 PM
Awesome job Karl. It looks so real. The paint and weathering really make it look good. Looks like you took Herr Peiper and his tank and shrunk them. Great job!
The only easy day was yesterday - U.S. Navy Seals
  • Member since
    July 2006
  • From: New Jersey
Posted by redleg12 on Tuesday, December 23, 2008 5:04 PM

Your work as usual ia awe inspiring. Another museum item for the collection.

The work on reviewing the MIG line is great. It is a benifit to all of us at all levels. Good to know they are worth the money and time to use (besides the pigments which I am also already a big fan).

Thanks again

Rounds Complete!!

"The Moral High Ground....A Great Place to Emplace Artillery."

  • Member since
    November 2008
  • From: Oklahoma City
Posted by Mixael on Tuesday, December 23, 2008 6:08 PM

Doog, I don't even feel worthy to SEE this KT!  Absolutely wonderful job of messing it up!

I may just have to get some of the Mig stuff to try out.  (I'll work towards that, as I've never weathered anything before!)

I have bookmarked the thread so as to have a ready access to the awesome-ness of this WIP!


Doog the man!  Doog the man!


Michael 

We could change the world, but God won't give us the source code!
  • Member since
    January 2007
Posted by the doog on Tuesday, December 23, 2008 6:14 PM
 Byrne0ut wrote:

Bow [bow]Bow [bow]Bow [bow]

I am not worthy...

 Incredibly inspirational.  You could easily put that bad boy on ebay and sell the finished product for a couple hundred dollars at least...

Sign - Welcome [#welcome]John, to the forums! I see you're a new member? Thanks for your kind compliment, and for commenting--I think I'll keep this one, though! Wink [;)]

Thanks, too, Marc and Jon! Jon, I'm not sure what you would pay for MIG stuff at various outlets, but Rick and Adam explained on a previous thread that it's best, and cheapest, to order from their website, direct. As far as how long they last--seriously, they could last for literally dozens of models depending on your application of them.The actual price-per-model would be literally pennies!

Thanks too, Bill,  and Manny! (Manny, you crack me up! Laugh [(-D]) Glad you guys liked this one!

Robert and Brendan-- thanks too, for the comments, and the compliments! Smile [:)]

Tony--I'lll probably take this to Buffcon, if I'm able to get there! Thanks for looking in!

Mike, and Michael,  thanks too, for the kind words!

I'm happy to know that I've contributed once again to another "take" on the mysteries and intricacies of heavy weathering. The MIG products are definitely a sure path to success in that regard! Thanks again, all who have taken the time to comment! Big Smile [:D]

  • Member since
    February 2008
  • From: ladner BC Canada
Posted by stick man on Tuesday, December 23, 2008 6:17 PM

Great work Doog! It's atruly inspiring build!

Smile [:)]

I'm 15 and I model I sk8board and I drum what could be better.
  • Member since
    July 2006
  • From: New Jersey
Posted by redleg12 on Tuesday, December 23, 2008 6:28 PM

Karl - Just thought of a quick question......when the MIG pigment fixer dries, is it flat or gloss?? Same for the acrylic resin???

The brain is working slow....too many Xmas cookies!

Rounds Complete!!

"The Moral High Ground....A Great Place to Emplace Artillery."

  • Member since
    October 2007
  • From: Louisville, KY
Posted by pordoi on Tuesday, December 23, 2008 6:32 PM

Doog,


... and to follow up on Redleg's question;  can the fixer be air brushed?

 Don


  • Member since
    January 2007
Posted by the doog on Tuesday, December 23, 2008 6:34 PM
 redleg12 wrote:

Karl - Just thought of a quick question......when the MIG pigment fixer dries, is it flat or gloss?? Same for the acrylic resin???

The brain is working slow....too many Xmas cookies!

Rounds Complete!!

Mike, the pigment fixer is dead flat. The acrylic resin seems to be as well. If it looks at all semi-glossy, it's because for the darker mud, I applied about a 70% additional mixture of gloss acrylic finish from Model Master. Without that, it would be dead flat! Dead [xx(]....Smile [:)]

Don--absolutely! It seals in the pigments fairly securely--but why would you airbrush the pigments?

  • Member since
    May 2006
  • From: Queensbury,NY
Posted by panzer88 on Tuesday, December 23, 2008 7:18 PM
Absolutely stunning Doog!!!!  Goes along perfect with this fine New York State weather we've been having. Thanks doog for the great how-to.


  • Member since
    December 2007
  • From: Bridgeview, Illinois
Posted by mg.mikael on Tuesday, December 23, 2008 8:55 PM

That is one GREAT looking King Tiger, not to mention one great WIP/tutorial!!!Thumbs Up [tup]Bow [bow]Thumbs Up [tup]

Sure turned this one out quick Doog, and it's fantastic! I'm struggling just to finish my SU-76M after working on it for months......but that's probably my fault & the LHS because they still didn't get in the paints I ordered almost two months ago.

"A good plan executed now is better than a perfect plan next week." - George S. Patton

  Photobucket 

  • Member since
    July 2003
  • From: Perth, Western Australia
Posted by madmike on Wednesday, December 24, 2008 12:36 AM

Doog

What can I say, that has been said before, except...

What a bloody beaut build mate!

I use MIG pigments all the time now, they look great applied even on tiny 1:72 builds.

Inspirational work mate.

Cheers

Mike

"I do not feel obliged to believe that the same God who has endowed us with sense, reason, and intellect has intended us to forgo their use." - Galileo Galilei
  • Member since
    April 2008
  • From: Canadian Prairies
Posted by caSSius on Wednesday, December 24, 2008 12:41 AM

It's hard to think up a fresh accolade that hasn't already been used Karl! Truly splendid build with a great toot thrown in as well.

I guess I'll have to order in some of the MIG products after all, it sounds and looks like they are in fact worth chasing down.

Looking forward to the Nashorn adventure!

Cheers

Brad

"Only those who will risk going too far can possibly find out how far one can go."

- T.S. Eliot


  • Member since
    October 2007
  • From: N.H.
Posted by panzerguy on Wednesday, December 24, 2008 8:44 AM


         Outstanding job KarlBow [bow]

          Just what we'd come to expect from a master modelerWink [;)]

      Still not a fan of the molded zimm but I love the way you've modified it.


"Happiness is a belt fed weapon"

  • Member since
    January 2007
Posted by the doog on Wednesday, December 24, 2008 10:22 AM

Thanks, David, Michael, Mike, Brad, and Steve!

I appreciate you all commenting, and thank you for the kind compliments!

Hope you all have a Merry Christmas!  Smile [:)]

  • Member since
    November 2005
Posted by Anonymous on Wednesday, December 24, 2008 10:43 AM
 the doog wrote:

Thanks, David, Michael, Mike, Brad, and Steve!

I appreciate you all commenting, and thank you for the kind compliments!

Hope you all have a Merry Christmas!  Smile [:)]

I just spoke to Jochen, and he said you nailed it pretty close, although he did mention there were a pair of boots on the back engine deck drying out...Thumbs Up [tup]Thumbs Up [tup]

Merry Christmas from me and the Nun... 

  • Member since
    January 2007
Posted by the doog on Wednesday, December 24, 2008 10:47 AM
 Mansteins revenge wrote:
 the doog wrote:

Thanks, David, Michael, Mike, Brad, and Steve!

I appreciate you all commenting, and thank you for the kind compliments!

Hope you all have a Merry Christmas!  Smile [:)]

I just spoke to Jochen, and he said you nailed it pretty close, although he did mention there were a pair of boots on the back engine deck drying out...Thumbs Up [tup]Thumbs Up [tup]

Merry Christmas from me and the Nun... 

LOL! Thanks, Manny! Wink [;)]

Tell Sister Mary that I have a confessional with a hanging misteltoe that I'd like to hear her "confession" in! Evil [}:)] LOL!

Have a Merry Christmas too, my friend! Big Smile [:D]

  • Member since
    May 2005
  • From: Dublin Rep Of Ireland
Posted by terry35 on Thursday, December 25, 2008 11:06 AM

Super work there Karl, just great. Do all modellers do their best work on filthy benches, and is that tea or coffee. Either one is an essential when doing model work. Very interesting to hear your opinions on Mig products.

Again cool work and seasons greetings.

Terry.

  • Member since
    July 2007
  • From: Reseda, California
Posted by BraileScale-Freak on Thursday, December 25, 2008 2:58 PM

Karl (the doog),

Read through your build log.  Excellent execution encompassing a wide verity of techniques, tools, materials and information used to render a very realistic and interesting subject such as the Tiger II of Jochen Peiper's that you chose for your build log.  Many of your techniques and your approach to achiveing a convinceing finish to an overall great build is worthy of being unique and unparalleled to any of the finist modeling that our hobby has to offer on the net, in magazines, CD's, DVD's that are currently available.  A modeler, or rather artist, such as yourself and quit a few others here on Finescale Modeler are what makes our hobby enjoyable, fun, exciting and brings a sense of wonder and fullfillment to those both new and old.  Thanks for sharing your craft with all of us and for taking your time to help in making this hobby better for everyone!

Marry Christmas,
Eddy and Hieu Nevarez Make a Toast [#toast]

  • Member since
    January 2008
  • From: Hickory, NC
Posted by Bushi on Thursday, December 25, 2008 3:51 PM

 Doog after looking over the whole thread I am just blown away by what you are capable of.Bow [bow]Bow [bow]Bow [bow] I sit and look at my second build and really wonder how it will turn out. The skill you have just make me envious, but it is nice to see someone like you passing along the knowledge they have to others such as my self to try new techniques to become better modelers. I thank you very much for this.

Jeff


  • Member since
    December 2008
  • From: Northern Va
Posted by psstoff995's lbro on Saturday, December 27, 2008 4:26 PM

Doog, great to watch a real master at work! Bow [bow]

 I've seen a lot of your work in the magazens. I'm new to the forums and I'm very pleased with all of the great work. Keep it up!

-Will young modeler Test fit master
  • Member since
    April 2003
  • From: 41 Degrees 52.4 minutes North; 72 Degrees 7.3 minutes West
Posted by bbrowniii on Saturday, December 27, 2008 8:09 PM

Doog,

Superb.  Simpy superb.

'All that is necessary for the triumph of evil is for good men to do nothing' - Edmund Burke (1770 ??)


  • Member since
    January 2007
Posted by the doog on Tuesday, December 30, 2008 9:58 AM

Hi guys!

Just getting back from Pennsylvania where I spent Christmas, and just wanted to say thanks to Jeff, Boyd, Bill, Eddy, and Terry

I'm flattered and humbled by the nice comments and sincerity of the replies here; I shall continue trying to impress you guys and share my progress and mistakes with you all! Blush [:I]

Hope you all had a great Christmas! Big Smile [:D]

JOIN OUR COMMUNITY!

Our community is FREE to join. To participate you must either login or register for an account.

SEARCH FORUMS
FREE NEWSLETTER
By signing up you may also receive reader surveys and occasional special offers. We do not sell, rent or trade our email lists. View our Privacy Policy.