SEARCH FINESCALE.COM

Enter keywords or a search phrase below:

DML Grille H Smart Kit WIP *COMPLETE Pics p.9* 05-03-09

25720 views
199 replies
1 rating 2 rating 3 rating 4 rating 5 rating
  • Member since
    July 2006
  • From: New Jersey
Posted by redleg12 on Tuesday, March 31, 2009 6:27 PM

Hummmm...there was a person on this site (the modeler that cannot be named!) who was sooo overbearing about how good Dragon/DML is......goes to show you...if you do your research...they all screw up a little.

Nice catch on their screw up. After my nightmare with their OH-6 kit (the figures the supply are too big for the cockpit), it is not surprising to find more problems in other kits.

Good research builds good models. Even if your not a rivit counter, generally it needs to be correct.

Weekday bench time....Shock [:O]....well....it was your birthday....Wink [;)]

Rounds Complete!!

"The Moral High Ground....A Great Place to Emplace Artillery."

  • Member since
    July 2004
  • From: Texas
Posted by wbill76 on Tuesday, March 31, 2009 7:39 PM

Boyd thanks for the comments! Thumbs Up [tup]

Mike,

I've yet to encounter the perfect kit...and some are more imperfect than others! Even some of DML's latest/best kits like their Pz IV Smart Kits have little areas here and there (mystery parts on the sprues anyone?) that will trip you up if you're not paying attention. The DML instructions definitely will keep you on your toes for sure, I've built a lot of their kits and have yet to build one that didn't have at least one error in them. Your OH-6 experience isn't all that different from the 251 driver problem...or any number of other instances where something looks great on paper but isn't designed to actually go together in reality. All it takes is to be slightly off in the tolerances and you're screwed due to the scale effect magnification. Shock [:O]

As for the weekday bench time, that was to make up for Friday's "distractions" but man did it make me tired for today...and served as a reminder as to why I don't build during the week. Big Smile [:D]

  • Member since
    May 2005
  • From: Dublin Rep Of Ireland
Posted by terry35 on Wednesday, April 1, 2009 10:44 AM

Hi, Bill sorry I wasn't online to wish you a happy birthday on the Day but "happy Birthday"Happy B-Day [bday]all the same, hope you enjoyed your self and had a nice pint.

Now on to the serious stuff, your killing me here, I'm meeting Johnner and going out to buy one of these next week. I had one of these as the early kit and seriously need to get working on one of these little brutes, I'm jealous looking of your work here, keep it up.

All the best,

Terry.

  • Member since
    July 2004
  • From: Texas
Posted by wbill76 on Wednesday, April 1, 2009 1:15 PM
Thanks terry for the comments and b-day wishes. Wink [;)] Despite the small problems I've encountered, there's nothing in my experience that would say this is a bad kit...just the usual DML conditions you can encounter in any of their products to contend with. Hope you don't wait too long to tackle this one, can never have too many 38t family builds IMHO! Big Smile [:D]
  • Member since
    May 2005
  • From: Dublin Rep Of Ireland
Posted by terry35 on Wednesday, April 1, 2009 3:40 PM

Bill I don't know if its still in print but Speilberger/Doyle done what can only be called a thome on the 35 and 38 series and Dolye done a drawing on every vehicle and concept proposed.

You may end up spending eternity building 38's.

Regards,

Terry.

  • Member since
    July 2004
  • From: Texas
Posted by wbill76 on Wednesday, April 1, 2009 5:49 PM
 terry35 wrote:

Bill I don't know if its still in print but Speilberger/Doyle done what can only be called a thome on the 35 and 38 series and Dolye done a drawing on every vehicle and concept proposed.

You may end up spending eternity building 38's.

I've got the hard-bound edition and you're right, it's definitely a tome! The only disappointing thing is that about 1/4 of the book is devoted to non-35/38t vehicles developed by the Czechs, but it's still got a ton of information on the advertised topic. Definitely a must-have for anyone interested in this family of vehicles. Wink [;)]

  • Member since
    July 2004
  • From: Texas
Posted by wbill76 on Friday, April 3, 2009 5:04 PM

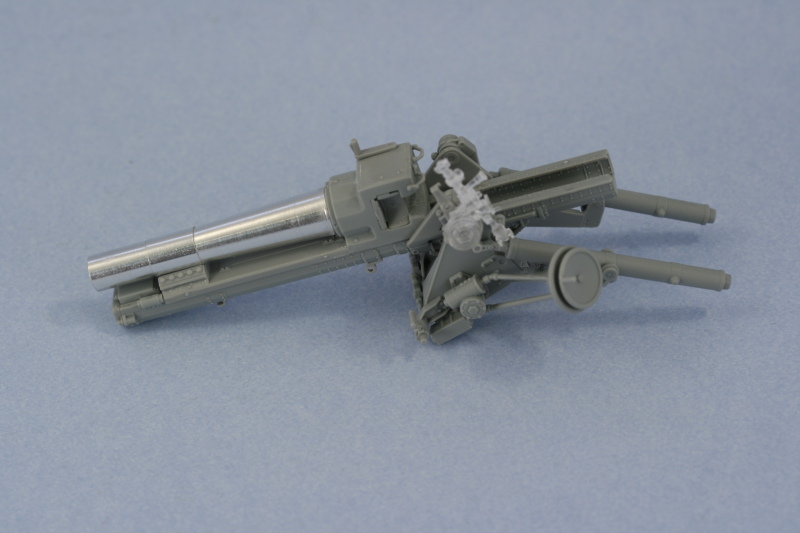
Since I will be out of town this weekend, I decided to get in as much time as I could squeeze in here and there to at least get the final pre-paint steps done. The biggest item of business was the sIG 33 gun, so work began there in Step 21. The step calls for assembly of the breech block first and has two halves for the breech and 4 parts for the sliding block. The instructions are a little vague when it comes to part B14 and indicates that you should glue this directly to the sliding block part B5...but I found it was better to glue it into the assembled block halves and leave the sliding block able to move freely. The assembly uses an insert for the top of the block to avoid a large seam but some sanding was still necessary around its edges to get a seamless look. The same was true of the interior of the two halves which I carefully sanded with a round needle file to avoid damaging the detail there.

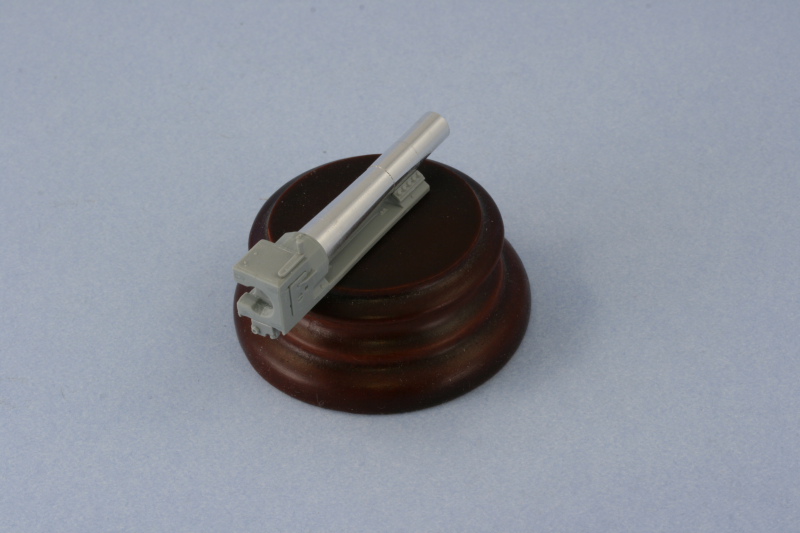
The second portion of the step adds the front part of the recoil sled along with the aluminum barrel. I added the recoil sled portion first so that it would have a solid/level connection with the breech block and let that dry. The small join with the block was lightly sanded and then the barrel added using CA gel at the base as well as the front where the barrel hoop attaches to the sled.

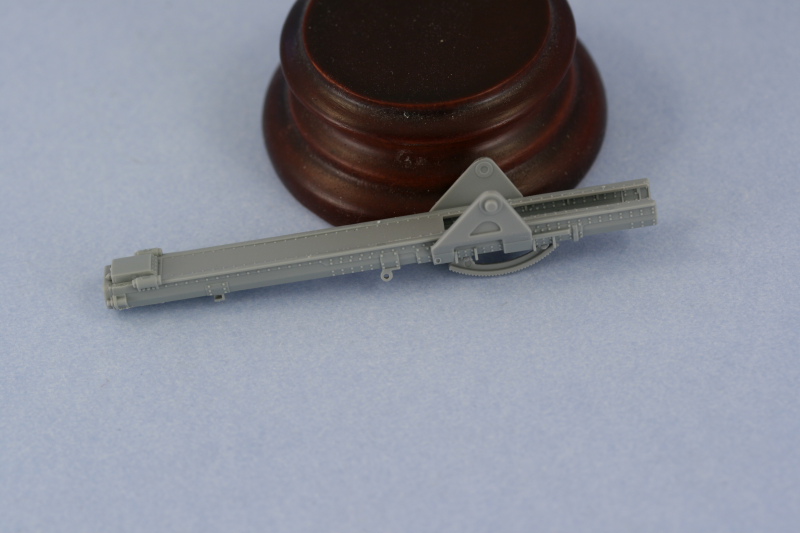
Next came the gun mount and tray in Step 22 and 23. This is a complex step with a lot of sub-diagrams, so you need to decide your angle of attack first. I started with the tray, which assembles out of 3 parts to avoid the longitudinal seam common in other kits. The contact surfaces for this approach are small though, so I glued the bottom piece first to one side using regular glue and then repeated for the other side once the glue had set up a little. I used the recoil sled from the previous step to test-fit and make sure the width was correct. Then I added the insert that completes the top portion of the tray using liquid glue to get it to align properly since the thin rear portions in particular needed to be aligned very carefully. The two small grab bars on the breech block were also added...a feature that wasn't always present on sIG 33 guns but which matches the style of this particular one that DML included.

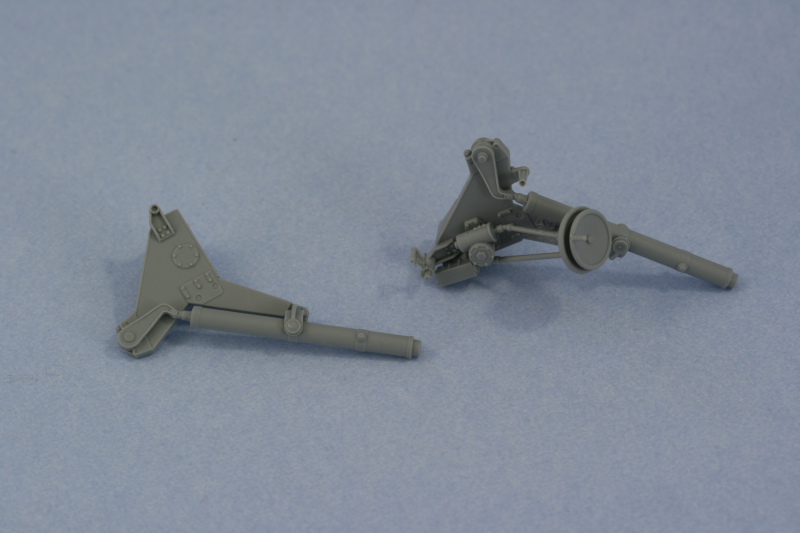
Next up were the two halves of the mount and the recoil cylinders. The right side of the mount is pretty simple while the left one is more complex since it also includes the elevation gears and gun sight. The sub-assembly diagrams for the elevation gears asks for a nearly impossible construction sequence where you add the different components to the wheel box and then install to the side of the mount. I ignored this except for the parts number call-outs and instead installed the two different gear elements, parts C13 and C7, into their proper positions on the mount side first. Then I added the gear box C10 and it's connection conduit part C6 to insure the proper alignment and fit of all the parts. Last but not least the hand wheels were then added.

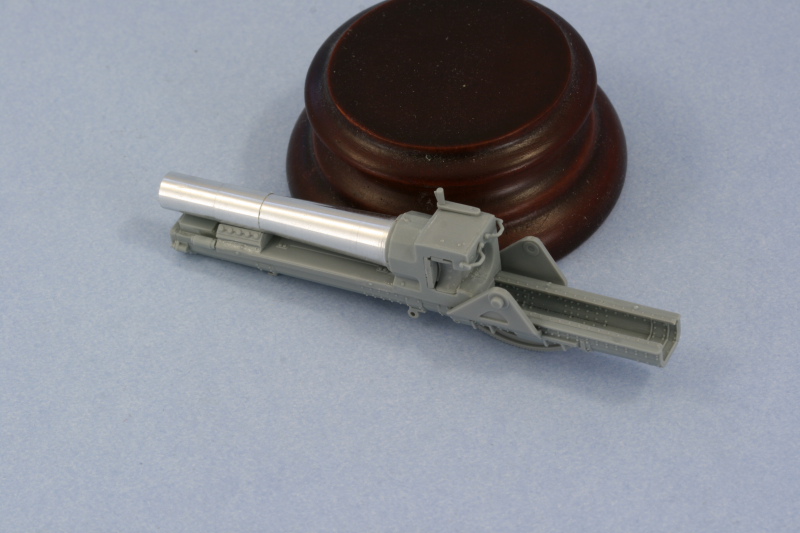
Everything was then brought together to complete the mount assembly. The instructions do not tell you this, but if you don't glue the tops of parts F46 and F47 to the trunnion points on the recoil tray, the gun can remain positionable for later installation. If you do glue them into position, be sure you've got the right elevation set or you'll be stuck otherwise. I also assembled the gun sight, opting for the short neck version since the Grille H has a cut-out in the front superstructure whereas the long neck is more common on the Grille M and Bison I that didn't have that type of cutout available. The elevation arms on the gradient gear had two small holes molded into them, these are not ejector marks but should be there however DML didn't mold them all the way open for some reason...so this was cured using a pin vise and drill bit.

I've left the recoil sled and gun dry fit for now to facilitate detail painting later on...it's a very tight fight as is, so no glue is actually required unless you choose to use it for a permanent join.

Returning back to Step 19, I added the details to the interior and exterior of the front superstructure plate. The driver's visor had a very tiny slit molded into it, so I opened this up a bit more using the tip of a needle file and then cleaned it up with a #11 blade. No armored glass block is provided for, I'm not sure if one was supposed to be fitted or not on this particular vehicle but it seems strange for it to be absent.

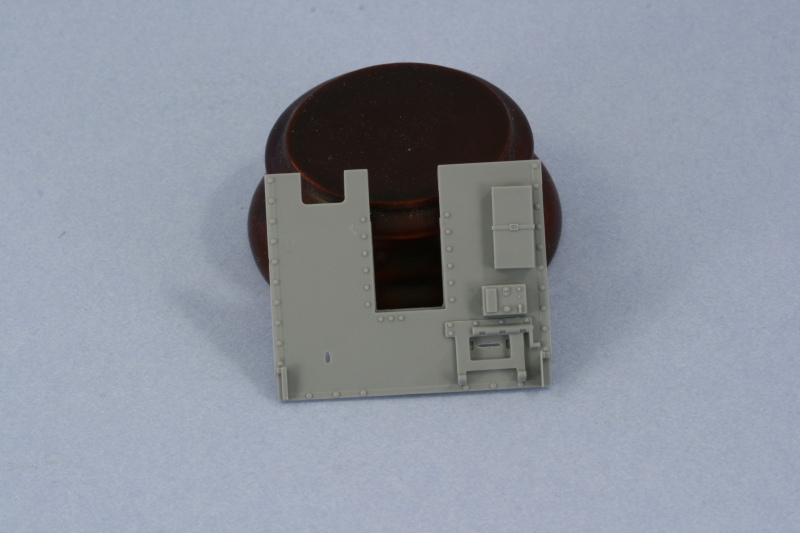
Details were also added to the front of the superstructure plate and a word of warning is appropriate here. The diagrams direct the installation of the sliding heavy additional front plate, part F60, and it's spring-loaded hinged plate F69 in the position that's appropriate for the gun in the travel level elevation position. If you decide to pose the gun in an elevated or firing position, you will need to adjust the position of both parts, not just the spring-loaded hinged part. I'm going to have mine in the level position and may or may not engage the lock, so that's not a problem for me but it is a trap for the unwary if you're doing a dio or similar where you decide on something different elevation-wise.

I also cleaned up the rear compartment doors and installed the fire extinguisher and small box to the left door. The rear fixed panel received the canvas cover pole while the right door was cleaned up in preparation for paint and didn't have any parts required.

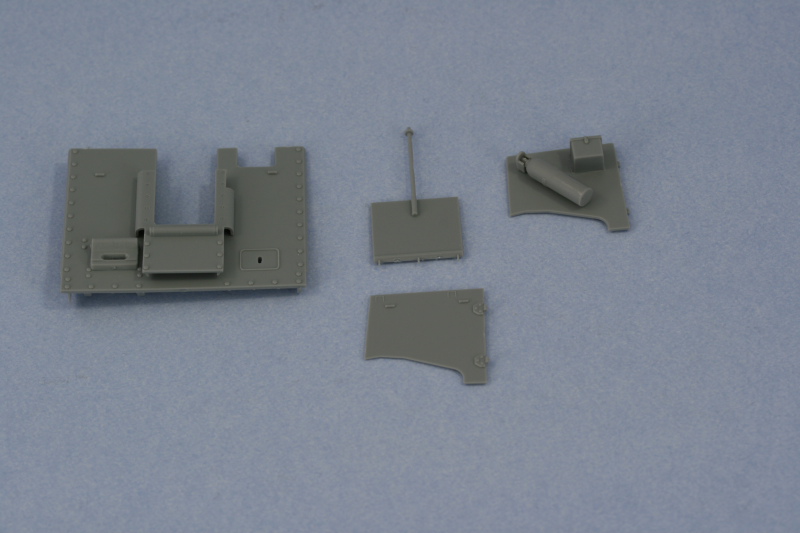
That's all the construction that will be completed before the superstructure interior is painted.

Total Session Time: 4.5 hours

Total Time to Date: 32.75 hours

  • Member since
    December 2006
  • From: N. Georgia
Posted by Jester75 on Friday, April 3, 2009 11:01 PM

Wow Bill, moving this one right along!! First of, happy albeit late birthday!!Happy B-Day [bday]

Second, Im not sure which i am more jealous of, your builds or the amount of benchtime you have! Looking forward to see this one all dressed up and ready for the ball!

Eric


  • Member since
    July 2006
  • From: New Jersey
Posted by redleg12 on Saturday, April 4, 2009 6:04 AM

Bill - I cannot tell without looking up the informaition on this particular weapon but....what you are calling recoil cylinders look to be equalibrators. The sled type setup would have the recuperator under the barrel in the sled. A hydraulic recoil is also usaully in line with the barrel and on this design may also be in the sled. Under the barrel on the front should be a bolt with a nut on it (known to artillerymen as the "jesus bolt"). This is the attachment of the recuperator to the forward barrel ring. If it is not quite in the center both recoil cylinder and recuperator may be in the sled.

Normally on either side are equalibrators which help dampen the weight effect of the barrel and allow the handwheel to operate freely at any elevation.....You know me...I am a bit anal about cannons.

Your tube overall looks great (non redlegs....stop your dirty minds). I like the fine detail on the bolts for the forward locking ring, and the breech handle. This design for the tube layout is very similar to the US M2/A1/A2/101 105mm howitzer!!

Nice work as always...enjoy your weekend...wherever you are!

Rounds Complete!!

"The Moral High Ground....A Great Place to Emplace Artillery."

  • Member since
    August 2006
  • From: Cygnus X-1
Posted by ogrejohn on Saturday, April 4, 2009 7:30 AM
That's some nice work Bill!
  • Member since
    July 2004
  • From: Texas
Posted by wbill76 on Saturday, April 4, 2009 1:11 PM

John, thanks for the comments!

 Jester75 wrote:
Second, Im not sure which i am more jealous of, your builds or the amount of benchtime you have! Looking forward to see this one all dressed up and ready for the ball!

Eric, thanks for the belated wishes and no need to feel jealous...I will be spending over 20 hours in coach travelling this weekend flying across the Pacific so I had to balance that out to keep the universe in order after all. Wink [;)] Propeller [8-] The only bad thing about trans-Pacific travel is the horrendous jetlag...it's much worse coming back than it is going out. Going out, I leave on a Saturday and arrive on a Tuesday but coming back I actually arrive home before I left! Shock [:O]

Mike, thanks for setting me straight on the terminology. I've always wondered why the sled was designed the way it is...and having the recoil cylinder and recuperator inside the sled makes sense. The front end of the sled has a cap that is sometimes shown open in some photos and you can clearly see what you describe in terms of them being offset from the center. When I saw your howitzer for the first time on Corregidor, I immediately thought it was very similar to the sIG 33 gun...which itself is a holdover from a WWI design, so it wouldn't surprise me that the characteristics wouldn't have been somewhat transposed during the inter-war years into US designs. Flight leaves for LAX at 3:30 MT this afternoon...then I get to wait 6 hours in LAX until flight leaves at close to midnight for non-stop to Fiji. At least I'll be able to sleep most of the way! Big Smile [:D]

  • Member since
    July 2004
  • From: Texas
Posted by wbill76 on Friday, April 10, 2009 5:53 PM

Push came to shove today and it was necessary to break out the airbrush and work on the interior. To prep for that, I masked off the already painted areas of the lower hull interior and also prepped the superstructure front and the rear panels by attaching them to strips of masking tape for easier handling.

I primed everything first with a coat of Italian Dark Brown. This insured I didn't leave any bare plastic behind and once it had dried, I sprayed the base coat of 50/50 Dunkelgelb/Light Gray to all the areas of the interior. In order to make it possible to fit the tools and not worry about masking them, I went ahead and painted the full lengths of the fenders as well as the engine deck and rear hull panel. These areas are much more accessible now vs. when the superstructure is fitted, so I took full advantage of the situation. The photo below shows the dunkelgelb as being a little darker than it actually is, I just didn't play around with the lighting too much when taking this shot and didn't notice it until later.

With the base coat on, it was now down to the detail work. I started in on the left hand side first since it had the most to do. The radios and gear were painted using a 50-50 mix of Panzer Gray and Russian Armor Green to create a sort of field-gray color and then installed into their racks. The fit is tight so only a small amount of glue was needed. The next step was to complete all of the wiring using the lengths of solder I'd added earlier plus several other lengths that needed to be cut to size and installed. I used the wiring diagram for the Marder II radio sets in Achtung Panzer #7 as a guide since it's essentially the same radio setup here in the Grille H with just a couple of minor differences. I also detailed the MP40 ammunition pouches and the belts in the empty ammunition racks on this side along with the gas mask container.

The side's not finished yet, I still need to add in the MP40 along with the gunner's seat cushion and do some weathering before it's ready for installation.

The right hand side was next and I quickly discovered the limitations of trying to paint the 4 15cm rounds while installed. I think it would've been a lot easier had I painted them off the vehicle and installed but rather than pull them out, I went ahead and painted them in location. I used the same 50-50 Panzer Gray/Russian Armor Green mix for the shell bodies and dry brushed some Steel, counter-dry brushed Russian Armor Green, and then ended with a dusting of black artist pastels. As with the opposite side, I still need to add the MP40, seat cushion, and weathering to complete this side. 

The devil's always in the details and this part of the build is no exception.

Total Session Time: 5.5 hours

Total Time to Date: 38.25 hours

  • Member since
    May 2005
  • From: Dublin Rep Of Ireland
Posted by terry35 on Friday, April 10, 2009 6:10 PM

Really coming to life now Bill. Great to see a new update , I went out and bought one myself today.

I'm starting to build up a real collection of 38t chassis's myself now. Your own work on these little gems is really inspiring me at the moment.

Thanks for the inspiration,

Terry.

  • Member since
    July 2004
  • From: Texas
Posted by wbill76 on Friday, April 10, 2009 7:48 PM
Thanks for the comments terry! Looks like you're building up quite a collection there. Can't ever have too many of the 38t persuasion on hand! Wink [;)]
  • Member since
    January 2007
Posted by the doog on Friday, April 10, 2009 7:52 PM

WOW, that's a beautiful interior, Bill. I agree about dirtying her up a bit; it could use just a wee bit o'weathering!

Looks great so far! 

  • Member since
    August 2008
  • From: S.W. Missouri
Posted by Pvt Mutt on Friday, April 10, 2009 7:54 PM

Good to have you back on track. I was on the verge of going into withdrawal.Big Smile [:D]

Tony the Mutt

Shoot Low Boys They're Ridin Ponys

  • Member since
    July 2004
  • From: Texas
Posted by wbill76 on Saturday, April 11, 2009 1:09 AM

Thanks Karl, I just ran out of time today what with it being a Friday and all...couldn't believe the clock when I checked the time invested so far. Definitely far from complete. Big Smile [:D]

Tony, now that would be a real shame! Can't have you getting the shakes, that would slow down your own production! Wink [;)]

  • Member since
    July 2006
  • From: New Jersey
Posted by redleg12 on Saturday, April 11, 2009 7:14 AM

Bill - I love the wiring. I must admit, the rounds look a but "funky" in that color green. Good job with the copper color on the rotating band.

Rounds Complete!!

"The Moral High Ground....A Great Place to Emplace Artillery."

  • Member since
    April 2005
  • From: Piscataway, NJ!
Posted by wing_nut on Saturday, April 11, 2009 7:48 AM
Outstanding work Bill.  The inteiror looks great. I particularly like the little straps in the empty ammo rack.

Marc  

  • Member since
    April 2007
  • From: Schroon Lake, NY
Posted by SMJmodeler on Saturday, April 11, 2009 11:52 AM
 wbill76 wrote:

The devil's always in the details and this part of the build is no exception.

Bill: The devil's always in the detailsEvil [}:)]...YEP!!!  But definately well worth it in this case, exceptional workThumbs Up [tup]Thumbs Up [tup]!  I'll third the motion on it being a bit clean, you could eat off that interiorWink [;)].  Seriously though, I know we differ in this departmnt, but she's even a bit clean for youBig Smile [:D].  Fantastic work Bill (William)...Cowboy [C):-)] 

  • Member since
    July 2004
  • From: Texas
Posted by wbill76 on Saturday, April 11, 2009 1:05 PM
 redleg12 wrote:

Bill - I love the wiring. I must admit, the rounds look a but "funky" in that color green. Good job with the copper color on the rotating band.

Mike, appreciate the comments but something might be up with your monitor settings? The band you're seeing is actually the leather retaining straps and are a dark brown,  not copper, color. Wink [;)]

Marc, I wish DML had provided the option for more of the racks to be posed empty...they only allow for a maximum of 4 straps in the PE set so you can leave one side or the other empty but not both. Sad [:(] The horizontal rack is the best candidate for being empty...that one would've been even more of a nightmare to paint! Laugh [(-D]

 SMJmodeler wrote:

Bill: The devil's always in the detailsEvil [}:)]...YEP!!!  But definately well worth it in this case, exceptional workThumbs Up [tup]Thumbs Up [tup]!  I'll third the motion on it being a bit clean, you could eat off that interiorWink [;)].  Seriously though, I know we differ in this departmnt, but she's even a bit clean for youBig Smile [:D].  Fantastic work Bill (William)...Cowboy [C):-)] 

Steve, appreciate the comments...but really, I have to ask, did you read my previous posts? I know you're on dial-up so may have skipped over some things, but sheesh you guys are hounding me needlessly (said with tongue firmly in cheek!)! Wink [;)] Laugh [(-D] I said twice now and will say it a third time <sigh> because it's a Saturday...the interior isn't done and I'm going to weather it before installation...in fact, that's what is on the agenda for today, have no fear! I'm actually debating whether or not to add in the missing treadplate for the interior, it's starting to aggravate me to no end the more I look at the interior reference photos that DML didn't provide for this. Even though I said this one was going to be straight OOB, I think I'll head down to my LHS and pick up some patterned sheet styrene and start messing around with it to see if I can make it work...that would be a "scratch built" item and still within the spirit of not using any AM on this one I think. Big Smile [:D]

  • Member since
    July 2004
  • From: Texas
Posted by wbill76 on Saturday, April 11, 2009 3:58 PM

I had finally decided after looking at reference photos that I was going to add the missing tread plate that the gun crew would've used as a platform. The tread plate can be clearly seen in both the MBI and Spielberger photos.

MBI: 

Spielberger:

In both photos you can see that the tread plate sits fairly high inside the lower hull, roughly flush with the curve over the bulkhead to the engine compartment on the MBI photo and about level with the drive shaft in the Speilberger photo. The Spielberger photo seems to have the simplified I-beam style of mount vs. the stepped style mount in the MBI photo, hence DML's option of mount types. I had used the stepped style so, in preparation for adding the tread plate, I did a dry fit of the gun mount and gun to see how things would line up using some poster blue tack to hold things in place.

I immediately noticed that something was wrong...the bases of the equilibrators were much lower than shown in either the
MBI or Spielberger photos. I compared the angles in the H mount vs. those in the M and it would appear that DML copied the angles from their earlier released M kit and didn't bother changing them for the H style mount which has a shallower angle configuration. This, to me, explains why there's no raised tread plate platform...if DML had included it, they would've had to change the angles on the equilibrators which would've required a totally new gun mount sprue. Instead, they stuck with the M style and omitted the plate. It also means that my plan to add the missing tread plate is now scrapped as it's impossible to change the angle on the equilibrators without completely replacing them due to the way they are integrated into the sides of the gun mount. That means I can't locate the plate at the correct height/level and throws everything off from an accuracy perspective and represents a substantial error on the interior IMHO.

  • Member since
    August 2008
  • From: S.W. Missouri
Posted by Pvt Mutt on Saturday, April 11, 2009 4:17 PM

Bill, I don't know how the gun and mount all goes together but could you file the bottom of the floor mount, more off the front tapered to the rear? That would kick up the rear and give you some more clearance for those cylinders.

Just a thought                                                                                                              Tony the Mutt

Shoot Low Boys They're Ridin Ponys

  • Member since
    October 2007
  • From: N.H.
Posted by panzerguy on Saturday, April 11, 2009 4:20 PM
 

     Bill the radio set up looks great. Looking forward to seeing the interior weathered up.Wink [;)]

  Just one question, are you sure the fuses were silver and not more of a brass color?

     Once again I'm a little (okay a lot) disappointed that DML couldn't take the time to produce the correct parts for the gun mount. Shame on them.

"Happiness is a belt fed weapon"

  • Member since
    July 2004
  • From: Texas
Posted by wbill76 on Saturday, April 11, 2009 6:36 PM
 Pvt Mutt wrote:

Bill, I don't know how the gun and mount all goes together but could you file the bottom of the floor mount, more off the front tapered to the rear? That would kick up the rear and give you some more clearance for those cylinders.

Tony,

Unfortunately no. Doing that will alter the platform angle on which the actual gun mates up to the platform portion of the mount and then the gun won't sit level as a result. The difference in where the equilibrator ends should be vs. where they actually are is huge...about 1/4 inch or so. Short of having an actual all-new mount such as the one made by TMD (which I sold about a month ago! Laugh [(-D]), there's no solution using the DML parts to this problem.

 panzerguy wrote:
Bill the radio set up looks great. Looking forward to seeing the interior weathered up.Wink [;)]

  Just one question, are you sure the fuses were silver and not more of a brass color?

     Once again I'm a little (okay a lot) disappointed that DML couldn't take the time to produce the correct parts for the gun mount. Shame on them.

Steve, thanks for the comments! So far as I know, all German HE rounds were fused with steel caps and not brass but I could be wrong. All the artillery and AA rounds that I've seen at any rate had steel caps, so that's what I went with. I too am really disappointed at the short-cut DML took with the gun mount and instead chose to just reuse the M mounts. It doesn't stop the kit from being buildable but considering how highly anticipated this, of all the new 38t family was, it was one area they could've, and should've, taken the time to get right IMHO.

  • Member since
    November 2005
Posted by Anonymous on Saturday, April 11, 2009 6:39 PM
Wow...seems like Dragon really slipped up on this one in a major way...a shame...what's plan B?
  • Member since
    May 2005
  • From: Dublin Rep Of Ireland
Posted by terry35 on Saturday, April 11, 2009 7:13 PM

Eweee........

Bill I 'm going to get the instructions out as soon as I go upstairs. I'm only half grasping this problem. I can guess that you have thought through your options.

I guess its easier to understand with the kit at hand. Hope you sort something out.

I'm hearing what your saying in respect of the parts transplanted from the M chassis.

(Just trying to think back to the early nineties when the first issue of this subject was kitted by Dragon, what problems were abound at that time. I do remember that a lot of etch was produced at the time.)

Good luck.

Terry.

  • Member since
    July 2004
  • From: Texas
Posted by wbill76 on Saturday, April 11, 2009 8:18 PM

MR, Plan B is to install it as is and let it go...there's nothing I can do to correct it without a total replacement of the mount. Sad [:(]

Terry, I recall the same thing...I had the original Kirin kit in the stash and sold it off when this new one was announced. In the package was an Eduard PE set (which includes the missing tread plate pieces) as well as a TMD resin sIG 33 and mount which would've addressed my problem there too...how ironic eh? Laugh [(-D] Looking back over the instructions there's no other way DML could have done this with the parts they had available...so they in essence cheated. They reused the Grille M parts for the mount and turned a blind eye to the tread plate and the storage boxes that are supposed to be underneath it...because if those had been included in the design, the Grille M mount parts wouldn't work.

  • Member since
    July 2006
  • From: New Jersey
Posted by redleg12 on Saturday, April 11, 2009 8:49 PM
 wbill76 wrote:
 redleg12 wrote:

Bill - I love the wiring. I must admit, the rounds look a but "funky" in that color green. Good job with the copper color on the rotating band.

Mike, appreciate the comments but something might be up with your monitor settings? The band you're seeing is actually the leather retaining straps and are a dark brown,  not copper, color. Wink [;)]

Hummmm....thats what I get for looking at it without enough coffee. I did go back and (on a different monitor) look....the rounds are a bit shiny (could be the camera light) and the straps...still look like rotating bands (you know us artillery types, hard headed)...maybe dirty copper Shock [:O]

As far as the equilibrator issue.... Banged Head [banghead] Banged Head [banghead] Banged Head [banghead] Banged Head [banghead] Banged Head [banghead].

I know how you feel. Run into some of the same type on my current build. And like you I am stuck. It may not be a rivit counters dream but I'm sure you will make it a work of art.

If anyone goes near it with a ruler just grab it and break it....fun is the bottom line!!Wink [;)]

Rounds Complete!! 

"The Moral High Ground....A Great Place to Emplace Artillery."

  • Member since
    July 2004
  • From: Texas
Posted by wbill76 on Sunday, April 12, 2009 12:49 PM

Mike, I'm not quite sure why, but the MM enamel Russian Armor Green tends to have a slight sheen to it when it's brush painted. That will disappear when everything gets flat coated after weathering, so you're not seeing things there! Wink [;)]

In regards to the equilibrator issue, it may be a case of some light at the end of the tunnel after all but for others, not necessarily for me. After some discussion on another forum it would appear that the parts that are on sprue C that are marked as "not for use"(C8 and C11 for the mount sides and C18 and C19 for the equilibrators) appear to be from the sIG 33 used on the Bision I kit. It would seem that those parts do have the right angle for the H-style mount or at least are a much closer approximation vs. the M-style mount. I can't validate this though as it's too late for me to tear things apart and try to use them given how far along I am at this point in the build and the damage that would likely result due to all the other small parts that would also have to be relocated. I can't say for sure if they'd still properly clear the rear bulkhead or not if used in place of the called for F46 and F47 parts, but it's a possible alternative for those to try who would like to add the missing platform.

JOIN OUR COMMUNITY!

Our community is FREE to join. To participate you must either login or register for an account.

SEARCH FORUMS
FREE NEWSLETTER
By signing up you may also receive reader surveys and occasional special offers. We do not sell, rent or trade our email lists. View our Privacy Policy.