SEARCH FINESCALE.COM

Enter keywords or a search phrase below:

#100 Tristar Pz 38(t) B COMPLETE PICS P.10 10-24-09

58938 views
221 replies
1 rating 2 rating 3 rating 4 rating 5 rating
  • Member since
    July 2004
  • From: Texas
Posted by wbill76 on Sunday, October 11, 2009 9:56 PM

Thanks Steve and John!

 scratchmod wrote:
I think this should get finished and then a well deserved vacation Wink [;)], you can't leave us hanging like that Bill. Just kidding my friend,this build is worth waiting for, we all need a break some times. Unfortunately I have tooo little time for the hobby.

Bill this T38 is looking better each time you post updates. a definate candidate for a display case, or maybe a Museum. I be watching for the next post.

Thanks Rob! I haven't been able to get away from work and take a real vacation for over two years now, so I'm definitely looking forward to this one! In honor of the 100th build, I'm going to DisneyWorld! (Of course it would be a little more fitting if I'd actually completed it first but it's close enough, right? Big Smile [:D])

 the doog wrote:
Again, WOW, Bill!

Just one question--what magazine cover will this one be on? Wink [;)]

Karl, thanks for the kind words as always and I'm humbled by the thought that this one would be cover-worthy. High praise indeed and it's not even finished yet...so no pressure, right? Laugh [(-D]

  • Member since
    October 2007
  • From: N.H.
Posted by panzerguy on Sunday, October 11, 2009 9:30 PM
 

    Well Bill  #100 has certainly surpassed all expectations. Beautiful work!

    Enjoy your vacation.

"Happiness is a belt fed weapon"

  • Member since
    August 2006
  • From: Cygnus X-1
Posted by ogrejohn on Sunday, October 11, 2009 7:21 PM
Absolutely beautiful work Bill!
  • Member since
    January 2007
Posted by the doog on Sunday, October 11, 2009 7:08 PM

Again, WOW, Bill!

Just one question--what magazine cover will this one be on? Wink [;)]

  • Member since
    February 2009
  • From: mass,USA
Posted by scratchmod on Sunday, October 11, 2009 6:31 PM

I think this should get finished and then a well deserved vacation Wink [;)], you can't leave us hanging like that Bill. Just kidding my friend,this build is worth waiting for, we all need a break some times. Unfortunately I have tooo little time for the hobby.

Bill this T38 is looking better each time you post updates. a definate candidate for a display case, or maybe a Museum.

I be watching for the next post.


Rob

  • Member since
    July 2004
  • From: Texas
Posted by wbill76 on Sunday, October 11, 2009 6:20 PM
Thanks Tony! Yes I know, terribly selfish to think I could take a vacation and leave the forum behind but it won't be for too long I promise! Laugh [(-D]
  • Member since
    August 2008
  • From: S.W. Missouri
Posted by Pvt Mutt on Sunday, October 11, 2009 5:19 PM

Vacation???? There you go just thinking about yourself, that alright, forget about us and be that way. You know you won't relax for thinking about how you're going to finish up.

Relax and have fun the best you can and we'll be expecting great things when you get back.Big Smile [:D]

I'm terrible huh                                                                                                                        Tony the Mutt

Shoot Low Boys They're Ridin Ponys

  • Member since
    July 2004
  • From: Texas
Posted by wbill76 on Sunday, October 11, 2009 3:26 PM

The weekend was good for spending time at the bench and I spent a lot of time on the detail side of things to wrap up some loose ends. The first order of business involved detailing and installing the crew hatches for both the hull and turret. The leather pads were base coated with Italian Dark Brown then dry brushed with a tan/yellow mix of "wood" color that I also use for tool handles. I also dry brushed some enamel Gunmetal and then dry brushed some of the Italian Dark Brown to tone down and blend in the previous efforts into a unified look. Before the front hatch could be installed, I needed to install the rubber base of the antenna mount. This was drilled out with a #72 finger drill to accept a brass antenna later on and then painted with Gunmetal and glued into position. The two hatch halves were then glued together and carefully positioned so that they were slightly bent/angled with one edge resting on the antenna base and then glued into position on their hinge points.

I also added the long pry bar for the left fender and detailed the leather straps with Italian Dark Brown and Non-buffing Metalizer for their buckles. The straps were then carefully bent to shape and the pry bar glued into position in the clamps to avoid it shifting position. I also dry brushed Steel along the rims of the road wheels to simulate their bare metal wear from contact with the track guide horns and then installed the rubber rims to the road wheels and return rollers on both sides.

Next up were the right side fender details. I detailed the jack straps the same as for the pry bar on the other side. The metal portions of the tools were base coated with Non-buffing Metalizer Gunmetal and lightly dry brushed with Steel to create their metallic finish. The wood handle on the axe and the jack block were base coated with my personal mix of "wood" color and then given a light wash of Leather. Once the wash dried, I lightly dry brushed more of the "wood" color to introduce some variation and then also applied some Burnt Umber artist pastel to wear/darken the overall appearance just a bit. The Bakelite handles on the wire cutters were painted with Italian Dark Brown and the rubber end caps with Gunmetal. The two spare track links were supplied courtesy of the MK workable track set since they already had the open holes for the missing pins front and back. The links were base coated with Non-Buffing Metalizer Gunmetal, dry brushed with a touch of Steel, then dry brushed with Rust and Burnt Umber to complete their look. The two small PE retaining straps were painted separately and carefully installed with regular glue to insure they were positioned correctly.

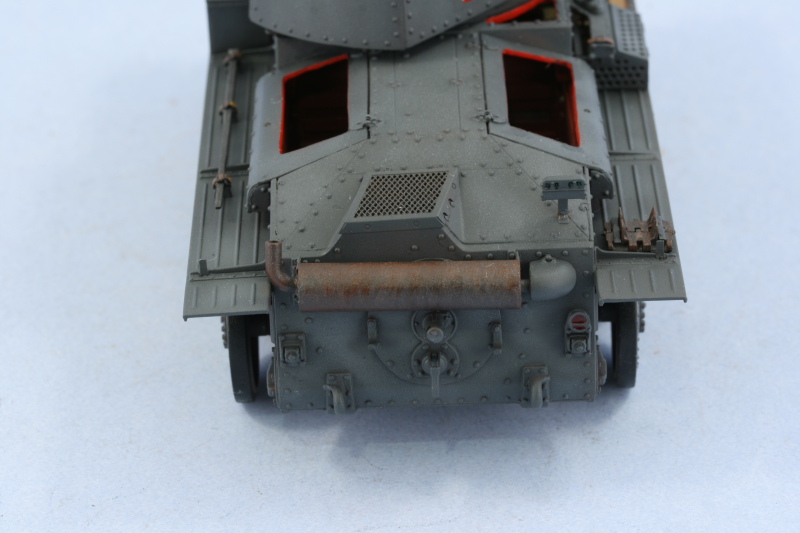
The rear hull also received some attention, I detailed the lenses in the Notek light with Tamiya Clear Green and those in the brake/tail light with Tamiya Clear Red.

I test fit the MK tracks along with the sprockets and idlers and needed to add another link in order to get the desired sag vs. the idler position. This brought the total # of links per track run to 93. In preparation for mounting the sprockets and idlers, both were given some bare metal wear on their teeth/rims/contact points by dry brushing Steel followed by an application of black artist pastels to tone down and blend them in with the painted surfaces.

The tracks themselves were painted next. I applied a primer coat of Flat Black by airbrush to protect the pins and joints from direct exposure to the lacquer-based Non-Buffing Metalizer Gunmetal base coat. This was also applied by air brush and dries very quickly. The tracks were then dry brushed with Steel followed by an overall wash of Burnt Umber.

The idlers were glued into the desired position and then the tracks and sprockets added. The tracks aren't yet glued down to the road wheels, that will come after the pigment weathering is applied to allow for a little flexibility.

That was the last remaining construction step so the entire vehicle received a sealing coat of Future applied by airbrush. This was allowed to dry overnight and the decals applied using Walther's Solvaset to insure they snugged down tight to the surfaces. A 2nd coat of Future was applied to seal in the decals to round things out. Because of the cutouts on the turret, only the rear received a vehicle number but I was still able to apply the 7th Pz Div markings and panzer forces rhomboid markings to the turret sides with some minor adjustments.

I head out on Tuesday for some vacation so won't get back to this one to complete the next steps for a little while but it's on track to be done before the end of the month, never fear! Wink [;)]

  • Member since
    July 2004
  • From: Texas
Posted by wbill76 on Sunday, October 11, 2009 11:21 AM

Nate, Marc, thanks for the comments, much appreciated!

 Mansteins revenge wrote:
Sweet...cutting up a tank to show the interior effectively yet maintaining the original integrity of the model is more of an exercise than is realized (especially a small tank), but you nailed it...very nice colors in the interior...nice touch in adding the red to the face of the cuts...this one is exceeding expectations in my book. Thumbs Up [tup]Thumbs Up [tup] 

Manny, I literally spent hours and hours agonizing over how best to do this. What made it possible was the design that Tristar chose for the roof plate with the turret ring. It was molded thick enough to tolerate the stress of the cutting/removal and also had enough strength left over when those parts were removed to retain it's shape and keep the overall hull integrity intact. The turret cut-outs were actually the more difficult to manage since the plates were curved and thin, had to be very careful not to snap them in two when working with the razor saw. I also had to think through the use of the red but Edmund's suggestion and flipping through different reference books that use that same convention on color plate cut-aways clinched it for me. Thanks for the comments and glad to hear it's exceeding expectations! Wink [;)]

  • Member since
    November 2005
Posted by Anonymous on Sunday, October 11, 2009 9:04 AM
Sweet...cutting up a tank to show the interior effectively yet maintaining the original integrity of the model is more of an exercise than is realized (especially a small tank), but you nailed it...very nice colors in the interior...nice touch in adding the red to the face of the cuts...this one is exceeding expectations in my book. Thumbs Up [tup]Thumbs Up [tup] 
  • Member since
    April 2005
  • From: Piscataway, NJ!
Posted by wing_nut on Sunday, October 11, 2009 6:20 AM
WOW Bill, that really is something special.  This will still be a shining star when you get to 200.

Marc  

  • Member since
    August 2003
  • From: Connecticut, USA
Posted by Nachtflieger on Sunday, October 11, 2009 5:41 AM

Awesome work as always Bill. Way to go!Thumbs Up [tup]

Nate


  • Member since
    July 2004
  • From: Texas
Posted by wbill76 on Saturday, October 10, 2009 7:42 PM
Thanks Rob, glad you like. Thumbs Up [tup]
  • Member since
    February 2009
  • From: mass,USA
Posted by scratchmod on Saturday, October 10, 2009 4:13 PM

Bow [bow]Bow [bow]Bow [bow]

Speechless Shock [:O]...damn that's an awesome looking 38t Bill.

 Rob


  • Member since
    July 2004
  • From: Texas
Posted by wbill76 on Saturday, October 10, 2009 11:00 AM
 Schnobs wrote:
It's official Bill you can now open your own 1\35th scale AFV museum this build will definately look the part.  I like how it turne dout very much.

Great craftsmanship Bill!!

Thanks Edmund! Glad to see you're still able to stop by despite your cold/flu complications. There was an article in the local paper a couple of months back about a guy in Mississippi or Louisiana who had done just that in order to display his over 2,000 built kits (cars, airplanes, tanks, ships, etc.) I immediately showed it to my wife so she could see that things could always be much, much worse than where I'm at now. Big Smile [:D]

  • Member since
    January 2009
  • From: Everett, WA
Posted by Schnobs on Friday, October 9, 2009 7:16 PM

It's official Bill you can now open your own 1\35th scale AFV museum this build will definately look the part.  I like how it turne dout very much.

Great craftsmanship Bill!!

"There is a principle which is a bar against all information, which is proof against all arguments and which cannot fail to keep a man in everlasting ignorance. That principle is contempt prior to investigation." Herbert Spencer
  • Member since
    July 2006
  • From: New Jersey
Posted by redleg12 on Friday, October 9, 2009 7:10 PM
 the doog wrote:

I'm just loving it with big sloppy kisses!  Tongue [:P]

Hummm......does Jenn know about this Blush [:I]....

Rounds Complete!!

"The Moral High Ground....A Great Place to Emplace Artillery."

  • Member since
    July 2004
  • From: Texas
Posted by wbill76 on Friday, October 9, 2009 7:08 PM

Scot, Tony, Andy, and Eric, thanks for the comments!

 Citadelgrad87 wrote:
Well, I can breathe again, Bill.

I've been holding my breath since I read your plan, it is simply, truly, utterly amazing and a flawless executon.

Nicely played, sir.

Thanks Bill, glad to hear you're not turning blue anymore in anticipation! Wink [;)]

Mike, I've seen those kinds of turntable jobbies that the auto builders use but don't think I've quite gone that far down the track on this one! Laugh [(-D] Besides the dirt would interfere with the sparkle effects and the mirrored base. Propeller [8-]

Karl, getting a "BORAT" is high praise indeed although I think the kisses are something that can be dispensed with! Thanks all the same and glad you like it.

  • Member since
    December 2006
  • From: N. Georgia
Posted by Jester75 on Friday, October 9, 2009 6:55 PM
I really just dont have the words to express how well this turned out Bill. Simply fantastic my friend!

Eric


  • Member since
    January 2007
Posted by the doog on Friday, October 9, 2009 6:47 PM

Bill, you deserve a "BORAT" for this one!!

"VEDDDY NICE!"

a HIGH FIVE! 

Seriously--that is just WICKED COOOL!!!!!

I'm just loving it with big sloppy kisses!  Tongue [:P]


  • Member since
    July 2006
  • From: New Jersey
Posted by redleg12 on Friday, October 9, 2009 6:26 PM

Very nice work, the cut-a-ways look great. Even from the photos you can see the inside work....very nice.

Now what you need is not only a case but mount it on a driven turntable. When you push the button it rotates, lights up and plays the theme from 20th CENTURY fox. Shock [:O] (and a little bit of dirt to keep Karl happySmile,Wink, & Grin [swg])


The Franklin is a winnerWink [;)]

Rounds Complete!!

"The Moral High Ground....A Great Place to Emplace Artillery."

  • Member since
    April 2009
  • From: Carmel, IN
Posted by deafpanzer on Friday, October 9, 2009 5:41 PM
Thumbs Up [tup] B-E-A-U-T-I-F-U-L! Thumbs Up [tup] This might help you win the Nobel prize one day!  Can't wait to see your work completed.  It is coming out better than what I had in picture...

Andy

  • Member since
    August 2008
  • From: S.W. Missouri
Posted by Pvt Mutt on Friday, October 9, 2009 5:37 PM

Well Bill that looks like it's going to work out better than I thought. I'm with Legs,when do you turn the lights on?Cool [8D]

Still Watchin                                                                                                                             Tony the Mutt

Shoot Low Boys They're Ridin Ponys

  • Member since
    January 2012
Posted by I make stuff on Friday, October 9, 2009 5:22 PM

Well, I can breathe again, Bill.

I've been holding my breath since I read your plan, it is simply, truly, utterly amazing and a flawless executon.


Nicely played, sir.

Bill

  • Member since
    December 2002
  • From: Reno, NV
Posted by espins1 on Friday, October 9, 2009 5:16 PM
I really like how your cutways turned out Bill, outstanding! 

Scott Espin - IPMS Reno High Rollers  Geeked My Reviews 

  • Member since
    July 2004
  • From: Texas
Posted by wbill76 on Friday, October 9, 2009 5:11 PM

Rob, thanks for the comments and support as always! Wink [;)]  

The bandages came off earlier in the week and the masking was removed. I used Testors Flat Red for the cut out sections to indicate where there would ordinarily be solid plate. The hull and turret MG were detailed with Non-buffing Metalizer Gunmetal and lightly dry-brushed with Steel. The rear muffler was base coated with the same metalizer and then given a wash of Rust with additional Rust dry-brushed to add some variation and depth to the finish.

The turret was test fit to the hull and everything works as intended. The turret will be posed at an angle to allow for maximum viewing through the cut-outs into the lower hull as well as the turret itself. I still need to add the crew seats but that will come at the very end to avoid damaging them.

  • Member since
    February 2009
  • From: mass,USA
Posted by scratchmod on Friday, October 9, 2009 3:52 PM

Looking great Bill, as usual. This is the part of your builds that I like the most, the painting. I'm dying to see this baby when it's done. Keep up the good work.


Rob

  • Member since
    July 2004
  • From: Texas
Posted by wbill76 on Thursday, October 8, 2009 8:13 PM
Thanks Manny! I don't know what the final result is going to be...all depends on the case size I can get for it I guess. I still have some Mold-A-Scene plaster from when I dabbled briefly in dios/bases that I could use to make up something I guess...but I don't have any of my groundwork supplies anymore so it might end up being rather plain as a result. Laugh [(-D]
  • Member since
    November 2005
Posted by Anonymous on Thursday, October 8, 2009 7:20 PM
 wbill76 wrote:

Thanks Mike!

 IBuild148 wrote:
Awe inspiring! That is "outside the box" level 5 craftsmanship. Just my two cents.

I hope you are going to display this in a class box case with a placard "100th Build by WBill" and date.

IB, thanks for the comments! I am considering this one getting its own special case with a little plate. Have to see what will work best, probably a small case such as those designed for auto models.

You gonna put some dirt on that base?--if not you know you are gonna catch some heck from doog---LOLWink [;)].  Looking good, Bill...Thumbs Up [tup] 
  • Member since
    July 2004
  • From: Texas
Posted by wbill76 on Thursday, October 8, 2009 5:59 PM

 disastermaster wrote:
They have something extremely similar to that at Hobby Lobby. It's probably a product common to all their stores.

That's what I have in mind...I'm not putting this one on a base so the amount of display space isn't huge that needs to be protected.

JOIN OUR COMMUNITY!

Our community is FREE to join. To participate you must either login or register for an account.

SEARCH FORUMS
FREE NEWSLETTER
By signing up you may also receive reader surveys and occasional special offers. We do not sell, rent or trade our email lists. View our Privacy Policy.