SEARCH FINESCALE.COM

Enter keywords or a search phrase below:

M26 Pershing...DONE!!!, lots of pic's

10629 views
44 replies
1 rating 2 rating 3 rating 4 rating 5 rating
  • Member since
    July 2004
  • From: Texas
Posted by wbill76 on Friday, December 11, 2009 12:33 PM

Coming along nicely Steve, good to see this one progressing with your usual method of tone variation. Yes

  • Member since
    September 2009
  • From: Rugby, England
Posted by Hinksy on Friday, December 11, 2009 12:17 PM

Oooh yeah,

She is looking great-keep it up!

One tip: If I were you I'd remove the .50cal MG mount while you are working in on her. I didn't and it took the lightest of knocks and the tiny stub that pushes into the hole snapped off in the hole-it's VERY brittle.

Obviously I managed to fix it but it wasn't easy! A Pershing isn't  a Pershing without the .50 cal!

HTH

Ben Cool


On the Bench - Dragon Pz. IV Ausf. G (L.A.H.) Yes

Your image is loading...


  • Member since
    April 2007
  • From: Schroon Lake, NY
Posted by SMJmodeler on Friday, December 11, 2009 11:20 AM

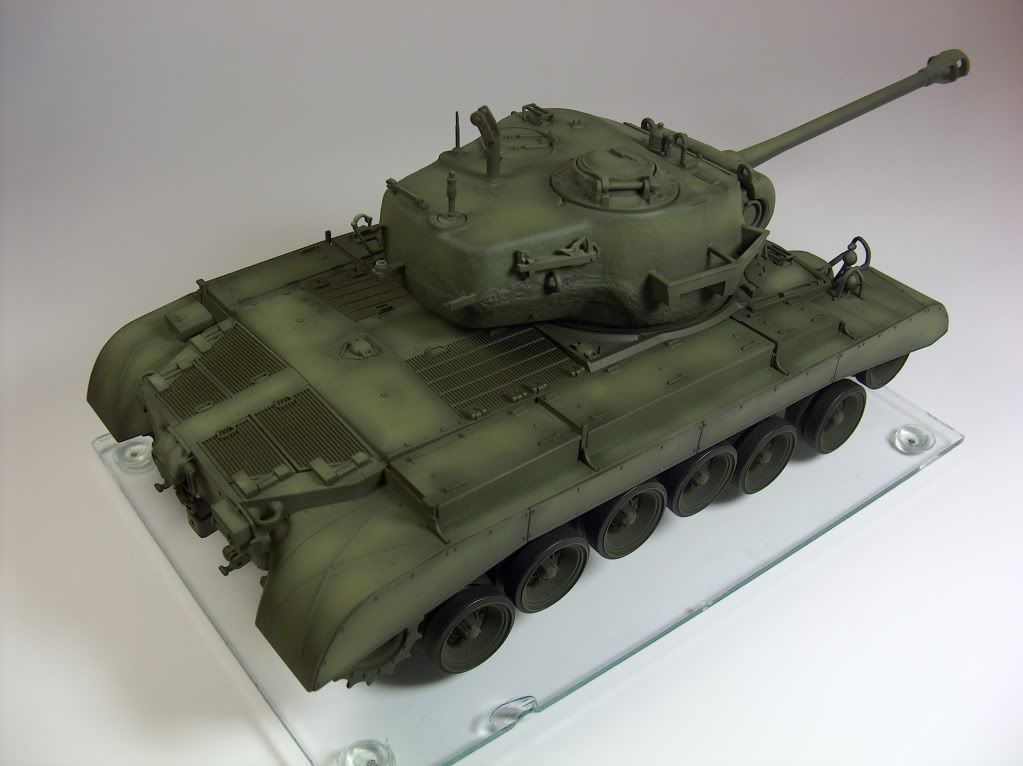
Guys:  Here's some current pic's. These were taken after oil washes of raw umber, burnt umber, permanent green and lemon yellow.  They were VERY diluted but I think they gave it a nice look.  I also added a pin wash to the details.    I'm sure enjoying this change of pace American thing!

  • Member since
    April 2007
  • From: Schroon Lake, NY
Posted by SMJmodeler on Friday, December 4, 2009 10:47 AM

tigerman/rjkplasticmod/panzerguy/doog/Rbaer/wbill76:  Thanks for the comments and encouragement!

modelbuilder: I'm not sure if a post-shading tutorial is out there...I would think so though.  Go check it out and let me know.  If not one is definately needed!

BeltFed:  This is the Tamiya Kit.

redleg12: I'm with you on being careful not to darken this one too much...I will proceed with that in mind.  Thanks for watchin' my backThumbs Up [tup].

Hinksy: Nice Pershing..and that's w/o and AB...not badThumbs Up [tup]!

  • Member since
    July 2004
  • From: Texas
Posted by wbill76 on Tuesday, December 1, 2009 5:06 PM
Looks like a very productive 3 days Steve! Nice work on this one so far. Thumbs Up [tup]
  • Member since
    September 2006
  • From: Dripping Springs, TX, USA
Posted by RBaer on Tuesday, December 1, 2009 12:22 PM

Nothing like a well-engineered kit to get the juices flowing again.

Looks great, Steve. 

Apprentice rivet counter.

  • Member since
    September 2009
  • From: Rugby, England
Posted by Hinksy on Tuesday, December 1, 2009 6:08 AM

Lovely job so far!

I built the very same one and, like you say, it just assembled itself-all I had to do was add the cement.

I sat a nice block of lead held (not overly heavy) in place with velcro stick on bases inside the tank base before fitting the top half of the hull-it really makes the torsion bars sit down nicely.

Here's mine-she's brush painted as I don't own an AB yet. For my third ever build I was chuffed to bits with her. Oout of all my builds she's my definate favourite so far..............

Keep us posted on the WIP.............

ATVB

Ben Smile [:)]

On the Bench - Dragon Pz. IV Ausf. G (L.A.H.) Yes

Your image is loading...


  • Member since
    July 2006
  • From: New Jersey
Posted by redleg12 on Monday, November 30, 2009 8:42 PM

What funk!!!

Hey, nice work, hope you took some time out for turkey!!.

Beeeeee careful with OD and washes. You are a little dark now....don't go much darker. Shading looks good but beeeeee careful.

For US WWII/Korean OD base I use PolyScale OD 505370 and use a 80/20 blend of Tamiya OD and YellowGreen for the dark shades. Then you are light enough for dots followed by a MIG wash.

Rounds Complete!!

"The Moral High Ground....A Great Place to Emplace Artillery."

  • Member since
    January 2007
Posted by the doog on Monday, November 30, 2009 6:39 PM

Nice work, Steve! Goood to see that you're over your funk!

This is a really nice kit--I built it about two years ago.

  • Member since
    October 2007
  • From: N.H.
Posted by panzerguy on Monday, November 30, 2009 4:19 PM

 You got this far in three daysShock [:O]! I would say the funk is over buddy!

 Nice job on the post shading. Looking forward to seeing the signature SMJ weathering on this guy.

"Happiness is a belt fed weapon"

  • Member since
    May 2008
  • From: Budd Lake, New Jersey
Posted by BeltFed on Monday, November 30, 2009 2:10 PM
What kit did you Use?  Makes me wanna build another Pershing....
  • Member since
    May 2004
  • From: Kings Mountain, NC
Posted by modelbuilder on Monday, November 30, 2009 10:36 AM
Is there a tutorial out there for post shading? I see many of you guys use it. would like to give it a try myself

  • Member since
    February 2003
  • From: A Spartan in the Wolverine State
Posted by rjkplasticmod on Monday, November 30, 2009 10:20 AM

The shading came out great.  Well done!

Regards,  Rick

RICK At My Age, I've Seen It All, Done It All, But I Don't Remember It All...
  • Member since
    March 2003
  • From: Rain USA, Vancouver WA
Posted by tigerman on Monday, November 30, 2009 10:17 AM
I like the different tones Stephen. Welcome back!

   http://i7.photobucket.com/albums/y269/wing_nut_5o/PANZERJAGERGB.jpg

 Eric 

  • Member since
    April 2007
  • From: Schroon Lake, NY
M26 Pershing...DONE!!!, lots of pic's
Posted by SMJmodeler on Monday, November 30, 2009 9:45 AM

Guys:  I had a productive holiday weekend!  I started the Pershing Thanksgiving morning and by Saturday night I got her this far:
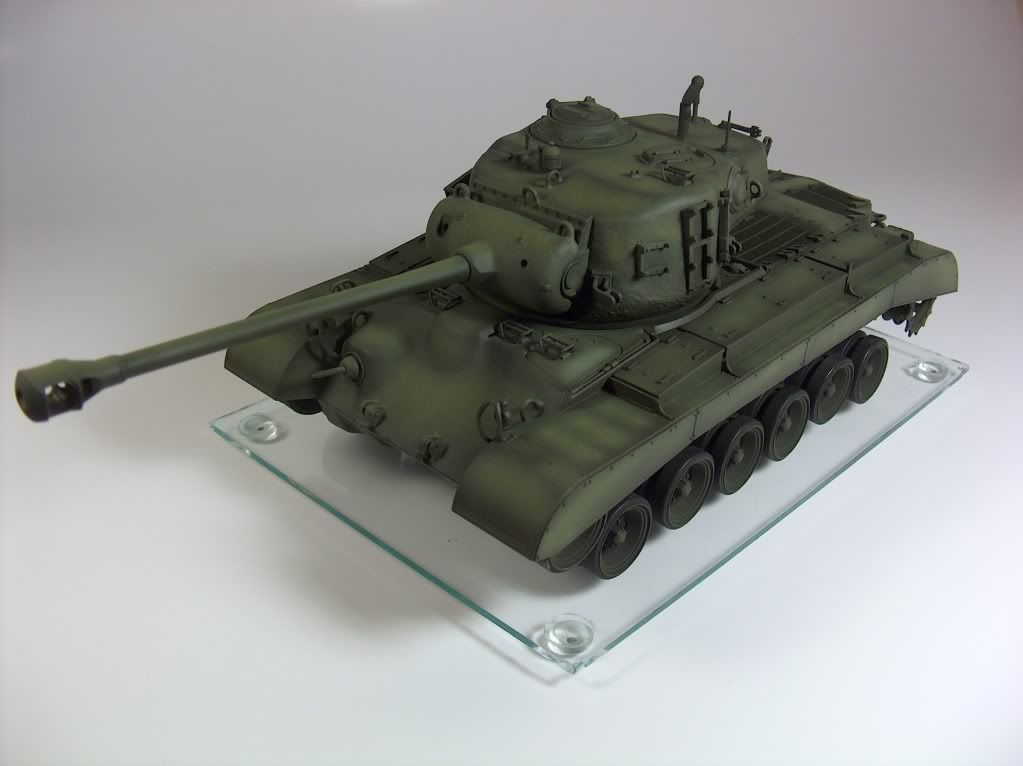
As you guys said this baby goes together great!  The only hang-up were the side skirts...I put them on then had a heck of a time getting the sprockets over the axle.  Thankfully I kept them in halves or I would have had a REAL problem.  

I painted her standard issue olive drab then post-shaded it with two shades of OD lightened with yellow-green.  I really like the effect..the olive-tones are very sharp!  The lighter shades will also help offset the darkening effect of the washes (still to come).

The suspension on this baby is killer, it moves just like the real thing!  The only problem, as you can see in the pic's, is that it won't stay flat...the back end keeps poppin' up. No problem to fix/adjust though, AND I had intended to show the working suspension by having it going over a fallen tree. 

I'm sure glad to be back at the bench and posting my stufff again!


JOIN OUR COMMUNITY!

Our community is FREE to join. To participate you must either login or register for an account.

SEARCH FORUMS
FREE NEWSLETTER
By signing up you may also receive reader surveys and occasional special offers. We do not sell, rent or trade our email lists. View our Privacy Policy.