Happy Memorial Day Weekend to everyone. First while you are
enjoying that hot dog, remember the 7% of the population who have worn the
uniform, and especially those who made the supreme sacrifice. Say thank you to
a vet!
OK….now for this weeks update
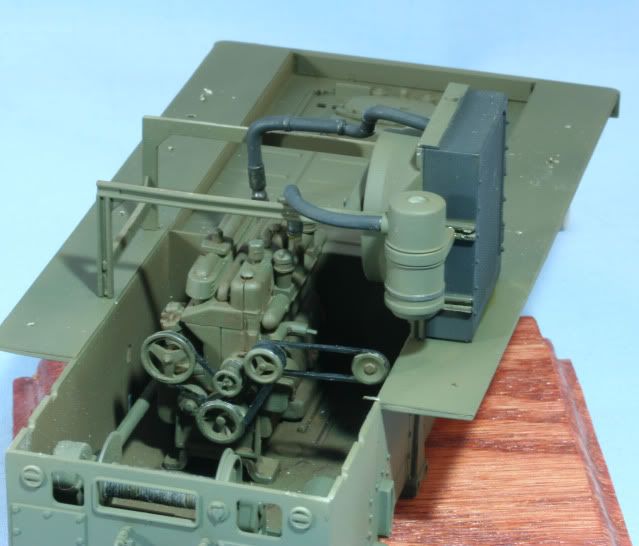
Going in one direction was completing the lower hull by installing
the engine and the radiator and fan assembly
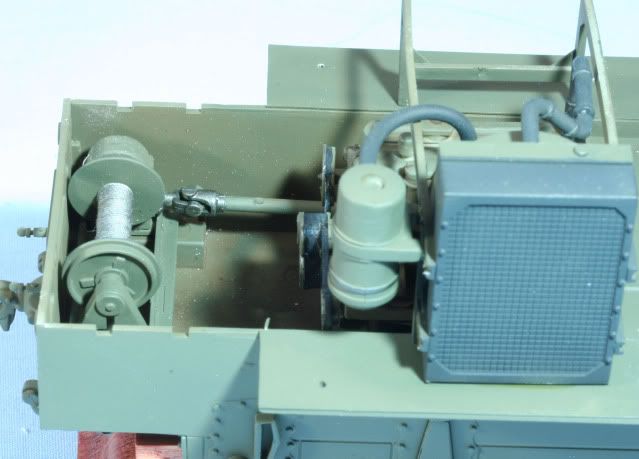
Then I installed the winch assembly and power takeoff
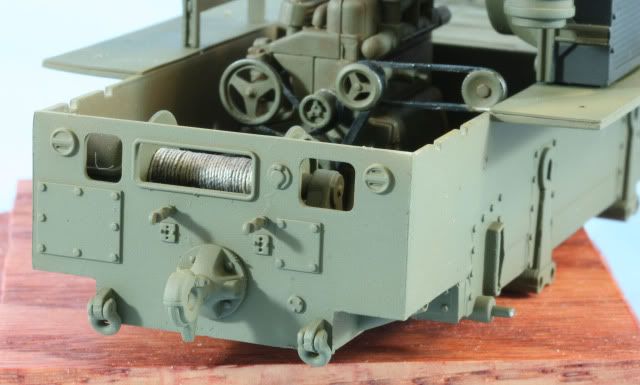
The rear of the hull has some details to add such as the towing
hook, Chicago fittings for the air lines and towing clevises. Once these were
complete I gave the lower half and bottom a prime coat with Vallejo OD primer
and a base coat with Poly Scale OD
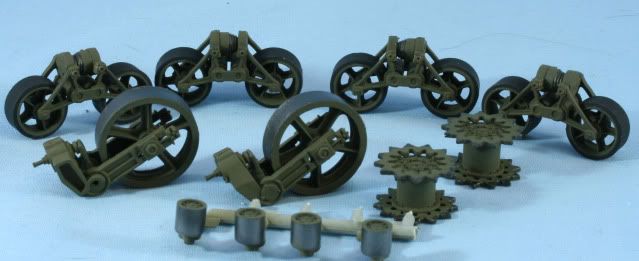
In another direction are the road wheels and assemblies. The drive
is a two-part assembly, the rear idler wheel is 3 parts for the wheel and then
another 3 parts for the assembly. The boogies are a three-part assembly plus
the two wheels. The upper idler rollers are mounted on there axels.
After cleaning up and priming all the parts the road wheels were
painted with a tire black mix of 50/50% Flat & NATO black. The idler and
upper idlers were painted with Alclad Steel. After drying the rims and mounting
parts were painted with Poly Scale OD. Once dry, I completed final assembly of
the road wheel assemblies.
Now…in a third direction, I began assembly of the ammo box. This
included the center floor plate with recess holes for 8 inch projectiles. The
kit gives you a choice of two different sizes for 155mm or 8 inch (203 mm).
Even with the large size the projectiles are a bit tight. On the internal walls,
are the brackets for the projectile holders from the Eduard PE set. On the
opposite side of each center wall panel is a divider bracket also from the
Eduard PE set
I mounted the internal divider walls and on the right wall is also
mounted the crane locking bracket from the Eduard PE set. I then worked on the
outside sidewalls removing the styrene blobs for the tie downs and the vent
grill. I applied the Eduard vent grills to the outside walls. The Eduard set
gives you parts so you can cut the holes through the end walls for the vents.
Even though I will have the ammo box partially open when finished, I will have
powder cans in those compartments so I took the easy way out and just mounted
the grilles since the holes would not be visible. Also, on the inside wall of
the end panels is a PE panel divider.
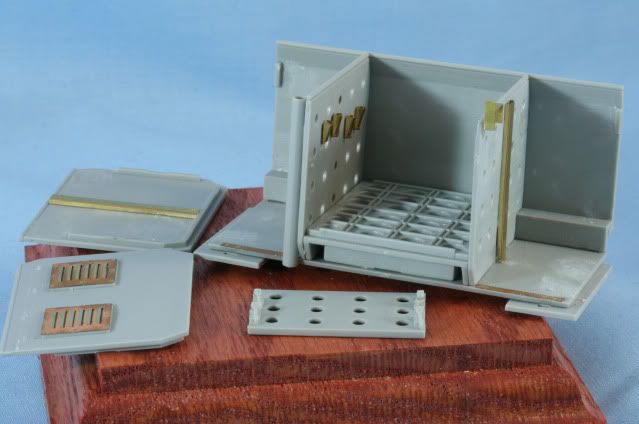
Also working on the ammo box front wall removing blobs for the tie
downs and filling some big ejector pin marks on the inside of the door and
front panels
That’s it for now, once I finish with the ammo box parts that will
head for internal painting, meanwhile I need to mud up the track area before I
mount the road wheels. And lets not
forget the cab!! See how many directions I head in by next week
As always all comments are welcome.
Rounds Complete!!