SEARCH FINESCALE.COM

Enter keywords or a search phrase below:

Jagdpanzer IV A-O FINISHED! Page 8 Final pics!

23324 views
124 replies
1 rating 2 rating 3 rating 4 rating 5 rating
  • Member since
    September 2006
  • From: Dripping Springs, TX, USA
Posted by RBaer on Monday, April 1, 2013 2:45 PM

Same here, welcome back, and I like the look of the pigments a LOT.

Apprentice rivet counter.

  • Member since
    January 2007
Posted by the doog on Monday, April 1, 2013 5:50 PM

Hey guys, thanks for the welcome back, and for the comments! I"m glad to hear that you're digging it so far. I know you guys would tell me if I was going off-course!

Tony, I had to laugh at what you said--it's kinda true, isn't it, that there are so many options available now with all the AM finishing stuff. I guess I can't really argue; I mean, who can say "This brand is heads-and-tails so much better than THAT product"? You really have to try them out to see what works for you.

Adam told me that these pigments are actually "purer" than many on the market, in that they're not "cut" with some generic powders that are used in some other pigments as "filler". They certainly seem to be pretty good product from what I've so far experienced, and that hasn't been much, YET. I CAN say that there's definitely more in HIS bottles than you get in either of the competitors' bottles that I have. And with the price of finishing products these days, that makes me smile!

Thanks again for the nice comments and all, guys! I can't wait to meet some of you at AMPS!

  • Member since
    January 2007
Posted by the doog on Saturday, April 6, 2013 6:28 AM

Hey everyone!

I have a new update---some detail painting and the schurzen mounts have been added. It's ready to add the skirts, so here's documentation of the weathering behind them for the record. I added the spare track to the front, and the spare wheels. I also got the exhaust done, and did some more chipping around the hatches.

Here's the pics so far...

I used Adam Wilder's pigments to weather the exhaust and spare tracks...

Here you can see the chipping effects, in 3 layers.

I've added some bullet holes to the schurzen with an awl.

Next update should be the addition of the side skirts and maybe finished pics? Still working on the crewman, so the finish line is well within sight!

Have a great weekend, guys! Smile

  • Member since
    March 2003
  • From: Rain USA, Vancouver WA
Posted by tigerman on Saturday, April 6, 2013 10:38 AM

Looks sweet Karl. Nice touch on the schurzen.

   http://i7.photobucket.com/albums/y269/wing_nut_5o/PANZERJAGERGB.jpg

 Eric 

  • Member since
    December 2006
  • From: N. Georgia
Posted by Jester75 on Saturday, April 6, 2013 11:18 AM

Ditto on the schurzen, like the effect!! Having not used pigs yet, I am looking to invest in some before my next armor build. Are these available anywhere yet Karl?? Obviously your pretty pleased with them and they look great on this Jagdpanzer!

Eric


  • Member since
    December 2012
Posted by RX7850 on Saturday, April 6, 2013 2:59 PM

Top shelf build you got going on so far.Yes

  • Member since
    September 2009
  • From: Rugby, England
Posted by Hinksy on Saturday, April 6, 2013 5:15 PM

Looking very, VERY nice Karl,

Once my current WIP Pz.IV G is done I'll be taking to my stash and building Dragon's recently released StuG III G with the Zim and Schurzen.

I'm planning on a factory fresh build for that one so I'll probably go for a fully assembled Shurzen affair. Should I decide to beat it up a little I'll remember your punch used here to create some bullet impact effects.

Lovely looking buid Karl, it's nice to see an old 'Imperial' on the bench. I'll be looking into one of these - I know a smart kit with Zim has been released (I hate doing my own Zim although homemade Zim beats anything else imo).

All the best matey,

Ben Toast

On the Bench - Dragon Pz. IV Ausf. G (L.A.H.) Yes

Your image is loading...


  • Member since
    August 2012
  • From: Parker City, IN.
Posted by Rambo on Saturday, April 6, 2013 7:55 PM

looks great I really like the impact marks on the side skirts

Clint

  • Member since
    July 2004
  • From: Texas
Posted by wbill76 on Saturday, April 6, 2013 8:20 PM

Almost done with this one Karl, nice work on the underside weathering. Beer

  • Member since
    April 2005
  • From: Gothenburg
Posted by JohanT on Sunday, April 7, 2013 2:35 PM

Hi the doog,

Great looking build, love your attention to detail!

Hoping to be able to adopt some of your ideas in my future builds.

Thank you for sharing!

Very Best Regards

Johan

  • Member since
    August 2006
  • From: Amherst, MA
Posted by M1 A1 A2 Tanker on Sunday, April 7, 2013 2:46 PM

The doog strikes again! With a totally awesome looking build.

I really like the bullet hole effect.

Scott


“Computers are like Old Testament gods; lots of rules and no mercy.”  ~ Joseph Campbell


  • Member since
    May 2005
  • From: Dublin Rep Of Ireland
Posted by terry35 on Sunday, April 7, 2013 5:14 PM
Brilliant work so far Karl, great WIP.

  • Member since
    January 2007
Posted by the doog on Monday, April 8, 2013 7:02 AM

Thanks, Tigerman, and Eric----Eric, I'm not sure when or from whom Adam's pigment line will be available; I'll have to ask him. He gave me a bunch to try out, but hey should be available really soon. I'll certainly let ya know when they're here in the US.

RX7850, Ben, Clint, Bill, Rambo, Johan, Scott and Terry--thanks again, all, for the encouragement and kind comments!

Ben, that StuG kit is a killer offering! I can't wait to see it built up! And I didn't know they did a Smart Kit of this tank with zimm?! WOW--man, they're going to put some of these AM zimm manufacturers out of business! :)

  • Member since
    July 2006
  • From: San Francisco Bay Area
Posted by bufflehead on Wednesday, April 10, 2013 9:05 PM

Beautiful work Karl!  I love all your techniques, especially those dirty, dusty, crusty tracks and suspension!  Awesome!  Do you have some figures planned for this veteran tank hunter?

Ernest

Last Armor Build - 1/35 Dragon M-26A1, 1/35 Emhar Mk.IV Female


Last Aircraft Builds - Hobby Boss 1/72 F4F Wildcat & FW-190A8


  • Member since
    September 2006
  • From: Dripping Springs, TX, USA
Posted by RBaer on Saturday, April 13, 2013 1:22 PM

Wonderful work, yet again, from the doog!

Apprentice rivet counter.

  • Member since
    January 2007
Posted by the doog on Saturday, April 13, 2013 2:43 PM

Thanks, Ernest!

I've got a crewman, and am slowly painting him up. I've had a busy couple days, but am finished with the model---just waiting to get some pics and finish the figure. Should have an update an day now!

  • Member since
    January 2007
Posted by the doog on Saturday, April 13, 2013 2:45 PM

Rbaer, thanks man! I appreciate it!

SHould have finished pics soon!!!

  • Member since
    August 2008
  • From: S.W. Missouri
Posted by Pvt Mutt on Saturday, April 13, 2013 9:26 PM

Karl that exhaust is killer,just the way I like it.YesStarStarStarToast

Tony lee

Shoot Low Boys They're Ridin Ponys

  • Member since
    January 2007
Posted by the doog on Sunday, April 14, 2013 10:42 AM

Thanks, Tony! I appreciate that!

Doing exhausts are always fun--so much opportunity for variety and rustful expression.  Smile

  • Member since
    January 2007
Posted by the doog on Sunday, April 14, 2013 12:47 PM

OK, last update in weathering and then finished pics!

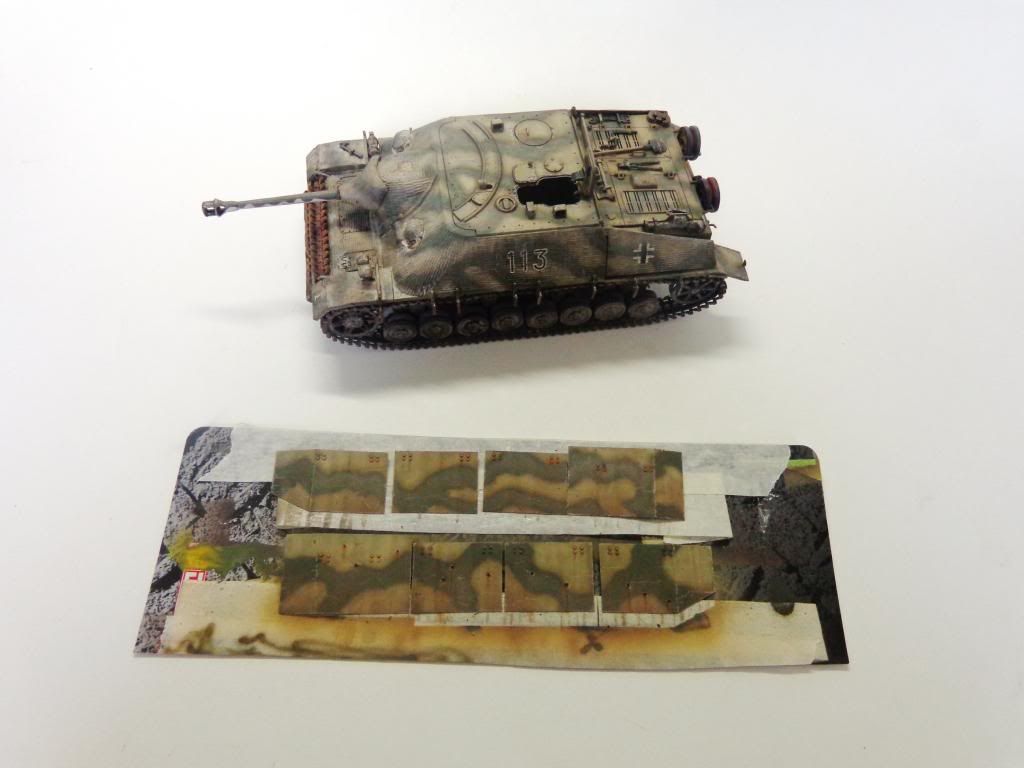
So, I wanted to work on the schurzen now; I started with a simple drawing-down of some ram umber oil dots on the skirts.
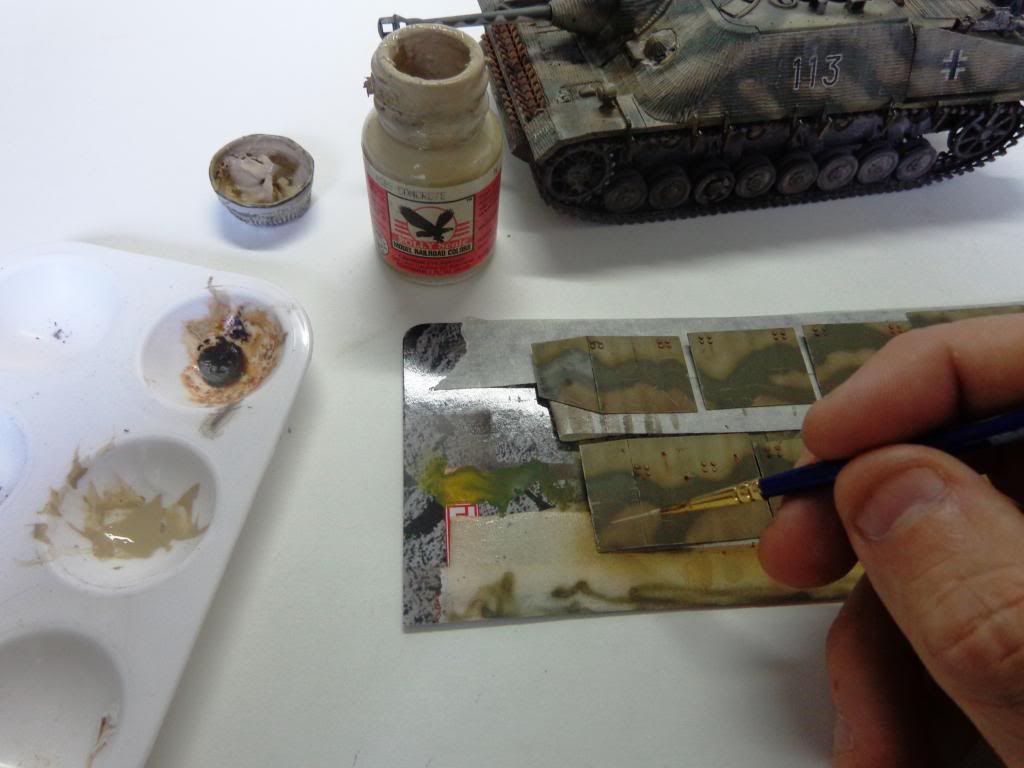
Next, I'm doing some scratching and chipping using a lighter shade of base color. For this, I chose an old bottle of Polly S "Aged Concrete".
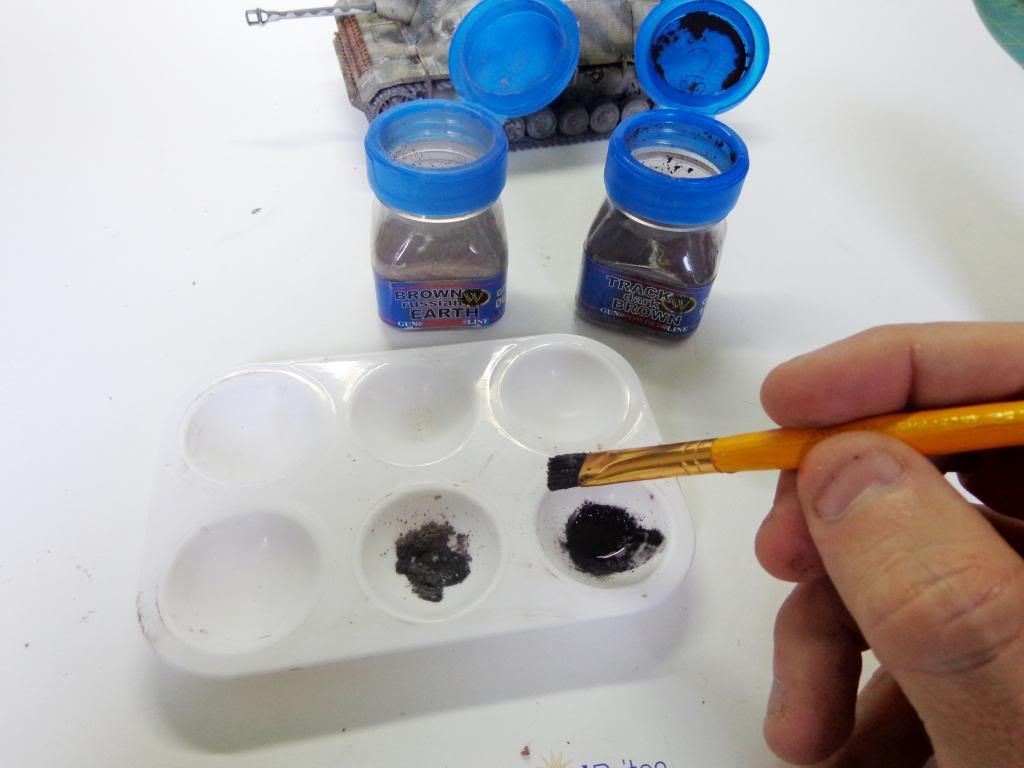
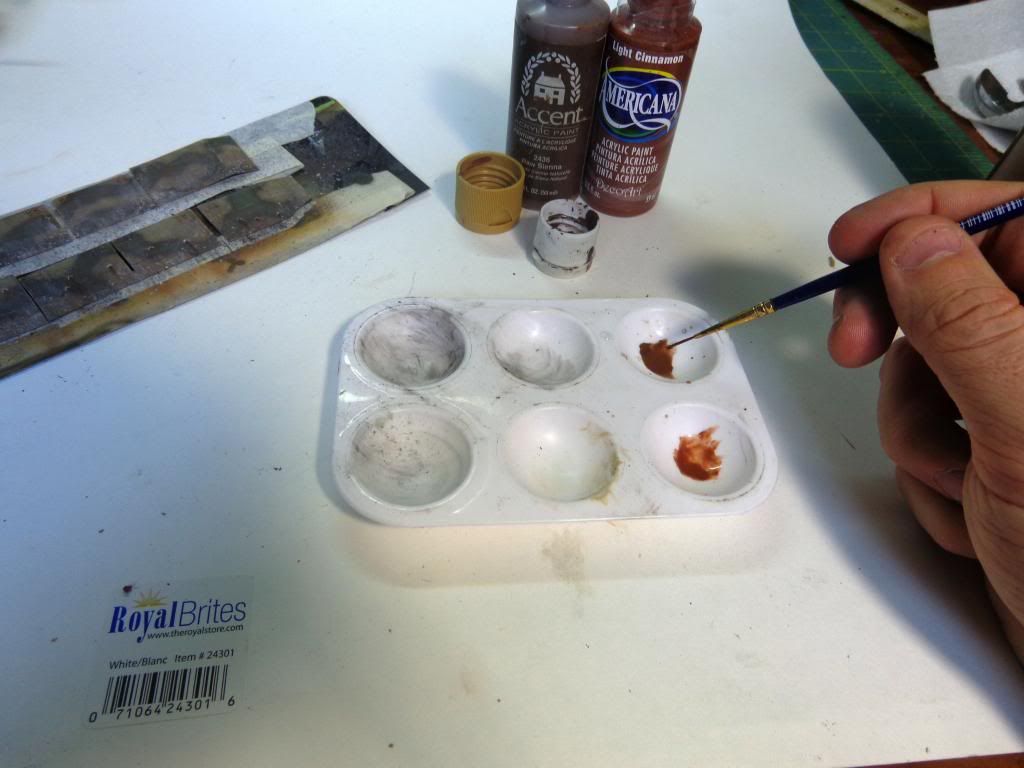
Next, I'm going to do some "spattering" of some pigment "Mud". I used Adam Wilder's pigments, choosing "Russian Brown Earth", and "Track Dark Brown". I mixed it up with some mineral spirits on a stiff brush....
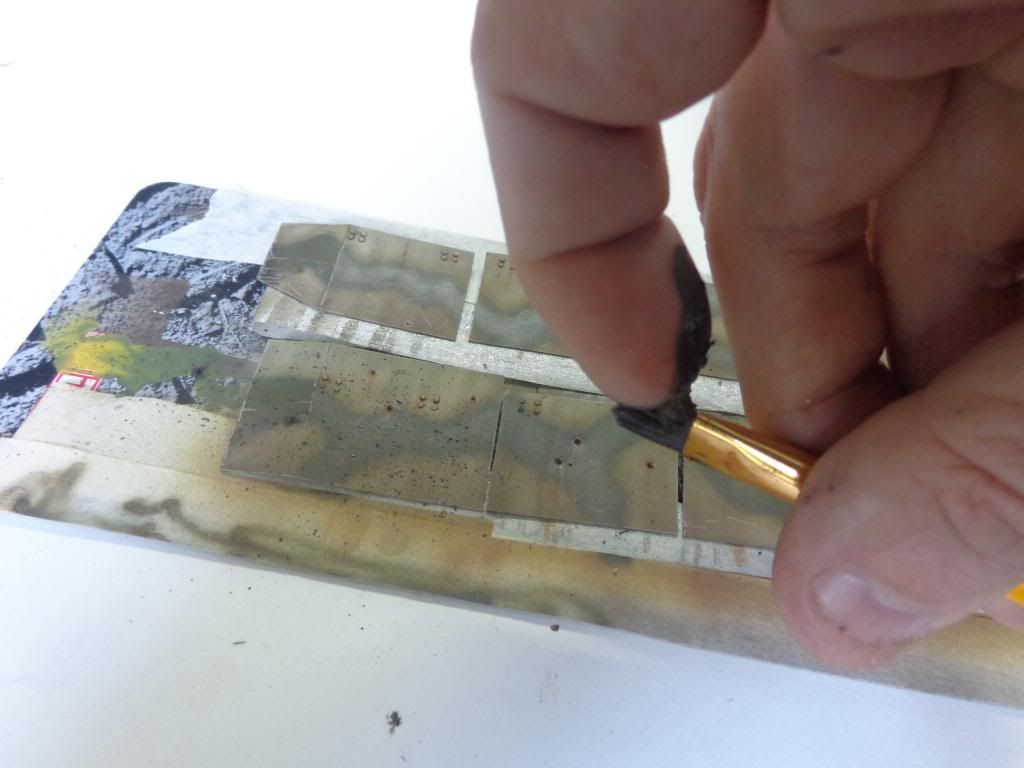
...and then used my finger to flick it against the parts.
Next, I used some regular craft store paints to put in some rust streaks.
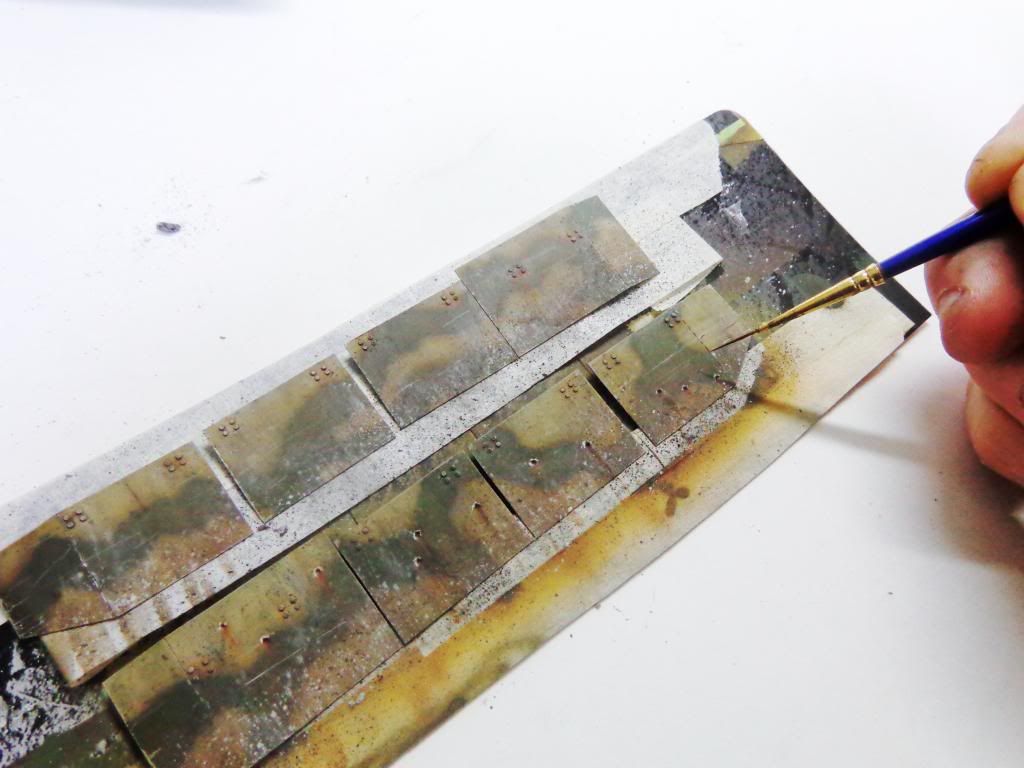
You see all the work I've already done on the skirts; I've done a few layers--streaks, spatters, pigment dusting, etc. The bulletholes have been outlined in this light tan color to highlight them and to simulate the paint edges in the paint scuffing.
And then I put them on the model.

At this point, I'll call it finished!

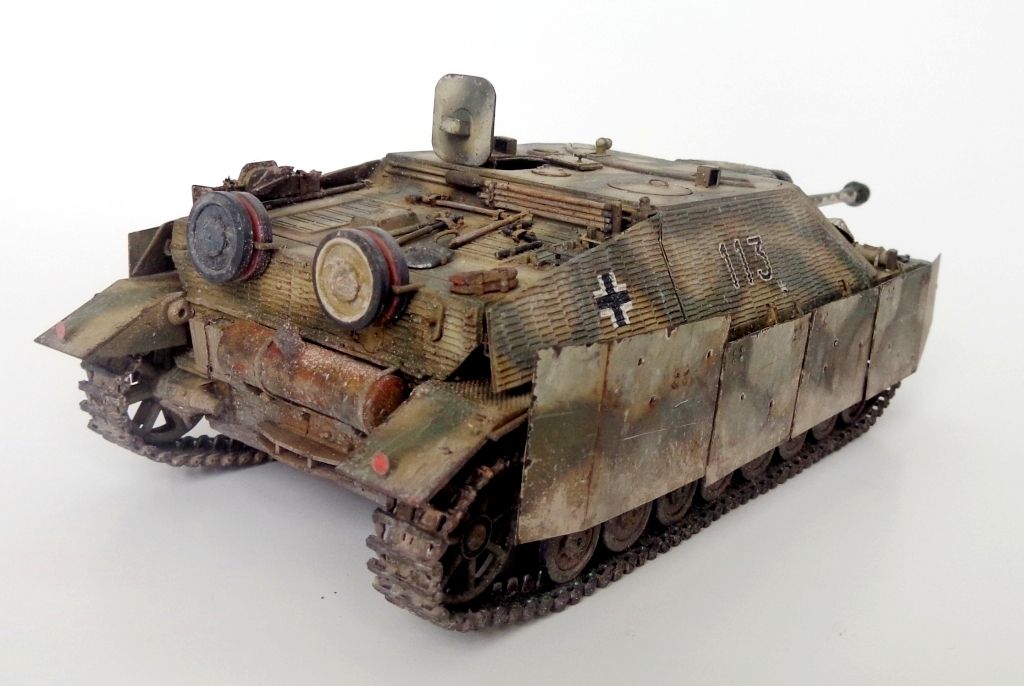
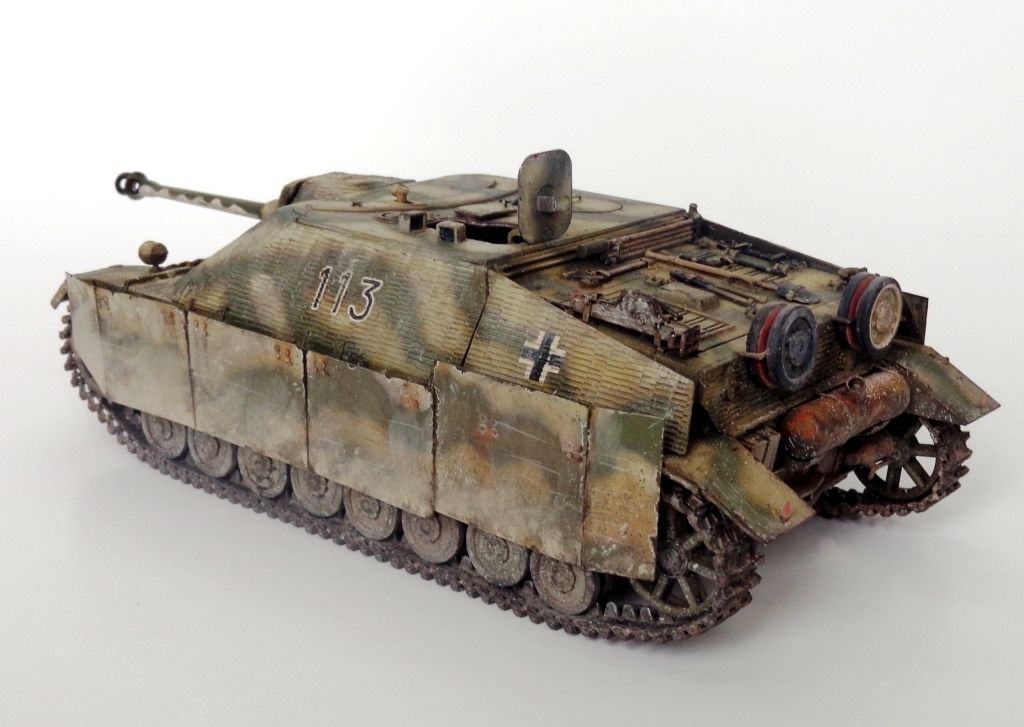
FINISHED PICS!
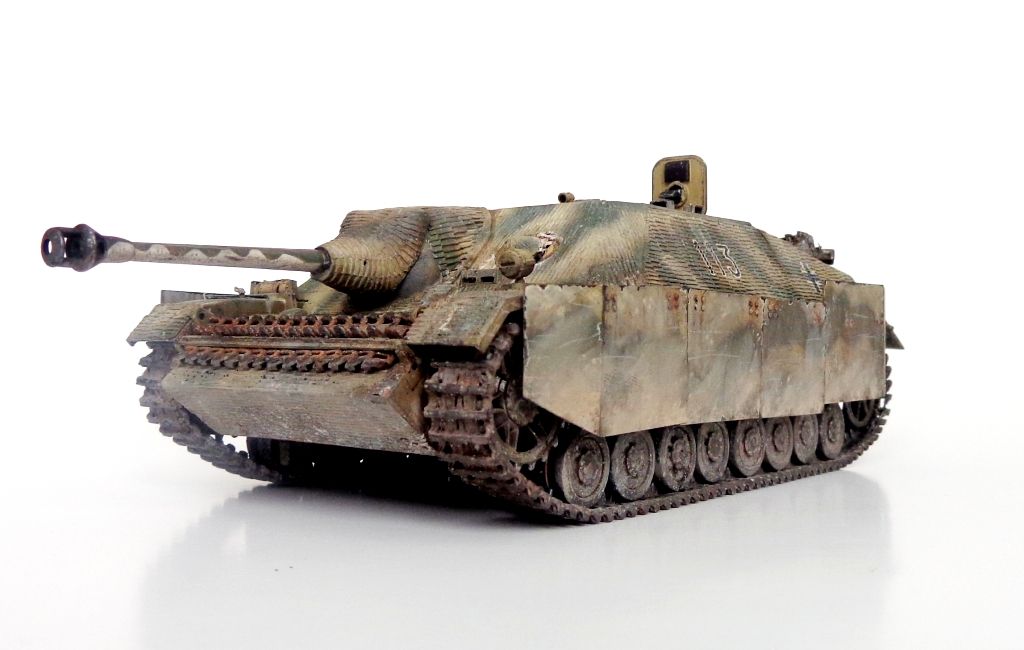
I put some "Black Metal" pigment (AW) on the tip of my finger and rubbed it on both the muzzle brake and the front spare track section.
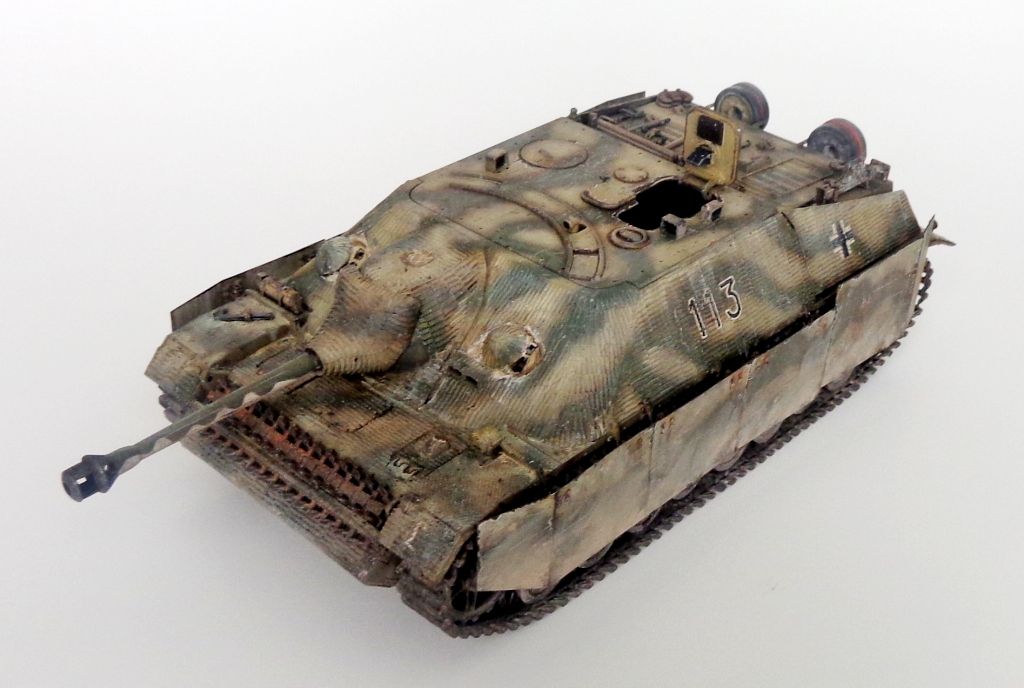
You might notice the oil stains on the one wheel....MIG "Grease and Oil Effect".
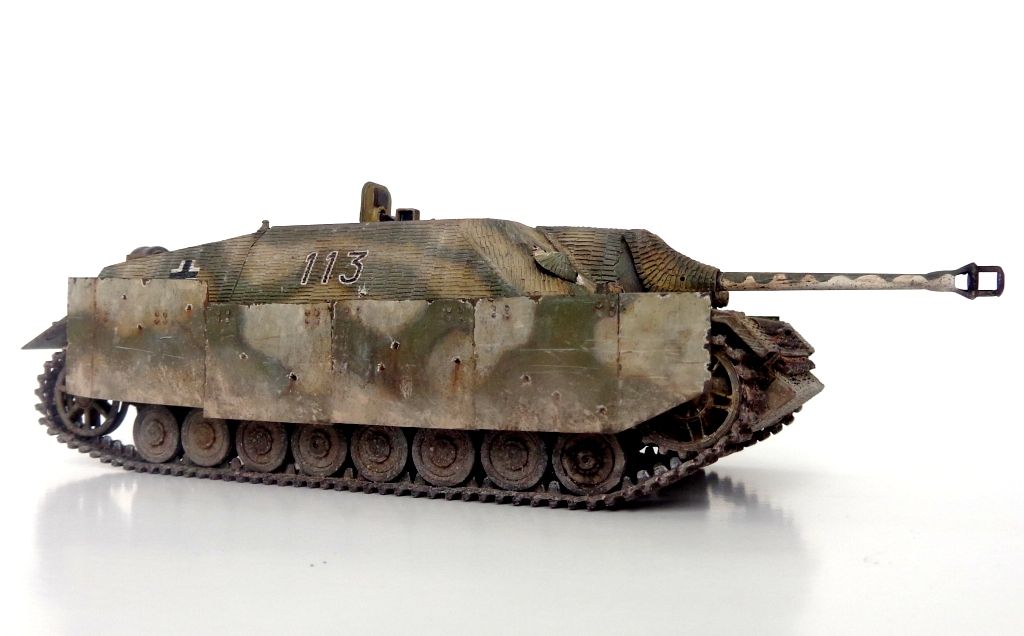
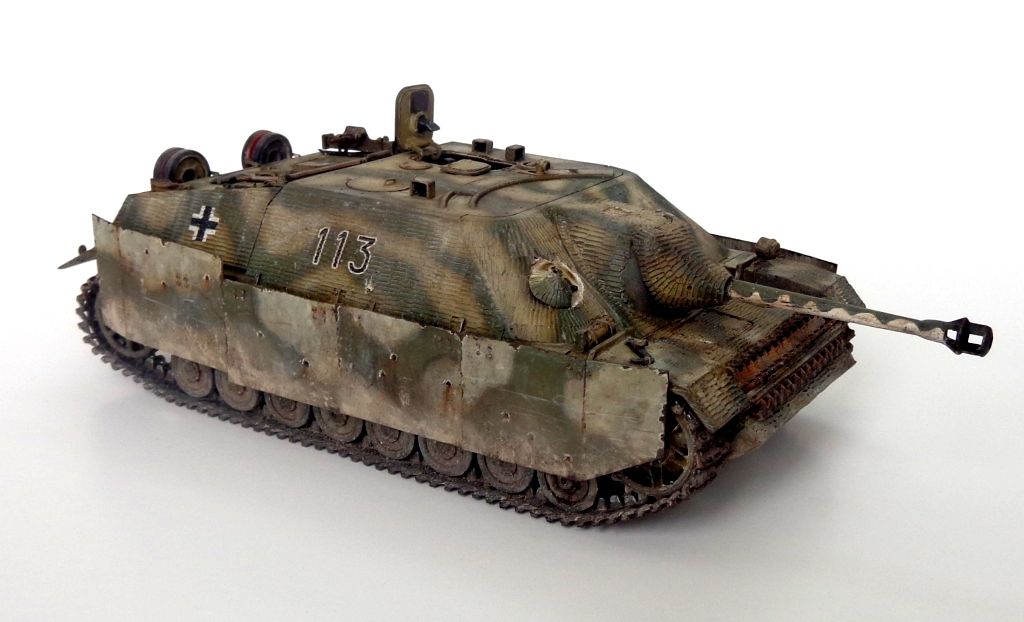
The muffler got "dusted" with paint splatters to simulate road spatter.
Hans got out his "reed green Denim Uniform" with the big pockets. I painted this with craft store paints--a combination of FOLK ART 426 Dark Grey and APPLE BARREL 20580 Pewter Gray with FOLK ART 467 Italian Sage for highlights. Hans got the pink-piped collar tabs and unadorned shoulder tabs, as well as the low-vis chest Eagle. I'm pretty sure this is just a standard DML figure?

Here's Hans in the new ride:
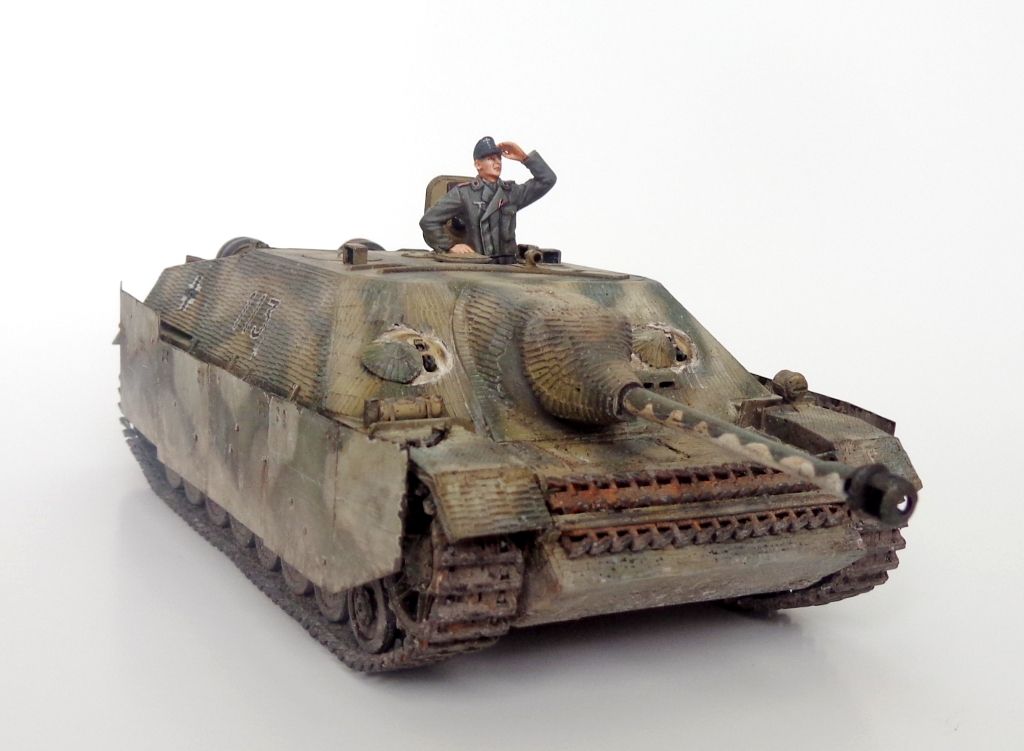
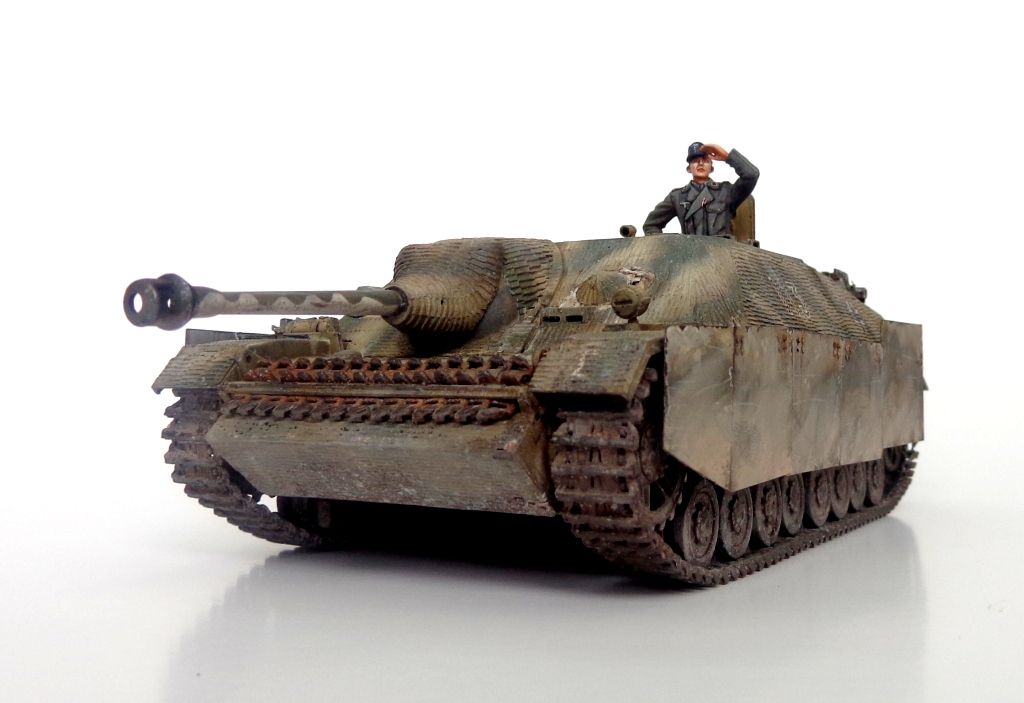
Well, that's it for this one, guys! It's ON TO AMPS!! I can't wait!!

Thanks for following along and for taking the time to comment!

Next up----the Hobby Boss VK4502 "Vorne"
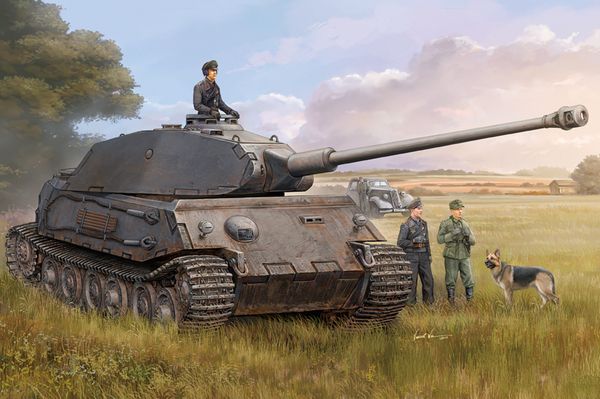
 --- hey, there's a doog in the picture! HEY DOOG! Smile

  • Member since
    August 2012
  • From: Parker City, IN.
Posted by Rambo on Sunday, April 14, 2013 3:37 PM

Its been fun watching this one come together and it turned out great once again

Clint

  • Member since
    December 2012
Posted by RX7850 on Sunday, April 14, 2013 6:22 PM

Like I said before top notch YesYes. Those craft store paints are a real hidden treasure. I'd like to know if and how  others are using them in their builds.

  • Member since
    July 2006
  • From: San Francisco Bay Area
Posted by bufflehead on Sunday, April 14, 2013 10:51 PM

Karl, awesome, just awesome! YesYes  Fantastic weathering and superb instructions!   I've said this before and I'll say it again.....I've got to try the "splatter" technique!!  You do it so well, yet its so simple!  I'm so glad you've stuck around when so many have abandoned these forums,.  Your dedication to the hobby and your great WIP posts are a boon to so many of the forum members....Thanks Karl for the great work and keep them coming!   

Ernest

Last Armor Build - 1/35 Dragon M-26A1, 1/35 Emhar Mk.IV Female


Last Aircraft Builds - Hobby Boss 1/72 F4F Wildcat & FW-190A8


  • Member since
    August 2007
  • From: back country of SO-CAL, at the birth place of Naval Aviation
Posted by DUSTER on Monday, April 15, 2013 12:49 AM

bufflehead

Karl, awesome, just awesome! YesYes  Fantastic weathering and superb instructions!   I've said this before and I'll say it again.....I've got to try the "splatter" technique!!  You do it so well, yet its so simple!  I'm so glad you've stuck around when so many have abandoned these forums,.  Your dedication to the hobby and your great WIP posts are a boon to so many of the forum members....Thanks Karl for the great work and keep them coming!   

amen 

Karl, You have provided me with a wealth of detailing ideas.   

Steve

Building the perfect model---just not quite yet  Confused

  • Member since
    July 2003
  • From: On my kitchen counter top somewhere in central North Carolina.
Posted by disastermaster on Monday, April 15, 2013 12:57 AM

 Karl, I'm always aghast at the results you come up with. http://i1208.photobucket.com/albums/cc366/PlagueEleven/Smileys/aghast.gif

 This Jagd is exactly what I've come to expect when I see you post up a project and I have never been disappointed either, especially since this is the way I like to see them.

 Looking forward to your take on the VK 45.02 Vorne. I've had the dragon version on the kitchen counter for over a year (nearly finished) but just like the Battle of the Bulge I have burnt out all my gas. http://i411.photobucket.com/albums/pp195/shellatkin/GIFs/smiley-whacky103.gif

 https://i.imgur.com/LjRRaV1.png


  • Member since
    January 2007
Posted by the doog on Monday, April 15, 2013 9:33 AM

Thanks, Clint! and thanks for following along!

RX7850, thanks, man!! -- I think a lot of guys probably use these cheaper paints. They're plentiful, come in mind-boggling array of colors, but they aren't great at all for airbrushing, and whatever medium they use makes it hard to paint anything too small--the paint just doesn't come off the brush finely enough. But they're good for basic tasks.

Ernest, thank you for your kind words, too! And don't worry; I don't plan on going anywhere. These forums are my "home", and I like the neighbors. Wink

Steve, (Duster)  thanks as well---and I"m happy to have given you some inspiration for your own builds. That's what this forum is all about!

Steve (Disaster Master) Thanks kindly, man---your words are much appreciated. Hey, the feelings mutual--I wish I could send you some gas! Maybe this will inspire you to get back to the bench and turn out another piece of disastrous art! Stick out tongue

  • Member since
    July 2004
  • From: Texas
Posted by wbill76 on Monday, April 15, 2013 10:48 AM

Nice work all around here Karl! Hans looks right at home in his new ride. Looking forward to seeing you tackle that Vorne!

  • Member since
    March 2004
  • From: Spartanburg, SC
Posted by subfixer on Monday, April 15, 2013 11:16 AM

Very fine job.  YesYes

Lee

I'm from the government and I'm here to help.

  • Member since
    December 2006
  • From: N. Georgia
Posted by Jester75 on Monday, April 15, 2013 1:18 PM

I think you've hit a home run with this one Karl. Absolutely love the weathering. Can't wait to see what you do with the VK.

Eric


  • Member since
    September 2006
  • From: Dripping Springs, TX, USA
Posted by RBaer on Monday, April 15, 2013 3:13 PM

Hans is stylin'!

Apprentice rivet counter.

JOIN OUR COMMUNITY!

Our community is FREE to join. To participate you must either login or register for an account.

SEARCH FORUMS
FREE NEWSLETTER
By signing up you may also receive reader surveys and occasional special offers. We do not sell, rent or trade our email lists. View our Privacy Policy.