SEARCH FINESCALE.COM

Enter keywords or a search phrase below:

Tamiya 1/35 Char B1 bis *WIP*

27555 views
137 replies
1 rating 2 rating 3 rating 4 rating 5 rating
  • Member since
    December 2002
  • From: Reno, NV
Posted by espins1 on Wednesday, July 2, 2008 11:09 AM

Nasonex and anti-biotics.... I think I'm going to live now.  Laugh [(-D]

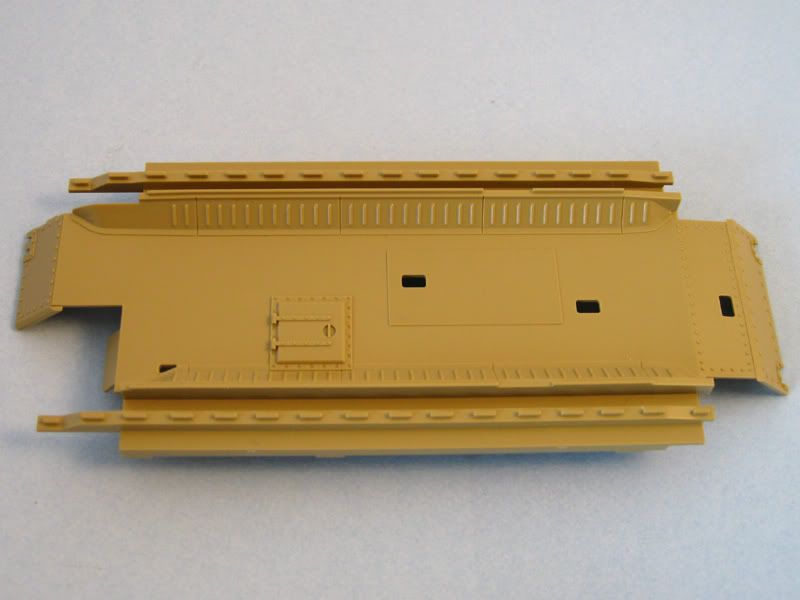
I decided to go ahead and cut out the opening for the mud shoots on the upper housing for the suspension components.  I simply used a 1mm bit in my pin vise and used it to create a perforated rectangle slightly smaller than the opening.  It was very easy to cut the piece of plastic out with an X-acto knife.  I then carefully used flat and rounded files, in addition to sanding sticks to clear the opening right up to edge of its correct shape.  I'm glad I did that as it really adds a lot to the look of the mud shoots, in fact you can see right through them now... way cool.  Cool [8D] I find it odd that Tamiya makes no mention of cutting out the openings, even though the opening is framed on the underside and clearly should be cut out.  Question [?]

I have a lot more progress done, but didn't have time to photograph.  I'll post another update this evening.

Scott Espin - IPMS Reno High Rollers  Geeked My Reviews 

  • Member since
    April 2005
  • From: Piscataway, NJ!
Posted by wing_nut on Wednesday, July 2, 2008 7:04 AM

Make sure you stay healthy so you can get this finished.  Oh and for the other reasons too like family, friends blah blah blahWink [;)]

Here in NJ we have that same grungy vaporous stuff that irritates eyes and lungs whenever you go outside.... we call it air.Dead [xx(]


Marc  

  • Member since
    March 2007
  • From: NJ
Posted by JMart on Tuesday, July 1, 2008 5:30 PM
excellent build log as usual Scott, looking good so far, again appreaciate all the pics and explanations! A must bookmark for anyone interested in the Bis


  • Member since
    December 2002
  • From: Reno, NV
Posted by espins1 on Tuesday, July 1, 2008 4:08 PM
 agentg wrote:

Good to see something other than a Pzkpfw something or other. Smile [:)] I'm liking it already.

BTW how's the fire situation up yonder thataway?

Friends in wine country had some anxious moments as did a casino shift manager friend of mine in Temecula.

Thanks for the comments and the intereste gentlemen, I appreciate it!

It had been really smokey in the Reno area from the California fires for about a week and a half.  As you can imagine, it caused many people to have sinus and respiratory problems.  We pretty much stayed indoors as much as we could, with the exception of going out in the yard to handwater the garden and flowers.  It gave me a nasty sinus infection, in fact, I'm heading off to the Dr. office right now to deal with that. 

If I'm up to it, I'll work some more on the Char this afternoon and post update pics this evening.

Scott Espin - IPMS Reno High Rollers  Geeked My Reviews 

  • Member since
    November 2005
Posted by T26E4 on Tuesday, July 1, 2008 1:36 AM

Here's a quick list of tweaks:

  1. fill the vertical seam on the driver's armor, parts B29 and the upper hull
  2. fill the seam of the 75mm mantlet D4 and where it meets D10 (it's supposed to be a single casting)
  3. add the "pigtail" hook atop D10
  4. add a seam to the upper turret parts C23 and C22
  5. add 3 lifting horns to the commander's cupola
  6. consider adding a row of rivets atop the sponsons at the outer edge
  7. open the mud chute
I think I listed all my tweaks on my build log.  Contact me offsite if you want my full nitpick list!  LOL

Roy Chow 

Join AMPS!

http://www.amps-armor.org


  • Member since
    April 2008
  • From: Commonwealth of Virginia
Posted by USArmyFAO on Tuesday, July 1, 2008 1:04 AM
I build 1/48th Armor and aircraft, but boy is this tank on my short list (probably right at the top) should I take the plunge and [gulp] start building 1/35th armor - unless Mr. Tamiya kicks one out in quarter scale.  I love this tank and its history.  Looking forward eagerly to your build!  Happy Modelling!

Cheers, Matt

"If we increase the size of the penguin until it is the same height as the man and then compare the relative brain size, we now find that the penguin's brain is still smaller. But, and this is the point, it is larger than it *was*."

  • Member since
    March 2003
  • From: Rain USA, Vancouver WA
Posted by tigerman on Tuesday, July 1, 2008 12:34 AM
This is kind of one of those cool ugly vehicles, much like the KV-II. I look forward to what you will do with this beast.

   http://i7.photobucket.com/albums/y269/wing_nut_5o/PANZERJAGERGB.jpg

 Eric 

  • Member since
    June 2008
Posted by scrambler8 on Monday, June 30, 2008 9:28 PM
Nicely done! I'm glad you posted this thread. I've been thinking about buying and building the B1 kit. You've increased my level of motivation. Thanks.
  • Member since
    November 2005
Posted by T26E4 on Monday, June 30, 2008 7:56 PM
Scott: I built one two years ago and have started another because I got one in a good trade.  If you want to look at another build blog have a look here.  Have fun!  I surely did.

Roy Chow 

Join AMPS!

http://www.amps-armor.org


  • Member since
    December 2007
  • From: Bridgeview, Illinois
Posted by mg.mikael on Monday, June 30, 2008 6:33 PM
So far your Char looks fantastic! Can't wait to you start painting.Thumbs Up [tup]Smile [:)]

"A good plan executed now is better than a perfect plan next week." - George S. Patton

  Photobucket 

  • Member since
    October 2007
  • From: N.H.
Posted by panzerguy on Monday, June 30, 2008 5:16 PM


  Scott looking foward to seeing more of this.I've seen one of these at just about every show I've been to but this is the first wip.

  Interesting thing about the Char, at the outbreak of WWII it was considerd on of the best tank's at that time,fire power and armor, and could have been a real problem for the Germans if the French had used them in the way that some of their General's had wanted.

"Happiness is a belt fed weapon"

  • Member since
    July 2004
  • From: Texas
Posted by wbill76 on Monday, June 30, 2008 4:46 PM

Scott,

Since Tamiya uses the polycaps, the idlers and sprockets remain fully rotatable once assembled. I made sure to paint them completely so as not to have any "bare plastic" showing through.

  • Member since
    December 2002
  • From: Reno, NV
Posted by espins1 on Monday, June 30, 2008 4:34 PM

Thanks guys. It's been fun researching this tank and learning all kinds of new things, especially about French armor and their "flawed" military doctrine in the use of their tanks.  The Char B1 bis had good potential, as did the Somua S35, but they were poorly deployed and the logistics/support structures in place for them was inadequate. 

Bill - I had already checked out your log for some pointers before I began.  I really liked the ways yours turned out.  I meant to ask you, did you have any problems painting the idlers with the idlers and hull completely assembled? 

Marc - I may have to make a trip back east!  Wink [;)]

Scott Espin - IPMS Reno High Rollers  Geeked My Reviews 

  • Member since
    October 2004
  • From: League City, Texas
Posted by sfcmac on Monday, June 30, 2008 3:39 PM
 Thanks for posting your build. I have alwats been curious about this kit.
  • Member since
    April 2005
  • From: Piscataway, NJ!
Posted by wing_nut on Monday, June 30, 2008 3:33 PM
Nice start Scott. I don't know anything about the Char either but it is an interesting looking vehicle.  At MosquitoCon since I am in a bunch of aircraft categories, I end up judging the armor. (I guess I'll be judging aircraft next yearWhistling [:-^]) and there is always a Char involved in the final decision.  Dunno why that is, but maybe you should bring it to NJ next yearWink [;)]

Marc  

  • Member since
    July 2004
  • From: Texas
Posted by wbill76 on Monday, June 30, 2008 3:24 PM
Off to a great start Scott, I built this one at the start of last year and kept a Build Log of it that you might find helpful. There's some little things that can be done to the kit to make it more accurate without too much difficulty, the real challenge will be deciding which style of fenders you go with based on the vehicle you decide to model. It's a great kit to build, the click-together tracks in particular are very very nice. Looking forward to seeing what you do with this one!
  • Member since
    November 2005
Posted by Anonymous on Monday, June 30, 2008 3:17 PM
Looking good....
  • Member since
    December 2002
  • From: Reno, NV
Tamiya 1/35 Char B1 bis *WIP*
Posted by espins1 on Monday, June 30, 2008 2:56 PM

"I'm French!  Why do you think I have this outrageous accent you silly English Knighits" (Monty Python and the Holy Grail)

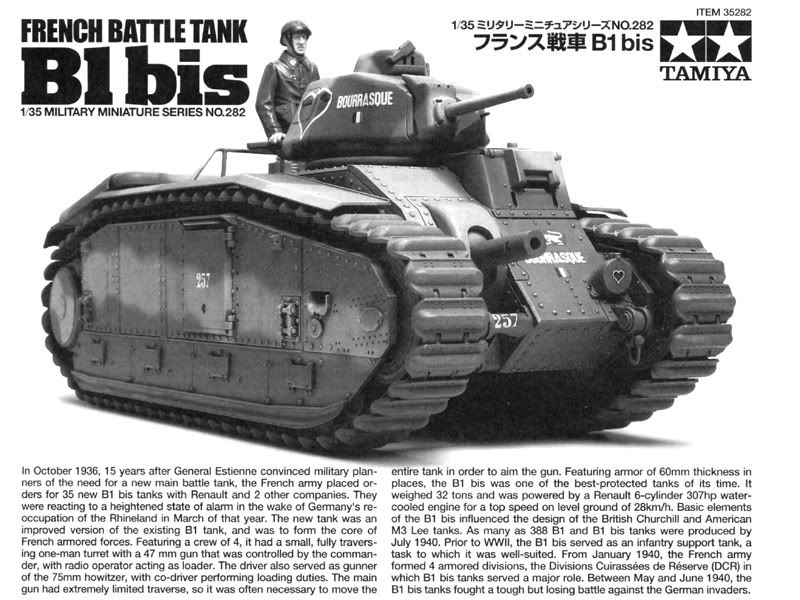
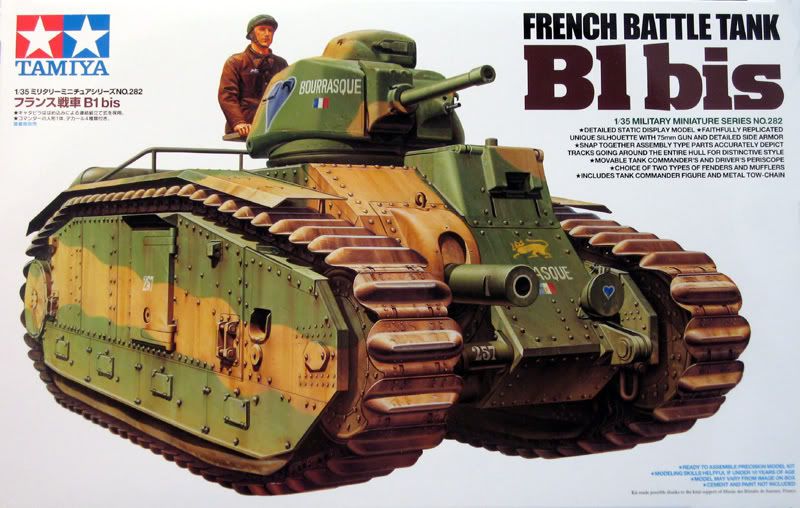
Work has begun on my Tamiya 1/35 Char B1 bis.  I must say this is a really interesting vehicle and has sparked my interest not only with the early days of Germany's Blitzkrieg, but also French Armor, which at the time were more heavily armed and armored than Germany's tanks.  I spent a good part of yesterday working on the kit and so far it's been very enjoyable.  The research has been fun too as I had known virtually nothing about the Char B1 bis until now.


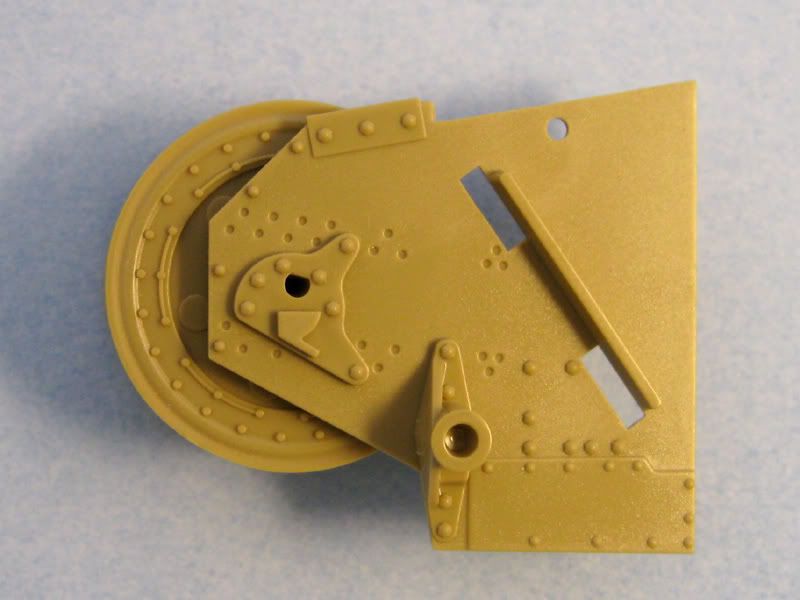
The wheels weren't too difficult.  The sprue attachement point on each wheel is right along the edge of the thinnest part.  Why they engineered it that way that way I'll never know because it made cleanup a bit tedious as you have to sand the outside of the thin rim, the inside and the outer edge.  However....... the wheels are pretty much hidden so you don't have to get too carried away with the cleanup because no one will ever notice.  I cleaned them up carefully anyway because... well, I felt like being a bit anal about it and it was good practice.... ya, that's what it was.... LOL

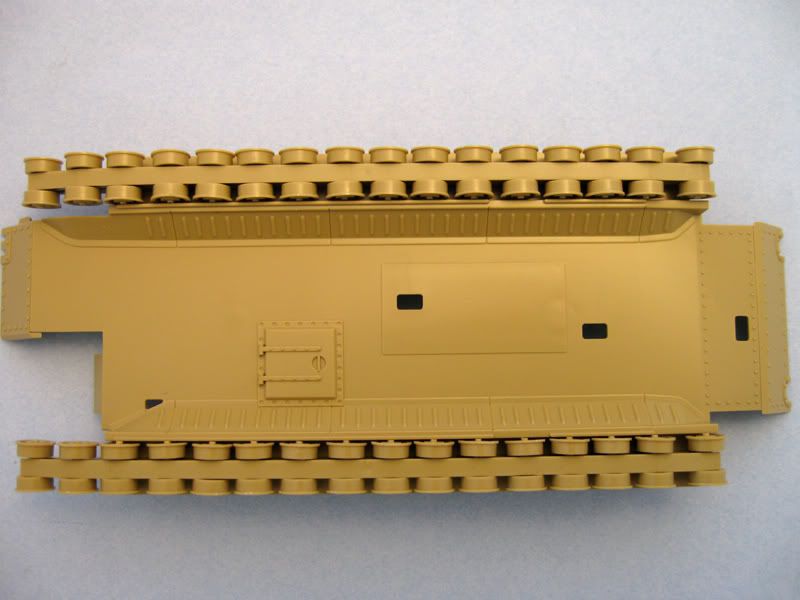
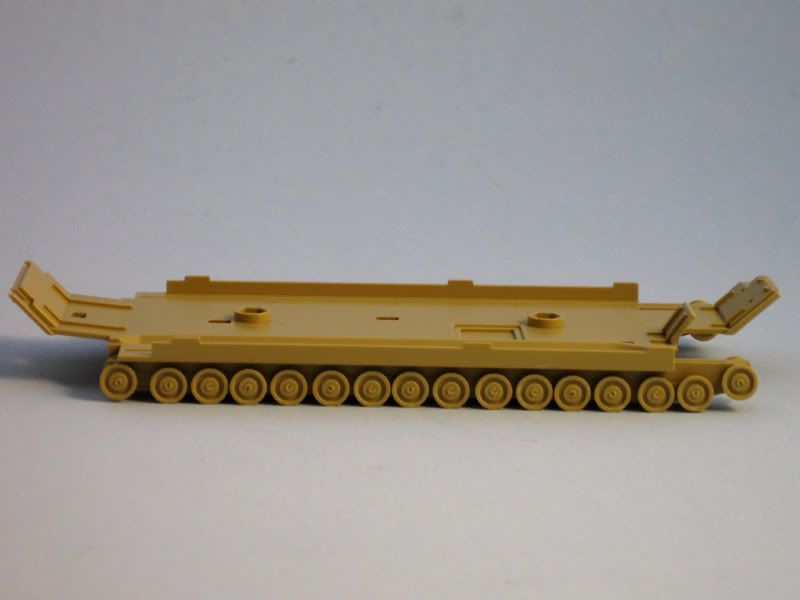
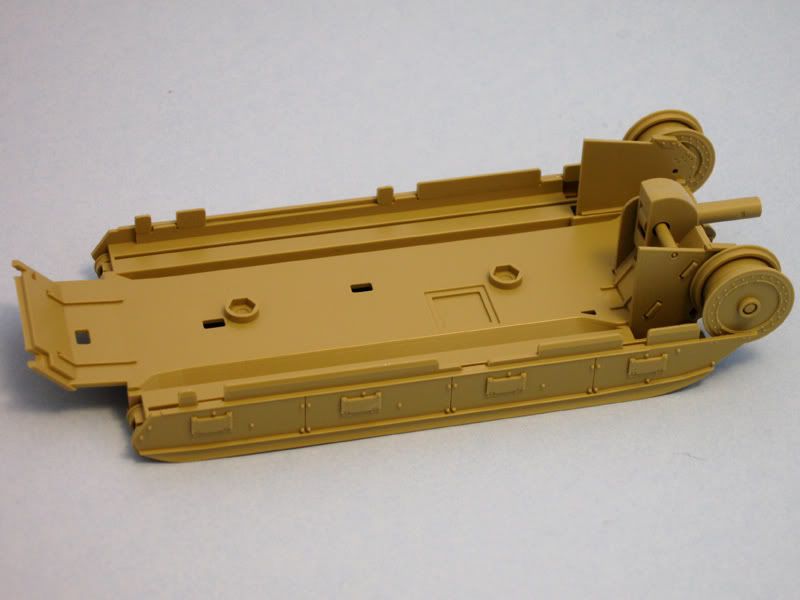
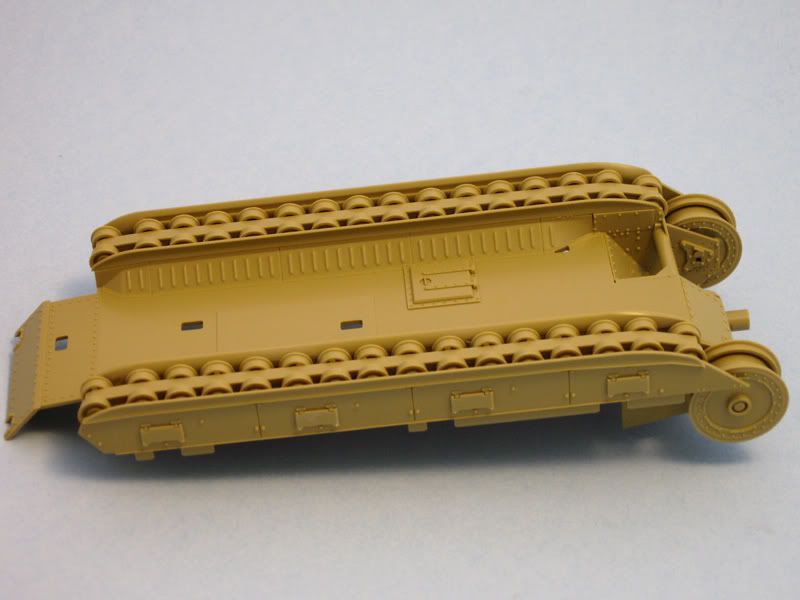
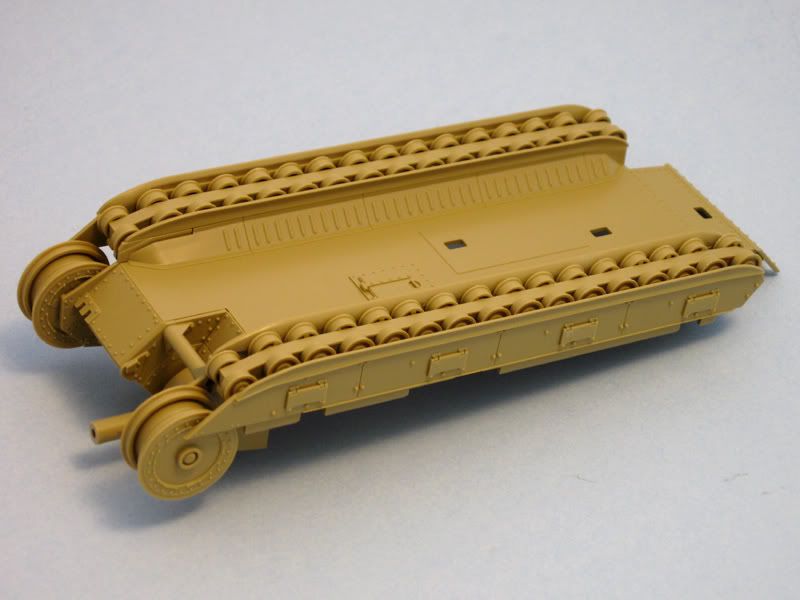
The running gear was a little tricky as you have to set the lower hull section onto the rail just right, then carefully flip it all over so it can be glued.  I just slid the folded instruction sheet underneath the wheels/rail to keep them from flying everywhere while carefully holding the lower hull section so the wheels stayed put.  To keep it simple I did one side at a time.
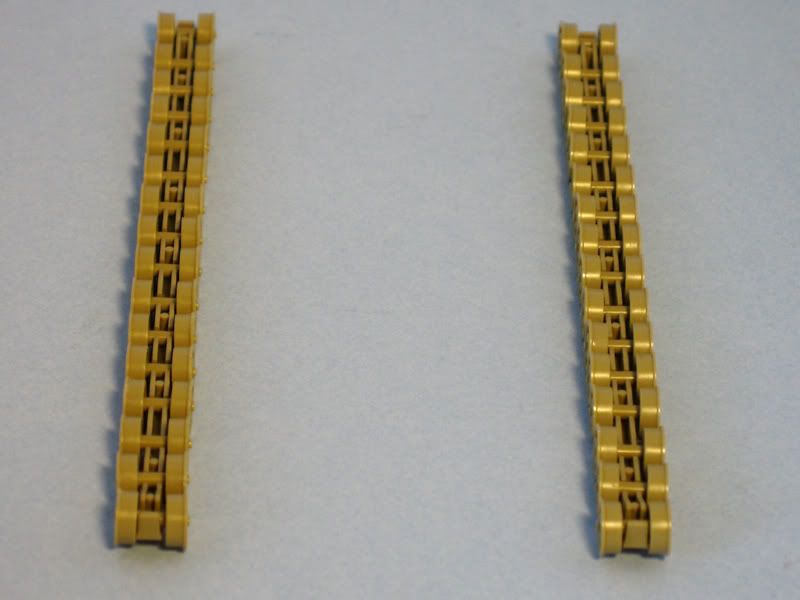


The 75mm gun assembly is very simple, but as always, when there are two barrel halves involved there will be seam work.  I carefully cemented the barrel halves together being sure to line them up to minimize the sanding work to keep the barrel round.  I used Mr. Surfacer applied with a toothpick which I laid along the seam lines, waited for it to dry then carefully worked away to smooth everything out and keep the barrel round. 
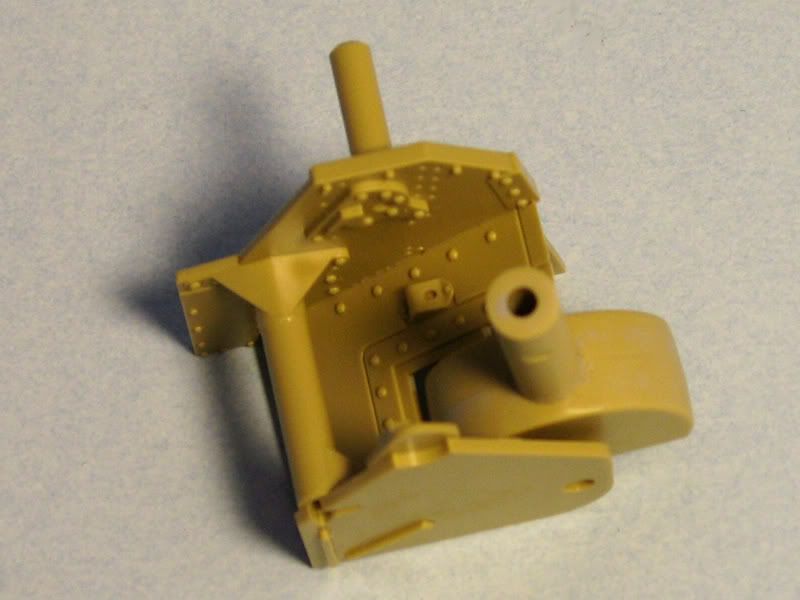


The gun assembly attaches very positively into the lower hull section so you'd really have to go out of your way to not install it properly.  The lower skirts, skids and hatches were attached at this point as well.
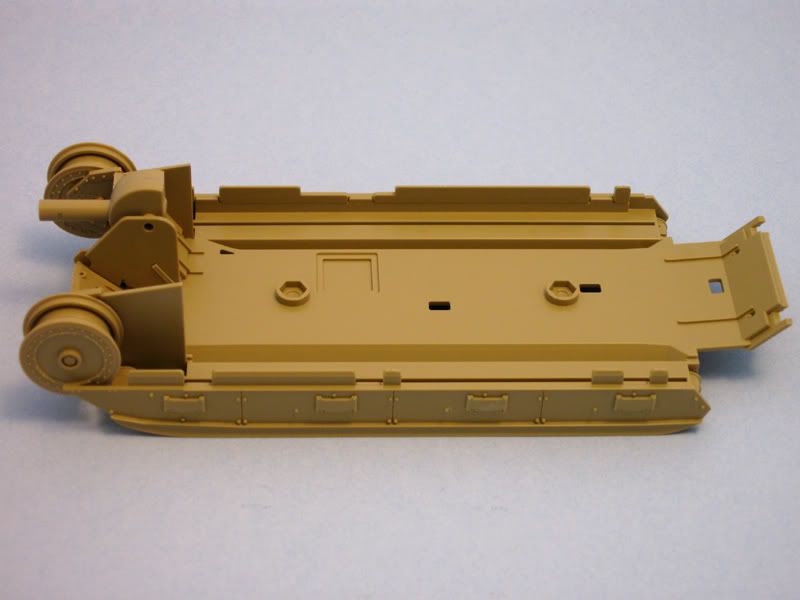


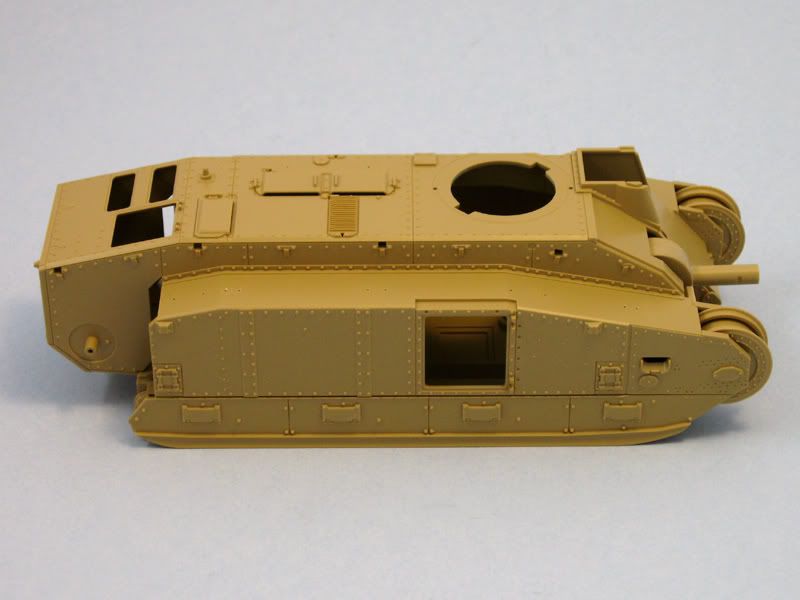
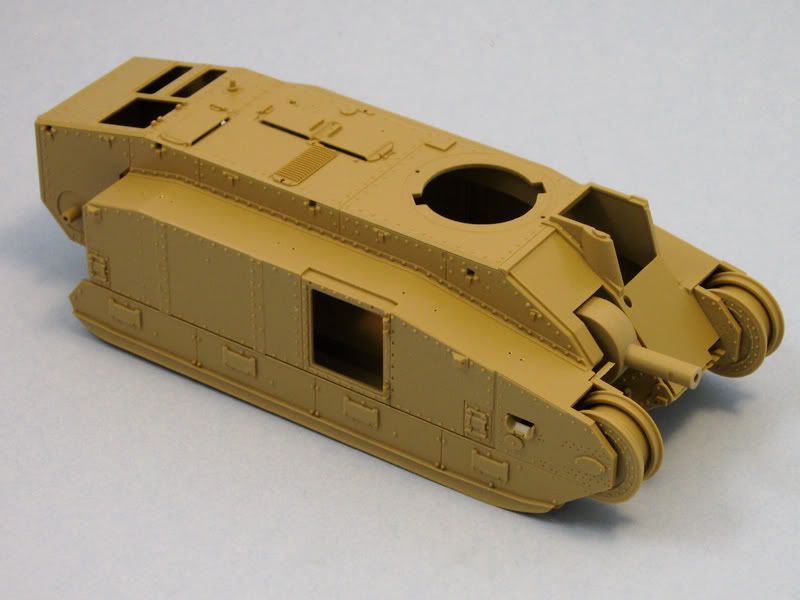
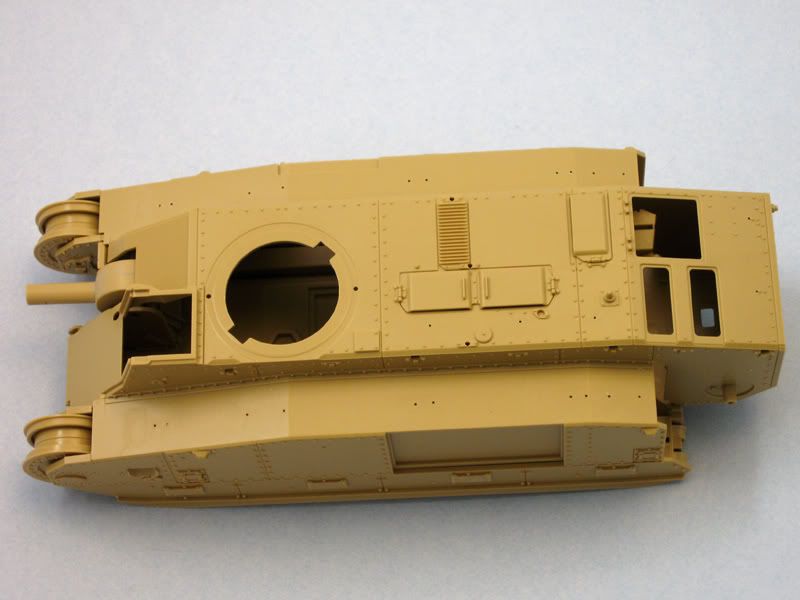
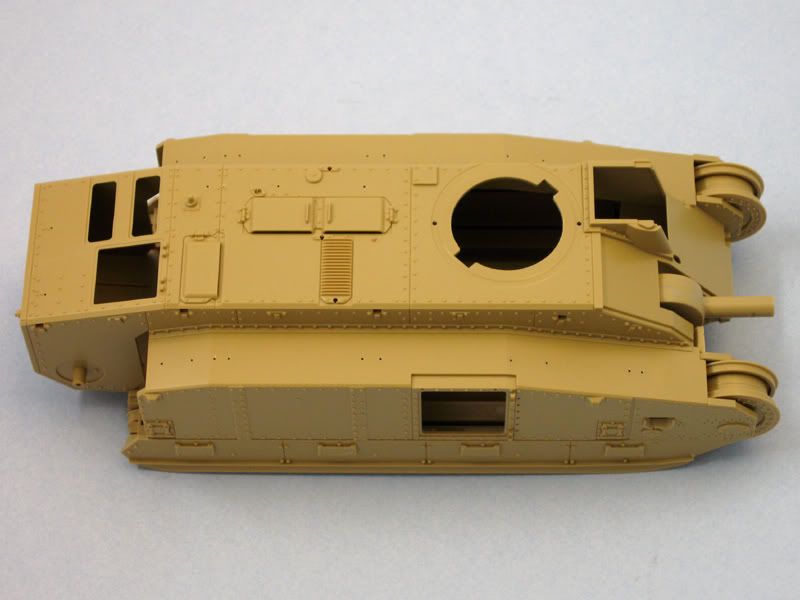
Here are a couple of photos with the hull dry fitted to the lower hull assembly.  There are 26 holes that needed to be drilled in the upper hull to provide locating holes for the various parts that will be added in the next steps.  If you have a pin vise with a 1mm bit this will go very quickly.  There were indentations on the underside of the upper hull section which made it impossible to drill a hole in the wrong place.... in theory.


Scott Espin - IPMS Reno High Rollers  Geeked My Reviews 

JOIN OUR COMMUNITY!

Our community is FREE to join. To participate you must either login or register for an account.

SEARCH FORUMS
FREE NEWSLETTER
By signing up you may also receive reader surveys and occasional special offers. We do not sell, rent or trade our email lists. View our Privacy Policy.