SEARCH FINESCALE.COM

Enter keywords or a search phrase below:

1/96 Cutty Sark WIP (Revell H-399)

31499 views
293 replies
1 rating 2 rating 3 rating 4 rating 5 rating
  • Member since
    December 2012
Posted by rwiederrich on Friday, August 3, 2018 7:21 AM

Dave....sometimes I can pull pics from my FB account to use here and other times I just can't (for some unknown reason).  I'll accept you as a friend so you can view through my images.

Rob

  • Member since
    April 2005
  • From: Roanoke, Virginia
Posted by BigJim on Tuesday, August 14, 2018 10:10 PM

I was going through my reference books and found that I had an extra copy of: "Masting and Rigging the Clipper Ship & Ocean Carrier". 
It is in very good condition. If anyone here is interested in it drop me a line.

  • Member since
    April 2016
  • From: Russia, St.Peterburg
Posted by kirill4 on Wednesday, August 15, 2018 2:20 PM

Thank You very much  Rob,

I think, need to buy this book... want/ need to have  more detailed info abt Thermopylae...

All The Best!!!

Kirill

  • Member since
    August 2018
Posted by Flint on Saturday, August 18, 2018 11:24 AM

That's looking great! She's a beautiful ship in the flesh (wood), and has one of my favourite figureheads. Would like to do this build myself one day.Yes 

  • Member since
    August 2018
Posted by Flint on Sunday, August 19, 2018 9:34 AM

That's looking great! She's a beautiful ship in the flesh (wood), and has one of my favourite figureheads. Would like to do this build myself one day.Yes 

  • Member since
    March 2012
  • From: Marysville, WA
Posted by David_K on Sunday, August 19, 2018 6:29 PM

Lol, guess they fixed the reply notifications...just got about 40 emails from various threads on the ship forum!

        _~
     _~ )_)_~
     )_))_))_)
     _!__!__!_         
     (_D_P_K_)
   ~~~~~~~~~~~~~
    ~~~~~~~~~~~

Current Project:  Imai/ERTL Spanish Galleon #2

Recently Finished: Revell 1/96 Cutty Sark

Next Up:  ???


  • Member since
    July 2010
  • From: Tempe AZ
Posted by docidle on Sunday, August 19, 2018 11:31 PM

I don't even want to look at my email until tomorrow morning. 

Anyway, your CS is looking awesome bud. I’m loving it!

Steve


  • Member since
    February 2003
  • From: Lacombe, LA.
Posted by Big Jake on Tuesday, August 21, 2018 3:42 PM

Dave, You may know of this, but Amazon is listing a new book on the Cutty Sark.

Cutty Sark: The Last of the Tea Clippers

https://www.amazon.com/Cutty-Sark-Last-Tea-Clippers/dp/1591141826/ref=sr_1_1?ie=UTF8&qid=1534883931&sr=8-1&keywords=the+cutty+sark


  • Member since
    March 2012
  • From: Marysville, WA
Posted by David_K on Saturday, August 25, 2018 9:39 AM

Thanks, Guys!

Jake, I'll keep an eye out for that book....though I have to say with the Campbell plans and Longridge's book, there's a lot of good info!

Here's a couple of pictures...

This is the installation of blocks on the foremast before stepping....I was actually suprised at the small number of blocks for the masttops...most of the rigging blocks go on the yards or the stays.

 20180811_121850 by Dave Kump, on Flickr

Starboard view...got all the shrouds looped, and I'm working my way up on the foremast...adding temp forestays to keep the mast upright while tensioning the shrouds, then installing the actual stays before repeating for the topstays, tgall, etc....it's a tricky business, keeping the tension even whilel working upward.  By the way, the lower deadeyes, while they are riding pretty high, are working well and they are pretty even...I was a bit concerned!

 20180825_071730 by Dave Kump, on Flickr

Closer shot of the fore shrouds and stay....

 20180825_071807 by Dave Kump, on Flickr

Anyway, it's going pretty smoothly, once I finish the fore standing rigging, I'll rig up the headgear and bowsprit stuff.  Then I have some more deckwork to attend to (headboards, boat tiedowns, davit rigging)....I'll do that stuff before the main shrouds go in, I think.

Thanks for watching!

Dave

        _~
     _~ )_)_~
     )_))_))_)
     _!__!__!_         
     (_D_P_K_)
   ~~~~~~~~~~~~~
    ~~~~~~~~~~~

Current Project:  Imai/ERTL Spanish Galleon #2

Recently Finished: Revell 1/96 Cutty Sark

Next Up:  ???


  • Member since
    July 2013
Posted by steve5 on Saturday, August 25, 2018 4:09 PM

as usual , beautiful work david . really enjoying tjis build .


  • Member since
    December 2010
  • From: Salem, Oregon
Posted by 1943Mike on Saturday, August 25, 2018 9:02 PM

Great attention to detail and a handsome outcome so far.

Dave, don't forget to put some iron/steel flanges toward the bow corners of the hatch where the anchor chain rubs ... Wink.

Mike

"Le temps est un grand maître, mais malheureusement, il tue tous ses élèves."

Hector Berlioz

  • Member since
    December 2012
Posted by rwiederrich on Monday, August 27, 2018 8:00 AM

WinkComing along nicely Dave...it apears your blocks have gone adrift on your stepped foremast...from the previous image of the mast in the vise.Confused

Dave I fashioned hooks for all my blocks that mounted to the masts..saving eons of time...I used the supplied blocks..and after they received paind and the hooks looked pretty convincing.


Robhttps://www.facebook.com/photo.php?fbid=10200268553969658&set=a.10200182948909585&type=3&size=960%2C720

  • Member since
    July 2010
  • From: Tempe AZ
Posted by docidle on Tuesday, August 28, 2018 1:11 AM

Dave,

I know that I’m sounding like a broken record, but you are doing beautiful work on her! Love the posts.

Steve


  • Member since
    March 2012
  • From: Marysville, WA
Posted by David_K on Tuesday, August 28, 2018 7:12 PM

LOL Steve, thanks....I feel the same way sometimes....I look at people's progress pics on here, and it seems like all I ever say is "wow, looking good!"....but it's true, I see so many updates that amaze and impress me.

Dave

        _~
     _~ )_)_~
     )_))_))_)
     _!__!__!_         
     (_D_P_K_)
   ~~~~~~~~~~~~~
    ~~~~~~~~~~~

Current Project:  Imai/ERTL Spanish Galleon #2

Recently Finished: Revell 1/96 Cutty Sark

Next Up:  ???


  • Member since
    March 2012
  • From: Marysville, WA
Posted by David_K on Tuesday, August 28, 2018 7:19 PM

Rob, the mast shown in the vise was the mainmast...it had more blocks.  For whatever reason, even though the mastcap had those eyes to accommodate some blocks, they aren't called for in my plans?  In fact, I think the mastcap parts are identical for the fore and main mast, same with the tops....wonder if they molded them the same to save time ro money in tooling?

I remember seeing your hooks when I was at your place....made for a really nice touch, and I bet they did save some time!  Great work!

Dave

        _~
     _~ )_)_~
     )_))_))_)
     _!__!__!_         
     (_D_P_K_)
   ~~~~~~~~~~~~~
    ~~~~~~~~~~~

Current Project:  Imai/ERTL Spanish Galleon #2

Recently Finished: Revell 1/96 Cutty Sark

Next Up:  ???


  • Member since
    December 2012
Posted by rwiederrich on Wednesday, August 29, 2018 2:58 PM

I recently came across all the individual plans for many of the CS's I've built over the years and it is clear there are some changes made fron the earliest to the newest plans, especially with the rigging...it has been made simpler it appears.

Rob

  • Member since
    December 2012
Posted by rwiederrich on Friday, September 14, 2018 8:47 AM

How's things coming along David....Haven't heard from you in a while.


Rob

  • Member since
    March 2012
  • From: Marysville, WA
Posted by David_K on Saturday, September 15, 2018 9:28 AM

Hi Rob-

Thanks for checking in.

I haven't made a ton of progress lately (busy, busy!), but I have completed the head gear rigging and fore stays....here's a couple of pctures:

 20180908_110831 by Dave Kump, on Flickr

 20180908_110824 by Dave Kump, on Flickr

 20180907_143859 by Dave Kump, on Flickr

Before I install the fore backstays, I'm going to finish fastening the anchors and other deck work (boat davits, tie-downs, etc.)...feel like I should get as much of that remaining stuff done before I block myself out with the rigging.

All in all, it's going pretty smoothly these days...slow, but smooth!
Thanks!

Dave

        _~
     _~ )_)_~
     )_))_))_)
     _!__!__!_         
     (_D_P_K_)
   ~~~~~~~~~~~~~
    ~~~~~~~~~~~

Current Project:  Imai/ERTL Spanish Galleon #2

Recently Finished: Revell 1/96 Cutty Sark

Next Up:  ???


  • Member since
    July 2006
Posted by Michael D. on Saturday, September 15, 2018 4:16 PM

Looking very nice there Dave, those photo etched parts really stand out, great workYes!!. I hope to start mine next year.


Michael D.

  • Member since
    December 2010
  • From: Salem, Oregon
Posted by 1943Mike on Saturday, September 15, 2018 9:26 PM

Dave,

Absolutely lovely, crisp, detailed work!

Is that dolphin striker the kit part? Mine was so bent I could never get it to be straight. Yours looks perfect! Where'd you get the chain you used for the bow sprit rigging? Should it not have been blackened? I'm probably off base here but just curious.

Mike

"Le temps est un grand maître, mais malheureusement, il tue tous ses élèves."

Hector Berlioz

  • Member since
    March 2012
  • From: Marysville, WA
Posted by David_K on Sunday, September 16, 2018 9:12 AM

Thanks, guys!

Yeah, the photo etch turned out okay...glad I used it instead of decals or painting for the scrollwork.

The dolphin striker wasn't bent or anything so I didn't have any trouble using it....I am building this model with the use of 2 separate kits, and there have been a few parts that I've needed to swipe from the 2nd kit because they were misshapened or warped...

As far as the chain, I think it should be black, but I like the way it looks uncoated (especially with the photoetch brass nearby!), so I decided to leave it shiny....just another artistic liberty I've taken lol :)

Thanks again!

Dave

        _~
     _~ )_)_~
     )_))_))_)
     _!__!__!_         
     (_D_P_K_)
   ~~~~~~~~~~~~~
    ~~~~~~~~~~~

Current Project:  Imai/ERTL Spanish Galleon #2

Recently Finished: Revell 1/96 Cutty Sark

Next Up:  ???


  • Member since
    March 2012
  • From: Marysville, WA
Posted by David_K on Sunday, September 30, 2018 3:53 PM

Had some time this week to get the rest of the lower shrouds installed.

Figured I would share some pictures....not because my results are out-of-this-world or anything, but mostly because I don't know what method others use for spacing their deadeyes when they install shrouds....maybe the jig I use is typical for everyone?

Anyway, I take a little strip of styrene, drill two holes in in at the correct spacing (usually 3x the deadeye diameter) and put some thin wire through each hole (I use staples for this size of lanyard hole)...bend them, and CA glue them to the styrene...
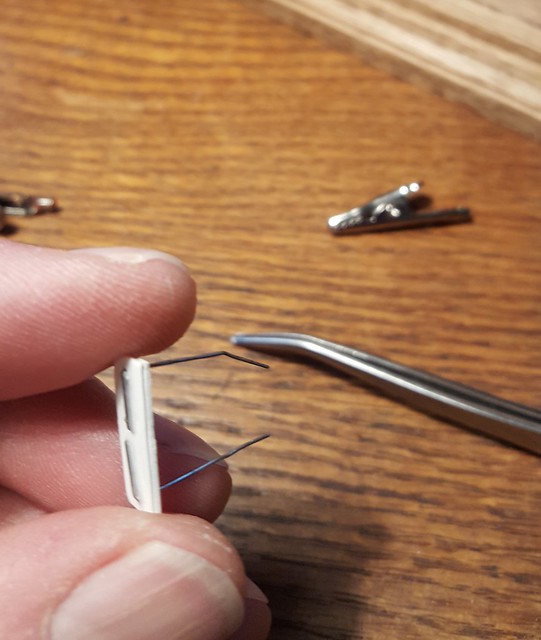
 20180930_095200 by Dave Kump, on Flickr

Then I insert a jig wire into the center hole of the upper deadeye...
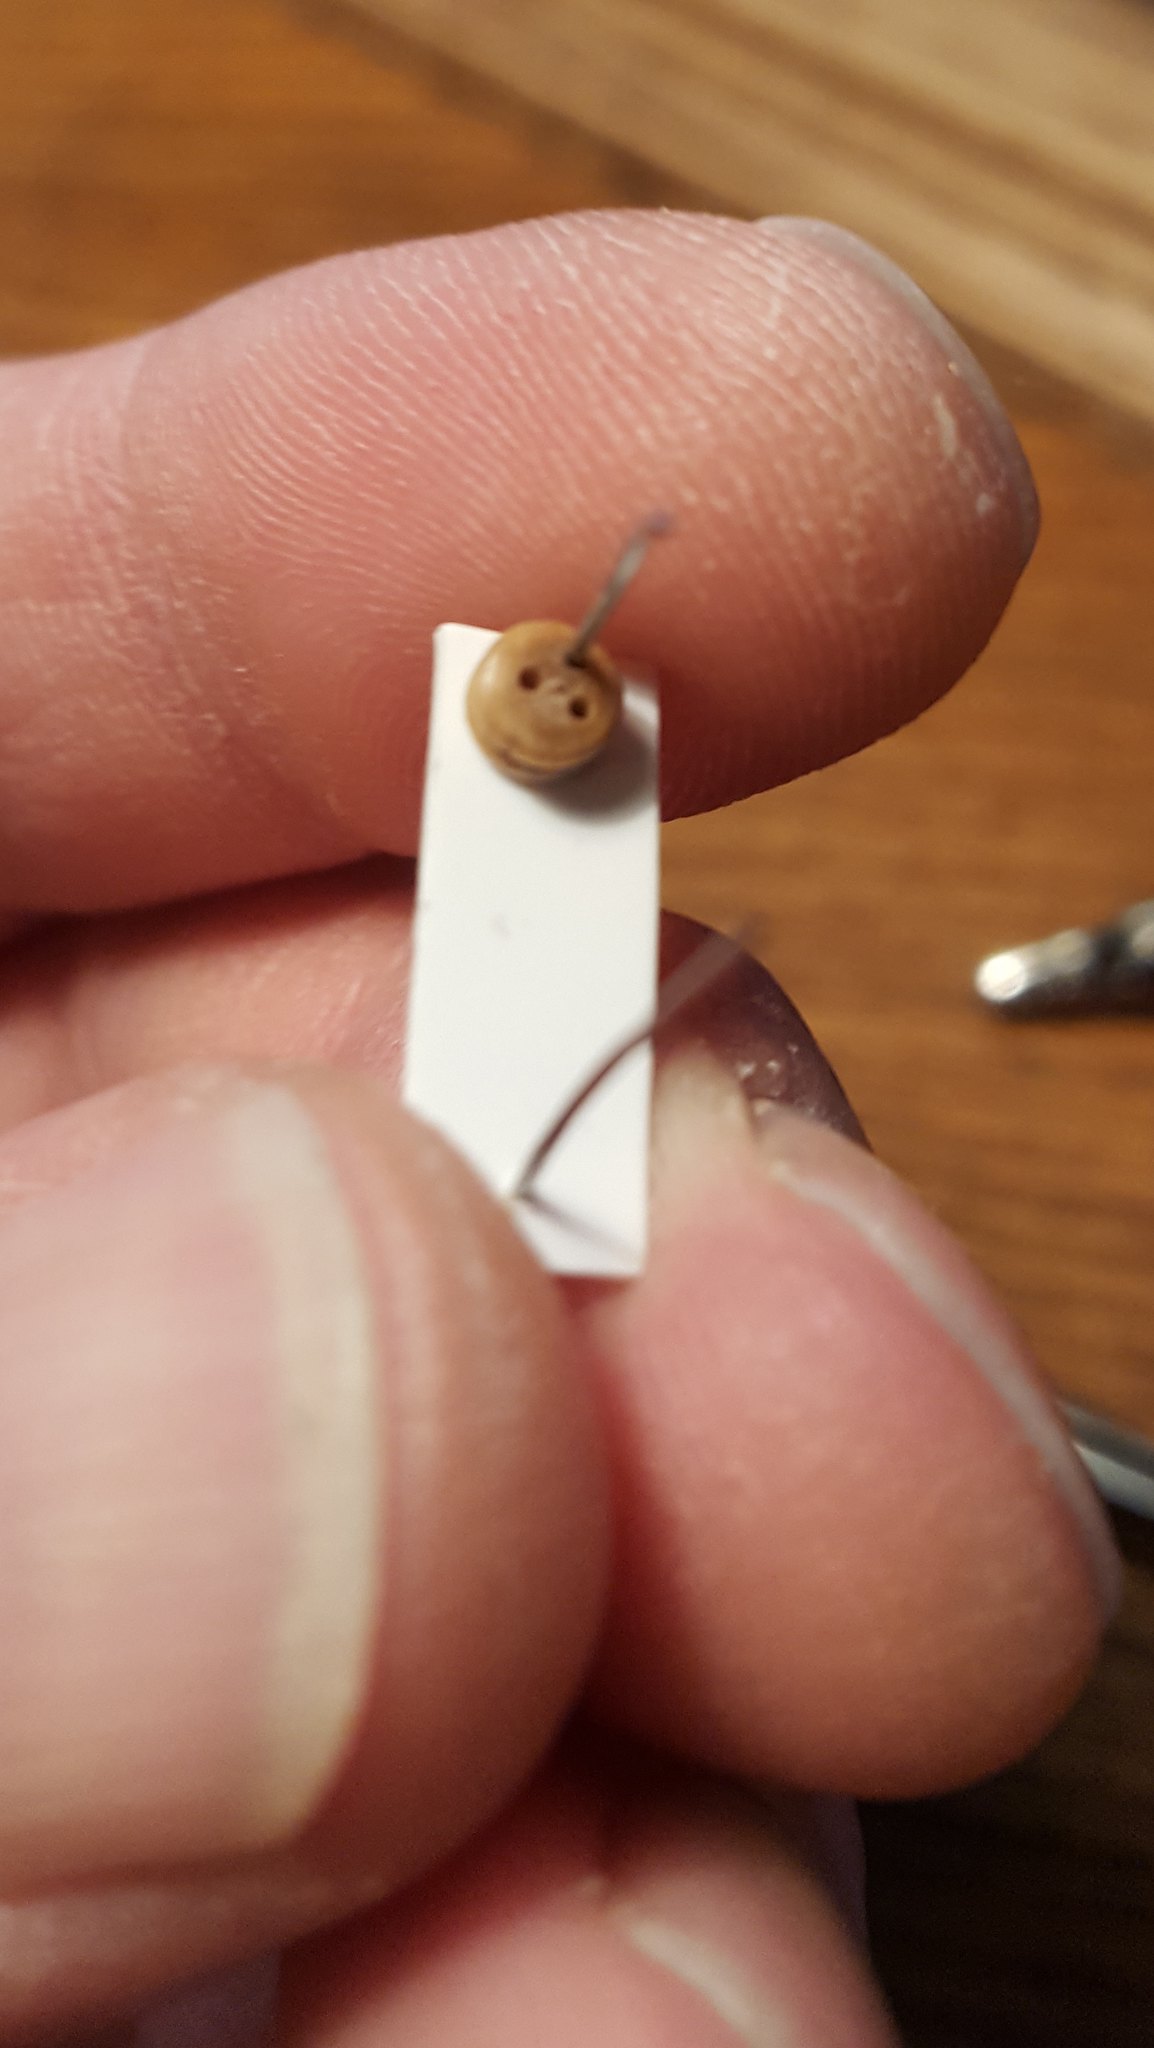
 20180930_095242 by Dave Kump, on Flickr

The other wire of the jig goes into the center hole of the lower deadeye, and then I run the shroud around the upper deadeye to hold it at the correct spacing
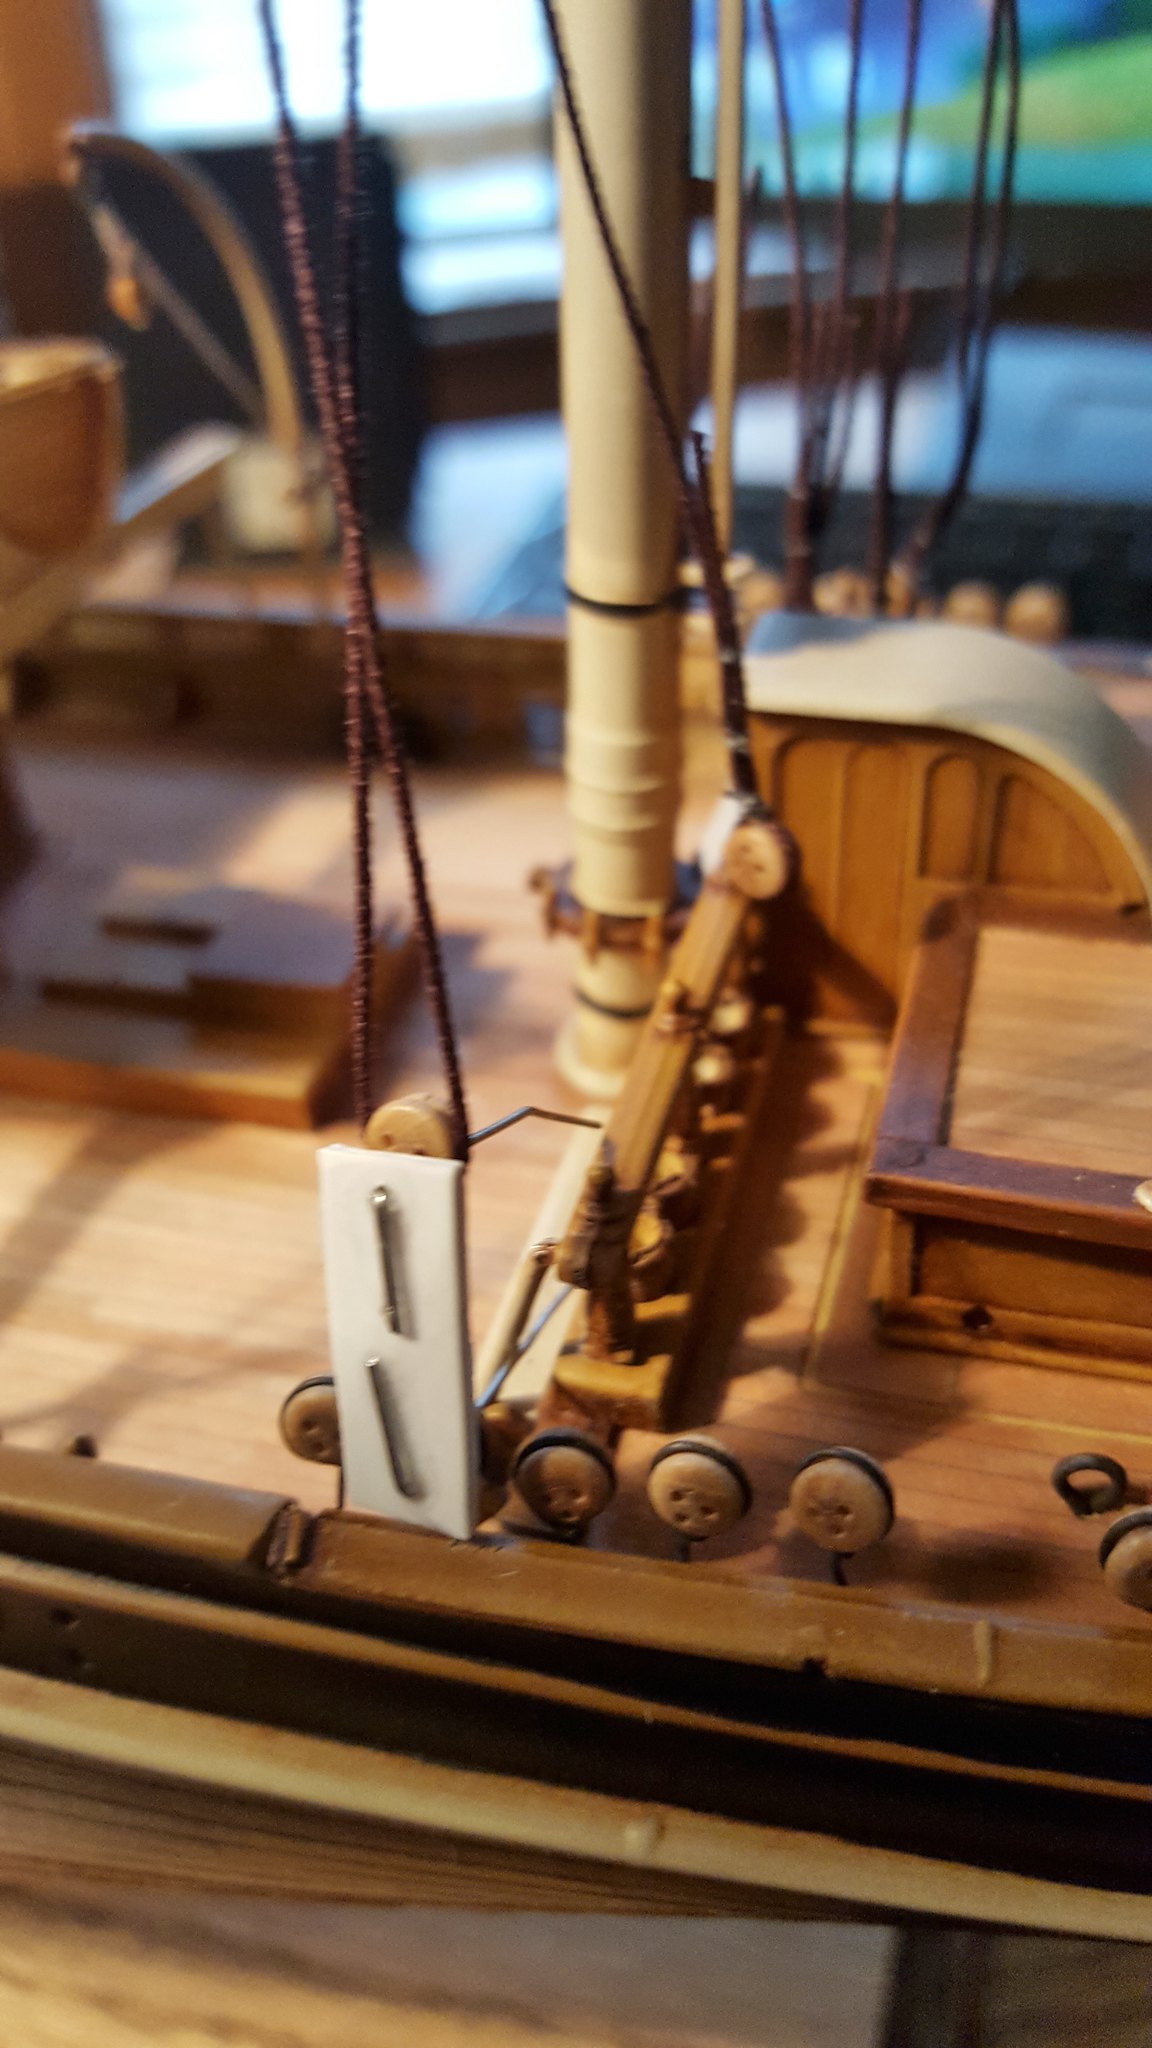
 20180930_095323 by Dave Kump, on Flickr
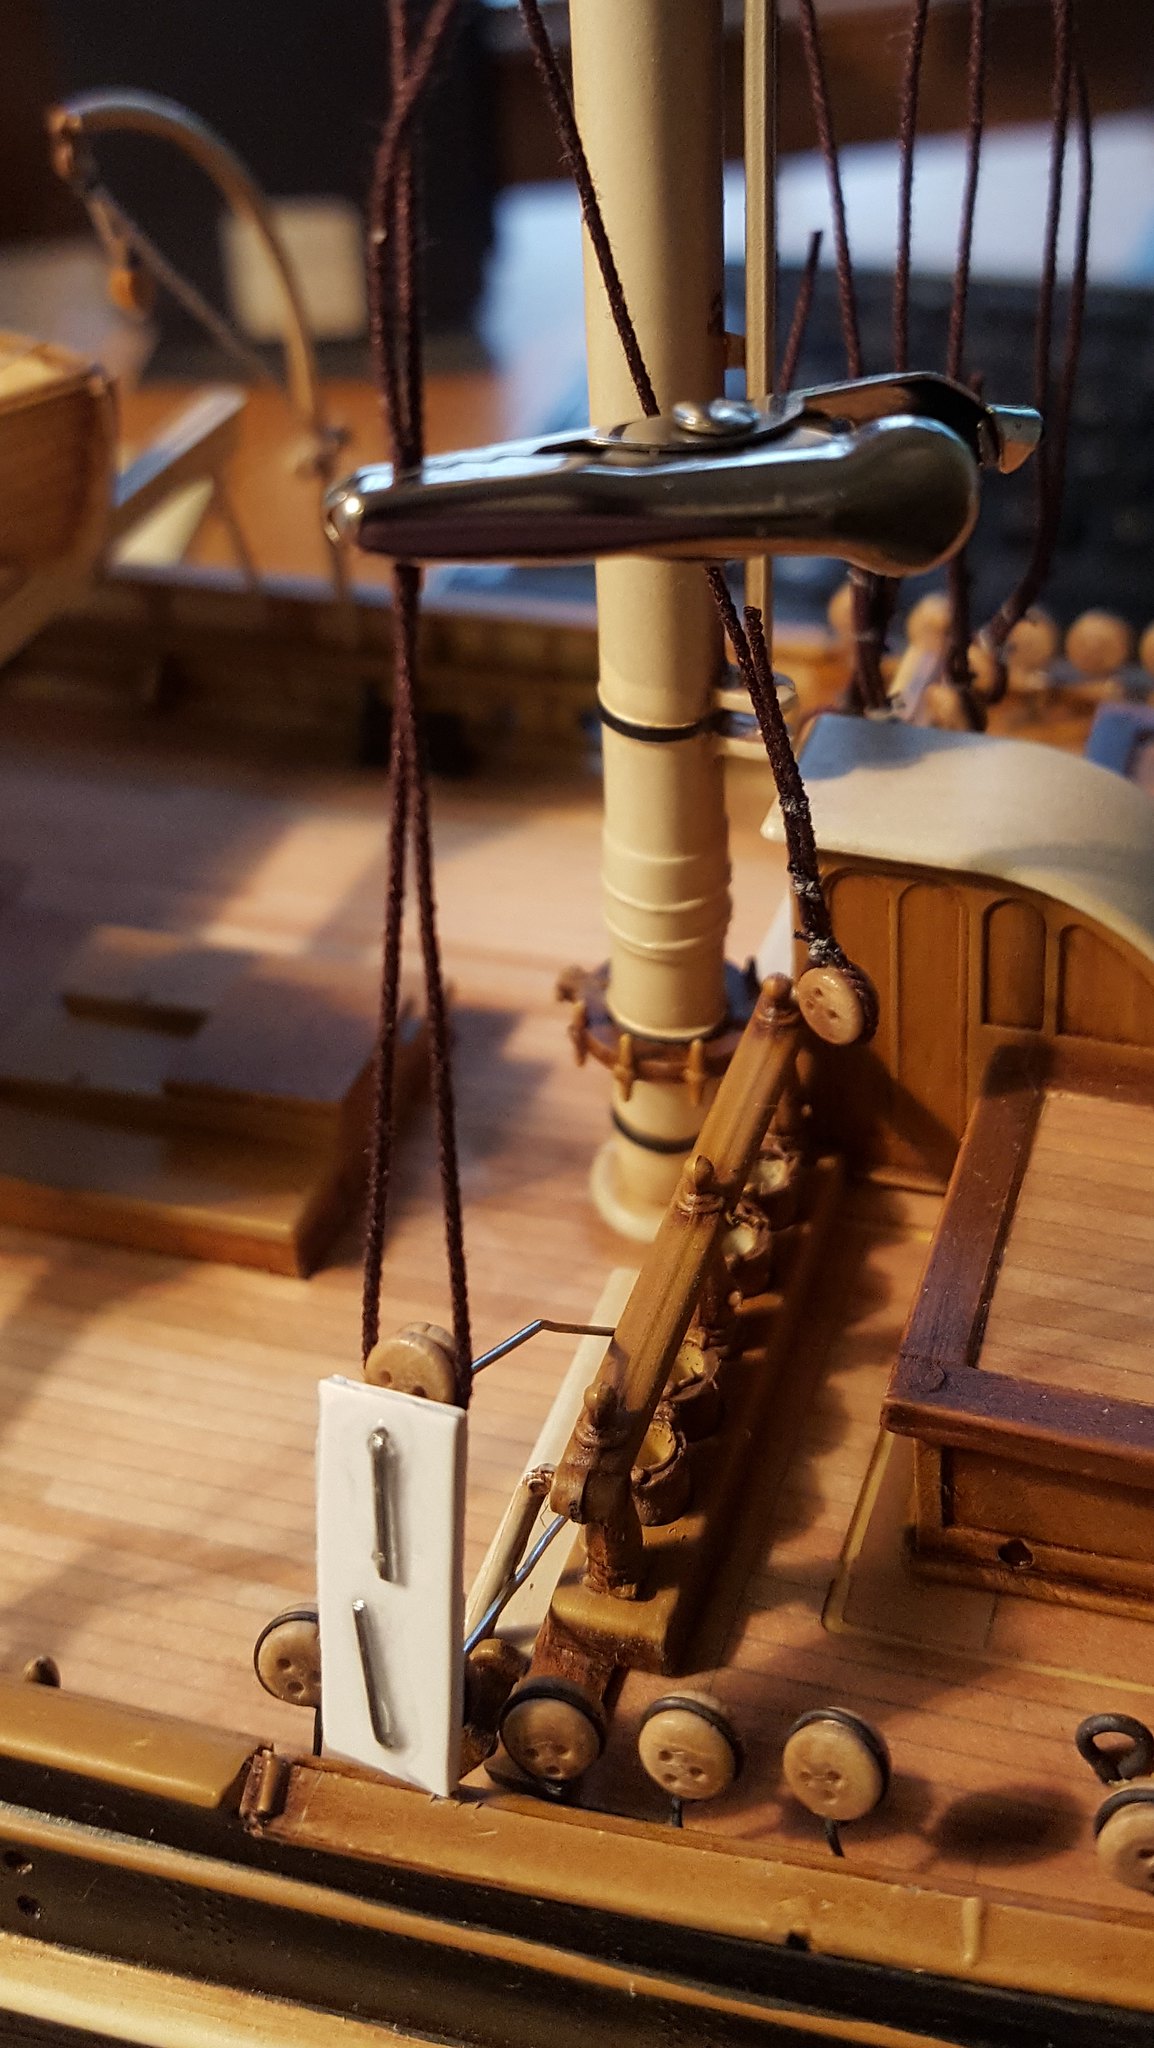
 20180930_095350 by Dave Kump, on Flickr

Alligator clip to keep the shroud tension on (just enough tension so it doesn't sag at this point, the deadeyes are easier to install with low tension, and the lanyards will get everything tight later)

 20180930_095350 by Dave Kump, on Flickr

Then I put another clip just above the deadeye, so I can tie it with black thread and minimize the gap...
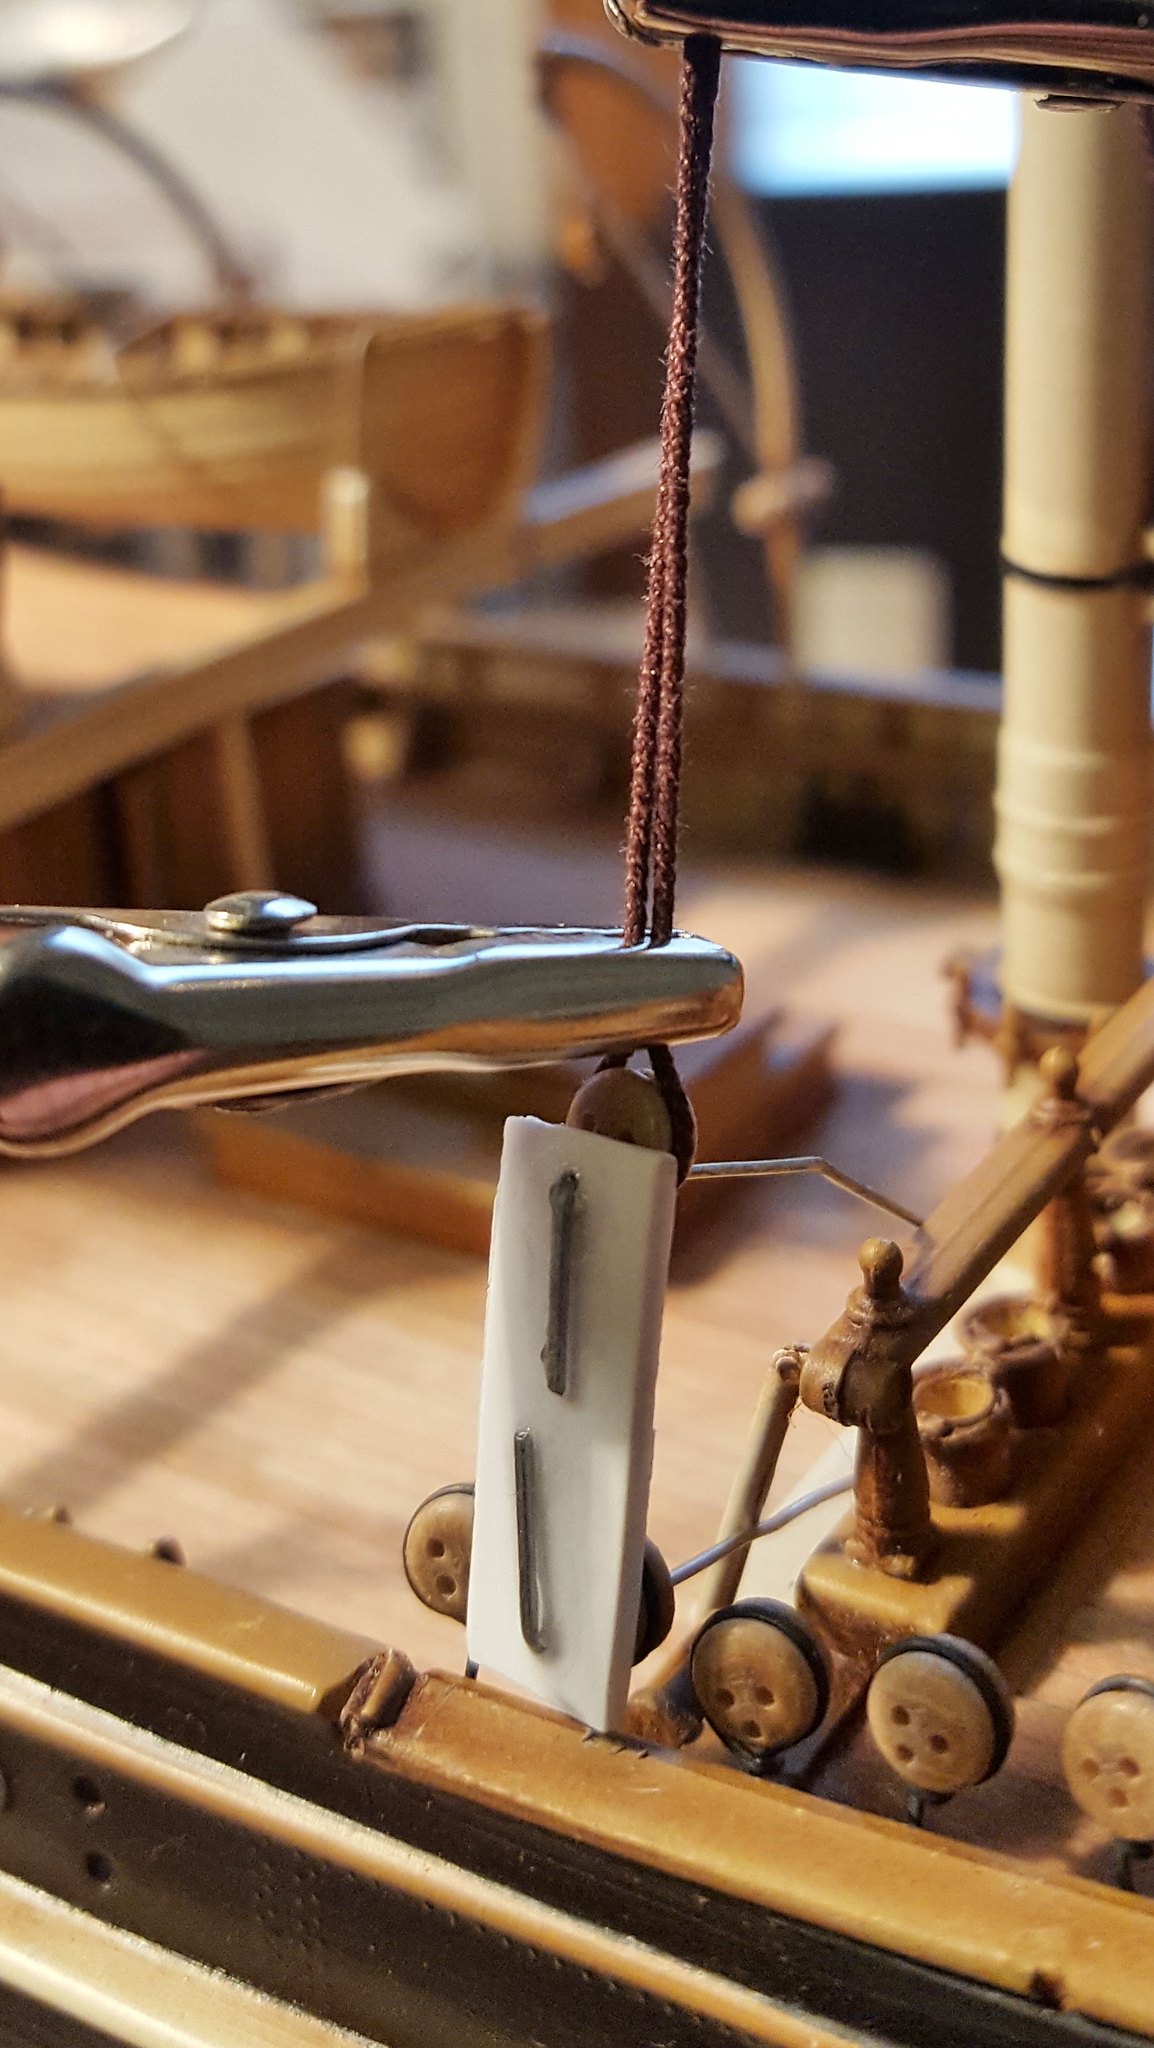
 20180930_095409 by Dave Kump, on Flickr

Sometimes there is still a slight gap above the deadeye, but once I have the knot tied, I remove the clip and add a second knot for strength, and also to cinch the shroud tighter to the deadeye
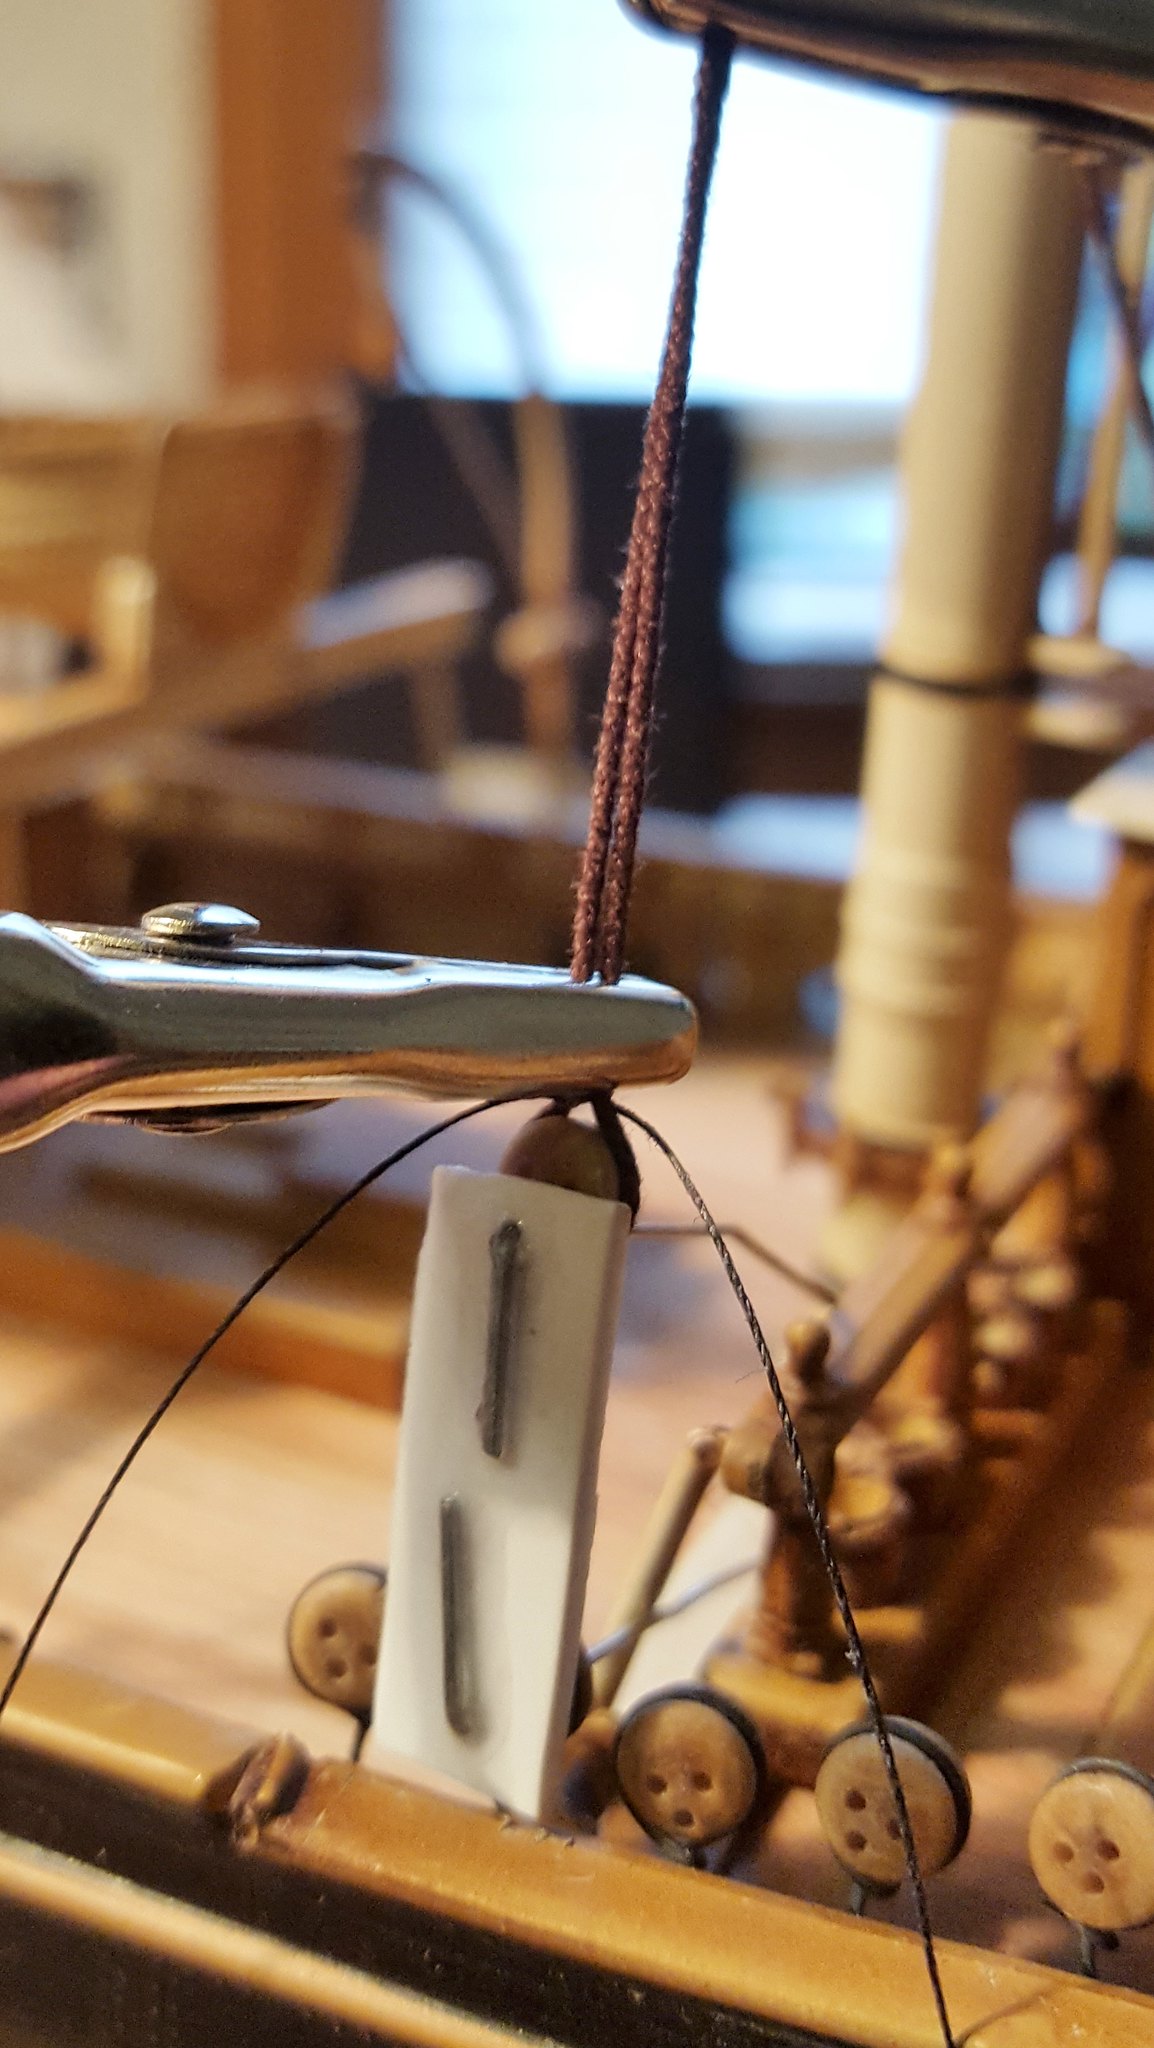
 20180930_095445 by Dave Kump, on Flickr

Add a couple seizings for the shroud, and voila.
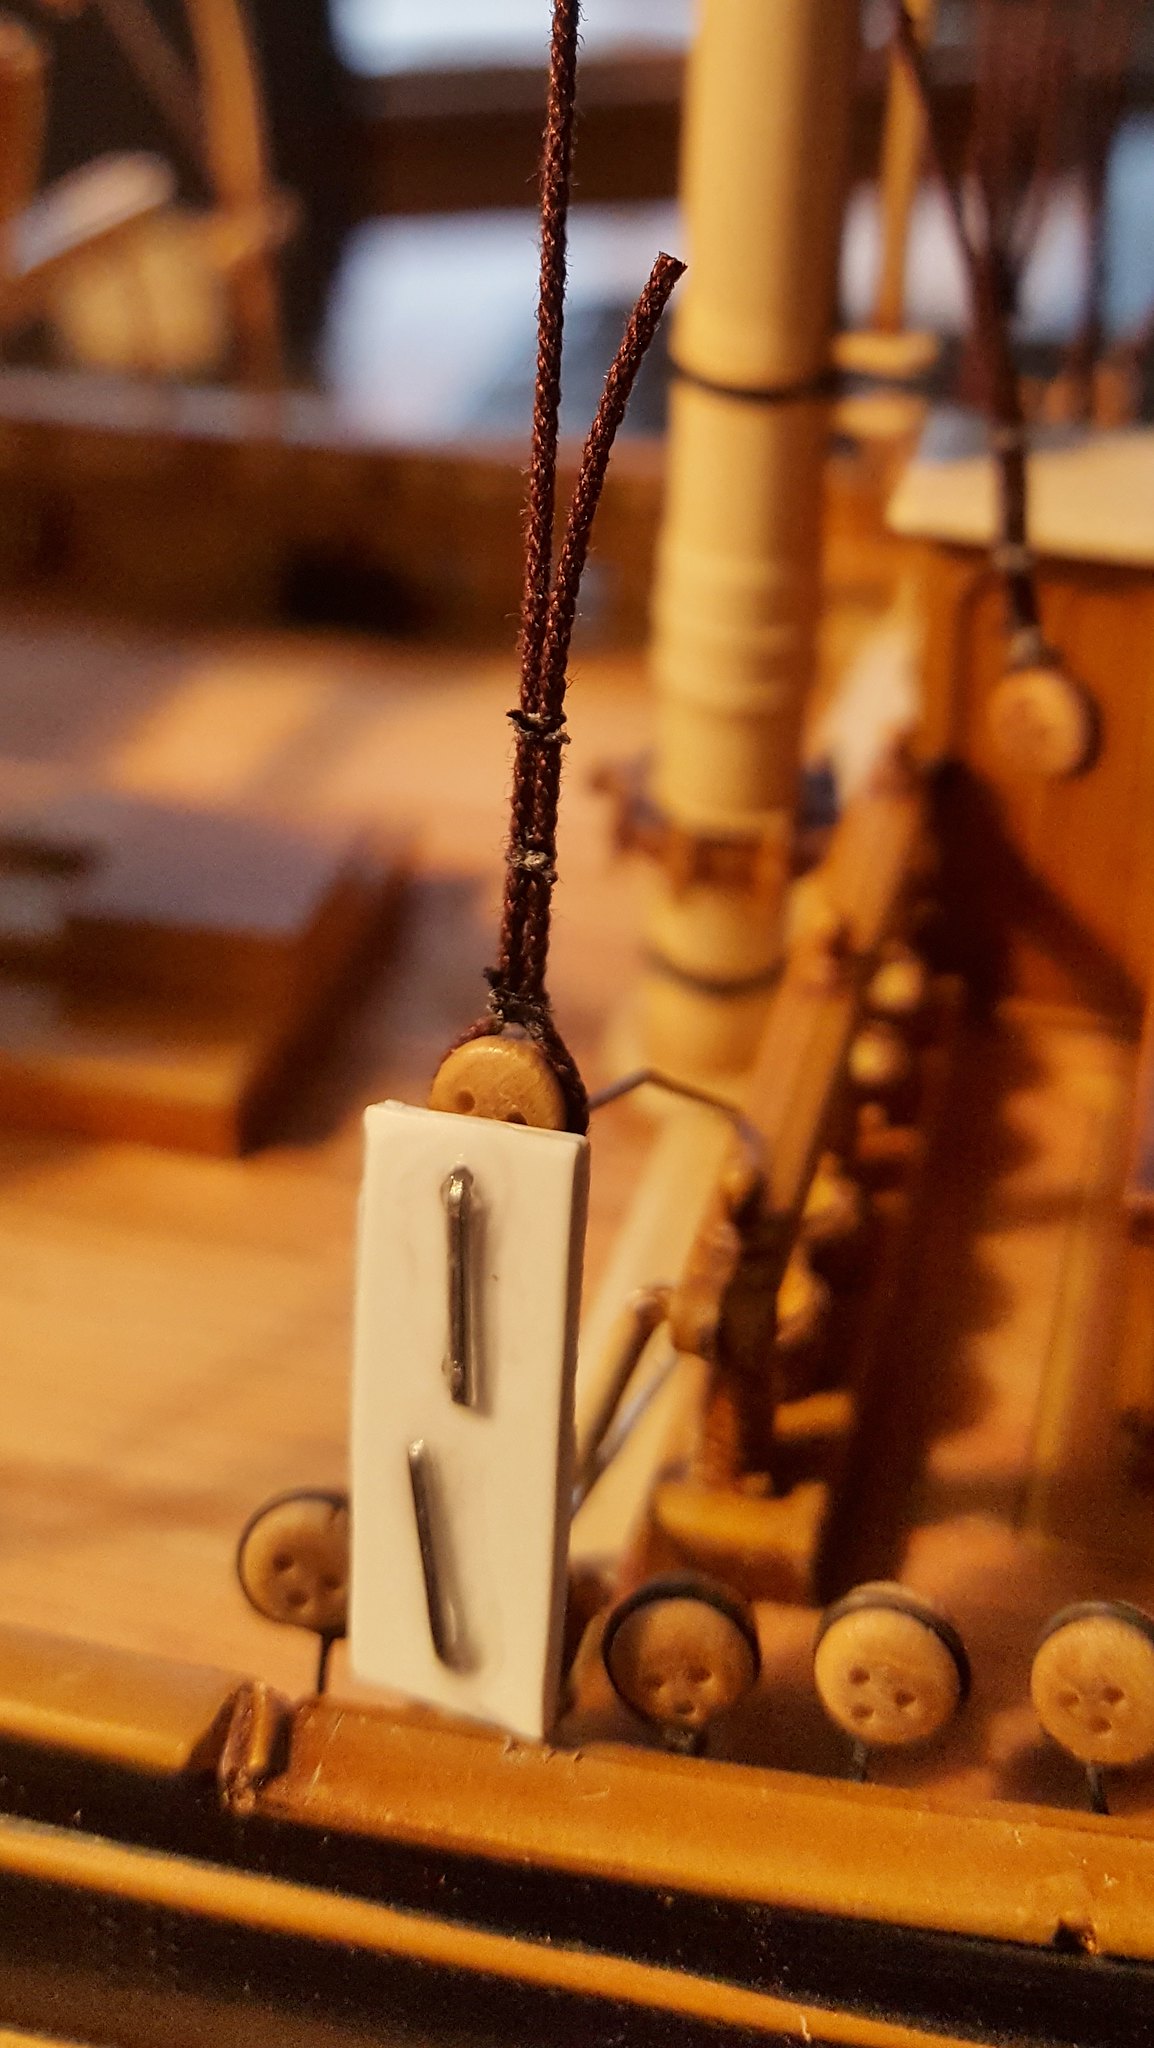
 20180930_095649 by Dave Kump, on Flickr

Then I pull the jig off and go on to the next shroud/deadeye.
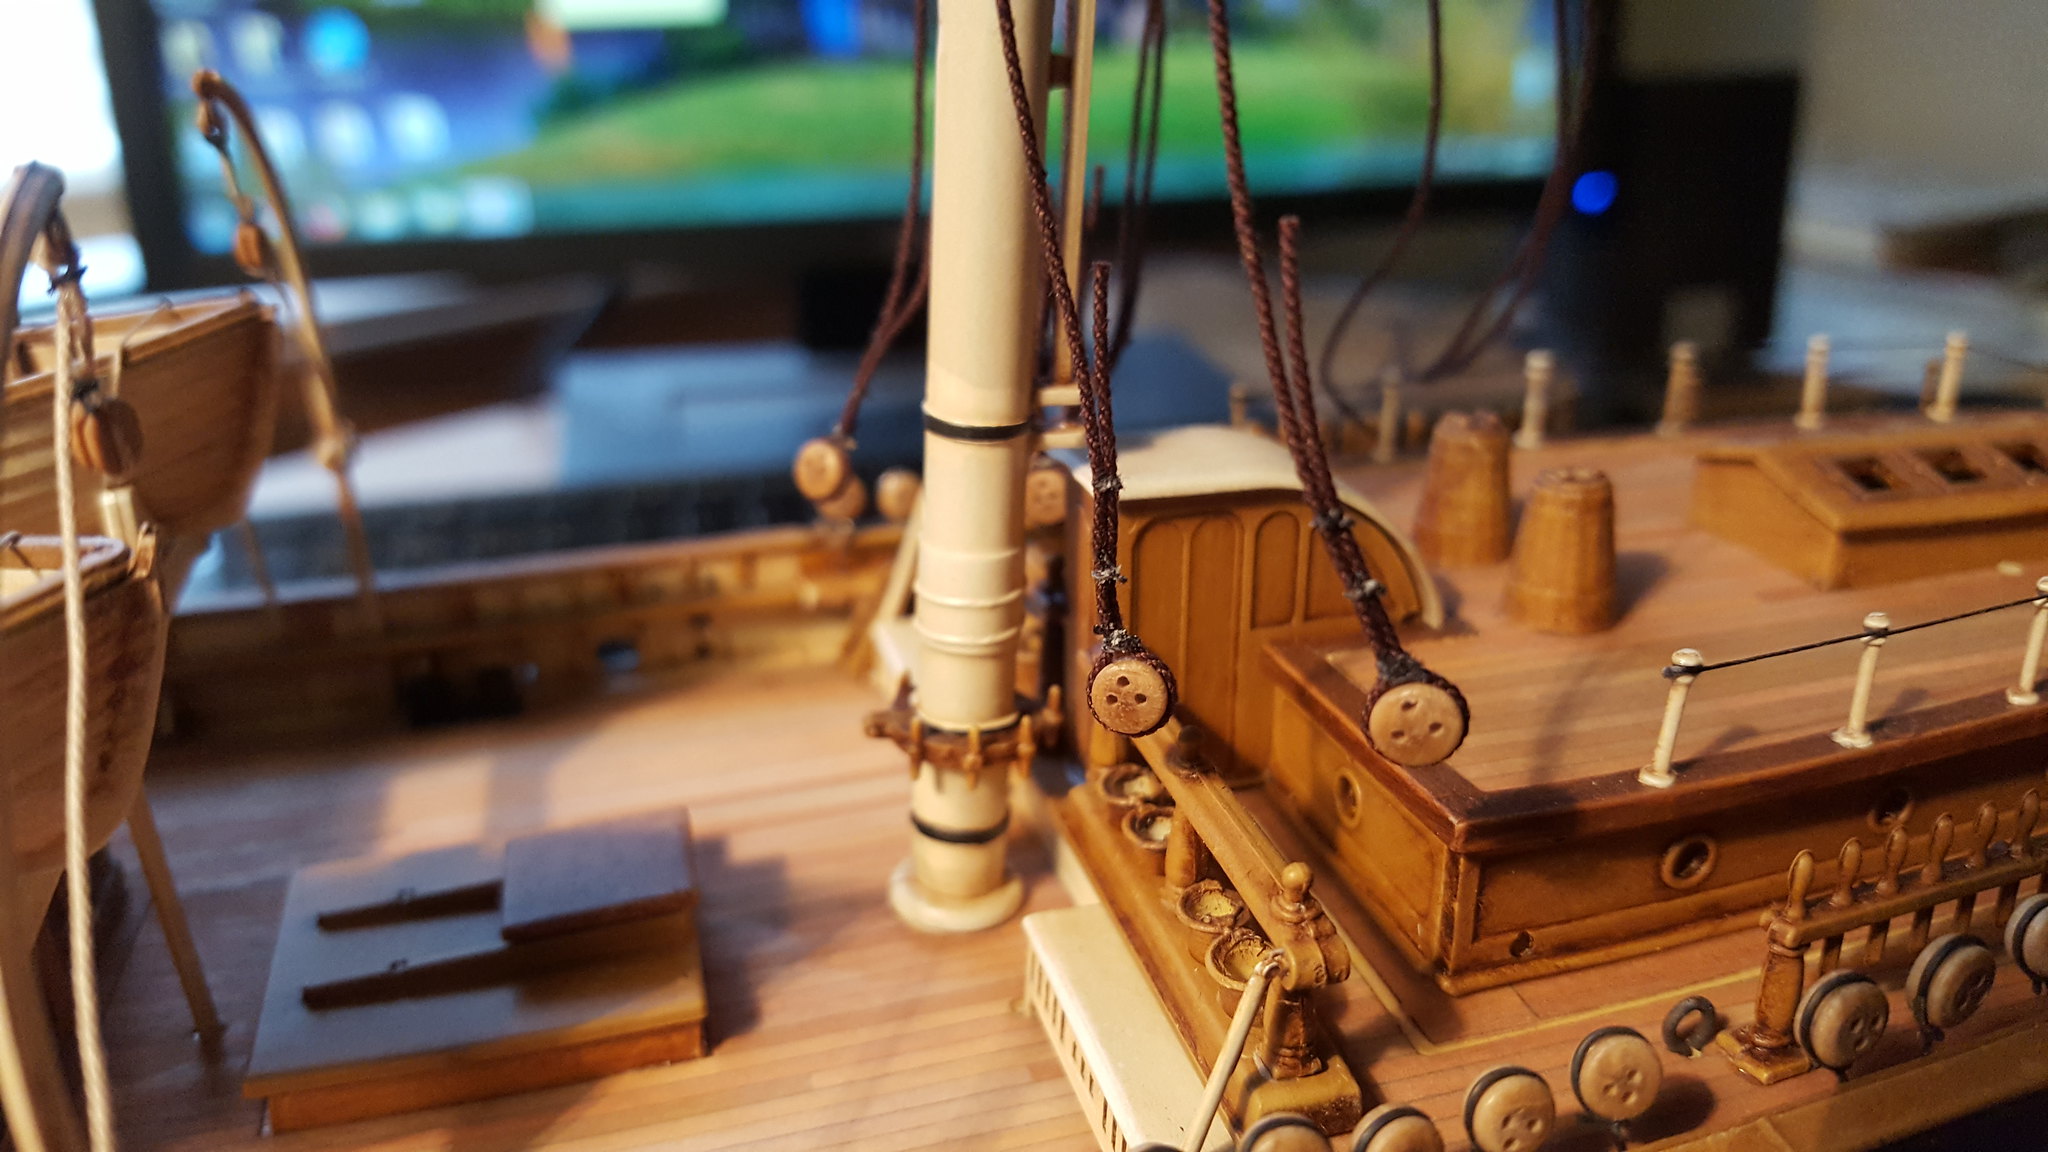
 20180930_095726 by Dave Kump, on Flickr

I used to tie each pair of shrouds and finish the lanyards as I went, but I found that as I worked aft, no matter how careful I was to keep the tension even, the foremost shrouds would end up slacking off slightly.  Now I run all the lanyards without tying them, and then I work from aft to fore as I add tension and hold them temporarily with alligator clips until I have the correct tension along the set (and it helps me keep the mast lined up).
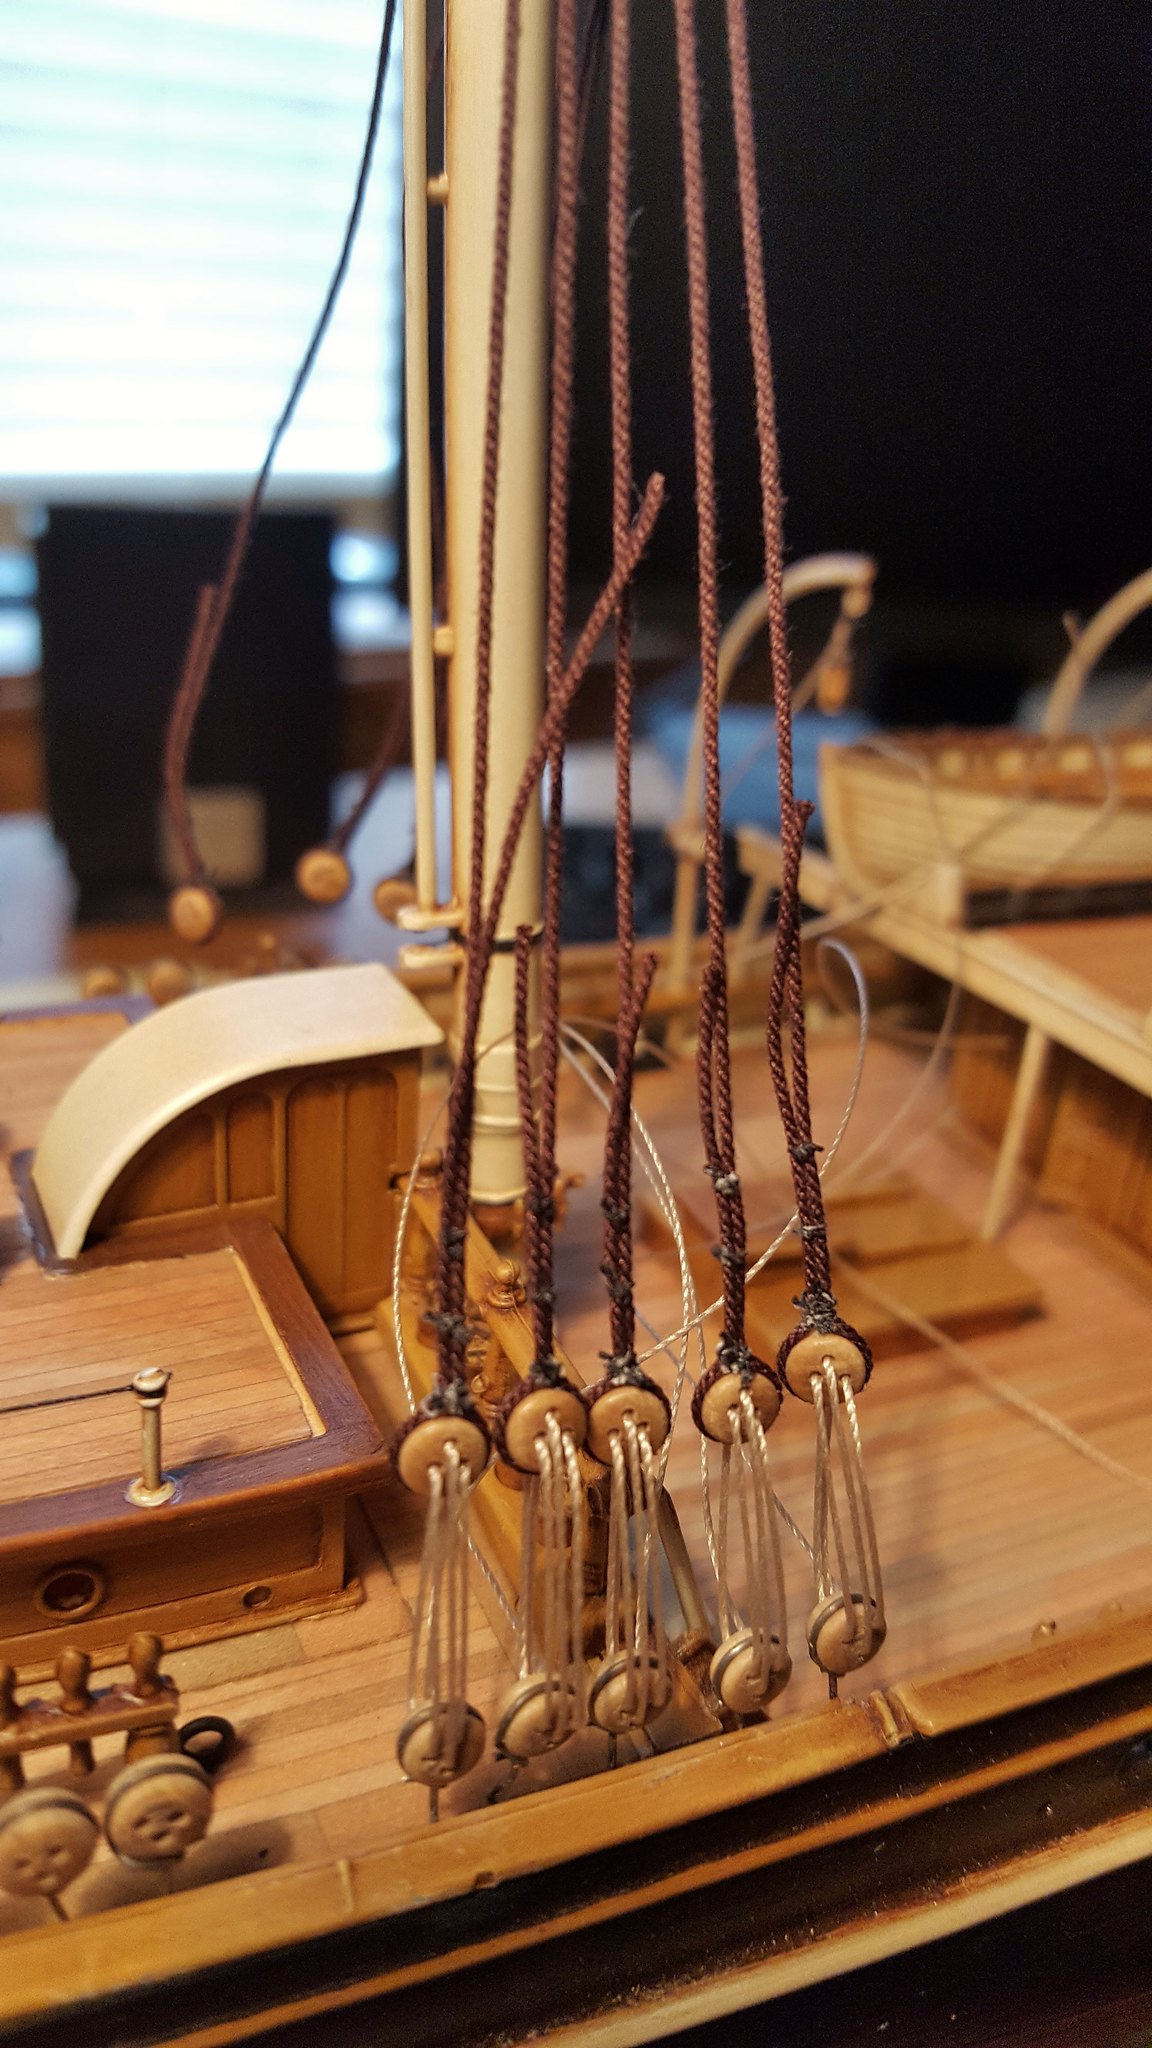
 20180930_103614 by Dave Kump, on Flickr

It's also worth noting that I put the stays on after the shrouds, so I always tie on temporary stays to keep the masts from being pulled back while I tension the shrouds.

Anyhow...the topmast and tgall shrouds will be quick and easy (only a few on each side), so I should have those done soon, then I can get all the Main and Mizzen stays on....there are a LOT of backstays on this model, each with deadeyes at the deck, so I'll be working on that for a while yet...but I'm a good deal into the standing rigging now...figure I'll be ready to start thinking about sails before too long....might go with a silkspan material, but I really like what Rob W does with paper...might need to bug him for some pointers.

Thanks again for reading!
Dave


        _~
     _~ )_)_~
     )_))_))_)
     _!__!__!_         
     (_D_P_K_)
   ~~~~~~~~~~~~~
    ~~~~~~~~~~~

Current Project:  Imai/ERTL Spanish Galleon #2

Recently Finished: Revell 1/96 Cutty Sark

Next Up:  ???


  • Member since
    July 2013
Posted by steve5 on Sunday, September 30, 2018 4:23 PM

very nice dave , now you show me LOL , will have to remember this , if I ever do another ship .


  • Member since
    December 2010
  • From: Salem, Oregon
Posted by 1943Mike on Sunday, September 30, 2018 10:21 PM

What Steve just said .. +1.

Mike

"Le temps est un grand maître, mais malheureusement, il tue tous ses élèves."

Hector Berlioz

  • Member since
    December 2012
Posted by rwiederrich on Monday, October 1, 2018 12:48 PM
Great job Dave...really. I'm glad you brought up the spacer for the lanyards. Yes, it is a common thing for discriminating modelers to use some form of a spacer..be it a single piece of wire(what I use) or with some apparatus of their own doing(like yours) . I generally rig shrouds in pairs...unless you have 5 shrouds...then you have an odd man out. What glue are you using for this process? Yes...I'll be more then happy to discuss my paper sail process, if you want to go that route. Much more to scale IMV. Looking good. Rob
  • Member since
    September 2012
Posted by GMorrison on Monday, October 1, 2018 1:13 PM

That's a better system than I've been able to come up with. Thanks for taking the time to make a visual toot.

I suppose in theory the spacing between the deadeyes gets longer as the angle of the shroud increases, but for all practical purposes that's not really an issue here.

That's the kind of stuff I get myself hung up on.

 Modeling is an excuse to buy books.


  • Member since
    May 2006
  • From: Chapin, South Carolina
Posted by Shipwreck on Monday, October 1, 2018 2:07 PM

Dave, I am really interested in your rigging process. It seems that you are rigging the shrouds before the standing and running rigging? I am asking because in a year I hope to be able to rig a 1:96 USS Condition (never been there)!

On the Bench:

Revell 1/96 USS Constitution - rigging

Revell 1/48 B-1B Lancer Prep and research

Trumpeter 1/350 USS Hornet CV-8 Prep and research


  • Member since
    March 2012
  • From: Marysville, WA
Posted by David_K on Monday, October 1, 2018 5:04 PM

Rob, I use CA to set the knots on my shrouds (and a lot of other rigging lines)...it dries fast, and strong.  The only problem really for me is that it sometimes discolors the line (especially light colored line for running rigging) where I apply it, so I do so sparingly.

I keep a toothpick and some little squares of shiny cardboard (like cereal box material)...when I need to apply some CA, I put a few drops on the cardboard and apply it with a toothpick.


GM, I have the fortunate position of not begin too hung up on the little stuff lol...I love the work I've seen of yours, your attention to details is incredible!

Shipwreck, I install the shrouds (as part of the standing rigging) first, because they are the first lines piled onto the foot of the mast.  I install them, and then move on to the stays, since they are piled above the shrouds...this way, I can keep the loops stacked up correctly and keep everything tight as I work my way up...I don't know if my method is different from other people?

Thanks!

Dave

        _~
     _~ )_)_~
     )_))_))_)
     _!__!__!_         
     (_D_P_K_)
   ~~~~~~~~~~~~~
    ~~~~~~~~~~~

Current Project:  Imai/ERTL Spanish Galleon #2

Recently Finished: Revell 1/96 Cutty Sark

Next Up:  ???


  • Member since
    April 2016
  • From: Russia, St.Peterburg
Posted by kirill4 on Monday, October 1, 2018 11:26 PM

Good day Dave,

Your model looks very good! and will look better and better with all this rigging growing up....

Read your last posts with great interest,I have plan to assemble same kit someday in the future :)))... the only thing I doubt - your choice to leave brass chains unblackened( in my opinion ,which is not realistic and "contradict"-"shadowing",if I could say that,  with gilded scrolworks, ....but I understood very well that You like how it looks ! :)))

Wish You all the best and Good Progress in rigging ( part of modeling I like most of all :)))

Kirill

  • Member since
    December 2012
Posted by rwiederrich on Wednesday, October 3, 2018 1:29 PM

I wanted to say I think your build is coming along extremely nicely Dave and wanted to encourage you as you work out the rigging.  I know you focus on detailing the model with a superior paint technique and such...but I also encourage you to detail her in her rigging as well....do your do-dilligence when it comes to studying of her rigging...it will make the model that more impressive...and will cause your own knowledge of clipper ship rigging to grow.

I have been working on my scratch build 1/128 Great Republic and I finished up all the top shrouds for her masts.  I'm focusing on working up the paper sails currently and how to work out all the rigging accociated with them.

Here is an image of her currently.

JOIN OUR COMMUNITY!

Our community is FREE to join. To participate you must either login or register for an account.

SEARCH FORUMS
FREE NEWSLETTER
By signing up you may also receive reader surveys and occasional special offers. We do not sell, rent or trade our email lists. View our Privacy Policy.