SEARCH FINESCALE.COM

Enter keywords or a search phrase below:

Revell Pro-Modeler 1/32 Junkers Ju 88A-1 Bomber - "FINAL REVEAL!!" (3.18.16)

7336 views
94 replies
1 rating 2 rating 3 rating 4 rating 5 rating
  • Member since
    April 2015
  • From: New Hampshire, USA
Posted by UKguyInUSA on Saturday, February 20, 2016 10:40 PM

allan

The details on this kit are amazing!  And you put it together really well!


Love the flare gun. :)


Thanks Allan, greatly appreciated!


Cheers Smile

Martin

  • Member since
    April 2015
  • From: New Hampshire, USA
Posted by UKguyInUSA on Saturday, February 20, 2016 10:41 PM

BrandonK

BK


Ha ha! Thanks Brandon, totally appreciated, dude!


Cheers Smile

Martin

  • Member since
    April 2015
  • From: New Hampshire, USA
Posted by UKguyInUSA on Saturday, February 20, 2016 10:42 PM

lawdog114
Absolutely stunning.


Thanks mate, greatly apprciated!


Cheers Smile

Martin

  • Member since
    April 2015
  • From: New Hampshire, USA
Posted by UKguyInUSA on Saturday, February 20, 2016 10:45 PM

Revell Pro-Modeler 1/32 Junkers Ju 88A-1 Bomber "Build Update #3" (2.20.16)


Hello Chaps,


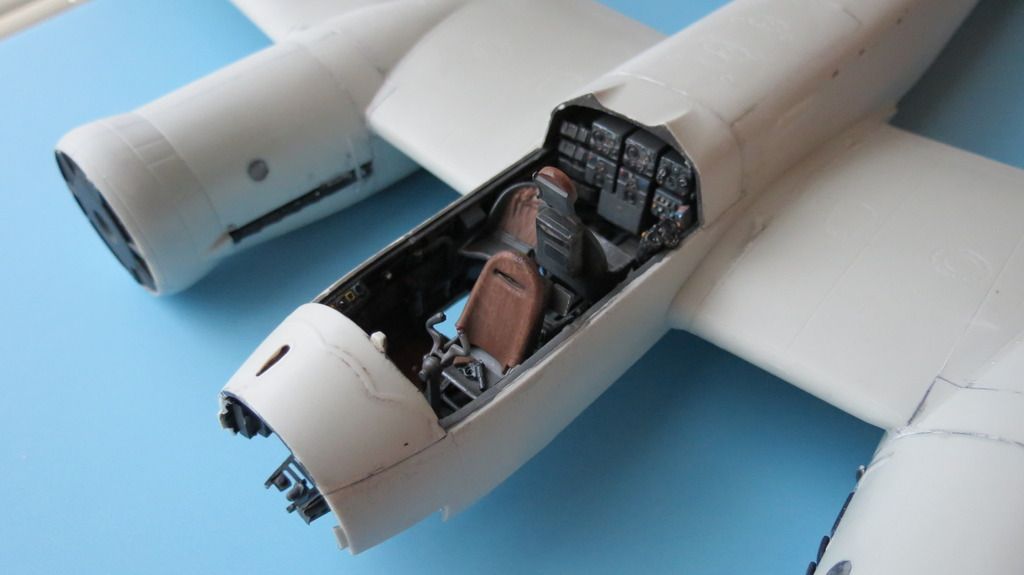
It's been 11 days since my last update, but I did manage to get more done during that time. At my last update, the cockpit had been assembled into the fuselage halves, and so now, it was time to assemble the rest of the main frame of the aircraft.


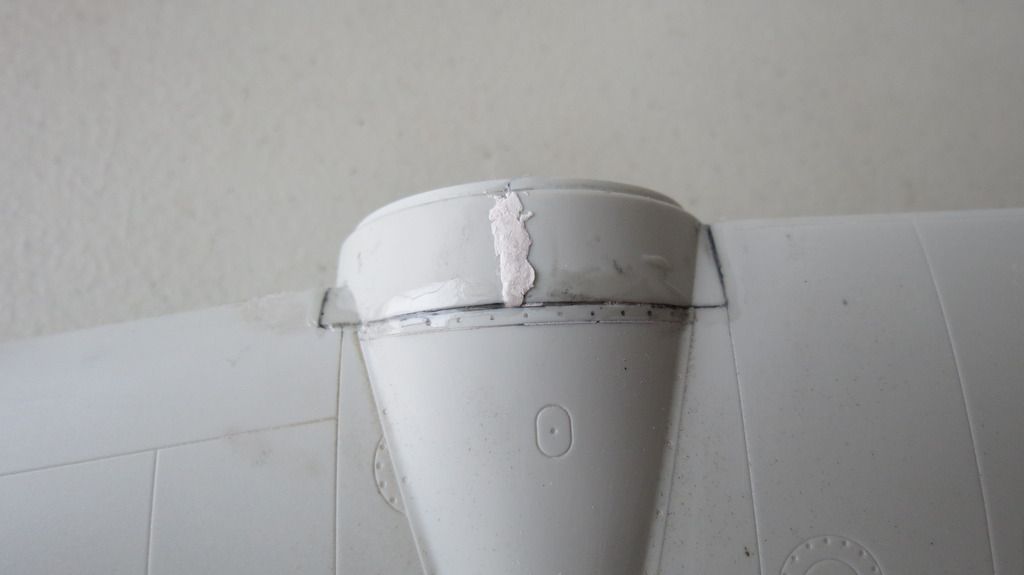
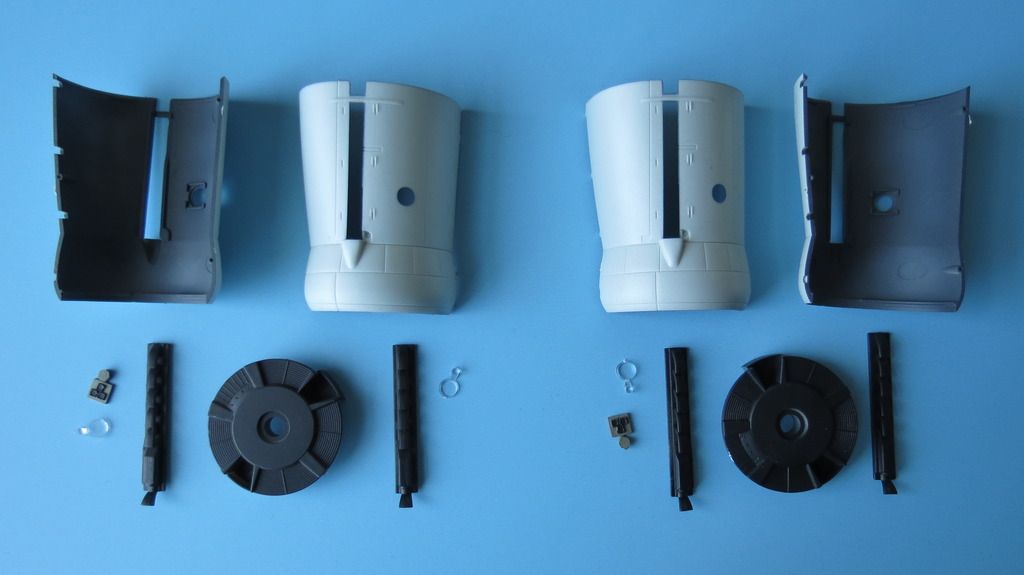
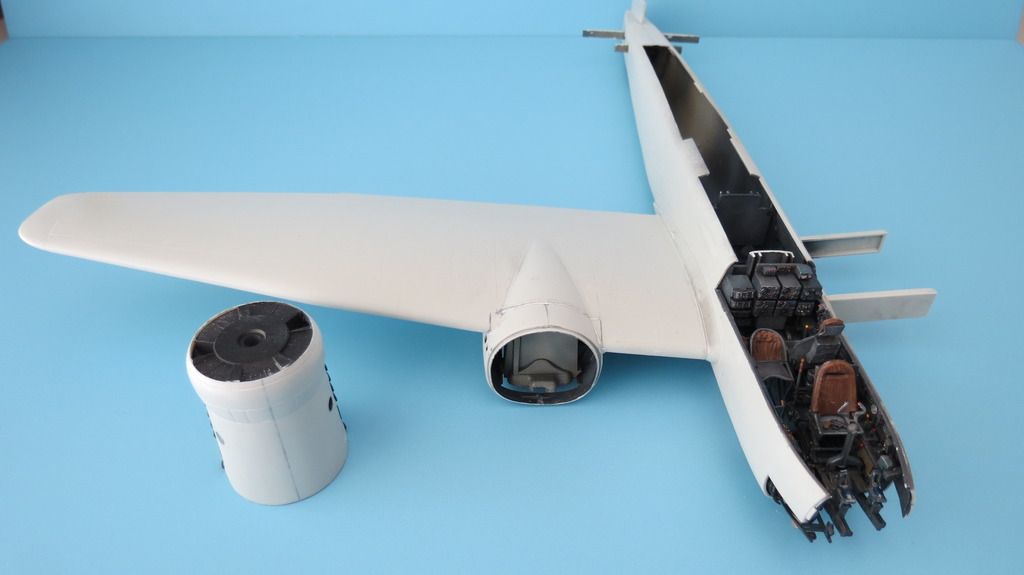
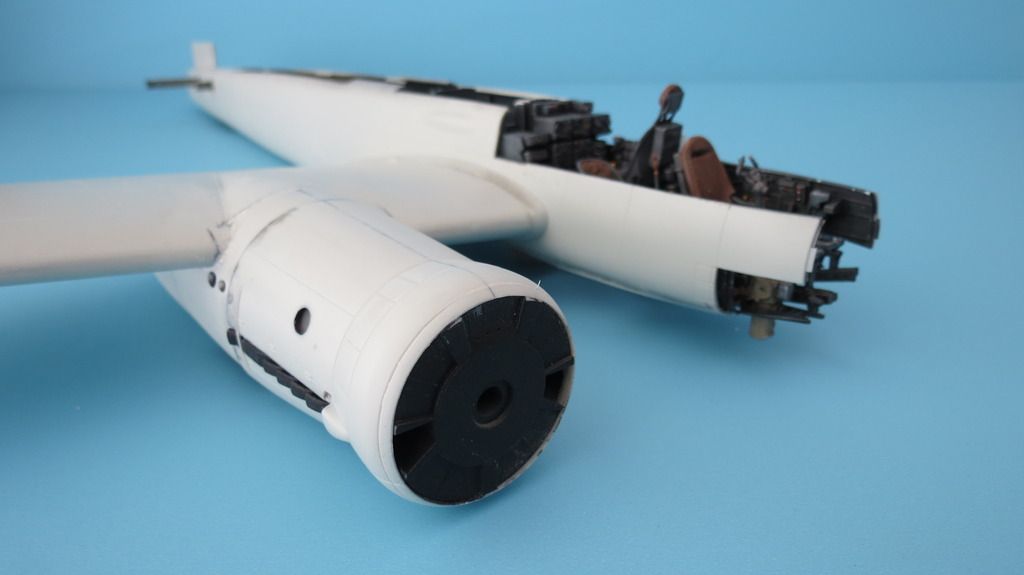
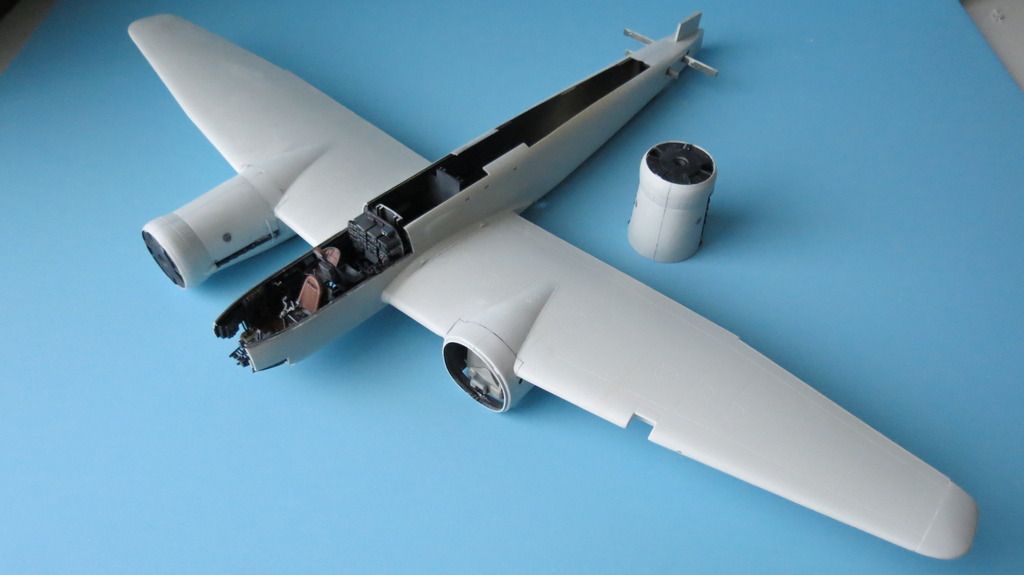
I started off by assembling the undercarriage/engine housing components then gluing those onto their corresponding wings. First the portside followed by the starboard side...


IMG_5097_zpsbz7nqwid.jpg


IMG_5098_zpsdup5wpmf.jpg


IMG_5099_zps2rs6irtm.jpg


IMG_5100_zpsojxodbk5.jpg


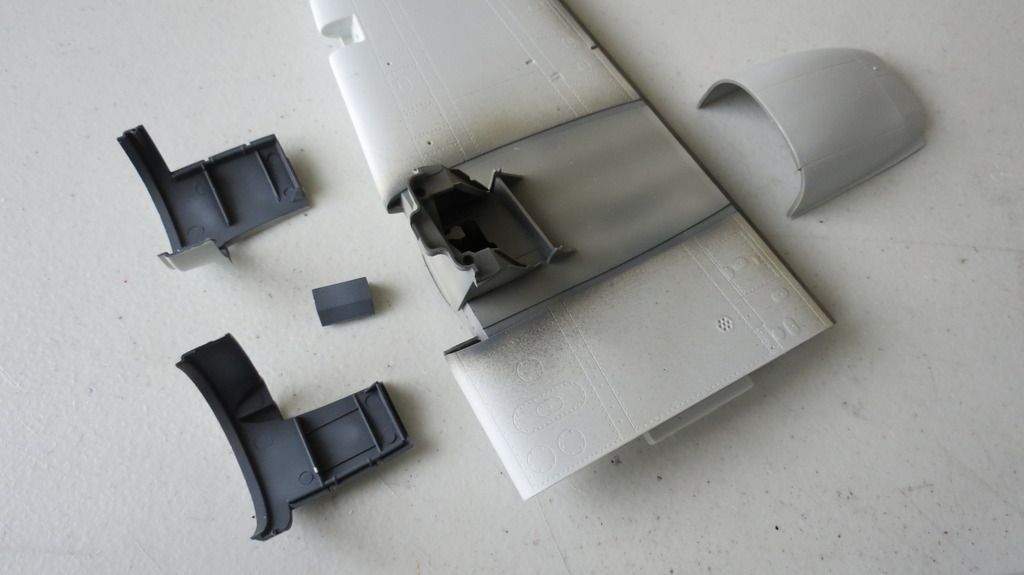
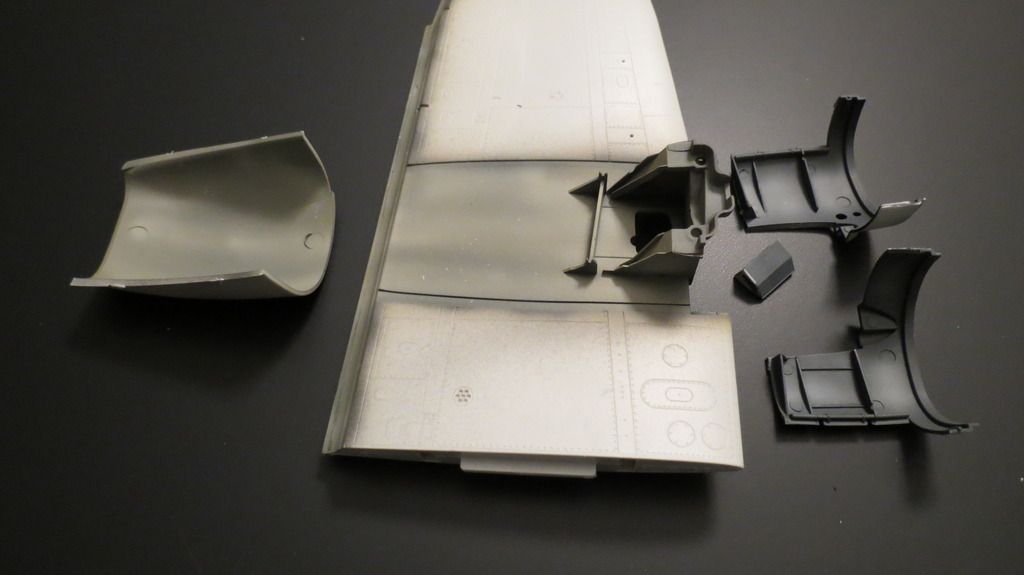
But, after dry-fitting a few times to ensure I was assembling the correct parts and joining them to their corresponding wings, I had substantial gaps where the rear component joined the front of the undercarriage housing assembly. I therefore filled the gaps and smoothed them down later when the filler had set...


IMG_5102_zpsk2xfahr0.jpg


IMG_5213_zpsuksouu4l.jpg


IMG_5217_zpsidobgxfe.jpg


IMG_5218_zpse4ilbdas.jpg


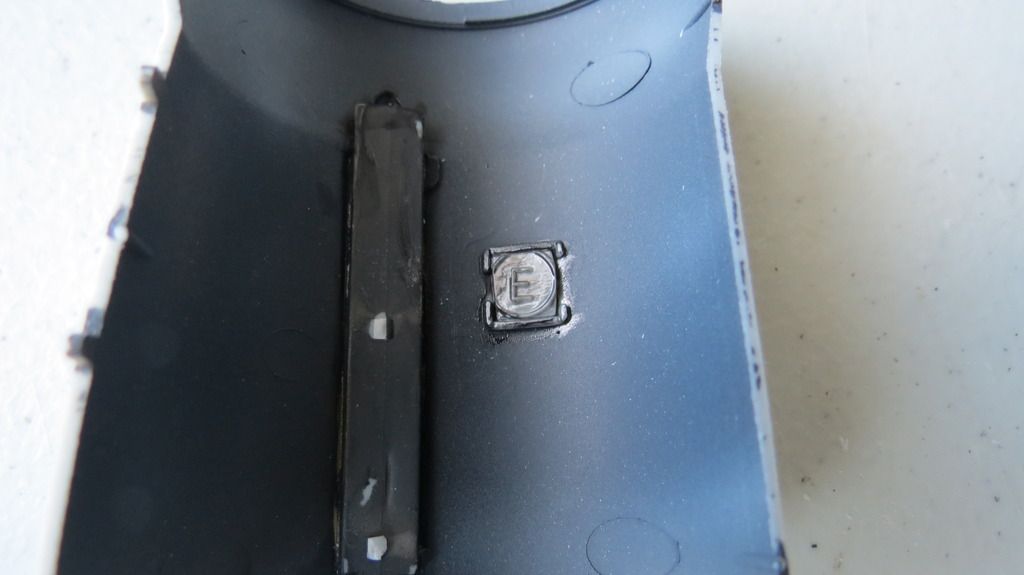
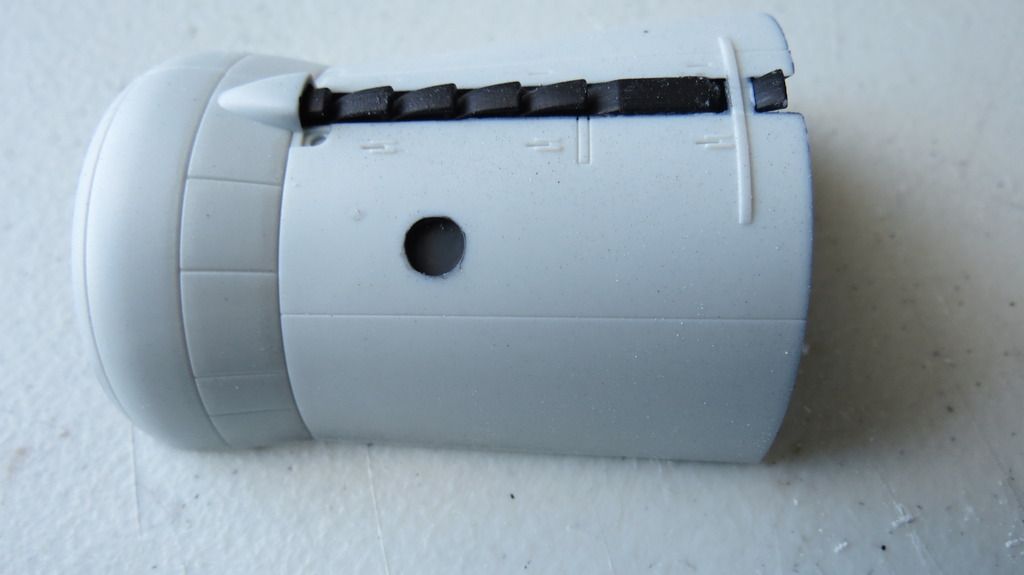
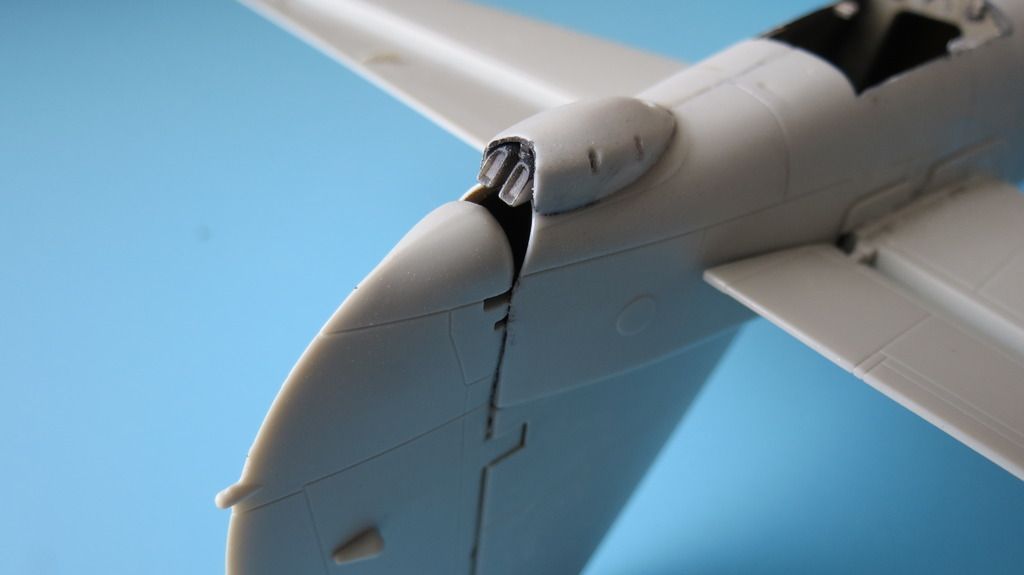
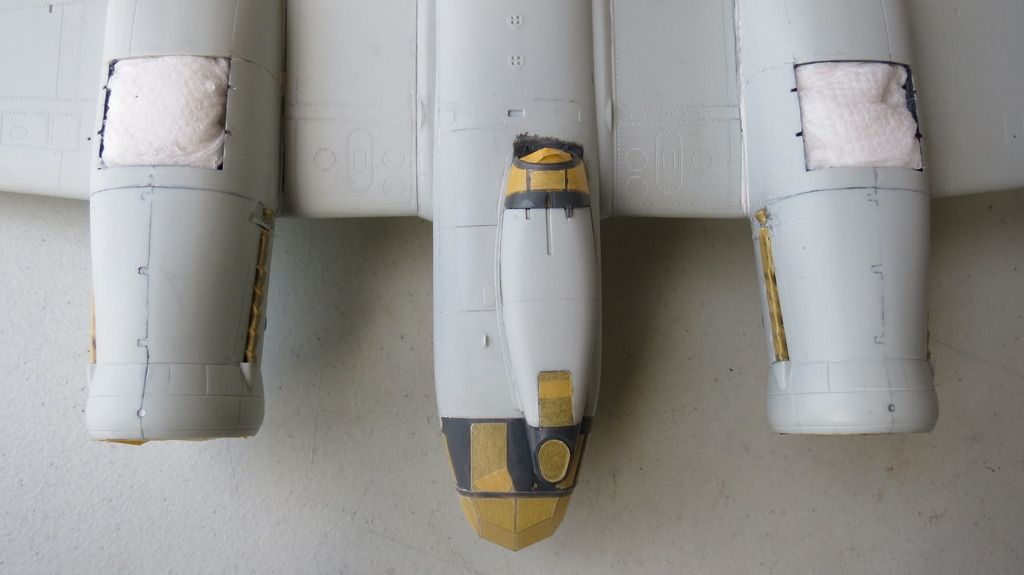
Next, I assembled the engine housing components and made them ready for assembling onto the wings. One of the engine indicator viewing window lenses was missing off the sprue, so, I cut a square tab marker from a sprue and glued that onto the inside of the engine housing, so that later on, I can fill it with pva glue to create a lens...


IMG_5107_zpsgjwjruc9.jpg


IMG_5108_zpst8hgun4n.jpg


IMG_5109_zpsodus10u0.jpg


IMG_5110_zpszk1ofer6.jpg


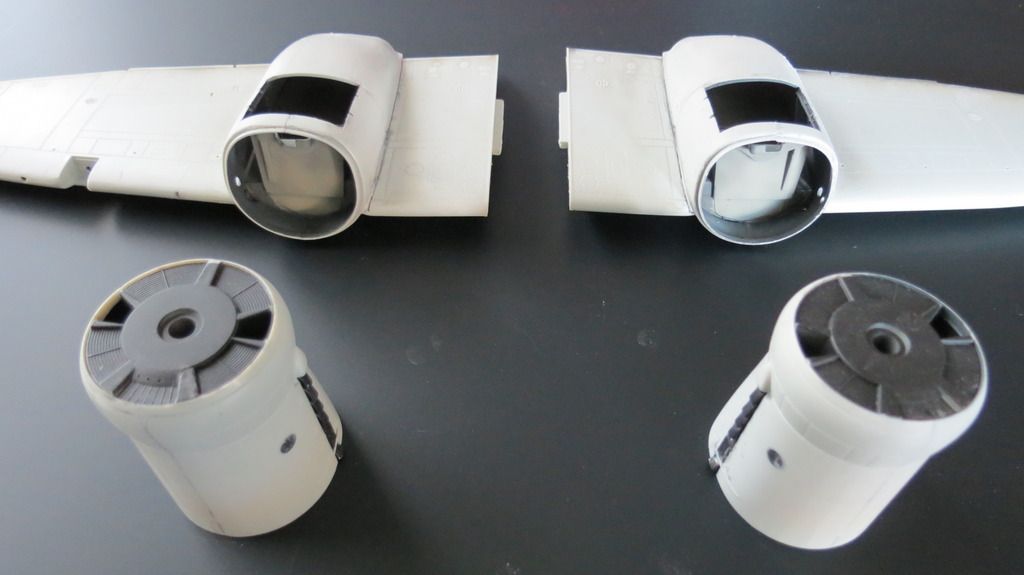
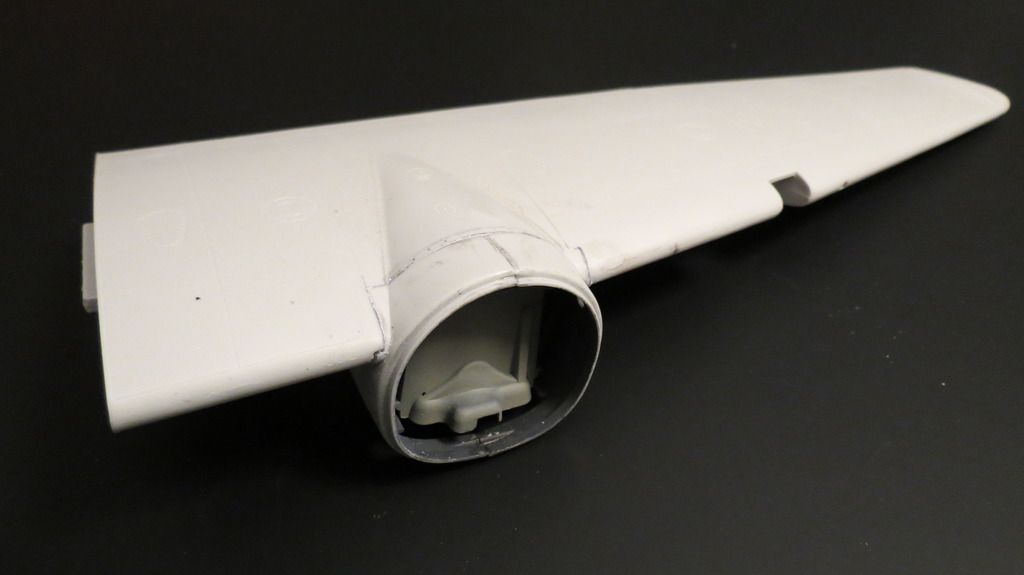
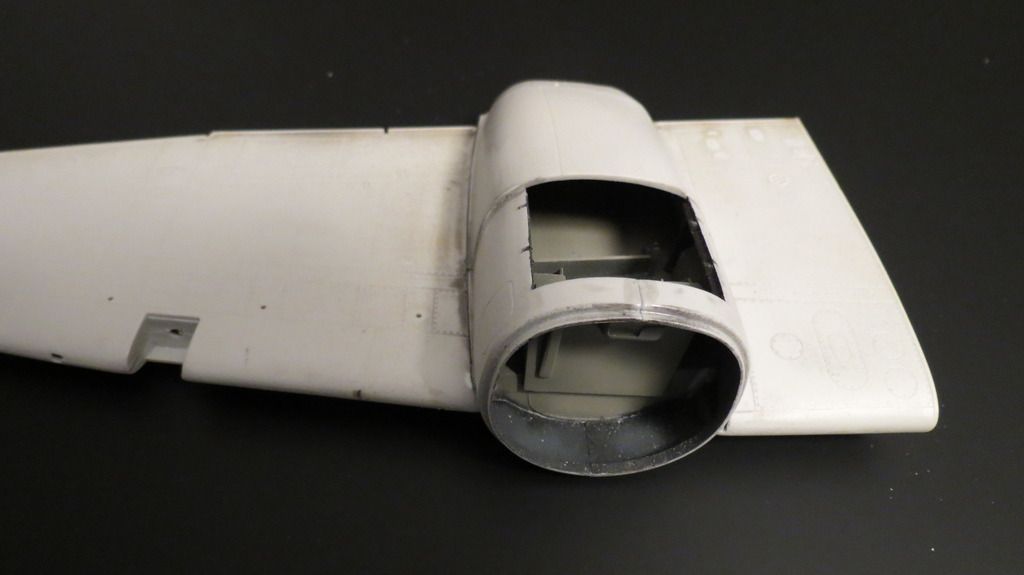
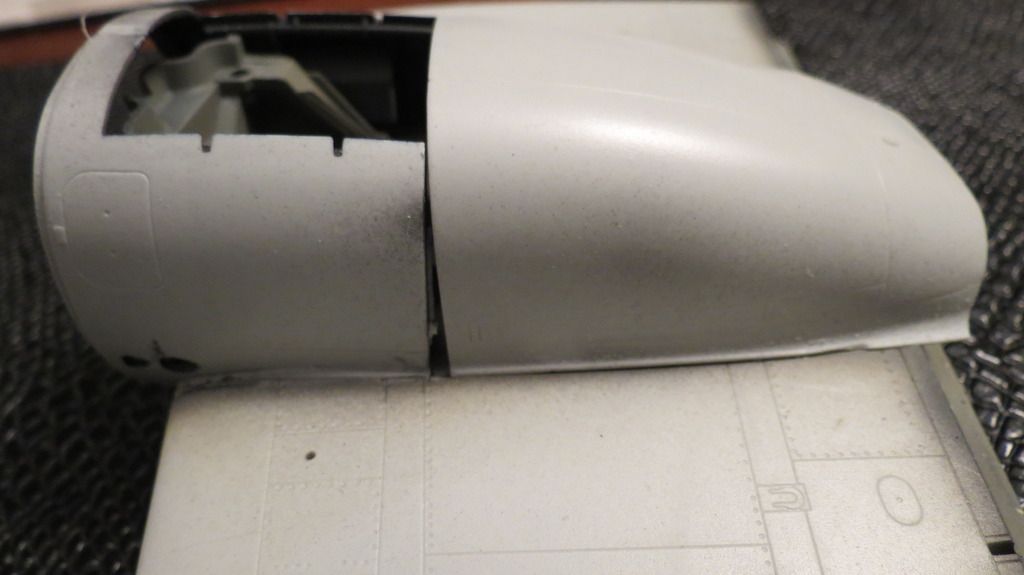
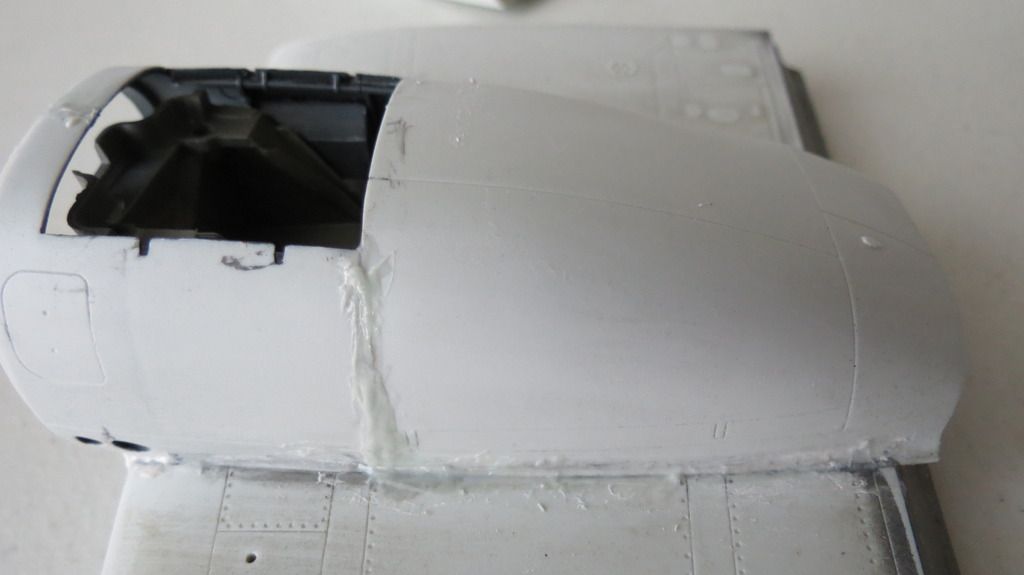
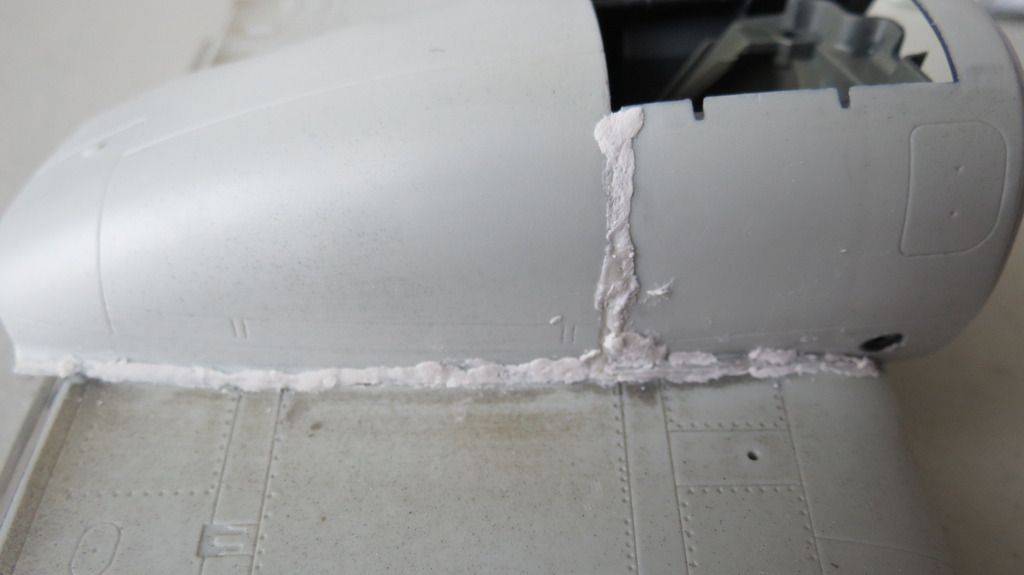
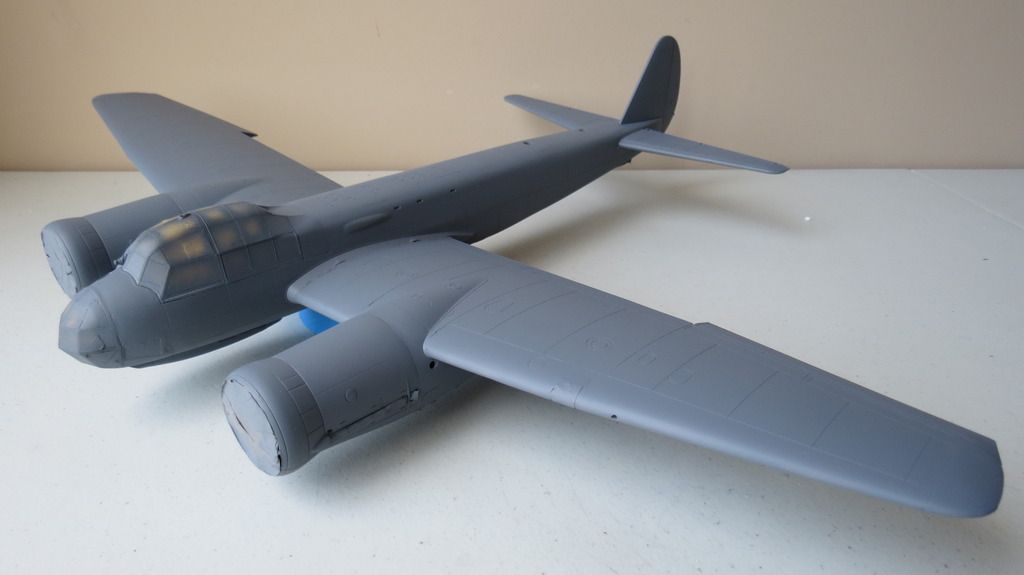
I then moved onto assembling the wings to the fuselage, starting with the starboard side, including fitting the engine housing. In the instructions, it indicates that the upper fuselage panel is to be put into place before attaching the wings, but, I left it off so that I could insert fingers inside to press the inside fuselage against the wing to fuselage joint and holding until set. This helped close any minor gap that was present. I used CA glue to give a fast acting and stronger bond...


IMG_5441_zpsyhfzvrdo.jpg


IMG_5442_zpsqymmjqym.jpg


IMG_5444_zpsuxjvmvp7.jpg


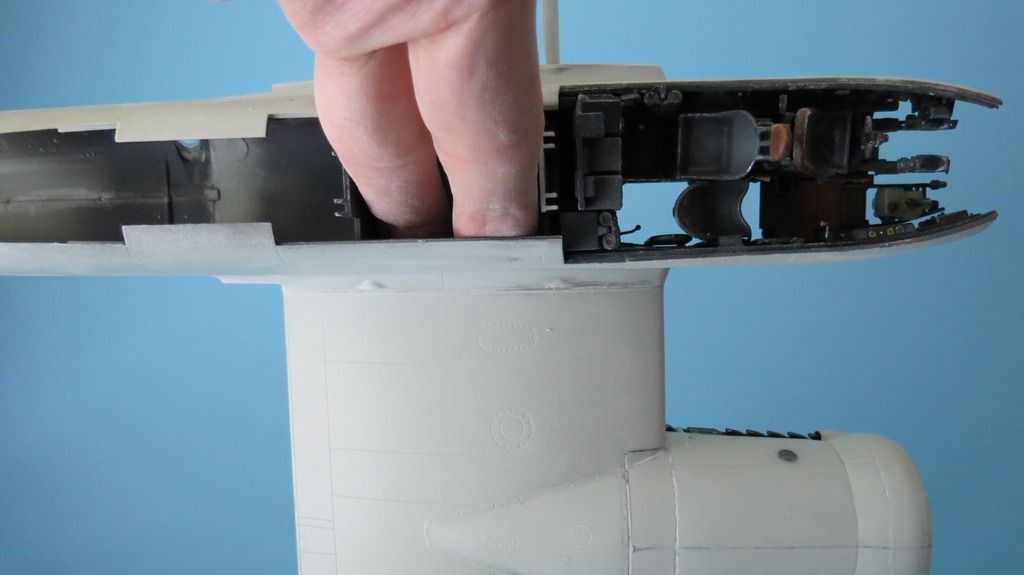
I then moved onto fitting the portside wing and engine housing, followed by fitting the upper fuselage panel...


IMG_5443_zpsu3oei5df.jpg


IMG_5445_zpsydkzfsra.jpg


IMG_5446_zps7zltwtn4.jpg


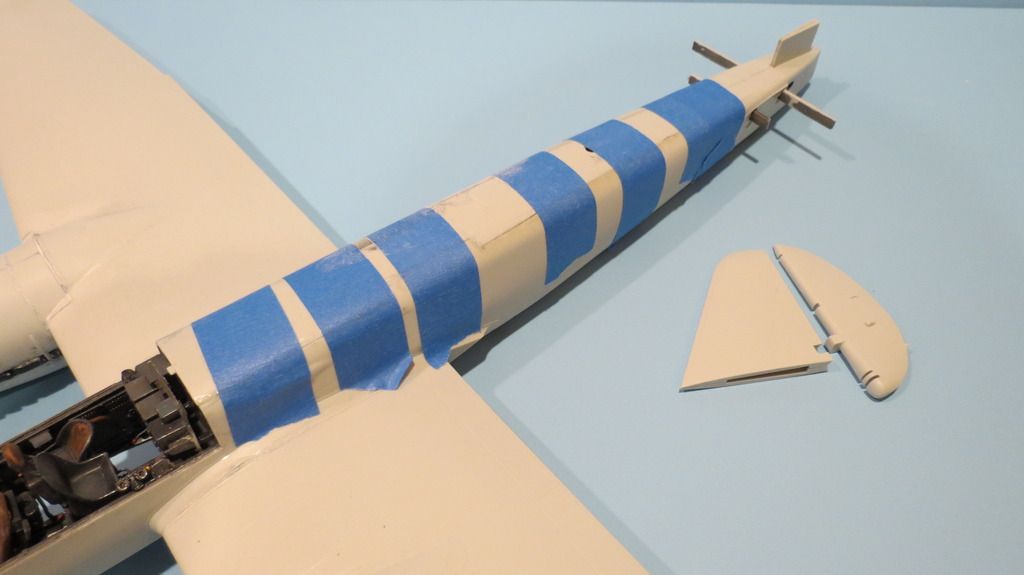
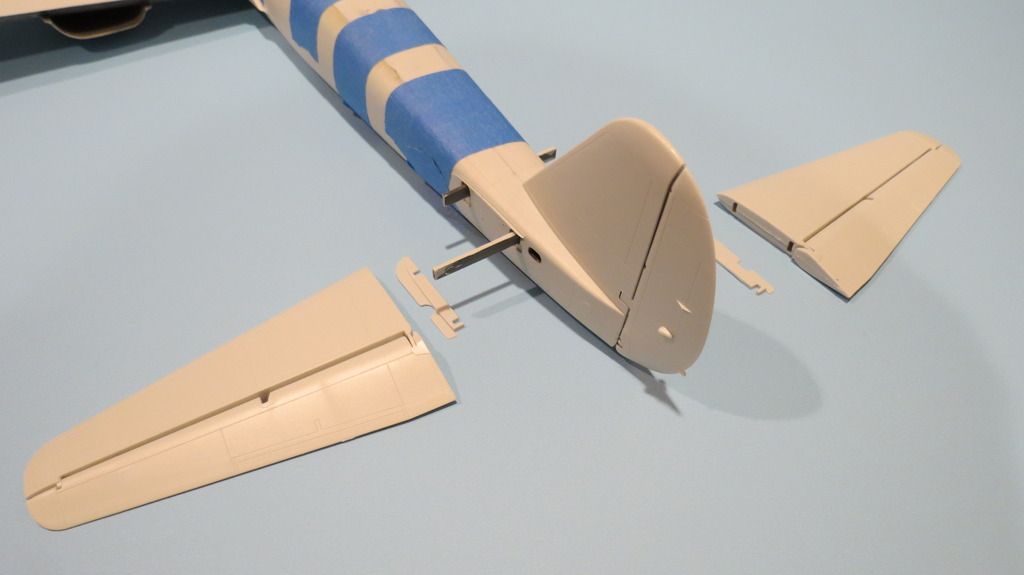
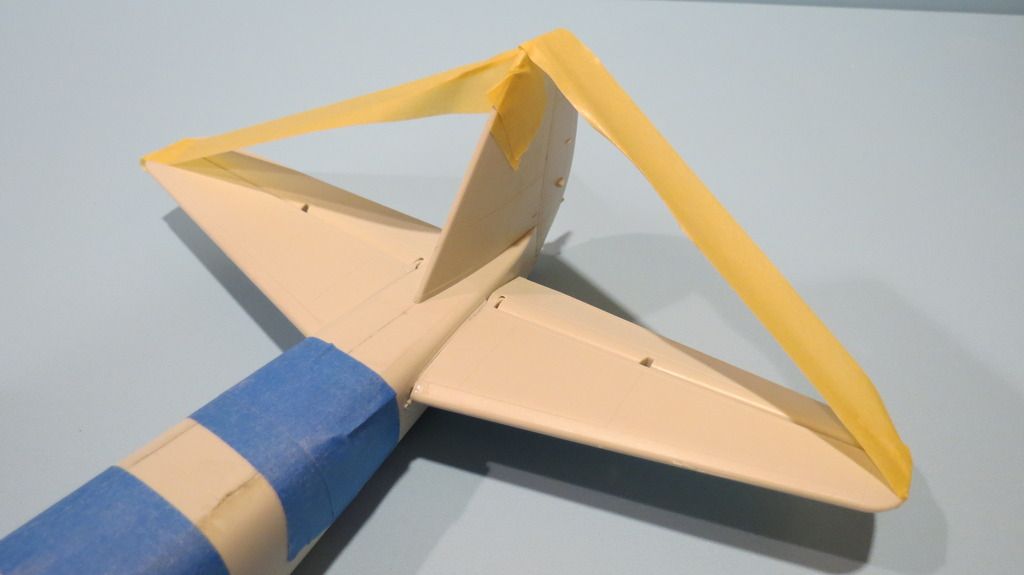
The upper fuselage panel was taped into place, and whilst that was setting, I fitted the vertical stabilizer, rudder, horizontal stabilizers and elevators. I taped the horizontal stabilizers to set their position and left them taped until the glue had set solid....


IMG_5447_zpsine6elbb.jpg


IMG_5448_zps9dakjffr.jpg


IMG_5449_zpstzalj6k4.jpg


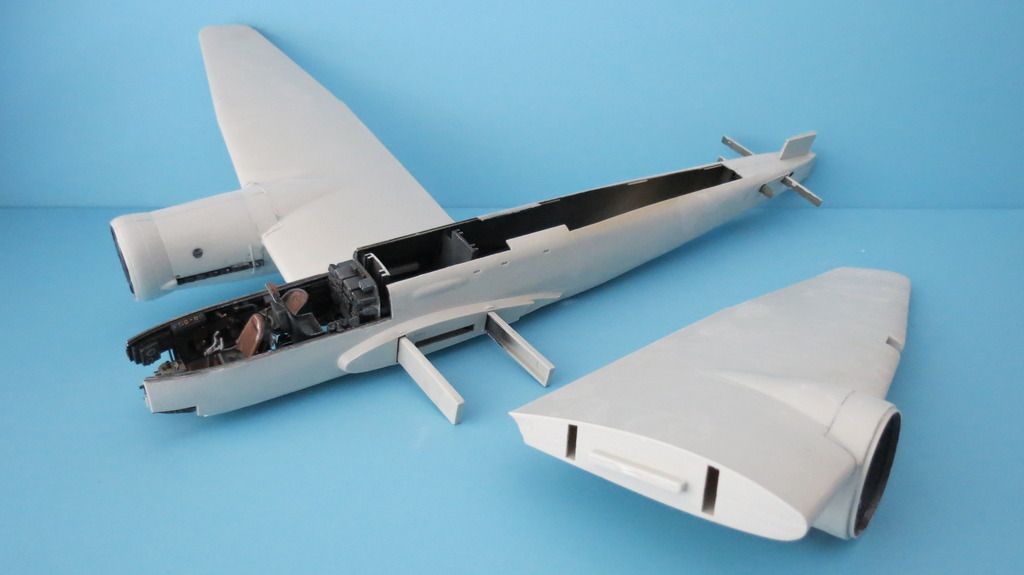
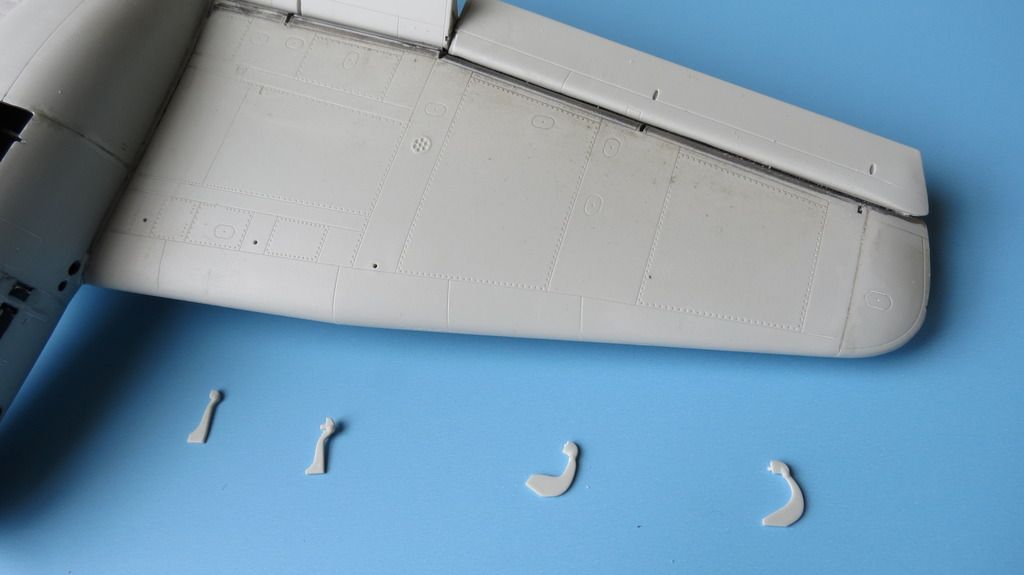
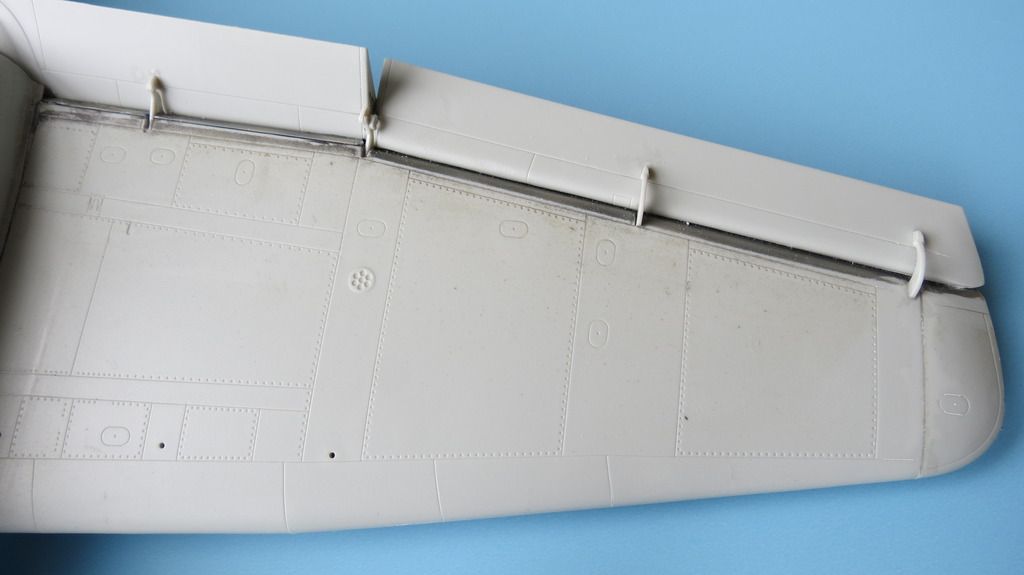
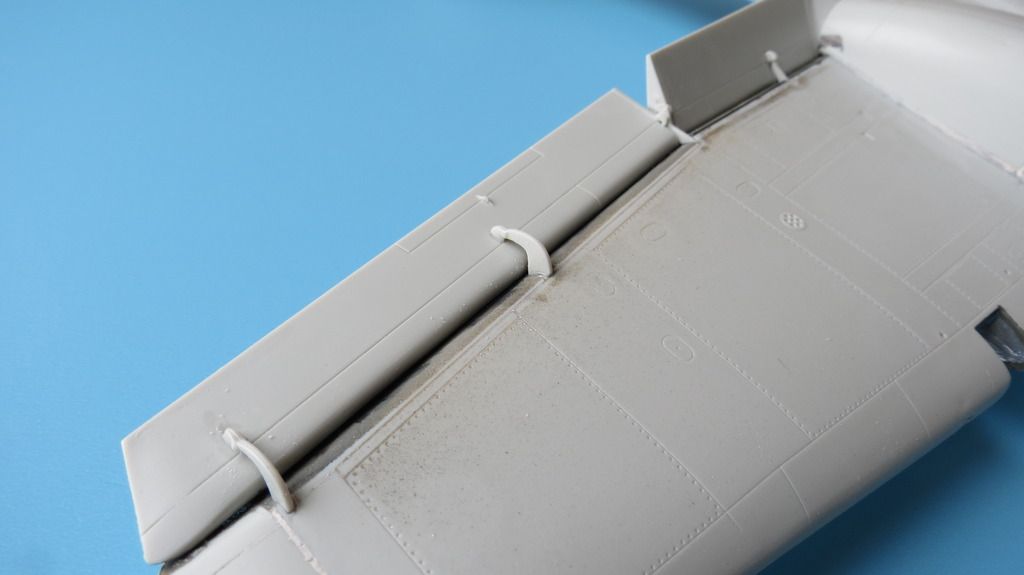
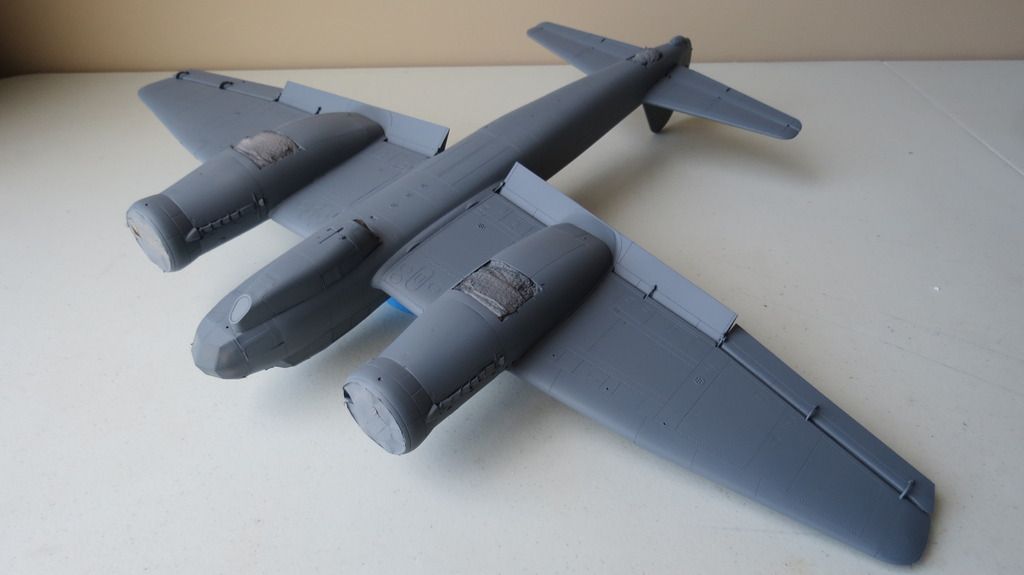
To complete the wings, I needed to add the flaps and ailerons and their actuators. I started with the starboard side, fitting the spacers for the flap first, fitting the flap and aileron. I positioned the flap down, although the instructions indicate them to be horizontal, or retracted. After the starboard side was done, I completed the portside wing...


IMG_5453_zps6mqsv0n0.jpg


IMG_5455_zpsmo7ju3xb.jpg


IMG_5457_zpsjc831a9w.jpg


IMG_5460_zps44aglwrp.jpg


IMG_5454_zps1a9mvl39.jpg


IMG_5459_zpsnm6xqihz.jpg


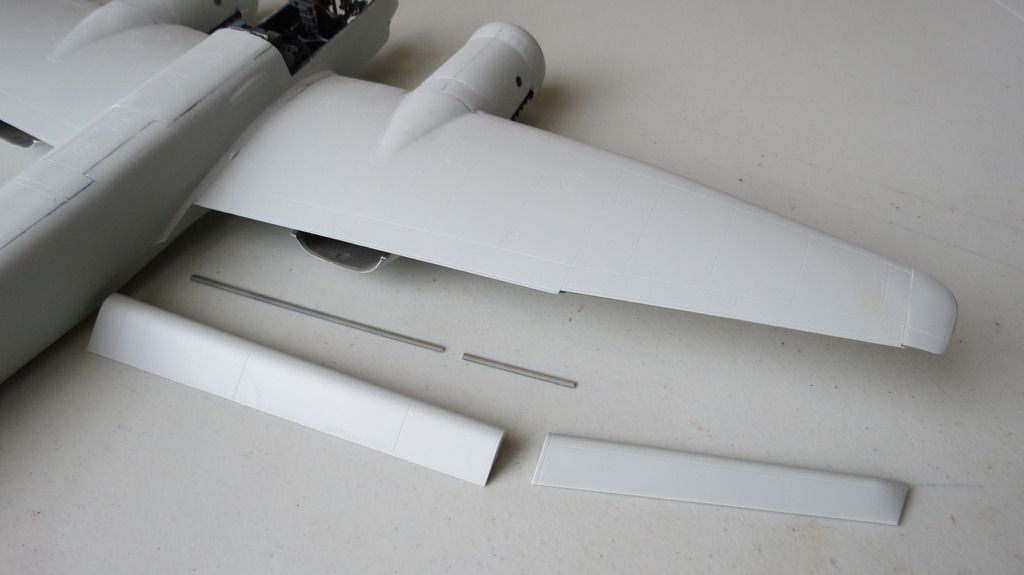
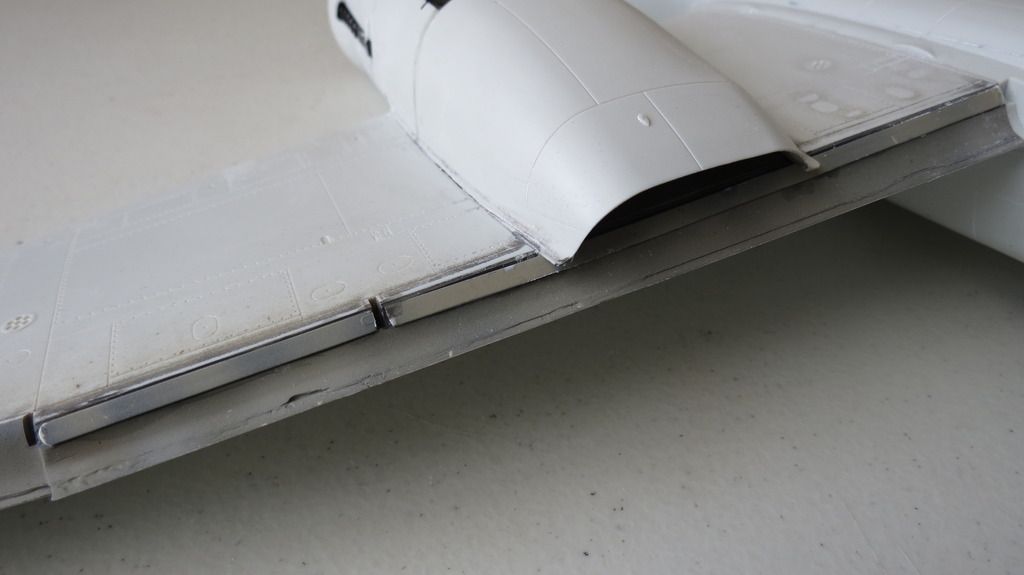
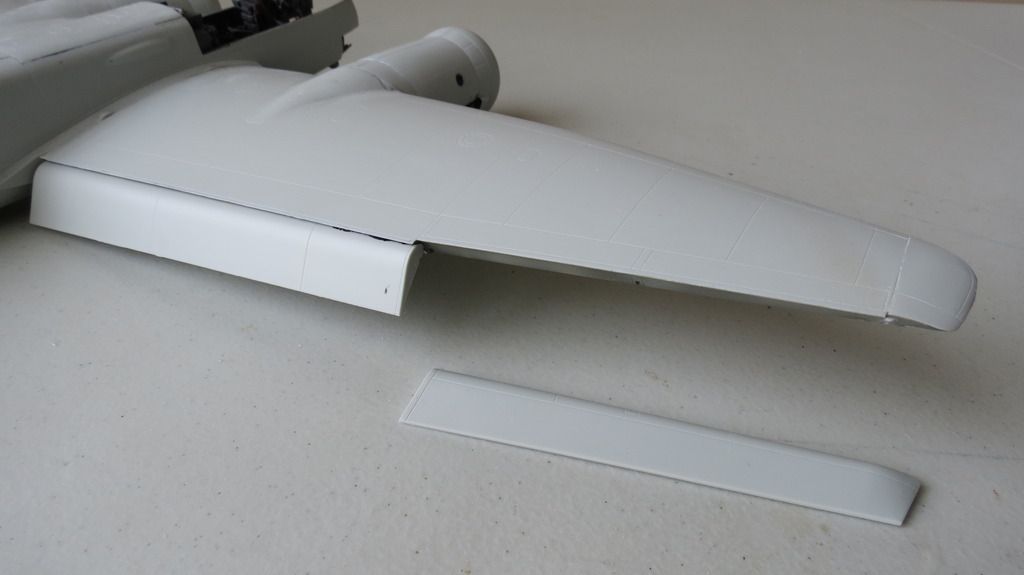
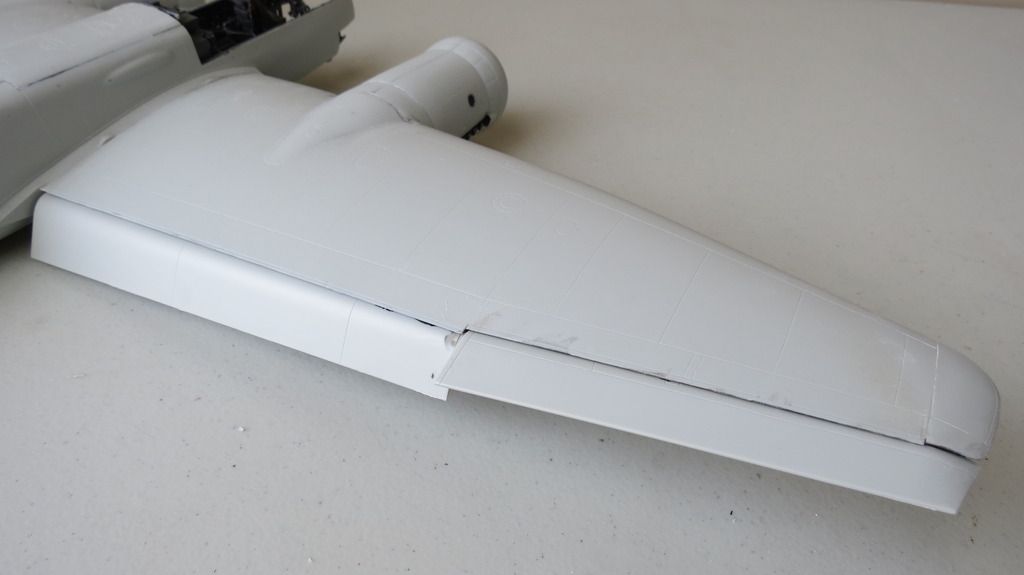
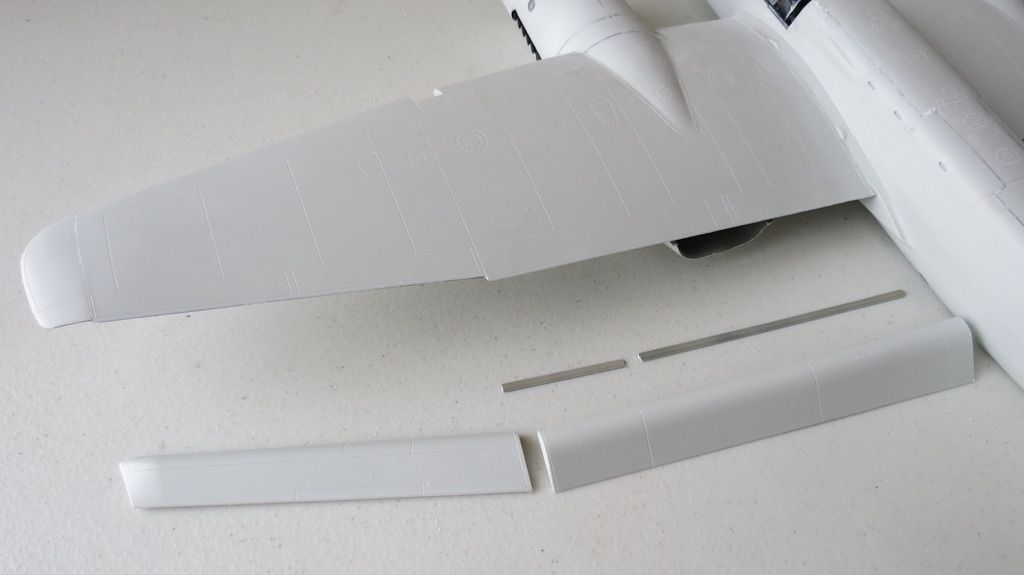
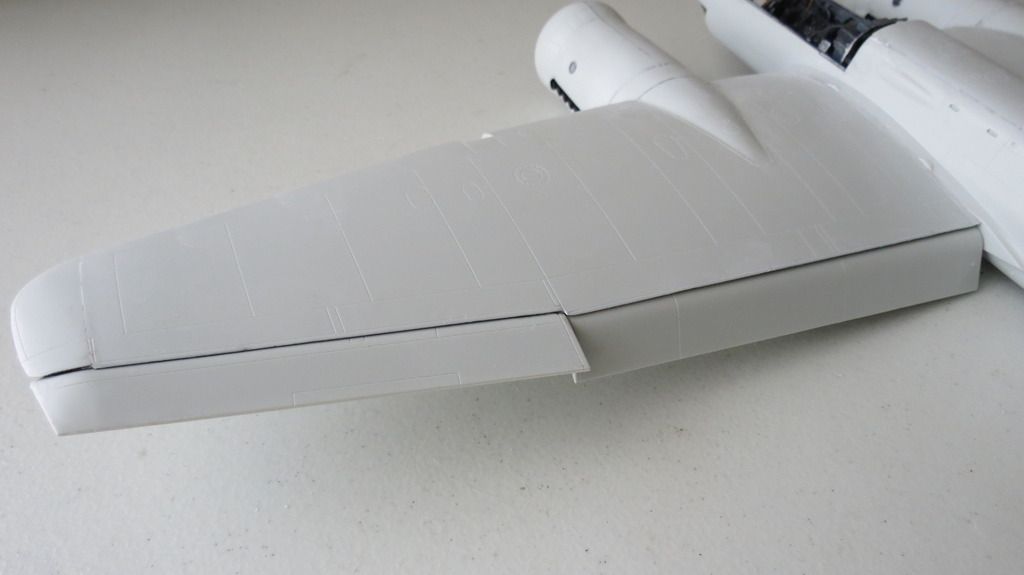
Because I modeled the flaps down, I then had to modify the length of the flap actuators to fit accordingly...


IMG_5502_zpso3honund.jpg


IMG_5503_zpsmn0e03cy.jpg


IMG_5499_zpsldygqia2.jpg


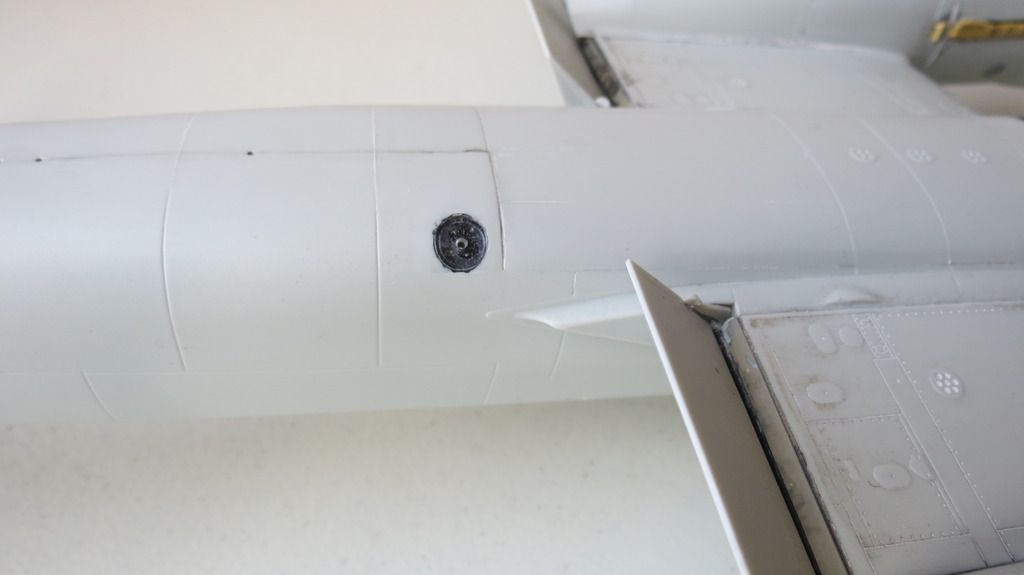
Next, I got the two components that make up the "fuel dump" assembly and fitted them to the underside of the tail end...


IMG_5462_zpsiidcpqjd.jpg


IMG_5463_zpsbtsfva4b.jpg


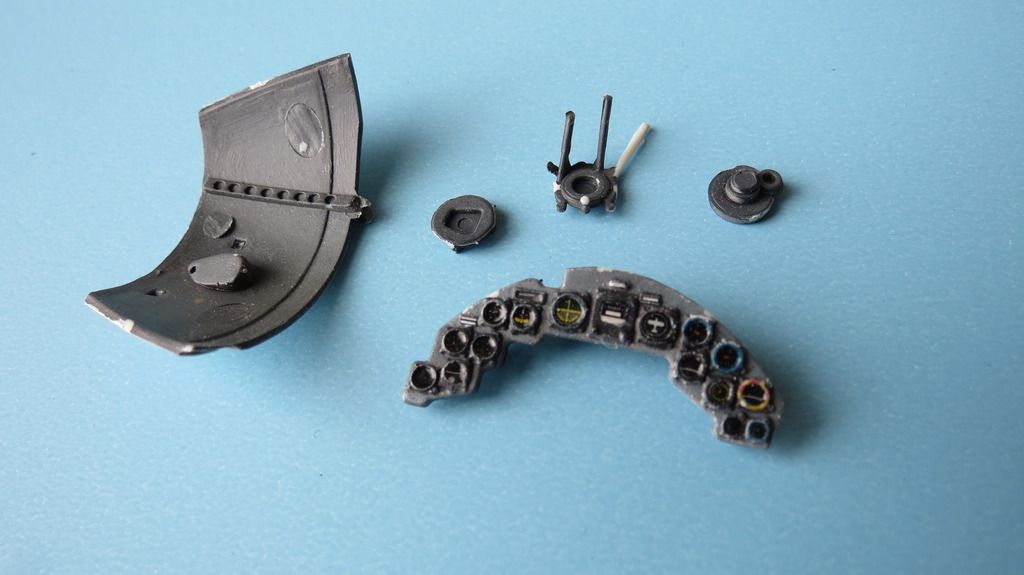
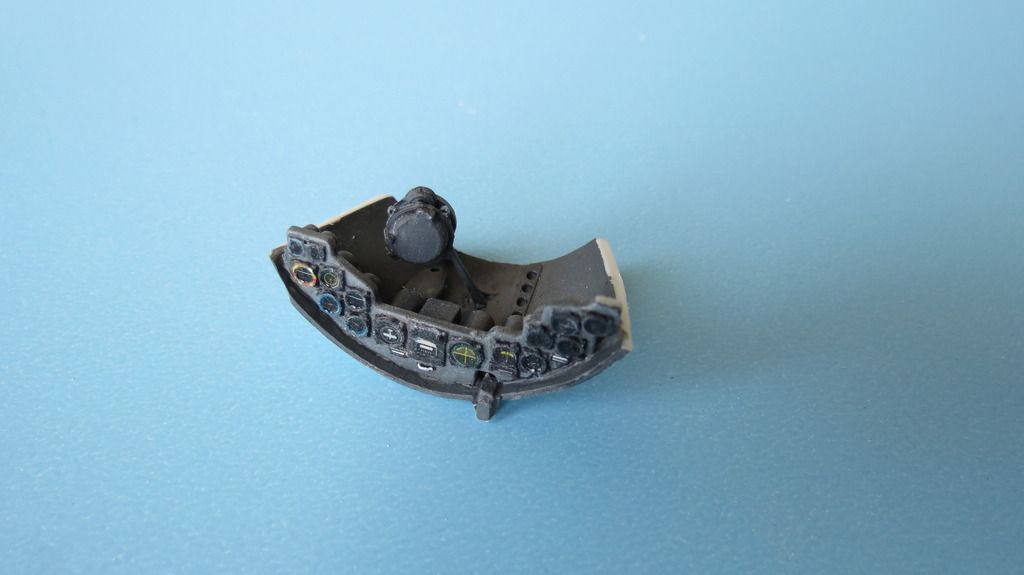
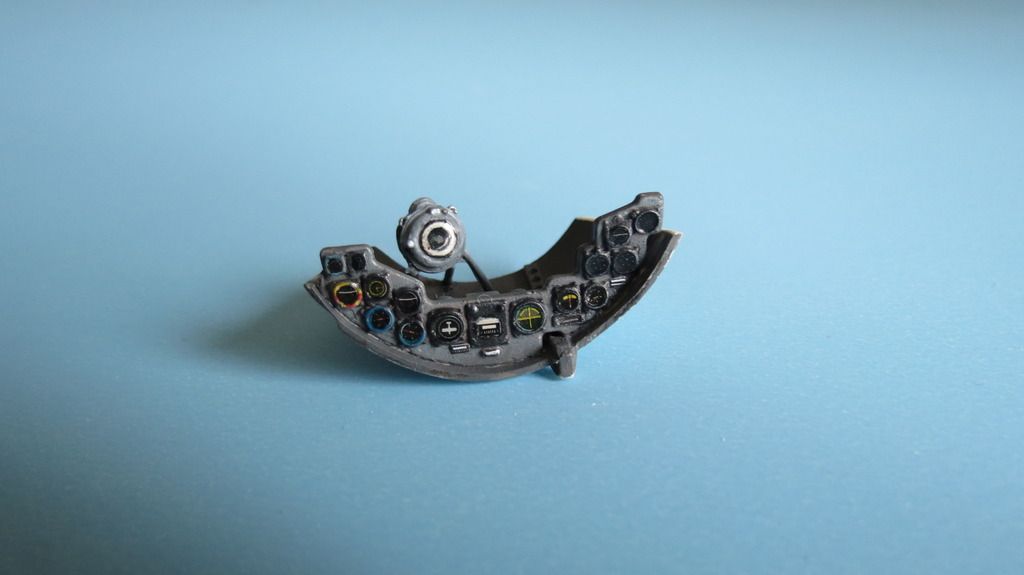
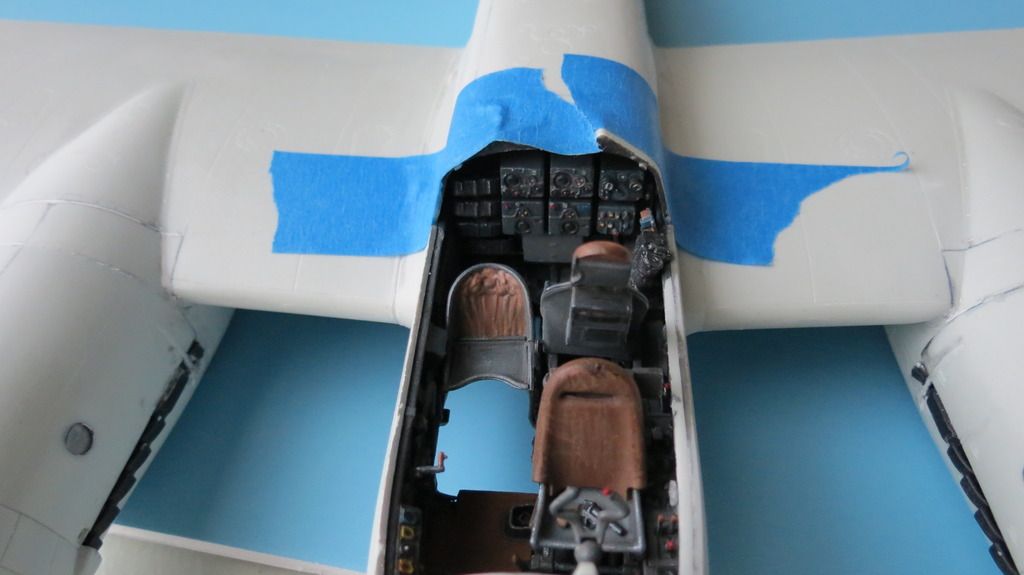
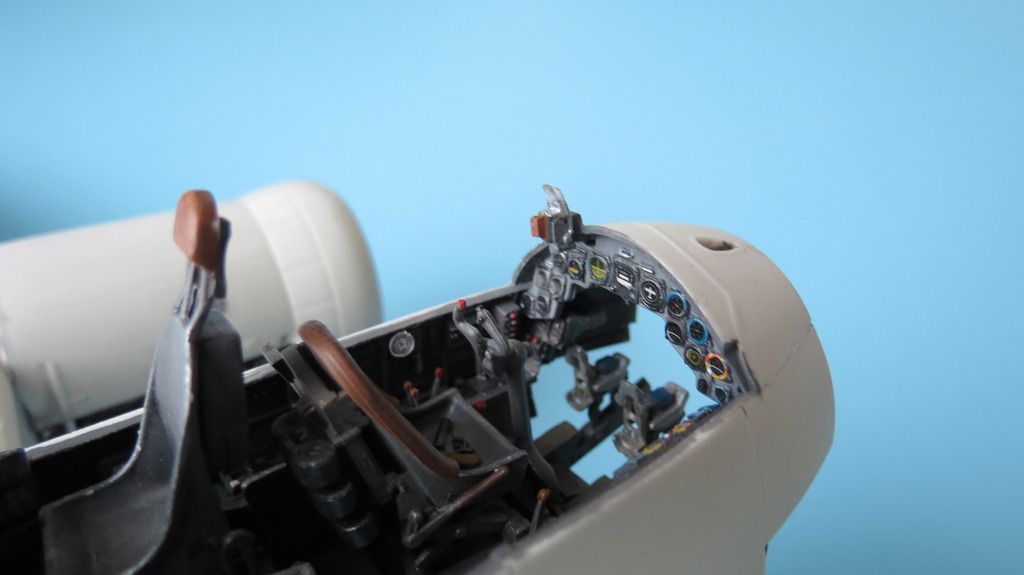
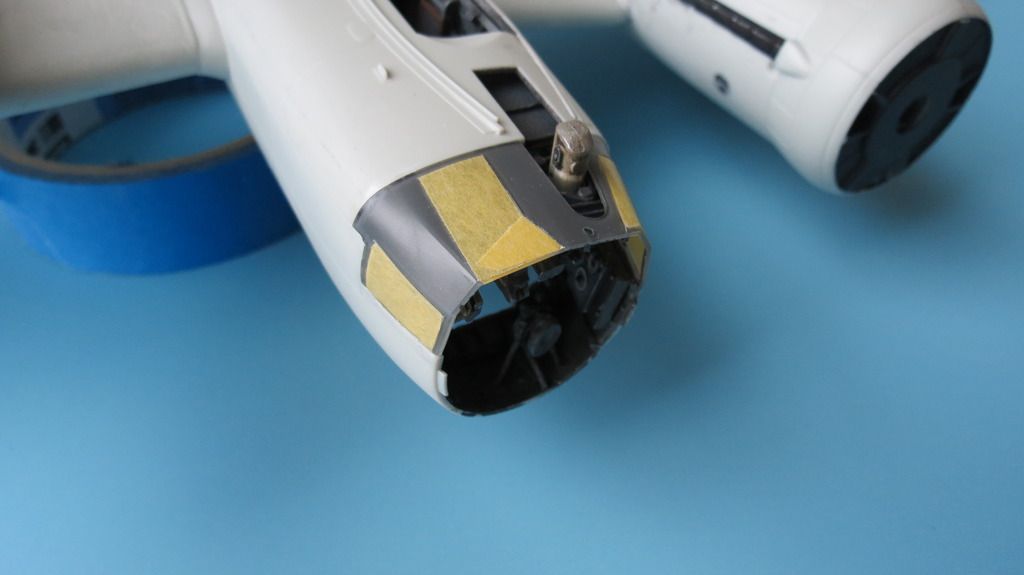
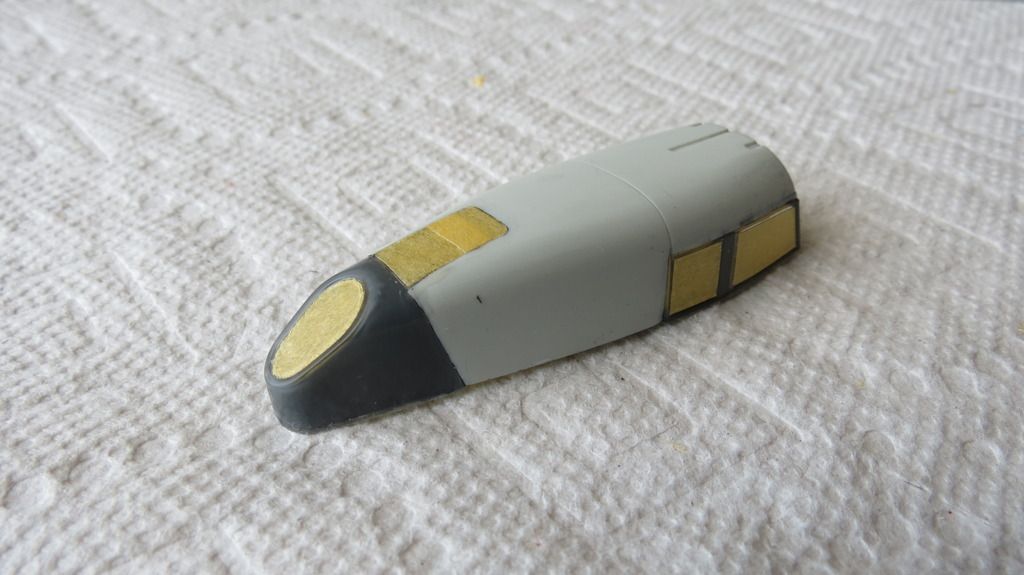
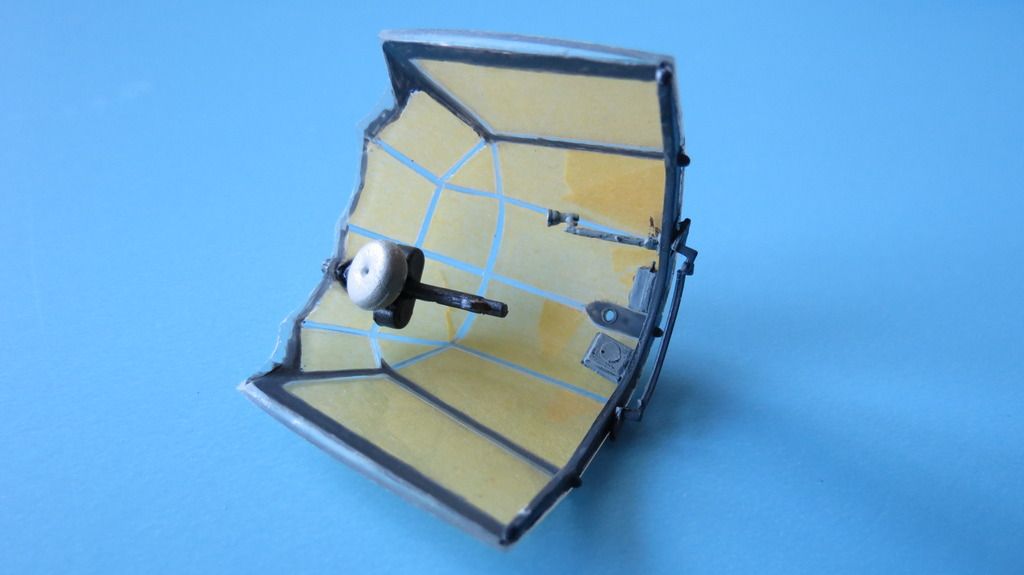
I then moved onto assembling the instrument panel and compass parts into the upper front cowling. The compass face didn't have a decal included to liven it up and make it look like a compass, so, I made an attempt to paint a compass face and then gloss clear coat it to give the appearance of a glass cover...


IMG_5461_zps1hyffsmx.jpg


IMG_5464_zpsanwcxbj6.jpg


IMG_5488_zps99bbmqso.jpg


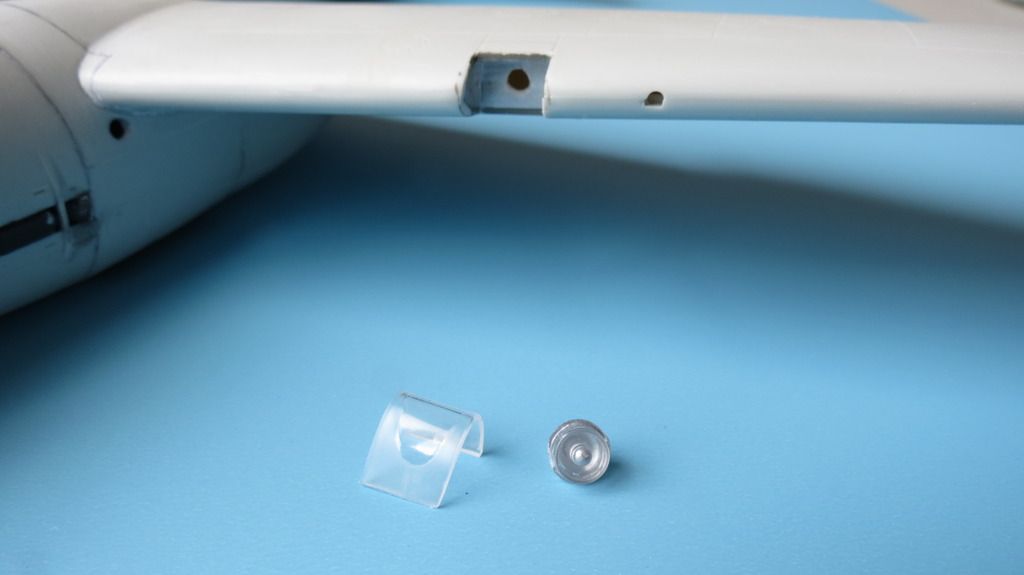
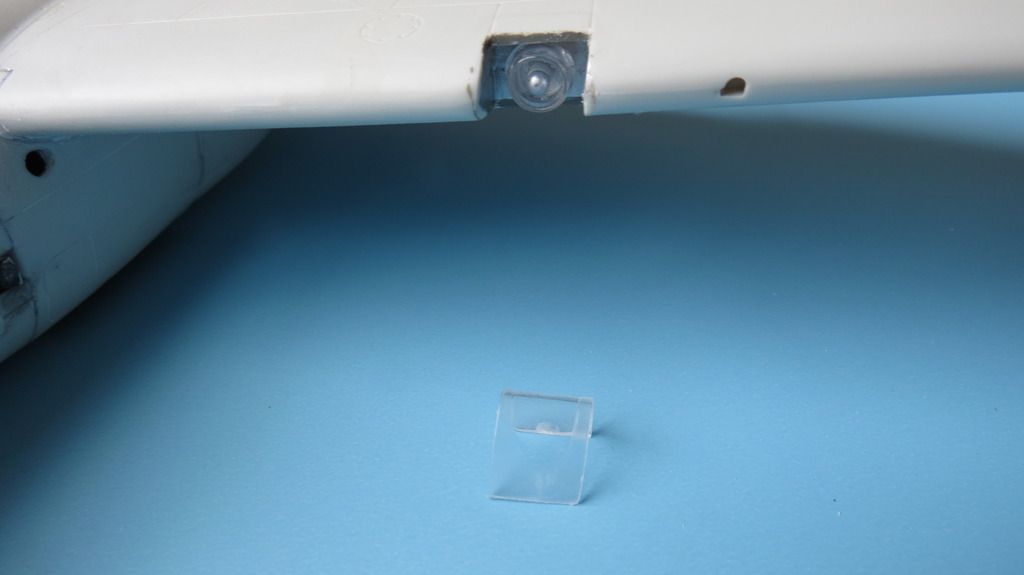
I then moved onto painting the inside of the navigation light lens housing silver, including the back face of the light. I then fitted them in place....


IMG_5500_zpsl6uvdztf.jpg


IMG_5501_zpspyjlpg6p.jpg


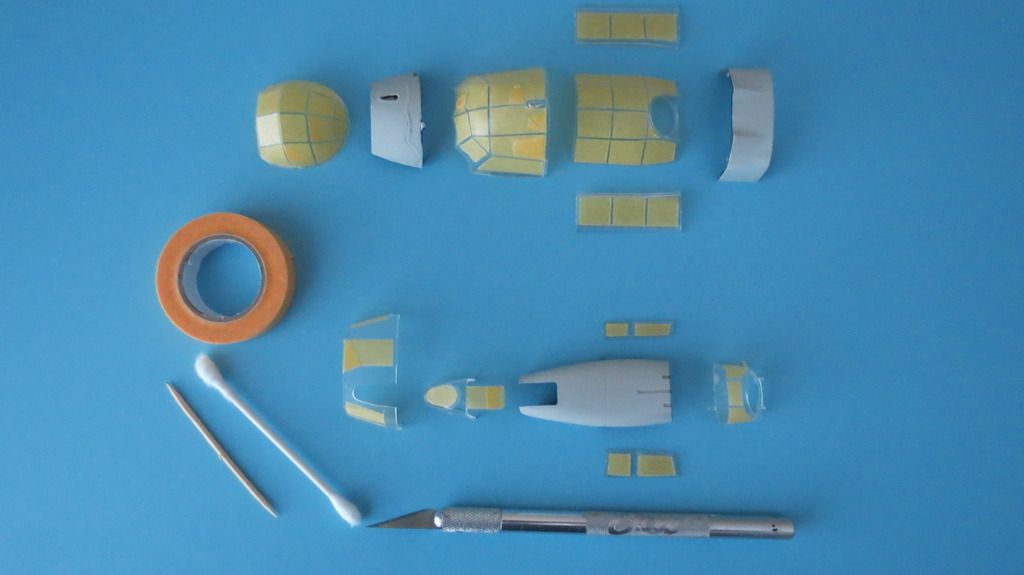
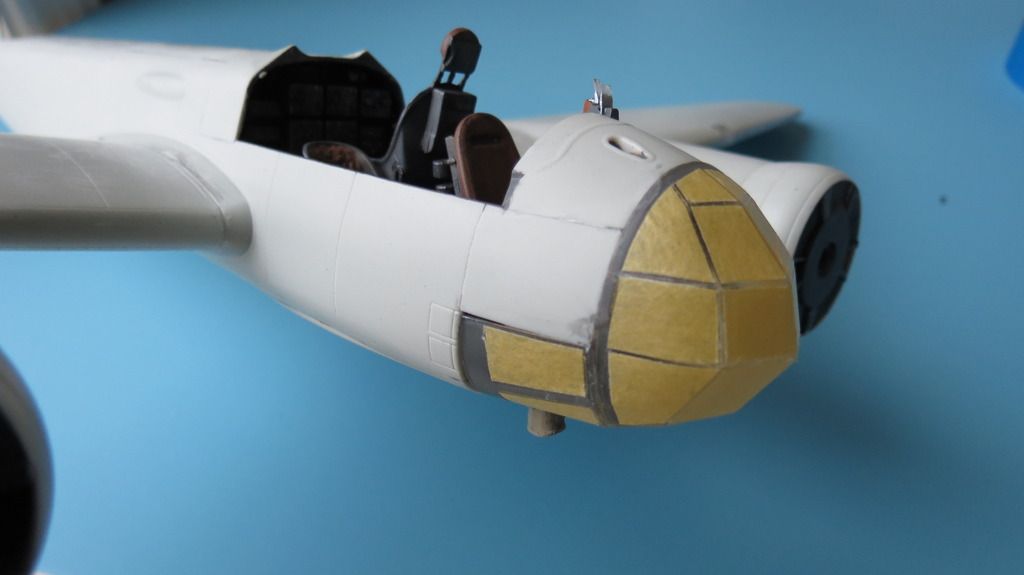
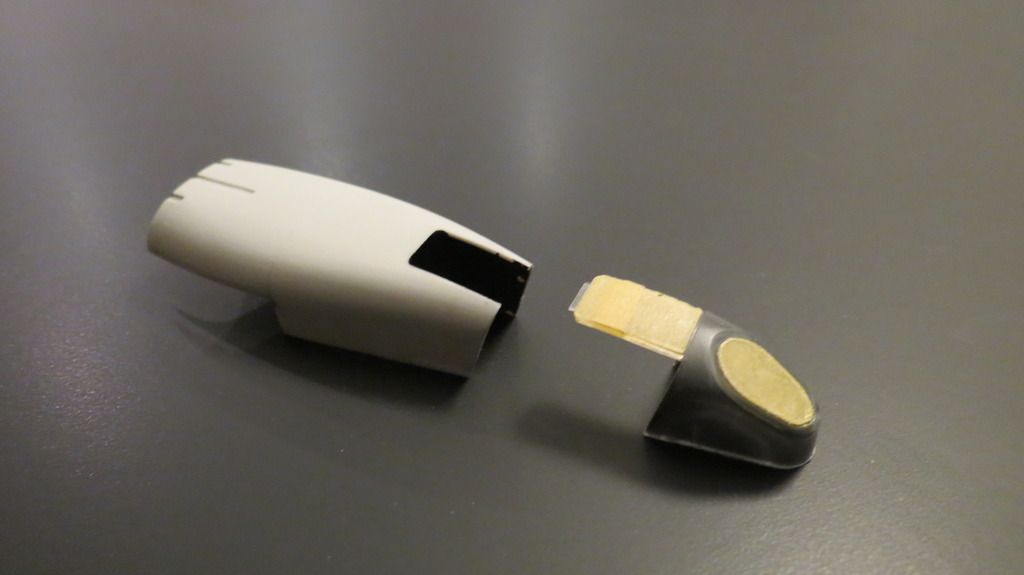
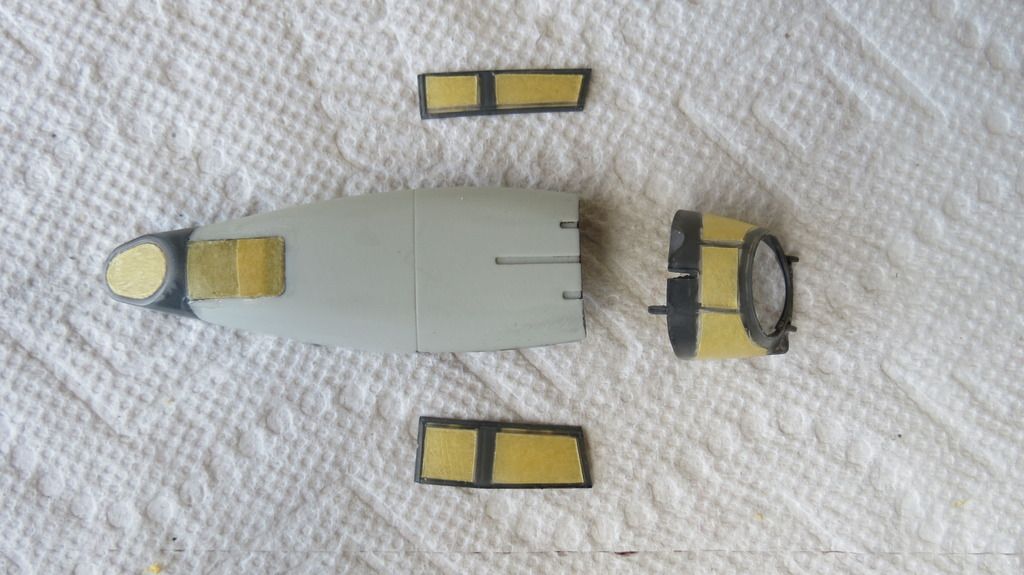
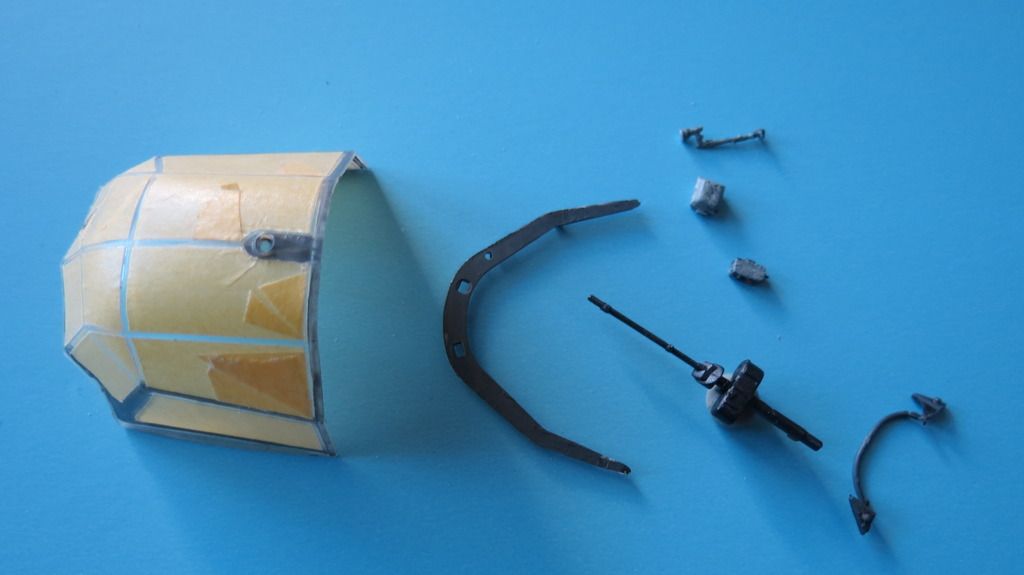
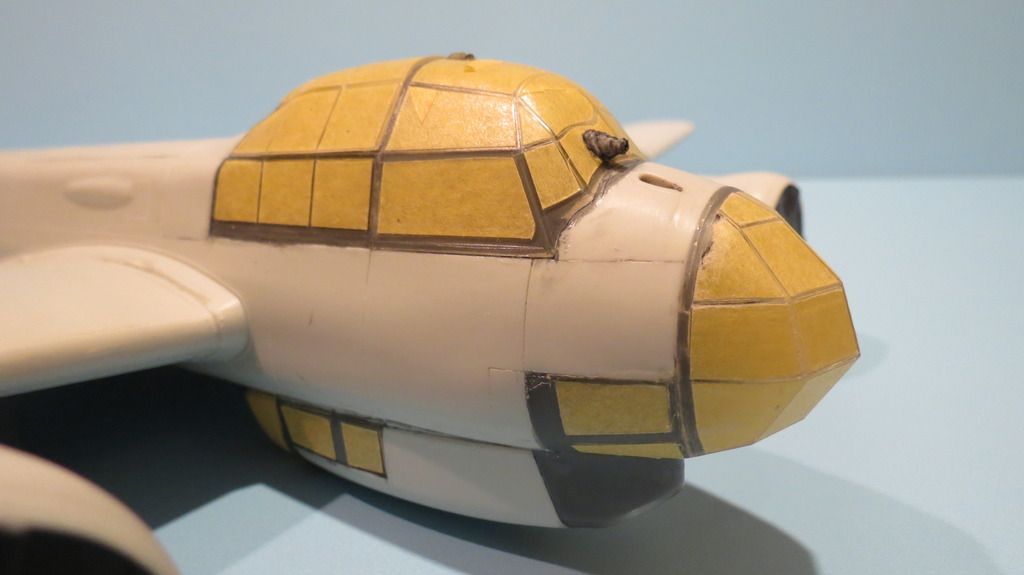
I then moved onto one of my least favorite tasks, especially with aircraft that have multiple windows/canopies....masking them! This included both the upper and lower canopy assemblies...


IMG_5496_zpspfvhysye.jpg


With those canopies masked, it was now time to glue them onto the fuselage assembly. I started off my gluing the rear upper fuselage cover that goes over the radio housing, followed by the front upper cowling that the instrument panel and compass are located into...


IMG_5504_zpssrsw0e1q.jpg


IMG_5505_zpsrtzzfk5o.jpg


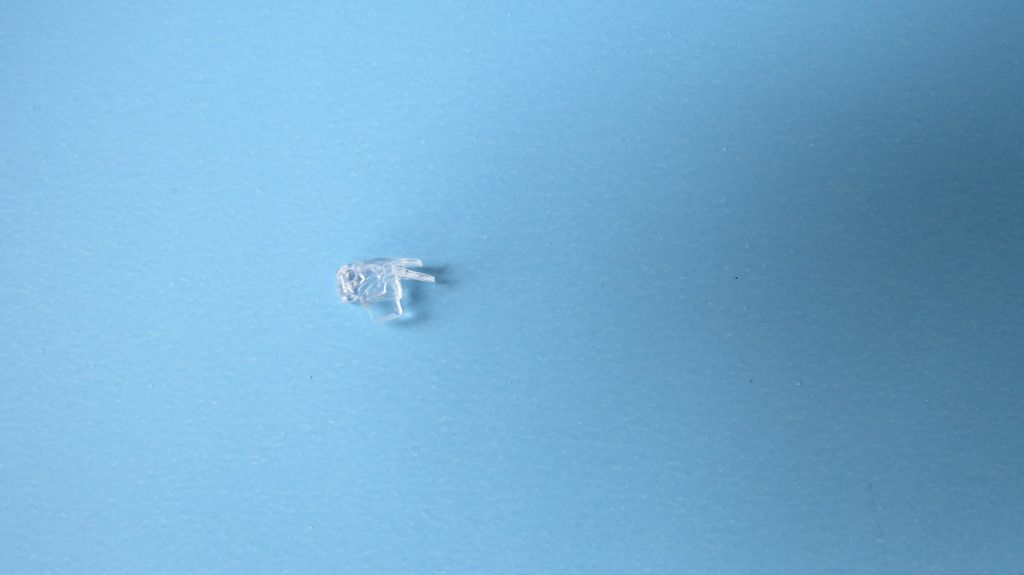
The gun-sight was next, so, I cut it off the sprue, cleaned it up, glued it in place, then painted it....


IMG_5510_zpsxwvybefj.jpg


IMG_5511_zpsigjizwl5.jpg


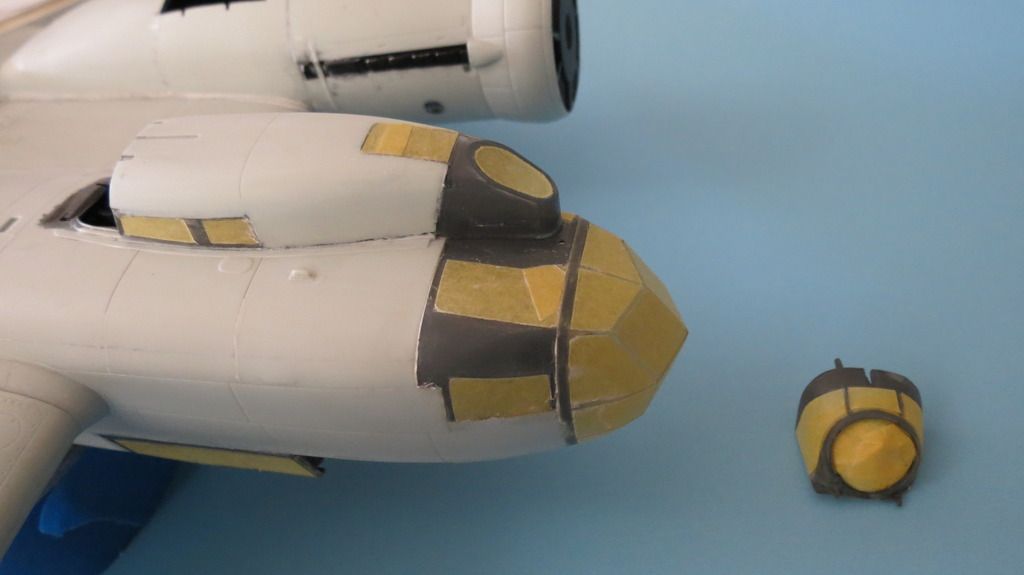
I now moved onto fitting the front lower canopy section that wraps around the bomb aimers sight, followed by fitting the very front/nose canopy...


IMG_5514_zpspgnem9sl.jpg


IMG_5515_zpshkamiasz.jpg


IMG_5516_zpsjryfxt78.jpg


IMG_5517_zpsgtbquu0y.jpg


I then assembled the part that makes the lower canopy that includes the drop down hatch through which the crew members climb when boarding and exiting the aircraft. I temporarily located the hatch so that I can display it in the open position...


IMG_5518_zpstko2lk8m.jpg


IMG_5521_zpsk4a986is.jpg


IMG_5523_zpsn04aw2eg.jpg


IMG_5524_zpsnxxtijsz.jpg


IMG_5537_zpsdk1jvqzd.jpg


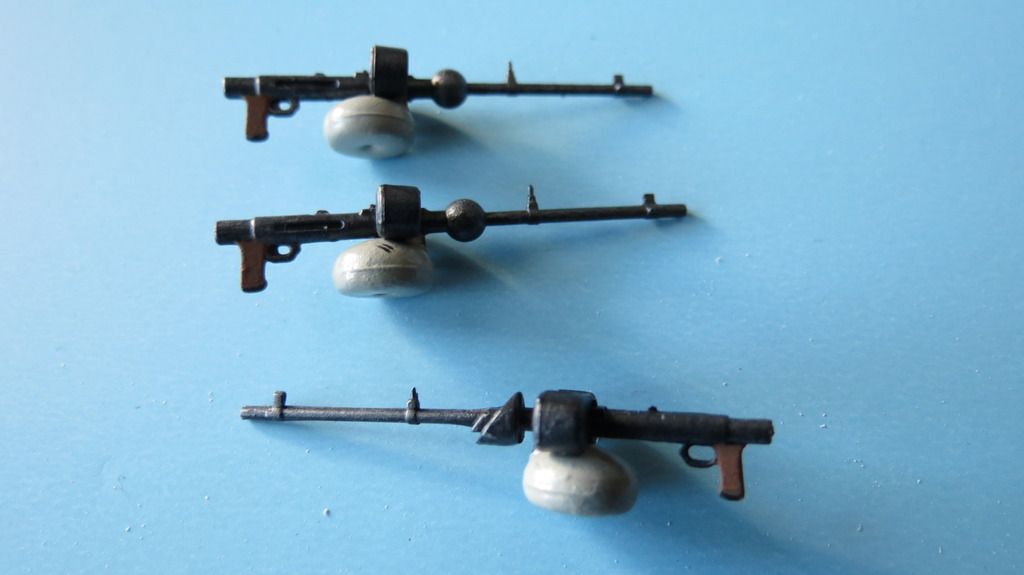
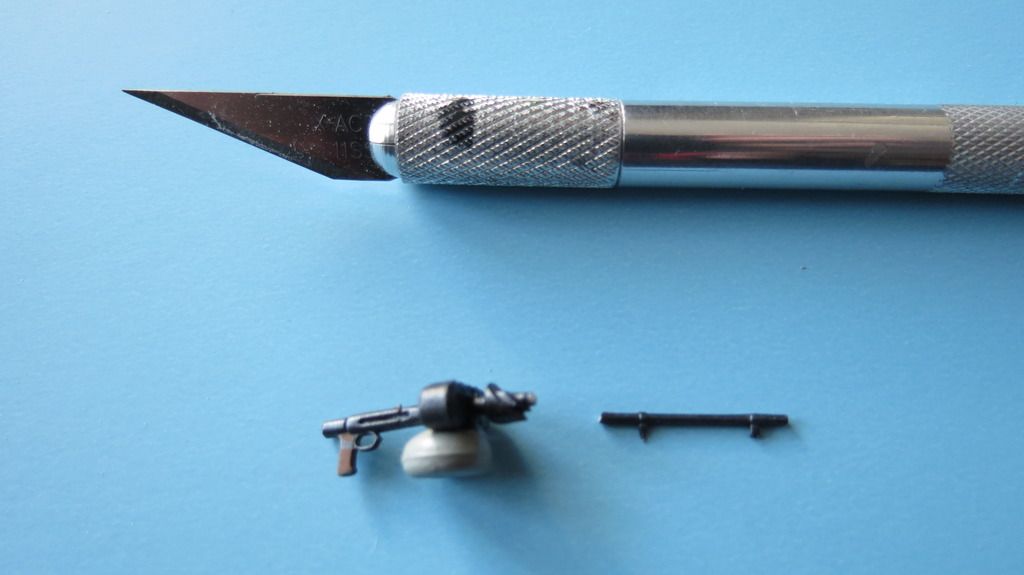
The three machine gun assemblies were then glued and painted...


IMG_5528_zpsffzkkbp9.jpg


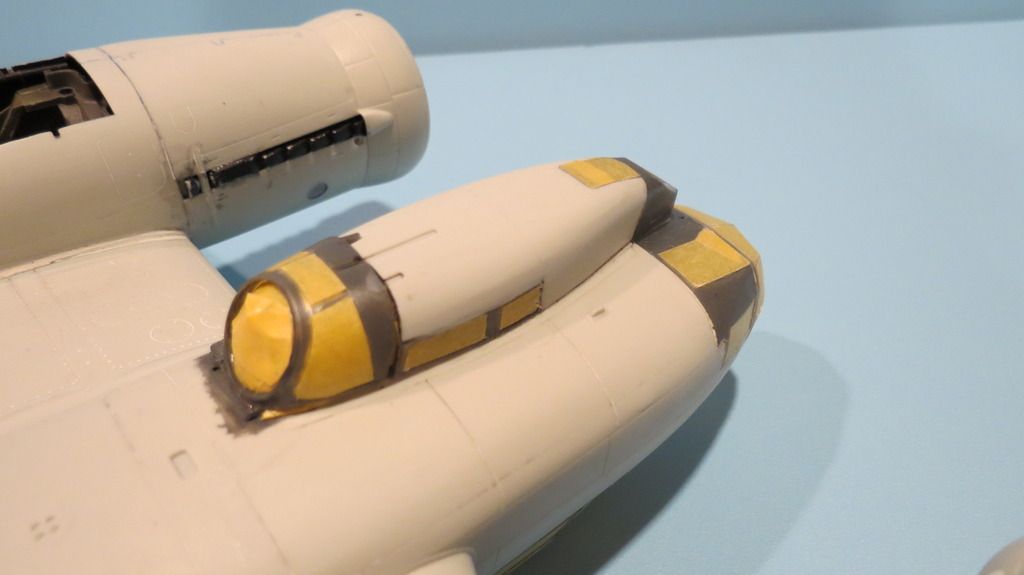
Next was assembling all the components into the upper front canopy, including one of the machine guns. But, before assembling the machine gun, I cut the barrel off so that it isn't accidentally broken off and lost to the carpet monster during all the handling that is still left to do before completing the build. I then glued the completed canopy assembly into its location at the front of the cockpit/fuselage. I temporarily located the rear upper canopy, because I want to be able to remove this to show the details within the cockpit....


IMG_5529_zpsrsvnsdco.jpg


IMG_5530_zpspk7zecmv.jpg


IMG_5532_zps90oj2vbv.jpg


IMG_5531_zpss6vu0zki.jpg


IMG_5536_zpsqwkkxaie.jpg


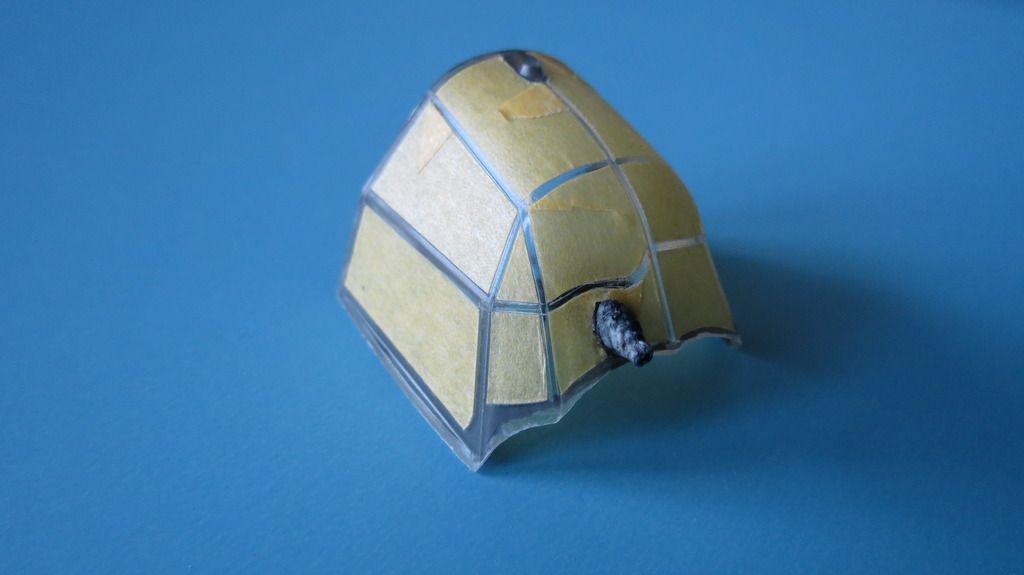
I then filled the engine indicator lens gap with pva glue and allowed that to set clear to simulate the missing molded lens...


IMG_5506_zpsz9rgrqpp.jpg


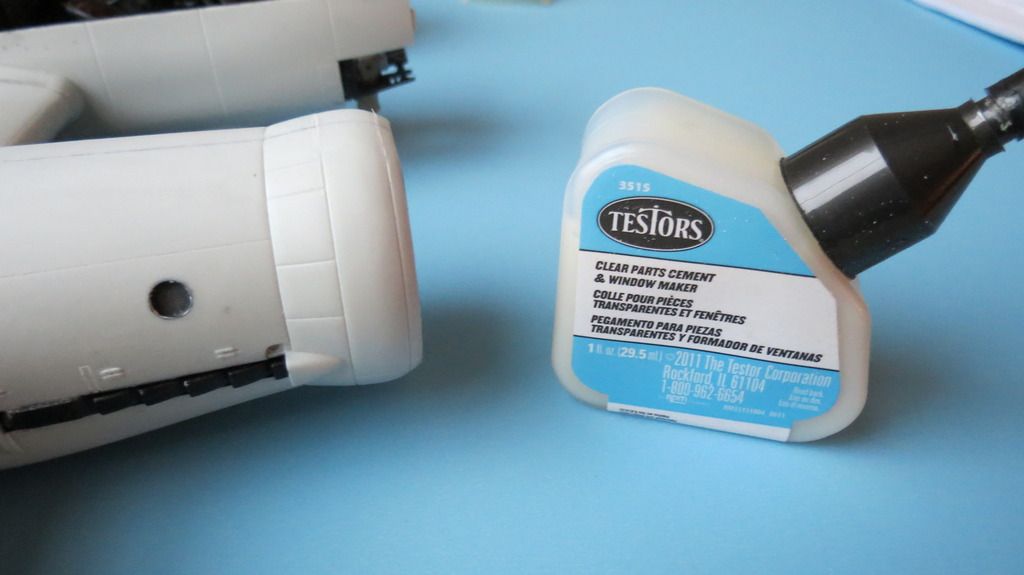
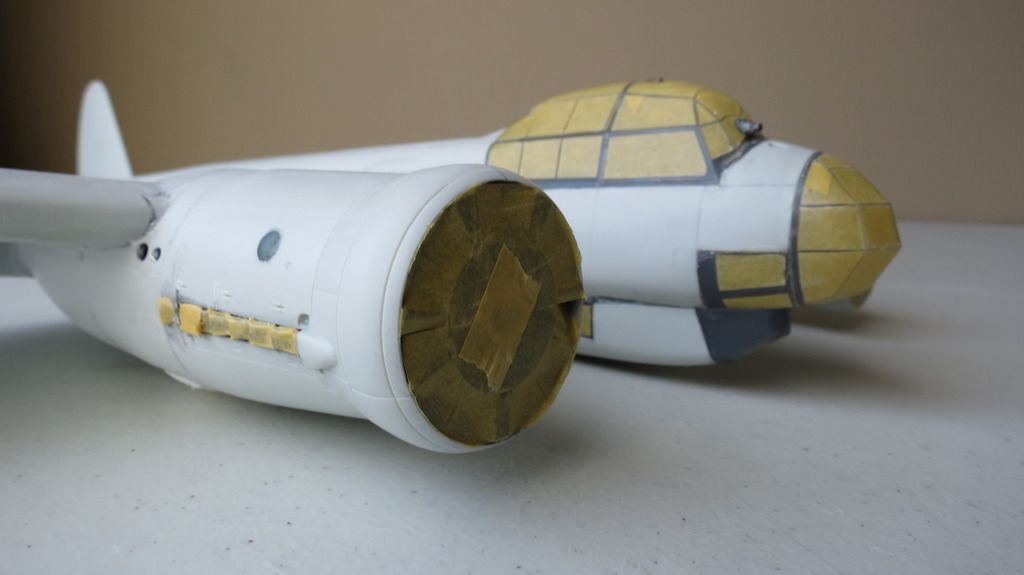
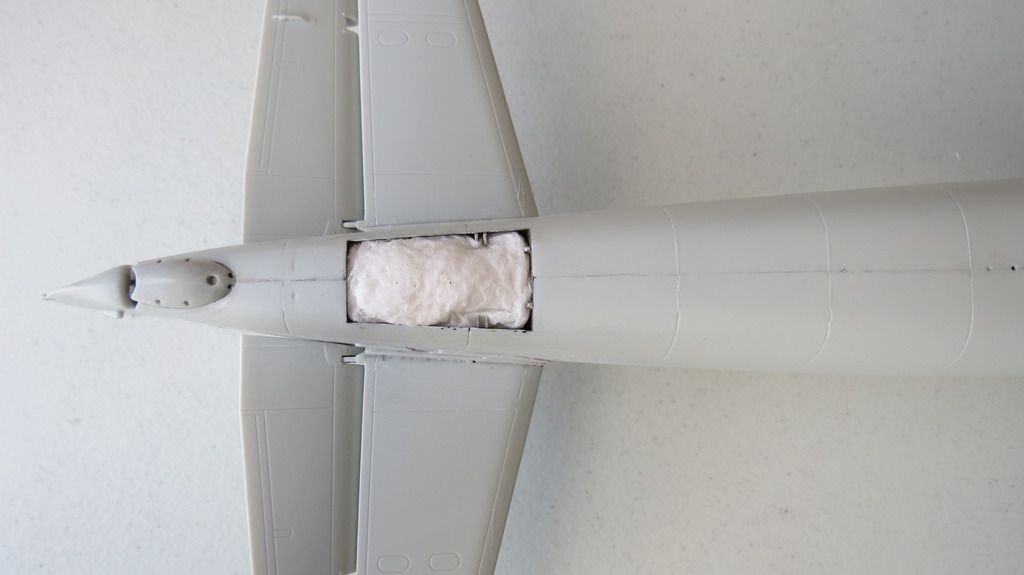
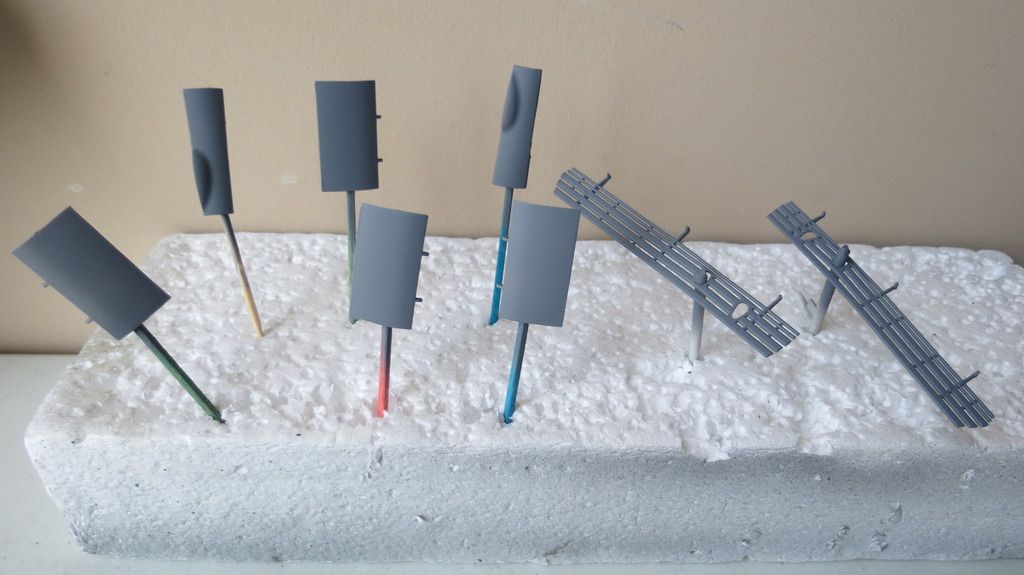
All that was left to do now was to mask the rest of the areas of the plane that I didn't want primer and paint to get on to. I masked the front of the engines, the exhausts, the navigation light, the wheel bays and rear wheel well with tissue, and, covered the clear lenses with liquid masking....


IMG_5539_zpssjl1tjyk.jpg


IMG_5540_zpsda2l2ohk.jpg


IMG_5541_zpspirfqqxh.jpg


IMG_5542_zps2hvpcgwg.jpg


IMG_5543_zpsgbdqeepz.jpg


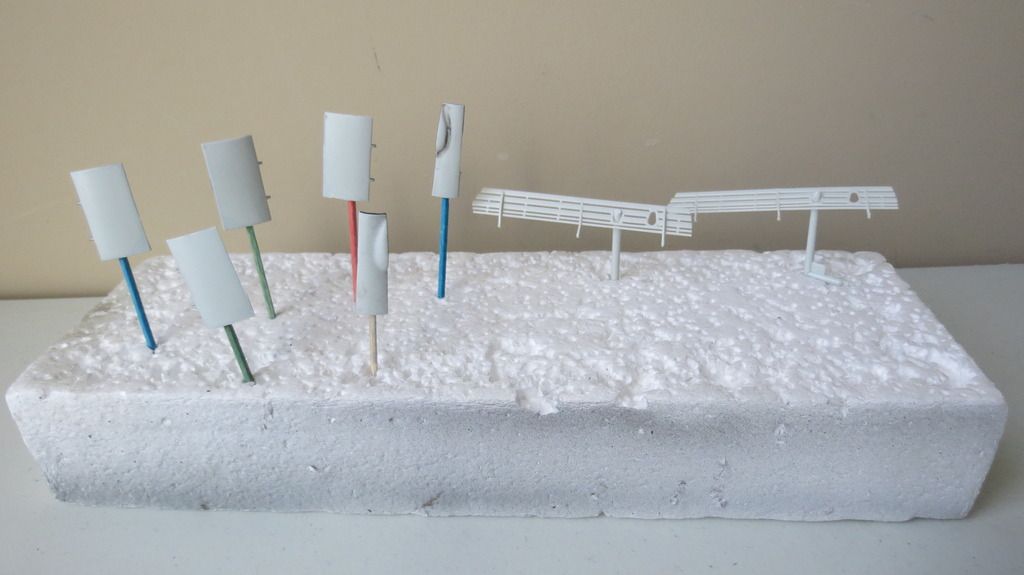
With the masking complete, I then put the wheel bay doors and air-brakes onto cocktail sticks and cleaned those and the plane down with Isopropyl alcohol to make them ready for priming...


IMG_5546_zpsgyvoxs6e.jpg


IMG_5548_zpsfngwzehk.jpg


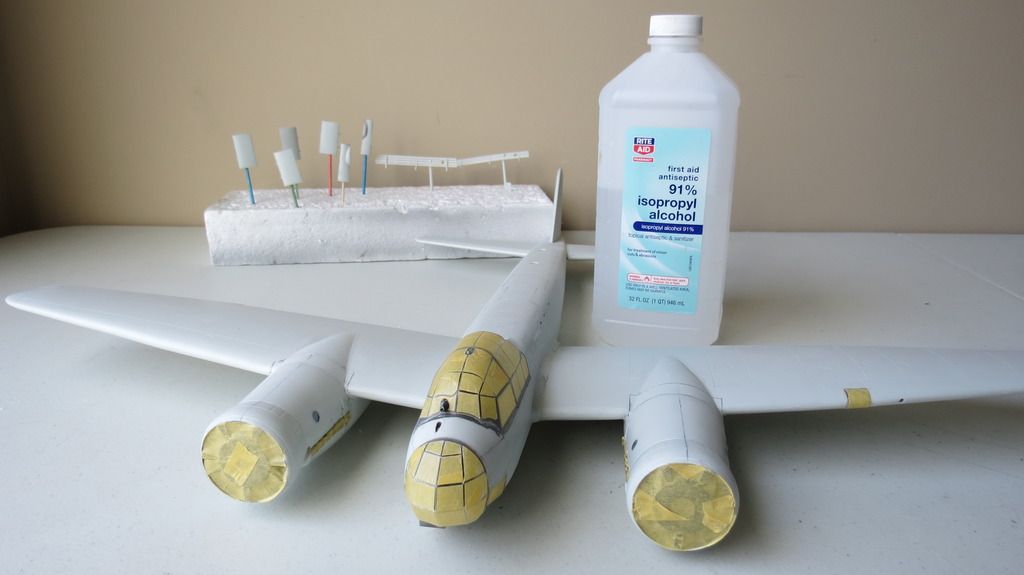
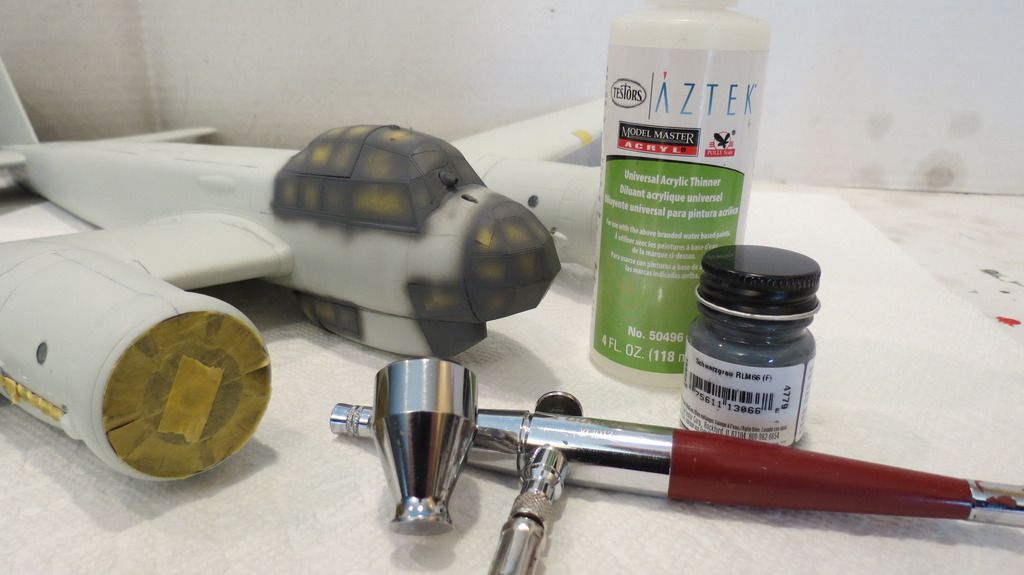
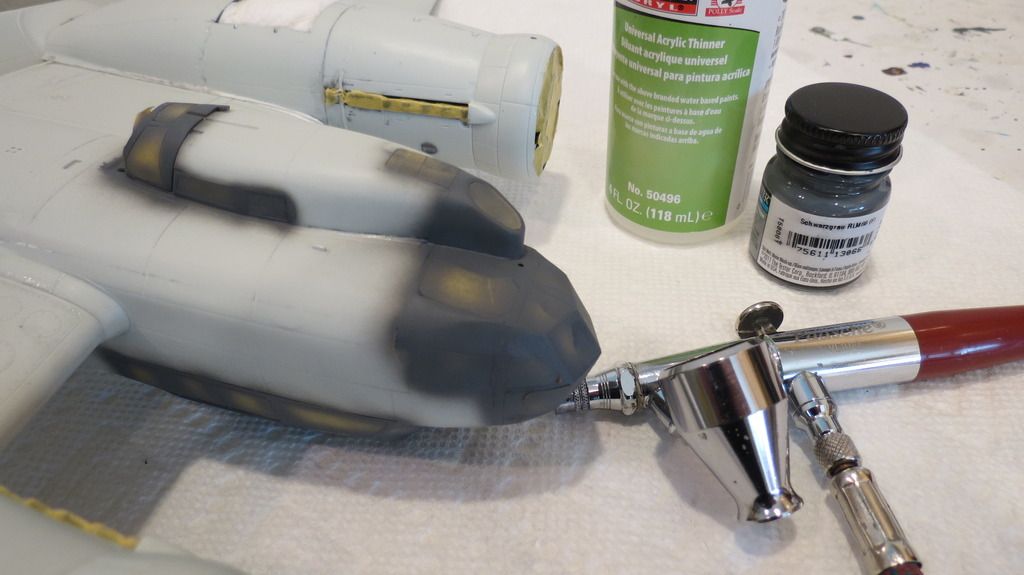
Before airbrushing the primer on, I airbrushed RLM 66 grey onto the window frames, which is the internal color of the cockpit...


IMG_5551_zpsmefomrq7.jpg


IMG_5552_zpsds5kx7ru.jpg


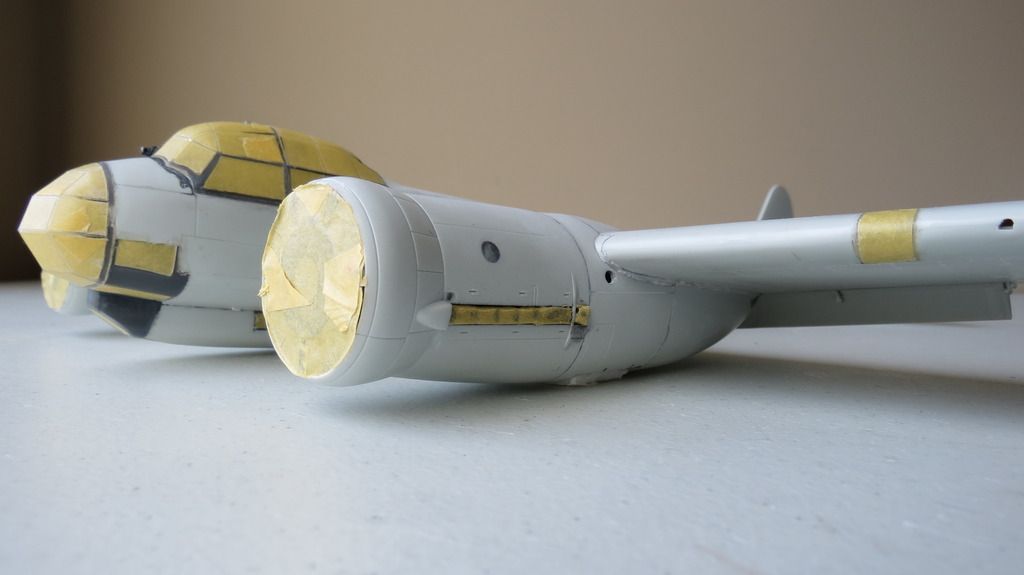
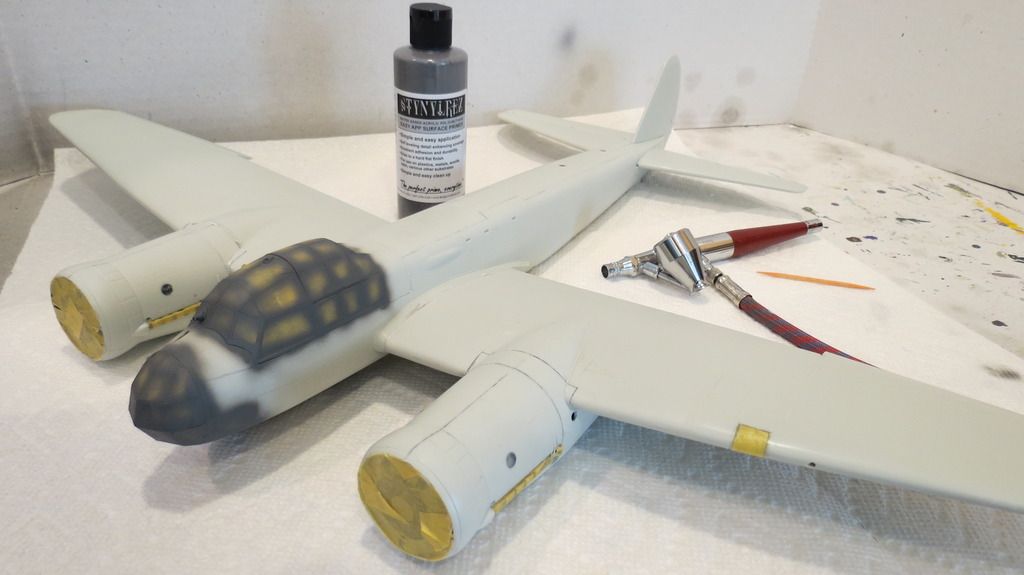
I then primed the loose parts on their cocktail sticks and the plane with Stynylrez grey primer, my first time using this primer made by Badger. I have to say, it's an exceptional product that flows beautifully through the airbrush, straight from the bottle and dries solid within minutes, It sticks extremely well! I did a test on a piece of plastic card, by putting the stickiest tape I had onto it and pulling it off quickly, nothing peeled off. To remove it, I had to use my sanding stick....highly recommended!.....


IMG_5553_zpsib7zwlv2.jpg


IMG_5558_zpszdgaqswb.jpg


IMG_5559_zpsj8oahrvb.jpg


IMG_5560_zps8c8jlil6.jpg


IMG_5561_zpsvuzufadh.jpg


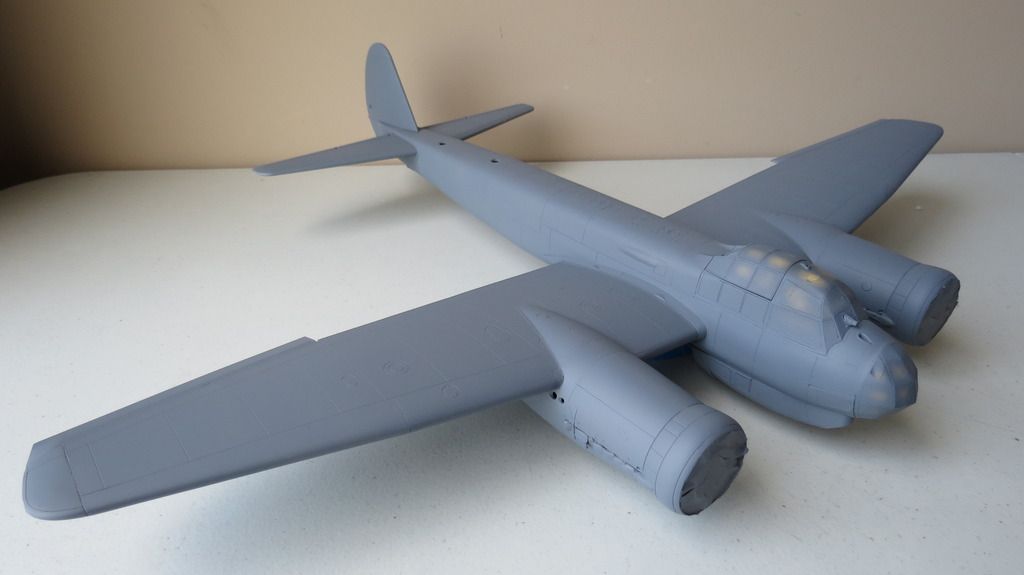
After priming, there were a few little gaps that became apparent, which I will have to attend to before moving onto the painting stage, along with re-scribing a few spots around seams where the sanding had removed the recessed panel lines.


So, that's where I've gotten to so far until my next update that will include the plane painted and decaled. In the meantime, if you'd like to watch my "Build Update #3" video on my YouTube channel, then here is the link to that: 


https://youtu.be/w45c8wqlLSo


Until next time, thanks for taking a look at this thread, leaving comments and watching my video, should you do so!


Happy modeling and have fun! ")


Cheers,   

Martin


  • Member since
    December 2010
  • From: Salem, Oregon
Posted by 1943Mike on Sunday, February 21, 2016 12:24 AM

Thank you so very much for all the work you've put into this WIP thread! As someone who hopes to build an aircraft from my stash that meets standards I've not yet aquired, watching your build is inspiring. Who knows, although I work in 1/48 for aircraft, I may take my Pro Modeler Ju-88A-4 from my stash for my next airplane model ... your thread is that motivational even though my 1/48 -4 may not have a lot in common with your 1/32 -1.

I watched your video - very well paced and instructional.

I've also made a personal note to buy some of Badger's primer since A) It's acrylic, and B) you've recommended it.

Thanks again,

Mike

Mike

"Le temps est un grand maître, mais malheureusement, il tue tous ses élèves."

Hector Berlioz

  • Member since
    December 2002
  • From: Bury St Edmunds, Suffolk, England
Posted by Bish on Sunday, February 21, 2016 3:42 AM

Some lovely work there and some great detail in this kit.

I am a Norfolk man and i glory in being so


On the bench: Airfix 1/72nd Harrier GR.3/Fujimi 1/72nd Ju 87D-3

  • Member since
    February 2014
  • From: Michigan
Posted by silentbob33 on Sunday, February 21, 2016 8:46 AM
I'm in awe by how great this looks, I can't wait to see more

On my bench: Academy 1/35 UH-60L Black Hawk

  • Member since
    August 2013
Posted by Jay Jay on Sunday, February 21, 2016 9:06 AM

I again took the time to watch all of your videos in order on this JU88, and I surely consider it as time well spent. Now I am anxious  to get back on the bench and endeavor to improve my little modeling skills. TY so much for the excellent WIP and inspiration.


 I'm finally retired. Now time I got, money I don't.

  • Member since
    January 2016
Posted by suomi39 on Sunday, February 21, 2016 12:06 PM

I just picked up the new Revell 1/72 Ju-88 A4 and I think I'll toss the instruction book and just use your post as a reference. THANKS for doing such a detailed step by step! I'll be checking out the videos as well. Beautiful work. 

  • Member since
    March 2015
  • From: Streetsboro, Ohio
Posted by Toshi on Sunday, February 21, 2016 2:33 PM

You've done an exceptional job on this WIP!!!  It's very inspiring, there's so much to learn from this build it's amazing.  Keep up the quality of work, I'm sure that the final product will be exceptional!

Toshi

On The Bench: Revell 1/48 B-25 Mitchell


Married to the most caring, loving, understanding, and beautiful wife in the world.  Mrs. Toshi


  • Member since
    April 2015
  • From: New Hampshire, USA
Posted by UKguyInUSA on Monday, February 29, 2016 10:47 PM

1943Mike

Thank you so very much for all the work you've put into this WIP thread! As someone who hopes to build an aircraft from my stash that meets standards I've not yet aquired, watching your build is inspiring. Who knows, although I work in 1/48 for aircraft, I may take my Pro Modeler Ju-88A-4 from my stash for my next airplane model ... your thread is that motivational even though my 1/48 -4 may not have a lot in common with your 1/32 -1.

I watched your video - very well paced and instructional.

I've also made a personal note to buy some of Badger's primer since A) It's acrylic, and B) you've recommended it.

Thanks again,

Mike


Thanks for your very kind comment, Mike, much appreciated! Have fun building your 1/48 scale Ju 88 and make sure you post your build updates on here to share with us!

That Stynylrez is wonderful stuff...I was sold as soon as I began to airbrush it!


Cheers,

Martin Smile

  • Member since
    April 2015
  • From: New Hampshire, USA
Posted by UKguyInUSA on Monday, February 29, 2016 10:48 PM

Bish

Some lovely work there and some great detail in this kit.


Thanks Bish, greatly appreciated!


Cheers,

Martin  Smile

  • Member since
    April 2015
  • From: New Hampshire, USA
Posted by UKguyInUSA on Monday, February 29, 2016 10:49 PM

silentbob33
I'm in awe by how great this looks, I can't wait to see more


Thanks for your kind comment, Bob, greatly appreciated!


Cheers,

Martin  Smile

  • Member since
    April 2015
  • From: New Hampshire, USA
Posted by UKguyInUSA on Monday, February 29, 2016 10:51 PM

Jay Jay

I again took the time to watch all of your videos in order on this JU88, and I surely consider it as time well spent. Now I am anxious  to get back on the bench and endeavor to improve my little modeling skills. TY so much for the excellent WIP and inspiration.


Thanks for your very kind comment Jay Jay, and for watching my videos, it is greatly appreciated!

Enjoy your newly inspired modeling time at the bench!


Cheers,

Martin Smile

  • Member since
    April 2015
  • From: New Hampshire, USA
Posted by UKguyInUSA on Monday, February 29, 2016 10:52 PM

suomi39

I just picked up the new Revell 1/72 Ju-88 A4 and I think I'll toss the instruction book and just use your post as a reference. THANKS for doing such a detailed step by step! I'll be checking out the videos as well. Beautiful work. 


Thanks for your kind comment Suomi, greatly appreciated! Have fun building your Ju 88!


Cheers,

Martin Smile

  • Member since
    April 2015
  • From: New Hampshire, USA
Posted by UKguyInUSA on Monday, February 29, 2016 10:53 PM

Toshi

You've done an exceptional job on this WIP!!!  It's very inspiring, there's so much to learn from this build it's amazing.  Keep up the quality of work, I'm sure that the final product will be exceptional!

Toshi


Thanks for your very kind comment, Toshi, greatly appreciated!


Cheers,

Martin  Smile

  • Member since
    April 2015
  • From: New Hampshire, USA
Posted by UKguyInUSA on Monday, February 29, 2016 10:55 PM

Revell Pro-Modeler 1/32 Junkers Ju 88A-1 Bomber "Build Update #4" (3.1.16)


Hello chaps, 9 days have passed since my last update and I managed to get some more done on my build since having her built and primed at my last update.


With her primed, I then airbrushed some silver paint onto areas that I thought would be prone to chipping, such as the engine cowlings, walk ways on the wings, access hatches that get opened frequently, oil and fuel ports, air-brakes and undercarriage doors. When the paint was dry, I sealed it in with a gloss clear coat...


IMG_5562_zpsabh4tgbl.jpg


IMG_5564_zpsvkv1zxcb.jpg


IMG_5566_zpskk2awico.jpg


IMG_5568_zpsnv70l2x0.jpg


IMG_5569_zpscjhskapx.jpg


IMG_5570_zps8epgqp7s.jpg


When the clear coat was dry, it was then time to apply the pre-shading...


IMG_5574_zpszzh9jpry.jpg


IMG_5575_zpsxcfxihzd.jpg


IMG_5577_zpsaqiuaikg.jpg


IMG_5579_zpsbywmc0f3.jpg


IMG_5580_zpsbnthdlvz.jpg


I let the pre-shading dry for one hour then made a start on the first of the three external colors- the underside blue. I mixed some RLM 76 Lichtblau with RLM 65 Hellblau and airbrushed that onto the undersides, the undercarriage doors and the airbrakes. I then mixed some white into the leftover paint and airbrushed some highlights on top of the previously airbrushed blue...


IMG_5582_zpsp0zy0cxt.jpg


IMG_5583_zpsisorjhlq.jpg


IMG_5584_zpsjm3benph.jpg


IMG_5590_zpsnhlgex5q.jpg


IMG_5594_zpsezstpzyh.jpg


I allowed that to dry for one hour then gloss clear coated all the blue painted areas/parts, along with the propeller parts to seal the paint in making them ready for decaling and weathering...


IMG_5597_zpsgrpkh8cb.jpg


IMG_5598_zpsojshexmy.jpg


IMG_5599_zpsxjkswlh9.jpg


I let the clear coat dry overnight, then the following morning, I masked the plane ready to airbrush the first of the two upper camouflage colors, RLM 71 Dunkelgrun. After airbrushing that onto the model, I then added some white to it to tone it down, then added some highlights. When it was touch dry, I removed the masking tape to check out the edges were clean, then let that dry for one hour. The Dunkelgrun was then sealed with a gloss clear coat...


IMG_5603_zpsfizxmkyu.jpg


IMG_5606_zps7rwmkwah.jpg


IMG_5610_zpsgrzn11kt.jpg


IMG_5611_zpsuw0tupec.jpg


IMG_5614_zpsns5jxzxy.jpg


After allowing that gloss clear coat to dry, I then masked over it in preparation to airbrush the RLM 70 Schwarzgrun onto the plane. I mixed a little black with it, because I didn't feel it was dark enough, and when I got a shade that I liked, I airbrushed it onto the plane. I then toned that mix down with some white and airbrushed some highlights. I then removed the masking tape and checked to see how it looked. There was just one small area where the paint hadn't covered and so I touched that up, then took a few photos. The RLM 70 was then gloss clear-coated to seal that and make it ready for decaling...


IMG_5615_zpsiepdpcjl.jpg


IMG_5621_zpsydqjd9zz.jpg


IMG_5622_zpsjuq1qeej.jpg


IMG_5624_zpskpuntwuy.jpg


IMG_5626_zps7qsq04kh.jpg


IMG_5627_zps1mvdfm8n.jpg


IMG_5628_zpspuxjx5ak.jpg


I let the gloss clear coat dry overnight and the following morning, I made a start on the decaling. I got my scalpel, tweezers, a brush, toothpick, Walther's Decal Setting Solution and a dish of warm water together to make me ready for applying them. When they were completed, I airbrushed a gloss clear coat over the decals to seal them in to make ready for the weathering stage....


IMG_5629_zpstznnelqb.jpg


IMG_5630_zpsjd1dke04.jpg


IMG_5631_zpsff4qqo1u.jpg


IMG_5632_zpsjnmceju7.jpg


IMG_5633_zpsjfszpywy.jpg


IMG_5634_zpsuo9cczfu.jpg


IMG_5636_zpssjeb4y88.jpg


IMG_5637_zpsrpu0wc1y.jpg


IMG_5638_zpstbrp6y35.jpg


IMG_5639_zpsmgmiz2a0.jpg


IMG_5640_zpsvvepugst.jpg


IMG_5641_zps4t7duldh.jpg


IMG_5642_zpsgctjltsb.jpg


IMG_5644_zpsji3pcefc.jpg


IMG_5645_zps062zlde1.jpg


IMG_5662_zpso6hjlmri.jpg


While the clear coat was drying on the decals, I then made a start at painting the propeller parts. The spinners have two colors to them, Schwarzgrun with a yellow tip. Masking around spinner tips isn't a easy task using masking tape, and so to create the demarcation between the yellow tip and the schwarzgrun rear, I did the following; 1) Airbrushed yellow onto the spinner. I toned it down a little wih some white, because it was too dark for the shade I wanted. 2) I then took a cap from a bottle of Vallejo paint and placed some putty inside of it. This was then located onto the tip of the spinner and pressed down to the level/depth at which the demarcation was to take place. 3) I then airbrushed RLM 70 Schwarzgrun darkened with some black onto the exposed rear area of the spinners. This was also airbrushed onto the outer surfaces of the spinner backing plates and the propeller blades. I then mixed some white with it to tone it down, then airbrushed some highlights...


IMG_5646_zpsy6kbzyj6.jpg


IMG_5647_zps1uvf5cab.jpg


IMG_5648_zpsr8kpcaqe.jpg


IMG_5649_zpseoopa0xq.jpg


IMG_5650_zpsk10vtrzt.jpg


IMG_5651_zpshqm3kp5o.jpg


Next, I airbrushed a Olive Drab toned down with white onto the undercarriage struts, then toned that mix down even more to spray on some highlights. I then detail painted the struts, the wheels and painted the tires. These were then gloss clear coated to make them ready for the weathering stage...


IMG_5652_zpsqqajnshr.jpg


IMG_5653_zpsoawwtcnc.jpg


IMG_5655_zpsz8cc2nq2.jpg


IMG_5657_zpsmteq1r0d.jpg


IMG_5658_zps3bxx1cmc.jpg


The last parts to paint and clear coat were the front of the engines and the exhausts...


IMG_5667_zpspkmjq7jj.jpg


IMG_5668_zpsdzq9cgzx.jpg


With everything painted, decaled and gloss clear coated, I was now ready to move onto the weathering and final assembly stage, and, this is where I ended this update. So, I took some photos of progress so far...


IMG_5664_zpsopl3t6vy.jpg


IMG_5666_zpsbggyasyl.jpg


IMG_5682_zpsl1zjdfd6.jpg


IMG_5683_zps3t6smzqn.jpg


IMG_5684_zpsnzca8oot.jpg


IMG_5685_zps4lgr6cke.jpg


IMG_5686_zpsdq2m5o0t.jpg


IMG_5687_zpszgqm45wr.jpg


IMG_5688_zpsxaozbwyk.jpg


IMG_5689_zps9a012494.jpg


Well, that's it until my next update! So far, I have really enjoyed the build and would like to say thank you to everyone that has followed my thread, left comments both on here and on my YouTube update videos, it is greatly appreciated!


In the meantime, if you'd like to watch my "Build Update #4" video for this progress report, then here is the link to that....


https://youtu.be/LnuzxfLRglU


Thanks again, happy modeling, tally ho and chocks away!


Cheers,

Martin


  • Member since
    June 2014
Posted by BrandonK on Tuesday, March 1, 2016 9:07 AM

She is looking simply amazing. Beautiful !!

BK

On the bench:

A lot !! And I mean A LOT!!

2024 Kits on deck / in process / completed   

                         14 / 5 / 2  

                              Tongue Tied

  • Member since
    August 2015
  • From: the redlands Fl
Posted by crown r n7 on Tuesday, March 1, 2016 10:18 AM

looks great Beer


 Nick.

  • Member since
    March 2015
  • From: Streetsboro, Ohio
Posted by Toshi on Tuesday, March 1, 2016 10:19 AM

I so enjoy your WIP, you're builds are very detailed orientated.  What a fantastic job you've done.

Toshi

On The Bench: Revell 1/48 B-25 Mitchell


Married to the most caring, loving, understanding, and beautiful wife in the world.  Mrs. Toshi


  • Member since
    January 2016
  • From: A Galaxy Far, Far Away
Posted by Hunter on Wednesday, March 2, 2016 6:44 AM

Absolutely Amazing Martin, I can't say enough on how wonderful this WIP and watching you has been. Great job Martin. 

Hunter 


  • Member since
    January 2015
  • From: Katy, TX
Posted by Aggieman on Wednesday, March 2, 2016 8:31 AM

You are doing a fantastic job on this Ju88.

I am amazed at your solution to a problematic area that I have struggled with on German aircraft - multi-colored spinners. I guess it is a case of not thinking outside the box, must use masking tape! We all know how frustrating that is.  So of course now that I see how you used the Vallejo paint cap to form the demarcation between yellow and dark green, it is so readily obvious and I cannot believe this or a similar solution has never before occurred to me.

  • Member since
    June 2010
Posted by 5-high on Wednesday, March 2, 2016 10:58 AM

WOW ..UK fantastic job ...Yes...I have this one in stash. .after seeing yours done up ..I'm thinking of digging it out and starting it ..Hmm but first I have to find a spot for that BIG BIRD!!!!!Confused

5-high 

  • Member since
    April 2015
  • From: New Hampshire, USA
Posted by UKguyInUSA on Friday, March 4, 2016 9:45 PM

BrandonK

She is looking simply amazing. Beautiful !!

BK


Thanks Brandon, greatly appreciated! :)


Cheers,

Martin

  • Member since
    April 2015
  • From: New Hampshire, USA
Posted by UKguyInUSA on Friday, March 4, 2016 9:46 PM

crown r n7

looks great Beer


Thanks Crown, much appreciated!


Cheers,

Martin :)

  • Member since
    April 2015
  • From: New Hampshire, USA
Posted by UKguyInUSA on Friday, March 4, 2016 9:48 PM

Toshi

I so enjoy your WIP, you're builds are very detailed orientated.  What a fantastic job you've done.

Toshi


Thanks for your kind comment, Toshi, greatly appreciated! :)


Cheers,

Martin

  • Member since
    August 2015
  • From: the redlands Fl
Posted by crown r n7 on Saturday, March 5, 2016 9:14 AM

 One question  the wheels look great what color did you use for the tires?


 Nick.

  • Member since
    July 2009
  • From: lafayette la
Posted by 40.mm on Saturday, March 5, 2016 9:51 AM

WoW and double WoW! Outstanding work !!!

http://www.vairhead.net/forum/dhg.jpg

  • Member since
    April 2015
  • From: New Hampshire, USA
Posted by UKguyInUSA on Monday, March 7, 2016 10:15 PM

Hunter

Absolutely Amazing Martin, I can't say enough on how wonderful this WIP and watching you has been. Great job Martin. 


Thanks Hunter, greatly appreciated!


Cheers Smile

Martin

  • Member since
    February 2012
  • From: Olmsted Township, Ohio
Posted by lawdog114 on Monday, March 7, 2016 10:30 PM
Outstanding work Martin. I'm curious on your choice of cement to attach the clear parts. Perhaps you said what you used and I just missed it. Looks like you're in the home stretch bud.

 "Can you fly this plane and land it?...Surely you can't be serious....I am serious, and don't call me Shirley"


JOIN OUR COMMUNITY!

Our community is FREE to join. To participate you must either login or register for an account.

SEARCH FORUMS
FREE NEWSLETTER
By signing up you may also receive reader surveys and occasional special offers. We do not sell, rent or trade our email lists. View our Privacy Policy.