SEARCH FINESCALE.COM

Enter keywords or a search phrase below:

(A)SW GBII - CLOSING

82193 views
560 replies
1 rating 2 rating 3 rating 4 rating 5 rating
  • Member since
    July 2010
Posted by jbrady on Sunday, March 20, 2011 10:54 PM

Bsyamato: Non ho nessun graffio costruzione di competenze. Vorrei che ho fatto. Hanno molto poco di modellazione esperienza così se riesco a trovare qualcosa di già fatto io uso.

Vetteman: I'm not going to give up on it. From all the reviews I read about AM kits, I thought they would be a little better engineered is all. I tell you the most straight forward construction is a nightmare. The biggest problem is the lousy instructions. Maybe I'm a little ham handed but the constant dryfitting kept knocking parts off that had already been installed. Give me a clear indication of where something fits and I'll put it there.


  • Member since
    June 2009
  • From: Netherlands
Posted by kermit on Monday, March 21, 2011 12:35 AM

De havilland Canada - A very warm welcome to the forums to you! There's never enough of us modeller folk aroundBig Smile.

A "spoof"! Goodie goodie goodie! I will add you to the list ASAP. Welcome again and have fun!Yes

Richard

"Success is the ability to go from one failure to another with no loss of enthusiasm." - Sir Winston Churchill

  • Member since
    March 2011
  • From: Victoria BC Canada
Posted by de havilland canada on Monday, March 21, 2011 7:41 PM

Awesome and thanks!Look for some progress this week.My Tracker will be in CDN Navy livery.There are some differences on a Canadian Built and operated Tracker,main one being shorter fuse.....I have been humming and hawing(or is that sawing) bout that one......anyways ,my brand new kit is getting hacked tonight ...LOL....wish me luck.....pics to follow.


Cheers

Martin

http://i756.photobucket.com/albums/xx202/kermit77/ASWgb2/ASWgb2Badge.jpg

  • Member since
    March 2011
  • From: Victoria BC Canada
Posted by de havilland canada on Monday, March 21, 2011 8:36 PM

Here is first bit of progress....feel kinda sick to the stomach now however........

http://i756.photobucket.com/albums/xx202/kermit77/ASWgb2/ASWgb2Badge.jpg

  • Member since
    March 2011
  • From: Victoria BC Canada
Posted by de havilland canada on Monday, March 21, 2011 9:52 PM

Here is picture of one half re attached......and beef up doublers for alignment and strength.I have noticed quite a few sink marks around alignment pins with this kit,especially the fuse,otherwise it looks quite good but could use a resin interior(stock one is rather spartan)


Cheers

http://i756.photobucket.com/albums/xx202/kermit77/ASWgb2/ASWgb2Badge.jpg

  • Member since
    June 2009
  • From: Netherlands
Posted by kermit on Tuesday, March 22, 2011 2:42 PM

Dehavilland Canada,

Looks like you are off to a good startWink

I have completed the sanding and filling part.... Especially needed some attention at the stern:

Because the port side is all opened up i chose to also open up the port side torpedo tube, ready to fire...:

Starting to get somewhere...:

As i type this the first coat of paint has been sprayed on after some fiddly masking the interior goodies with wet kitchentowel and tamyia tape... Pics soon!Big Smile

Richard

"Success is the ability to go from one failure to another with no loss of enthusiasm." - Sir Winston Churchill

  • Member since
    June 2009
  • From: Netherlands
Posted by kermit on Thursday, March 24, 2011 12:22 PM

Well,... as promised. Here are the pics of my little sub with paint on it (and a subsequent coat of future to make working with the washes i am planning easier):

After the base paint was on (these are all revell acrylic paints) i went over each panel again of the same paint with a few drops of white added to create some shading. It's subtle but you can see it:

Next up will be highlighting even more with a black wash for the panel lines and some drybrushing for stuff sticking out. No real weathering yet but preparing....

Richard

"Success is the ability to go from one failure to another with no loss of enthusiasm." - Sir Winston Churchill

  • Member since
    October 2008
  • From: italy
Posted by bsyamato on Thursday, March 24, 2011 12:39 PM

jbrady

Bsyamato: Non ho nessun graffio costruzione di competenze. Vorrei che ho fatto. Hanno molto poco di modellazione esperienza così se riesco a trovare qualcosa di già fatto io uso.

mmm not good italian, but can be my english is worse Big Smile

Scratchin someting it's hard only if you don't try Yes 

------

de havilland canada good tracker as i see till now

Kermit you're about to finish your work!! Bow Down

Bsyamato move you on your gannet!!!! (self reproach)

  • Member since
    July 2010
Posted by jbrady on Thursday, March 24, 2011 2:26 PM

bsyamato

 jbrady:

Bsyamato: Non ho nessun graffio costruzione di competenze. Vorrei che ho fatto. Hanno molto poco di modellazione esperienza così se riesco a trovare qualcosa di già fatto io uso.


mmm not good italian, but can be my english is worse Big Smile

Scratchin someting it's hard only if you don't try Yes 

------

de havilland canada good tracker as i see till now

Kermit you're about to finish your work!! Bow Down

Bsyamato move you on your gannet!!!! (self reproach)

Blame it on the Microsoft translator.


  • Member since
    October 2008
  • From: italy
Posted by bsyamato on Thursday, March 24, 2011 6:48 PM

jbrady


 bsyamato:


 jbrady:

Bsyamato: Non ho nessun graffio costruzione di competenze. Vorrei che ho fatto. Hanno molto poco di modellazione esperienza così se riesco a trovare qualcosa di già fatto io uso.


mmm not good italian, but can be my english is worse Big Smile

Scratchin someting it's hard only if you don't try Yes 

------

de havilland canada good tracker as i see till now

Kermit you're about to finish your work!! Bow Down

Bsyamato move you on your gannet!!!! (self reproach)


Blame it on the Microsoft translator.

let me to try the right translation ( i use goggle to traslate single words)

"Non ho nessuna competenza nell'autocostruzione. Vorrei averlo fatto. Ho pochissima esperienza nella modellazione così se trovo qualcosa di già fatto la uso" .. Black Eye italian language are hard even for italians

.. 

On the gannet i painted the whole cockpit with all IP (now i use IP word!! Yes) left to adjust the ugliest parts of this good kit, crew seats , cloches and rudder pedals, tomorrow i'll post some picture.

  • Member since
    March 2011
  • From: Victoria BC Canada
Posted by de havilland canada on Thursday, March 24, 2011 7:38 PM

Hey that sub is looking really sweet!!!You know that is one thing I have never built...I remember when I was a kid my bro making that old Revell Polaris I think.Do you use pastel chalks at all for your weathering after dullcoat?I have had good luck with that following future ,washes and dull clear.

Keep up the great work.I am taking a short break to finish my Revell Super Hornet...decals just arrived(tomcatters VFA31).I will post a pic this weekend ,it should be done then back to Stoofin......


Cheers

http://i756.photobucket.com/albums/xx202/kermit77/ASWgb2/ASWgb2Badge.jpg

  • Member since
    March 2010
  • From: Brisbane
Posted by Julez72 on Friday, March 25, 2011 6:50 AM

DeHav,Welcome Sign i like the start you have made on your build, i'll be watching this one with interestYes

Richard, well here i was thinking that i might actually finish before you for once but yeah you've "kermified" meTongue Tiedagain.................

Nice work man, your Type XXI is looking very tricked outYes

WIP pic.I've finished all the construction and the Biber is ready for some paint...the two fish are also done but i need to replace the little props on the warhead, the Verlinden ones are frikkin massive and look way to big so i'll make some new ones.....i have to paint Brass paint on the torpedos, never done that before....used a brass paint that isToast


  • Member since
    July 2010
Posted by jbrady on Friday, March 25, 2011 6:48 PM

It's starting to look like a turkey. At this point I usually go into overdrive but I just can't get into this kit at all. I read a couple of reviews that call this kit one of the best plastic model kits ever... for me not so much. I just want it off the bench.


  • Member since
    October 2008
  • From: italy
Posted by bsyamato on Friday, March 25, 2011 8:33 PM

Great progress Jbrady and Julez , but effectively kermit it's about 99,9 % of wip Big Smile

Big Smile ... Big Smile me at 5-10 %?... Indifferent

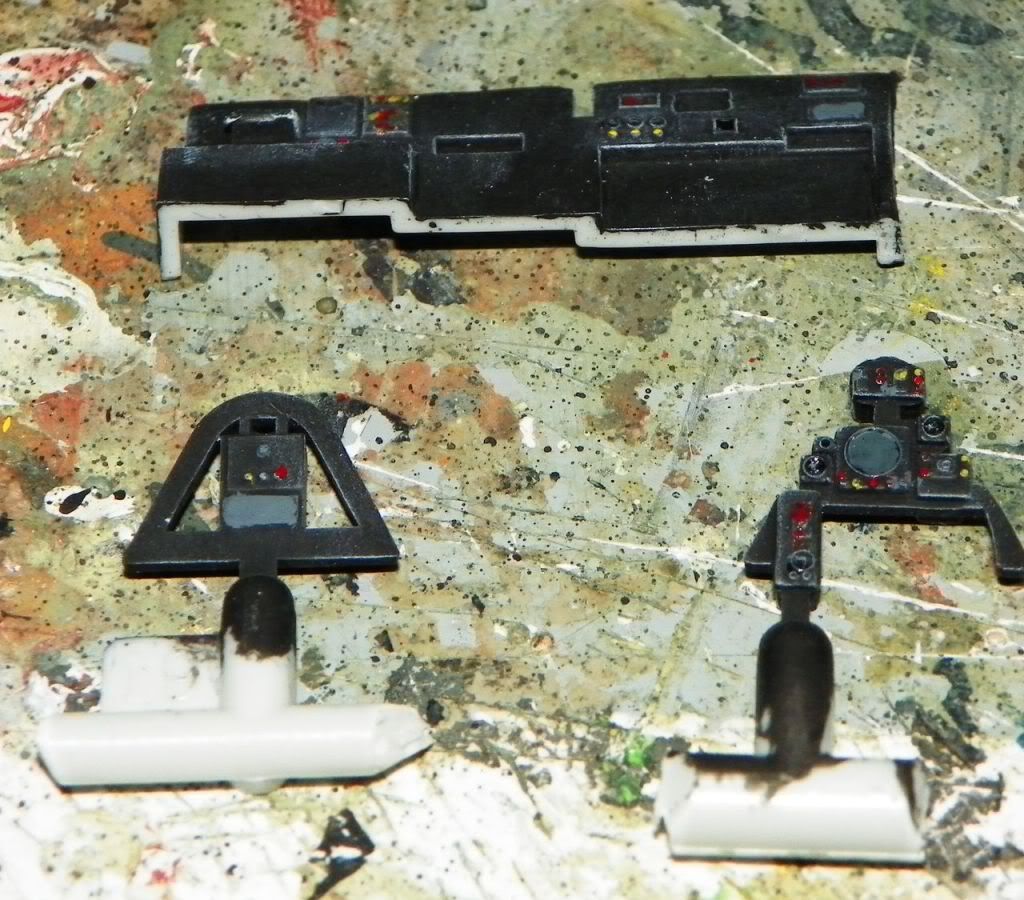
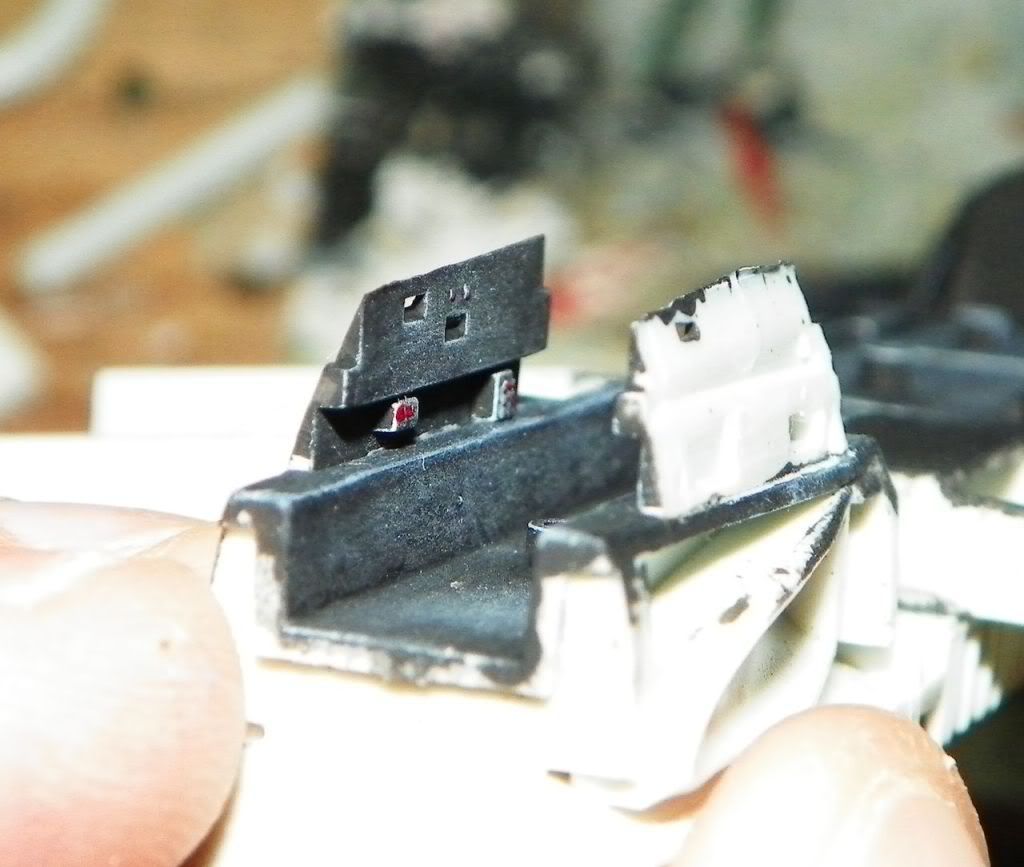
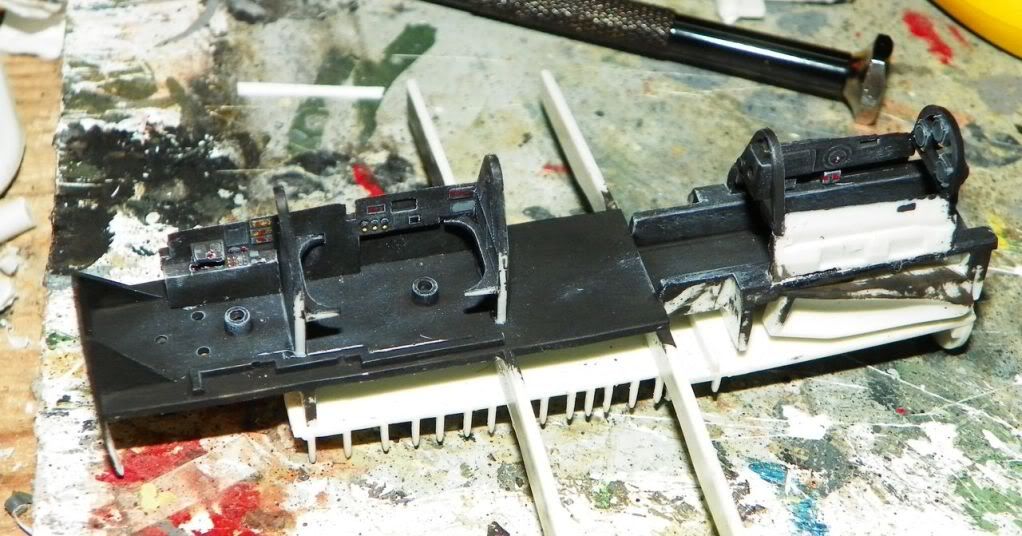
Some pictures of actual cockpit progression

triyng to simulate some indicator in panel instruments, with some scratch (litteraly scratch this time) on the paint to reveal the plastic under

Photobucket

that's the results on pilot cockpit ip

Photobucket

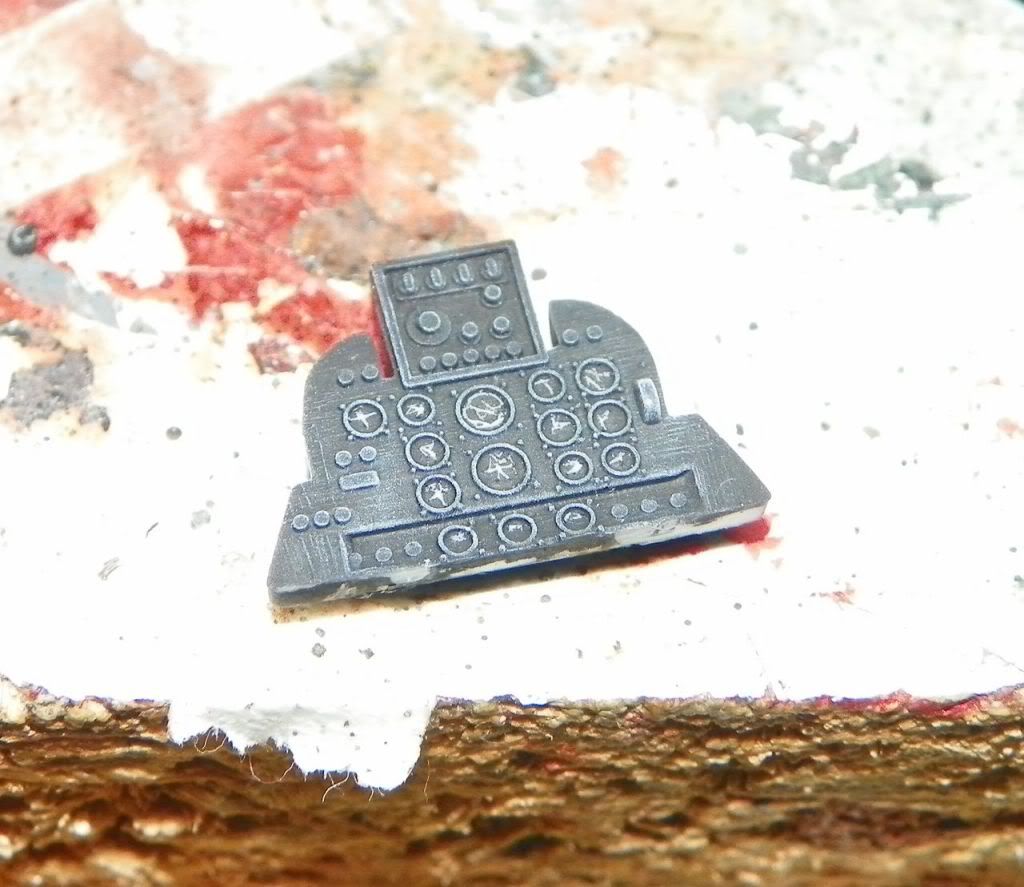
not so perfect but keep in mind that instruments in the middle are less than 2 mm in diameter

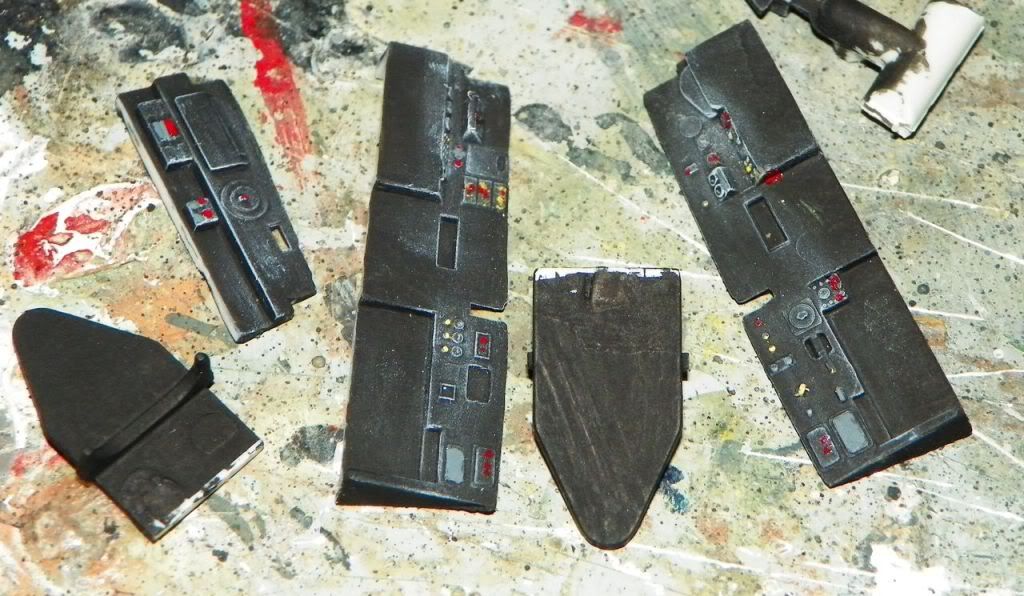
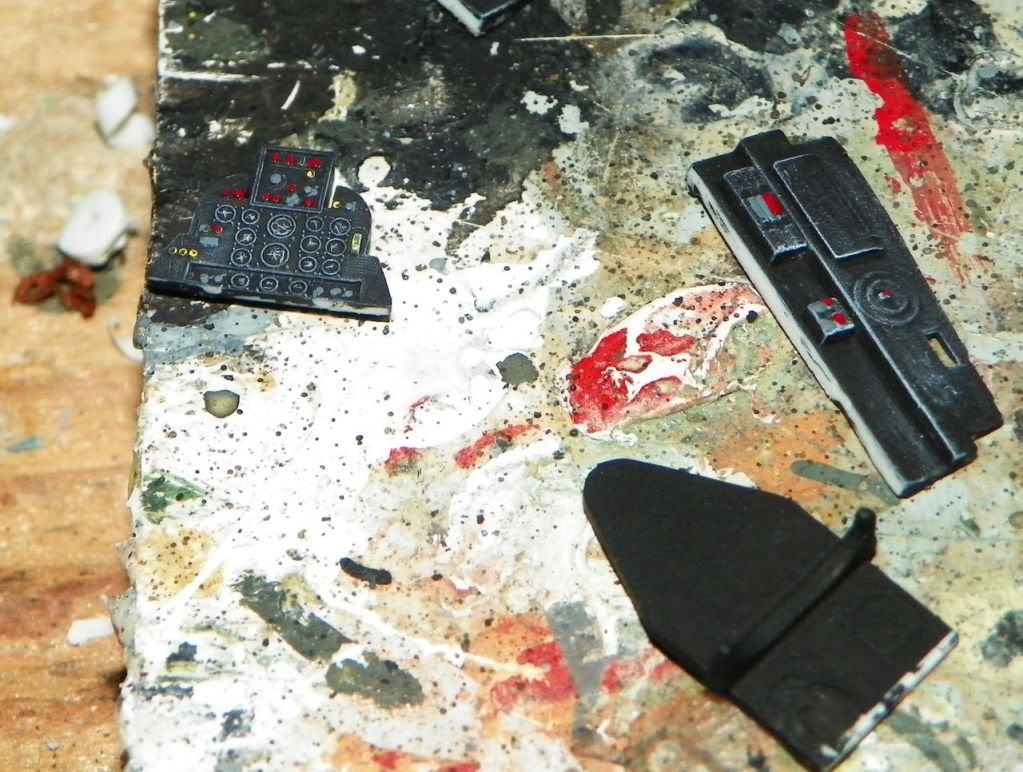
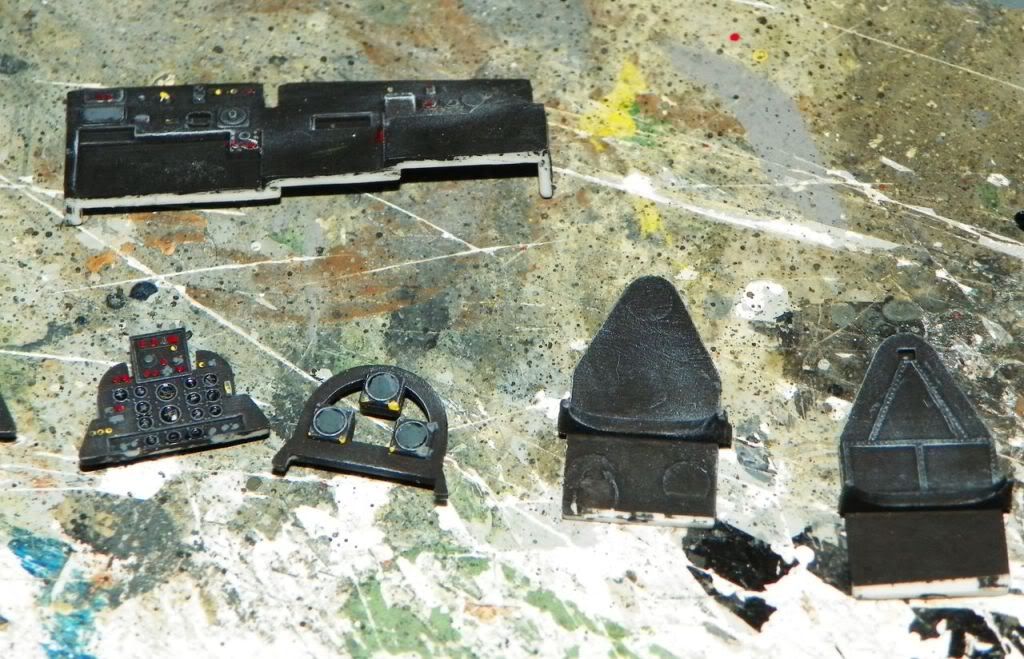
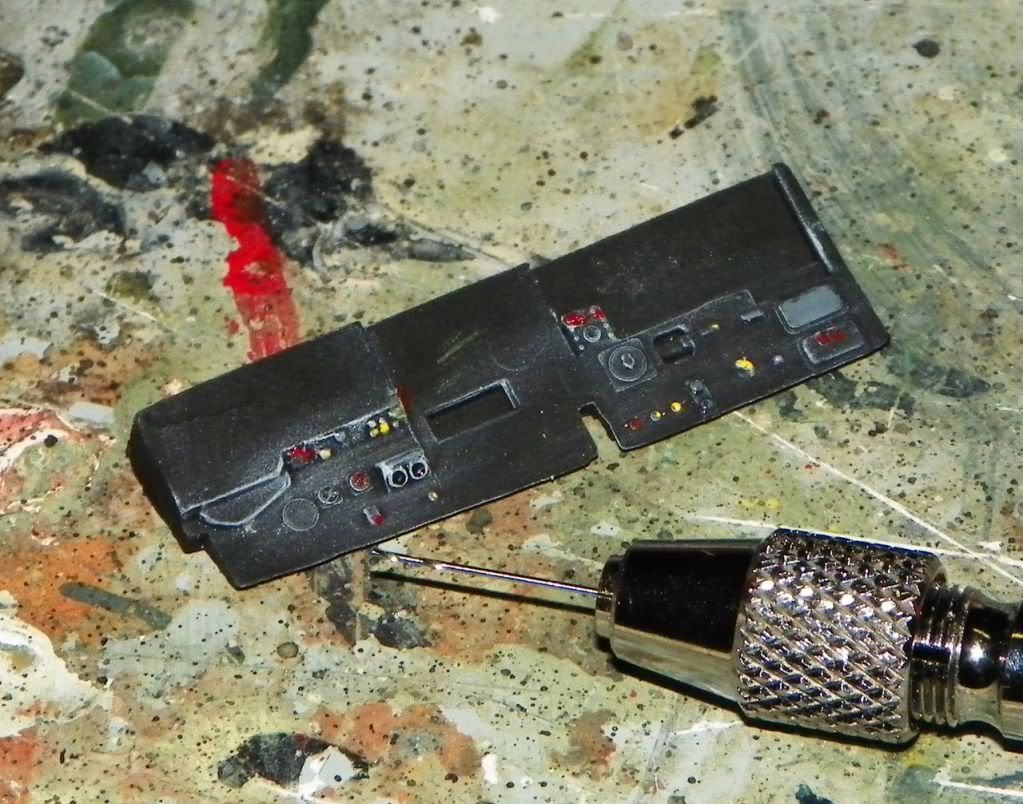
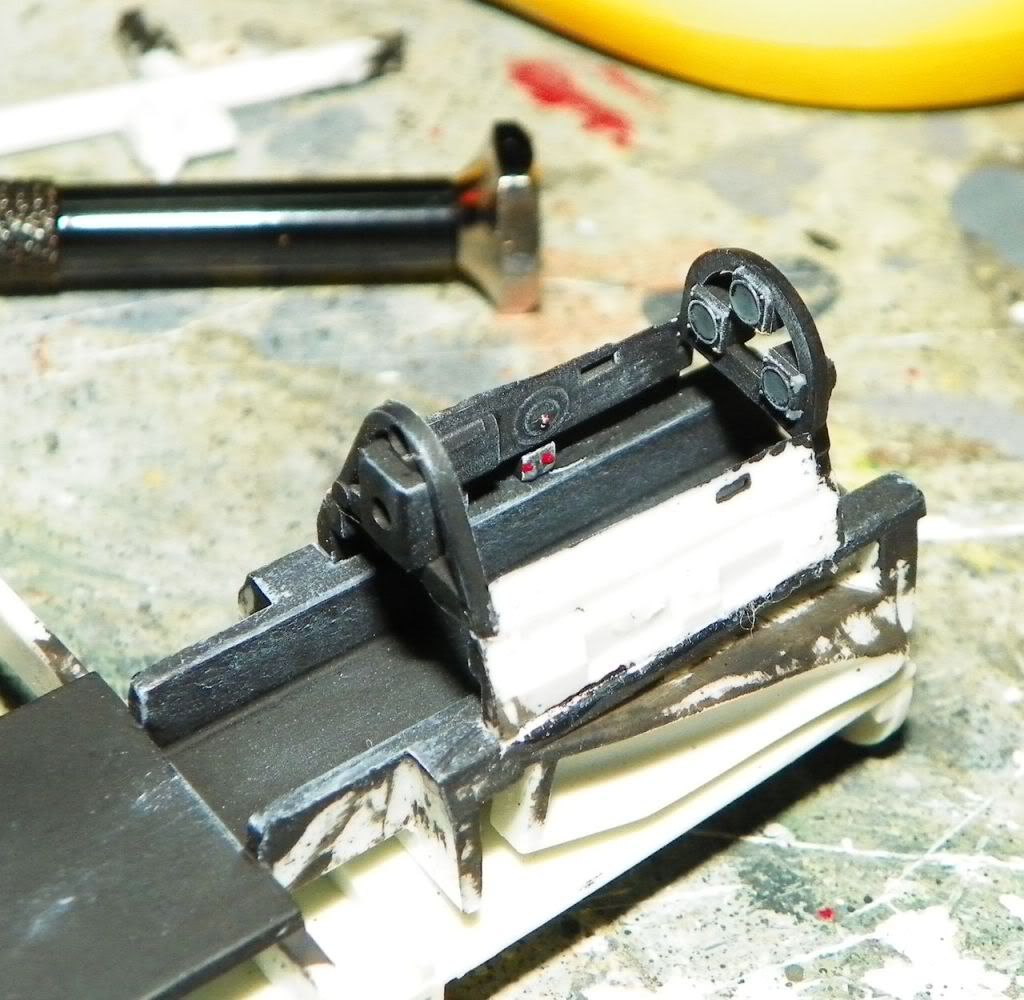
Start to paint detais, switches etc..

Photobucket

Photobucket

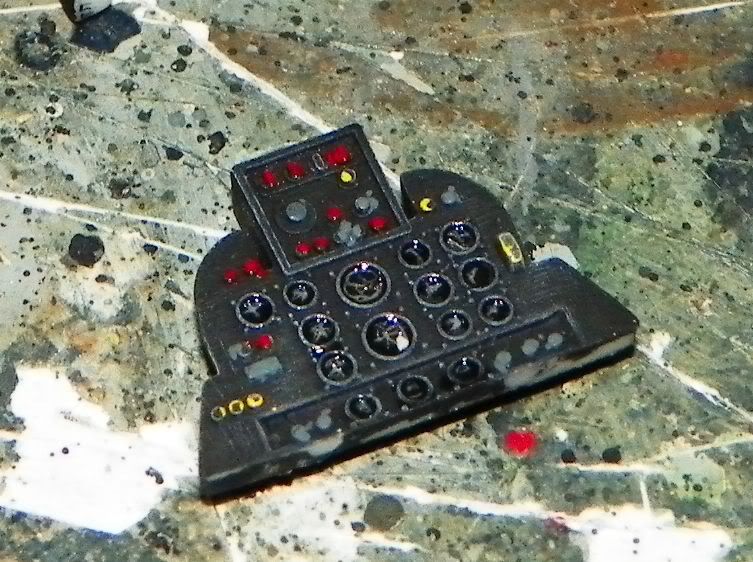
Now some drop of clear gloss to simulate glass on instruments

Photobucket

Photobucket

Photobucket

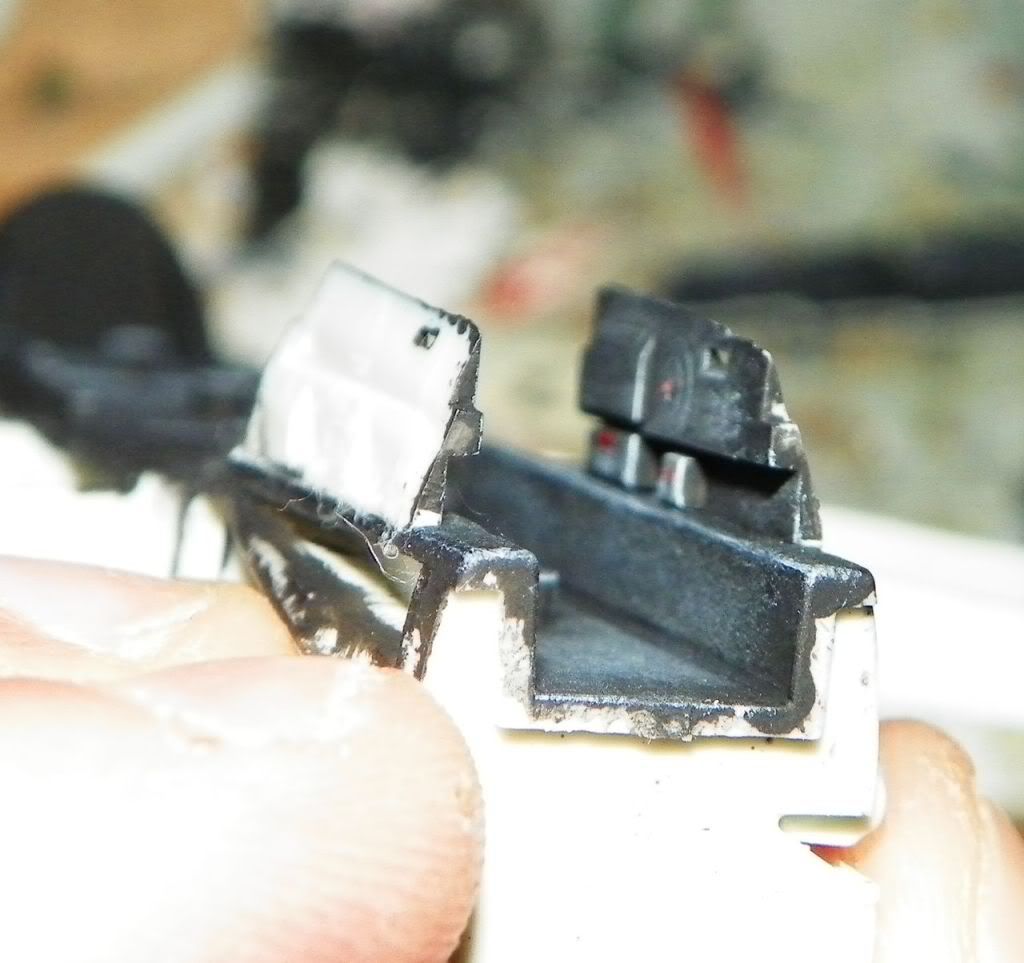
drilled a hole to put something on to simulate the throttles, the only important retail that revell miss to include

Photobucket

and put a very fine plastic rod in the hole (not in pictures..  forgot to take picture of it Bow Down)

Photobucket

Photobucket

rear cockpit ready to receive some cables after:

Photobucket

right side of front and central cockpit and vertical bulkheads can be glued (not followed the exact step of instruction)

Photobucket

Photobucket

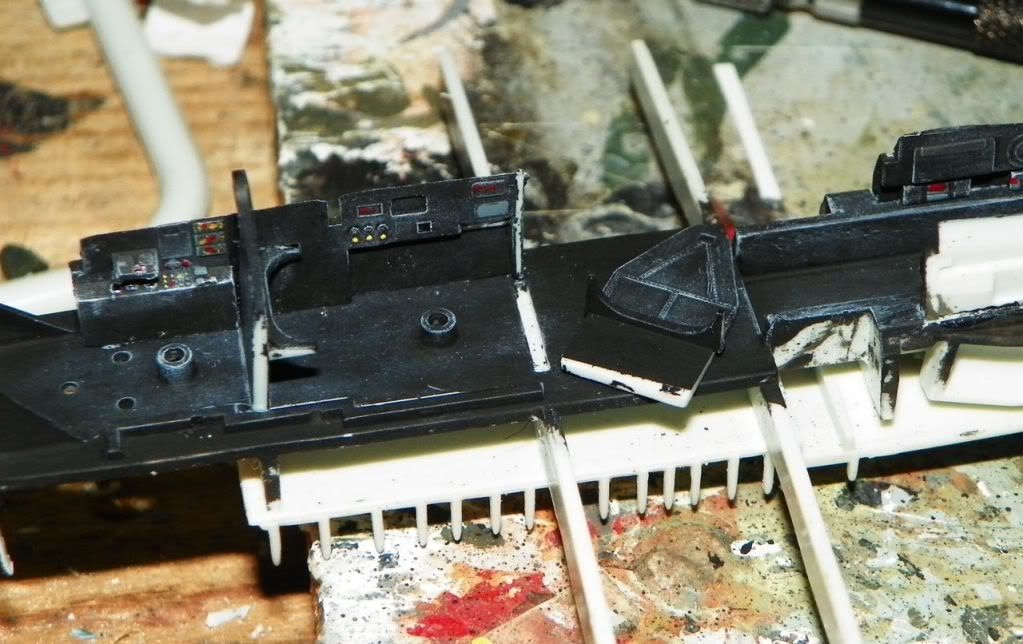
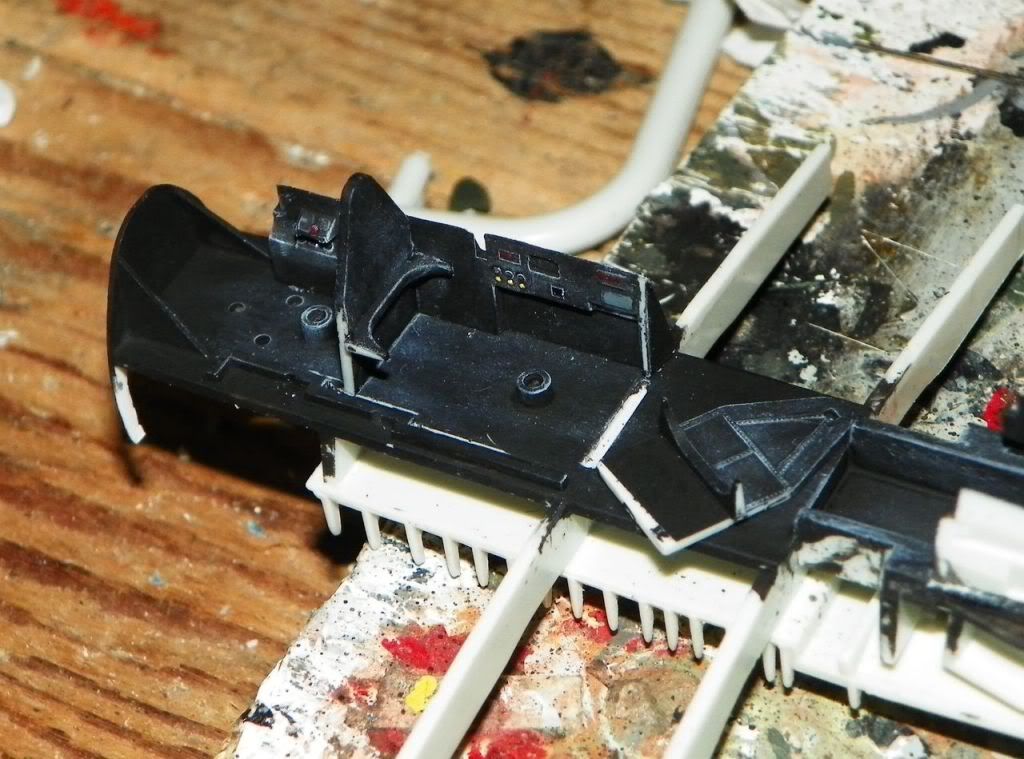
the whole cockpit as is now

Photobucket

i left out the others two panel to add wires and lots of others details, between front and center cockpit have large glasses that allow to see inside, and more the pilot cockpit don't have cover on it, the the rear of instruments are visible.

honestly don't know if was a good choise to complete the cockpit before to finish the engines housing... Hmm

that's all for this night


  • Member since
    March 2011
  • From: Victoria BC Canada
Posted by de havilland canada on Sunday, March 27, 2011 3:24 PM

The Avenger is looking really nice.....walk away for a few if you get frustrated.I also have an AM Avenger on the shelf and am looking fwd to building it.I will learn alot from your build.The gannet is comming nice too.


I just finished my Revell 1/48 Super Hornet ....now back to the Stoof,

http://i756.photobucket.com/albums/xx202/kermit77/ASWgb2/ASWgb2Badge.jpg

  • Member since
    October 2008
  • From: italy
Posted by bsyamato on Sunday, March 27, 2011 5:50 PM

Nice super hornet de havilland Yes

Some ups on gannet

Added engines throttle

Photobucket

and start to adjust seats

Photobucket

Photobucket

Photobucket

now seats need padding and belts


  • Member since
    March 2011
  • From: Victoria BC Canada
Posted by de havilland canada on Sunday, March 27, 2011 9:16 PM

That is going to be a great Gannet.

here are some  progress shots,great fitting nacelles and pieced together for some visual progress

http://i756.photobucket.com/albums/xx202/kermit77/ASWgb2/ASWgb2Badge.jpg

  • Member since
    June 2009
  • From: Netherlands
Posted by kermit on Tuesday, March 29, 2011 1:01 PM

Dehavilland:

Great model and nice work oin your sp2f sofar! Keep em comin' Big SmileYes

Bsyamato,

Amazing scratchwork there and every little bit improves an already very nice kitYesYes

Well,.....I am calling my sub done!Big Smile Had one major FUBAR moment with it a few hours ago when i secured a rigging line with tamyia tape, ripping off part of a decal...Bang Head What was i thinking!!

Anyways, other than that it turned out to be a nice rustbucketSmile:

After heavy drybrushing and washes i got the idea to use a very thin green wash on the lower hull as to simulate algea and such:

Hope you guys like her too!

Richard

"Success is the ability to go from one failure to another with no loss of enthusiasm." - Sir Winston Churchill

  • Member since
    July 2010
Posted by jbrady on Tuesday, March 29, 2011 1:14 PM

Very nice kermit... good call on the green wash.


  • Member since
    July 2008
  • From: USA California
Posted by vetteman42 on Tuesday, March 29, 2011 1:37 PM

Guys everything goin on here is looking fantastic !!!!!!!!!!!! Bow Down

Jbrady it may be lookin like a turkey to you, but  it is shaping up to be a top notch turkey leme tell ya. YesYes

Bsyamato WOW!!!! I love the attention you are giving to fine detail keep up the good work Toast

De Havilland Canada that Hornet looks great man, well done. And yes the Gannet is shaping up to be a top of the line build for sure. Eats

Julez wheres the Biber man ??? We need a Biber fix man Tongue Tied

Kermit man you are one of the Big Dawgs with the subs buddy Yeah Your sub is a show stopper man. Love the detail work and the weathering is something to aspire to for sure. Damn nice work my friend ToastYesYesBeer

Randy So many to build.......So little time

  • Member since
    October 2008
  • From: italy
Posted by bsyamato on Tuesday, March 29, 2011 5:38 PM

Thanx for comments on gannet men Bow Down

kermit

Well,.....I am calling my sub done!Big Smile Had one major FUBAR moment with it a few hours ago when i secured a rigging line with tamyia tape, ripping off part of a decal...Bang Head What was i thinking!!


Kermit you started as a dragster and come out a great sub !! YesYes weathering seems about perfect!!

When i'll decide to built my few ships in my stash i'll break the balls to you for a good marine weathering Big Smile

Sorry for decals but now..... dramatic time ! Lightning

 this afternoon i lost 5 kg of weight when i come inside my hobby room for the usualy daily midhour of building....

I hear a .. cat mew coming inside the room .. Indifferent panic!!!

on the workbench i leave the whole gannet cockpit section not assembled, a zaku (mech from gundam series) about 99% complete, and lots of stuff........

carefully opened the door Angry

... the cat quickly out of room and with eyes pumped of blood ii see lots of things on the floor!! Bang Head x5

bad smell inside ..

Taken a quick look on the bench, the mech orizontally but .. some gannet cockpit piece moved away and...

I decided to go to work  and postpone the damage list, before to istantly build a billfold maded with fresh cat fur Super Angry

Fortunately coming back at the evening ,after checking the situation in hobby room,  no piece of gannet was lost or damaged, the zaku undamaged, and the cat is still alive.. Wink

At the next updates Yes


  • Member since
    March 2011
  • From: Victoria BC Canada
Posted by de havilland canada on Tuesday, March 29, 2011 7:06 PM

Well Richard I think you have  done a phenominal weathering job here...it looks just right!!!!Very nice indeed.

And Gannett man I too have a little helper with my building as well......cat...LOL

Cheers and all keep up the fine work!!!

http://i756.photobucket.com/albums/xx202/kermit77/ASWgb2/ASWgb2Badge.jpg

  • Member since
    March 2011
  • From: Victoria BC Canada
Posted by de havilland canada on Tuesday, March 29, 2011 7:08 PM

Thanks for the compliment vetteman.........

http://i756.photobucket.com/albums/xx202/kermit77/ASWgb2/ASWgb2Badge.jpg

  • Member since
    March 2010
  • From: Brisbane
Posted by Julez72 on Tuesday, March 29, 2011 8:08 PM

Richard, well there you have it, another fantastic sub build for your collection, well done sirYesYesYesI  too like the green wash you added, a very nice touch....So whats next??? I hear the Italeri Biber is a nice kitWhistlingOk so i want to see it built to see how well it compares to the Verlinden one....

Vette, The Biber is on it's way mate, i put it down to work on the Mustang for a few days but i brushed some future over the glue points too add some extra bonding and last night i gave it an overall coat of future through the AB as a prime coat, preshade tonightYeah

Bs, your making some excellent progress on the Gannet, your attention to detail will certainly pay off with a great modelYes

DeHav, great work on your tracker, i like what i'm seeing and your Hornet is a very nice looking model, well doneToast


  • Member since
    March 2011
  • From: Victoria BC Canada
Posted by de havilland canada on Tuesday, March 29, 2011 11:27 PM

Thanks Julez and good to meet you.

here is the latest progress

Engines painted

weight added behind engines so I don't have a taildragger

Bomb bay shortened...kits is too long ,now the prop warning stripe will go in right spot.

filled and sande maybe color this weekend.

http://i756.photobucket.com/albums/xx202/kermit77/ASWgb2/ASWgb2Badge.jpg

  • Member since
    March 2011
  • From: Victoria BC Canada
Posted by de havilland canada on Sunday, April 3, 2011 12:43 AM

More progress and ready to start paint.....I added detail to torpedo bayThere was none,added armrests and throttles,squared off wing tips that are typical of Canadian Trackers.

http://i756.photobucket.com/albums/xx202/kermit77/ASWgb2/ASWgb2Badge.jpg

  • Member since
    October 2008
  • From: italy
Posted by bsyamato on Sunday, April 3, 2011 9:28 AM

Really nice progress on tracker !!!! Yes


  • Member since
    March 2011
  • From: Victoria BC Canada
Posted by de havilland canada on Sunday, April 3, 2011 1:40 PM

Thanks Bysamoto....it has had a few challenges,but I am heading out to the paintshop today.

Cheers

http://i756.photobucket.com/albums/xx202/kermit77/ASWgb2/ASWgb2Badge.jpg

  • Member since
    October 2008
  • From: italy
Posted by bsyamato on Sunday, April 3, 2011 4:33 PM

...ok.. Storm


bs


who damned is samoto??

...

----

...


  • Member since
    March 2011
  • From: Victoria BC Canada
Posted by de havilland canada on Sunday, April 3, 2011 6:13 PM

LOL sorry Bsyamato......spelling issues.....

http://i756.photobucket.com/albums/xx202/kermit77/ASWgb2/ASWgb2Badge.jpg

JOIN OUR COMMUNITY!

Our community is FREE to join. To participate you must either login or register for an account.

SEARCH FORUMS
FREE NEWSLETTER
By signing up you may also receive reader surveys and occasional special offers. We do not sell, rent or trade our email lists. View our Privacy Policy.