SEARCH FINESCALE.COM

Enter keywords or a search phrase below:

Star Wars GB Episode II CLOSED

57123 views
1031 replies
1 rating 2 rating 3 rating 4 rating 5 rating
  • Member since
    December 2002
  • From: Bury St Edmunds, Suffolk, England
Posted by Bish on Saturday, February 7, 2015 10:58 AM

Bob, I always found it was just below the ball, where the stand comes out of the bottom. Of course, after it broke once, that was the weak point. I found CA glue works but the bike is now at a funny angle to get it to balance.

Steve, any excuse for a re watch is a good one.

I am a Norfolk man and i glory in being so


On the bench: Airfix 1/72nd Harrier GR.3/Fujimi 1/72nd Ju 87D-3

  • Member since
    October 2008
  • From: Georgia
Posted by Rigidrider on Sunday, February 8, 2015 7:42 AM

Morning all... Little more progress yesterday...

Getting the next parts laid out and cleaned up...Lots of flash, and burrs and such...

Some of the tube frame parts were either twisted or shifted and I'm having to cut locating pins off, heat in hot water and tack down straight until cool to get to line up correctly. All in all though, I am enjoying the challenge , Its fun stepping out of your comfort zone at times. Take care all, more later!

Doug 

When Life Hands You A Bucket Of Lemons...

Make Lemonade!

Then Sell It Back At $2 Bucks A Glass...

  • Member since
    December 2002
  • From: Bury St Edmunds, Suffolk, England
Posted by Bish on Sunday, February 8, 2015 7:56 AM

That's nice work Doug, its really making me want to get one of mine out. Might have to do that for Ep III

I am a Norfolk man and i glory in being so


On the bench: Airfix 1/72nd Harrier GR.3/Fujimi 1/72nd Ju 87D-3

  • Member since
    October 2008
  • From: Georgia
Posted by Rigidrider on Sunday, February 8, 2015 8:02 AM

Well thanks Bish... I'll officially be the first to throw my hat in for III! lol...

When Life Hands You A Bucket Of Lemons...

Make Lemonade!

Then Sell It Back At $2 Bucks A Glass...

  • Member since
    December 2002
  • From: Bury St Edmunds, Suffolk, England
Posted by Bish on Sunday, February 8, 2015 12:57 PM

As soon as there is a confirmed release date, I will get planning the next GB. At the moment its just 2017.

I am a Norfolk man and i glory in being so


On the bench: Airfix 1/72nd Harrier GR.3/Fujimi 1/72nd Ju 87D-3

  • Member since
    October 2008
  • From: Georgia
Posted by Rigidrider on Monday, February 9, 2015 6:26 PM

That's cool Bish... Just my way of letting you know, you've drawn me to the Dark Side! LOL...

When Life Hands You A Bucket Of Lemons...

Make Lemonade!

Then Sell It Back At $2 Bucks A Glass...

  • Member since
    October 2008
  • From: Georgia
Posted by Rigidrider on Wednesday, February 11, 2015 7:52 PM

OK, I did some more over the last couple of days...

Kinda sorta getting the main body of the bike done.

I couldn't bring my self to use the molded plastic hoses (?) so... We make some.

And I guess this is part of the steering control (?).

Well I guess that's all for now... More to come.

Doug 

When Life Hands You A Bucket Of Lemons...

Make Lemonade!

Then Sell It Back At $2 Bucks A Glass...

  • Member since
    January 2014
  • From: Toronto
Posted by Rob S. on Wednesday, February 11, 2015 8:23 PM

Excellent Doug!!

______________________________________________________________________________


On the Bench: Nothing on the go ATM

  • Member since
    December 2002
  • From: Bury St Edmunds, Suffolk, England
Posted by Bish on Thursday, February 12, 2015 12:47 AM

Nice work Doug,  I like those hoses, what did you use.

I am a Norfolk man and i glory in being so


On the bench: Airfix 1/72nd Harrier GR.3/Fujimi 1/72nd Ju 87D-3

  • Member since
    October 2008
  • From: Georgia
Posted by Rigidrider on Thursday, February 12, 2015 4:54 AM

Thanks guys. I'm humbled being a sci-fi building novice.

Bish, the hoses are about a 12gauge wire with a finer wire wrapped aound it then painted satin black. Of course the heavier gauge wire is pretty much pre-bent and fit before wrapping with the finer wire. I was lucky once and found at a hardware store some very pliable picture hanging wire and it wrapped and stayed wrapped with no effort at all.

Thanks again

Doug

When Life Hands You A Bucket Of Lemons...

Make Lemonade!

Then Sell It Back At $2 Bucks A Glass...

  • Member since
    February 2014
  • From: Michigan
Posted by silentbob33 on Thursday, February 12, 2015 7:32 AM

Those hoses look great Doug. I might try that when I get around to finishing the repairs on my speeder bike

On my bench: Academy 1/35 UH-60L Black Hawk

  • Member since
    December 2002
  • From: Bury St Edmunds, Suffolk, England
Posted by Bish on Thursday, February 12, 2015 12:36 PM

Nice tip, thanks. I have been getting together a range of various gauge wire for different things, will need to add that to the list.

I am a Norfolk man and i glory in being so


On the bench: Airfix 1/72nd Harrier GR.3/Fujimi 1/72nd Ju 87D-3

  • Member since
    October 2008
  • From: Georgia
Posted by Rigidrider on Thursday, February 12, 2015 7:19 PM

Bob... Great! Give it a go...

Bish... Cant do without a box of scrap wire! lol...

When Life Hands You A Bucket Of Lemons...

Make Lemonade!

Then Sell It Back At $2 Bucks A Glass...

  • Member since
    December 2002
  • From: Bury St Edmunds, Suffolk, England
Posted by Bish on Friday, February 13, 2015 11:23 AM

Nice start Terry. I notice that with the TIe In.

Doug, that's for sure.

I am a Norfolk man and i glory in being so


On the bench: Airfix 1/72nd Harrier GR.3/Fujimi 1/72nd Ju 87D-3

  • Member since
    October 2008
  • From: Georgia
Posted by Rigidrider on Saturday, February 14, 2015 8:30 AM

Terry... Yes indeed a nice start!

Well I have a bit more done...

Tis all for now! More this weekend I hope...

Doug 

When Life Hands You A Bucket Of Lemons...

Make Lemonade!

Then Sell It Back At $2 Bucks A Glass...

  • Member since
    March 2014
Posted by Señormodeler on Saturday, February 14, 2015 9:17 AM

Excellent work, Doug!

I applied the base coat to the falcon this week. Tried to keep the pre-shade effect very subtle.

Masked off all the red panels on the upper side. Sponged on some Humbrol masking liquid for the paint chips. Applied a custom mix of muted red tamiya paint.

I think the red panels came out a little too dark, so I'm going to give them a light sanding with fine grit sandpaper to beat them back a little. Then I'll sponge on a few nuetral gray paint chips.

Still have the bottom panels to do and then I'll attach the cockpit and start the weathering. 

Comments welcome. Thanks for looking!

  • Member since
    January 2010
Posted by Klik on Saturday, February 14, 2015 7:12 PM

Be-a-u-tiful, Senor! I hate hop on your bandwagon (Two Falcons in a row, WOW), but I've been busy over the last two weeks, and was able to get a little work done (not totally true--I've done a LOT).

I haven't been able to get progress uploaded until today. I apologize for this rather lengthy post.

First off, I chose a pale green for the "other color" (for some reason it doesn't appear that green in my photos):

With that painted, I finished the side walls and mandible "inserts", then glued the whole mess together:

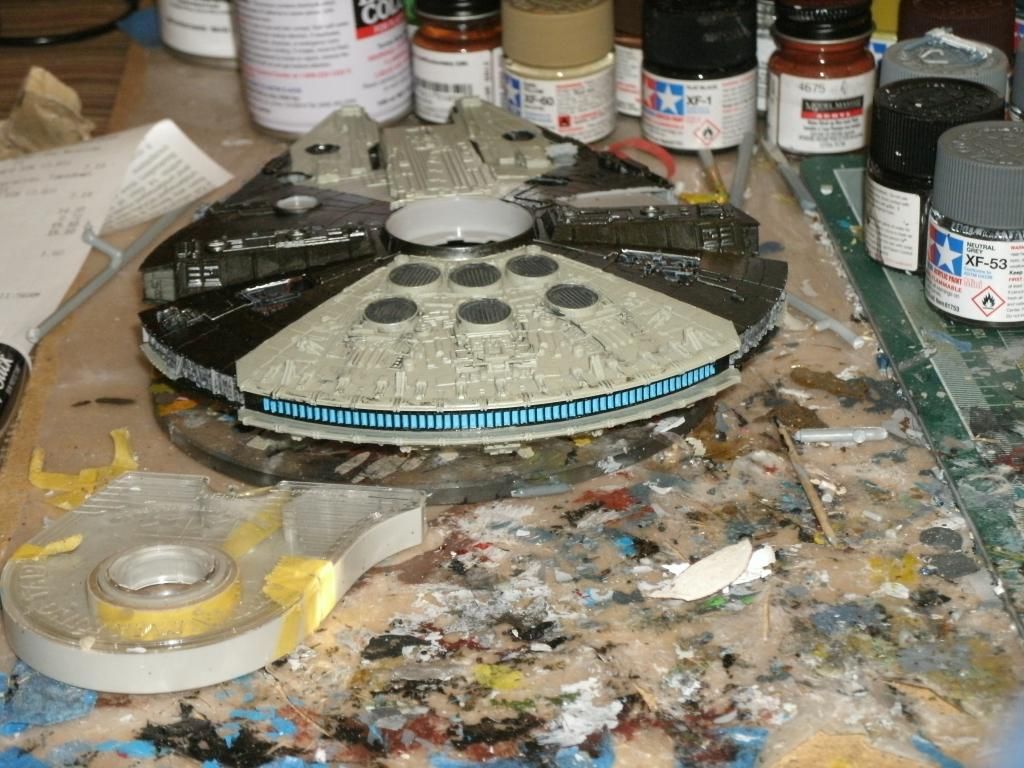
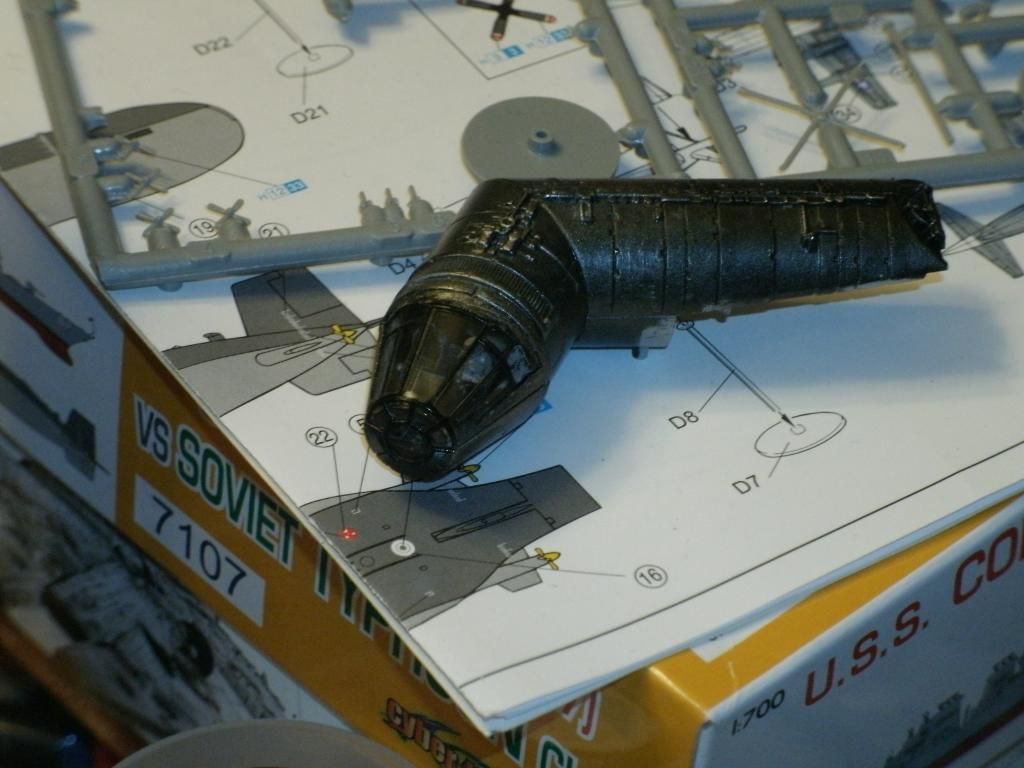
As you can see, I started with the weathering, just enough to add some details (at this point, the side walls were "finished"). I chose to paint them grey to reflect the ship's "original" color scheme. I also painted a select few cables.

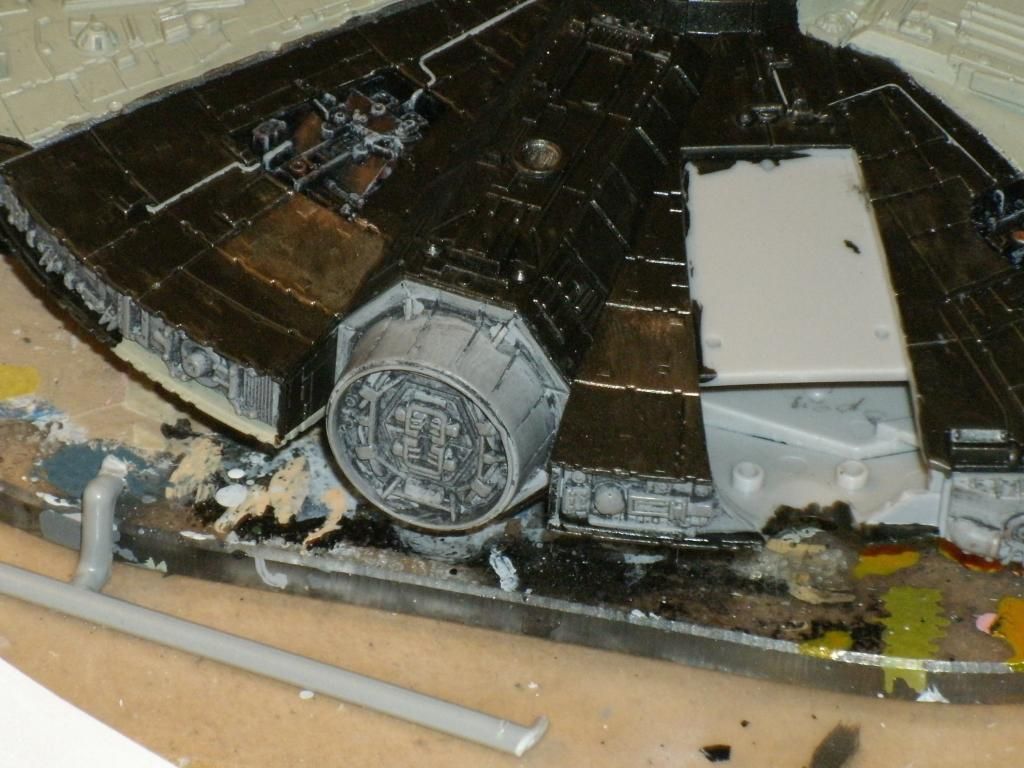
Then came the canopy, which was masked with the included paint masks, then spray painted with regular ol' semi-gloss black spray paint, then glued into the cockpit arm:

with the masks removed, the canopy came out awesomely:

and that's where it sat for a few days (though I didn't paint the canopy until last Tuesday and didn't unmask the canopy until Thursday).

To avoid overly-lenghthy posts, I'll do a second post following this one....

oneyearwar1

The hardest part of flying isn't flying...it's landing.

  • Member since
    January 2010
Posted by Klik on Saturday, February 14, 2015 7:29 PM

O.K. back on the second half...

I began painting (and weathering) the gun turrets. I'll be adding the guns and canopies for the turrets last, but for now, the turret bodies themselves look like this:

I also weathered the cockpit arm:

Finally, more weathering was done to the body of the ship:

I also assembled the antenna dish. This kit actually had a pylon broken in the factory (so its got a 'damaged' leg, which I paint as such).

(more weathering on the rear deck)

Close up of the antenna. Please note that it is not attached yet. You can see the missing rear pylon leg. (Laser damage?) My Camera can't perfectly capture all of the weathering without supplemental lighting, but I promise you, it is looking good.

The story I've come up with for this craft is that it was a surplus purchase that went through a few owners, one of whom added all the add-ons I've given it, another who had the hull coated with some stealthy metallic coating, and the "new" owner, who has painted it green (so the green paint won't be showing as much wear and tear). One of the recent add-ons was the addition of gun turrets (I'm thinking in response to Han's infamy), so they won't look the same as the rest of the ship (but I'm keeping it a surprise for now_).

That's about all I've got to share with you for now, though I may be tempted to get more work done on it over the holiday weekend...

Keep up the great work!

Klik

oneyearwar1

The hardest part of flying isn't flying...it's landing.

  • Member since
    October 2008
  • From: Georgia
Posted by Rigidrider on Saturday, February 14, 2015 8:22 PM

Senor and Klik, Guys, I built that kit WAY back in the late 70s, and it didn't come out any where near as good as what your doing... May have to nerve up and do another some day. Great work guys!

Doug

When Life Hands You A Bucket Of Lemons...

Make Lemonade!

Then Sell It Back At $2 Bucks A Glass...

  • Member since
    December 2002
  • From: Bury St Edmunds, Suffolk, England
Posted by Bish on Saturday, February 14, 2015 11:51 PM

Doug loving the look of the e, the pipes are a real nice touch.

I am guessing you mean the MPC Falcon kit. Both those guys are building Fine Molds kits, one in 72nd and one in 144. I wish I had got the 72nd kit when I had the chance. I have the MPC kit but I am sure the detail is nothing like these FM kits.

Great work on those Falcons guys. Two different looks but both looking great.

I am a Norfolk man and i glory in being so


On the bench: Airfix 1/72nd Harrier GR.3/Fujimi 1/72nd Ju 87D-3

  • Member since
    October 2008
  • From: Georgia
Posted by Rigidrider on Sunday, February 15, 2015 7:08 AM

Yes the MPC kit, I bought it shortly after the release in 1978 or 79(?) while still living in California. Wow... I didn't realize the size of those kits, That makes them even more incredible.

Thanks for comments on the bike, I'm mulling around a dio for it and while not decided yet I have some pretty solid thoughts. We'll see. Take care all!

Doug

When Life Hands You A Bucket Of Lemons...

Make Lemonade!

Then Sell It Back At $2 Bucks A Glass...

  • Member since
    October 2008
  • From: Georgia
Posted by Rigidrider on Sunday, February 15, 2015 7:33 AM

Morning all! Well after the Valentines day ritual I(I got my wife a Day spa Gift card, Wink ) I was able to get a bit more done while she was gone, (funny how that works...lol) Not much, but here are the results...

Foot rests and controls along with seat and beginning some of the weathering. It wont be too beat up, but will show signs of normal wear and tear. The grey top cote was washed lightly with a brown wash to add a hint of dirt and the tube frame having been painted with MM metalizing paints (gun metal buffing ) were washed (prior to assy) with a weak raw sienna, seen in the background to simulate mud and such.

A closer look, I didn't like the look of the "chrome" paint on the cyl rods of the control rods, so I cut to fit some small pieces of chromed foil from a sheet and wrapped around them. Much better, but would have been easier if done before assy (Duuuh).  

And finally for now, the beginnings of the hand controls, heeding note to self to wrap chromed foil around cyl rods BEFORE assy! Much easier...

Take care all!  

Doug


When Life Hands You A Bucket Of Lemons...

Make Lemonade!

Then Sell It Back At $2 Bucks A Glass...

  • Member since
    December 2002
  • From: Bury St Edmunds, Suffolk, England
Posted by Bish on Sunday, February 15, 2015 1:34 PM

A dio sounds a good idea. Any idea what setting you might go for. The bike is looking good, I like the idea of the chrome foil. Might have to get some of that.

I am a Norfolk man and i glory in being so


On the bench: Airfix 1/72nd Harrier GR.3/Fujimi 1/72nd Ju 87D-3

  • Member since
    October 2008
  • From: Georgia
Posted by Rigidrider on Sunday, February 15, 2015 2:45 PM

The foil is a great addition for any type cyl rod, including aircraft landing gear. Its relatively inexpensive and comes in several different tones and shades. I like it a lot. Yeah, Being my "Storm Trooper" is going to be more of an elite Special Forces type, and will be wearing camo, I'm thinking kinda sorta along the lines of a forest type setting.  Still thinking it over though... Thanks Bish. More to follow...

Doug

When Life Hands You A Bucket Of Lemons...

Make Lemonade!

Then Sell It Back At $2 Bucks A Glass...

  • Member since
    December 2002
  • From: Bury St Edmunds, Suffolk, England
Posted by Bish on Sunday, February 15, 2015 3:03 PM

I have never used any sort of foil before. Did you use one specific for modelling. I just searched and found some by Bare Metal, which seems to be for modellers, but some others that I am not sure about.

Nice idea for the camo trooper. I have 2 in the stash, and while one will be in traditional white, I plan on doing the other in a German scheme with the trooper in SS camo.

I am a Norfolk man and i glory in being so


On the bench: Airfix 1/72nd Harrier GR.3/Fujimi 1/72nd Ju 87D-3

  • Member since
    October 2008
  • From: Georgia
Posted by Rigidrider on Sunday, February 15, 2015 4:59 PM

Yup , Those are the ones... Bare-Metal Brand. They are extremely thin and have a light adhesive on them, however, you can also get an adhesive just for it if desired. I have used this before to do NMF on the undersides of aircraft and even did the whole aircraft on a 48th scale B-17 once, of course it took more then 1 sheet. I like this stuff for doing model car trim and such due to it conforming to and showing all surface features , rivets, panel lines and such when burnished.

When Life Hands You A Bucket Of Lemons...

Make Lemonade!

Then Sell It Back At $2 Bucks A Glass...

  • Member since
    November 2010
  • From: Florida-West Central
Posted by Eagle90 on Sunday, February 15, 2015 6:38 PM

WOW!  There are some great builds here!  Makes me feel silly doing the ARC Snap-Tite!  Embarrassed  But I'm not doing just the snap together thing, I'm putting a little more love into it...and I actually started it last night!  Got bored waiting for something with the Sherman I'm doing and grabbed the box and started.  Whistling

Here are a couple of progress pics for you!  Thanks for looking!

Eagle90


  • Member since
    December 2002
  • From: Bury St Edmunds, Suffolk, England
Posted by Bish on Sunday, February 15, 2015 11:14 PM

Thanks Doug, i'll grab some of that.

Nice start Eagle, looks like it goes together pretty well.

I am a Norfolk man and i glory in being so


On the bench: Airfix 1/72nd Harrier GR.3/Fujimi 1/72nd Ju 87D-3

  • Member since
    March 2014
Posted by Señormodeler on Monday, February 16, 2015 8:57 AM

Very nice speeder bike, doug!

I like the what you're doing with the 1/144 falcon, Kilk.

Quick update. I painted the bottom panels.

[/URL]

And primed the base with duplicolor gray.

[/URL]

That is all.

JOIN OUR COMMUNITY!

Our community is FREE to join. To participate you must either login or register for an account.

SEARCH FORUMS
FREE NEWSLETTER
By signing up you may also receive reader surveys and occasional special offers. We do not sell, rent or trade our email lists. View our Privacy Policy.