SEARCH FINESCALE.COM

Enter keywords or a search phrase below:

The 2015 /16 Red Hot and Rollin Automotive Group Build--Ended

120418 views
2225 replies
1 rating 2 rating 3 rating 4 rating 5 rating
  • Member since
    July 2014
Posted by modelcrazy on Sunday, May 29, 2016 11:46 PM

OK Mustang,

I'm starting on the Vette. My other builds are in the process of drying or in various painting stages. I have owned this kit for over 25 years.

I believe I will be showing the engine so I need to do some detail work. It will also be finished in a Burgundy Red Metallic.

Steve

Steve

Building a kit from your stash is like cutting a head off a Hydra, two more take it's place.


http://www.spamodeler.com/forum/

  • Member since
    January 2015
Posted by MOPAR - D on Monday, May 30, 2016 6:55 AM

Thanks Seabe the stacks are the from the Revell dump truck kit already chrome plated. 

  • Member since
    January 2015
Posted by MOPAR - D on Monday, May 30, 2016 11:45 AM

Worked on fitting all the glass in was able to use the glass from the Mack kit for the back and side windows. For the front    Windshield I used a paper template ( only 3 try's) to get it to fit good. I also scratch built supports for the stacks. 

  • Member since
    January 2015
Posted by MOPAR - D on Monday, May 30, 2016 6:20 PM

Broke out the air brush today and some yellow. Next will be black on the fenders  


  • Member since
    March 2012
  • From: Corpus Christi, Tx
Posted by mustang1989 on Tuesday, May 31, 2016 1:47 PM

Steve: Man that's great!!! I can't wait to see what you do with this Vette!!!

Dan: Your progress is lookin' good. Engine detail looks quite the part!


 Forum | Modelers Social Club Forum (proboards.com) 

  • Member since
    July 2014
Posted by modelcrazy on Tuesday, May 31, 2016 9:53 PM
Thanks Mustang,
The Vette has it’s first coat of paint. I need to wet sand and shoot again. The engine will have plug wire and hose detail.

Steve

Building a kit from your stash is like cutting a head off a Hydra, two more take it's place.


http://www.spamodeler.com/forum/

  • Member since
    March 2012
  • From: Corpus Christi, Tx
Posted by mustang1989 on Wednesday, June 1, 2016 6:15 AM

I like that color Steve. Looking forward to more with the paint.


 Forum | Modelers Social Club Forum (proboards.com) 

  • Member since
    January 2015
Posted by MOPAR - D on Wednesday, June 1, 2016 8:55 PM

Looking good Steve like the red. 

  • Member since
    July 2014
Posted by modelcrazy on Wednesday, June 1, 2016 11:24 PM

Thanks guys,

Here is the second coat and I started on the engine.

Steve

Building a kit from your stash is like cutting a head off a Hydra, two more take it's place.


http://www.spamodeler.com/forum/

  • Member since
    July 2014
Posted by modelcrazy on Thursday, June 2, 2016 9:29 PM
Coat #3 applied. Now to give it a few days to dry as I work on the engine.

Steve

Building a kit from your stash is like cutting a head off a Hydra, two more take it's place.


http://www.spamodeler.com/forum/

  • Member since
    March 2012
  • From: Corpus Christi, Tx
Posted by mustang1989 on Thursday, June 2, 2016 10:08 PM

Man that paint job is looking killer so far Steve. Say....is that a "mystical floating alternator" I see on that beauty of an engine?


 Forum | Modelers Social Club Forum (proboards.com) 

  • Member since
    July 2014
Posted by modelcrazy on Thursday, June 2, 2016 11:37 PM

Naa, the brackets are invisable. Here are some updated pics of the 396. I guess I need to install the alternator brackets LOL

Steve

Building a kit from your stash is like cutting a head off a Hydra, two more take it's place.


http://www.spamodeler.com/forum/

  • Member since
    March 2012
  • From: Corpus Christi, Tx
Posted by mustang1989 on Friday, June 3, 2016 6:51 AM

Man that plug wire routing is like .........tha bomb Steve!!! Wow!


 Forum | Modelers Social Club Forum (proboards.com) 

  • Member since
    January 2015
Posted by MOPAR - D on Friday, June 3, 2016 7:30 AM

Steve nice detail on your engine. 

  • Member since
    July 2014
Posted by modelcrazy on Friday, June 3, 2016 7:42 AM

Thanks guys. I don't do too many cars, but really enjoy them when the bug bites.

Steve

Building a kit from your stash is like cutting a head off a Hydra, two more take it's place.


http://www.spamodeler.com/forum/

  • Member since
    August 2015
  • From: the redlands Fl
Posted by crown r n7 on Friday, June 3, 2016 8:26 AM

Nice color and the engine work beauitful . the bug bites


 Nick.

  • Member since
    March 2012
  • From: Corpus Christi, Tx
Posted by mustang1989 on Friday, June 3, 2016 9:44 PM

Looks like the bug bit alright. Heya Steve. I've got a bottle of Tamiya "Smoke". It's got just enough tint to it to make chrome look like real metal and when thinned down just a hair it's perfect for that air cleaner element to bring out the detail. Just a friendly tip is all. That engine does look good buddy.Yes


 Forum | Modelers Social Club Forum (proboards.com) 

  • Member since
    January 2014
Posted by Seabe on Friday, June 3, 2016 10:28 PM

Agree with Mustang. If somebody haven't yet picked it up, I also use Smoke on my engines. Less hassle than washes, same effect, just flows into the low-lying areas nicely and created that bit of contrast.

  • Member since
    March 2012
  • From: Corpus Christi, Tx
Posted by mustang1989 on Friday, June 3, 2016 11:09 PM

I'll be finishing this up with the paint and decals exactly how it is on the box. I was able to fab out the original decals to get a new set printed up with a customized license plate based off of the most recent Texas plate design that reads RUQWKR. lol

Folks this gets more "do-able" by the day. I've got the bulk of it all test fitted here and so far everything is fitting and clearing where it's supposed to. A couple of shots:


This is where things had to be adjusted a bit. The firewall was sitting to low from the rear of the body line at the rear of the engine bay opening causing a gap between the firewall and the body. I shimmed it up a little to close the gap up. I've already test fitted the body and I'm in good shape so far.


 Forum | Modelers Social Club Forum (proboards.com) 

  • Member since
    January 2015
Posted by MOPAR - D on Saturday, June 4, 2016 10:47 AM

Joe I really like all your attention to these little details in your build 


Thanks for the continued comments guys I do appreciate them  

Even with all the rain we have been getting here in Houston I've been able to get some more painting done. I used BMF on the radiator grill and chrome powder on the rest. I'm still not sure what I'm going to do with the fuel tanks yet either black, chrome or aluminum  

  • Member since
    July 2014
Posted by modelcrazy on Saturday, June 4, 2016 11:55 PM
 
 
Thanks guys. I looked in my paints and I don’t own any smoke, so I used a good ole oil wash. I also added a bracket for the alternator.
I got the engine installed into the frame. I’m going to let the body dry another day or two before I finish it and do some work to the frame and interior.

Steve

Building a kit from your stash is like cutting a head off a Hydra, two more take it's place.


http://www.spamodeler.com/forum/

  • Member since
    March 2012
  • From: Corpus Christi, Tx
Posted by mustang1989 on Sunday, June 5, 2016 7:33 AM

Dan: Man you are really movin' along with that build man. Lookin' great with all that work so far. Yes

Steve: I can't get over that spark plug wire routing!  Great job on that man!!! That usage of a wash really brought out the details on that engine.


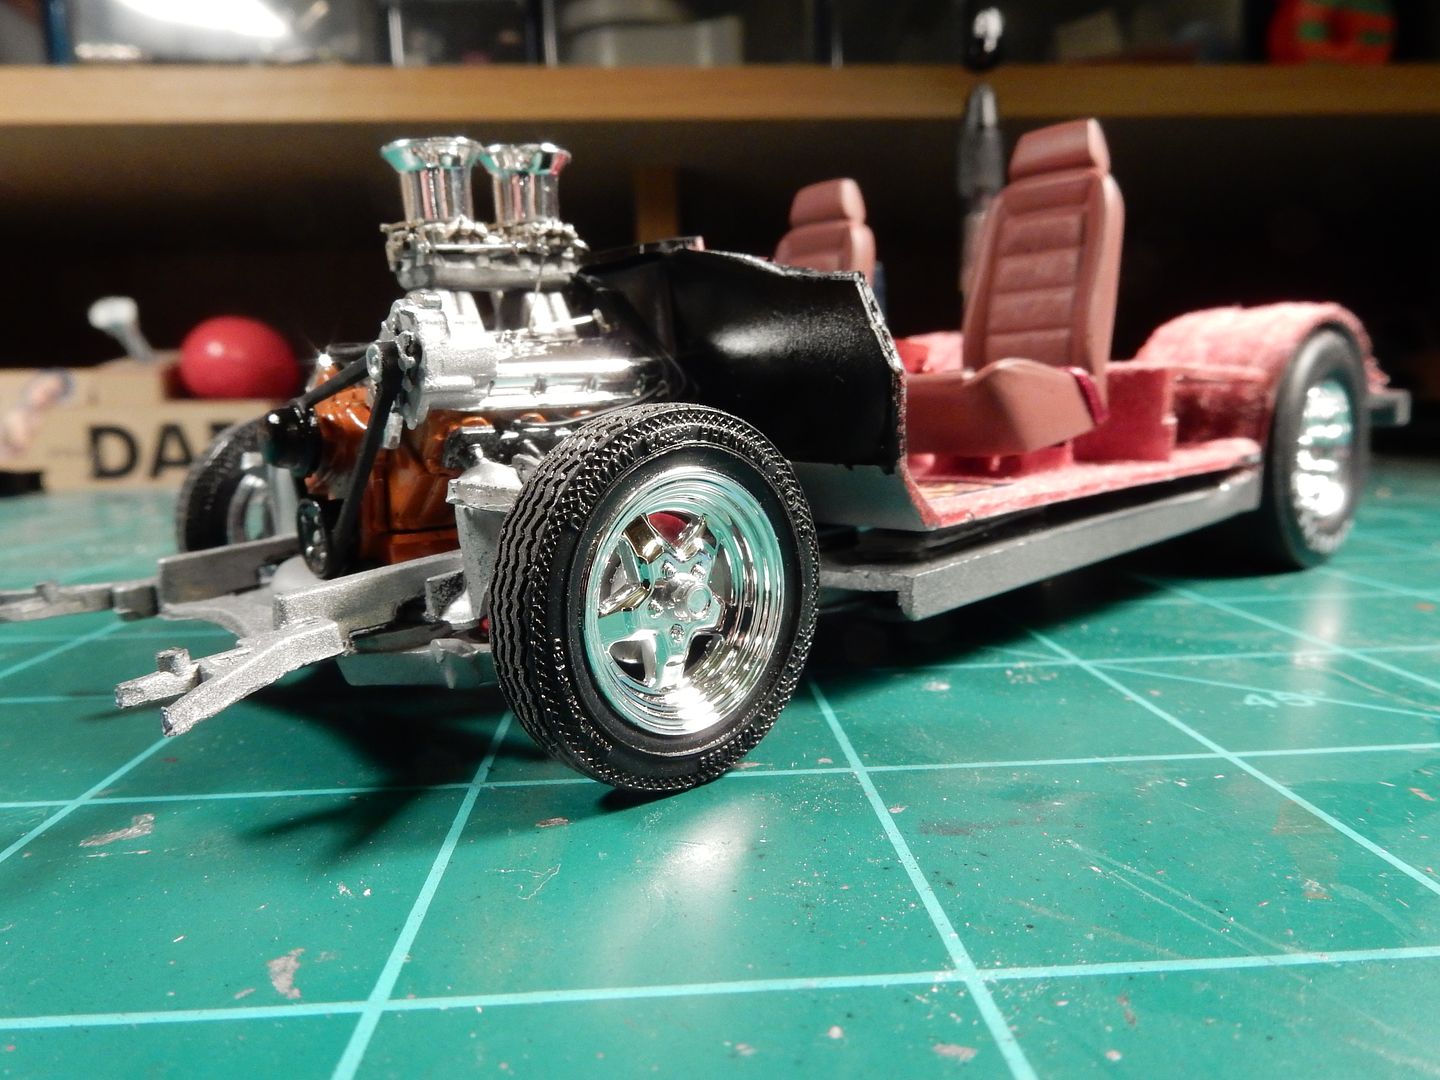
Well I took a break from all the test fit and prep work to get this thing to fit together. All that is going ok so far though. I mentioned that I was going to work on the wheel center caps for the front wheels. I just couldn't stand leaving the front wheels the way they were with no cap:


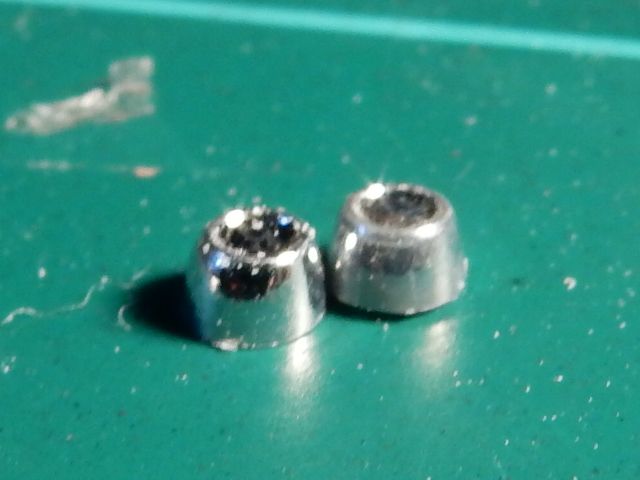
I then took the two rear wheels that did have a center cap and sanded the backs of the wheels down until all I had left were......well ....the center caps:


I then test fitted them to the spare front wheel that still attached to sprue. This'll work is all I've gotta say:


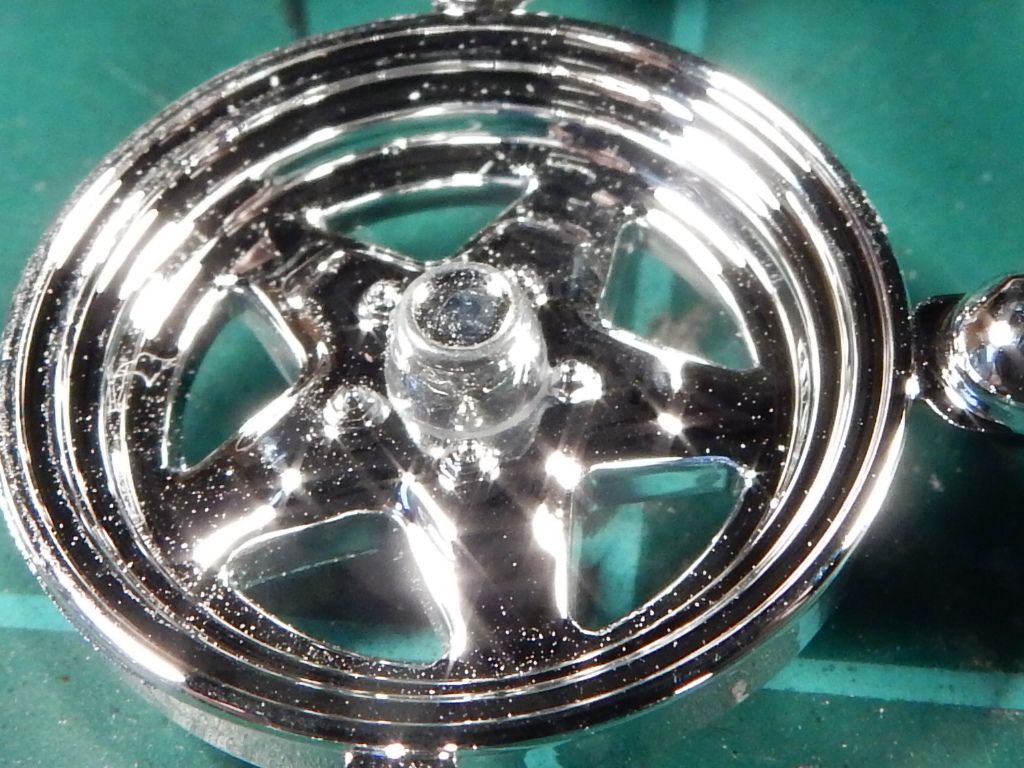
Some clean up left to do but looks like I'm in business!

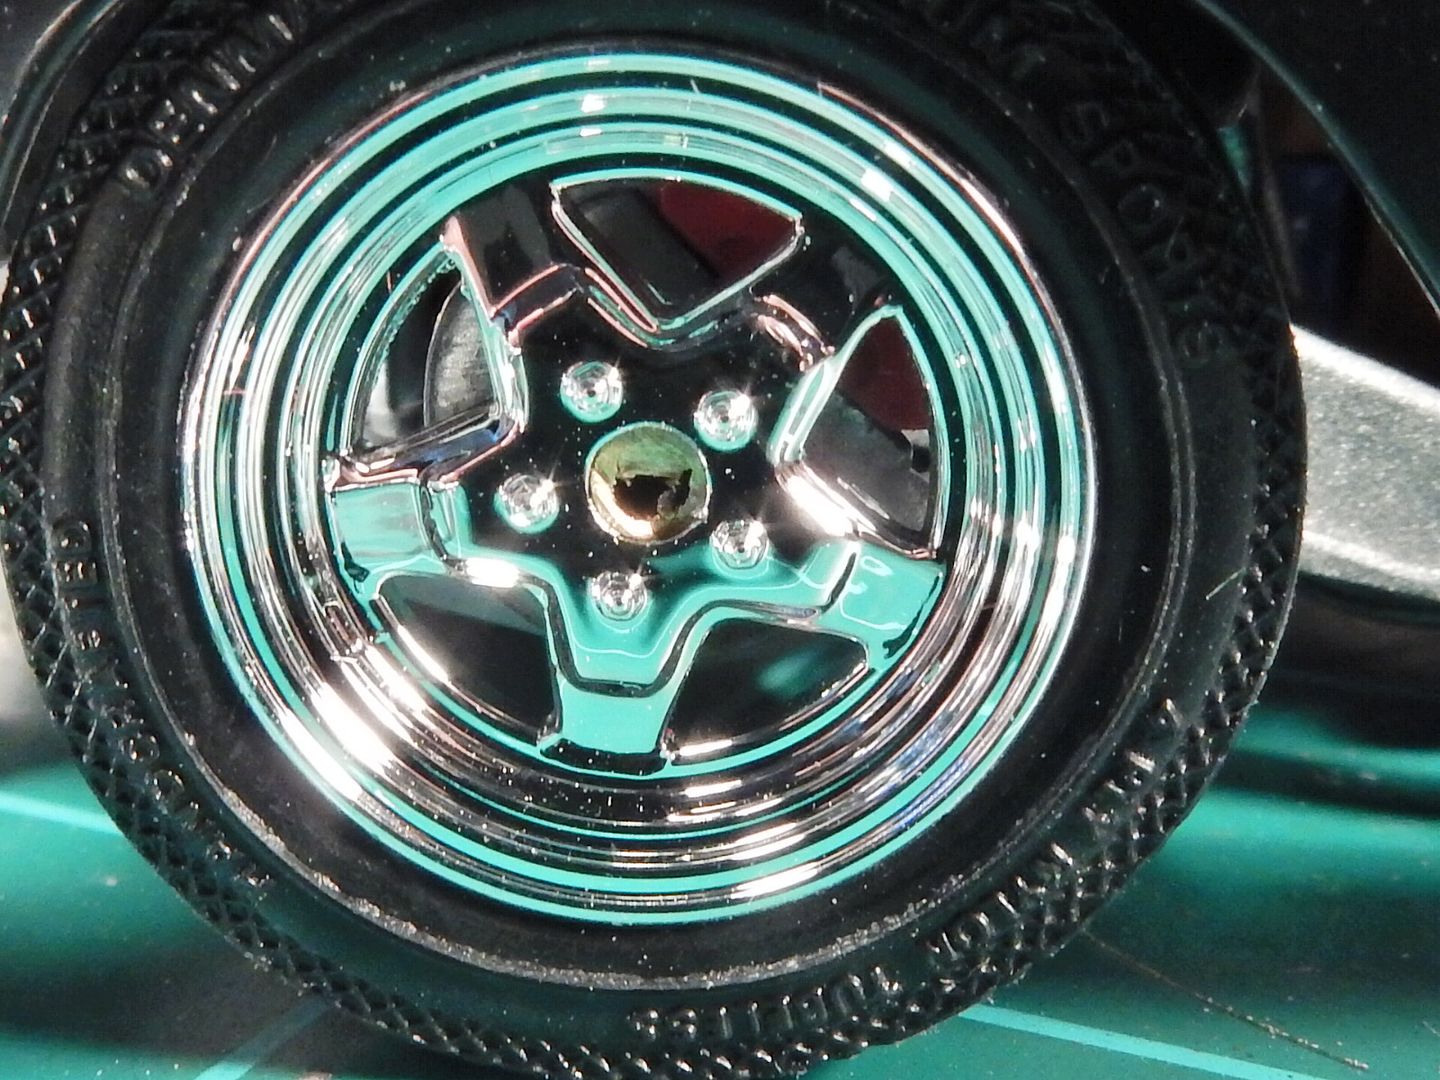
Here's how the center caps look on the real thing with them glued in place. Flooring is all glued down as well and we're ready for some upcoming body work!!!

Image


 Forum | Modelers Social Club Forum (proboards.com) 

  • Member since
    January 2015
Posted by MOPAR - D on Sunday, June 5, 2016 4:21 PM

Looking good Joe. 

  • Member since
    March 2012
  • From: Corpus Christi, Tx
Posted by mustang1989 on Sunday, June 5, 2016 5:27 PM

Thanks Dan!

Here's a GB Badge for this year BTW guys:


 Forum | Modelers Social Club Forum (proboards.com) 

  • Member since
    July 2014
Posted by modelcrazy on Tuesday, June 7, 2016 11:59 PM
A few more touch ups to go such as the flag emblems and the radio antenna, but here is the engine in its mounts. I added some radiator hoses, battery cables and air-conditioning lines.


Steve

Steve

Building a kit from your stash is like cutting a head off a Hydra, two more take it's place.


http://www.spamodeler.com/forum/

  • Member since
    August 2015
  • From: the redlands Fl
Posted by crown r n7 on Wednesday, June 8, 2016 11:06 AM

That's nice its true shine is addictive lol


 Nick.

  • Member since
    January 2015
Posted by MOPAR - D on Saturday, June 11, 2016 8:53 PM

Small update today but I received my other metal powders so I used the steel on the fuel tanks and the gray metal on the dump body. 

  • Member since
    July 2014
Posted by modelcrazy on Sunday, June 12, 2016 1:51 AM
Looking really good Mopar! Kinda reminds me of my Simi driving days.
I’m done with the Vette. I was thinking today, I’ve had this kit in my stash since 91, the year the internet went public. WOW! If I built it back then it would not have looked as good, not bad, just not as good. Thank you Mustang for running the GB again this year and will be interested if it runs again next year.
Here it is.
Steve

Steve

Building a kit from your stash is like cutting a head off a Hydra, two more take it's place.


http://www.spamodeler.com/forum/

  • Member since
    March 2006
Posted by simpilot34 on Sunday, June 12, 2016 9:47 AM

Wow MC you are multi-talented! Very nice build! All the builds I have seen at the beginning are top notch!

I MIGHT just have to join this one. However I have a bad habit of over committing, so will set back and watch til I see I can get one in. If not this year then definitely next year. I started the 348 on my AMT '58 Impala, but haven't gotten anything else done on it, and over the years I also came across MCGs PE set for it. Now, the real problem is, I have no idea which box it is in since my last move. So, if I see I can get started on it again the hunt will be on.

Cheers, Lt. Cmdr. Richie "To be prepared for war, is one of the most effectual means of preserving the peace."-George Washington
  • Member since
    January 2015
Posted by MOPAR - D on Sunday, June 12, 2016 3:20 PM

MC nice work on the Vet holding out on building it until now paid off. 

JOIN OUR COMMUNITY!

Our community is FREE to join. To participate you must either login or register for an account.

SEARCH FORUMS
FREE NEWSLETTER
By signing up you may also receive reader surveys and occasional special offers. We do not sell, rent or trade our email lists. View our Privacy Policy.