SEARCH FINESCALE.COM

Enter keywords or a search phrase below:

Battle of Britain 75th Anniversary GB

21470 views
279 replies
1 rating 2 rating 3 rating 4 rating 5 rating
  • Member since
    January 2015
Posted by BrandonD on Wednesday, August 26, 2015 1:25 AM

I got some time with the Stuka tonight, and I got the RLM 71 down. I don't know if the colors look right. I always pictured the Stukas having a richer green color to them... Maybe a filter coat is in order once the decals are on. I don't know.

Anyway, here it is as it sits:

I used the Tamiya color guidelines for all colors. The 71 looks right on my 109, and it's the same mixture, so maybe I just have an incorrect picture in my head. I don't know.

-BD-

  • Member since
    July 2014
Posted by modelcrazy on Tuesday, August 25, 2015 9:32 AM

I like that, thanks for sharing.

Steve

Building a kit from your stash is like cutting a head off a Hydra, two more take it's place.


http://www.spamodeler.com/forum/

  • Member since
    January 2015
Posted by BrandonD on Tuesday, August 25, 2015 2:43 AM

Not really Battle of Britain (the Spitfire looks to me like a Mk. VB or a Mk. IX, but the 109 looks like an E-4), but this 10-minute film is kind of fun with some decent aerial combat in the beginning. It's called The German.

https://www.youtube.com/watch?v=oLTfWeg1NIc

  • Member since
    November 2007
  • From: Wisconsin Rapids, WI
Posted by moose421 on Monday, August 24, 2015 4:56 PM

You're welcome.  I like when mistakes are pointed out early.  I makes me fix and pay more attention to my builds.

Looking great and you're welcome

Kim

  • Member since
    September 2014
Posted by rooster513 on Monday, August 24, 2015 3:09 PM

Thanks for pointing that out moose421! Cockpit isn't closed up yet so it will be easy to glue em down. Thanks for taking the time to give feedback. I would have quoted your post but that feature doesn't seem to be working for me with this new website formatHmm

-Andy

  • Member since
    January 2015
Posted by BrandonD on Monday, August 24, 2015 1:55 AM

Thanks, Lewbud!

As for thepic - the first one in my completion post, please.

Thanks again.

-BD-

  • Member since
    June 2008
Posted by lewbud on Sunday, August 23, 2015 1:14 AM

Ladies and Gentlemen, the front page has been updated.  If I've missed anyone, let me know.

Buddy- Those who say there are no stupid questions have never worked in customer service.

  • Member since
    June 2008
Posted by lewbud on Sunday, August 23, 2015 12:54 AM

Brandon, 

The Hurricane looks great!  Which pic would you like me to use on the front page.  Can't wait to see the Stuka come together.

Owl,

Welcome aboard!  Look forward to seeing your build!

Model crazy,

Will update the front page.

Buddy- Those who say there are no stupid questions have never worked in customer service.

  • Member since
    July 2014
Posted by modelcrazy on Sunday, August 23, 2015 12:37 AM

lewbud,

Here's my entry. The wee little 1/144 Minicraft He 111, of the KG 55 clan.

Steve

Building a kit from your stash is like cutting a head off a Hydra, two more take it's place.


http://www.spamodeler.com/forum/

  • Member since
    January 2010
  • From: Nebraska, USA
Posted by CallSignOWL on Saturday, August 22, 2015 9:32 AM

Is it too late to join? 

I've got a little airfix -109 that can be entered :)

------------------------

Now that I'm here, where am I??

  • Member since
    November 2007
  • From: Wisconsin Rapids, WI
Posted by moose421 on Friday, August 21, 2015 6:54 PM

Andy, Your colors on your belts are awesome.  I hate to nit pick on the great work that you are doing but. Your belts are suspended in mid air.  Would they not be laying flat on the seat?  Please take that as constructive.  Bish pointed it out to me on a build that I did.  I missed mine till I saw the picture.


Keep up the great work.


Kim

  • Member since
    September 2003
  • From: AandF in the Badger State
Posted by checkmateking02 on Friday, August 21, 2015 1:44 PM
Looking very nice, Andy!


  • Member since
    September 2014
Posted by rooster513 on Friday, August 21, 2015 8:51 AM

 I know it will come out great Brandon! Quick update here, was finally was able to get some work done on this thing. Cockpit assembled and some paint on it. I have to finish glueing it in place and add a little weathering.

I'm really liking this new Airfix kit so far. Hopefully I'll get a chance to work a little more on this and get the cockpit closed up. Keep up the great work everyone!

-Andy

  • Member since
    January 2015
Posted by BrandonD on Friday, August 21, 2015 2:13 AM

Thanks, guys. This one is giving me lots of fit issues with the cowling. I have been at it with the files, filler and now am rescribing panel lines. But hopefully it comes out OK.

-BD-

  • Member since
    September 2014
Posted by rooster513 on Thursday, August 20, 2015 6:48 AM

Great looking start Brandon! Can't wait to see this one come together!

-Andy

  • Member since
    September 2003
  • From: AandF in the Badger State
Posted by checkmateking02 on Tuesday, August 18, 2015 6:27 PM
A start well-done, BD!


  • Member since
    January 2015
Posted by BrandonD on Tuesday, August 18, 2015 3:03 PM

Ok, I got started on the Stuka this week. I had actually bought this kit in February or so and started it, but I stopped shortly after because I was having troubles with the airbrush and paints in general. Basically, I only got as far as gluing the wing tops to the bottom, and painting the cockpit the wrong color. I had also tried to spray the underside, but I painted it the wrong color of blue, and I had thinned it with water, which caused all sorts of problems.

So my first order of business was sanding the bottom to get the paint off/smooth, and repainting the cockpit to RLM 02.

Here is the early stage of cockpit assembly. More details yet to be picked out. The Hurricane is keeping a very watchful eye on this Stuka...

Next was some detail painting and a wash with Flory dark dirt. I then drybrushed it with Tamiya neutral gray.

After that, I glued the cockpit tub together and then glued it to one fuselae half, clamping it it tight since it didn't want to be there. Then I glued the fuselage halves together, and I clamped the cockpit tub to the other fuselage side to prevent the tub from popping out, since it seems like it doesn't want to fit too well.

With that done, I glued on the firewall, and I got the engine hastily assembled and balecked out, then put the cowlings around it. I'd originally wanted to leave the top cowling loose and detail the engine, but it doesn't fit well, and it seems like a common issue people have with this kit. So I just drilled out the exhaust stacks and will probably mount it tonight and close up the cowling. It looks like I'll need to add some evergreen to the front of it to thicken it and make it profile correctly with the propeller.

Next up is some more sanding and fitting to make things all mate up. Then I'll mount the canopy and get it masked, which should be a real blast...

I also can't decide whether to mount the landing gear before or after mainting. It's a snug fit, but looks like some filler might be needed. Oh, decisions, decisions.

Thanks for looking!

-BD-


  • Member since
    January 2003
  • From: Poland
Posted by Aleksander on Tuesday, August 18, 2015 2:47 PM

lewbud

Aleksandr, if you can give a direct link to your build on the Polish website and it shows that you started the build after July 10 (which was the start date for this build), then I'll allow it.  If you started it before, then its a no go. 

It's a pity but I started my model on June 4th, so I understand I can't take part in this GB. Sorry for the problem...

I'll try to show my Fiat G.50 when finished on Aircraft Forum! Deadline for our Group Build is September 15th.

Cheers!

Aleksander

  • Member since
    January 2015
Posted by BrandonD on Tuesday, August 18, 2015 1:34 PM

Thanks for the compliments, everyone! I really recommend the kit and had a lot of fun building it.

-BD-

  • Member since
    September 2014
Posted by rooster513 on Friday, August 14, 2015 6:35 AM

Turned out awesome Brandon! Paint, weathering, it all looks great. I especially like the weathering on the underside. Again, well doneYes

-Andy

  • Member since
    November 2007
  • From: Wisconsin Rapids, WI
Posted by moose421 on Thursday, August 13, 2015 10:45 PM

WowSurprise Brandon. Your hurricane looks great.  The weathering really bought her to life.  Looks like she is ready to scramble to meet the next wave of He 111's


Kim

  • Member since
    September 2003
  • From: AandF in the Badger State
Posted by checkmateking02 on Thursday, August 13, 2015 9:53 PM
Excellent looking Hurricane. Well done!


  • Member since
    January 2015
Posted by BrandonD on Thursday, August 13, 2015 9:51 PM

And it's done in time for Eagle Day! (Finished it late last night, and it looks to have just returned from its first mission).

Overall this was a fantasic kit with great decals that provided minimal problems and a whole lot of fun. 

Without being too wordy, I'll just get to the pics.

All comments and criticisms welcome. The dirtiness on the bottom is meant to represent mud flung up on a grass runway. The exhaust streaks are airbrushed - the first time I've used the airbrush on an already-decaled model. I used the airbrush for the gunsmoke, too. The other dirt is ground up Yarka Sauce brushed on, then wiped with a damp finger.

I think I'd like pic one for the gallery, please.

Thanks for looking!

-BD-

P.S. Please excuse the photo lighting. I had to shoot them at lunch today, and the sun was pretty stark and threw off the white balance, and I'm not good enough with Photoshop to fix it.

  • Member since
    January 2015
Posted by BrandonD on Thursday, August 13, 2015 9:50 PM

Thanks, Flyerduke! This kit made things really easy for me :)

-BD-

  • Member since
    December 2012
Posted by flyerduke on Thursday, August 13, 2015 6:27 PM

Hey, when did the site change.  I guess it's been a few weeks since I've checked in.  

BD- That bird is impressive!  You do a killer job and your quick.  I just wish I could find the time to model more.


  • Member since
    September 2003
  • From: AandF in the Badger State
Posted by checkmateking02 on Wednesday, August 12, 2015 1:44 PM
Nice looking Hurricane! Very pleasing to look at.


  • Member since
    November 2007
  • From: Wisconsin Rapids, WI
Posted by moose421 on Wednesday, August 12, 2015 6:14 AM

Brandon,  Your hurricane is really coming alive.  I am really liking the underside.  Also the slight soft edge of the upper camo is very nicce.

Keep up the great work.


Kim

  • Member since
    January 2015
Posted by BrandonD on Wednesday, August 12, 2015 2:27 AM

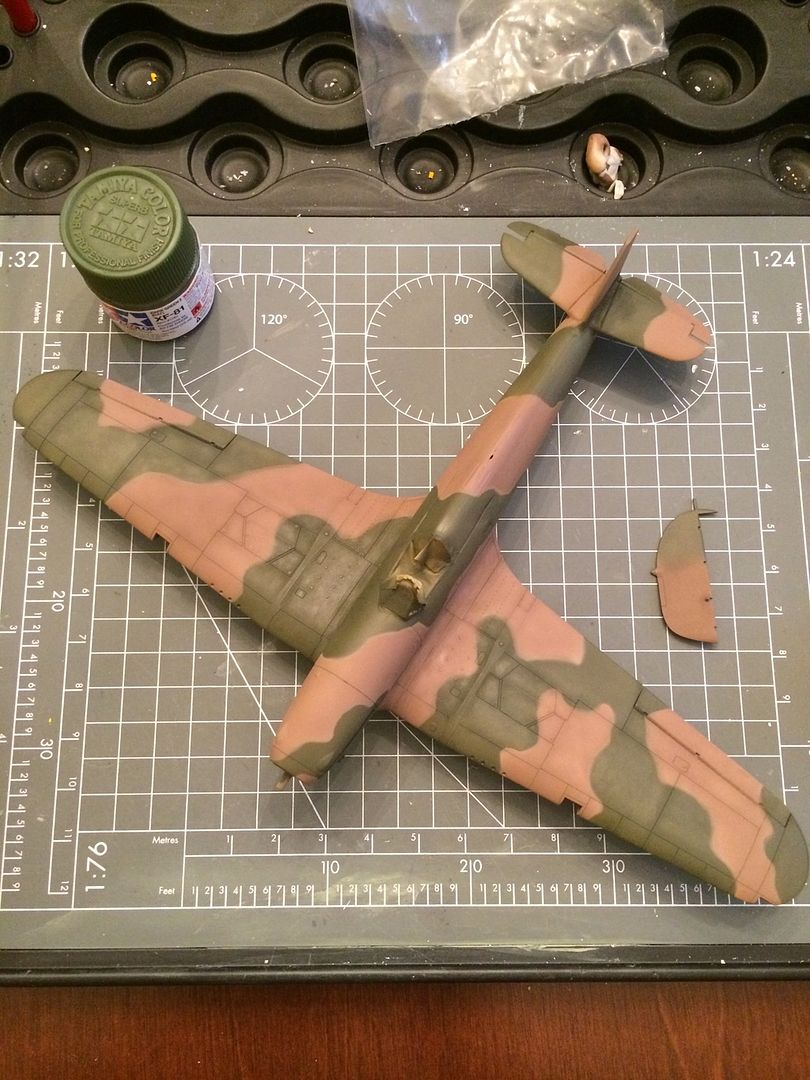
Well, I've made progress on the Airfix 1/48 Hurricane Mk.I.

I finished the camouflage, using Simply Tacky for the demarcations to give them a slight softness instead of the cut tape I used on a Spitfire recently.
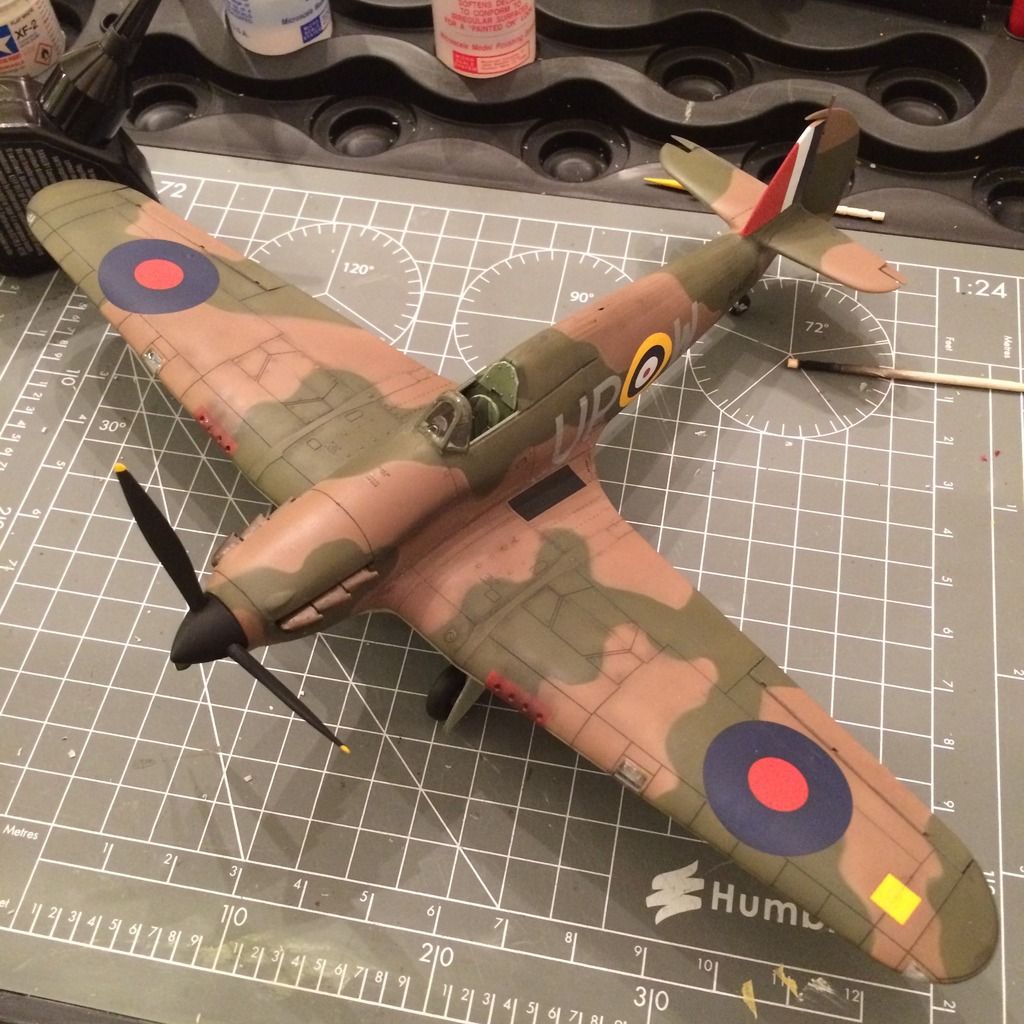
When that was done, I went to the decals. Against my natural aversion to them, I used the decals for the tail markings...and to my surprise, they worked very well. I only had to paint the leading edge, and the decals matched perfectly with Tamiya XF-7 for the red and XF-2 for the white.

The rest of the decals and stencils went down without issue. It took several dosings of Micro Sol to get them to sit over some of the raised details (the roundels on the upper wings, specifically), but they all sunk down into the panel lines quite well. I'm guessing they're printed by Cartograf.

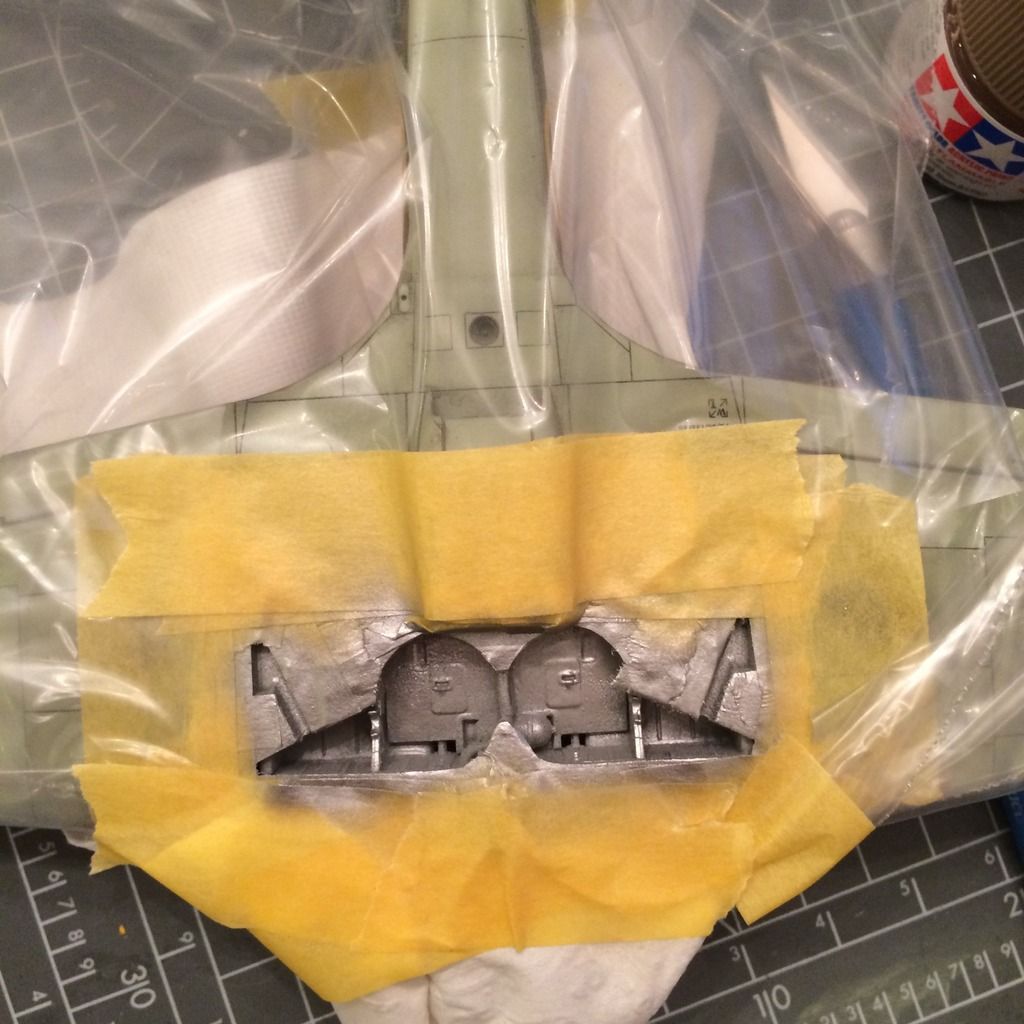
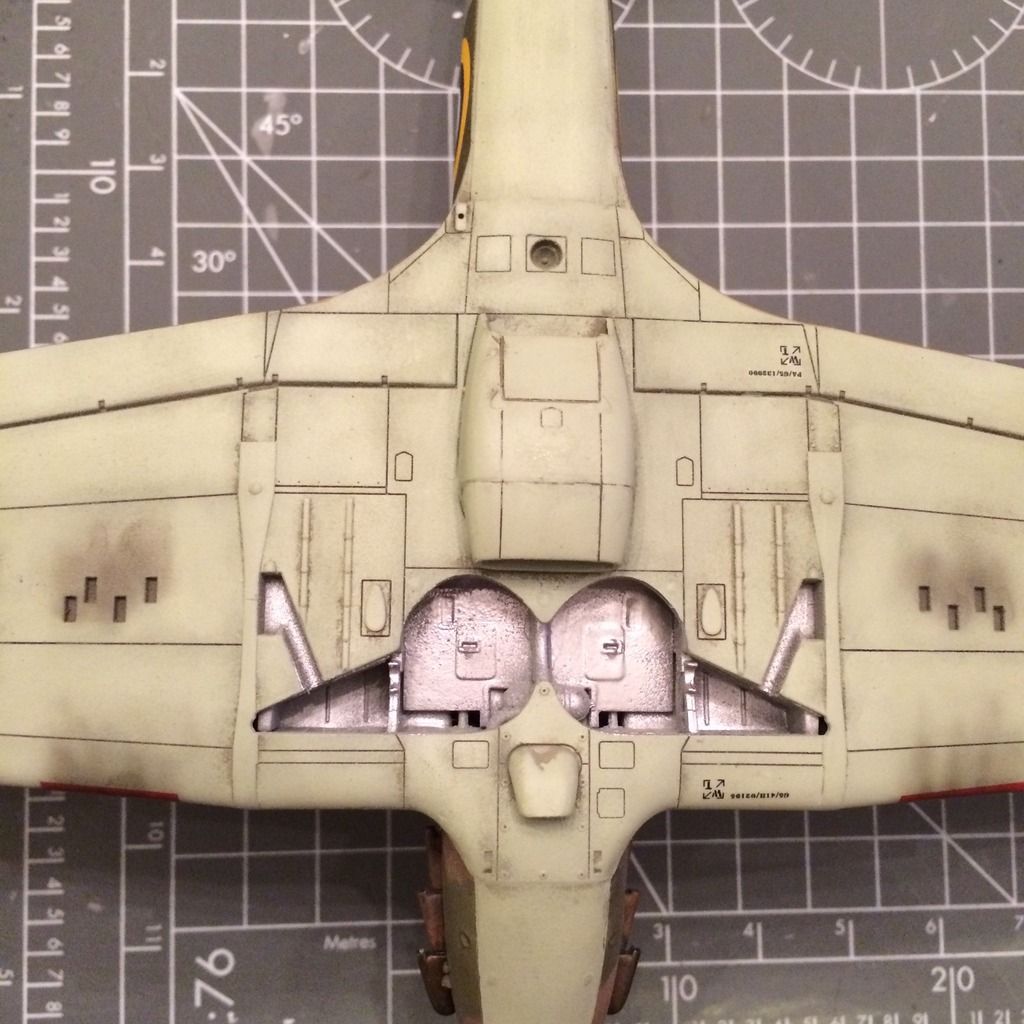
After looking at the restored aircraft this one represents, I decided that I should actually respray the wheel well aluminum. And in this week's edition of "Crap, I sound like my father," I will say that it would have been way easier and faster to do it right the first time.
For the exhaust stacks, I tried to replicate the brownish metal patina (not rust) of the Hurricanes I've seen, along with the exhaust staining on the back two exhaust stacks. I base coated them in gun metal, then gave them a wash with metallic brown before giving them a very thin coat of clear orange. Then I gave them a Flory Grime wash, and finally dull-coated them and used the Tamiya weathering kit (the one that looks like makeup) with the oil stain pigment. The exhaust streaks on the fuselage were applied with airbrushed Tamiya smoke at about 25 psi. After that, I streaked the Tamiya weathering kit's oil stain with a hint of burnt blue in it. Then I ended up wiping most of it off, so I really have no idea what the final result is made of.

I'm working on throwing some mud staining on the underside, as those grassy airfields in England in September weren't exactly dry, and I've seen that on some BoB RAF planes.

I'm hoping to have it done by Eagle Day, and then, if the votes on my Instagram page hold, it looks like I'll be doing the Stuka next.

-BD-

  • Member since
    January 2015
Posted by BrandonD on Wednesday, August 12, 2015 2:14 AM

Wow, that is good customer service. Glad you got your parts, and it's looking better with each update!


-BD-

  • Member since
    October 2013
Posted by ajd3530 on Tuesday, August 11, 2015 2:41 AM
Work continues on the Pegasus 109E. The cowling top falls on a non-existant panel line, so that will have to go.  The wing fits pretty well, not much filler needed at all, except one problem. It rides too high on the fuselage in the front, creating a small step down from the top of the wing to the wing root. A small Evergreen strip fixed it pretty easy.  The bottom of the cowling is the worst fitting part of the kit. Not good fit at all. Will require two rounds of Mr. Surfaces 500 at least. Which turns out to not be that big of a deal, as the part is shaped too boxy (in my eye) and required some reshaping. Other than that, everything is going pretty smooth. Here is the airframe pretty much together.  ***Note*** While fiddling with the horizontal stablizer struts, one shot out of my tweezers to parts unknown. After an hour long search, i declared it MIA, destined to reappear after Christmas sometime. So I called Pegasus Hobbies in SoCal around lunch time Wed, and asked if/how replacement parts could be obtained. I talked to a younger gentleman, and before I could even say that I wasn't looking for a hand out and had no problem paying for a replacment since it was my own doing and not the fault of the manufacturer, he asked for my name, address, telephone number, and the part number. After that, he told me he would have that out to me as soon as he could. Come Saturday afternoon when the mail ran, there in my mail box was an envelope from.Pegasus Hobbies, with BOTH struts inside. So a BIG shout out to you Pegasus guys over there on the Left Coast! You guys sure know how to treat people, and I will make it a priority of mine to purchase more of your kits in the future knowing you have your customers' backs.
JOIN OUR COMMUNITY!

Our community is FREE to join. To participate you must either login or register for an account.

SEARCH FORUMS
FREE NEWSLETTER
By signing up you may also receive reader surveys and occasional special offers. We do not sell, rent or trade our email lists. View our Privacy Policy.