SEARCH FINESCALE.COM

Enter keywords or a search phrase below:

T54-E1 FINISHED PICS!

12940 views
222 replies
1 rating 2 rating 3 rating 4 rating 5 rating
  • Member since
    February 2015
  • From: Charlotte, NC
Posted by panzer948 on Wednesday, April 12, 2017 11:33 AM
Wow good stuff Karl! Yes that is a long barrel. You probably need an extra jar of paint to finish that sucker. Great example of how to properly mask for painting. This one is coming along nicely.

On the bench: Revell 1/32nd Junkers JU-88 A1

  • Member since
    September 2005
  • From: Groton, CT
Posted by warshipguy on Wednesday, April 12, 2017 10:41 AM

Karl,

Great work!

Bill

  • Member since
    December 2002
  • From: Fort Knox
Posted by Rob Gronovius on Wednesday, April 12, 2017 9:44 AM

Some resin manufacturer should try to get you to cast your turret and sell it as as an aftermarket replacement for the kit turret. You've done a superb job on the turret, and it would be a "shame" not to pass it on for others to enjoy!

  • Member since
    January 2007
Posted by the doog on Wednesday, April 12, 2017 9:25 AM

Glenn, thank you for looking in and commenting! Big Smile

  • Member since
    January 2007
Posted by the doog on Wednesday, April 12, 2017 9:24 AM

Stik, that cartoon is hilarious, haha!! I don't remember seeing that one..

Thanks too, for the props...Smile

  • Member since
    January 2007
Posted by the doog on Wednesday, April 12, 2017 9:23 AM

HeavyArty

Very nice.  Great job on the mantlet cover using the MP and hex rod.  The corrected undercut looks great too.  It should look awesome once painted.


Thanks, Gino! I know you would tell me if it wasn't! Much appreciated! YesBeer

I can't wait to slap some paint on it!

  • Member since
    April 2016
  • From: N. Burbs of ChiKawgo
Posted by GlennH on Wednesday, April 12, 2017 9:11 AM

stikpusher

Karl, that is looking too sweet! Super work! And like Gino said, your work on the undercut correction looks great as well...


and your milliput prep work  gave me a bit of a chuckle and a flashback to this Far Side cartoon...


Thanks for the cartoon. I remember this and the smiles. Great modeling work.

A number Army Viet Nam scans from hundreds yet to be done:

https://www.flickr.com/photos/southwestdreams/albums/72157621855914355

Have had the great fortune to be on every side of the howitzers.

  • Member since
    July 2004
  • From: Sonora Desert
Posted by stikpusher on Tuesday, April 11, 2017 9:39 PM

Karl, that is looking too sweet! Super work! And like Gino said, your work on the undercut correction looks great as well...


and your milliput prep work  gave me a bit of a chuckle and a flashback to this Far Side cartoon...


F is for FIRE, That burns down the whole town!

U is for URANIUM... BOMBS!

N is for NO SURVIVORS...

       - Plankton

LSM


  • Member since
    December 2002
  • From: Valrico, FL
Posted by HeavyArty on Tuesday, April 11, 2017 9:29 PM

Very nice.  Great job on the mantlet cover using the MP and hex rod.  The corrected undercut looks great too.  It should look awesome once painted.

Gino P. Quintiliani - Field Artillery - The KING of BATTLE!!!

Check out my Gallery: https://app.photobucket.com/u/HeavyArty

"People sleep peaceably in their beds at night only because rough men stand ready to do violence on their behalf." -- George Orwell

  • Member since
    January 2007
Posted by the doog on Tuesday, April 11, 2017 9:24 PM

OK, so this post deals wirth the construction of the mantlet cover using Milliput (hereafter referred to as MP) I chose this because I didn't think I could get the necessary bulk using tissue paper, as is the standard method.

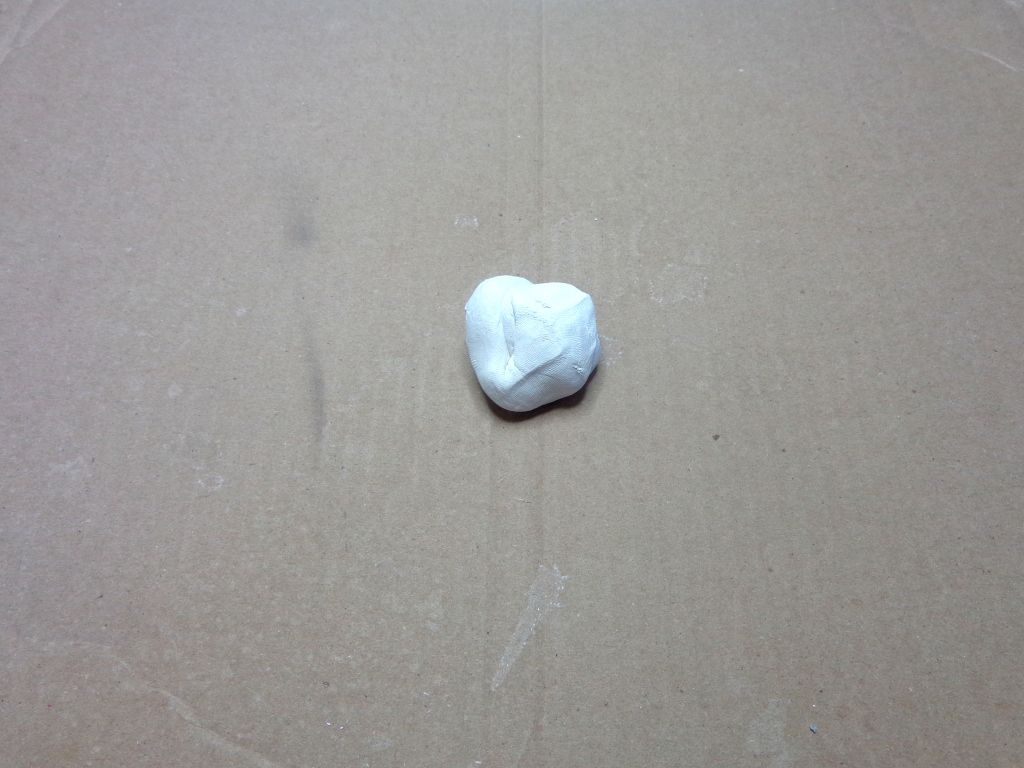
I mixed up the two parts of MP into a big ball.

Roll it out with your fingers...

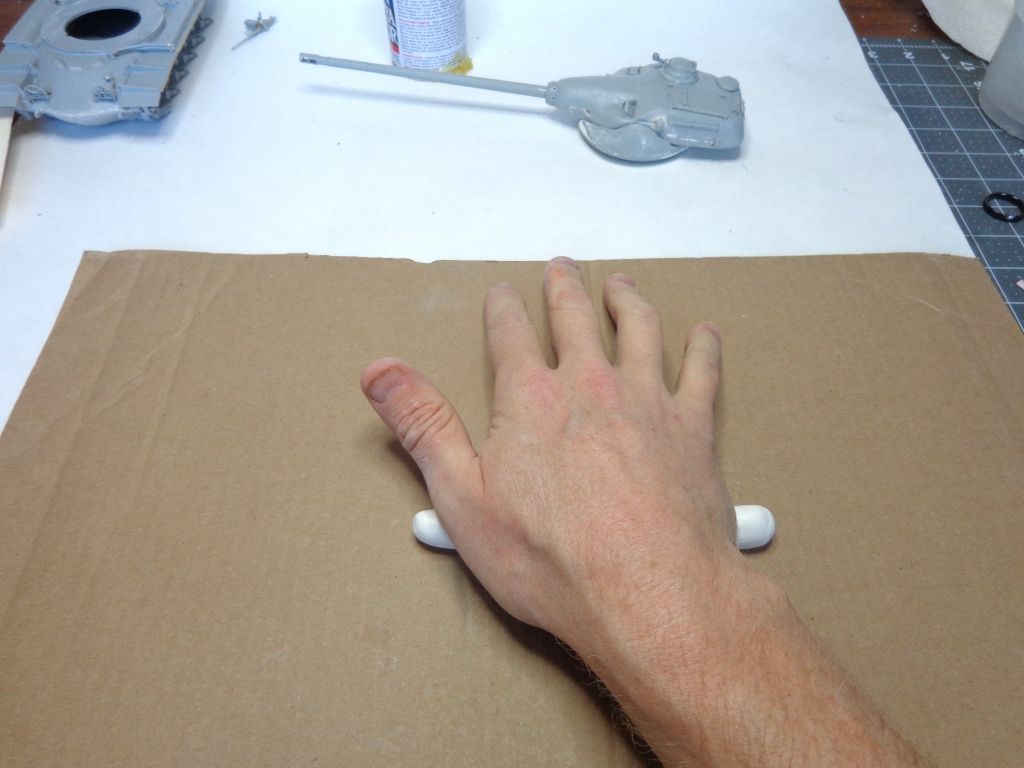
Use both hands; make a long snake of it.

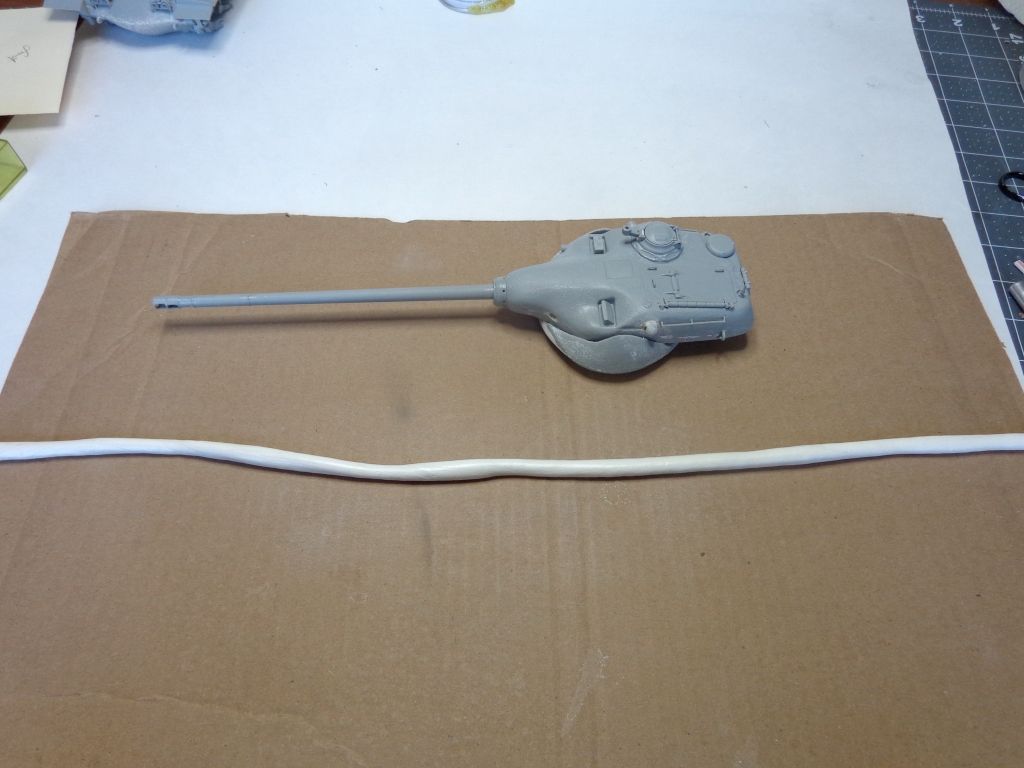
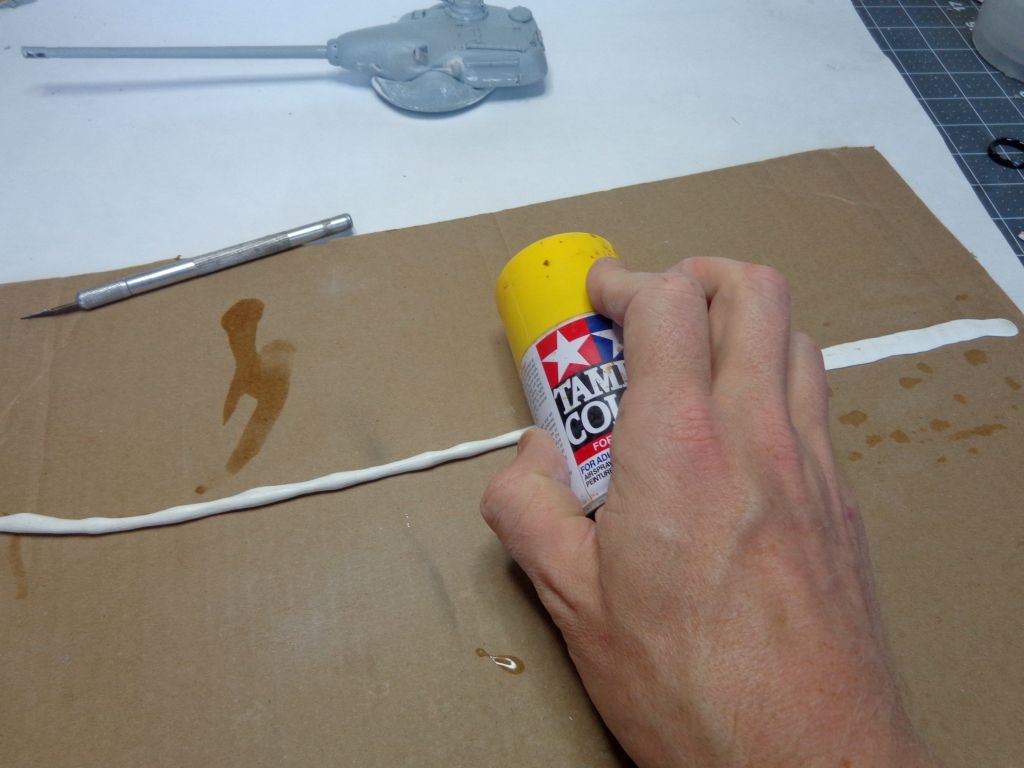
Now flatten it. I used a Tamiya paint can to do this----wet the can to prevent the MP from sticking. Water can be used to shape MP and prevent it from sticking to things.

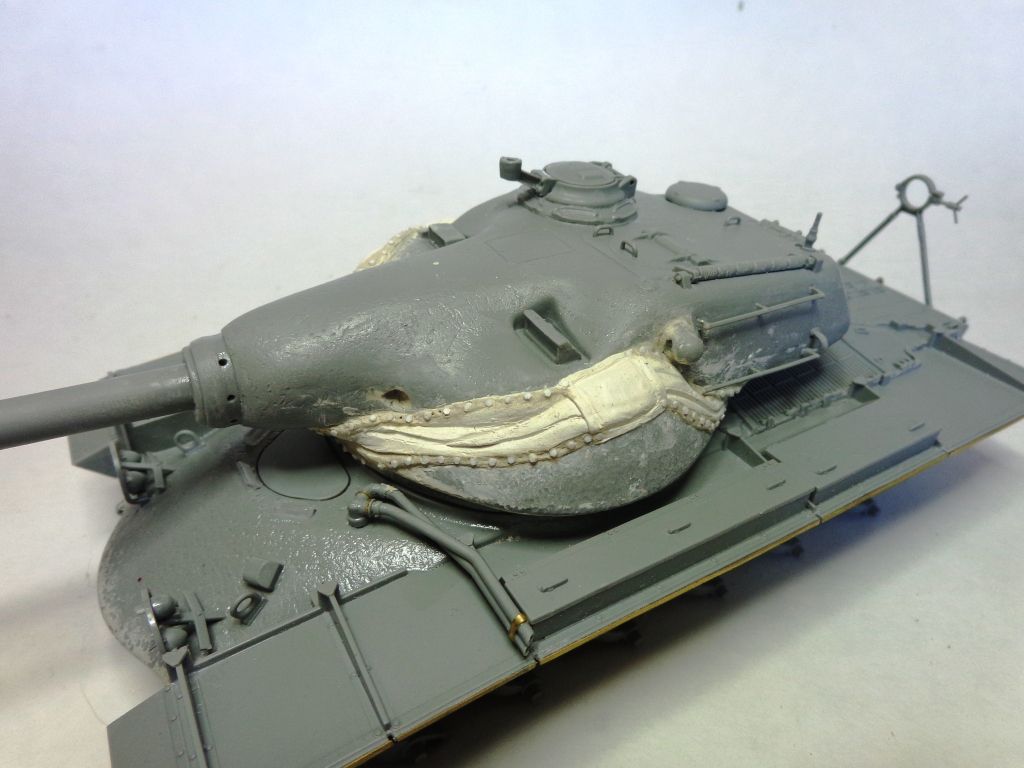
Now I started shaping it around the turret. I made a decision to leave off the lower rear hand rails, but this caused me problems later because I had to modify the MP when I couldn't fit the rails where they needed to go. Put the rails on before you do this.

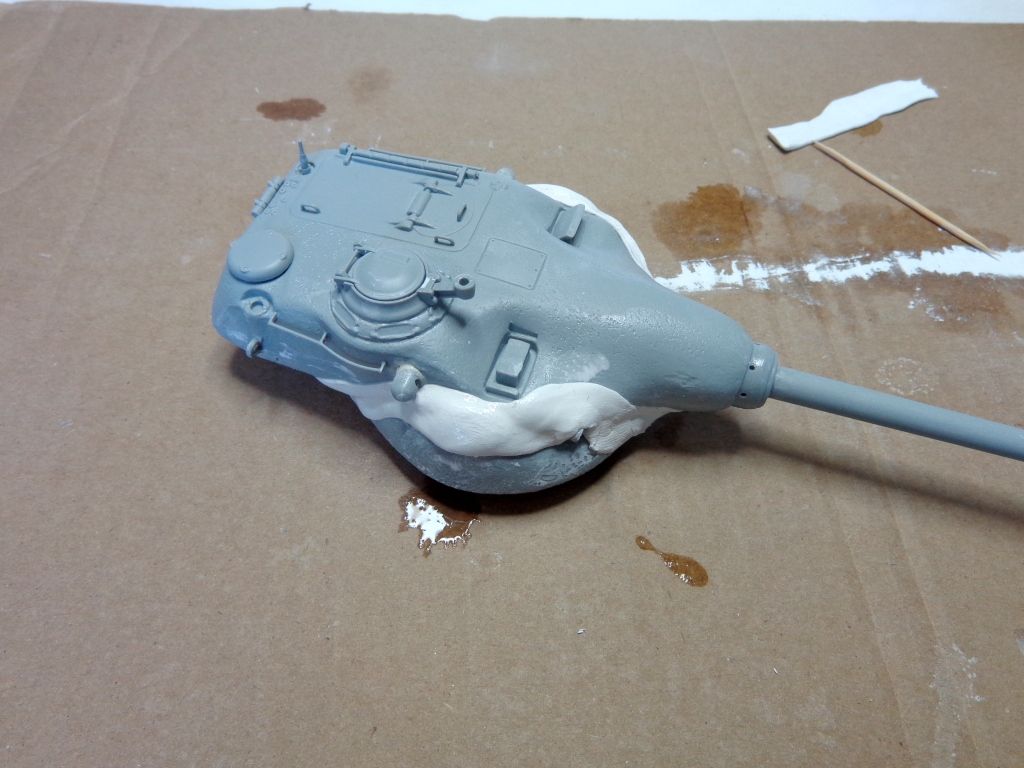
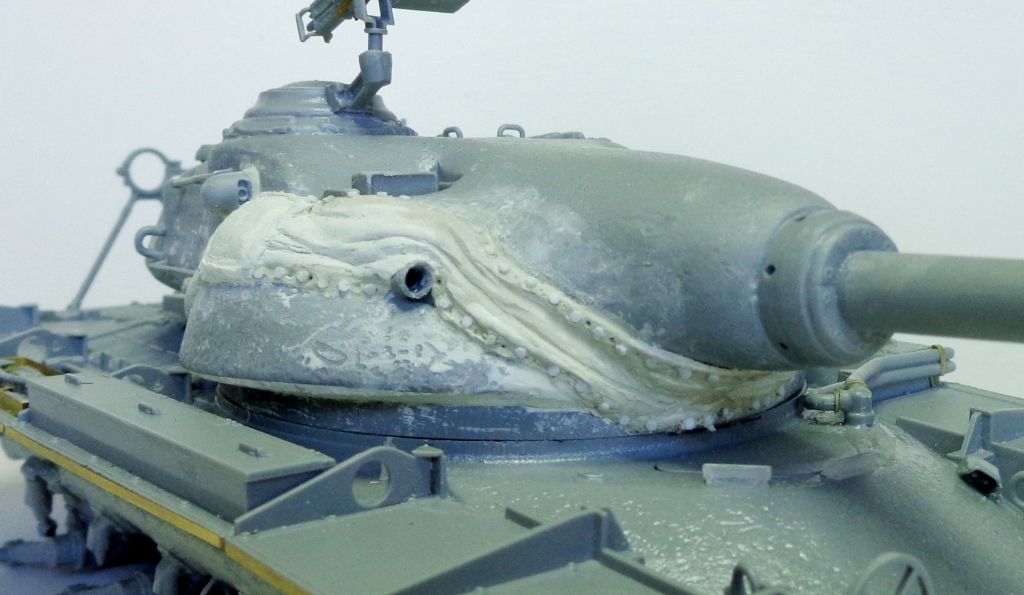
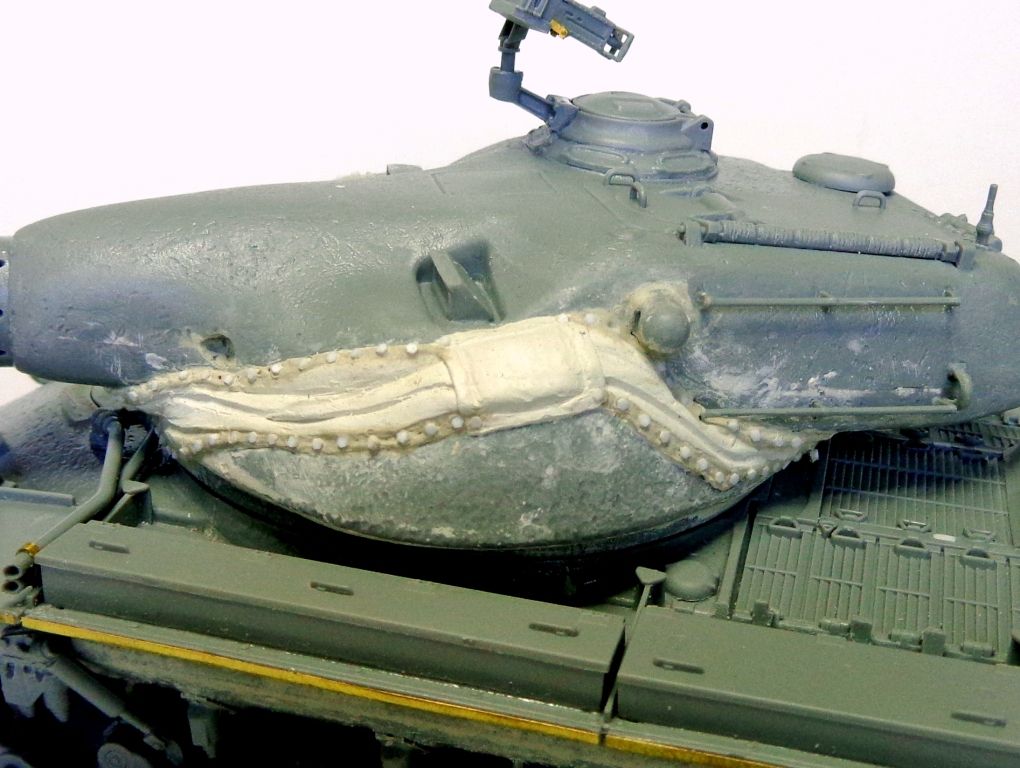
I used the back end of a scribing tool to put in folds and layers. You'll notice some tiny holes in the edges---I mistakenly thought that this cover was laced like regular mantelt covers, but it is actually bolted hard onto the turret. I had to fill this in later with white putty.

The other side. It's a pain to get the cover around all the projections and contours of the turret, no doubt..

...'round back....

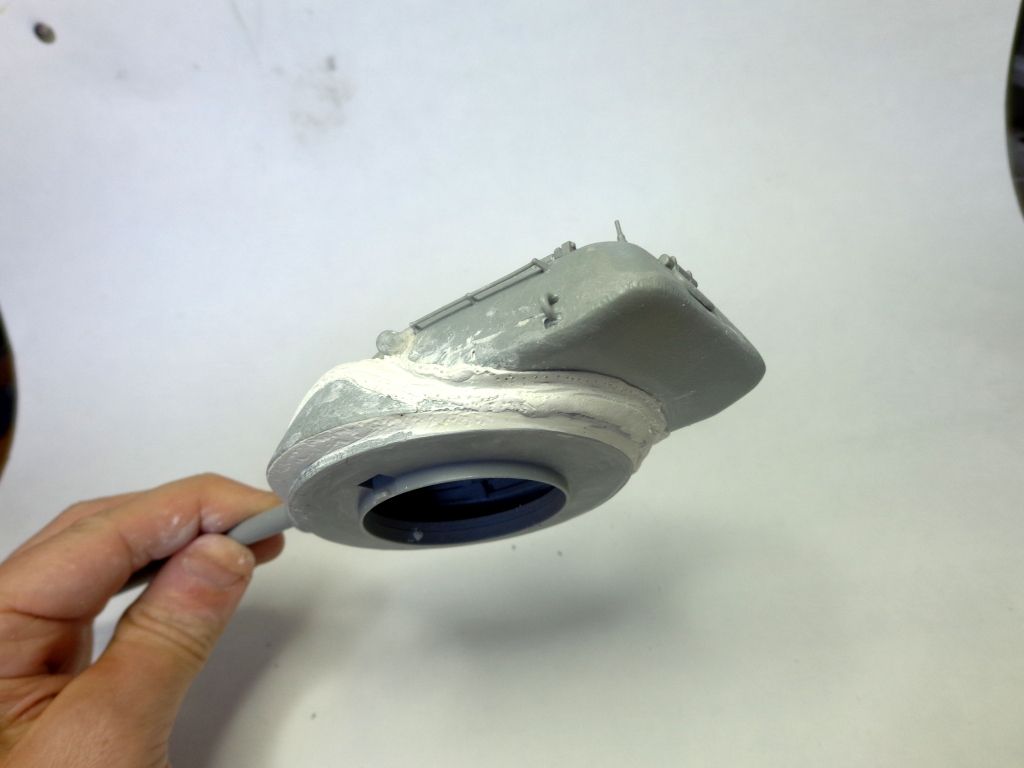
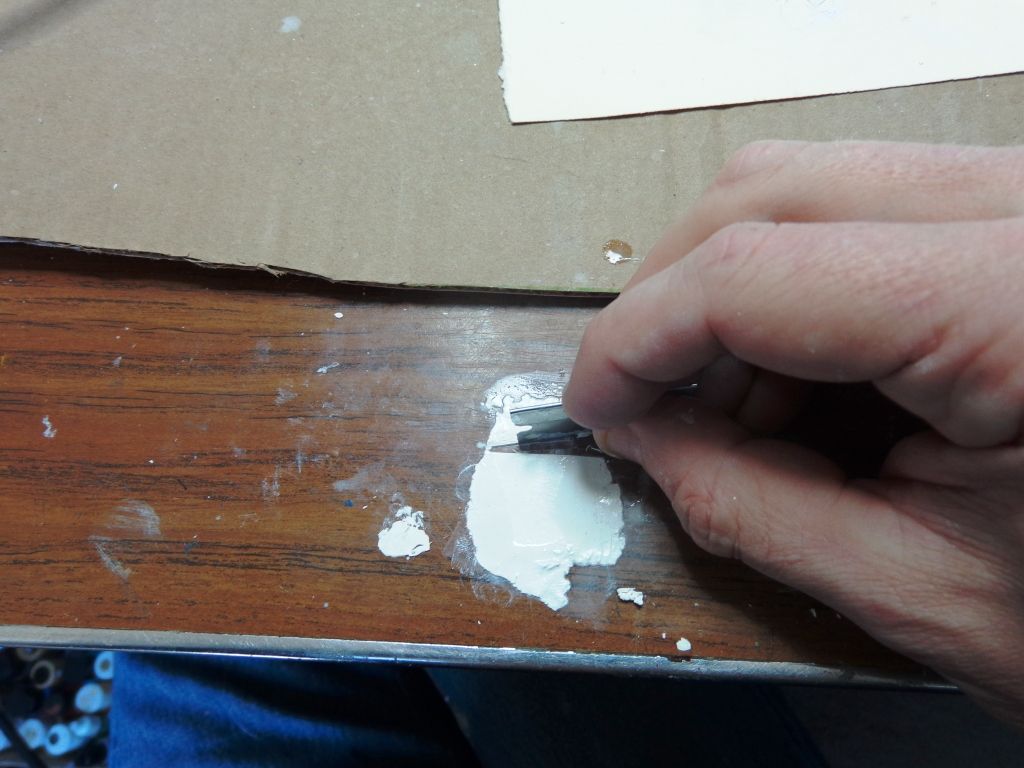
Since the mentlet is bolted on, I cut out a hundred or more little "bolt heads" from a piece of Plastruct 1.5 styrene hex rod using a razor blade.

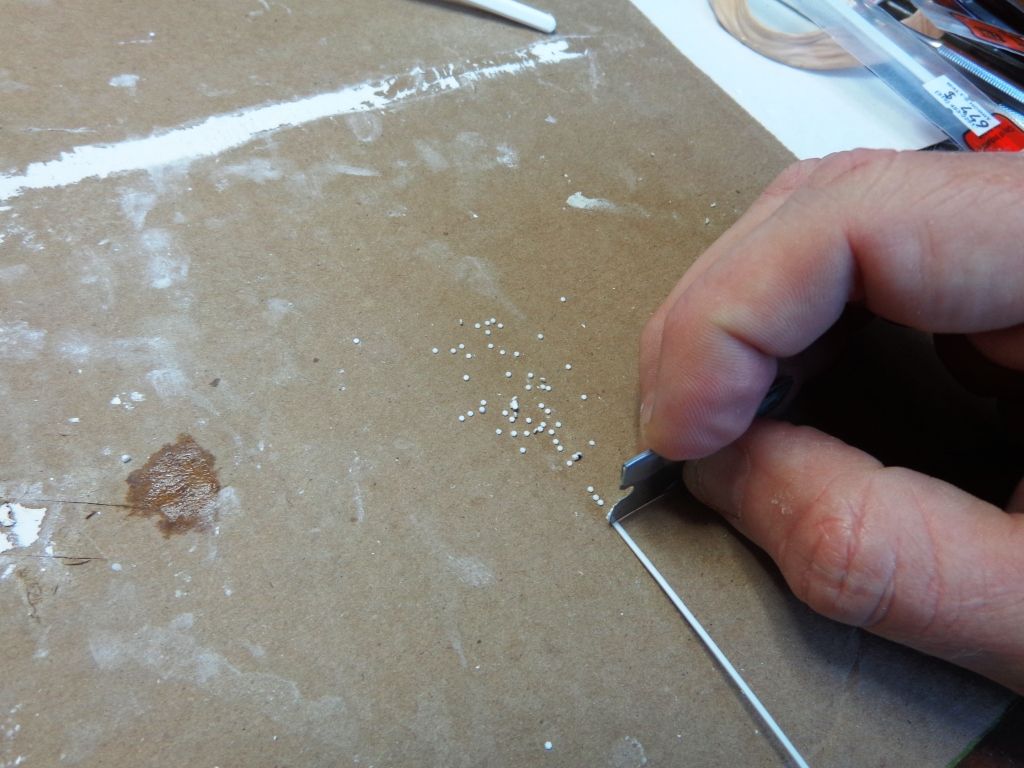
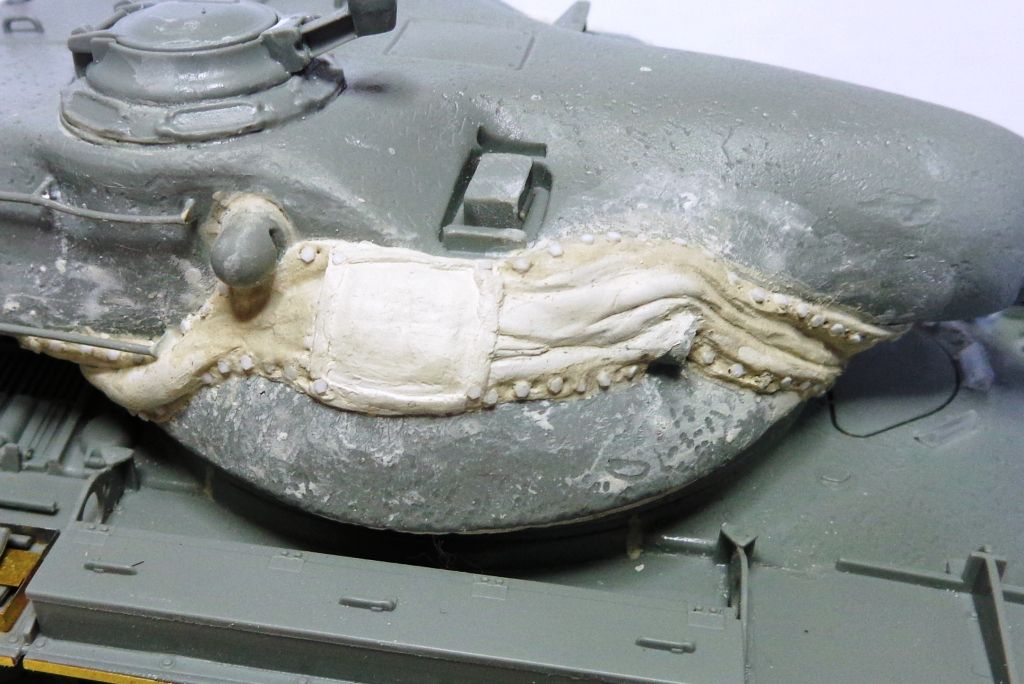
I used thinned Squadron White Putty to "paint" a line around the edges of the MP cover, filling in those previous holes but also laying an adhesive "bed" for the "bolts". Tediously, I laid in each bolt into the putty after dipping it into some Testor's liquid glue.

Note the "pockets" on the side of the cover? I made these AFTER the MP had dried, of MP as well. I flattened a ball of putty on the desktop, and then used a razor blade to cut out the square, which I then fastened into a reasonable resemblance of the feature. It's hard to tell what exactly this was, or what it really looked like from photos, but I gave it my best guess. It also seems to have been bolted at the four corners. I'm guessing that it could have somehow enclosed the two stereoscopic sighting "bubbles" on the side of the turret near it?

The other side...

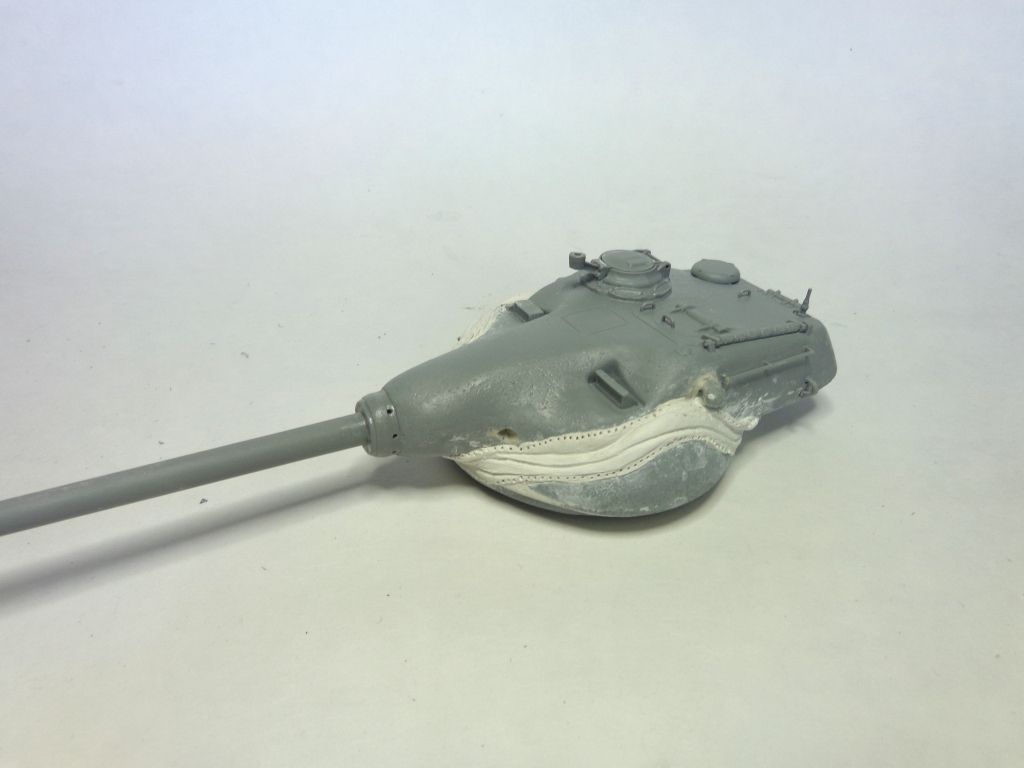
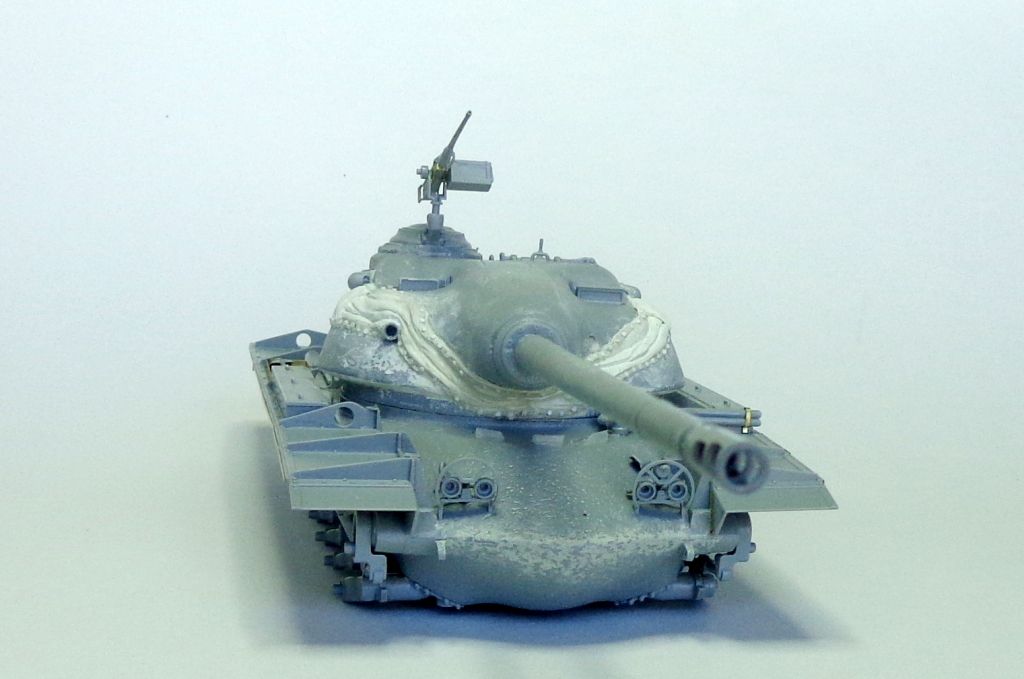
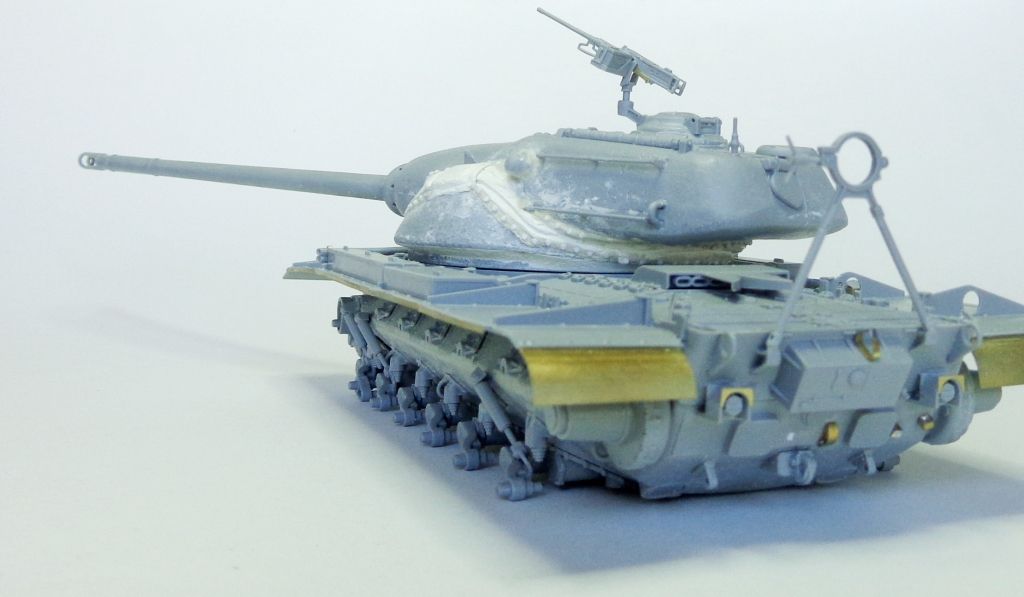
And here's the model, ready for primer. Man, this sucker has a LOOOOOOOONG barrel!

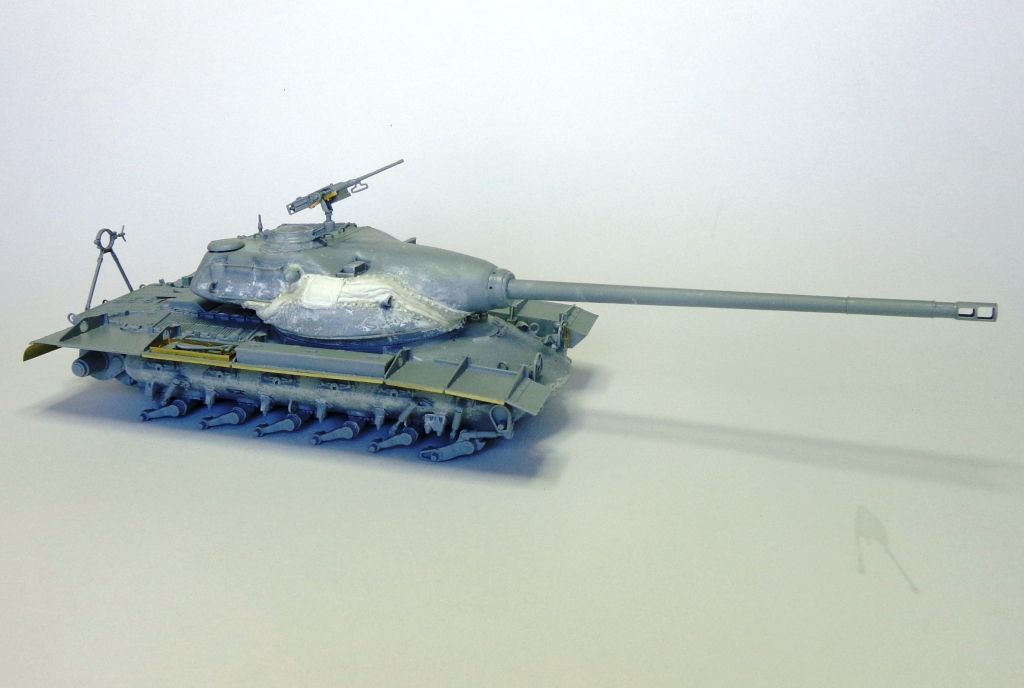
Some more pics of the mantlet and model showing profile and turret corrections.

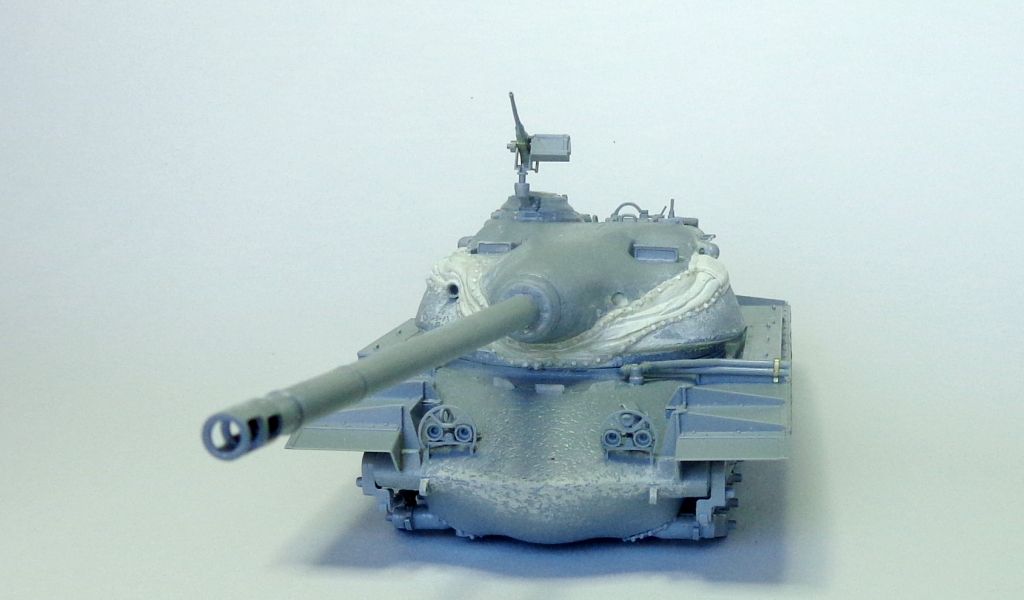
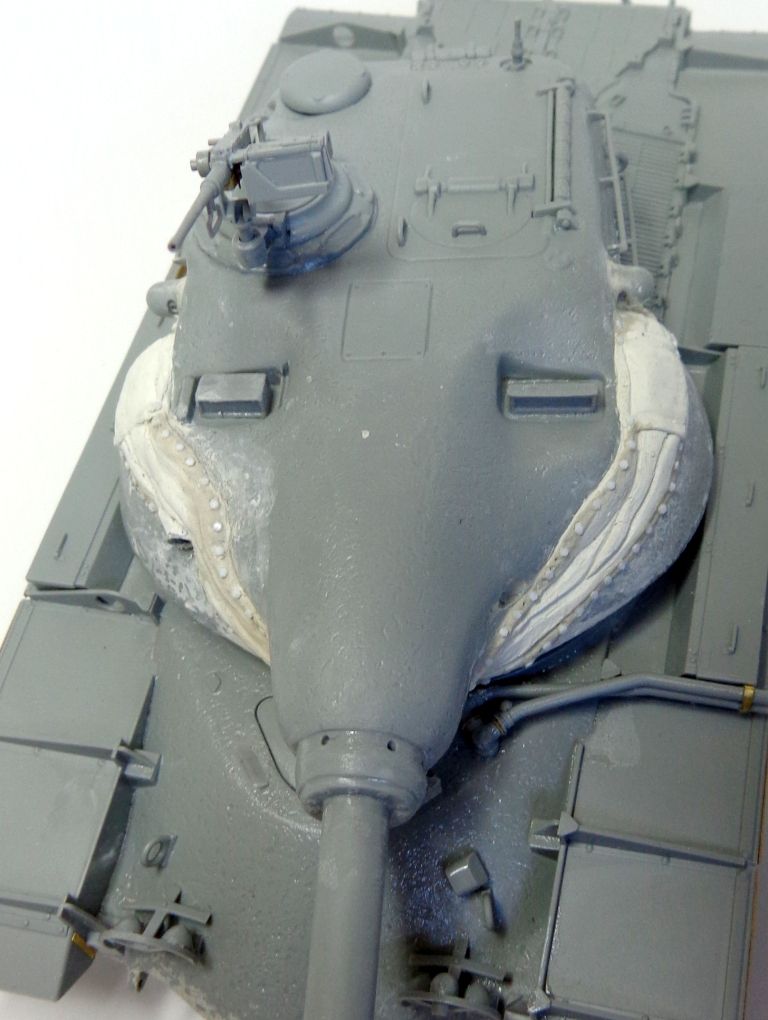
All in all, I'm pretty happy with how it turned out. Now I'll prime it and clean up whatever shows as a flaw, or smooth out the mantlet cover a bit more if necessary. I think that once the primer is on, I'll be able to get more of a sense of what the cover will actually look like---it's kinda hard to see with all the putty residue around. I make no claim to this being 100% accurate, and I can't tell you that it has the correct number of bolts securing the cover to the turret--all I know is that it looks the part much more so than the kit's original design and DS-plastic mantlet cover. I hope you agree. Smile

As always, comments, critique, and conversation welcomed! Big Smile

  • Member since
    January 2007
Posted by the doog on Tuesday, April 11, 2017 8:24 PM

panzer948
Hi Karl, I haven't been on here in a while myself. Will be following along on your build of this US monster. I know a guy in the Wildcats group down in Columbia that bought this kit too. I will let you know if I hear of something that may help! Anyway, good luck on the build and glad to see you back in some armor.... I knew you couldn't be gone from armor to long.
 

Good to be back, and to see you back, Brian. :) Getting ready to paint soon. Sure wish I had a chance to go see this again and take detail shots before I started, but I think it's coming out pretty nicely. See what you think---here comes the next installment! :)

  • Member since
    January 2007
Posted by the doog on Tuesday, April 11, 2017 8:21 PM

warshipguy

Karl,

I'm impressed, and I am learning a lot from following this build.  By the way, my wife just gave me the Conqueror Mark II kit as a surprise, and I need to look up the recommended corrections to the kit.  Otherwise, I plan on emulating what you are doing here, such as with the texturing.

Bill


Bill, good luck with that one! Hope it turns out to be a killer build! Thanks for following along here!

  • Member since
    February 2015
  • From: Charlotte, NC
Posted by panzer948 on Tuesday, April 11, 2017 6:39 PM
Hi Karl, I haven't been on here in a while myself. Will be following along on your build of this US monster. I know a guy in the Wildcats group down in Columbia that bought this kit too. I will let you know if I hear of something that may help! Anyway, good luck on the build and glad to see you back in some armor.... I knew you couldn't be gone from armor to long.

On the bench: Revell 1/32nd Junkers JU-88 A1

  • Member since
    September 2005
  • From: Groton, CT
Posted by warshipguy on Monday, April 10, 2017 3:17 PM

Karl,

I'm impressed, and I am learning a lot from following this build.  By the way, my wife just gave me the Conqueror Mark II kit as a surprise, and I need to look up the recommended corrections to the kit.  Otherwise, I plan on emulating what you are doing here, such as with the texturing.

Bill

  • Member since
    January 2007
Posted by the doog on Saturday, April 8, 2017 8:24 PM

Gamera


stikpusher


But it is nice to tag along vicariously and watch as Karl/Doog tackles this kit's problems. 


Oh yeah! At this point I'm happy to just follow along and watch Karl work his magical voodoo on making it awesome! Wink


Here we go again, Cliff! This one's for you! :)

So the next "episode"....

I decided the rough-up the hull and turret since that Milliput application was so smooth. I used a Dremel grinding bit to bounce around the hull and turret to get the effect...

The effect...

When you assemble the machine gun, be aware that there are actually two different "J" sprues...

The lights are a fiddly assembly, but they look great when done. They're missing the horn (?) on the right side, center of the light tree. I couldn't find one in the box or sprues. I may look for one in the spares box.

If you can assemble the PE part that's supposed to wrap around the muffler pipe ends, you're a better modeler than me! Its bend-indentations are very weirdly proportioned, and I just substituted a piece of PE cut from the frame to contain them.

The machine gun has one PE part---I knew I would one day love that bender tool that I got three years ago..be careful bending this part. If you muck up the bends, the two ends will not be equidistant and will not allow the gun to sit properly in the cradle. The PE cradle actually pins onto two plastic pins on the mount, and if the parts are lined up, it skews the whole cradle and makes a mess..

When properly assembled, it's a nice little MG...

You got two problems with the MG mounting piece; 1. you have to fill this weird depression on top of it, and 2. it blocks the placement of the hatch if you try to close it. You can see it here before I corrected it by cutting it out with a sharp #11...

The rear hatch is a poor fit; you can see daylight behind it. I filled in the gap and that solved the problem.

The gun mount can use some help. I drilled some holes in the collar and used a minifile to better define the "stepped" forward-collar that surrounds the gun in front.

 You also have to drill out that tube on the side, and fill in the space around it to make it look welded in.

I stilll have some cleaning-up to do on the side sighting "bubbles" that don't fit in very well to the side of the turret. I also didn't put in the bottom hand rail yet because I still have to fashion the Milliput mantlet cover.

Almost there, almost there....construction almost finished..by the way that's not a deep crease on the turret bottom-side--it's just the way the light is hitting it.

I can't believe how long the gun is on this sucker. It's going to be a challenge to fit it in my display case!

Well, by the next post I should have the mantlet cover done, so please stay tuned. And I have to work on those "workable" tracks---NOT looking forward to THAT, as the last time I used these on my M48 build they proved to be as delicate as lace....going to try to reinforce the assembly with some CA glue and see what happens. Stay tuned, guys! Thanks for being a part of this build! Big Smile


  • Member since
    January 2007
Posted by the doog on Saturday, April 8, 2017 7:53 PM

stikpusher


Rob Gronovius
 

  A third person may prefer the Academy or Tamiya kit because they are cheaper and can live with those older kits.


That would be me... I am reluctant to spend big bucks (pretty much anything over $40) on a kit that needs serious work like the subject of this thread. Let alone most any tank that never made it into service. The M103, is a maybe, if I can find it for a good price, due to less corrective work being required, and I like it as a subject more. I build primarily for myself and filling gaps in my collection. My friends who see my builds won't know about corrections or not, nor will most of the guys at IPMS, and probably less than half at AMPS. 

But it is nice to tag along vicariously and watch as Karl/Doog tackles this kit's problems. 


Glad to have you along, Carlos; I agree with you when you say "My friends who see my builds won't know about corrections or not, nor will most of the guys at IPMS, and probably less than half at AMPS. ". True, that! And that's why I don't really worry about it much. Smile

  • Member since
    January 2007
Posted by the doog on Saturday, April 8, 2017 7:51 PM

M1GarandFan

Once again, just my two cents, but, I agree with Rob here. If I'm paying 50-60 bucks for a kit, I expect it to competently represent the actual object. Minor details and pieces not included are one thing, but when the gross scale of hull, turret and tracks are incorrect, I don't feel it's worth my time to bother with major surgery. I "fixed" my hatch problem on my M4 (105), but it ain't great. I probably won't spend much on a Dragon kit again. Not worth the effort. BTW, none of these builds are for anyone's eyes but me. No posted photos or shows.


"Scale" imperfections just never bothered me unless they're like, something that my wife could point out, lol.

I think we can all say that anything using the DS tracks is going to look too loose unless you monkey with them. I HATE these tracks; I hope like hell that they go back to indylinks or link-and-length.

  • Member since
    January 2007
Posted by the doog on Saturday, April 8, 2017 7:49 PM

Rob Gronovius


Your opinion, abilities and wallet may not agree with me, and that's okay. That's why we aren't all required to like and buy the same subjects. Fortunately, I don't have to buy a kit just because someone else thinks it's good enough for them.


Seriously, Rob; no umbrage taken, and none intended; I was only genuinely curious why you were so dead-set against it. That's ok: we've all got our preferences and quirks as modelers. I appreciate your input here on this thread. I love reading your knowledgeable posts and historical references. Wink

  • Member since
    January 2007
Posted by the doog on Saturday, April 8, 2017 7:44 PM

HeavyArty

I agree with you guys above.   It seems some modelers are just spoiled and looking for a perfect kit out of the box.  I built the M103A1 for a customer pretty much straight from the box with only a few corrections.  I think it looks like an M103 and a pretty nice one at that.  It may not be 100% accurate, but it was close enough for me and the customer.  It would definitely look good in anyone's collection.

M103A1:  http://armorama.com/modules.php?op=modload&name=SquawkBox&file=index&req=viewtopic&topic_id=232867&page=1


A fine job on that big boy, Gino. Well done, and we're on the same page here. Build it, improve it if you can. revel in the glory of it up on the shelf. Big Smile

  • Member since
    January 2007
Posted by the doog on Saturday, April 8, 2017 7:42 PM

warshipguy

Karl,

I couldn't agree with you more!  I have read reviews that have stopped modelers cold, only to find build logs on that same kit raving about the fun the builder is having.  Isn't that what the hobby exists for?

Bill


I'm with you there, Bill. Having fun with this one, even though it's a bit of a turkey..where's the cranberry sauce? Eats

  • Member since
    November 2009
  • From: SW Virginia
Posted by Gamera on Thursday, April 6, 2017 7:55 AM

stikpusher


But it is nice to tag along vicariously and watch as Karl/Doog tackles this kit's problems. 


Oh yeah! At this point I'm happy to just follow along and watch Karl work his magical voodoo on making it awesome! Wink

"I dream in fire but work in clay." -Arthur Machen


  • Member since
    July 2004
  • From: Sonora Desert
Posted by stikpusher on Wednesday, April 5, 2017 10:43 PM

Rob Gronovius
 

  A third person may prefer the Academy or Tamiya kit because they are cheaper and can live with those older kits.


That would be me... I am reluctant to spend big bucks (pretty much anything over $40) on a kit that needs serious work like the subject of this thread. Let alone most any tank that never made it into service. The M103, is a maybe, if I can find it for a good price, due to less corrective work being required, and I like it as a subject more. I build primarily for myself and filling gaps in my collection. My friends who see my builds won't know about corrections or not, nor will most of the guys at IPMS, and probably less than half at AMPS. 

But it is nice to tag along vicariously and watch as Karl/Doog tackles this kit's problems. 


F is for FIRE, That burns down the whole town!

U is for URANIUM... BOMBS!

N is for NO SURVIVORS...

       - Plankton

LSM


  • Member since
    July 2014
  • From: Rifle, CO. USA
Posted by M1GarandFan on Wednesday, April 5, 2017 7:25 PM

Once again, just my two cents, but, I agree with Rob here. If I'm paying 50-60 bucks for a kit, I expect it to competently represent the actual object. Minor details and pieces not included are one thing, but when the gross scale of hull, turret and tracks are incorrect, I don't feel it's worth my time to bother with major surgery. I "fixed" my hatch problem on my M4 (105), but it ain't great. I probably won't spend much on a Dragon kit again. Not worth the effort. BTW, none of these builds are for anyone's eyes but me. No posted photos or shows.

  • Member since
    December 2002
  • From: Fort Knox
Posted by Rob Gronovius on Wednesday, April 5, 2017 6:47 PM

the doog


Rob Gronovius

....in order to just build the kit as it should be (not correcting accuracy errors) seemed like just too much work and you wouldn't end up with a good model in the end.


Rob, really? Seriously, I'm floored that you would say that "...you wouldn't end up with a good model in the end." What's so godawful about it that would preclude even a decent representation of the tank? Geez, I thought it looked pretty ballpark, enough so at least to throw it together and put it in the 1/35 arsenal. What's so unforgiveably "off" about it that makes you say something so stringent? Smile


Yes, it would look like an M103. Yes, I could make the necessary modifications to either build it out of box or attempt major and minor surgery to accurize the kit. Results might vary depending on if I think the detail is worth the effort to correct. But if I have to pay $50-60 for the kit, why should it require surgery to assemble out of box?

To me, in my opinion, it would be too much work for me to build this kit that does not interest me and costs more money for what I'd end up with. I could buy one of the best Abrams kits with the same amount of money. Your opinion, abilities and wallet may not agree with me, and that's okay. That's why we aren't all required to like and buy the same subjects. Fortunately, I don't have to buy a kit just because someone else thinks it's good enough for them.

Likewise, Gino perfers the Meng Bradley. To me, I got the Orochi kit in a trade, and it is good enough for me. Am I fully satisfied with it? Nah, but I can live with it. A third person may prefer the Academy or Tamiya kit because they are cheaper and can live with those older kits.

  • Member since
    December 2002
  • From: Valrico, FL
Posted by HeavyArty on Wednesday, April 5, 2017 4:24 PM

I agree with you guys above.   It seems some modelers are just spoiled and looking for a perfect kit out of the box.  I built the M103A1 for a customer pretty much straight from the box with only a few corrections.  I think it looks like an M103 and a pretty nice one at that.  It may not be 100% accurate, but it was close enough for me and the customer.  It would definitely look good in anyone's collection.

M103A1:  http://armorama.com/modules.php?op=modload&name=SquawkBox&file=index&req=viewtopic&topic_id=232867&page=1

Gino P. Quintiliani - Field Artillery - The KING of BATTLE!!!

Check out my Gallery: https://app.photobucket.com/u/HeavyArty

"People sleep peaceably in their beds at night only because rough men stand ready to do violence on their behalf." -- George Orwell

  • Member since
    March 2013
Posted by MikeyBugs95 on Wednesday, April 5, 2017 4:09 PM

I do agree with you, doog (at least the part I could see, the mobile site cuts off a bit of some posts occasionally). I'm of the mind that as long as it looks like the subject and is generally accurate (especially if it's such a well documented and photo'd subject like the M103...) it's fine but I prefer that the kit be mostly accurate shape-wise. In cases like the M103, if i want it enough I'll buy it cheaper through third parties. I was able to get the kit for around $30. 

 In progress:

CAD:

1/35 SINCGARS ICOM/ASIP; 1/35 Flat screen TVs; 1/35 tactical light that I shall reveal later Devil

Models:

1/35 DML M4A1 DV; AFV Club M18 Hellcat; DML StuG IV; DML Armored Jeep w/ .50 cal; Panda Cougar 4x4 MRAP; Academy M3A1 Stuart; 1/700 Midship Models USS Miami; 1/700 Skywave Rudderow Destroyer Escort

  • Member since
    September 2005
  • From: Groton, CT
Posted by warshipguy on Wednesday, April 5, 2017 1:26 PM

Karl,

I couldn't agree with you more!  I have read reviews that have stopped modelers cold, only to find build logs on that same kit raving about the fun the builder is having.  Isn't that what the hobby exists for?

Bill

  • Member since
    January 2007
Posted by the doog on Wednesday, April 5, 2017 1:11 PM

MikeyBugs95

I can't tell if you're being sarcastic or not (doesn't really translate well over the internet) but this is why the Black Label M103 is such a bad kit:

http://www.armorama.com/modules.php?op=modload&name=SquawkBox&file=index&req=viewtopic&topic_id=219229&page=1

Build is by Pawel "Vodnik" Krupo...(forgive me but I can't spell his last name). He corrects nearly 85% (if not, more) of the kit. The turret won't even rotate completely... The Dragon engineers placed an exhaust (that they designed too high way) in the path of a bulge under the turret...


No, not being saracastic at all. I've seen Pavel's months thread earlier, (didn't realize that he was going to correct the whole kit!) but honestly felt that it was a little over-the-top in its condemnations. I honestly am happy that there are guys like Pavel out there to be so rigorous in his estimation of new kits, but I find it all to be a bit much. In his own words: "...we have a kit that will look impressive and certainly look like M103 once built, but in fact is seriously inaccurate.". Again: "...we have a kit that will...certainly look like M103 once built..." -- that's good enough for me, seriously.

Don't get me wrong--it's not that I just "accept" the ridiculous corner-cutting obvious on that and even this kit that I"m building; it's obvious that the engineers of these kits are using shortcuts to save money by using existing parts, molds, CAD programs, etc, to cobble together reasonable facsimiles of these tanks. ANd if a reasonable correction can be made here and there to improve them, great! I agree that the turret problem of not being able to turn is just ridiculous--kind like this model's clearance problems on the turret. But, if not, they STILL "will certainly look like" the models they are intended to represent. For most guys, I genuinely believe that that's reason enough to buy them.

I know guys too who date swimsuit models and break up with them, complaining about the size of their....yeah...or the shape of their toes or something insignificant like that...some guys just can't see the pretty forest for the trees.

In the end, I would wish that ANY model company would strive to give us the best models possible, but I look at the word "Model" as BOTH a noun AND a verb. :)

Thanks for your response though, and the info.Yes

  • Member since
    March 2013
Posted by MikeyBugs95 on Wednesday, April 5, 2017 12:14 PM

I can't tell if you're being sarcastic or not (doesn't really translate well over the internet) but this is why the Black Label M103 is such a bad kit:

http://www.armorama.com/modules.php?op=modload&name=SquawkBox&file=index&req=viewtopic&topic_id=219229&page=1

Build is by Pawel "Vodnik" Krupo...(forgive me but I can't spell his last name). He corrects nearly 85% (if not, more) of the kit. The turret won't even rotate completely... The Dragon engineers placed an exhaust (that they designed too high way) in the path of a bulge under the turret... 

 In progress:

CAD:

1/35 SINCGARS ICOM/ASIP; 1/35 Flat screen TVs; 1/35 tactical light that I shall reveal later Devil

Models:

1/35 DML M4A1 DV; AFV Club M18 Hellcat; DML StuG IV; DML Armored Jeep w/ .50 cal; Panda Cougar 4x4 MRAP; Academy M3A1 Stuart; 1/700 Midship Models USS Miami; 1/700 Skywave Rudderow Destroyer Escort

  • Member since
    January 2007
Posted by the doog on Wednesday, April 5, 2017 11:58 AM

Rob Gronovius


....in order to just build the kit as it should be (not correcting accuracy errors) seemed like just too much work and you wouldn't end up with a good model in the end.


Rob, really? Seriously, I'm floored that you would say that "...you wouldn't end up with a good model in the end." What's so godawful about it that would preclude even a decent representation of the tank? Geez, I thought it looked pretty ballpark, enough so at least to throw it together and put it in the 1/35 arsenal. What's so unforgiveably "off" about it that makes you say something so stringent? Smile

JOIN OUR COMMUNITY!

Our community is FREE to join. To participate you must either login or register for an account.

SEARCH FORUMS
FREE NEWSLETTER
By signing up you may also receive reader surveys and occasional special offers. We do not sell, rent or trade our email lists. View our Privacy Policy.