SEARCH FINESCALE.COM

Enter keywords or a search phrase below:

FINISHED PICS--1969 Dodge Daytona

5897 views
67 replies
1 rating 2 rating 3 rating 4 rating 5 rating
  • Member since
    January 2007
FINISHED PICS--1969 Dodge Daytona
Posted by the doog on Tuesday, October 13, 2015 12:44 PM

Guys,

If anyone has built this kit, what is the correct way to build it regarding the gluing/mating of the nose cone to the body before assembly, for painting's sake? I would hope that you can glue the front cone on and then paint the whole body, and still have it be possible to get the body over the chassis?

Can anyone offer their experience with this?

  • Member since
    February 2003
  • From: East Bethel, MN
Posted by midnightprowler on Tuesday, October 13, 2015 4:22 PM

I built the kit, but don't remember, lol. What you can do is tape the nose one in place, then try putting the body on the chassis. That will answer the question.

Hi, I am Lee, I am a plastiholic.

Co. A, 682 Engineers, Ltchfield, MN, 1980-1986

1 Thessalonians 4:13-18 1 Corinthians 15:51-54

Ask me about Speedway Decals

  • Member since
    August 2015
  • From: the redlands Fl
Posted by crown r n7 on Tuesday, October 13, 2015 4:29 PM

I would attach the nose with elmers tack inside of the body


 Nick.

  • Member since
    October 2009
Posted by Kentucky Colonel on Tuesday, October 13, 2015 4:51 PM

I'm going to follow this since I have to buile it before Christmas. My brother bought one when they first came out and I wanted to give him one I build.

  • Member since
    January 2007
Posted by the doog on Tuesday, October 13, 2015 8:41 PM

Hmmm. Well, I ws hoping for some experience, but thanks for the suggestions, guys.

Anyone else have any experience with building it? Indifferent

  • Member since
    February 2003
  • From: East Bethel, MN
Posted by midnightprowler on Thursday, October 15, 2015 4:54 PM

Like I said, I built it, but it was 10 years ago. Iirc, it will work that way. It is very simple to attach the nose cone with tape and try to put the chassis in. I do it all the time. It is a great way to determine these kind of things.

Hi, I am Lee, I am a plastiholic.

Co. A, 682 Engineers, Ltchfield, MN, 1980-1986

1 Thessalonians 4:13-18 1 Corinthians 15:51-54

Ask me about Speedway Decals

  • Member since
    January 2007
Posted by the doog on Friday, October 23, 2015 7:23 PM

Hi Guys,

So, I have some photos and work to share. It's been a while since I asked the first question here, but now I've finally gotten somewhere. First of all, a model and this little hobbyist do not go together well...

I forgot the first rule of Dachshund Kingdom: "If it's on the floor, it's mine". I left a few parts on the ground and in no time at all I had a severely altered firewall and teeth marks in my oil pan. Sad Off to eBay to order another one....

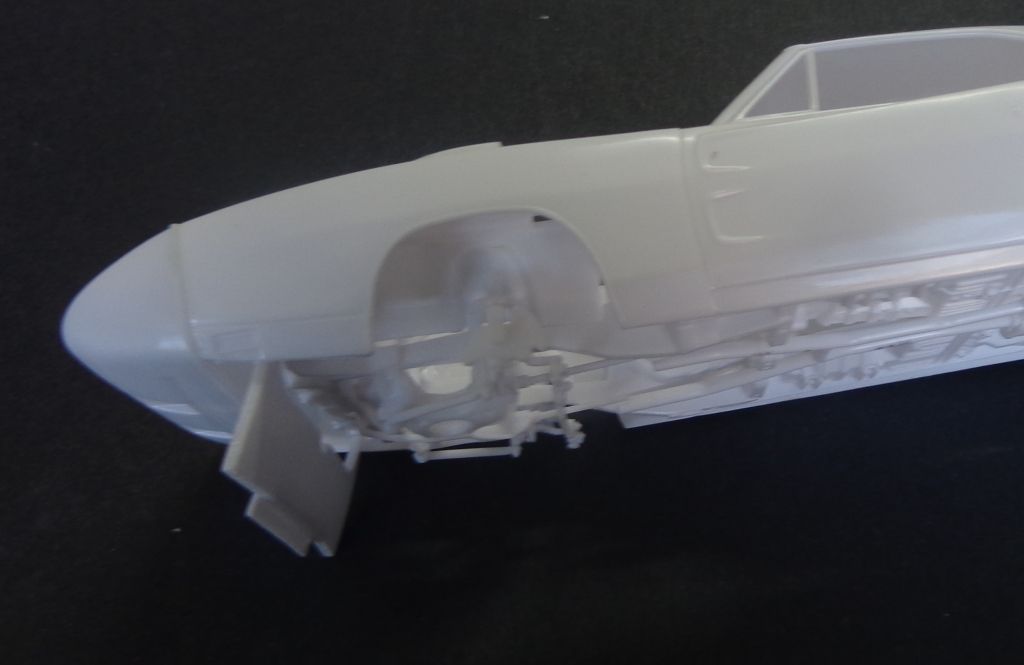
Anyway, I've been doing a lot of research and doing some test-fitting; it seems that it's ok to add the nose cone if you DON'T add this filler piece, inserted here as a prudent spacer while the cone glues. The chassis inserts around the bottom of the radiator, and if you add the spacer, you can't do that when ou assemble it.

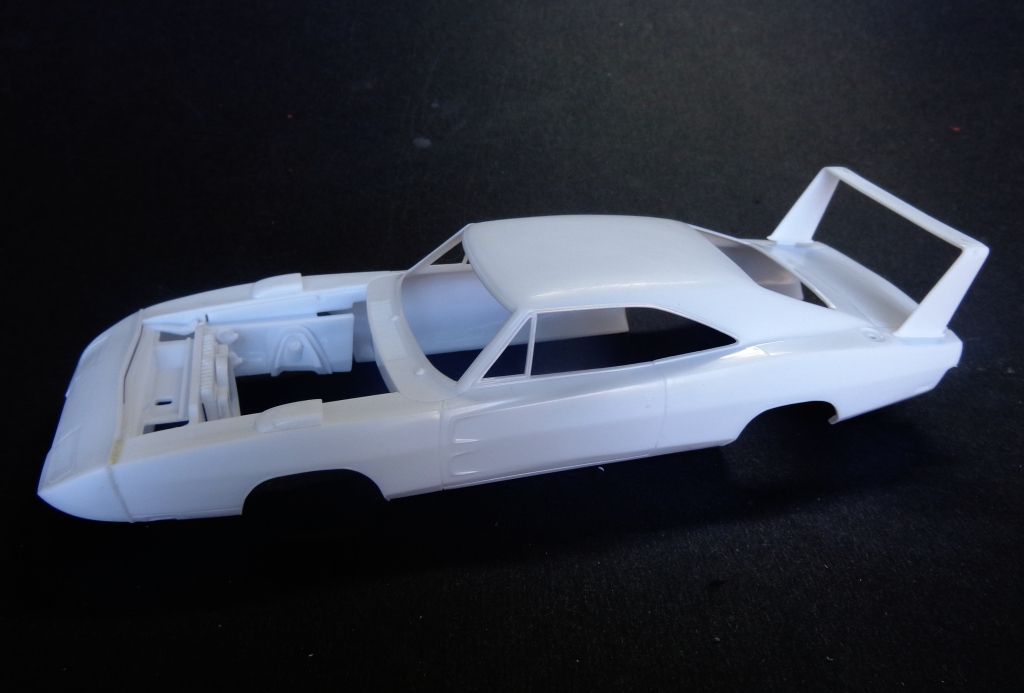
The body so far. The tail wing is not glued on, but it's in three parts and needs to be assembled, so I have the tabs in thebody where it will go so that it sets straight.

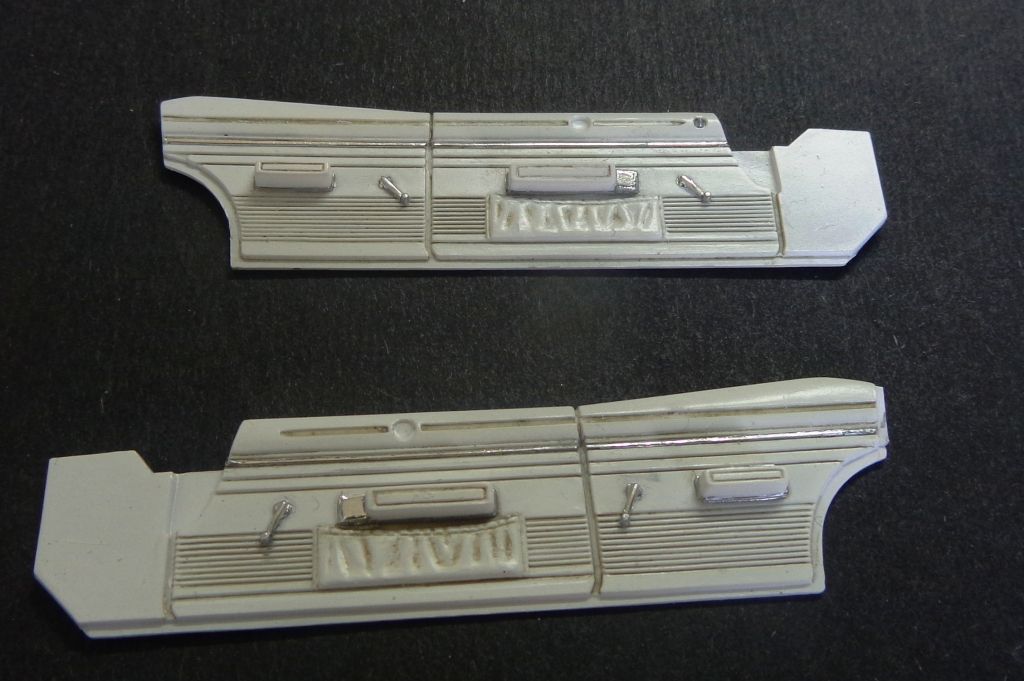
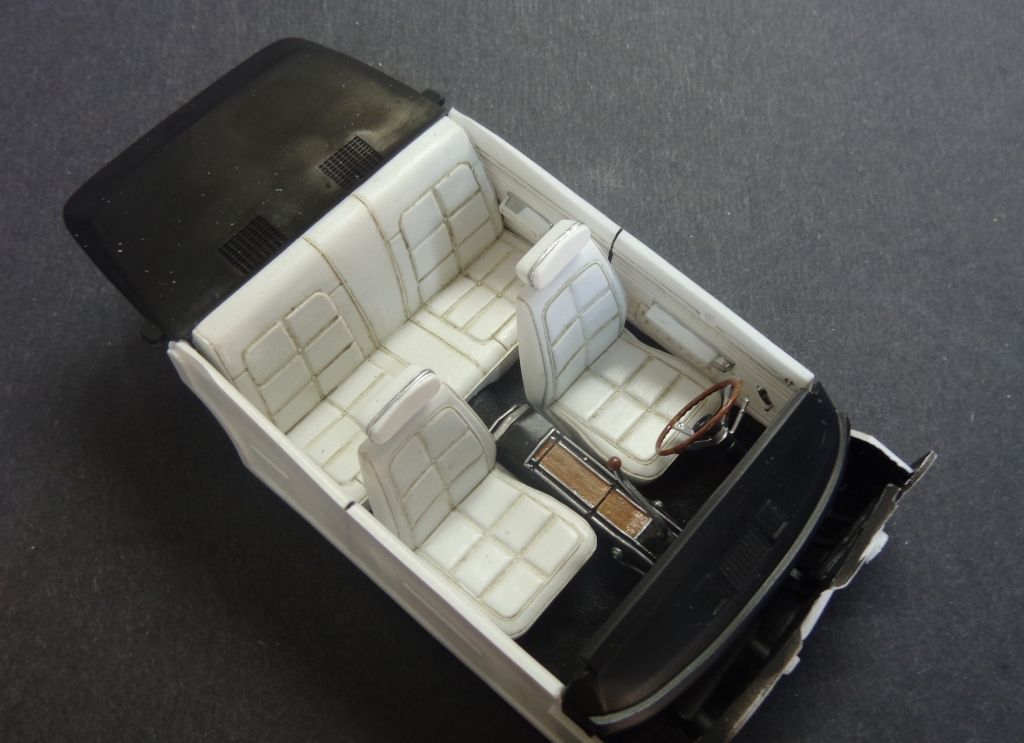
The sides of the tub. I used some BMF (bare metal foil) here, but realized that it really didn't look much better than the silver enamel paint, so I didn't bother with a lot of it on the small details. All of the lines and seams were detailed with a pin wash of gray oil paint. This really gives some depth to the white parts.

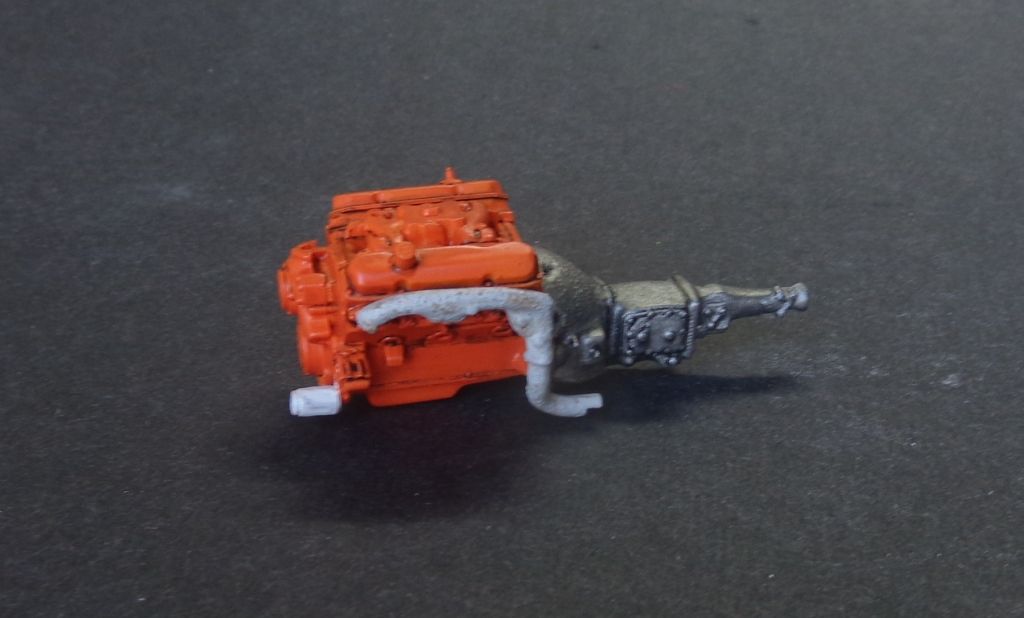
The re-assembled 2nd engine. After reading through a bunch of hoohah on that internet on the "correct color" of orange, I painted it Tamiya Orange and declared it perfectly suitable. It really seems that Tamiya matched their orange to a good Hemi orange. I detailed it with pin washes of Black oil. The pipes have been roughened up a but by adding Mr Surfacer 500, and were painted Gull Gray and speckled with craft store "Pennsylvania Clay" to show a little bit of heat damage.

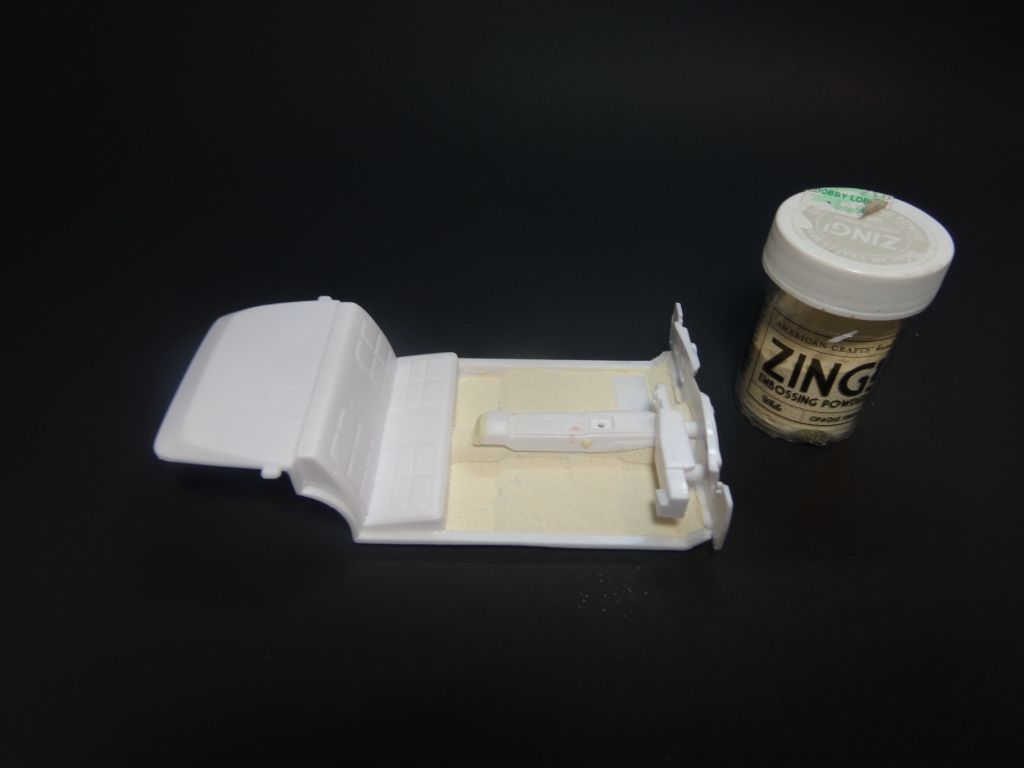
The interior got a "carpet" of embossing powder over white glue. This looks MUCH better than flocking material for a realistic carpet.

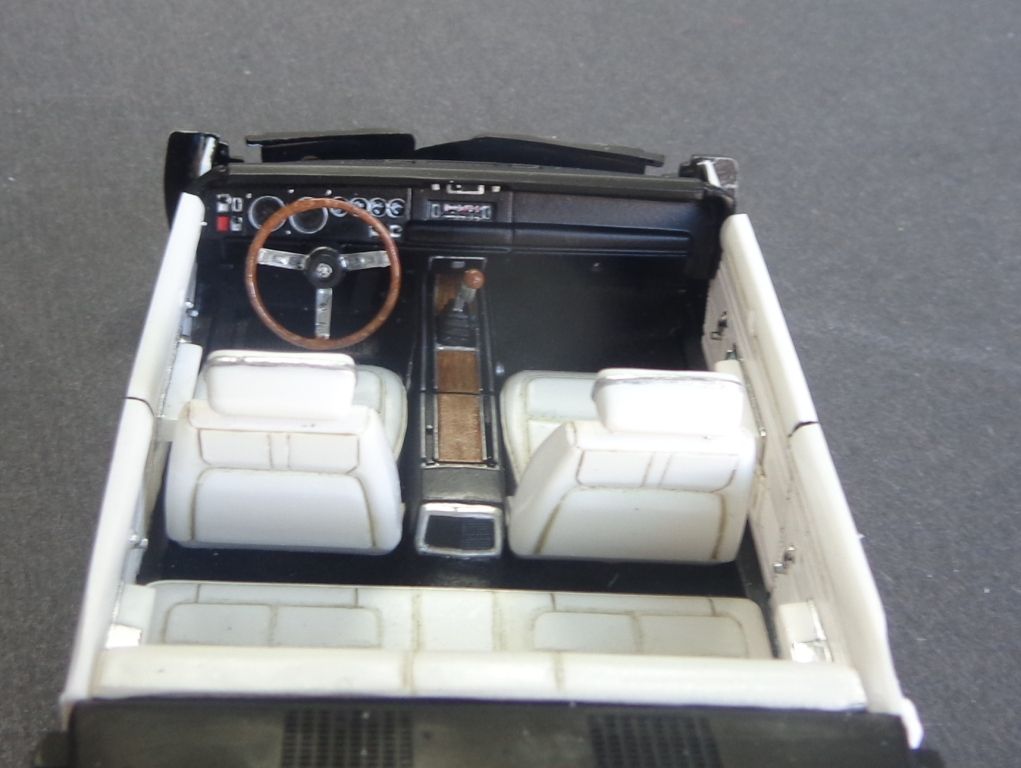
How it looks with some paint...

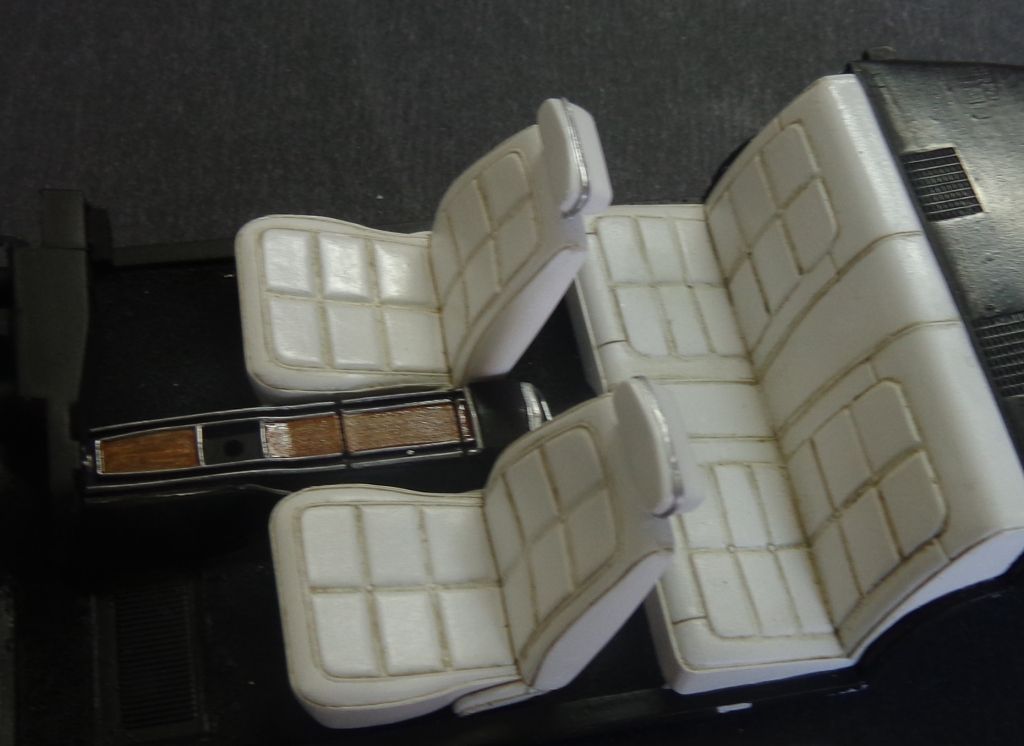
The wood parts were painted with craft store acrylics. Tan first, then diluted wood color stroked on with an old brush. The silver parts are painted, not BMF'ed.

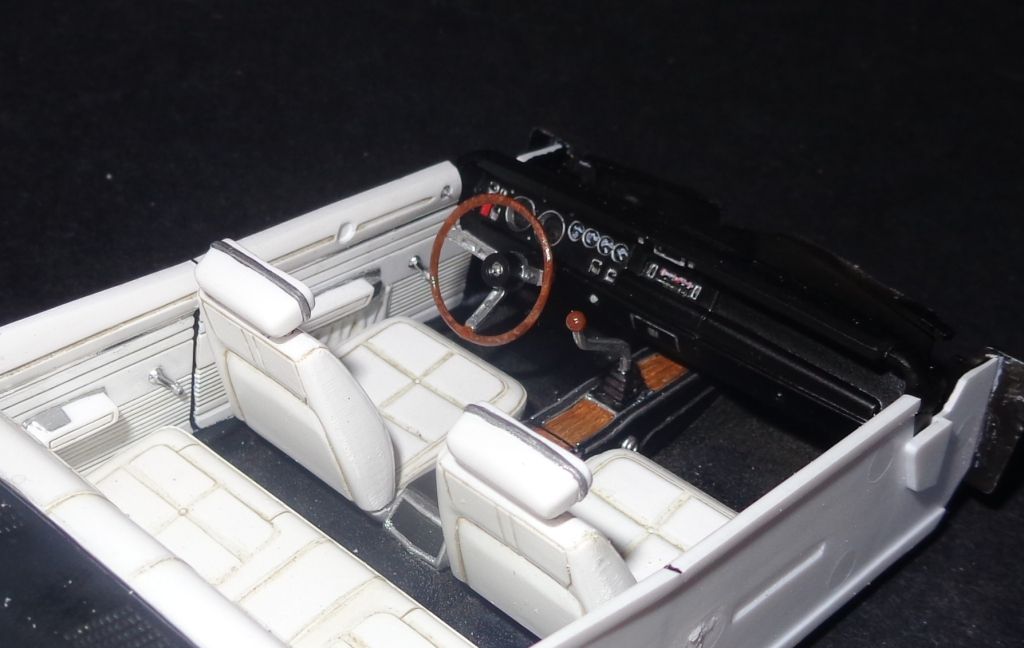
The tub assembled with dash.

I'll be going for the Bronze/Copper finish on this one. I've got some "poverty caps", and will be making what is essentially comedian David Spade's new Daytona.

So that's all I've got so far. Stay tuned for more fun! Big Smile


  • Member since
    October 2009
Posted by Kentucky Colonel on Friday, October 23, 2015 7:47 PM

Good job!!

  • Member since
    March 2012
  • From: Corpus Christi, Tx
Posted by mustang1989 on Friday, October 23, 2015 9:30 PM

Watching with great interest Karl................................


 Forum | Modelers Social Club Forum (proboards.com) 

  • Member since
    August 2007
  • From: back country of SO-CAL, at the birth place of Naval Aviation
Posted by DUSTER on Friday, October 23, 2015 11:09 PM

Man o man have you got the number of this kit!  Great idea for the interior colors.

As to the embossing power, I assume it is a very fine grain  material and then can be painted to suite --boy the stuff we modelers find in other crafts fields


Good looking "helper". We used to have a tri color, so I feel your equal pain and laughter.

Steve

Building the perfect model---just not quite yet  Confused

  • Member since
    March 2014
Posted by kpnuts on Saturday, October 24, 2015 1:53 AM

Looking very good.

  • Member since
    October 2009
Posted by Kentucky Colonel on Saturday, October 24, 2015 3:39 PM
Did you prime any of the interior before painting? I can't make up my mind but I know I will be priming the body since I'll be using Model Master lacquer and clear coat system.
  • Member since
    January 2007
Posted by the doog on Saturday, October 24, 2015 5:41 PM

Thanks, guys, I appreciate you following along and taking time to comment! Smile

  • Member since
    January 2007
Posted by the doog on Saturday, October 24, 2015 5:46 PM

DUSTER

Man o man have you got the number of this kit!  Great idea for the interior colors.

As to the embossing power, I assume it is a very fine grain  material and then can be painted to suite --boy the stuff we modelers find in other crafts fields


Good looking "helper". We used to have a tri color, so I feel your equal pain and laughter.


You got that right, Steve. It's fine powder that looks much better than the flocking stuff.

And I hope you enrich your life with another Doxy. I couldn't imagine my life without this little monster, lol. He's actually very sweet and full of personality. Heart

  • Member since
    January 2007
Posted by the doog on Saturday, October 24, 2015 5:48 PM

Kentucky Colonel
Did you prime any of the interior before painting? I can't make up my mind but I know I will be priming the body since I'll be using Model Master lacquer and clear coat system.
 

Yup, I primed the interior with Duplicolor white primer, so it would be easier to paint the white over the seats, etc. Plus I wanted to seal in the embossing powder. Smile

  • Member since
    February 2003
  • From: East Bethel, MN
Posted by midnightprowler on Sunday, October 25, 2015 7:58 AM

Very impressive so far. I have been thinking hard about when I did mine. IIRC I painted my nosecone seperate, but at the same time and the exact same process as the rest, and it turned out fine.

Hi, I am Lee, I am a plastiholic.

Co. A, 682 Engineers, Ltchfield, MN, 1980-1986

1 Thessalonians 4:13-18 1 Corinthians 15:51-54

Ask me about Speedway Decals

  • Member since
    January 2007
Posted by the doog on Monday, October 26, 2015 8:55 PM

midnightprowler

Very impressive so far. I have been thinking hard about when I did mine. IIRC I painted my nosecone seperate, but at the same time and the exact same process as the rest, and it turned out fine.


I LOVE the Turquoise/WHite scheme! That looks awesome, Lee! I was seriously considering this scheme at one point. Glad now that I chose another. lol.

  • Member since
    January 2007
Posted by the doog on Monday, October 26, 2015 8:59 PM

Quick update: I have the engine finished, more or less. It's ready to go in the body once painted. I wired it according to info I found on another build log. I am pretty happy with how it came out.

From what I read, that last wire on the distributor goes over the top of the manifold and into the back of the cylinder...

Lastly, I corrected the wrong shirter that I put in it. This is the correct, shorter one.

I should be priming tomorrow...stay tuned!

  • Member since
    November 2003
  • From: State of Mississippi. State motto: Virtute et armis (By valor and arms)
Posted by mississippivol on Monday, October 26, 2015 9:07 PM
Looking fine! Will you add heater hoses when you mount the engine?
  • Member since
    March 2012
  • From: Corpus Christi, Tx
Posted by mustang1989 on Monday, October 26, 2015 9:25 PM

Man that engine looks good Karl. Seems like you got just the right amount of wash on it to bring out the details without it looking too dirty. Interior looks nice and busy. The steering wheel would look nice with the spoke holes drilled out but looks like you did great with what you had here. The carpet looks flat out awesome as well! Yes


 Forum | Modelers Social Club Forum (proboards.com) 

  • Member since
    January 2007
Posted by the doog on Tuesday, October 27, 2015 6:52 AM

mississippivol
Looking fine! Will you add heater hoses when you mount the engine?
 

Yes, absolutely! They have to wait until it goes in the body though; there are some nice hoses included in the kit's moldings. Thanks for looking in!

  • Member since
    January 2007
Posted by the doog on Tuesday, October 27, 2015 6:53 AM

mustang1989

Man that engine looks good Karl. Seems like you got just the right amount of wash on it to bring out the details without it looking too dirty. Interior looks nice and busy. The steering wheel would look nice with the spoke holes drilled out but looks like you did great with what you had here. The carpet looks flat out awesome as well! Yes


THanks, Mustang!

The washes were done very carefully, with a small brush, applied only to seams. It doesn't seem like you ever see one of these "orange" engines looking grimy.

And darn it--I meant to drill out that steering wheel! Thanks for reminding me! I'll get to it...SmileYes

  • Member since
    March 2012
  • From: Corpus Christi, Tx
Posted by mustang1989 on Tuesday, October 27, 2015 8:02 AM

No prob dude and lookin' forward to seeing future progress outta this one.Cool


 Forum | Modelers Social Club Forum (proboards.com) 

  • Member since
    October 2009
Posted by Kentucky Colonel on Tuesday, October 27, 2015 9:07 AM

Good job. I'm learning from your thread to do mine.

  • Member since
    February 2003
  • From: East Bethel, MN
Posted by midnightprowler on Tuesday, October 27, 2015 4:50 PM

Awesome job! You are correct about the plug wires.

Hi, I am Lee, I am a plastiholic.

Co. A, 682 Engineers, Ltchfield, MN, 1980-1986

1 Thessalonians 4:13-18 1 Corinthians 15:51-54

Ask me about Speedway Decals

  • Member since
    March 2012
  • From: Corpus Christi, Tx
Posted by mustang1989 on Wednesday, October 28, 2015 3:55 AM

Aw man! And I was up early this morning lookin' for a progress update on this thing too!


 Forum | Modelers Social Club Forum (proboards.com) 

  • Member since
    August 2007
  • From: back country of SO-CAL, at the birth place of Naval Aviation
Posted by DUSTER on Wednesday, October 28, 2015 9:23 AM

   me too......Oh well Propeller

Steve

Building the perfect model---just not quite yet  Confused

  • Member since
    January 2007
Posted by the doog on Wednesday, October 28, 2015 7:36 PM

Hey guys, thanks to everyone following along and taking the time to leave a comment! I appreciate you being on board!

I had a minor snafu with the priming: I discovered a blemish in the body, and it took me a while to realize that it came from using too much glue on the underside where I glued in the radiator support. It made a little depression marrnig the plastic, so I had to fill it with some putty nd then sand it down. You can see the before/after here. I should be getting some paint on her possibly tomorrow, depending on the humidity. It's supposed to rain...Tongue Tied Keeping my fingers crossed...

  • Member since
    March 2012
  • From: Corpus Christi, Tx
Posted by mustang1989 on Thursday, October 29, 2015 3:53 AM

Man I hate it when stuff like that happens! Looks like you whipped into shape though. YesYesYesYesYes


 Forum | Modelers Social Club Forum (proboards.com) 

  • Member since
    October 2009
Posted by Kentucky Colonel on Friday, October 30, 2015 7:32 PM

One question. I see you put in the radiator and the fan shroud in before painting the body. Is that because of the fromt cowling needing to be glued on before painting? I already have mine painted semi gloss black but not put in yet but I can work around that if I have to.

JOIN OUR COMMUNITY!

Our community is FREE to join. To participate you must either login or register for an account.

SEARCH FORUMS
FREE NEWSLETTER
By signing up you may also receive reader surveys and occasional special offers. We do not sell, rent or trade our email lists. View our Privacy Policy.