SEARCH FINESCALE.COM

Enter keywords or a search phrase below:

FINISHED PICS--1969 Dodge Daytona

5898 views
67 replies
1 rating 2 rating 3 rating 4 rating 5 rating
  • Member since
    May 2015
Posted by DAYTONA on Saturday, October 31, 2015 9:59 PM

...don't worry about matching the nose to the front of the car, they weren't painted at the same time during the original build at Creative Industries...they were built as Charger R/Ts, sent to the builder, rear window removed, roofline rebuilt, trunk lid shortened and rear of car was painted...nose was hung, painted along with fender scoops and the undernose belly pan...I am still a little curious about some other details of the build not answered in the article...the first real 1969 Daytona I owned was a low mile all original car, paint peeled off the nose and rear roof like house paint, it was F6 Bright Green...they weren't built as classics, they were rushed out the door to meet the deadline for NASCAR

...nice work on the interior and engine, great attention to detail

  • Member since
    January 2007
Posted by the doog on Monday, November 2, 2015 10:23 AM

Kentucky Colonel

One question. I see you put in the radiator and the fan shroud in before painting the body. Is that because of the fromt cowling needing to be glued on before painting? I already have mine painted semi gloss black but not put in yet but I can work around that if I have to.


Hey man, sorry I didn't get back to you earlier; Halloween and the weekend, you know...

Anyway, yes, it would have been very difficult to wedge in the radiator assembly and I really wanted to have the front pice glued on before paint. No way I wanted to get a nice glossy finish on it and then have to work with supergluing it on---that's practically a guarantee to get excess glue spots and fingerprints on the finish.

Anyway, I shot a coat of paint this weekend and made two dumb mistakes: shooting at too high an air pressure and in too cool an environment. I am using Model Car World (MCW) lacquers, which dry very quickly. Under the circumstances, the paint dried with a grainy finish. Not good at all. I am in the process of sanding it out and should be able to get something done by midweek to try to correct it. I'm going to thin the paint just a smidge and try a trick that I read about online: soaking the bottle in a glass of warm water to heat the paint before the "wet coat". Stay tuned....

  • Member since
    January 2007
Posted by the doog on Monday, November 2, 2015 10:26 AM

DAYTONA

...don't worry about matching the nose to the front of the car, they weren't painted at the same time during the original build at Creative Industries...they were built as Charger R/Ts, sent to the builder, rear window removed, roofline rebuilt, trunk lid shortened and rear of car was painted...nose was hung, painted along with fender scoops and the undernose belly pan...I am still a little curious about some other details of the build not answered in the article...the first real 1969 Daytona I owned was a low mile all original car, paint peeled off the nose and rear roof like house paint, it was F6 Bright Green...they weren't built as classics, they were rushed out the door to meet the deadline for NASCAR

...nice work on the interior and engine, great attention to detail


Thanks, Daytona, I apppreciate your input to this thread. I prefer to glue the nose on for reasons articulated in the previous post. Also, although I don't think I"d have any problem matching the paint, given that the hood is being painted separately from the body as well, but I think that most people unfamiliar with the specifics of this car's build history would think that it was a modeler's mistake if the paint didn't actually colsely match. But it's a cool little detail to know. Smile

  • Member since
    October 2009
Posted by Kentucky Colonel on Monday, November 2, 2015 10:52 AM

the doog
 
Kentucky Colonel

One question. I see you put in the radiator and the fan shroud in before painting the body. Is that because of the fromt cowling needing to be glued on before painting? I already have mine painted semi gloss black but not put in yet but I can work around that if I have to.


Hey man, sorry I didn't get back to you earlier; Halloween and the weekend, you know...


Anyway, yes, it would have been very difficult to wedge in the radiator assembly and I really wanted to have the front pice glued on before paint. No way I wanted to get a nice glossy finish on it and then have to work with supergluing it on---that's practically a guarantee to get excess glue spots and fingerprints on the finish.

Anyway, I shot a coat of paint this weekend and made two dumb mistakes: shooting at too high an air pressure and in too cool an environment. I am using Model Car World (MCW) lacquers, which dry very quickly. Under the circumstances, the paint dried with a grainy finish. Not good at all. I am in the process of sanding it out and should be able to get something done by midweek to try to correct it. I'm going to thin the paint just a smidge and try a trick that I read about online: soaking the bottle in a glass of warm water to heat the paint before the "wet coat". Stay tuned....


Thanks!! That's what I thought. I plan to do the same ever if I have to paint the radiator housing again. I'm going to use the Model Master Lacquer rattle can system when I paint the body.

  • Member since
    January 2007
Posted by the doog on Thursday, November 5, 2015 10:26 AM

Hey, just an update: I'm not dead on this project, but I experienced an air compressor melt-down on my 10 year old Badger compressor, so I sent it, and my airbrush, back to the company for a refurbishment. It should be back in two weeks. Taking the opportunity to organize my stash a bit and start another build to work on after this one.

  • Member since
    March 2012
  • From: Corpus Christi, Tx
Posted by mustang1989 on Thursday, November 5, 2015 10:30 AM

Man that do do some SUCKIN'!!! Hate to hear that and will be lookin forward to more progress on this one Karl.


 Forum | Modelers Social Club Forum (proboards.com) 

  • Member since
    January 2007
Posted by the doog on Thursday, November 5, 2015 10:42 AM

mustang1989

Man that do do some SUCKIN'!!! Hate to hear that and will be lookin forward to more progress on this one Karl.


Yeah, but I can't complain. It's an old diaphragm compressor, one of their small ones from a decade ago, and over that time, I've put a load on it comparable to asking a Sherpa to carry my Winnebago up to the summit of Everest, lol. It still worked, but air flow was noticeably diminished. I probably overheated it. I figured that I should get my airbrush tuned up too, while I was sending a package to them.I just wish I got all my parts painted--the hood still needs a coat, but the body is lookinhg pretty good. Gotta do some polishing now..

From what I hear though, Badger is exceptional in itrs customer service, so I should be in good stead when it gets back. Geeked

  • Member since
    January 2007
Posted by the doog on Thursday, November 12, 2015 1:20 PM

Well, STILL waiting for my airbrush and new compressor. The Badger man called me and said that my old compressor was pretty much ready for a bullet-"not cost-effective" to fix. They gave me a great deal on a new one, so I'm awaitin' now for the UPS man.

I figured I'd start another project; this is a 1969 Dodge Coronet R/T from t.m.resin that I got off eBay. I'm using the 69 Revell Charger as a donor kit.

Pretty cool ride---you don't see this one around on model sites much, especially with that hood. Unfortunately -- or not? Geeked -- it's a curbside chassis-the hood is molded in, but that's ok. I didn't really feel like detailing another similar motor right now. Still, the engine will be in it, just not detailed topside.

Waiting for that airbrush...

Here's how far I got on the Daytona paint before the meltdown; a few mist coats and then one light wet coat--nowhere near what I want from it yet.

Hopefully that big, beautiful brown van is going to pull up this afternoon....stay tuned!


  • Member since
    January 2010
Posted by CrashTestDummy on Thursday, November 12, 2015 3:34 PM

the doog
DAYTONA

...don't worry about matching the nose to the front of the car, they weren't painted at the same time during the original build at Creative Industries...they were built as Charger R/Ts, sent to the builder, rear window removed, roofline rebuilt, trunk lid shortened and rear of car was painted...nose was hung, painted along with fender scoops and the undernose belly pan...I am still a little curious about some other details of the build not answered in the article...the first real 1969 Daytona I owned was a low mile all original car, paint peeled off the nose and rear roof like house paint, it was F6 Bright Green...they weren't built as classics, they were rushed out the door to meet the deadline for NASCAR

...nice work on the interior and engine, great attention to detail

Thanks, Daytona, I apppreciate your input to this thread. I prefer to glue the nose on for reasons articulated in the previous post. Also, although I don't think I"d have any problem matching the paint, given that the hood is being painted separately from the body as well, but I think that most people unfamiliar with the specifics of this car's build history would think that it was a modeler's mistake if the paint didn't actually colsely match. But it's a cool little detail to know. Smile

Yep.  What Daytona said.  Those things were slapped together!  They frequently went down the assembly line with Dodge emblems on one side of the car, and Plymouth on the other.  It happened more often than you would think back then.

Additionally, as you have included, there was a black rubber 'gasket' strip that was visible between the front end and the nose piece, so you'll need to paint that sometime. 

Beautiful work on the engine!  I'd note that the power steering pump pulley was painted black, you could hardly see it in the engine bay.  I know you're just pulling detail out, but they really were barely visible due to the paint.

The interior is awesome!!  Nice work on the door panels.  I love the map pouches.  I, too, have moved to embossing powder.  My wife has essentially a small-, no, make that medium-sized craft store in one of our spare bedrooms.  It really is amazing what you can use to build and detail model kits from the scrap-booking hobby.

Gene Beaird,
Pearland, Texas

G. Beaird,

Pearland, Texas

  • Member since
    March 2014
Posted by kpnuts on Thursday, November 12, 2015 3:44 PM

Great work so far, awesome looking kit.

  • Member since
    January 2007
Posted by the doog on Saturday, November 14, 2015 9:15 AM

Thanks, Gene, for your kind works and input in your response!

And kpnuts, too---thank you!

Big Smile

  • Member since
    August 2007
  • From: back country of SO-CAL, at the birth place of Naval Aviation
Posted by DUSTER on Sunday, November 15, 2015 4:34 PM

I still like what I see.

would be sorta cool to see a build with the Dodge an' Plymouth emblems on opposite  sides and the nose piece “not quite “  the “right color” .Wink


Steve

Building the perfect model---just not quite yet  Confused

  • Member since
    March 2012
  • From: Corpus Christi, Tx
Posted by mustang1989 on Monday, November 16, 2015 3:13 PM

Beautiful work so far Karl. I can't wait to see the shine on the paint job.


 Forum | Modelers Social Club Forum (proboards.com) 

  • Member since
    January 2007
Posted by the doog on Thursday, November 19, 2015 9:37 PM

Thanks, Steve and Lee! I appreciate you stopping in!

Well, here's the update.

First of all, Badger Airbrush company ROCKS!!! I sent my airbrush and compressor in to get fixed. The guy called and said that my compressor was so old that they hardly had parts for it--proof of how well built are their products--but he refurbished it anyway even though it was pretty trashed. It works fine now. I also got a great deal on a Badger compressor with an air tank to use as a spare/main when I want. He included a moisture trap and regulator valve with my old one. My airbrush is also basically new. No charge for labor on any of them!!! WOW!

So now I've been working on getting a decent finish on this car, always a battle for me. I'm not a fan of super high-gloss finished on Muscle cars, as they just didn't have 'em. so at least it's not an unachievable goal. I use Model Car World paint, and I learned to turn the air pressure way down to spray it, and to thin it slightly for the wet coat. It buffs out beautifully with some NOVUS plastic polish and a little elbow grease.


I'm sure that the guys over at Scale Auto would say "It's got some orange peel" but I am fine with it. It'll shine up even more with some wax and buffing. I got the windows foiled.

I put some "matts" made from black sandpaper; the paper should be well-used to look like an old matt.

The bottom of the chassis. I tried to put some of the builder's marks on certain parts. I weathered it with an acrylic wash of dirty black.

And here's the parts ready for assembly. I placed the windows in with a combination of epoxy and white glue.

I'm on my way north for Thanksgiving, so it'll be a week or so until I get back to this. Hope you're diggin' it as much as I am at this point!

Thanks for following along!!! Big Smile

  • Member since
    October 2009
Posted by Kentucky Colonel on Thursday, November 19, 2015 9:59 PM
Great job!! That car looks just like the way I remember them. I hope mine can look half as good.
  • Member since
    April 2007
  • From: Canada
Posted by JTRACING on Thursday, November 19, 2015 10:02 PM

Looking great man! Nice color

  • Member since
    March 2012
  • From: Corpus Christi, Tx
Posted by mustang1989 on Friday, November 20, 2015 3:28 AM

This build looks sharp so far. I really like what you're doing here with the the details and paint here.


 Forum | Modelers Social Club Forum (proboards.com) 

  • Member since
    January 2007
Posted by the doog on Friday, November 20, 2015 7:33 AM

Thanks, guys! I can't wait to get this one up on the shelf; one of my favorite cars! Big Smile

  • Member since
    February 2003
  • From: East Bethel, MN
Posted by midnightprowler on Friday, November 20, 2015 4:42 PM

Wow!

Hi, I am Lee, I am a plastiholic.

Co. A, 682 Engineers, Ltchfield, MN, 1980-1986

1 Thessalonians 4:13-18 1 Corinthians 15:51-54

Ask me about Speedway Decals

  • Member since
    May 2015
Posted by DAYTONA on Saturday, November 21, 2015 5:14 PM

...beautiful build...white headliner ?

  • Member since
    March 2012
  • From: Corpus Christi, Tx
Posted by mustang1989 on Wednesday, November 25, 2015 5:09 AM

Just checkin' in for the latest....Whistling. lol. I can't say much as I've been getting ready for Thanksgiving for the last week so my build progress hasn't been what I want so my updates have been far and few between.


 Forum | Modelers Social Club Forum (proboards.com) 

  • Member since
    January 2007
Posted by the doog on Saturday, December 5, 2015 8:01 PM

Hi all,

I am happy to say that this one has finally wrapped up. It was a typical auto build for me--full of setbacks and screw-ups and patience-testing minor disasters, but I somehow pulled it off. Here she is....

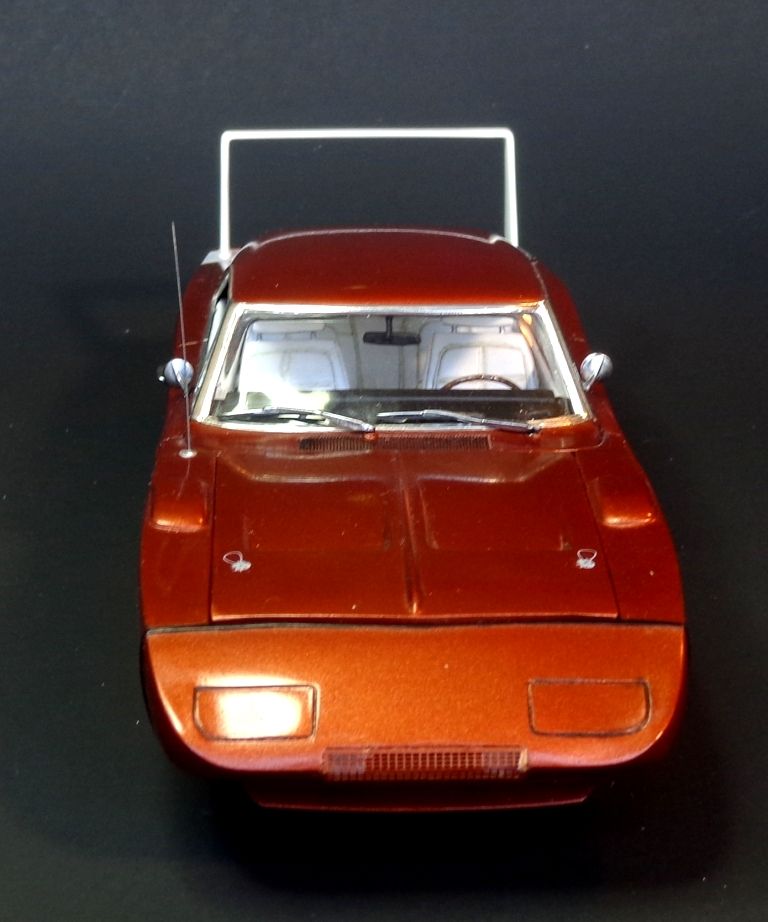
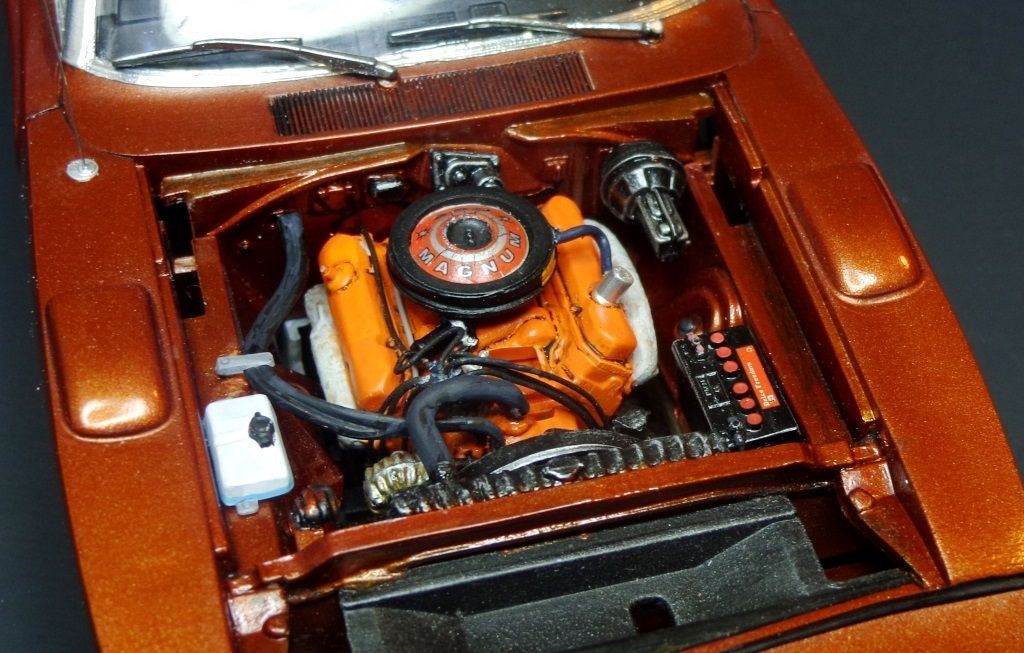
I actually lost the photoetched metal intake screen for the front, and ordered another kit to get the piece after Revell Customer service said that the kit was out-of-production and the part could not be sent. Yesterday I found it; it had fallen into the mesh metalwork over the fan in my spray booth! I am so relieved that I won't have to use an entire kit just to get one impossible-to-replace or replicate part! Now I have another kit to build of this fine-looking car! COOL!

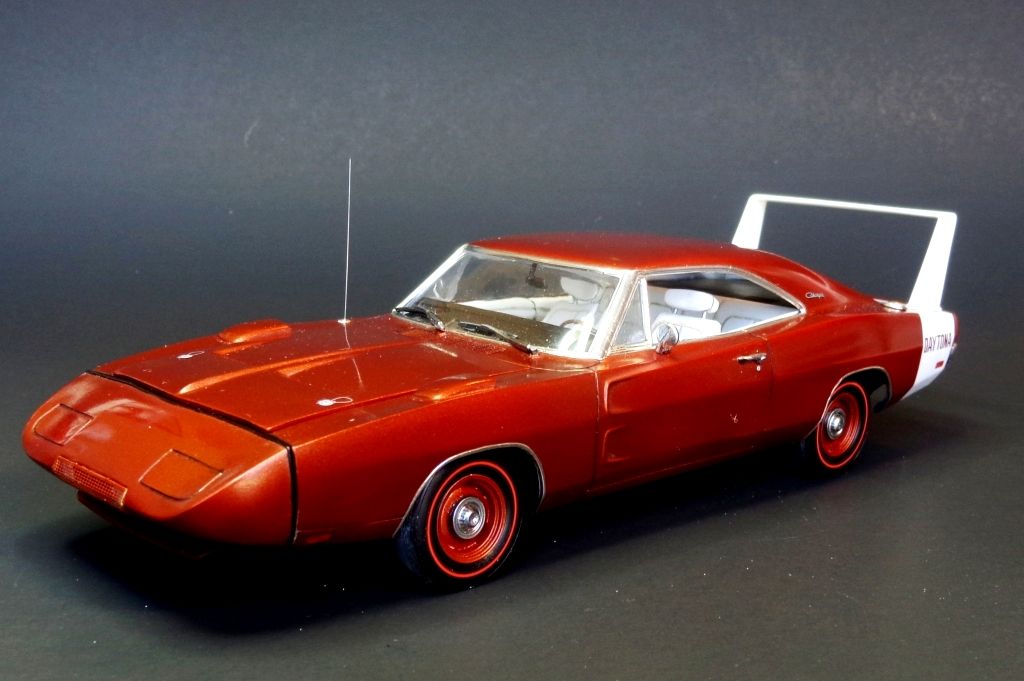
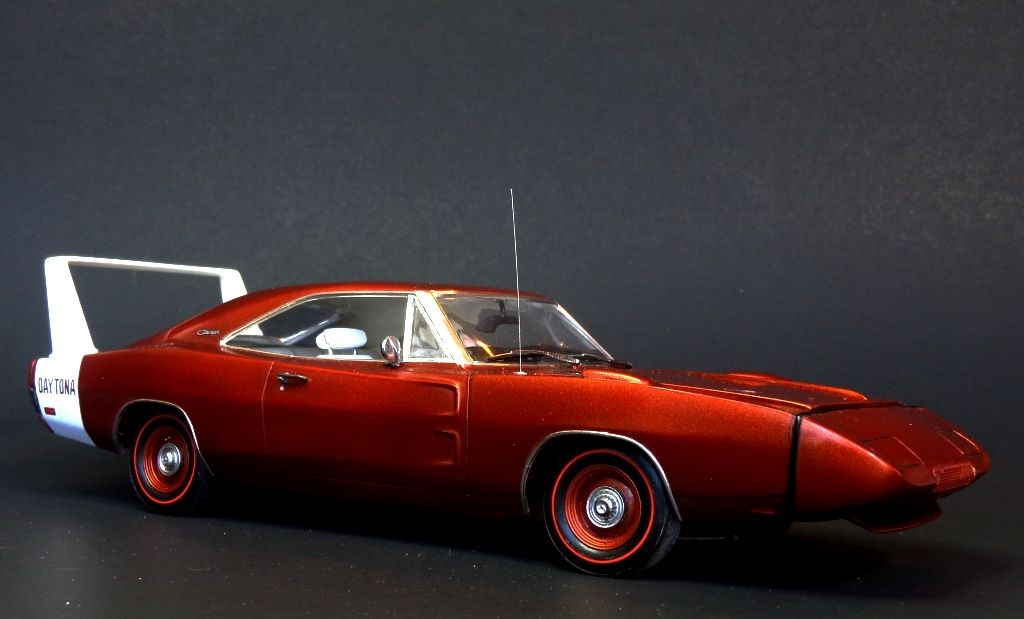
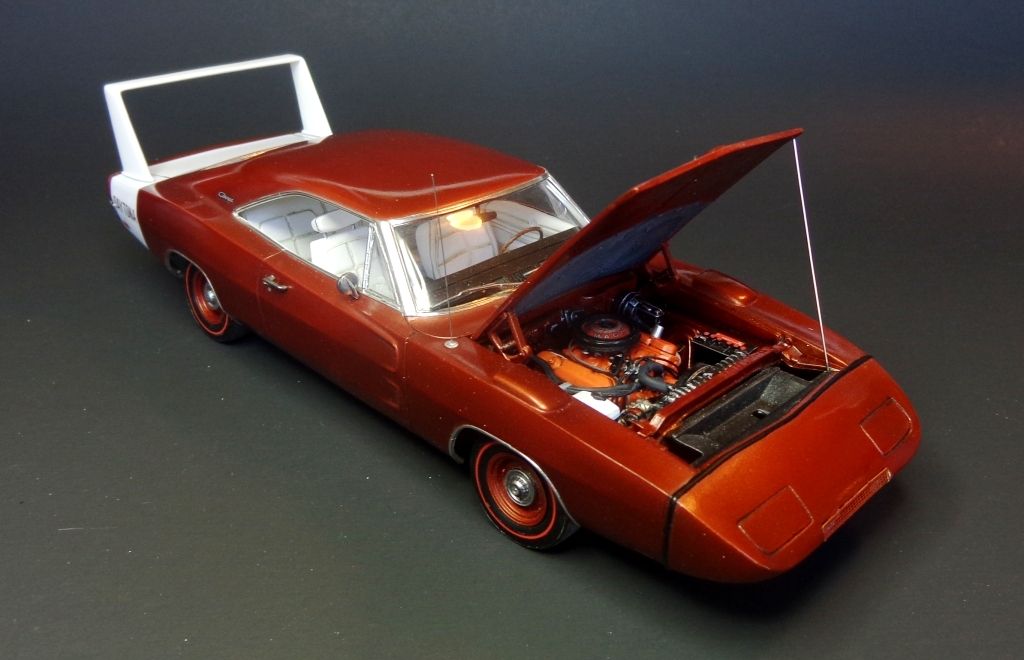
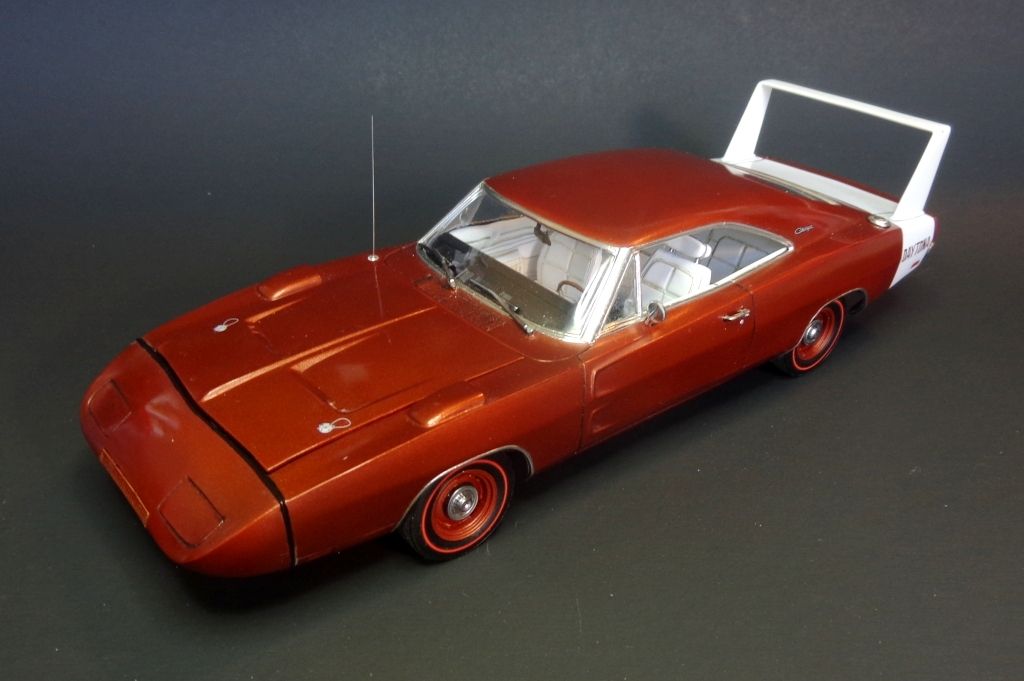
I am also thrilled that I did not have to modify anything to get the wheels to line up correctly and to get a decent sit. By the way, those "poverty caps" are not the stock wheels, either, nor are they available in the kit. The kit comes with mag wheels which look cool, but I got this set off eBay for a few bucks.


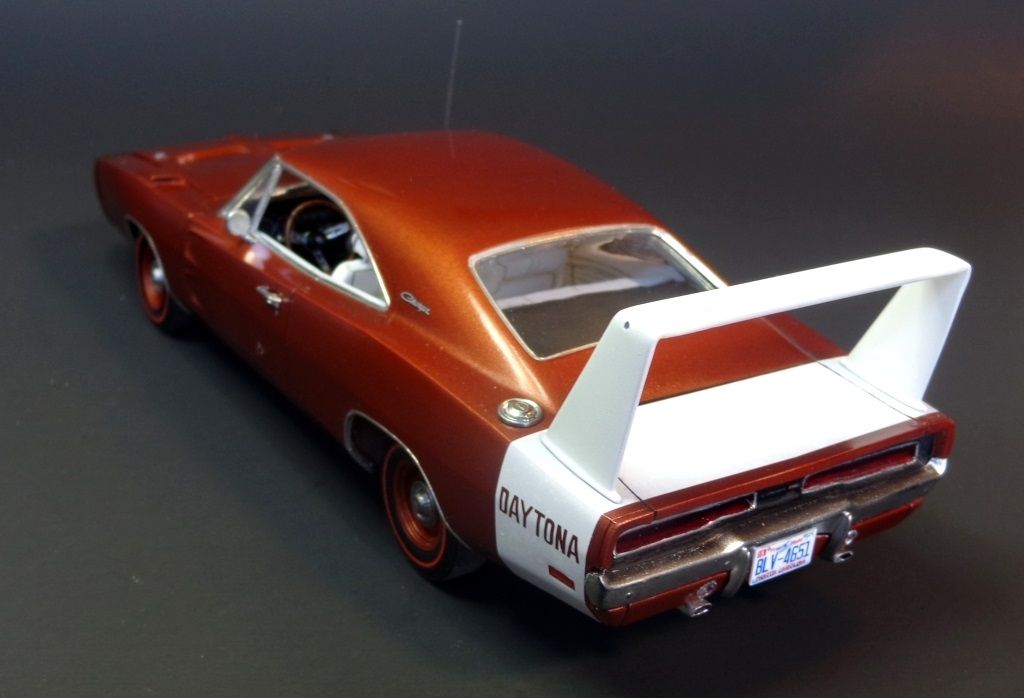
Don't forget to cut the decal through the trunk lines after you apply it.

The engine. One thing I should mention is that I did NOT glue on the fan belt assembly to the engine until AFTER I put the body on. I have found that to be a problem area, trying to fit the fan inside the circular radiator shroud when trying to wedge the body on. So what I did was to place the fan belt and propeller assembly into the radiator shroud and then put the chassis into the body, and then, using a pair of tweezers, mated the assmbly to the engine and glued it on. I also used a black oil wash in the vents there.

The antenna base was a small circular disc cut from a styrene rod with a razor blade. The antenna is a guitar string, natch.

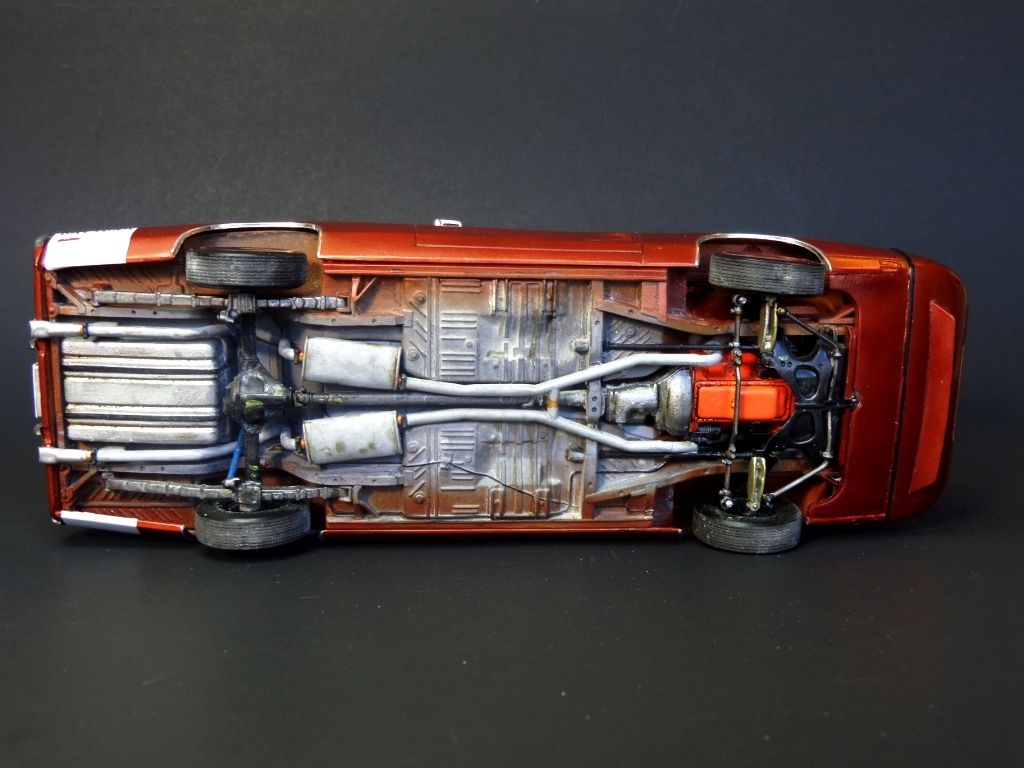
The bottom. I am happy with how this came out. It was weathered ala' Armor-style, with Adam Wilder Nitroline pigments and oil washes.

I had a bit of a problem with the hood closing, and I wound up having to shave the crossbar in front of the radiator with an Exacto blade. I took about 1mm off the top of it--you can't even tell, but it made the hood close more flush with the fenders.

Well, that's it. I"m thrilled to have finished it just in time before I have to do a little bit of traveling for tour rehearsals. Nice to get this one up on the shelf--I always lose parts when I leave a model on the bench!

Thanks for following along everyone, and all comments or questions are of ocurse welcomed. I'll try to back to you as soon as I can when my schedule allows. Big Smile


  • Member since
    March 2012
  • From: Corpus Christi, Tx
Posted by mustang1989 on Saturday, December 5, 2015 9:30 PM

Man Karl! I'd sure be happy with that too!! I really enjoyed following along on your build here. That's a great factory stock paint finish and I like how you got that hood to sit flush with the front fenders. Good luck with the rehearsals and am looking forward to another build.


 Forum | Modelers Social Club Forum (proboards.com) 

  • Member since
    November 2003
  • From: State of Mississippi. State motto: Virtute et armis (By valor and arms)
Posted by mississippivol on Saturday, December 5, 2015 10:37 PM
Well played, sir! That's a fine car.
fox
  • Member since
    January 2007
  • From: Narvon, Pa.
Posted by fox on Saturday, December 5, 2015 10:51 PM

Great build as usual Karl.  Always like to follow your builds.  I've learned a lot following them.  Keep up the great work.

Jim  Captain

 Main WIP: 

   On the Bench: Artesania Latina  (aka) Artists in the Latrine 1/75 Bluenose II

I keep hitting "escape", but I'm still here.

  • Member since
    October 2009
Posted by Kentucky Colonel on Sunday, December 6, 2015 9:58 PM
That is a great build. I'm trying to get mine finished before Christmas so I can give it to my brother. Maybe I will post a picture of his real Daytona and the model.
  • Member since
    August 2007
  • From: back country of SO-CAL, at the birth place of Naval Aviation
Posted by DUSTER on Sunday, December 6, 2015 10:26 PM

What a great finish. it all came together just liike you planned it

Steve

Building the perfect model---just not quite yet  Confused

  • Member since
    May 2015
Posted by DAYTONA on Sunday, December 6, 2015 10:58 PM

...stunning build, beautiful


...I was puzzled by two things, 4-spd shifter looks sideways, maybe it is the pix...second, the hub caps don't look correct for a 69 Daytona,

  • Member since
    January 2007
Posted by the doog on Wednesday, December 9, 2015 6:27 PM

mustang1989

Man Karl! I'd sure be happy with that too!! I really enjoyed following along on your build here. That's a great factory stock paint finish and I like how you got that hood to sit flush with the front fenders. Good luck with the rehearsals and am looking forward to another build.


Thanks, man! I appreciate it and thanks for following along!

  • Member since
    January 2007
Posted by the doog on Wednesday, December 9, 2015 6:28 PM

Thanks, Mississippivol, Steve, Colonel, and Jim! Smile I appreciate you taking the time to leave a comment! :)


JOIN OUR COMMUNITY!

Our community is FREE to join. To participate you must either login or register for an account.

SEARCH FORUMS
FREE NEWSLETTER
By signing up you may also receive reader surveys and occasional special offers. We do not sell, rent or trade our email lists. View our Privacy Policy.