SEARCH FINESCALE.COM

Enter keywords or a search phrase below:

Mack RW rebuild

2059468 views
239 replies
1 rating 2 rating 3 rating 4 rating 5 rating
  • Member since
    May 2009
  • From: Poland
Posted by Pawel on Thursday, September 9, 2010 10:28 AM

Awright, it's been a long time, so it's time for an update! Now enough of building the kit parts, it's time for some gentle scratchingStick out tongue

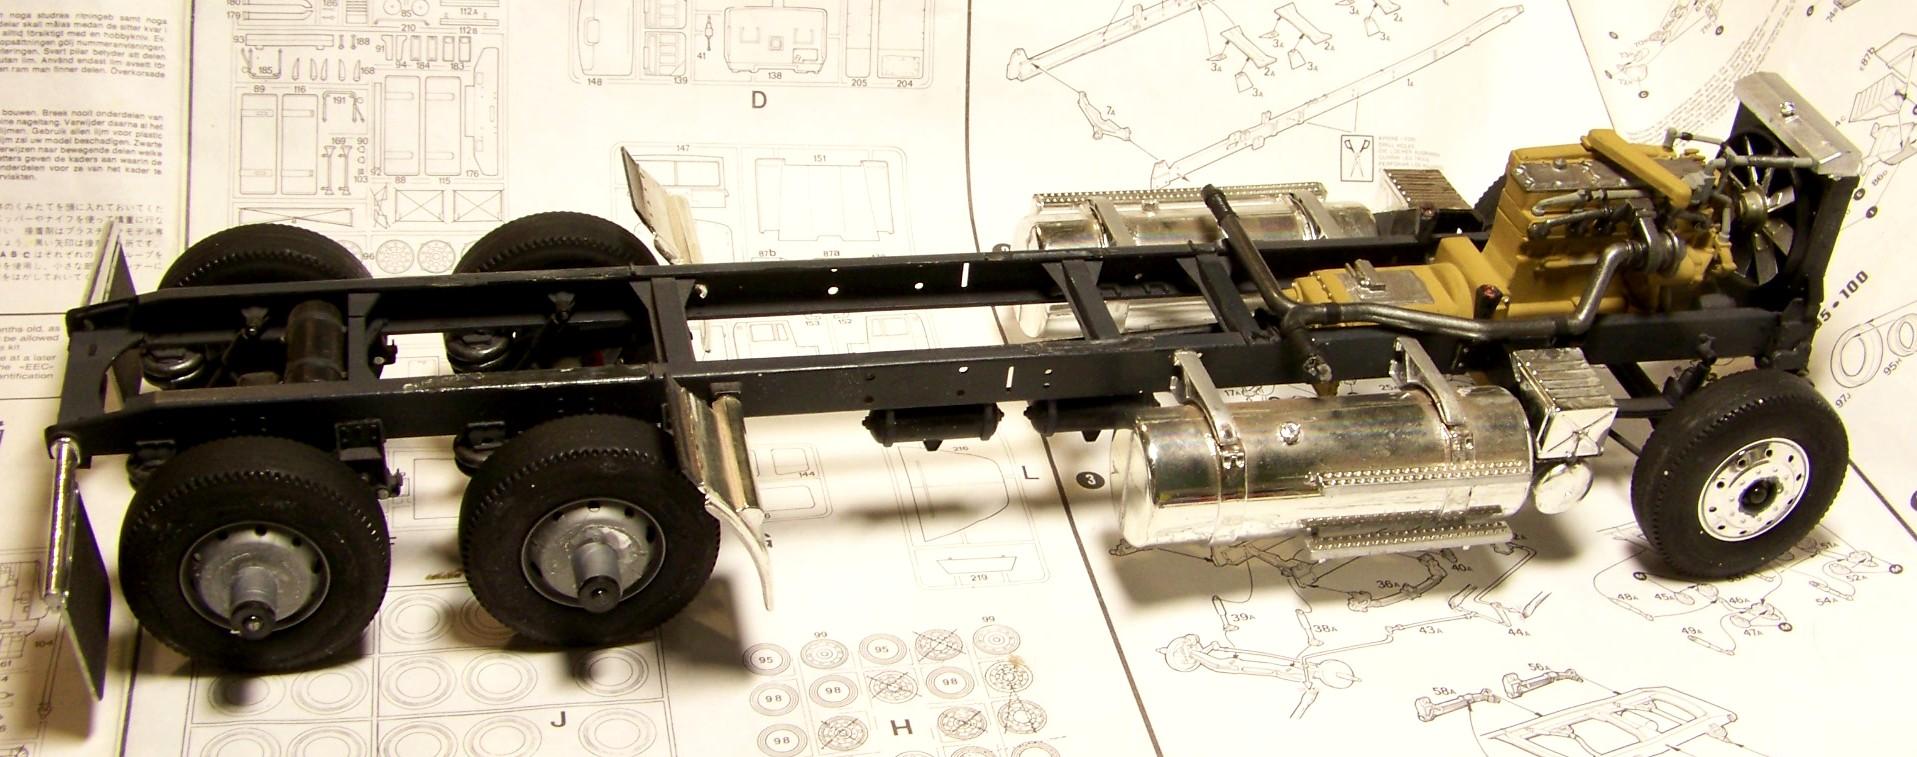
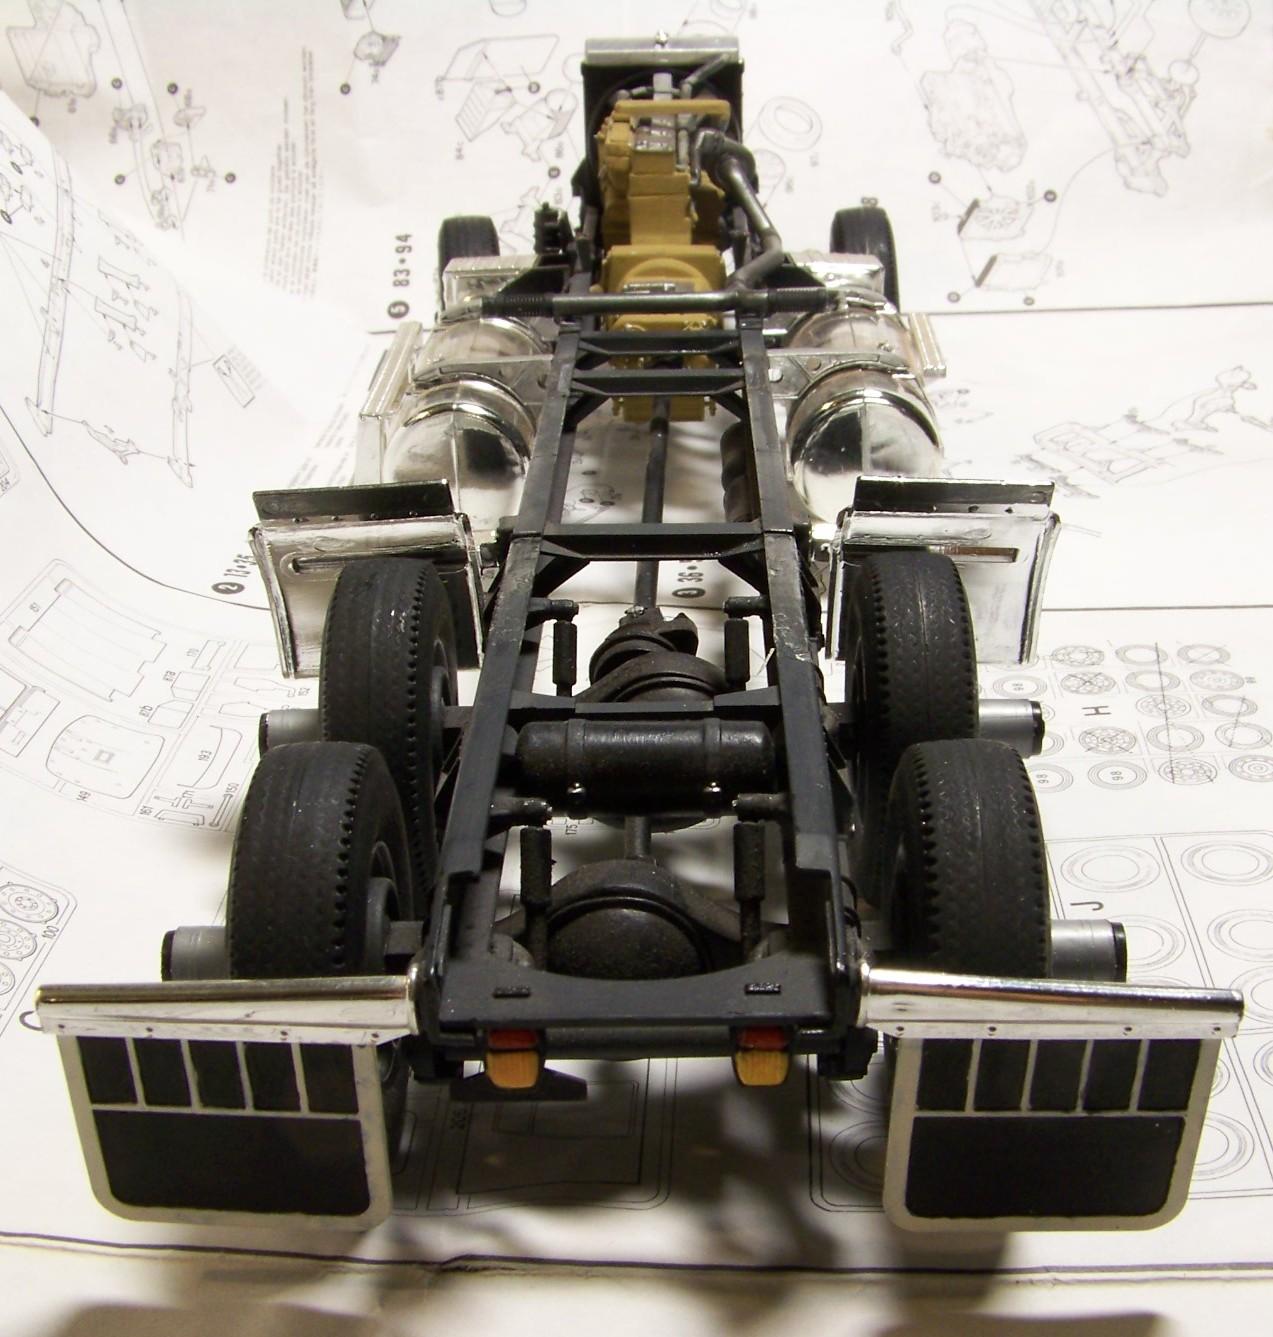
While the work on the sleeper is draggin' on (painting the interior and stuff like that, I decided it's time to attend to the chassis. Here's what it looked like with the duals partially disassembled. It's the last time you see it in this condition:

1:24 Mack Superliner by Pawel Mroczkowski

1:24 Mack Superliner by Pawel Mroczkowski

1:24 Mack Superliner by Pawel Mroczkowski

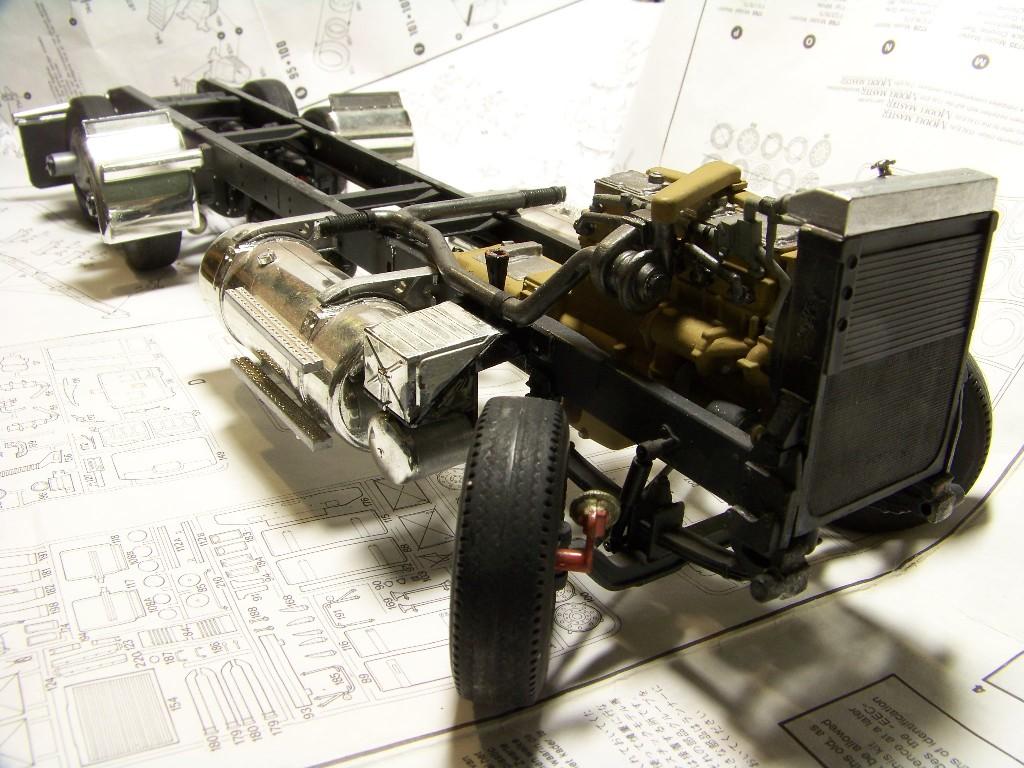
Then I disassembled it carefully, trying to unglue the parts, as opposed to breaking them. It went quit allright, only the crossmembers gave in a little, but they couldn't be used anyhow. At the moment the most important parts were the frame rails. After a little cleanup I plugged all the holes with stretched sprue and other styrene bits and sanded the rails smooth, leaving only the rear fender mounts. For the Mack look I reconstructed the "bobbed" frame rear. I cut the frame front and fitted a scratchbuilt drop front. It's not smooth and ready yet, but it's just the right time for my favourite "before&after" shots". The upper rail before modification and the lower modified with the drop front fitted:

1:24 Mack Superliner by Pawel Mroczkowski

1:24 Mack Superliner by Pawel Mroczkowski

I also scratchbuilt new fuel tanks - figured it will be faster and easier than cleaning up and puttying the old tanks, especially considering that Macks have quite different mounting system than Freightliners. So here's another "before&after" shot - the left tank sanded and the right tank just with the endplates fitted:

1:24 Mack Superliner by Pawel Mroczkowski

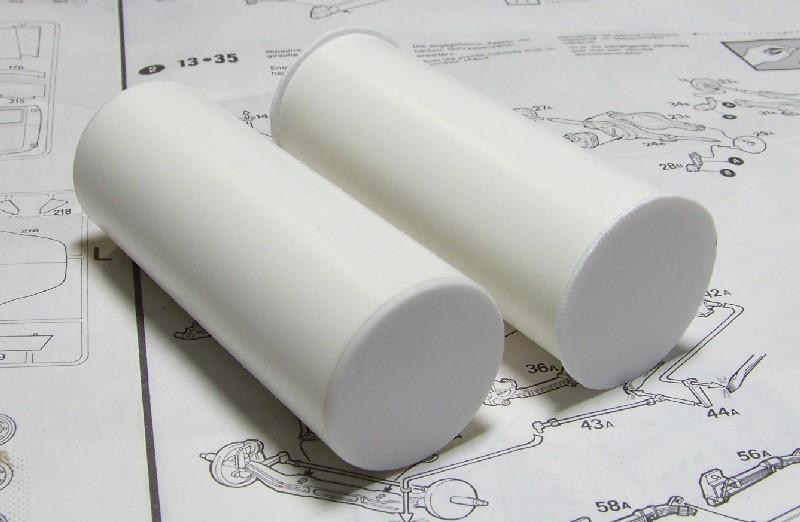
And both tanks sanded waiting for the straps and maximum shine silver finish:

1:24 Mack Superliner by Pawel Mroczkowski

I also cut up the grille and also cut up second grille, bought from American industrial Truck Modeles, and mixed their parts to get a logo on the grille:

1:24 Mack Superliner by Pawel Mroczkowski

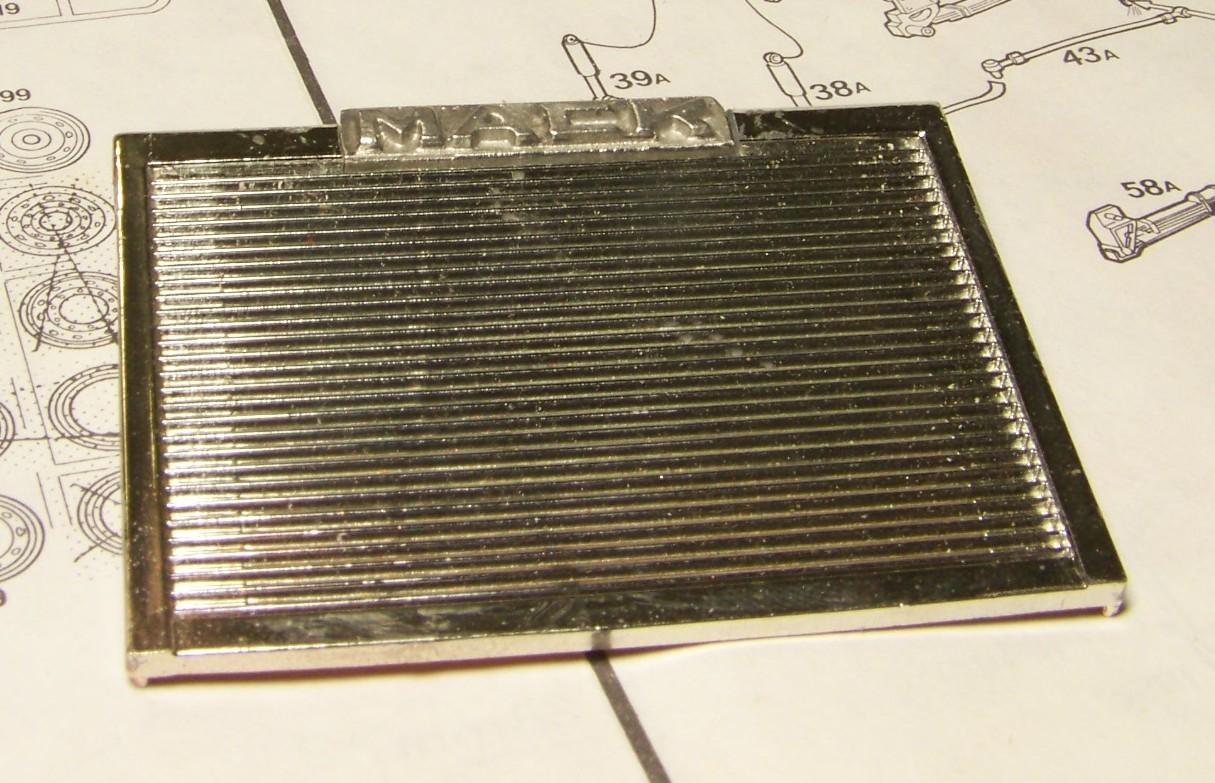
I still have to chrome at least the upper part of it.

Now I'm working on closing up and smoothing the sleeper, and also on the frame crossmembers. Would be nice if somebody dropped me a line, so I know if anyone is reading this. Please stay tuned and 'till next time, have a nice day

Pawel


All comments and critique welcomed. Thanks for your honest opinions!

www.vietnam.net.pl

  • Member since
    October 2009
  • From: SURREY ,B.C.
Posted by krow113 on Thursday, September 9, 2010 11:46 AM

Very complicated Pawel ,dont worry about comments just model on Bud!

Thank you ,Krow113

  • Member since
    July 2008
  • From: Florida
Posted by Railfan 233 on Thursday, September 9, 2010 2:36 PM

I definately like what I see so far with this truck. With the front wheels on the chassis (before you started deconstruction) it looked like they could be positioned in a realistic mannor. Did you modify the kit, or was it stock?

I can't wait for the next update, Keep on truckinCowboy

P.S., Don't worry about readers. I love watching this truck take shape. I'm stayin in for the whole re-build


http://i6.photobucket.com/albums/y211/razordws/GB%20Badges/WMIIIGBsmall.jpgRed, White, and YOU! group build of 2010

  • Member since
    May 2009
  • From: Poland
Posted by Pawel on Friday, September 10, 2010 3:32 AM

Steve, Railfan 233 - thanks a lot for your comments!

Steve - more complicated than your Bobber? I don't think so! You're right, I'm modelling on!

Railfan 233 - that was the good thing about the Italeri kit - it gives you pretty accurate Freightliner chassis, with movable front wheels, complete with tie rod, drag link and steering box with movable arm. Pity it's all totally inaccurate for a Mack - the Freightliner has it's steering boxon the rear, under the cab, whereas the older Superliners had their steereing boxes mounted on the front axle.

That's right, keep on truckin' and have a nice day

Pawel

All comments and critique welcomed. Thanks for your honest opinions!

www.vietnam.net.pl

  • Member since
    July 2008
  • From: Florida
Posted by Railfan 233 on Friday, September 10, 2010 2:14 PM

Hmm,  I think the Italeri kit is the first (and so far, only) kit I've known to have the accurate movable front wheels, tie rod, drag link, and steering box. While it's not accurate for the kit, it is a nice feature.

I'll still be here for the build, and I can't wait to see the next update.


http://i6.photobucket.com/albums/y211/razordws/GB%20Badges/WMIIIGBsmall.jpgRed, White, and YOU! group build of 2010

  • Member since
    June 2010
  • From: Amsterdan & Zürich
Posted by Model Junkyard on Wednesday, September 15, 2010 11:00 AM

great work on the scratch build parts!! I love it!

Scratch Built Dreams -  ModelJunkyard's Blog

  • Member since
    July 2010
  • From: Surrey B.C. Canada
Posted by Subhuman1 on Wednesday, September 15, 2010 2:53 PM

Not to worry, this thread is being followed, rigs where how I got my start in "serious" modeling as a kid, when my uncle presented me my first big rig model of my very own, after coveting his collection for years and years Smile as soon as I get done with my current project ( a what if, to blow the dust off of 17 years of non modeling) I plan on tackling another rig.


Looking forward to more updates!

  • Member since
    May 2009
  • From: Poland
Posted by Pawel on Thursday, September 16, 2010 1:49 AM

Hello everybody!

Model Junkyard - thanks for your comment, I'm afraid I'm going for a bright 'n shiny look here, but I hope you'll enjoy this thread nonetheless.

Subhuman1 - thanks a lot. Do you have any particular truck model in your sight?

Now I have a bit of an update for you:

I put the sleeper together, first on the inside:

1:24 Mack Superliner by Pawel Mroczkowski

Then on the outside:

1:24 Mack Superliner by Pawel Mroczkowski

1:24 Mack Superliner by Pawel Mroczkowski

1:24 Mack Superliner by Pawel Mroczkowski

Now I have a lot of smoothing and recreating the rivet detail before me. While it's probably inaccurate, I do the rivets by drilling shallow holes in the plastic.

I also started working on the crossmembers, on the photo below you can see them alongside the drop-fronts:

1:24 Mack Superliner by Pawel Mroczkowski

Thanks a lot for your attention, please stay tuned and have a nice day

Paweł

All comments and critique welcomed. Thanks for your honest opinions!

www.vietnam.net.pl

  • Member since
    October 2009
  • From: SURREY ,B.C.
Posted by krow113 on Thursday, September 16, 2010 10:35 AM

Lookin good Pawel ,keep going .MDC has a rivit tool that I recommend...............

Thank you ,Krow113

  • Member since
    July 2008
  • From: Florida
Posted by Railfan 233 on Thursday, September 16, 2010 3:15 PM

That sleeper is looking good. The interior looks exelent, too. I definately can't wait for the next up-date


http://i6.photobucket.com/albums/y211/razordws/GB%20Badges/WMIIIGBsmall.jpgRed, White, and YOU! group build of 2010

  • Member since
    May 2009
  • From: Poland
Posted by Pawel on Friday, September 17, 2010 2:59 AM

Hello!

Steve - thanks for the tip, I'll check that tool out.

Railfan 233 - thanks for reading. Bad thing is I'm going for a business trip next week so an update is going to take some time now... But I'll do my best. Please stay tuned and have a nice day

Paweł

All comments and critique welcomed. Thanks for your honest opinions!

www.vietnam.net.pl

  • Member since
    July 2008
  • From: Florida
Posted by Railfan 233 on Friday, September 17, 2010 1:45 PM

I understand the buisness trip. It may drive me up the wall waiting, but I can wait.

 Buisness trips got to have the priority.

Have a good weekend.Yes


http://i6.photobucket.com/albums/y211/razordws/GB%20Badges/WMIIIGBsmall.jpgRed, White, and YOU! group build of 2010

  • Member since
    May 2009
  • From: Poland
Posted by Pawel on Thursday, September 30, 2010 2:32 AM

Hello!

So I'm back from Hungary and I have an update for you!

I smoothed the sleeper a bit and prepared it for painting. I also scribed some parting lines and drilled some rivets. I used a saw to keep the distances between rivets even, the tool that Steve recomended inspired me.

Here's what the sleeper looks like:

1:24 Mack Superliner by Pawel Mroczkowski

1:24 Mack Superliner by Pawel Mroczkowski

I also shortened the "collar" connecting the cab and the sleeper. The reason it was so long in the kit was the sleeper didn't have the exhaust stack cutouts. Now that I have the cutouts the sleeper and the cab have to be closer together:

1:24 Mack Superliner by Pawel Mroczkowski

Then I opened another area of operations - the motor. Here's what it looked like after I ripped it out of the chassis:

1:24 Mack Superliner by Pawel Mroczkowski

1:24 Mack Superliner by Pawel Mroczkowski

1:24 Mack Superliner by Pawel Mroczkowski

The kit shows a Cummins motor, most probably of the type NTC-400 also known as Big Cam II. I even found a manual for it: http://www.tpub.com/content/automotiveenginemechanics/TM-9-2815-226-34-1/TM-9-2815-226-34-10011.htm

Apart of many parts molded together with the engine block, the biggest problem of the Italeri engine is the motor head depicted as single part, where the Cummins engine has three separate motor heads. So I stripped the engine I had of everything that went off fairly and made the cuts to show three motor heads. I also removed some "half round" details with the intention of replacing them with round pieces. The worst was the primary fuel filter, which left a gap in the block to be filled. Here's what I have so far:

1:24 Mack Superliner by Pawel Mroczkowski

1:24 Mack Superliner by Pawel Mroczkowski

I also targeted the aftercooler and boxed it with sheet styrene to avoid a gap from being seen between the aftercooler and the motor heads:

1:24 Mack Superliner by Pawel Mroczkowski

1:24 Mack Superliner by Pawel Mroczkowski

That would be it for now, I also work on the front axle, frame crossmembers and on painting the sleeper, so as soon as I rach a good point I'll post another update. Thanks for reading and have a nice day

Paweł

All comments and critique welcomed. Thanks for your honest opinions!

www.vietnam.net.pl

  • Member since
    October 2009
  • From: SURREY ,B.C.
Posted by krow113 on Thursday, September 30, 2010 10:19 AM

Pawel - Nice progression ,looks like you are on the attack!

Thank you ,Krow113

  • Member since
    July 2008
  • From: Florida
Posted by Railfan 233 on Thursday, September 30, 2010 2:01 PM

Alright, she's looking better and better Pawel.

That engine looks great right now as-is, and the cab and sleeper are in exelent shape.

            I like it.Yes


http://i6.photobucket.com/albums/y211/razordws/GB%20Badges/WMIIIGBsmall.jpgRed, White, and YOU! group build of 2010

  • Member since
    May 2009
  • From: Poland
Posted by Pawel on Thursday, October 7, 2010 9:33 AM

Steve, Railfan 233 - thanks for the comments! Been travelling again, so I didn't do as much as I wanted, but still I managed something. What I wanted to show you today is the front axle I modified to look more Mack-like. So first, with a beating heart I cut up the old one:

1:24 Mack Superliner by Pawel Mroczkowski

Then I fabricated the center drop section out of styrene sheet. The vertical section is 2mm thick, while the horizontal sections are below 1mm and were bent both hot and cold:

1:24 Mack Superliner by Pawel Mroczkowski

I also plan to start working on the rear suspension soon, so here's the frame crossmember that the rears will sit around:

1:24 Mack Superliner by Pawel Mroczkowski

I'm also still working on the sleeper, there's still a lot of filling and sanding left there to do. Thanks for reading, and have a nice day

Paweł

All comments and critique welcomed. Thanks for your honest opinions!

www.vietnam.net.pl

  • Member since
    July 2008
  • From: Florida
Posted by Railfan 233 on Thursday, October 7, 2010 5:49 PM

Exelent work Pawel.

I definately wouldn't try anything like that. Knowing my luck, something would probably go realy wrong with the axel fabrication, and leave me up the creek.

Definately can't wait for the next up-dateYes


http://i6.photobucket.com/albums/y211/razordws/GB%20Badges/WMIIIGBsmall.jpgRed, White, and YOU! group build of 2010

  • Member since
    May 2009
  • From: Poland
Posted by Pawel on Wednesday, October 20, 2010 6:00 AM

Railfan 233, thanks a lot for your interest and sorry to have you waiting for so long. My health hasn't been the best lately, but forunately I'm better now and here we go with another update!

I've been trying to move on with the engine, but the longer I looked at the references, the more frustrated I got. Finally I got so pissed off I decided to go radical. I cut off most of the engine acessories molded together with the block and in the next move I'll fill the block sides smooth and will try to recreate the details, this time correctly. So far it looks like this:

1:24 Mack Superliner by Pawel Mroczkowski

My achievement was the finishing of the four frame crossmembers. Here's what they look like:

1:24 Mack Superliner by Pawel Mroczkowski

1:24 Mack Superliner by Pawel Mroczkowski

And I'm starting to work on yet another area, the rear suspension. First a reference shot:

Mack 58000 lbs rear suspension

I'm working witk a suspension kit from American Industrial Truck Models. The kit itself isn't very good, but the price was OK and their service is great. I started working on the trunnion mounts, they needed a lot of cleanup, so the next fotos are right part - before and left part - after I was done (for now) with it.

1:24 Mack Superliner by Pawel Mroczkowski

1:24 Mack Superliner by Pawel Mroczkowski

And then I test-fitted the trunnion mounts together with the suspension crossmember and it looks like this:

1:24 Mack Superliner by Pawel Mroczkowski

Hope you like it, I'm as always waiting for your comments. Thanks for reading and have a nice day

Paweł

All comments and critique welcomed. Thanks for your honest opinions!

www.vietnam.net.pl

  • Member since
    July 2008
  • From: Florida
Posted by Railfan 233 on Wednesday, October 20, 2010 1:41 PM

Exelent work as always, Pawel.

   I'm sorry to hear about your medical problems, and please don't rush healing. Do as the doctor says,and you'll be felling as good as new in no time.

I'll say you got some good work going on with the rear-end right now, too.

                         As always, keep on truckin. Cowboy


http://i6.photobucket.com/albums/y211/razordws/GB%20Badges/WMIIIGBsmall.jpgRed, White, and YOU! group build of 2010

  • Member since
    May 2009
  • From: Poland
Posted by Pawel on Thursday, October 21, 2010 1:23 AM

Railfan 233, thanks a lot, I'm feeling OK now, so no worries. The work on the Mack is good this week, so I'm happy. 'Till next time, truckin' on!

Paweł

All comments and critique welcomed. Thanks for your honest opinions!

www.vietnam.net.pl

  • Member since
    July 2008
  • From: Florida
Posted by Railfan 233 on Thursday, October 21, 2010 3:44 PM

I'm glad to hear that Pawel.

Being sick is not good, any way you cut it.


http://i6.photobucket.com/albums/y211/razordws/GB%20Badges/WMIIIGBsmall.jpgRed, White, and YOU! group build of 2010

  • Member since
    May 2009
  • From: Poland
Posted by Pawel on Tuesday, November 2, 2010 9:25 AM

Hello everybody!

Problems with my camera delayed this update a little, but here we go again!

And I'm still concentrated on the suspension. I went on to work on the rear springs. Those parts aren't problem free, they have a lot of nicks and dents, so I decided to cut them up a little:

1:24 Mack Superliner by Pawel Mroczkowski

The top spring is as it came from the box, the bottom part is being modified, it will get a new bushing and U-bolts, and will hopefully look a lot better.

I also started to tackle the axles, they turned out to be a little too wide and I also had a little problem of mating them to the Italeri wheels. First I narrowed the axle a little and tried to fit the Italeri  backing plates on it:

1:24 Mack Superliner by Pawel Mroczkowski

The top axle is before narrowing, the bottom one is narrowed, with backing plates temporarily fitted. Then I turned four aluminium tubes with inside diameter of 3 mm (A.I.T.M. axle) and outside diameter of 4 mm (Italeri wheels) and those turned parts solved the problem:

1:24 Mack Superliner by Pawel Mroczkowski

The black stuff is Miliput Black used as putty.

I also started working on the front springs. The kit springs need their front, rear and axle mounts reworked. So far I have something like that:

1:24 Mack Superliner by Pawel Mroczkowski

Top part is stripped from the wreck, bottom part has already got a new rear mount.

Hope you liked it, have a nice day

Paweł

All comments and critique welcomed. Thanks for your honest opinions!

www.vietnam.net.pl

  • Member since
    October 2009
  • From: SURREY ,B.C.
Posted by krow113 on Tuesday, November 2, 2010 11:48 AM

Keep ploughing away Pawel!  I really wanna see this done.

Thank you ,Krow113

  • Member since
    July 2008
  • From: Florida
Posted by Railfan 233 on Tuesday, November 2, 2010 1:57 PM

She's looking better and better, Pawel. I, too, am itching to see it done. (With all honesty, I say you out to enter it into a contest. I'd bet you would probably walk away with 1st prze)


http://i6.photobucket.com/albums/y211/razordws/GB%20Badges/WMIIIGBsmall.jpgRed, White, and YOU! group build of 2010

  • Member since
    January 2009
  • From: San Antonio
Posted by paintsniffer on Tuesday, November 2, 2010 2:14 PM

If you want to get closer to a "purebred" Mack you might want to consider converting the rear diffs from those (possibly Rockwells?) to the very unique Mack rear ends.

Excuse me.. Is that an Uzi?

  • Member since
    May 2009
  • From: Poland
Posted by Pawel on Wednesday, November 3, 2010 3:56 AM

Gennulmen, thanks a lot for your comments!

Steve - nice new avatar you got there!

railfan 233 - I dunno - contests aren not quite my thing, but when that baby is finished, and a contest presents itself... We shall see...

I want to see that truck done too, that's what keeps me enthusiastic building it!Big Smile

paintsniffer - thanks for your comment! The kit supplied rears were rockwells, that's why I got the resin kit from A.I.T.M., and the resin rears are Macks, allright. They look a little misleading now, because the primary gears are not fitted yet. A correct rear suspension is very important for me in this model, because I wanted to show why Mack trucks are different. The Italeri kit doesn't give you any clue as to that.

Keep on truckin', and have a nice day

Paweł

All comments and critique welcomed. Thanks for your honest opinions!

www.vietnam.net.pl

  • Member since
    May 2009
  • From: Poland
Posted by Pawel on Tuesday, November 9, 2010 6:07 AM

Hello!

Here I am with a new update!

I went on with the rear spring, now I have one done, with aluminium bushing and copper U-bolts. The top one is before, the lower one is after:

1:24 Mack Superliner by Pawel Mroczkowski

1:24 Mack Superliner by Pawel Mroczkowski

I also worked some on the engine - I smoothed the engine block sides with thin styrene sheet and then scratchbuilt the cam follower covers and the characteristic ribbing of the engine block top:

1:24 Mack Superliner by Pawel Mroczkowski

Additionally I cut out the flywheel cover sides where I will depict the detail of the removed engine hangers (this power pack will be hung by the gearbox).

I also filled the cut-off engine acessories with Miliput, and when they were solid I could rework them. Now they are round and will hopefully be reattached soon:

1:24 Mack Superliner by Pawel Mroczkowski

Now I'll work on the front springs and the axles. As usually I'm waiting for your comments, have a nice day

Paweł

All comments and critique welcomed. Thanks for your honest opinions!

www.vietnam.net.pl

  • Member since
    July 2008
  • From: Florida
Posted by Railfan 233 on Tuesday, November 9, 2010 4:37 PM

Exelent wrok, as always Pawel.

The suspension is getting there, at a good pace, and the engine looks great (even more so, when it's remembered that you removed all detail from the engine block, and started building it all up again)

I'm completely amazed.


http://i6.photobucket.com/albums/y211/razordws/GB%20Badges/WMIIIGBsmall.jpgRed, White, and YOU! group build of 2010

  • Member since
    March 2007
  • From: Atlanta, Ga.
Posted by MrSquid2U on Wednesday, November 10, 2010 12:49 PM

Dang!


You sir are Insane, Possessed , Driven and Determined!Surprise


BTW- all admirable traits in my book!Wink

Great stuff- keep it coming!Yes


  • Member since
    May 2009
  • From: Poland
Posted by Pawel on Wednesday, November 10, 2010 2:54 PM

Railfan 233 - thanks for your comments, nice to know you're reading! I just couldn't let that engine be.

MrSquid2U - good to have you aboard! Determined - this one is going to be important in this build.

Please stay tuned and have a nice day

Paweł

All comments and critique welcomed. Thanks for your honest opinions!

www.vietnam.net.pl

JOIN OUR COMMUNITY!

Our community is FREE to join. To participate you must either login or register for an account.

SEARCH FORUMS
FREE NEWSLETTER
By signing up you may also receive reader surveys and occasional special offers. We do not sell, rent or trade our email lists. View our Privacy Policy.