SEARCH FINESCALE.COM

Enter keywords or a search phrase below:

My Super 61 (Walcott's bird) in progress

57107 views
168 replies
1 rating 2 rating 3 rating 4 rating 5 rating
  • Member since
    March 2003
  • From: Lafayette, LA
Posted by Melgyver on Thursday, May 19, 2005 11:09 PM
WOW! Amazing detail! Good work!

Clear Left!

Mel

  • Member since
    December 2002
  • From: Valrico, FL
Posted by HeavyArty on Thursday, May 19, 2005 11:18 PM
Looks great. Can't wait to see it finished. Keep us updated.

Gino P. Quintiliani - Field Artillery - The KING of BATTLE!!!

Check out my Gallery: https://app.photobucket.com/u/HeavyArty

"People sleep peaceably in their beds at night only because rough men stand ready to do violence on their behalf." -- George Orwell

  • Member since
    June 2003
  • From: Caput Mundi
Posted by Avus on Friday, May 20, 2005 3:50 AM
Bow [bow]WOW!Bow [bow]
Outstanding work!
I was considering improving the cargoroof like you did.
Could you tell me where to find pics or better schemes in order to make an accurate work like you did?

Klaus

Thanks to ImageShack for Free Image Hosting

  • Member since
    August 2004
  • From: Australia
Posted by wooty on Friday, May 20, 2005 4:06 AM
Andy..
Very Nice!!!
What scale is it?
And who's manufacter of the kit?
Looking good Keep Us Posted
Robert

Rob..

  • Member since
    December 2002
  • From: Valrico, FL
Posted by HeavyArty on Friday, May 20, 2005 9:27 AM
QUOTE: Originally posted by wooty

Andy..
Very Nice!!!
What scale is it?
And who's manufacter of the kit?
Looking good Keep Us Posted
Robert


Robert,
He's building the good ol' 1/35 Academy bird. Looks like it will come out great.

Gino P. Quintiliani - Field Artillery - The KING of BATTLE!!!

Check out my Gallery: https://app.photobucket.com/u/HeavyArty

"People sleep peaceably in their beds at night only because rough men stand ready to do violence on their behalf." -- George Orwell

  • Member since
    November 2005
Posted by Anonymous on Friday, May 20, 2005 9:47 AM
Shock [:O] WOW some great detail on the build so far. Can't wait to see more.
  • Member since
    February 2004
  • From: Green Lantern Corps HQ on Oa
Posted by LemonJello on Friday, May 20, 2005 1:37 PM
If that's the detail you're putting into the office, I can only imagine how incredible this one will be when you're done! Keep the photos coming as you progress.
A day in the Corps is like a day on the farm; every meal is a banquet, every paycheck a fortune, every formation a parade... The Marine Corps is a department of the Navy? Yeah...The Men's Department.
  • Member since
    November 2013
Posted by intruder_bass on Friday, May 20, 2005 7:57 PM
Thanks guys!
HeavyArty is right! This is (well, was ) Academy kit AH-60L DAP + Eduard photoached detailed interior set,

which is VERY NICE!!! but even with metal parts from eduard, 80% of work on the interior took scratch building. Especially ceiling!
Eduard gives only main transmission drip pan... all frames, bulkheads, soundproof cover and wires were made by myself from styrene.


I did not use Cobra Company set (although its nice too) just because in my particular case there were not too much i could use from it on my model.
To Avus: I'll try to draw you and send a basic scheme of the ceiling with measurements that i used for mine but you should keep in mind that ALL of them based just on photos and are APPROXIMATE - I wish I could take measurements by myself being inside the Black Hawk with the ruler :-)) So they are not perfect and of course to make them fit the academy kit you'll have to spend couple of evenings.
To Heavy Arty: By the way your DAP detailed pictures where grate reference for me. Thanks for them!


  • Member since
    December 2002
  • From: Valrico, FL
Posted by HeavyArty on Saturday, May 21, 2005 12:52 AM
Glad the pics helped. I would be interrested in the ceiling drawings as well. I ahve a few more MH/UH-60 models to build still.

Gino P. Quintiliani - Field Artillery - The KING of BATTLE!!!

Check out my Gallery: https://app.photobucket.com/u/HeavyArty

"People sleep peaceably in their beds at night only because rough men stand ready to do violence on their behalf." -- George Orwell

  • Member since
    November 2005
Posted by Anonymous on Saturday, May 21, 2005 9:03 AM
Wow! That looks great. Keep us posted on the progress.Bow [bow]
  • Member since
    April 2005
  • From: Gothenburg
Posted by JohanT on Saturday, May 21, 2005 10:25 AM
Brought the kit home today, needed something to balance the Hind :)
I am not sure if I dare start building it now...
Love the adders to the roof and the cabling.
Would be happy if you would share your dwg's Andy.
Superb details! Bow [bow]
  • Member since
    February 2004
  • From: Moooooon River!
Posted by Trigger on Saturday, May 21, 2005 3:07 PM
Andy

You need assistance?!? That's the best overhead I've seen so far. I like the detail you've added to the gunner's bulkheads, under the pilot's seats, and hell... everything!

I'm with Avus and Heavy Arty on seeing a drawing from which to do something like that.
------------------------------------------------------------------ - Grant "Can't let that nest in there..."
  • Member since
    February 2003
  • From: phoenix
Posted by grandadjohn on Saturday, May 21, 2005 5:49 PM
Great looking build, please keep posting
  • Member since
    November 2003
  • From: Oklahoma
Posted by chopperfan on Sunday, May 22, 2005 2:17 AM
Bow [bow] This has to be one of the best, if not THE best, interior work I have seen in my 45 years of modeling.
I can only wish for the kind of skill and patience it takes to do something that detailed.
As with what the others have said. Please keep us posted. I have got to see the finished bird!!! Bow [bow]
Randie [C):-)]Agape Models Without them? The men on the ground would have to work a lot harder. You can help. Please keep 'em flying! http://www.airtanker.com/
  • Member since
    November 2005
Posted by Anonymous on Sunday, May 22, 2005 3:02 AM


This is the nose compartment for the UH-60. I read where Intruder asked if someone had it, so I thought I would share, please disregard ifyou have a picture already.
  • Member since
    November 2005
Posted by Anonymous on Sunday, May 22, 2005 5:37 AM
Hope this helps. I wasn't sure whether, "Under the hood" meant under the Hydraulics system, the engine or the powertrain.


  • Member since
    November 2005
Posted by Anonymous on Sunday, May 22, 2005 5:39 AM


No More, I promise!
  • Member since
    November 2013
Posted by intruder_bass on Sunday, May 22, 2005 1:00 PM
Smile [:)]WOW!!! Mscottholt, thanks a lot! these pictures I’ve been looking for for a long time. Great! Especially MAIN TRANSMISSION ASSEMBLY picture - is really helpful!
I am glad I did register on this forum, with you guys - modelling is much easier and pleasant!
Thanks again!
BTW, by "Under the hood" I meant this part of the aircraft

- unfortunately I am closer to NAVY then to helos so i don't know all terminology.Wink [;)]
So about this picture: the square "hole" in front of this "hood" - i will make net on it like it should be on real aircraft, but you'll be able to look through it, so I was going to make "what's on sight" in thereWink [;)] If you have any picture - post it here please!

to chopperfan: thanks for kind words but I think the best interior scratch buid that i've seen is of oldhooker's Chinook! thats a great work!
thanks again!
Andy


  • Member since
    November 2005
Posted by Anonymous on Monday, May 23, 2005 7:02 AM
Man, you have me digging photos I thought I would never see again!

Here you go, what's under the hood.


This is what you would see if the "Hood" (Aka Doghouse) is removed and you are standing on the windscreen looking aft.


Sideview (standing over right gunner's window.) Shows mixing unit under the maint platform. Upper left corner of photo is Main Rotor and Transmission.


Not near as good photo, these are the primary servos. (Standing on the MR looking forward)
  • Member since
    November 2005
Posted by Anonymous on Monday, May 23, 2005 7:07 AM

This is a larger blowup of the Hydraulic deck
  • Member since
    November 2005
Posted by Anonymous on Monday, May 23, 2005 7:11 AM
The rectangular hole in the front is merely an air scoop. You don't really see into the doghouse, but the scoop is a fiberglass orange. The hole on the right of the doghouse is the vent blower intake. It is a tube. You see it in the picture above, the triangular thingy with no step stencilled. Any more questions I'd be happy to share with you.
  • Member since
    November 2013
Posted by intruder_bass on Monday, May 23, 2005 2:01 PM
Thanks a lot, mscottholt really great pics and really helpful info!

Hydraulicandmixingdeck.jpg - the first file posted by you did not open - can you please do it one more time?
Now since I have these pictures I am thinking of building my next Hawk with opened doghouse, engine sections and even transmission shaft.
One more thing about this square hole on doghouse: you can not look through the net? is there some kind of filter on the inside of it?
Here is what i made on it:


should I block it from the inside?
Andy


P.S.
Here is the ceiling scheme i promised to you guys
if there will be any questions please don’t hesitate to ask


Scratch build part starts right from the "troop cabin door front line" and ends a little bit AFT the "rear wall line". I did not make the front part of the ceiling (pilot cabin - troop cabin door line) because it is usually covered with sound proof material (OD color)
  • Member since
    February 2004
  • From: Moooooon River!
Posted by Trigger on Monday, May 23, 2005 9:22 PM
Awesome! Thanks for taking the time to share that with us.
------------------------------------------------------------------ - Grant "Can't let that nest in there..."
  • Member since
    December 2002
  • From: Valrico, FL
Posted by HeavyArty on Monday, May 23, 2005 9:25 PM
Great stuff, thanks for the ceiling drawing.

Gino P. Quintiliani - Field Artillery - The KING of BATTLE!!!

Check out my Gallery: https://app.photobucket.com/u/HeavyArty

"People sleep peaceably in their beds at night only because rough men stand ready to do violence on their behalf." -- George Orwell

  • Member since
    November 2005
Posted by Anonymous on Tuesday, May 24, 2005 2:41 AM


Sorry this is a terrible drawing, but I did it on photoshop. That is the sort-of general profile of the scoop on the doghouse.
  • Member since
    November 2005
Posted by Anonymous on Tuesday, May 24, 2005 2:42 AM
The scoop is either a yellow-brown to orange in color.
  • Member since
    June 2003
  • From: Caput Mundi
Posted by Avus on Tuesday, May 24, 2005 7:35 AM
Thanks intruder_bass!
Looking at your pics it seems you used Evergreen I-beams. Could you please tell me the models or the sizes?
What is the diameter (or radius) of the holes and the thickness of the plasticard?
Thanks.

Klaus

Thanks to ImageShack for Free Image Hosting

  • Member since
    February 2005
Posted by TommyHawk on Tuesday, May 24, 2005 11:14 AM
This is great! Really gives me some inspiration/aspiration! Thanks for posting the pictures...

TommyHawk
  • Member since
    November 2013
Posted by intruder_bass on Tuesday, May 24, 2005 1:16 PM
Mscottholt so if I understood you right the air scoop looks about like this:


is it correct? what's the length of the scoop? i mean should it be longer then on my picture or shorter?
As i am building the hawk that flew in Somalia, is it possible that air scoop was of darker color because of dust and dirt?

To Avus Yes, I used Evergreen T - beams. As I said before everything I did is approximate so the sizes of bulkheads and diameters of the holes can possibly be not in proper scale. I tried to make them look like on photos but there is no guarantee that they are correct.
Evergreen catalogue numbers that i used:
275 - central bulkheads
113,153,219,128, styrene sheets 0.5 mm thick
Plastruct
90512 - side bulkheads
...and others
well its hard to describe - i used everything that i found in my stock.Smile [:)]
good luck!
  • Member since
    April 2005
  • From: Gothenburg
Posted by JohanT on Tuesday, May 24, 2005 1:56 PM
The most constructive thread I have followed so far!
Thank You for sharing intruder_bass!
Thank You for all details mscottholt and all!
Please keep posting guys Smile [:)]
  • Member since
    November 2005
Posted by Anonymous on Tuesday, May 24, 2005 3:57 PM
Intruder_Bass, That looks pretty close. Much better job than I could ever do. The scoop has a rather thin profile, and is very hard to see due to the screen mesh.
  • Member since
    November 2003
  • From: Oklahoma
Posted by chopperfan on Wednesday, May 25, 2005 3:52 PM
I am putting all of this information on my computer.
Starting to get me all worked up. Gonna have to pull the DAP kit off the shelf and start gluing!!!
Randie [C):-)]Agape Models Without them? The men on the ground would have to work a lot harder. You can help. Please keep 'em flying! http://www.airtanker.com/
  • Member since
    December 2002
  • From: Valrico, FL
Posted by HeavyArty on Wednesday, May 25, 2005 5:01 PM
QUOTE: Originally posted by chopperfan

I am putting all of this information on my computer.
Starting to get me all worked up. Gonna have to pull the DAP kit off the shelf and start gluing!!!


Sign - Ditto [#ditto] I have 3 moreAcademy MH/UH-60s in the pile, will definitely use the info from here on them.

Gino P. Quintiliani - Field Artillery - The KING of BATTLE!!!

Check out my Gallery: https://app.photobucket.com/u/HeavyArty

"People sleep peaceably in their beds at night only because rough men stand ready to do violence on their behalf." -- George Orwell

  • Member since
    November 2013
Posted by intruder_bass on Wednesday, May 25, 2005 7:27 PM
Mscottholt, if you dont mind I will ask couple more questions about Black Hawks. Think it can be interesting for others too.
The hawk I am recreating in my model-copy had no fairings around the main landing gear strut just like on picture below. Usually you can't see the upper part of the strut because of the fairing.


#1.the question is: there are 2 "polished metal places" on the strut - one very close to the weel and another goes up. Is this correct or just bad picture makes this fake view? Do you have any close to this section pictures?

#2. ballistic blanket (again)
ALL Black hawks in Somalia had ballistic blankets on the floor. This is the only useful pic that I was able to find. But its still not enough for me - i don’t know how they should be allocated on the floor. Any scheme or other photo will be really appriciated!!!


Thanks a lot
Andy

  • Member since
    November 2005
Posted by Anonymous on Thursday, May 26, 2005 5:06 PM
#1 WHat the picture shows is correct. I don't have pictures of that area, sorry.

#2 The ballistic blankets are an invention that I didn't see. They were introduced after I left the army. If you are able to find the company that makes it (maybe dupont?) they might have the schematics, but they might be leery about giving out information about armor ballistic protection, in the interests of OPSEC.
  • Member since
    November 2013
Posted by intruder_bass on Thursday, May 26, 2005 8:06 PM
Question or even suggestion to Avus and others who intrested in making home decals for Black Hawk. As you all know the Academy decals are not very good:
1.because of their color
2.they dont have some really usefull stuff - markings like:


So I suggest adding these markings to home-made decals by Avus. I could draw all markings in PHOTOSHOP and prepare them to be added to Avus's decal sheet. All I need is the better quality photo of them and text written on them (if possible) If somebody here still works on this birds or can make picture (i hope this is not secret stuff) - it would be just awesome! At last there should be black Hawks somewhere in museums!

Thanks
Andy
  • Member since
    November 2005
Posted by Anonymous on Thursday, May 26, 2005 9:21 PM
each one of those is a data plate with the serial number and nsn/description most are hard to read 1/1 scale and the print is very small so anything that looks like them in general would work


sgtkopp
  • Member since
    November 2013
Posted by intruder_bass on Thursday, May 26, 2005 10:00 PM
Smile [:)] yes but the last one for example contains some drawings on it.... well from my point of view if there is a possibility to make it closer to original - i will do my best to achieve it.
  • Member since
    February 2004
  • From: Moooooon River!
Posted by Trigger on Friday, May 27, 2005 1:36 AM
QUOTE: Originally posted by intruder_bass

Question or even suggestion to Avus and others who intrested in making home decals for Black Hawk. As you all know the Academy decals are not very good:
So I suggest adding these markings to home-made decals by Avus. I could draw all markings in PHOTOSHOP and prepare them to be added to Avus's decal sheet. All I need is the better quality photo of them and text written on them (if possible) If somebody here still works on this birds or can make picture (i hope this is not secret stuff) - it would be just awesome! At last there should be black Hawks somewhere in museums!

Thanks
Andy


Andy -

I'm working on an "expanded edition" decal sheet for MH-60Ls and A/MH-6s based off of what Avus and Heavy Arty have done and there's room a plenty for such markings. Main thing I would need to know are the dimensions of those labels to scale the art properly.
------------------------------------------------------------------ - Grant "Can't let that nest in there..."
  • Member since
    June 2003
  • From: Caput Mundi
Posted by Avus on Friday, May 27, 2005 2:09 AM
Great idea!
We could ask two persons (one in the AF and one army guy, you might know who I'm talking about) to get us the dimensions and some close ups to make correct decals.

This is going to become one hell of a decal sheet! If anyone has contacts to Cobra Co., Two Bobs or similar companies we might get them to make a "real" decal sheet.

Klaus

Thanks to ImageShack for Free Image Hosting

  • Member since
    November 2005
Posted by Anonymous on Friday, May 27, 2005 5:43 AM
I'm on it (USAF -60 Placards/data plates).

But as my great grandfather used to say back in the old country (Sicily) "I may ask you for a favor in the future" (i.e. a couple decal sheets).Wink [;)]Wink [;)]nudge, nudge, say no more.
  • Member since
    June 2003
  • From: Caput Mundi
Posted by Avus on Friday, May 27, 2005 7:35 AM
OK the AF guy replied! Thanks salbando!Thumbs Up [tup]

Of course you'll be rewarded with an appropriate ammount of decals!Smile [:)]

Klaus

Thanks to ImageShack for Free Image Hosting

  • Member since
    December 2002
  • From: Valrico, FL
Posted by HeavyArty on Friday, May 27, 2005 9:24 AM
OK, I can take a hint. I think I am "The Army Guy". I really don't have regular access to Blackhawks to get pics of data plates though. I'm sure Sal will come through. He is on these birds all the time, everyday. I only get to ride in them every once in a while.

Gino P. Quintiliani - Field Artillery - The KING of BATTLE!!!

Check out my Gallery: https://app.photobucket.com/u/HeavyArty

"People sleep peaceably in their beds at night only because rough men stand ready to do violence on their behalf." -- George Orwell

  • Member since
    January 2004
  • From: atop a UH-60
Posted by Mogwa on Friday, May 27, 2005 9:28 AM
Im a 60 guy and i can handle the Army stuff. I think I've got a pretty good idea where I can get data plate info.
Mog
UH-60 Crewchief / Technical Inspector and Modelling Addict
  • Member since
    February 2004
  • From: Moooooon River!
Posted by Trigger on Friday, May 27, 2005 10:35 AM
QUOTE: Originally posted by Avus

Great idea!
We could ask two persons (one in the AF and one army guy, you might know who I'm talking about) to get us the dimensions and some close ups to make correct decals.

This is going to become one hell of a decal sheet! If anyone has contacts to Cobra Co., Two Bobs or similar companies we might get them to make a "real" decal sheet.


Already on it Wink [;)]

I've spoken with some of you guys off the boards about this, but now's a good time to mention that I've already been looking at vendors for just such a sheet of MH-60L and HH-60G decals. I've already started on MH-60L sheet version 3.0 so yeah, placecard info would be awesome to have.

The manufacturers are all slammed right now getting ready for the Nats and I've got to find time to finish what I've started with the MH-60L sheet (Avus, HA - I haven't forgotten your proofs) so don't expect anything produced before the Nats this July. But it will happen!
------------------------------------------------------------------ - Grant "Can't let that nest in there..."
  • Member since
    November 2013
Posted by intruder_bass on Friday, May 27, 2005 2:21 PM
Guys, YOU ARE THE BEST!!!

Special thanks to Army and AF fellows who agreed to take pictures and (or) info about place cards.
one thing only.... I don’t know what is Nats.
I am planning to finish my Super 61 before July. If its possible I’d love to have decals earlier then CC or other company will accept and start production (may take them a while Smile [:)])

thanks
Andy
  • Member since
    December 2002
  • From: Valrico, FL
Posted by HeavyArty on Friday, May 27, 2005 4:15 PM
QUOTE: Originally posted by intruder_bass

Guys, YOU ARE THE BEST!!!

Special thanks to Army and AF fellows who agreed to take pictures and (or) info about place cards.
one thing only.... I don’t know what is Nats.
I am planning to finish my Super 61 before July. If its possible I’d love to have decals earlier then CC or other company will accept and start production (may take them a while Smile [:)])

thanks
Andy


Sent you an email on the deals. Nats is the IPMS (International Plastic Modelers Society) National competition and show. I think it is in Atlanta this year, early to mid July.

Gino P. Quintiliani - Field Artillery - The KING of BATTLE!!!

Check out my Gallery: https://app.photobucket.com/u/HeavyArty

"People sleep peaceably in their beds at night only because rough men stand ready to do violence on their behalf." -- George Orwell

  • Member since
    November 2013
Posted by intruder_bass on Friday, May 27, 2005 5:34 PM
Next step of my project - main rotor assembly. Still have to add some smaller parts thoughSmile [:)] thanks to Mscottholt for photos and info. If everything will go fine next week I'll be ready for the worst part of the model... RIVETS!!!!Dead [xx(]
God help me to handle it!!!


andy
  • Member since
    November 2005
Posted by Anonymous on Friday, May 27, 2005 6:04 PM
Awesome.
Great attention to detail.
Smile [:)]
  • Member since
    May 2015
Posted by willuride on Friday, May 27, 2005 6:17 PM
That thing is coming along great!!

On the bench Knoxville, TN:

1/48 Monogram F-4 Phantom "Black Bunny"  I wanted to relive the past....Never again

On the Bench Manchester, TN:

1/48 Revell F-18E 


  • Member since
    June 2003
  • From: Caput Mundi
Posted by Avus on Sunday, May 29, 2005 6:55 AM
I'm sorry HeavyArty, I wasn't thinking of you but of mogwa (thanks for dropping by)!

intruder_bass seeing your impressive work I've decided to pack my things and move to an other planet where my models don't have to compete with the accuracy of yours!

Klaus

Thanks to ImageShack for Free Image Hosting

  • Member since
    February 2004
  • From: Moooooon River!
Posted by Trigger on Monday, May 30, 2005 8:31 PM
QUOTE: Originally posted by intruder_bass


andy


Maybe my eyes deceive me but...is that carved out of...clay?!? Regardless of what it's made from, it looks great. Love those Eduard parts!
------------------------------------------------------------------ - Grant "Can't let that nest in there..."
  • Member since
    November 2013
Posted by intruder_bass on Monday, May 30, 2005 9:59 PM
to Trigger74 No, its not from claySmile [:)] its cylinder part from the kit but a little bit "modified". I just glued small pieces of plastic all around cylinder to make it look like cone. All the relief on it is Evergreen's styrene. On photo it is painted with grey primer, so it looks solid but its notCool [8D]

andy
  • Member since
    November 2005
Posted by Anonymous on Tuesday, May 31, 2005 6:46 AM
Have you considered making resin casts? I'd buy the stuff from you. Hell I'll dig out every photo I can find and send it to you if that would help you.
  • Member since
    December 2002
  • From: Valrico, FL
Posted by HeavyArty on Tuesday, May 31, 2005 10:31 AM
QUOTE: Originally posted by mscottholt

Have you considered making resin casts? I'd buy the stuff from you. Hell I'll dig out every photo I can find and send it to you if that would help you.


Second the above. I would probably buy a few as well.

Gino P. Quintiliani - Field Artillery - The KING of BATTLE!!!

Check out my Gallery: https://app.photobucket.com/u/HeavyArty

"People sleep peaceably in their beds at night only because rough men stand ready to do violence on their behalf." -- George Orwell

  • Member since
    November 2013
Posted by intruder_bass on Tuesday, May 31, 2005 11:32 AM
I've thought about it but:
I have NO EXPERIENCE in making resin parts. Maybe I could make master-model and send it to some company which is carrying out stuff like that and can put it on production (Cobra Company?). So if there is interest in this just let me know. Right now I already can offer them MAIN TRANSMISSION ASSEMBLY, TAIL GEAR BOX, CABIN CEILING. I am planning to build both engines (academy's are way too simplified) for my next Black Hawk.

2 Mscottholt - If its possible I would appreciate every photo you'll send me. They all help a lot, and more of them I have - more accurate will be the detail. As I said before, if I only had chance to get close enough to Black Hawk with my camera Big Smile [:D] I really like this aircraft!
Thanks for great pics

Andy


  • Member since
    November 2005
Posted by Anonymous on Tuesday, May 31, 2005 10:21 PM
I just bought an AH-60L DAP, i have afew questions....

Both times i've built helo's, the rotors sagged.....now i know the brass-rod technique... but not alot about it, or how to do it.

Does this kit's rotor's sag aswell??? Do i need to do something to fix this???
  • Member since
    November 2005
Posted by Anonymous on Tuesday, May 31, 2005 10:25 PM
unless you're buildling it in-flight, it's desirable to have the rotors sag a bit. Depends on the airframe, but usually every main rotor blade I ever saw sagged to a certain extent when on the ground. Hopefully your idea of "sag" is the same as mine.
  • Member since
    November 2013
Posted by intruder_bass on Tuesday, May 31, 2005 11:50 PM
I am not sure about what kind of "sagging" you are asking. I did not connect blades yet to my rotor.Smile [:)] The only thing i can tell you for now: I did not find kit's main rotor detailed enough for me so i cut it into several pieces, drilled them and added some metal pipes.


Andy
  • Member since
    November 2005
Posted by Anonymous on Wednesday, June 1, 2005 7:29 AM
I think Salbando meant by sag is the amount of droop of the MR blades as they sit., usually the droop is more exxagerated by the blade tiedowns pulling the tips further down. A good example is in the Operator's manual, showing the normal amount of droop of the blades as it would sit on the ramp.

As you are super detailing the Mast, to be fairly accurate, the Pitch change links (the thin vertical rods x 4) have a colored stripe somewhere in the bottom third of the rod. The colors are Red, Yellow, Blue and Black. Even on the real machine, they are hard to see. Also around the mast/swashplate area are tons of grease stains. The mast is a single piece of machine milled Titanium.

  • Member since
    November 2013
Posted by intruder_bass on Wednesday, June 1, 2005 7:46 AM
to mscottholt
QUOTE: Pitch change links (the thin vertical rods x 4) have a colored stripe somewhere in the bottom third of the rod. The colors are Red, Yellow, Blue and Black.

Thanks, I just noticed this looking through photosSmile [:)] Btw what this colors mean?
QUOTE: The mast is a single piece of machine milled Titanium


Yes but unfortunately I have no lathe (I’d love to make it solid) so I had to imitate relief on mast with different sized pipesSmile [:)]

  • Member since
    November 2005
Posted by Anonymous on Wednesday, June 1, 2005 7:59 AM
The blades have individual colors when it comes to track and balance of the blades. The Color on the PCL's just help with the identification.

Here are some more pictures to help you with accuracy.


  • Member since
    November 2005
Posted by Anonymous on Wednesday, June 1, 2005 8:17 AM
well when i did my Italeri AH-1 the rotors sagged until they were about 3 cm from the ground.... WAY too much.

My Revell AH-64 did the same, so maybe i'm just doing something wrong.

I DO NOT want them to sag, as in the DIO this will be a bird that has just landed, and will still be spinning.
  • Member since
    November 2005
Posted by Anonymous on Wednesday, June 1, 2005 11:38 PM
Scott knows what I meant concerning sag/droop.

DoWBaseball,
Yeah that's waaay to much droop.

By the way, the tail rotor blades and pitch links have the same 4 colors for ID, and we have a mix of Titanium and OD colored main rotor masts (some of both). And I'm talking USAF HH-60's here but I wouldn't think it would be much different for Army birds.
  • Member since
    November 2005
Posted by Anonymous on Thursday, June 2, 2005 9:31 AM
Alot of the Alpha models had CARC painted masts, wheras I've seen only one Lima with a painted Mast.. Also on one of the TR blades, there was a strip of reflective tape that ran from the Base of a Paddle to about 8-10 inches into the blade, I can't remember what color blade it was on.
  • Member since
    January 2004
  • From: atop a UH-60
Posted by Mogwa on Thursday, June 2, 2005 5:01 PM
The relective tape should have been removed after the T/R balance, But you see it out the sometimes. Almost all the M/R masts Ive seen are natural metal color. Ive seen a couple that are helo drab and one was black (apparently scored from task force).
Ive got pics only a modeller can love of UH-60 widgets, lemme know what you want to see and ill see what i have. Cant get the floor plates as theyre all in storage. Got a diagram of typical rotor droop for your enjoyment.


Actually after looking at the diagram thats not typical droop. At rest theyre about half that. You can also see how the M/R componants are color coded from the swashplate up to the spindles. Some M/R blade cuffs get a colored square also.
Personally I hate the Kit rotor head and hope Cobra or somebody does resin casts of the Main mod and rotor head.
HTH,
Mog
UH-60 Crewchief / Technical Inspector and Modelling Addict
  • Member since
    January 2004
  • From: atop a UH-60
Posted by Mogwa on Thursday, June 2, 2005 5:27 PM
More useless crap


Mog
UH-60 Crewchief / Technical Inspector and Modelling Addict
  • Member since
    November 2013
Posted by intruder_bass on Thursday, June 2, 2005 9:38 PM
wow!

Mscottholt and Mogwa - thanks for great pictures and info about the M/R and blades. According to Super 61 photos that I have the MR mast was of natural metal color but the rest stuff - black as on all Night stalker’s birds. I planned to "park" my helo on the airfield, but I don't think there where any RBF tags on it... What do you think guys?


About "More useless crap" posted by Mogwa. Love those pics! do you have more? I couldn't find something even close to them. Very useful! Thanks!

I marked with "question sign" some spots that I am interested in. I still can not find anything useful about them. Close photo or drawing will be appreciated.


are the searchlight and landing light holes where they soppose to be?


Have to make at least "something" inside this hole...


What are these small holes for? What's on sight in there?

Thanks
Andy


  • Member since
    January 2004
  • From: atop a UH-60
Posted by Mogwa on Thursday, June 2, 2005 10:59 PM
Well, the landing light and IR searchlight appear to me to be slightly to far outboard and aft, but I dont have any reference here so I'll get back to you on that one.
The hole in the M/R fairing is just a handhold.


This is the portion of the 5 pack that is visible. Its the top of the Input mod.


As far as the M/L/G that area is covered by a fairing and isnt really visible. The acft in this photo has this fairing removed for whatever reason. See the pic in my more useless crap post. Notice the fairings covering the ESSS lower strut mounts in my pics, but the mounts are exposed in your pic. It would be unusual for acft to operate without these fairings. Not that they are required, just they are rarely removed and are reinstalled after any maintenance in that area.

[img]http://i6.photobucket.com/albums/y211/intruder_bass/landinggear1.jpg[img]

Only the lower piston near the wheel rims would be exposed.
HTH,
Mog

UH-60 Crewchief / Technical Inspector and Modelling Addict
  • Member since
    November 2013
Posted by intruder_bass on Thursday, June 2, 2005 11:26 PM
OK, now i have the clue...Smile [:)]

about M/L/G I got the info from real participant of operation. Here is what he said:
- " The aircraft always flew with the cockpit doors off. Super 61 had a hoist mount, but no hoist was installed. It would be a U shaped piece of metal about a foot long and about a foot forward of the right hand engine air inlet.
One other thing, the fairings around the main landing gear
strut weren't installed on any of the Black hawks in D Company
Cargo Hooks weren't installed in the aircraft. There was a tube, about 3 inches in diameter installed in its place. The tube had 4 rings (in a clover leaf pattern) attached to it in the center. The system was installed in place of the cargo hook for securing the aircraft during fixed wing transport of the helicopter..." (Pat Powers crew chief Super 65)

So thats y I asked you about the "no fairing" photo....Smile [:)]
BTW have you ever encounter this "hook for securing the aircraft thing"? I did not find any info or photo of it on the web. Only what Pat mentioned...

Andy
  • Member since
    June 2003
  • From: Caput Mundi
Posted by Avus on Friday, June 3, 2005 2:12 AM
Wow! Now that's a HOT topic!
With all this reference it'll take me years to make my Pavehawk accurate!

Thanks Guys for all the pics and info.

Klaus

Thanks to ImageShack for Free Image Hosting

  • Member since
    November 2013
Posted by intruder_bass on Monday, June 6, 2005 11:15 AM
Hello guys!
I have couple of new questions to ALL, who is familiar to Black Hawks.

1. According to info that I have there where six M-134 ammo cans on board of Super 61- 3 for each minigun. Ammo cans were rather big - 1500 rounds each, so 4500 rounds per gun.
- "By the way I used all of mine and started to use one of the other gunners when we were shot down..." (Ray Dowdy. Crew chief of Super 61)
So the question is: how do those ammo cans look like? any photo or picture will be helpful. I had no luck to find any on web. As Heavy Arty suggested: maybe they used 40mm standard ammo boxes...?

2.Did anybody see CC miniguns? Are they better then kit's? Can somebody make a close photo of CC's - just need to know if they worth it.

Thanks
andy

  • Member since
    June 2003
  • From: Caput Mundi
Posted by Avus on Tuesday, June 7, 2005 1:59 AM
The ammo cans look like the standard M-60 ammo cans only much bigger and with the ammo feed mechanism.

CC's Miniguns are definitively better then the kit ones. BUT all the miniguns I've seen lack the "used-shell-thing" (i.e. where the used shells are ejected; It's a sort of conical cover).

I understand I haven't been very clear so I'll try to get some pics as soon as I get home.

OK here are some pics i found on the net:
"used-shell-thing" is that thing on the right with the hose attached


Ammo box without ammo feed mechanism

Klaus

Thanks to ImageShack for Free Image Hosting

  • Member since
    December 2002
  • From: Valrico, FL
Posted by HeavyArty on Tuesday, June 7, 2005 9:24 AM
Avus,
Above pic of ammo box is the type I am talking about, a 40mm ammo can. Nice pic of the chick...I mean spent shell thingie too.

Gino P. Quintiliani - Field Artillery - The KING of BATTLE!!!

Check out my Gallery: https://app.photobucket.com/u/HeavyArty

"People sleep peaceably in their beds at night only because rough men stand ready to do violence on their behalf." -- George Orwell

  • Member since
    November 2013
Posted by intruder_bass on Tuesday, June 7, 2005 7:05 PM
Oh, thanks guys, now I got it.

I wonder how these ammo cans where secured to floor if there was ballistic blancket all over it?
So the feeding mechanism included the electric engine or just the chute?

If it did, was the motor installed on each can?

To Avus: Do CC miniguns have this "used-shell-thing"?
To Heavy Arty: thanks for the file! i finally downloaded it Smile [:)]


Andy

  • Member since
    December 2002
  • From: Valrico, FL
Posted by HeavyArty on Wednesday, June 8, 2005 12:48 AM
My understanding is that the cans just had the ammo chutes attached. The motors on the miniguns would pull the rounds through the chute. The cans would most likely be strapped or bungi corded into place under the guns, doubt they would have the ballistic blankets on them either.

Gino P. Quintiliani - Field Artillery - The KING of BATTLE!!!

Check out my Gallery: https://app.photobucket.com/u/HeavyArty

"People sleep peaceably in their beds at night only because rough men stand ready to do violence on their behalf." -- George Orwell

  • Member since
    June 2003
  • From: Caput Mundi
Posted by Avus on Wednesday, June 8, 2005 2:37 AM
No intruder_bass the CC miniguns don't have the "used-shell-thing". I scratchbuilt one and added it to theirs.
As to the feeding mechanism I've seen pics of the whole mechanism attached to the ammo box. And CC sells thier miniguns with ammo boxes that have the feeding mechanism.
Again, at home I'll try to find those pics.

QUOTE: Nice pic of the chick...I mean spent shell thingie too.

Yeah I figured a pic with a chick would look better than only a minigun.Wink [;)]

Klaus

Thanks to ImageShack for Free Image Hosting

  • Member since
    November 2005
Posted by Anonymous on Thursday, June 9, 2005 8:13 PM
Avus,
Concerning the ammo boxes, don't worry about changing anything on the Pavehawk as we have the center mounted can's with the drivers installed whenever we're employing the GAU-2B (M-134 for you Army guys). With the new Block and SPS upgrades, these cans are now mounted externally below the gunner's windows. I'm not sure if the 160th or the Army in general will follow suite but they may. It really frees up space in the cabin.

Now, after thinking real hard (it's been around 12 years now) I'm pretty sure that the 160th Hawks had the big ammo cans and only had feed trays hooked up to them. Looking at the drivers, I don't see how they could have mounted them to the cans as they are a fairly intricate piece of gear and go hand in hand with the center mounted bins. All of our 7.62 linked comes in the big ammo cans (40mm cans) when we get it from the ammo dudes. Usually the gunners and FE's will upload the ammo into the center bins with the help of the ammo troops.
  • Member since
    June 2003
  • From: Caput Mundi
Posted by Avus on Saturday, June 11, 2005 5:27 AM
Thanks for the info Salbando.
Actually I wasn't thinking to change the ammo boxes on the Pavehawk, I was only providing info to intruder_bass.
What I have started to do is change the position of one ammo driver on the center box, in order to have both ammo chutes coming out of the same side of the box.
Picture might be clearer:

Klaus

Thanks to ImageShack for Free Image Hosting

  • Member since
    December 2002
  • From: Valrico, FL
Posted by HeavyArty on Saturday, June 11, 2005 11:03 AM
Avus,
I did the same thing on my MH-60L DAP model. I also cut the box down about 1/4 inch. It looked way too tall to me, it goes almost to the ceiling in the original Academy size.

Gino P. Quintiliani - Field Artillery - The KING of BATTLE!!!

Check out my Gallery: https://app.photobucket.com/u/HeavyArty

"People sleep peaceably in their beds at night only because rough men stand ready to do violence on their behalf." -- George Orwell

  • Member since
    November 2013
Posted by intruder_bass on Saturday, June 11, 2005 7:23 PM
Avus, the photo you sent me recently with M-134 on it is really nice...and not because of MinigunBig Smile [:D]

The M/L/G fairing is removed on this aircraft. Some wiring is exposed. Do you have some more pics of this Black Hawk?

Salbando, Avus,Heavy Arty: thanks again for the modern ammo magazine info... Its really helpful. For now I will use 40mm ammo cans that I have from some TAMYIA (or Verlinden) kit...

  • Member since
    June 2003
  • From: Caput Mundi
Posted by Avus on Sunday, June 12, 2005 3:20 AM
HeavyArty
Thanks for the hint on shortening the ammo box. I'll follow your suggestion.

intruder_bass
Glad the picture was useful. I'll have a look at my pics and see if I can find some more shots.
BTW I got those pics from Mr.Werner (the e-mail is on the pic). Try to mail him and see if he has more pics that cuold interest you.

Klaus

Thanks to ImageShack for Free Image Hosting

  • Member since
    November 2005
Posted by Anonymous on Tuesday, June 14, 2005 1:51 AM
Looks great,keep us posted.
  • Member since
    November 2005
Posted by Anonymous on Thursday, June 16, 2005 8:50 PM
Here's what the balistic "blankets" look like when installed. This shot was from Mog but the aircraft is a UH-60 armed mith M-60D's. The blankets on the MH's were installed the same.


Fox model Cobras and 58's down on the beach FARP at Mog. I thought they were 10th Mountains birds but can't remember. The 58's flew on the 3rd but the Cobra's were on stand-by. I think they flew on the 4th though.


Super 66 "Gun Slinger". You can see how they had the numbers on the main cabin windows and they DID have the cabin doors on. The only thing wrong with the text on the photo is that it's 2nd Squad, not 3rd Squad (Keni is on the left)


  • Member since
    November 2013
Posted by intruder_bass on Thursday, June 16, 2005 10:49 PM
Thanks Salbando...
I have these photos too from BHD93.com...
The first photo is correct for Super 6's but second one is not... I've drown basic plan of the blanket allocation and sent it to Ray Dowdy (crew chief on "Super 61"). I should say it was very kind of him to correct it and reply on my questions about the particular bird...
According to Ray - "there where 6 sheets of it on the floor. The sheets were touching each other. There was cutouts so the FWD facing seats, and the AFT facing seats could be attached to the floor"....
The ballistic blanket is done on my model already (if there is an interest I will post pics).
BTW - about the cabin doors... I didn't say the cabin doors were off - just the cockpit ones
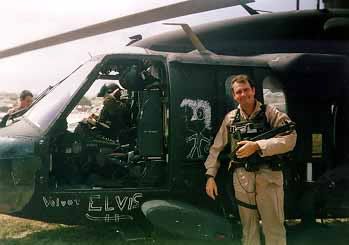
here is one of most famous pics of "Super 61" for example:


Right now I stuck for a bit cause have not enough time for finishing the intakes/exhaustsDead [xx(]… also there is a delay in “rivets production” - I ordered beading tools from Russia… Seems like it will take them a while to arrive here… That’s about it for now…Cool [8D]

I also have to say again that your help guys - Salbando, Mogwa, Heavy Arty, Avus, is REALLY APPRECIATED!Smile [:)]

Andy

  • Member since
    December 2002
  • From: Valrico, FL
Posted by HeavyArty on Friday, June 17, 2005 12:28 AM
Sure there is an interest. Always like looking at your progress. This is going to be one super-detailed model. Show more pics.

Gino P. Quintiliani - Field Artillery - The KING of BATTLE!!!

Check out my Gallery: https://app.photobucket.com/u/HeavyArty

"People sleep peaceably in their beds at night only because rough men stand ready to do violence on their behalf." -- George Orwell

  • Member since
    November 2005
Posted by Anonymous on Friday, June 17, 2005 1:41 AM
Andy,
I didn't know if you had seen the site or not. As I've told Grant, I've got photos taken from my time in Somalia, but I'm still digging stuff out of storage and figuring out where to put it in the new house Big Smile [:D]
When I find the pics I'll try to scan them and post them. For the time being I'm like a one legged man in an ****** kicking contest trying to finish up my Senior NCO PME (maybe someone will screw up and I'll make E-8), prepare for an upcoming UCI, and getting ready for another deployment to the land of little grass.

Oh and if that's not enough, the local fire department has really been pissing me off lately. 3 requests for assistance in 3 weeks (2 rescues and one medevac). All 3 called off once we stepped, launched and arrived on scene because their dispatch and incident commanders weren't sharing info.

(sorry guys....had to vent a little)

I will say that your MH-60 is one of the most comprehensive and detailed birds I've yet to see. Keep it up!!!!!Thumbs Up [tup]
  • Member since
    November 2013
Posted by intruder_bass on Friday, June 17, 2005 4:25 PM
Smile [:)] I'd like to see those pics of yours from Somalia, Salbando! thanks for compliment to my model... to say truth I am not on 7th sky of what I did (some parts turned out not as good as i could expect Big Smile [:D]) But that’s probably normal reaction when you look back on your first steps and say: "Damn! I should have done this part a little smoother" or "glue it other way".
Well, maybe thats what they call growing experience...

Here is what I made by now:
bulletproof blankets


main transmission and starboard intake


Andy
  • Member since
    February 2004
  • From: Ft. Bragg, NC
Posted by adrake2 on Saturday, June 18, 2005 11:23 AM
Wow, it's lookin' great. I look forward to these pictures every time I check the forums. They're definitely inspiring. I know what you mean about the growing experience. More than once have I wanted to scrape a project because I could have done something easier and better the next time around. Thanks for the pics, Andy, and keep up the excellent work.
-Aaron
  • Member since
    November 2013
Posted by intruder_bass on Saturday, June 18, 2005 9:38 PM
Hi guys!
Another quick question. Looking trough photoes like ~8356th timeTongue [:P] I've noticed couple of interesting things. I marked the "thing" with red question marks.
What is it? Why is it missing on Academy's DAP? Was this sort of "equipment" installed on h-60s back in 93'?


By the way: take a look at size of the pipe marked with green arrow on the first pic.... On Academy's kit this "hole" is allmost twice smaller!

Andy
  • Member since
    November 2005
Posted by Anonymous on Saturday, June 18, 2005 10:31 PM
It almost looks like a DIRCM mount, but I'm not sure.

I haven't looked at my Academy H-60 lately, but after what you've said I'll be checking out the APU exhaust. Might have to open it up a bit.
  • Member since
    November 2005
Posted by Anonymous on Saturday, June 18, 2005 11:22 PM
Looks like the 160th is still flying their MH-60L's without the main strut fairings. This was taken in Aug of 2003 during a CAPEX.

  • Member since
    November 2013
Posted by intruder_bass on Sunday, June 19, 2005 8:58 AM
Wow! what a nice shot!!!!!
thanks salbando! Great!

Andy
  • Member since
    November 2005
Posted by Anonymous on Sunday, June 19, 2005 12:39 PM
Great details..looks awsome!
  • Member since
    November 2005
Posted by Anonymous on Sunday, June 19, 2005 5:53 PM
That looks like the mount points for the AN/AVR-2A(V).
  • Member since
    November 2005
Posted by Anonymous on Sunday, June 19, 2005 9:40 PM
You can see the crew chief giving the two minute warning, the fast rope Hausers, and FRIES bar deployed, and pretty good detail of the M-134, and main gear strut.

Not sure why the 160th operates with the main strut fairings off. Never noticed it in Mog.

  • Member since
    November 2013
Posted by intruder_bass on Sunday, June 19, 2005 9:42 PM
QUOTE: Originally posted by salbando

For some reason the pic is not showing in the forum, but it shows when you click on it. You can see the crew chief giving the two minute warning, the fast rope Hausers, and FRIES bar deployed, and pretty good detail of the M-134, and main gear strut.


Oh ya i can see it! Great shot!
  • Member since
    November 2005
Posted by Anonymous on Monday, June 20, 2005 12:03 AM
Here's some detail pics of one of my squadron's HH-60G's showing the tail rotor gearbox detail, and tail rotor drive shaft and intermediate gearbox. Should be the same as any other H-60.


notice our Jolly Green mascot in the background.

Main rotor hub detail


Theres some H-3 and NSAWC SH-60F stuff that I posted as well.
http://photos.kitmaker.net/showgallery.php/cat/500/page/1/perpage/10/ppuser/6667/what/allfields
  • Member since
    November 2013
Posted by intruder_bass on Monday, June 20, 2005 7:54 AM
Holly Jesus! Where all this pics were before????Smile [:)] I love them!
did you take them by yourself? Can you take some more?????
The air intake is off on the 3rd pic! I'd love to take a look at this section. if only i could move the camera a little bit lower..... Gear boxes are awesome!
Thanks a lot!
  • Member since
    June 2003
  • From: Caput Mundi
Posted by Avus on Monday, June 20, 2005 1:29 PM
Seems I'm having problems with the .mil domains. I can't open any of the army, air force, navy or usmc pages, neither from home nor from work!
Angry [:(!]

Klaus

Thanks to ImageShack for Free Image Hosting

  • Member since
    February 2004
  • From: Moooooon River!
Posted by Trigger on Monday, June 20, 2005 7:35 PM
Avus

What is it you're looking for? Maybe I can help.
------------------------------------------------------------------ - Grant "Can't let that nest in there..."
  • Member since
    November 2005
Posted by Anonymous on Monday, June 20, 2005 9:22 PM
Andy,
Yeah, I took them over at our maintenance hangar. I'll take a look to see if i've got what you're looking for.

Avus,
I have the same thing at home when trying to access certain .mil sites. Some will only open when the user is on a .mil domain for security reasons. Usually they will have a second .mil site that is open to public domains.
  • Member since
    June 2003
  • From: Caput Mundi
Posted by Avus on Tuesday, June 21, 2005 2:12 PM
I'm looking for nothing in particular.
I just wanted to see the pic Sal posted (currently I have a mean red X) so I had a look at the HTML code and found out that it's on a . mil site. And I recalled that momentarily I don't have access to that kind of sites!

Klaus

Thanks to ImageShack for Free Image Hosting

  • Member since
    November 2013
Posted by intruder_bass on Tuesday, June 21, 2005 9:36 PM
Some more pics...


and new tool test - rivets (I will not be able to make exact ammount of themTongue [:P] but at least something) What do you guys think? Do they look better then whats given in Academy's kit? Of course its far from what Huey has (still can't understand y Academy made nice rivets on UH-1 and so bad on Black HawksAngry [:(!]


Andy
  • Member since
    December 2002
  • From: Valrico, FL
Posted by HeavyArty on Tuesday, June 21, 2005 9:55 PM
Rivets look good. How did you make them?

Gino P. Quintiliani - Field Artillery - The KING of BATTLE!!!

Check out my Gallery: https://app.photobucket.com/u/HeavyArty

"People sleep peaceably in their beds at night only because rough men stand ready to do violence on their behalf." -- George Orwell

  • Member since
    November 2013
Posted by intruder_bass on Tuesday, June 21, 2005 11:08 PM


I am testing beading tools designed to repair or making jewelry...


then there is a good info about rivet making here:
http://www.largescaleplanes.com/tips/RatoMarczak/riveting_1/riveting_1.html

Andy
  • Member since
    June 2003
  • From: Caput Mundi
Posted by Avus on Friday, June 24, 2005 2:27 AM
Wow, your rivets look great (as the rest does).

I read the article thoroughly, but which of the described methods did you use?
Look like you used the raised panel technique; if so you had to apply sheets of plasticard over the model, did I get that right?

Klaus

Thanks to ImageShack for Free Image Hosting

  • Member since
    November 2013
Posted by intruder_bass on Friday, June 24, 2005 7:43 AM
Avus
No I used recessed rivets method but instead of injection needles I took beading tools. Needles are good too but due to the softness or small diameter of the shaft - can't stand even a couple of dozen of rivets. The kit's plastic is too hard for them which leads to deformation of needle. Beading tool is much "stronger" comparing to needles and has all diameters from 0.3mm to 2mm. Its rather cheap and very helpful.

About rising panels - I thought about it but probably it's tooo early for meWink [;)] It is a hardcore! And if one day I decide to do it - I will use brass foil not a plasticSmile [:)]

Andy

  • Member since
    December 2002
  • From: Valrico, FL
Posted by HeavyArty on Friday, June 24, 2005 11:03 AM
QUOTE: Originally posted by intruder_bass

Avus
No I used recessed rivets method but instead of injection needles I took beading tools. Needles are good too but due to the softness or small diameter of the shaft - can't stand even a couple of dozen of rivets. The kit's plastic is too hard for them which leads to deformation of needle. Beading tool is much "stronger" comparing to needles and has all diameters from 0.3mm to 2mm. Its rather cheap and very helpful.

About rising panels - I thought about it but probably it's tooo early for meWink [;)] It is a hardcore! And if one day I decide to do it - I will use brass foil not a plasticSmile [:)]

Andy


Let me make sure I understand how you did it. Still a little fuzzy.

You punched each individual rivet out of thin sheet with a beeding tool, then placed each individually into the existing recessed rivets. Is that correct?

If so, that is way too tedious for me. I'll stick with the kit's recessed rivets.

Gino P. Quintiliani - Field Artillery - The KING of BATTLE!!!

Check out my Gallery: https://app.photobucket.com/u/HeavyArty

"People sleep peaceably in their beds at night only because rough men stand ready to do violence on their behalf." -- George Orwell

  • Member since
    November 2013
Posted by intruder_bass on Friday, June 24, 2005 10:18 PM
Smile [:)] LOL!!!!

Well I am little "crazy" about models but I am not insane to make about 2000 punched each individual rivet out of styreneSmile [:)] I hardly can even imagine how long it would take to glue them back on the hull....

Here is a simple drawing of the process:


There are two main tricks in this method:
1. Its really hard to make the rivets lay on straight line (I suggest to draw guiding lines with a pencil right on the hull)
2. its hard to keep the pressure on the tool constant. Other ways it can effect the size and depth of the rivet...

If you have more questions please don’t hesitate to ask
Andy
  • Member since
    December 2002
  • From: Valrico, FL
Posted by HeavyArty on Saturday, June 25, 2005 12:45 AM
I see, so it is a mock raised rivet since there is still some recessed area. Very interresting. I think i'll still stick with the recessed kit rivets. Still looks way too tedious for me. Good job, it is coming out great.

Gino P. Quintiliani - Field Artillery - The KING of BATTLE!!!

Check out my Gallery: https://app.photobucket.com/u/HeavyArty

"People sleep peaceably in their beds at night only because rough men stand ready to do violence on their behalf." -- George Orwell

  • Member since
    June 2003
  • From: Caput Mundi
Posted by Avus on Saturday, June 25, 2005 3:54 AM
I have one more question:
What happened to the original recessed rivets?

I mean to model comes with recessed rivets, i.e. holes in the surface, did you sand the surface to make the holes disappear or did you punch over them?

Klaus

Thanks to ImageShack for Free Image Hosting

  • Member since
    November 2013
Posted by intruder_bass on Saturday, June 25, 2005 7:57 AM
QUOTE: Originally posted by Avus

did you sand the surface to make the holes disappear or did you punch over them?


Yes. I filled them with putty and sand the surface (it wasn't so hard because kit has only about 30% of suppose-to-be rivets)

Andy
  • Member since
    November 2005
Posted by Anonymous on Tuesday, June 28, 2005 2:49 AM
Looks great
  • Member since
    November 2013
Posted by intruder_bass on Sunday, July 3, 2005 5:07 PM
Salbando,
If you don't mind I will transfer our sensor conversation here cuz I am not sure Black Wizard is enjoying it under his topicSmile [:)]
If I understood correct they started to install these sensors on Paw Hawks first and then on ARMY helos but it was later then 93' I have many photos with the "horns" on 160th birds but they are dated 2002 and later... So in my particular case I should make only spiral antennas on the nose and no sensors even on the tail? Thats kinda in-time cuz I was about to glue them on my modelBig Smile [:D]

Andy
  • Member since
    November 2005
Posted by Anonymous on Monday, July 4, 2005 1:14 AM
Andy,
Concerning the Gothic Serpent era MH-60L you are correct. Spiral antennas only; no plume detectors.

In actuality, I believe the 160th birds got the plume detectors before our Pavehawks, but it was after 1993 (can't remember when I actually started seeing them on the MH-60L). Our (USAF) Pave Lows (MH-53J's now M's) actually have had plume detectors and spiral antennas for quite some time, but on the HH-60G it was part of the Block 152/162 upgrade and SPS mods started in the mid-late 90's. You'll even see some birds (HH-60G's) that still don't have the plume detectors, albeit most of them have gone down for the Mod and have them by now.

Bottom line on your MH-60L.....spiral antennas-yes......plume detectors-no.
  • Member since
    November 2013
Posted by intruder_bass on Monday, July 4, 2005 8:48 PM
Roger thatSmile [:)]

I have some more questions if you don't mind... I've got stuck a little making the bottom of the aircraft. On some photos of 160th birds you can see "equipment" not included in the DAP kit. Looks like antennas or something but the problem is that I have no idea what is it and (which is most important for me) was it installed on MH-60's back in 93'?
I marked these "antennas" with "question marks" on photos:


What is this bubble? Is there any chance it was there on Super 61?


You can see 3(three) antennas aft from FLIR... Should I build them too?

Thanks a lot for helping me on my research on Black Hawks!!!Smile [:)]

Andy
  • Member since
    November 2005
Posted by Anonymous on Tuesday, July 5, 2005 2:05 AM
The Two downward fins belong to the Pilot Locator System, the whitish oval/circle is the receiver or transmitter for the Radar altimeter and I have no idea about the two plugs behind the FLIR, looks like the female ends for a cannon plug?
  • Member since
    November 2005
Posted by Anonymous on Tuesday, July 5, 2005 2:08 AM
I think on the top picture pointing to the triangular looking thing is the lower IFF Antennae, I could be wrong, when I left I chucked all my -10's. Andy, if you have the operator's manual, all that you arelooking for should be in chapter 2.
  • Member since
    November 2013
Posted by intruder_bass on Tuesday, July 5, 2005 12:56 PM
Thats really great idea!
I already forgot about this ManualBig Smile [:D]
chapter 3


The only thing is that I have TM 1-1520-253-10 for UH-60Q helicopters... it doesn't contain all special equipment for DAP or 160th birds.
According to this bottom view picture 2 whitish disks ARE the altimeter antennas and the triandle bubble is LD/ADF antenna... If I am not mistakingCool [8D]

Still nothing about 3 antennas behind the FLIR and the plugs.

Andy
  • Member since
    November 2005
Posted by Anonymous on Tuesday, July 5, 2005 5:41 PM
The Two long antennas behind the FLIR are the ones for the Pilot Locator System. In the 'Hawk, one of the FM radios is removed and the control head is inserted in the center console. My last unit had three birds wired for it. It is used to locate pilots who are using their PRC-112's. The UH-60's PLS antenna's are slightly behind the pilot/co-pilot stations, slightly ahead of the Struts in alignment.
  • Member since
    November 2013
Posted by intruder_bass on Tuesday, July 5, 2005 6:25 PM
From your opinion do i have to make them too? I mean this PLS system was installed back in 93'?

Here are couple of new pics of the progress...


Andy
  • Member since
    November 2005
Posted by Anonymous on Monday, July 11, 2005 8:55 PM
We had the AN/ARS-6(V) or the earlier cousin of it. Selected units in ArmyAv had them, namely 1/52nd in Korea on the A+ 'hawks and a few Medivacs. That was back in '89 or '90. However, from some of the photos I've seen of DAPS, they seem to be absent, or very hard to see. You have plenty of room as the antennas were more under the crew dog's station.

Your tailboom looks great, however, I have a question, and hopefully if I'm wrong someone will correct me. Your side profile of the tailboom has the panel access to what I remember is the ECS (Environmental Control System) or older High Freq radio shtuph. The only -60's that had that were EH's and the VIP birds. EH's had them because of the DF equipment in back would bake the AC if the ECS would fail (not red X'able, so aircraft was PMC instead of FMC) and the VIP birds because of all the perfumed princes that rode in the back. Again, memory is clouded by age and a misspent youth, so crew dogs or line techs, please correct me if I'm wrong.
  • Member since
    November 2013
Posted by intruder_bass on Monday, July 11, 2005 11:35 PM
Wow! Thats interesting!
Do you mean this multi-angle panel with rivets on it is the access one? It did not come with the kit (Eduard set gives it) To say truth I didn't even think it might not be necessary on DAPs...Wink [;)]

Andy
  • Member since
    November 2005
Posted by Anonymous on Friday, July 15, 2005 4:21 AM
Andy,
If it's the panel you're refering to then I can tell you that we have one on each side of the tailboom on our HH-60G's. They're not on the MH-60K and I can't remember on the MH-60L. I've got some pics of them on our HH-60G's. If you'd like I'll try to post them (a little busy at the moment). The one on the left side has a meshed vent opening in the middle of it (not sure what for).

Oh yeah, I know that at least S-67 had PLS installed in Mog and I know that a couple other MH-60L's had PLS as well....just can't remember exact tail numbers. Most of the SOF Hawks I've worked out of have (or have had) PLS installed simply because CSAR is often a SOF-air mission.
  • Member since
    November 2013
Posted by intruder_bass on Saturday, July 16, 2005 8:08 AM
Salbando, Mscottholt - you are right (as always thoughSmile [:)]) I took this panel off already and sanded the surface. Here is the pic of what Eduard offers to make on the right (starboard) side of tailcone:


Same story with this panels?
I found at least one photo of 160th bird where it is seen but I better ask you guys before I glew it on just to make sureBig Smile [:D]


Andy
  • Member since
    November 2005
Posted by Anonymous on Saturday, July 16, 2005 8:44 AM
The lower left panel is an access panel, for an antenna, it stays. The right panel looks like a sheetmetal repair patch, as the rivets follows the longerons fairly accurately and the "Footballs" are used to bolt into the skeleton of the tailboom. Unless that is a later mod for the ECS, I can't think what that is for. The Task Force does have considerably more radio capacity than line units, it might be for SATCOM .
  • Member since
    February 2005
Posted by TommyHawk on Wednesday, August 10, 2005 9:57 AM
Hi - Any new in-progress pics?
  • Member since
    November 2013
Posted by intruder_bass on Wednesday, August 10, 2005 9:50 PM
LOL!!!
No problem! I thought I made everybody sick allready with this topicWink [;)]
But if you interested....
here is Super 61 allmost ready for painting (just couple of things left to add like hoist and antennas)
Hope next week will start paint job.


Andy
  • Member since
    June 2003
  • From: Caput Mundi
Posted by Avus on Thursday, August 11, 2005 2:34 AM
Yawn!
Is that all?!
Yeah not bad ...

Bow [bow]Just kidding it's AWESOME!Bow [bow]
It's only that ev'rybody keeps saying that your work is impressive, so thought I'd change a little. Big Smile [:D]

Klaus

Thanks to ImageShack for Free Image Hosting

  • Member since
    May 2003
  • From: Belgium
Posted by Awood23 on Saturday, August 13, 2005 3:41 PM
Intruder, If I didint know better Id swear those were pics of a real Blackhawk working its way down the assembly line.
Outstanding.
[img]http://img.photobucket.com/albums/v515/Awood23/DarkSideBadge.jpg "your' not trying if your not cheating" "no one ever won a war by dying for his country, he won it by making the other poor bugger die for his" 'never before have so many owed so much to so few" 1/48 Spitfire %80
  • Member since
    February 2004
  • From: Second City
Posted by arki30 on Saturday, August 13, 2005 7:04 PM
I'm more than slightly impressed. Wow, that's freakin awesome!

Building Now:

1/48 Academy Bf-109G6 - 100%

1/48 Tamiya F4U-1A - 5%

Upcoming:

1/48 Revell F-14D

  • Member since
    February 2003
  • From: phoenix
Posted by grandadjohn on Saturday, August 13, 2005 9:13 PM
Been a while since I checked in here, you have one GREAT looking bird coming along, can't believe the detail you've put in
  • Member since
    September 2003
  • From: Northern hemisphere - most of the time-
Posted by blkhwkmatt on Tuesday, August 16, 2005 3:25 PM
Wow!! [wow]very, very nice. I must say that I am way beyond impressed!!! Looks good enough to climb in and crank up right now!! Big Smile [:D]
Bow [bow]

You are setting a very high bar for the rest of us, thanks for the inspiration.

Big Smile [:D]Big Smile [:D]

Quidquid latine dictum sit, altum videtur!!! - Anything said in Latin sounds profound!


  • Member since
    April 2005
  • From: Gothenburg
Posted by JohanT on Wednesday, September 7, 2005 4:39 PM
I have been on vacation.
You too?
This is so the best thread on this site, please keep posting :)
  • Member since
    November 2013
Posted by intruder_bass on Monday, October 10, 2005 12:11 AM
A little update before finish. Smile [:)]

M-134 Minigun
barrels and "body" from CC
handles - from the kit but a little modifiedWink [;)]
ammo chute - Eduard PE (Huey armament set)
"spent-shells-thing" - piece of plastic sprue (drilled out)
nuzzle - foil
electric cables - wiresWink [;)]
lower mount - brass square rods
upper mount - kit's


Ammo boxes under constructionWink [;)]

Andy
  • Member since
    June 2003
  • From: Caput Mundi
Posted by Avus on Monday, October 10, 2005 3:41 AM
OK Guys, we can pack our stuff and go home! intruder_bass is here with his superb Miniguns ... as usual!
Andy would you please stop posting your pics ... we are green with envy Wink [;)]

Klaus

Thanks to ImageShack for Free Image Hosting

  • Member since
    February 2004
  • From: Ft. Bragg, NC
Posted by adrake2 on Monday, October 10, 2005 6:15 PM
Whistling [:-^] Now that is a beautiful gun. Once again, I am very impressed with your work, Andy. I think I can speak for all of us on the helo forum that we can't wait to see the finished product.
-Aaron
  • Member since
    November 2005
Posted by Anonymous on Monday, October 10, 2005 7:34 PM
Very nice work. I wish I'd seen this thread before I started my bird. Keep us up to date with the build.Big Smile [:D]
  • Member since
    November 2004
Posted by DPD1 on Friday, October 14, 2005 12:50 AM
Just read all the way through this thread for the first time, and wanted to comment on all the great info. Looks like you will definitely have a show stopper when it's finished.

It's a shame all the photos and info can't be moved to a permanent place to save, so it won't all be lost eventually. It wouldn't be too hard to save everything and archive it on a page. Looks like some of the pics have disappeared already though.

Dave
-DPD Productions - Custom Scanner, MURS, & Ham Antennas-
http://eje.railfan.net/dpdp/
  • Member since
    November 2013
Posted by intruder_bass on Sunday, October 30, 2005 10:31 PM
"Finito la comedia"

Done! Finished! Complete! etc.
No matter which one is the best attack helo in the world - Black Hawk is my favorite chopper in the world!!!Wink [;)]
All critique is welcome and appreciated


Currently working on web page with all explanations on the build and all collected info on MH-60L...
Special thanks to ALL you guys who participate in this project - I will definitely mention your names on that page.
Thanks again!!!
Andy


  • Member since
    December 2002
  • From: Valrico, FL
Posted by HeavyArty on Sunday, October 30, 2005 10:44 PM
Came out looking awesome. I love the cabin roof. Excellent job.

Gino P. Quintiliani - Field Artillery - The KING of BATTLE!!!

Check out my Gallery: https://app.photobucket.com/u/HeavyArty

"People sleep peaceably in their beds at night only because rough men stand ready to do violence on their behalf." -- George Orwell

  • Member since
    February 2004
  • From: Ft. Bragg, NC
Posted by adrake2 on Monday, October 31, 2005 6:39 AM
WOW!!!! Congratulations on finishing the project. That's definitely something anyone would be proud.
-Aaron
  • Member since
    November 2004
Posted by DPD1 on Monday, October 31, 2005 12:26 PM
Excellent job... That tail rotor is awesome. Even the grass on your base looks good.

Dave
-DPD Productions - Custom Scanner, MURS, & Ham Antennas-
http://eje.railfan.net/dpdp/dpd1
  • Member since
    June 2003
  • From: Caput Mundi
Posted by Avus on Monday, October 31, 2005 12:47 PM
Wow! Outstanding helo!
Hope mine will look only half as good as this one!

Bow [bow] Bow [bow] Bow [bow] Bow [bow] Bow [bow] Bow [bow] Bow [bow] Bow [bow] Bow [bow]
Just one thing ... what happend to all the stencils?
Didn't you get a copy of our DAP-Decals?

Klaus

Thanks to ImageShack for Free Image Hosting

  • Member since
    April 2005
  • From: SW Ohio
Posted by Cableguy9238 on Monday, October 31, 2005 1:36 PM
WOW! That is one AMAZING build! I can't wait to see the website when you get it up and running. The amount of detail just posted in THIS thread alone is spectacular.

Great job!
  • Member since
    May 2005
Posted by RotorRob60 on Monday, October 31, 2005 2:21 PM
Congratulations! You are a Master Modeler. I can only wish that my work was any where close to the quality you produce. I thought you posted pics of a real aircraft on a flightline somewhere!
  • Member since
    November 2013
Posted by intruder_bass on Monday, October 31, 2005 3:54 PM
QUOTE: [i]Originally posted by AvusJust one thing ... what happend to all the stencils?
Didn't you get a copy of our DAP-Decals?


Yes I did... And they are great! Thanks to You and Gino for them.
But I did not apply them. Well, its a long story First of all I wanted to imitate the flat black surface like on Nightstalkers birds so I used NATO black from Tamiya (works good especially if you wipe the surface after the paint is dry with a tissue - all raised detail becomes darker but all hollows and gaps stay just a little brighter which makes it look dusty. At least to me ) So finally when I was going to apply decals I faced the problem with rough surface, which makes the silvering effect. I covered it with one coat of Future but it did not help a lot. I printed 2 sheets of your decals and tried to put them anyways. The result was as I expected - messy In other case I would probably apply one or even two more coats of Future but it would kill ALL MY RIVETS.... So I took everything off and made just "major" stencils like "UNITED STATES ARMY",tail number, 61 on the door window and "THUNDERSTRUCK" on the coaling. These markings I made with real stencils So basically this is one of the weakest parts on the model.
I tryed but it did not work out

Thanks
Andy
  • Member since
    December 2002
  • From: Valrico, FL
Posted by HeavyArty on Monday, October 31, 2005 4:08 PM
Sorry to hear that our decals didn't work out well for you. They came out great on mine.
Maybe it was the decal paper you used or something like that. I did put two coats of gloss on mine, decaled, then 3 thin coats of flat. No problems with loss of detail.


Gino P. Quintiliani - Field Artillery - The KING of BATTLE!!!

Check out my Gallery: https://app.photobucket.com/u/HeavyArty

"People sleep peaceably in their beds at night only because rough men stand ready to do violence on their behalf." -- George Orwell

  • Member since
    November 2013
Posted by intruder_bass on Monday, October 31, 2005 5:59 PM
Gino,
I donno maybe my printer sucks, maybe not enough glossy serface... oh well...Nothing is perfectWink [;)]
I have only one excuse for that... Maybe Salbando will correct me, but it seems like in Somalia they where pretty dusty and the paint was faded so that small markings could be hardly seen.Big Smile [:D] But of course next time I wont skip on thisSmile [:)]
Once again - all pics of Super 61 that I have:
Clif (Elvis) Wolcott

D. Briley

All together


Andy
  • Member since
    December 2002
  • From: Valrico, FL
Posted by HeavyArty on Monday, October 31, 2005 7:32 PM
Oh well, still looks great. Have you thought about getting a white colored pencil and drawing the grafiti onto it, would look pretty cool. Also, in the above group pic, the word "Thunderstruck" looks like it is in a Gunship Grey color, just like "Venom" on Super 64 was.

Gino P. Quintiliani - Field Artillery - The KING of BATTLE!!!

Check out my Gallery: https://app.photobucket.com/u/HeavyArty

"People sleep peaceably in their beds at night only because rough men stand ready to do violence on their behalf." -- George Orwell

  • Member since
    November 2013
Posted by intruder_bass on Monday, October 31, 2005 9:27 PM
))))) guess what was one of my first questions to left gunner of 324, Ray DowdyWink [;)]
And here is his answer:
"chalk drawings of Elvis and Bull were not there on the 3rd, they only lasted a couple days."

Exactly the same answer I got from Pat Powers (65)
" The crew chiefs had written in white chalk on both sides of the aircraft in the vicinity of the pilots door "velvet Elvis" on the left, and "Bull" on the right. On the 3rd of October, I don't believe the chalk markings were still visible"

You are right about "Thunderstruck" - it is very light grey. Maybe I should make it a little darker))))
  • Member since
    June 2003
  • From: Caput Mundi
Posted by Avus on Tuesday, November 1, 2005 12:59 AM
Sorry to hear the decals didn't work out.
But I don't understand what's silvering got to do with that; did you use the clear version or the black one?
From your answer I guess you made a clear version so ... how the hell did you do that ? Do you have a dye sublimation printer (Alps)?

Anyway excellent build! I agree on the black color thing; even though beeing flat black it has a cool dusty wear to it.

Klaus

Thanks to ImageShack for Free Image Hosting

  • Member since
    November 2013
Posted by intruder_bass on Tuesday, November 1, 2005 6:02 AM
)))) No..no. I dont have ALPS
I made decals on white decal paper with black around the letters just like you and Gino. Silvering its not the right word for this effect that I got. The black color of decal background did not match dusty black on the model. It looked pretty bad with all these square decal marks all over the hull. Besides if you look on the light - decals where glossy but the rest of the surface - flat. Really wild lookDead [xx(] As I said before - I did not planned to apply 3 or more coats of Future. I spent 3 weeks doing rivets - so could not let them disapear.
  • Member since
    June 2003
  • From: Caput Mundi
Posted by Avus on Tuesday, November 1, 2005 10:33 AM
OK, got the situation.
Well as you said, stencils are so small they probably were hardly seen on a dusty helo.

Klaus

Thanks to ImageShack for Free Image Hosting

  • Member since
    April 2005
  • From: I am at play in the fields of the Lord. (Texas)
Posted by m60a3 on Tuesday, November 1, 2005 8:54 PM
That's a great build. Be proud, you earned it. It's also very touching. I again take my hat off to the vets of "the Mog".
With alot of us vets, any day can be memorial day...

-60
"I lay like a small idea in a vacant mind" - Wm. Least Heat Moon "I am at the center of the earth." - Black Elk My FSM friends are the best.
  • Member since
    December 2005
  • From: Goteborg / Sverige
Posted by Svenne Duva on Monday, December 12, 2005 4:12 PM

This is just SO one off the coolest threads on this site.
A Project.
People contributing all the way to make it happen.
And a result that is something at least I have never seen before.
Hats off, this is the just so cool...
And the result is just stunning!

More, PLEASE!

Svenne

sic transit gloria mundi

  • Member since
    November 2005
Posted by Anonymous on Monday, December 12, 2005 7:56 PM

Fantastic!!!!!! I can't remember where, but a while back I saw a diorama in 1/35 of the downed bird using Dragon figures for the rescue team. I think it may have been at WWW.ARMORAMA.COM .

Keep up the great work, it's an inspiration to us all.

  • Member since
    December 2002
  • From: Valrico, FL
Posted by HeavyArty on Monday, December 12, 2005 9:14 PM
 FMF Doc wrote:

Fantastic!!!!!! I can't remember where, but a while back I saw a diorama in 1/35 of the downed bird using Dragon figures for the rescue team. I think it may have been at WWW.ARMORAMA.COM .

Keep up the great work, it's an inspiration to us all.


Yup, it is by Pablo Roig Sanchez, titled "Super 64", and is at Armorama.  It depics Durant's bird as Shugart and Gordon arrive to secure the crash site.  A great dio.


A few more pics here.

Gino P. Quintiliani - Field Artillery - The KING of BATTLE!!!

Check out my Gallery: https://app.photobucket.com/u/HeavyArty

"People sleep peaceably in their beds at night only because rough men stand ready to do violence on their behalf." -- George Orwell

  • Member since
    November 2005
Posted by Anonymous on Monday, December 12, 2005 9:58 PM

Andy,

OUTSTANDING my friend!  Brings back memories...some good, some bad. 

From what I remember there were actually lots of grafitti markings.  Some were G-rated and some were not.  Since they were done in chaulk they'd fade and wouldn't last long.  I'm pretty sure that "thunderstruck' was painted with the same gray color as the interior.


The diorama is pretty good as well, except that during the real event the tail rotor and most of the vertical stab departed the aircraft.


  • Member since
    November 2013
Posted by intruder_bass on Monday, December 12, 2005 10:25 PM

Thanks guys...I am really glad you like it.

Sal, about this chulck markings of "Velvet Elvis" and "Sitting Bull" I wrote here allready - they lasted only few weeks. BTW not long time ago Ray Dowdy (left gunner) post a topic on Somalia Descussion Forum (bhd93.com) about these drowings on Super 61. Here is quote:

The real ELVIS!

Many know in the book, and in the movie Cliff Wolcott is referred to as Elvis as a nickname. This all came about due to the pictures I took plane side.

http://www.nightstalkers.com/tfranger/memorial/wolcott/default.html

http://www.nightstalkers.com/tfranger/memorial/briley/default.html

These are my pictures. Mark Bowden when he was gathering the info for his book came across the pictures on the NS web sight. He took what he saw and thought that was his nickname. Well I am here to tell you that is all BS!!!!!

What happened that day the graffiti appeared on my ACFT, the boys came out and put what you have seen on the ACFT as a joke. There was a lot more not shown in the pictures. I took the pictures when we came back for a deception flight.

Now for the Elvis stuff. For many years after Elvis died there have been reports that he has been seen, and is not dead. Therefore the stuff like “Elvis has left the building” or he is a CIA agent someplace.

So while we were in Somalia whenever someone informed us (TFR) about General Adid whereabouts, it was an ELVIS sighting. ELVIS was General Adid! Not Cliff Wolcott!

When Somalia came about I had been in the 160th for four years. In that time I was lucky enough to have flown with MR. Wolcott MANY times. Never did I hear ANYONE call him Elvis as a nickname. OR Elvis at all. The Joke written on the ACFT became much bigger and something it was not when the book came out.

Donovan was an Indian; no one I know ever called him sitting bull. His nickname was bull, but for a very different reason.

If any of this does not make since, or f*cked up spelling, blame the Jack Daniels.

_________________
Left gunner Super 61
Nightstalker Aug 89 - Jan 98

Daps rule kilo's drule


Andy


  • Member since
    November 2005
Posted by Anonymous on Tuesday, December 13, 2005 11:09 PM

That explains it. 

What's up for your next challenge Andy?

  • Member since
    November 2013
Posted by intruder_bass on Tuesday, December 13, 2005 11:37 PM

Right now I am still building Academy's Huey C from 121th Assault Helicopter Company (Vietnam)

Stucked a little making transmission and engine (I opened it from both sides)

Interior is allmost done though so hopefully it wont take too long.

Also at the same time I am building F-15E from Revell 1/48 (great kit! One of the best from Revell)

and a little diorama of Mog street with HUMVEE and 7 rangers...

Next will be AH-6J (Somalia again :-) ) I did not decide yet which one - probably Star 41 (still need some info)

Thats about it)))))

Andy


  • Member since
    February 2004
  • From: Moooooon River!
Posted by Trigger on Wednesday, December 14, 2005 8:38 AM
Great looking MH-60L Andy. Looking forward to that article!
------------------------------------------------------------------ - Grant "Can't let that nest in there..."
  • Member since
    March 2008
Posted by NSDQ on Saturday, March 29, 2008 10:28 PM

I agree with Ray. 

 I have never heard Cliff referrred to as Elvis in the 7 years I was in unit.  I never heard Ray or any other in any mission brief or war story speak as such.  I was confused when the nick surfaced. 

 CW3

DOUG WOLCOTT

  • Member since
    November 2013
Posted by intruder_bass on Sunday, March 30, 2008 12:17 AM

  Thanks Doug!

And welcome to Best Helo Forum on web!


Andy

  • Member since
    March 2005
  • From: usa
Posted by hawkwrench on Sunday, March 30, 2008 12:46 AM
Andy,That is a awesome looking Blackhawk you've built.It looks like the real thing.You really outdone yourself with that detail,especially with the rotorhead.My hats off to you on this one.ABSOLUTELY AWESOME!!!!!!!!!Does Salbando still surf this forum?If so,I need to PM him about the C2 bird on that mission that day.It sounds like he was there.
2/82nd Aviation Battalion"When you absolutely need to be there RIGHT NOW!!!
  • Member since
    March 2008
Posted by NSDQ on Sunday, March 30, 2008 9:31 PM

Helo blades droop at rest on the ground.  

 CW3

Doug Wolcott

Aviation Maint Officer

151AE

JOIN OUR COMMUNITY!

Our community is FREE to join. To participate you must either login or register for an account.

SEARCH FORUMS
FREE NEWSLETTER
By signing up you may also receive reader surveys and occasional special offers. We do not sell, rent or trade our email lists. View our Privacy Policy.