SEARCH FINESCALE.COM

Enter keywords or a search phrase below:

My Super 61 (Walcott's bird) in progress

57106 views
168 replies
1 rating 2 rating 3 rating 4 rating 5 rating
  • Member since
    November 2013
My Super 61 (Walcott's bird) in progress
Posted by intruder_bass on Thursday, May 19, 2005 10:16 PM
Here are couple of pics of my recent project - Black Hawk "Super 61"
Of course its still far from being complete. 2 months of collecting info about the original chopper downed in Mog on 3d October 93' and little scratch building.
By the way if somebody is familiar with UH-60s or presently works with them I REALLY NEED SOME ASSISTANCE! I am very short of information although I have about 200 pics from Internet and even Operators manual for the aircraftWink [;)]
I don’t ask for "top secret stuff" - just need couple of pics of transmission shaft and of what is under the "hood". Please contact me via MSN or e-mail. Any help will be apriciated!
[Thanks
Andy

  • Member since
    March 2003
  • From: Lafayette, LA
Posted by Melgyver on Thursday, May 19, 2005 11:09 PM
WOW! Amazing detail! Good work!

Clear Left!

Mel

  • Member since
    December 2002
  • From: Valrico, FL
Posted by HeavyArty on Thursday, May 19, 2005 11:18 PM
Looks great. Can't wait to see it finished. Keep us updated.

Gino P. Quintiliani - Field Artillery - The KING of BATTLE!!!

Check out my Gallery: https://app.photobucket.com/u/HeavyArty

"People sleep peaceably in their beds at night only because rough men stand ready to do violence on their behalf." -- George Orwell

  • Member since
    June 2003
  • From: Caput Mundi
Posted by Avus on Friday, May 20, 2005 3:50 AM
Bow [bow]WOW!Bow [bow]
Outstanding work!
I was considering improving the cargoroof like you did.
Could you tell me where to find pics or better schemes in order to make an accurate work like you did?

Klaus

Thanks to ImageShack for Free Image Hosting

  • Member since
    August 2004
  • From: Australia
Posted by wooty on Friday, May 20, 2005 4:06 AM
Andy..
Very Nice!!!
What scale is it?
And who's manufacter of the kit?
Looking good Keep Us Posted
Robert

Rob..

  • Member since
    December 2002
  • From: Valrico, FL
Posted by HeavyArty on Friday, May 20, 2005 9:27 AM
QUOTE: Originally posted by wooty

Andy..
Very Nice!!!
What scale is it?
And who's manufacter of the kit?
Looking good Keep Us Posted
Robert


Robert,
He's building the good ol' 1/35 Academy bird. Looks like it will come out great.

Gino P. Quintiliani - Field Artillery - The KING of BATTLE!!!

Check out my Gallery: https://app.photobucket.com/u/HeavyArty

"People sleep peaceably in their beds at night only because rough men stand ready to do violence on their behalf." -- George Orwell

  • Member since
    November 2005
Posted by Anonymous on Friday, May 20, 2005 9:47 AM
Shock [:O] WOW some great detail on the build so far. Can't wait to see more.
  • Member since
    February 2004
  • From: Green Lantern Corps HQ on Oa
Posted by LemonJello on Friday, May 20, 2005 1:37 PM
If that's the detail you're putting into the office, I can only imagine how incredible this one will be when you're done! Keep the photos coming as you progress.
A day in the Corps is like a day on the farm; every meal is a banquet, every paycheck a fortune, every formation a parade... The Marine Corps is a department of the Navy? Yeah...The Men's Department.
  • Member since
    November 2013
Posted by intruder_bass on Friday, May 20, 2005 7:57 PM
Thanks guys!
HeavyArty is right! This is (well, was ) Academy kit AH-60L DAP + Eduard photoached detailed interior set,

which is VERY NICE!!! but even with metal parts from eduard, 80% of work on the interior took scratch building. Especially ceiling!
Eduard gives only main transmission drip pan... all frames, bulkheads, soundproof cover and wires were made by myself from styrene.


I did not use Cobra Company set (although its nice too) just because in my particular case there were not too much i could use from it on my model.
To Avus: I'll try to draw you and send a basic scheme of the ceiling with measurements that i used for mine but you should keep in mind that ALL of them based just on photos and are APPROXIMATE - I wish I could take measurements by myself being inside the Black Hawk with the ruler :-)) So they are not perfect and of course to make them fit the academy kit you'll have to spend couple of evenings.
To Heavy Arty: By the way your DAP detailed pictures where grate reference for me. Thanks for them!


  • Member since
    December 2002
  • From: Valrico, FL
Posted by HeavyArty on Saturday, May 21, 2005 12:52 AM
Glad the pics helped. I would be interrested in the ceiling drawings as well. I ahve a few more MH/UH-60 models to build still.

Gino P. Quintiliani - Field Artillery - The KING of BATTLE!!!

Check out my Gallery: https://app.photobucket.com/u/HeavyArty

"People sleep peaceably in their beds at night only because rough men stand ready to do violence on their behalf." -- George Orwell

  • Member since
    November 2005
Posted by Anonymous on Saturday, May 21, 2005 9:03 AM
Wow! That looks great. Keep us posted on the progress.Bow [bow]
  • Member since
    April 2005
  • From: Gothenburg
Posted by JohanT on Saturday, May 21, 2005 10:25 AM
Brought the kit home today, needed something to balance the Hind :)
I am not sure if I dare start building it now...
Love the adders to the roof and the cabling.
Would be happy if you would share your dwg's Andy.
Superb details! Bow [bow]
  • Member since
    February 2004
  • From: Moooooon River!
Posted by Trigger on Saturday, May 21, 2005 3:07 PM
Andy

You need assistance?!? That's the best overhead I've seen so far. I like the detail you've added to the gunner's bulkheads, under the pilot's seats, and hell... everything!

I'm with Avus and Heavy Arty on seeing a drawing from which to do something like that.
------------------------------------------------------------------ - Grant "Can't let that nest in there..."
  • Member since
    February 2003
  • From: phoenix
Posted by grandadjohn on Saturday, May 21, 2005 5:49 PM
Great looking build, please keep posting
  • Member since
    November 2003
  • From: Oklahoma
Posted by chopperfan on Sunday, May 22, 2005 2:17 AM
Bow [bow] This has to be one of the best, if not THE best, interior work I have seen in my 45 years of modeling.
I can only wish for the kind of skill and patience it takes to do something that detailed.
As with what the others have said. Please keep us posted. I have got to see the finished bird!!! Bow [bow]
Randie [C):-)]Agape Models Without them? The men on the ground would have to work a lot harder. You can help. Please keep 'em flying! http://www.airtanker.com/
  • Member since
    November 2005
Posted by Anonymous on Sunday, May 22, 2005 3:02 AM


This is the nose compartment for the UH-60. I read where Intruder asked if someone had it, so I thought I would share, please disregard ifyou have a picture already.
  • Member since
    November 2005
Posted by Anonymous on Sunday, May 22, 2005 5:37 AM
Hope this helps. I wasn't sure whether, "Under the hood" meant under the Hydraulics system, the engine or the powertrain.


  • Member since
    November 2005
Posted by Anonymous on Sunday, May 22, 2005 5:39 AM


No More, I promise!
  • Member since
    November 2013
Posted by intruder_bass on Sunday, May 22, 2005 1:00 PM
Smile [:)]WOW!!! Mscottholt, thanks a lot! these pictures I’ve been looking for for a long time. Great! Especially MAIN TRANSMISSION ASSEMBLY picture - is really helpful!
I am glad I did register on this forum, with you guys - modelling is much easier and pleasant!
Thanks again!
BTW, by "Under the hood" I meant this part of the aircraft

- unfortunately I am closer to NAVY then to helos so i don't know all terminology.Wink [;)]
So about this picture: the square "hole" in front of this "hood" - i will make net on it like it should be on real aircraft, but you'll be able to look through it, so I was going to make "what's on sight" in thereWink [;)] If you have any picture - post it here please!

to chopperfan: thanks for kind words but I think the best interior scratch buid that i've seen is of oldhooker's Chinook! thats a great work!
thanks again!
Andy


  • Member since
    November 2005
Posted by Anonymous on Monday, May 23, 2005 7:02 AM
Man, you have me digging photos I thought I would never see again!

Here you go, what's under the hood.


This is what you would see if the "Hood" (Aka Doghouse) is removed and you are standing on the windscreen looking aft.


Sideview (standing over right gunner's window.) Shows mixing unit under the maint platform. Upper left corner of photo is Main Rotor and Transmission.


Not near as good photo, these are the primary servos. (Standing on the MR looking forward)
  • Member since
    November 2005
Posted by Anonymous on Monday, May 23, 2005 7:07 AM

This is a larger blowup of the Hydraulic deck
  • Member since
    November 2005
Posted by Anonymous on Monday, May 23, 2005 7:11 AM
The rectangular hole in the front is merely an air scoop. You don't really see into the doghouse, but the scoop is a fiberglass orange. The hole on the right of the doghouse is the vent blower intake. It is a tube. You see it in the picture above, the triangular thingy with no step stencilled. Any more questions I'd be happy to share with you.
  • Member since
    November 2013
Posted by intruder_bass on Monday, May 23, 2005 2:01 PM
Thanks a lot, mscottholt really great pics and really helpful info!

Hydraulicandmixingdeck.jpg - the first file posted by you did not open - can you please do it one more time?
Now since I have these pictures I am thinking of building my next Hawk with opened doghouse, engine sections and even transmission shaft.
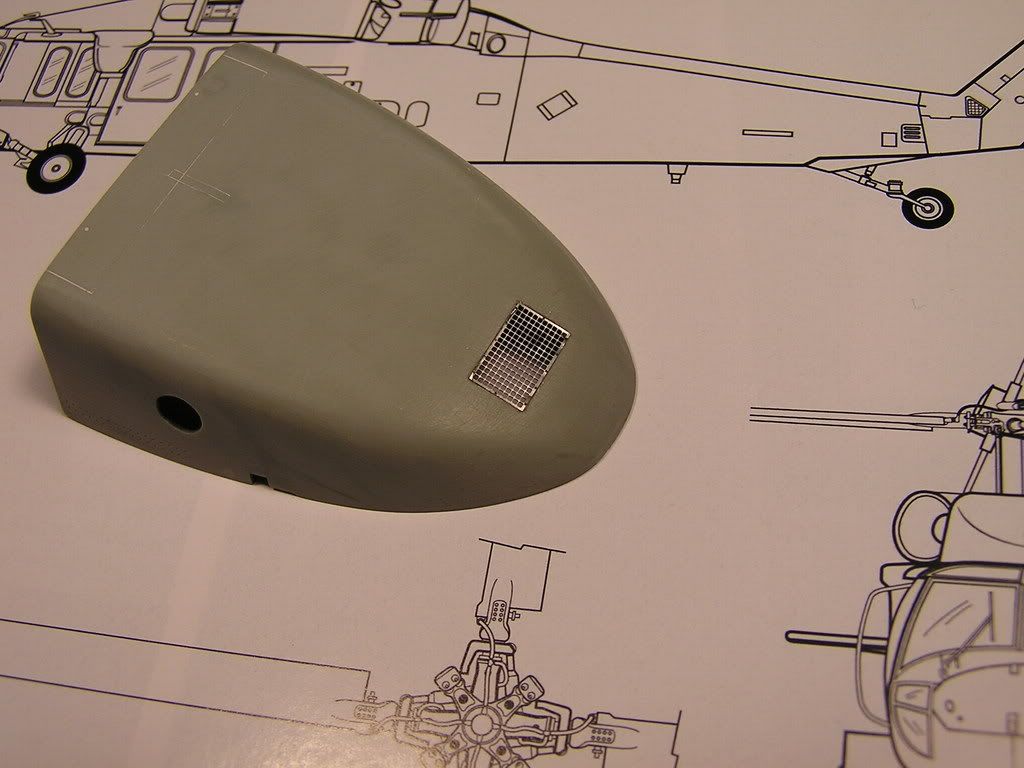
One more thing about this square hole on doghouse: you can not look through the net? is there some kind of filter on the inside of it?
Here is what i made on it:


should I block it from the inside?
Andy


P.S.
Here is the ceiling scheme i promised to you guys
if there will be any questions please don’t hesitate to ask


Scratch build part starts right from the "troop cabin door front line" and ends a little bit AFT the "rear wall line". I did not make the front part of the ceiling (pilot cabin - troop cabin door line) because it is usually covered with sound proof material (OD color)
  • Member since
    February 2004
  • From: Moooooon River!
Posted by Trigger on Monday, May 23, 2005 9:22 PM
Awesome! Thanks for taking the time to share that with us.
------------------------------------------------------------------ - Grant "Can't let that nest in there..."
  • Member since
    December 2002
  • From: Valrico, FL
Posted by HeavyArty on Monday, May 23, 2005 9:25 PM
Great stuff, thanks for the ceiling drawing.

Gino P. Quintiliani - Field Artillery - The KING of BATTLE!!!

Check out my Gallery: https://app.photobucket.com/u/HeavyArty

"People sleep peaceably in their beds at night only because rough men stand ready to do violence on their behalf." -- George Orwell

  • Member since
    November 2005
Posted by Anonymous on Tuesday, May 24, 2005 2:41 AM


Sorry this is a terrible drawing, but I did it on photoshop. That is the sort-of general profile of the scoop on the doghouse.
  • Member since
    November 2005
Posted by Anonymous on Tuesday, May 24, 2005 2:42 AM
The scoop is either a yellow-brown to orange in color.
  • Member since
    June 2003
  • From: Caput Mundi
Posted by Avus on Tuesday, May 24, 2005 7:35 AM
Thanks intruder_bass!
Looking at your pics it seems you used Evergreen I-beams. Could you please tell me the models or the sizes?
What is the diameter (or radius) of the holes and the thickness of the plasticard?
Thanks.

Klaus

Thanks to ImageShack for Free Image Hosting

  • Member since
    February 2005
Posted by TommyHawk on Tuesday, May 24, 2005 11:14 AM
This is great! Really gives me some inspiration/aspiration! Thanks for posting the pictures...

TommyHawk
  • Member since
    November 2013
Posted by intruder_bass on Tuesday, May 24, 2005 1:16 PM
Mscottholt so if I understood you right the air scoop looks about like this:


is it correct? what's the length of the scoop? i mean should it be longer then on my picture or shorter?
As i am building the hawk that flew in Somalia, is it possible that air scoop was of darker color because of dust and dirt?

To Avus Yes, I used Evergreen T - beams. As I said before everything I did is approximate so the sizes of bulkheads and diameters of the holes can possibly be not in proper scale. I tried to make them look like on photos but there is no guarantee that they are correct.
Evergreen catalogue numbers that i used:
275 - central bulkheads
113,153,219,128, styrene sheets 0.5 mm thick
Plastruct
90512 - side bulkheads
...and others
well its hard to describe - i used everything that i found in my stock.Smile [:)]
good luck!
JOIN OUR COMMUNITY!

Our community is FREE to join. To participate you must either login or register for an account.

SEARCH FORUMS
FREE NEWSLETTER
By signing up you may also receive reader surveys and occasional special offers. We do not sell, rent or trade our email lists. View our Privacy Policy.